Download to read offline


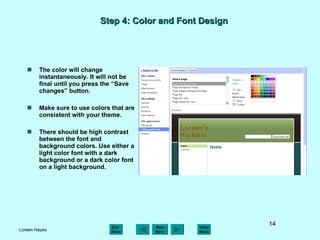


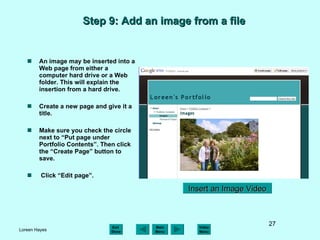


This tutorial provides step-by-step instructions for creating an online electronic portfolio using Google Sites and other Google applications. It covers setting up a Google account, creating a Google Site, customizing the design, adding content such as documents and images, linking pages within the site, and ensuring student safety online. The goal is to guide students and teachers in transforming document-based portfolios into online portfolios that can include multimedia content.