Download to read offline
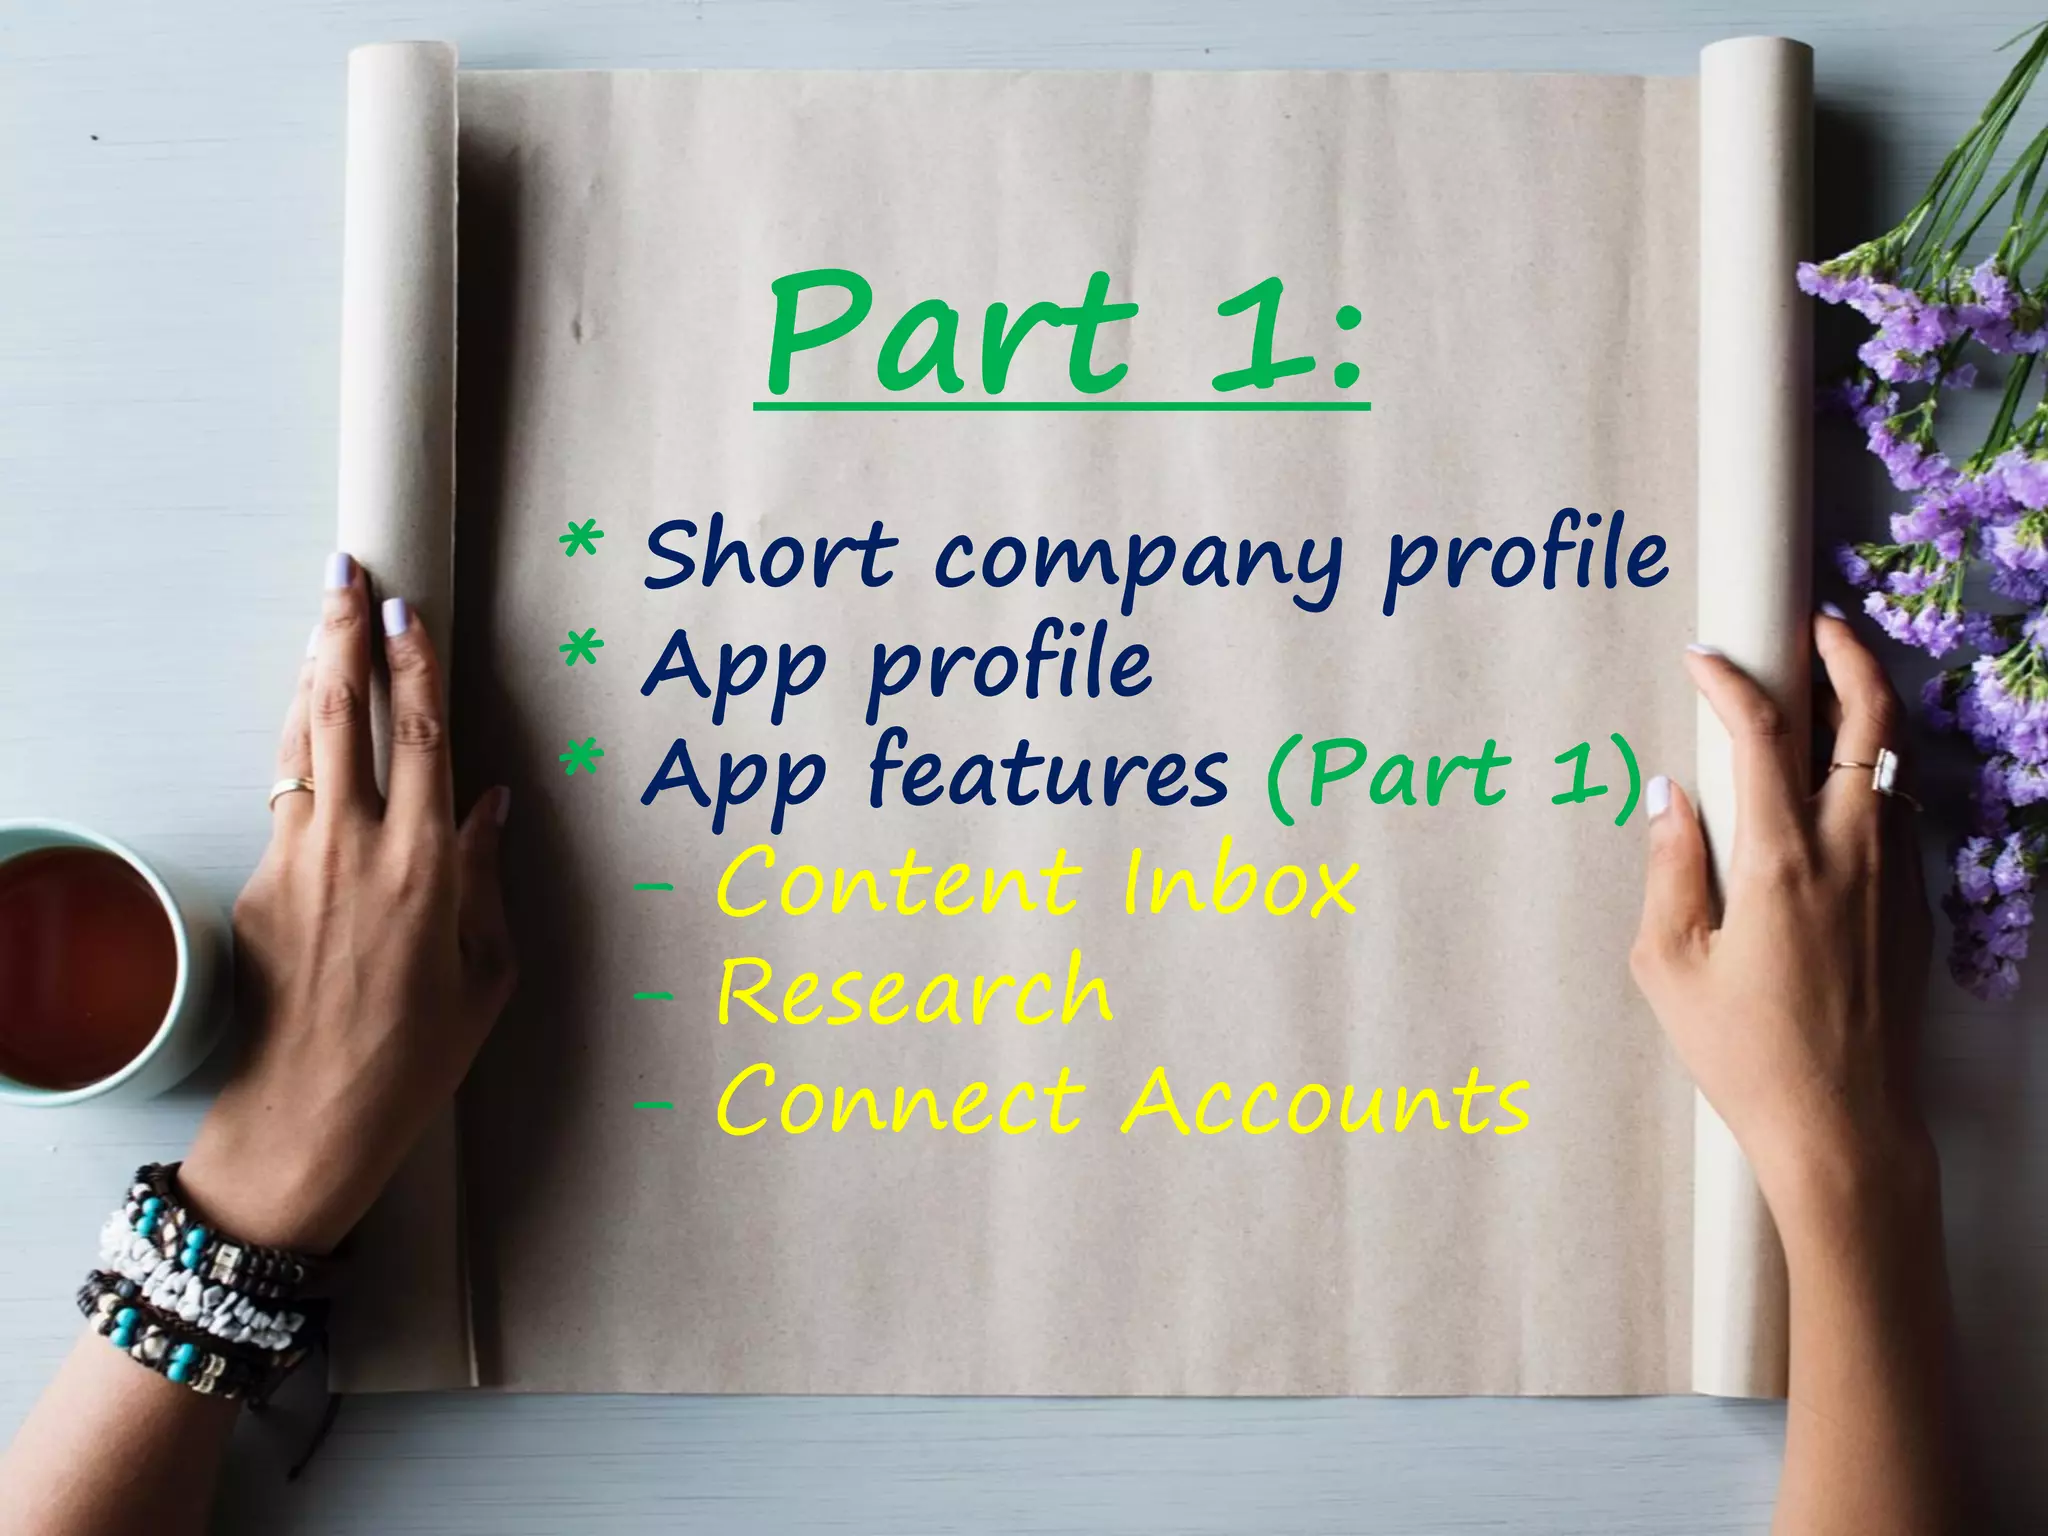


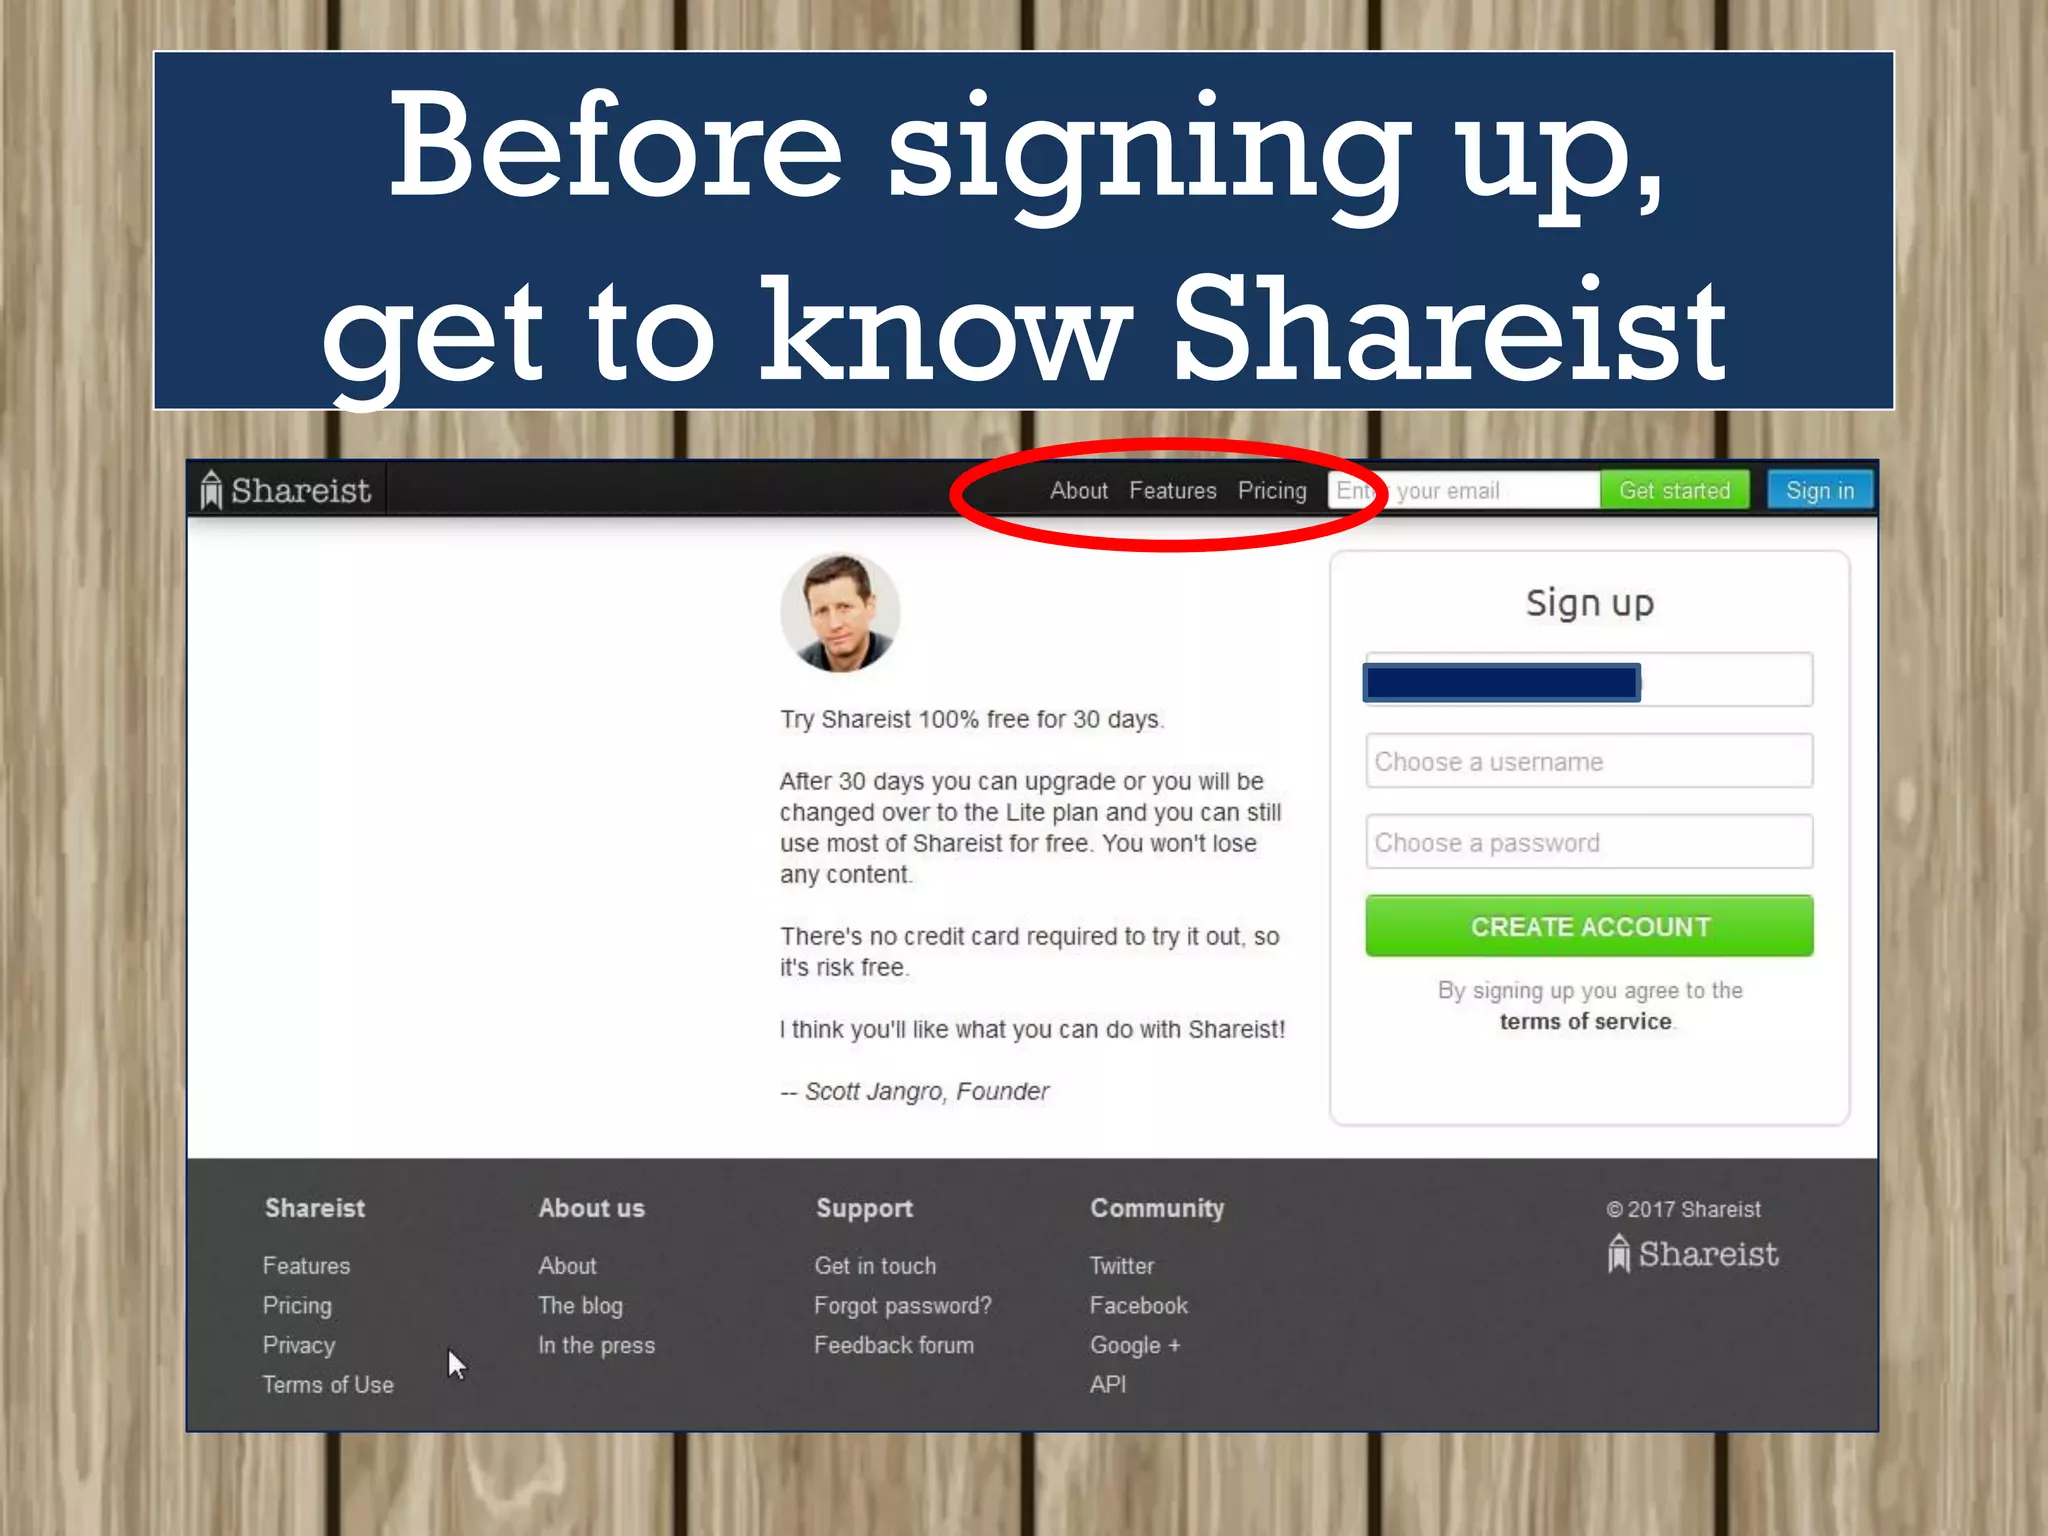
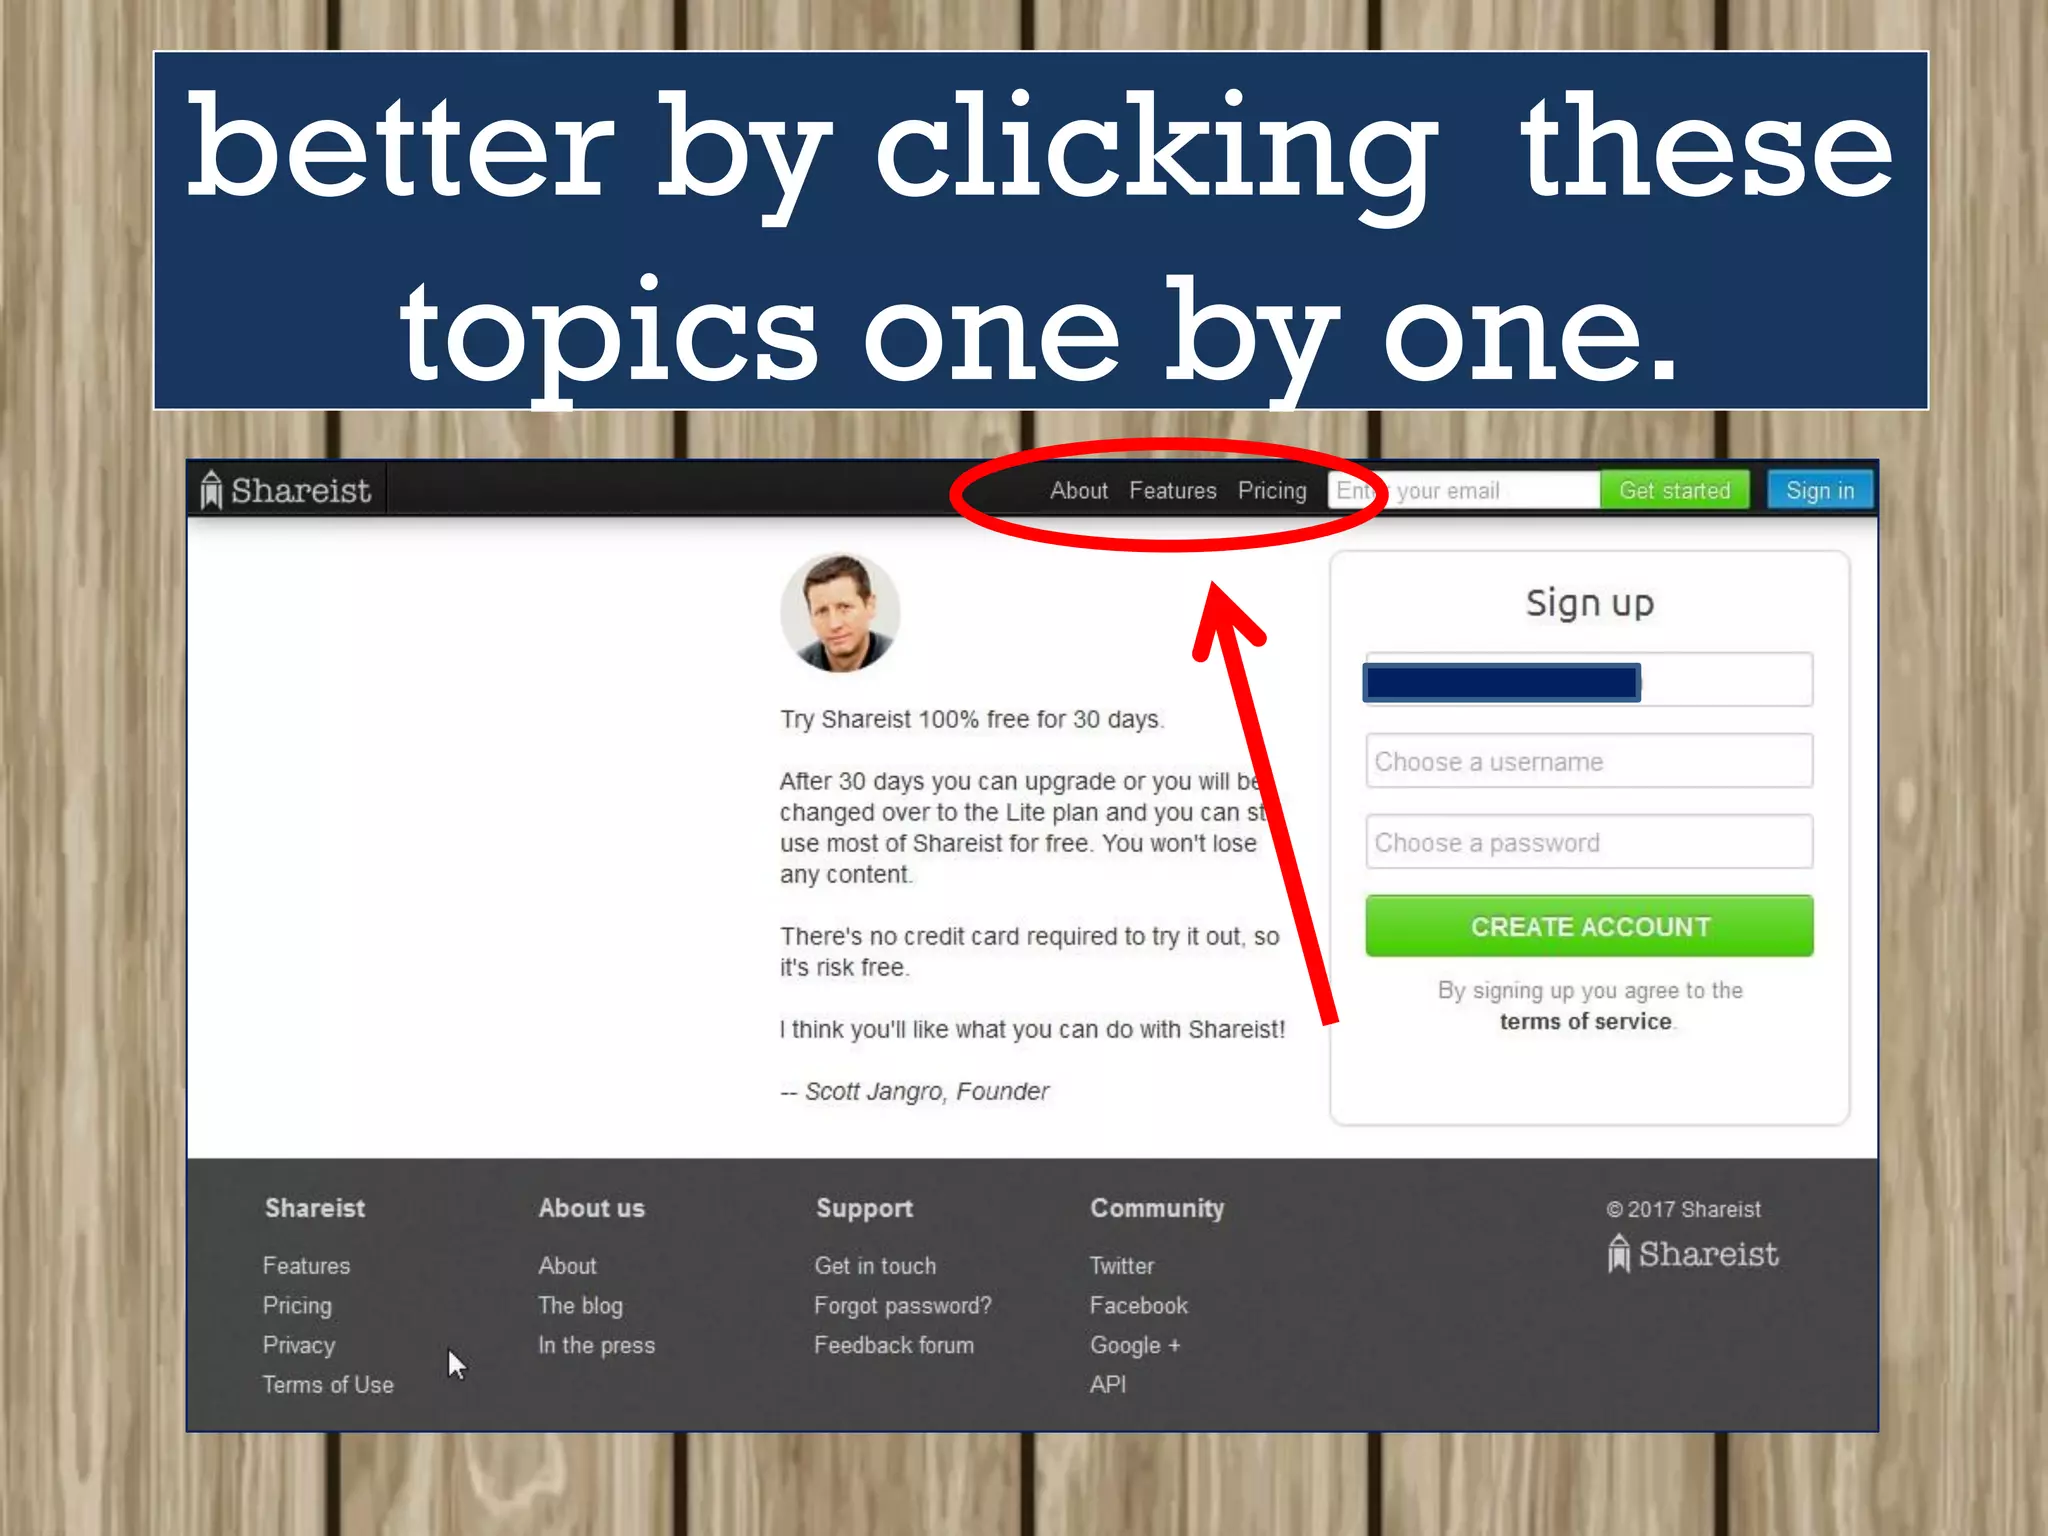

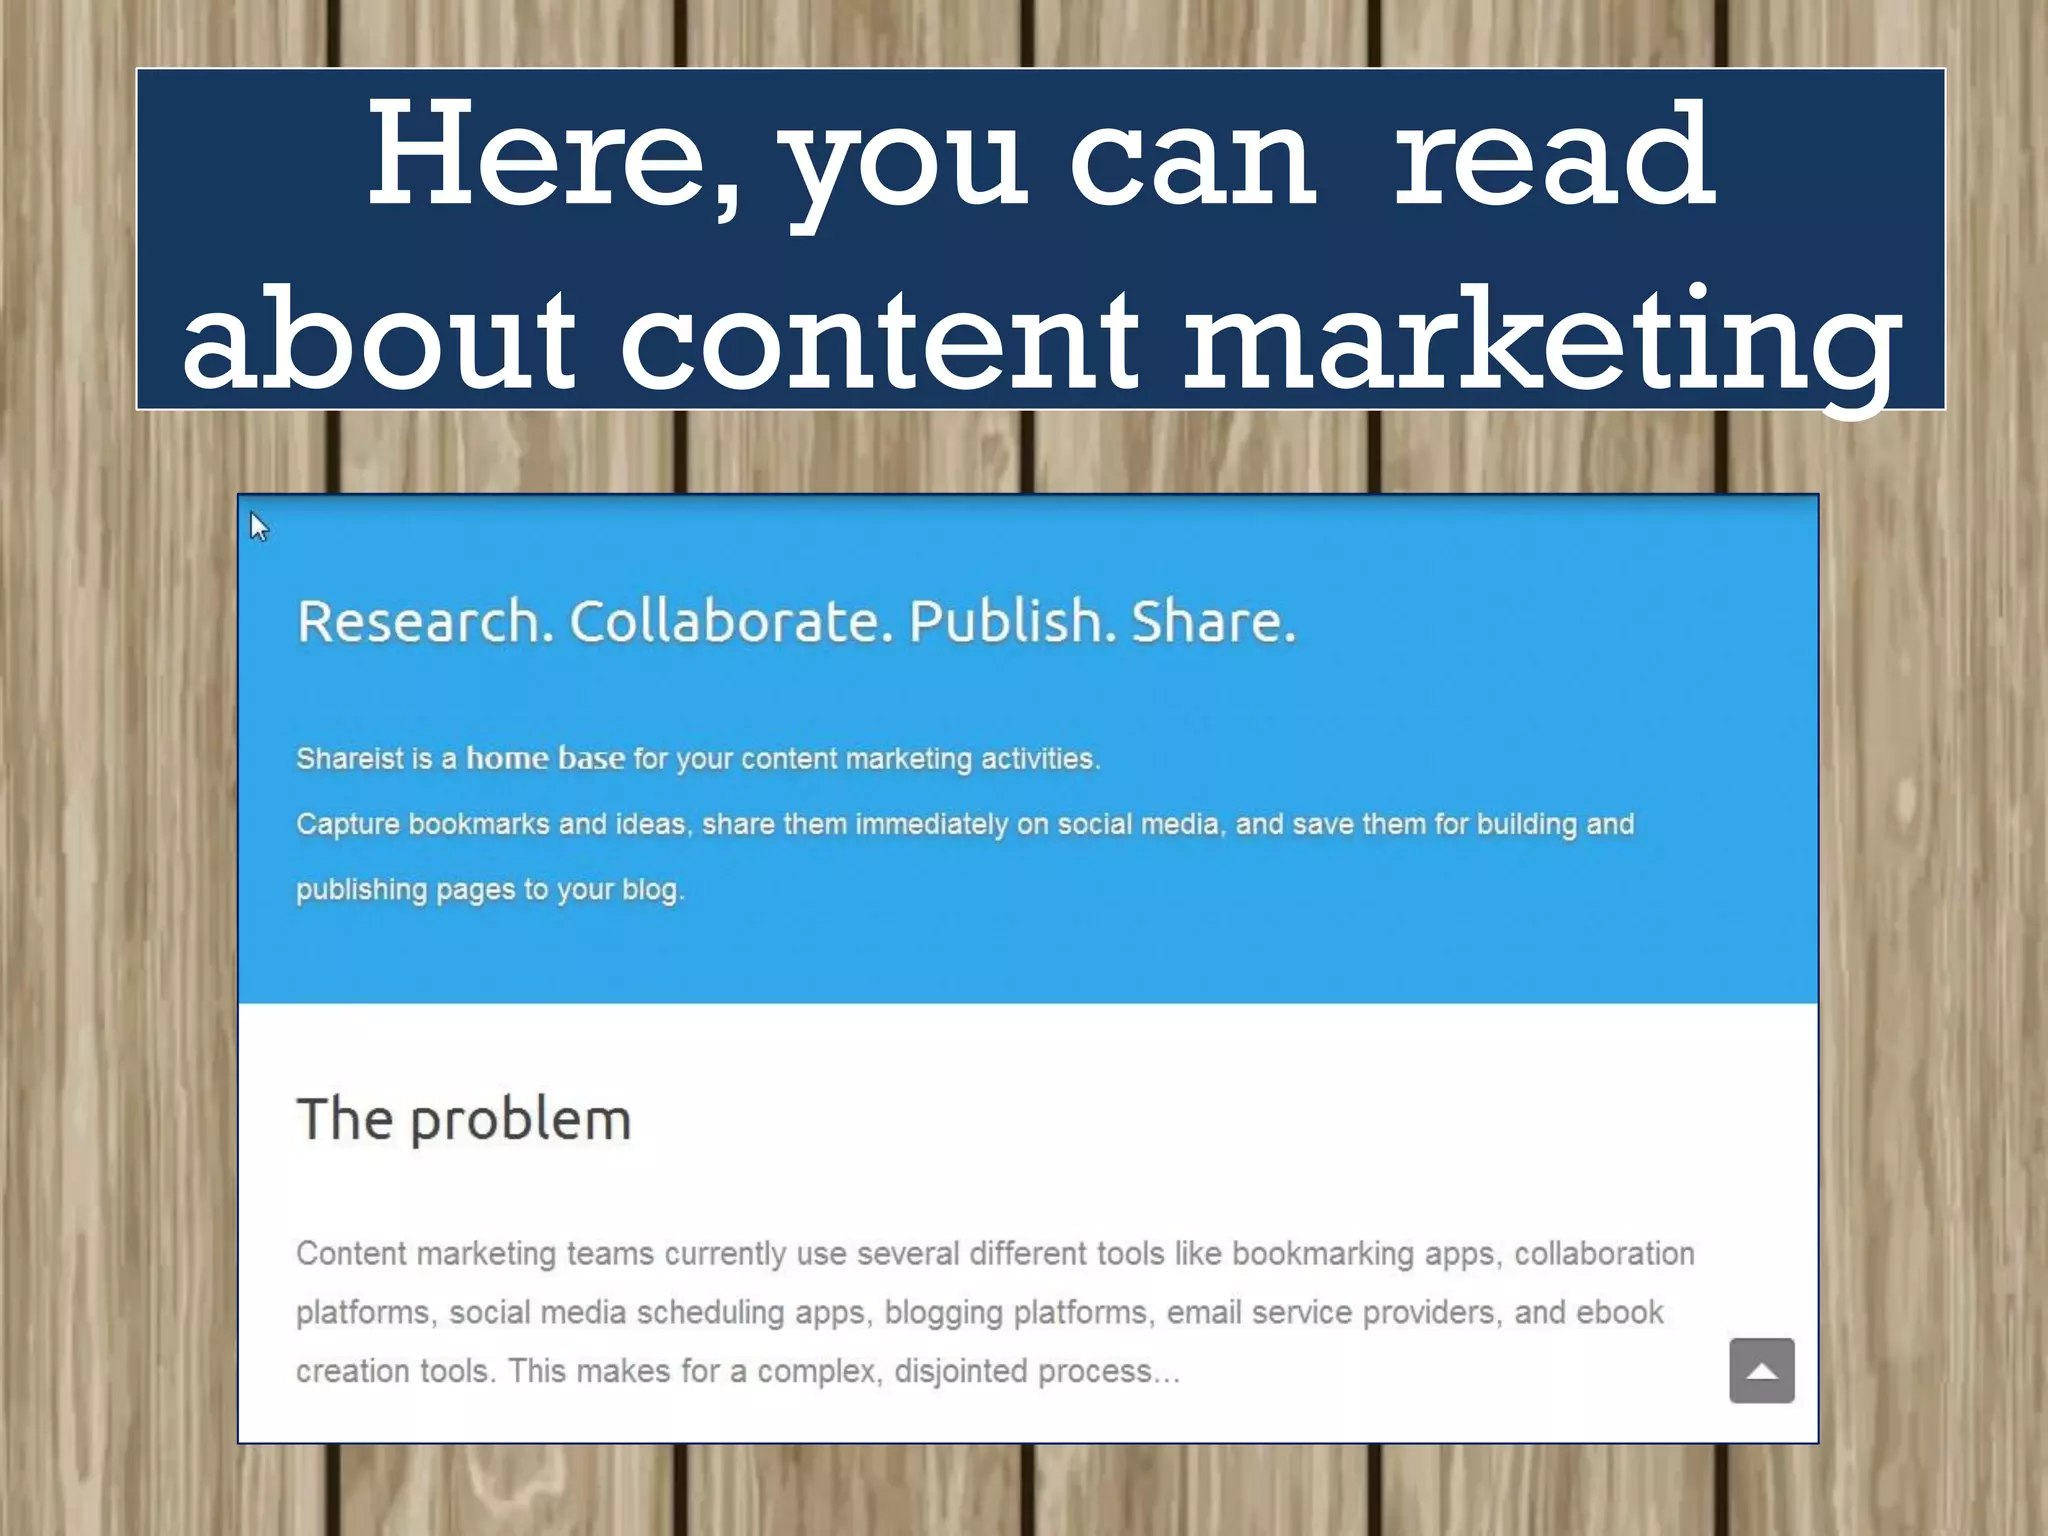
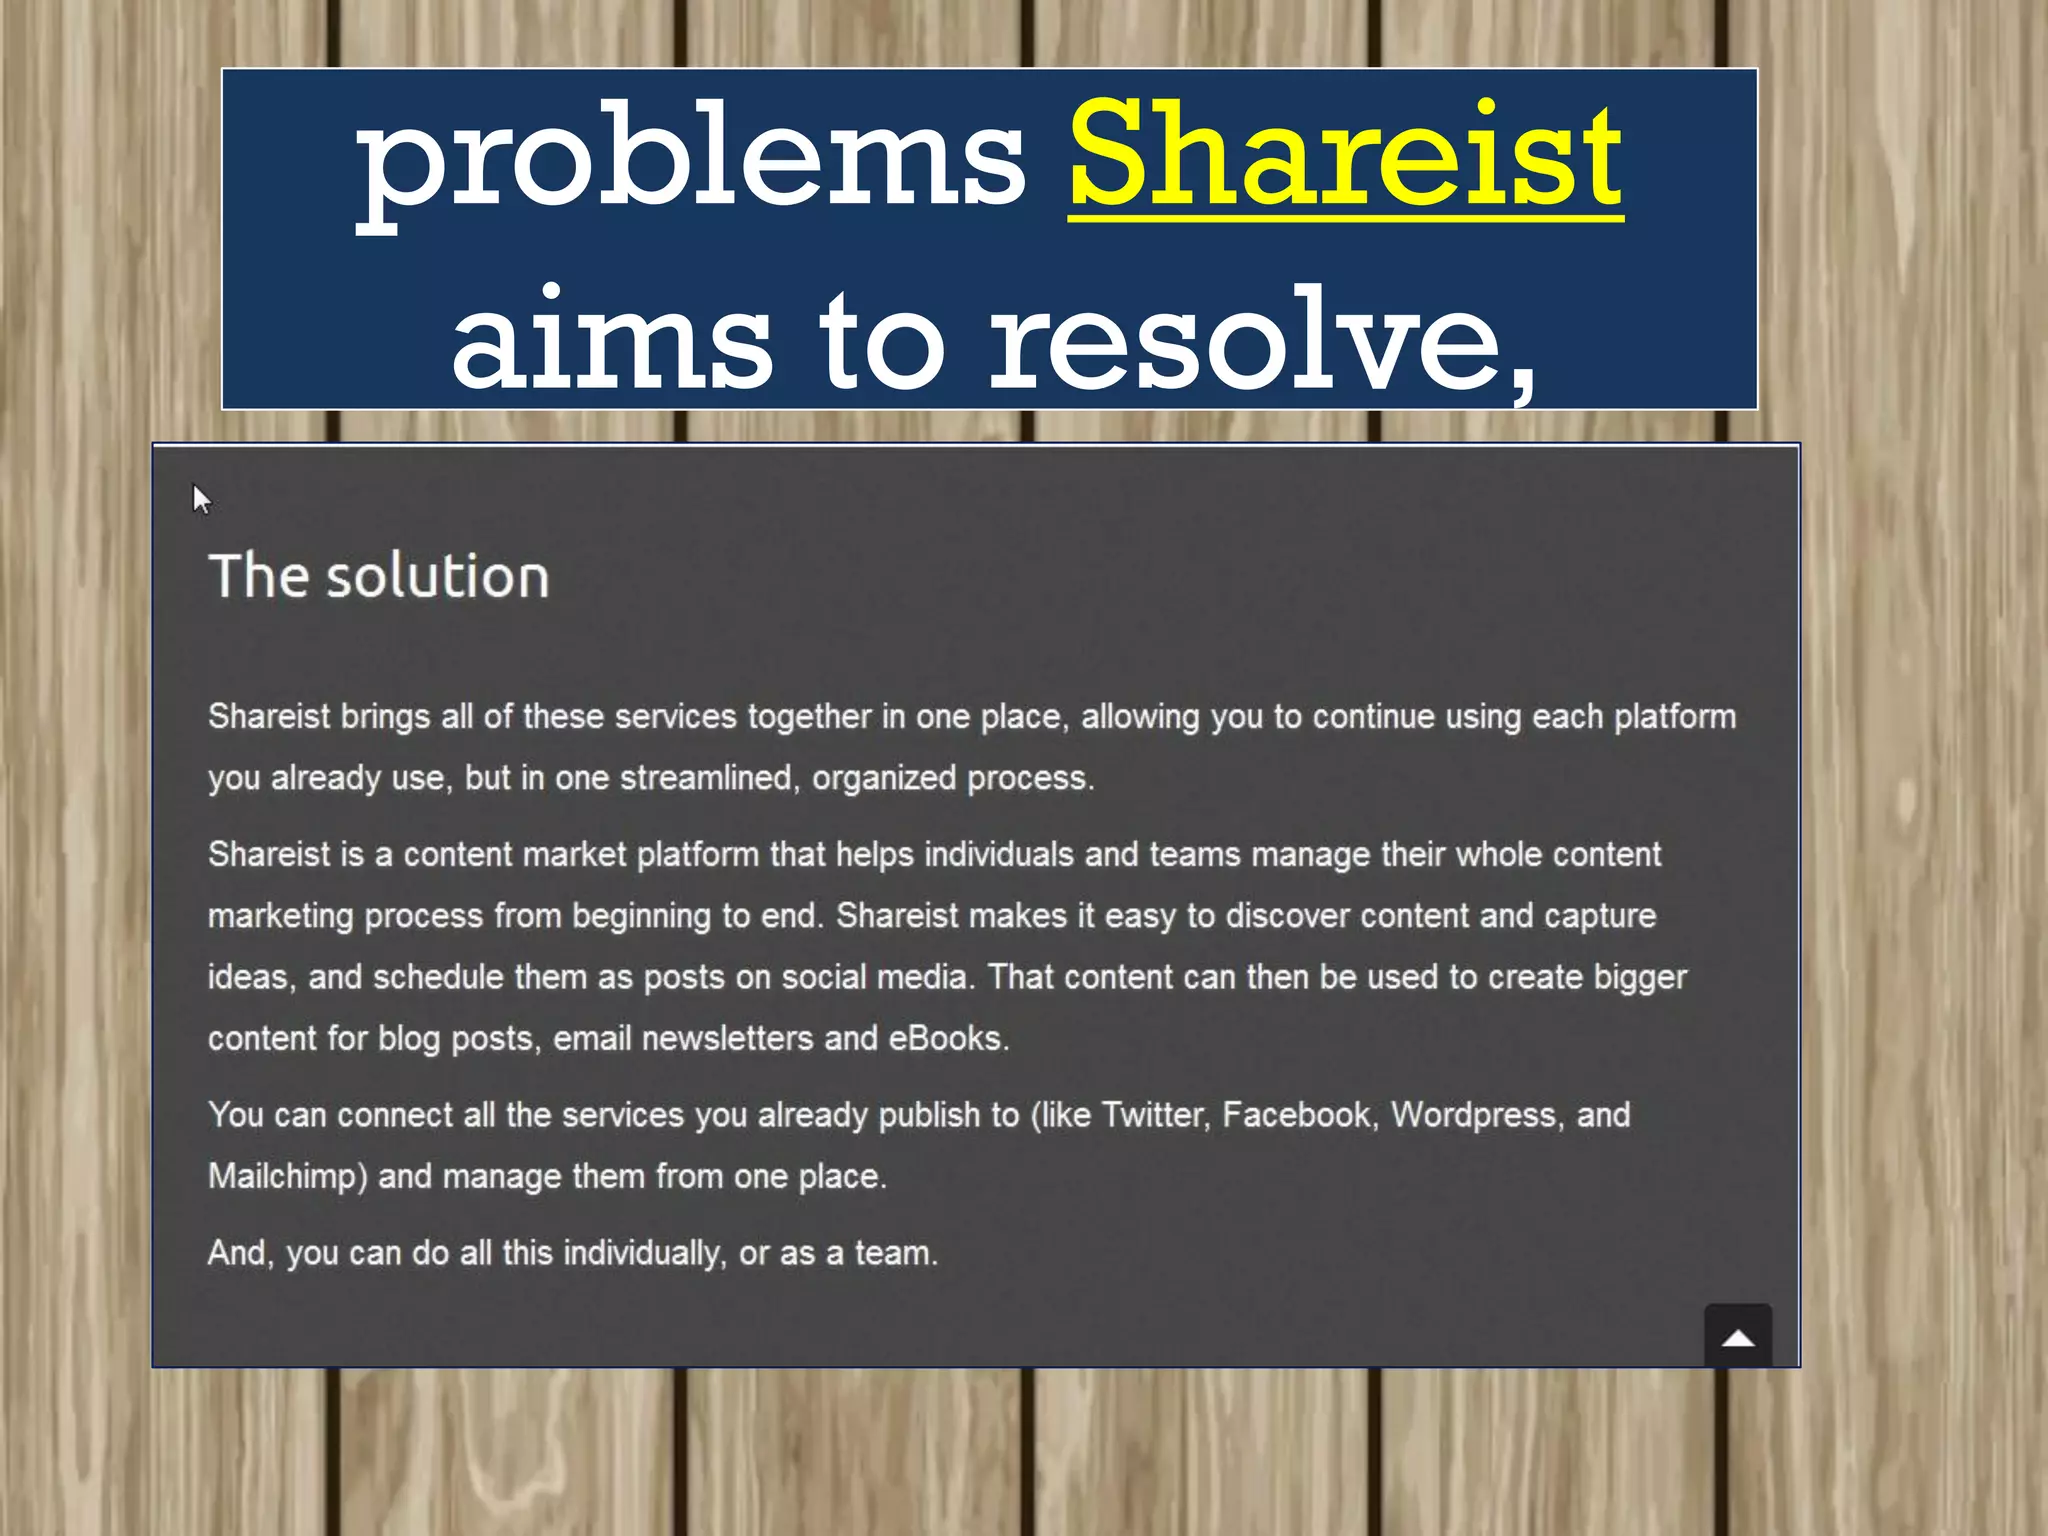
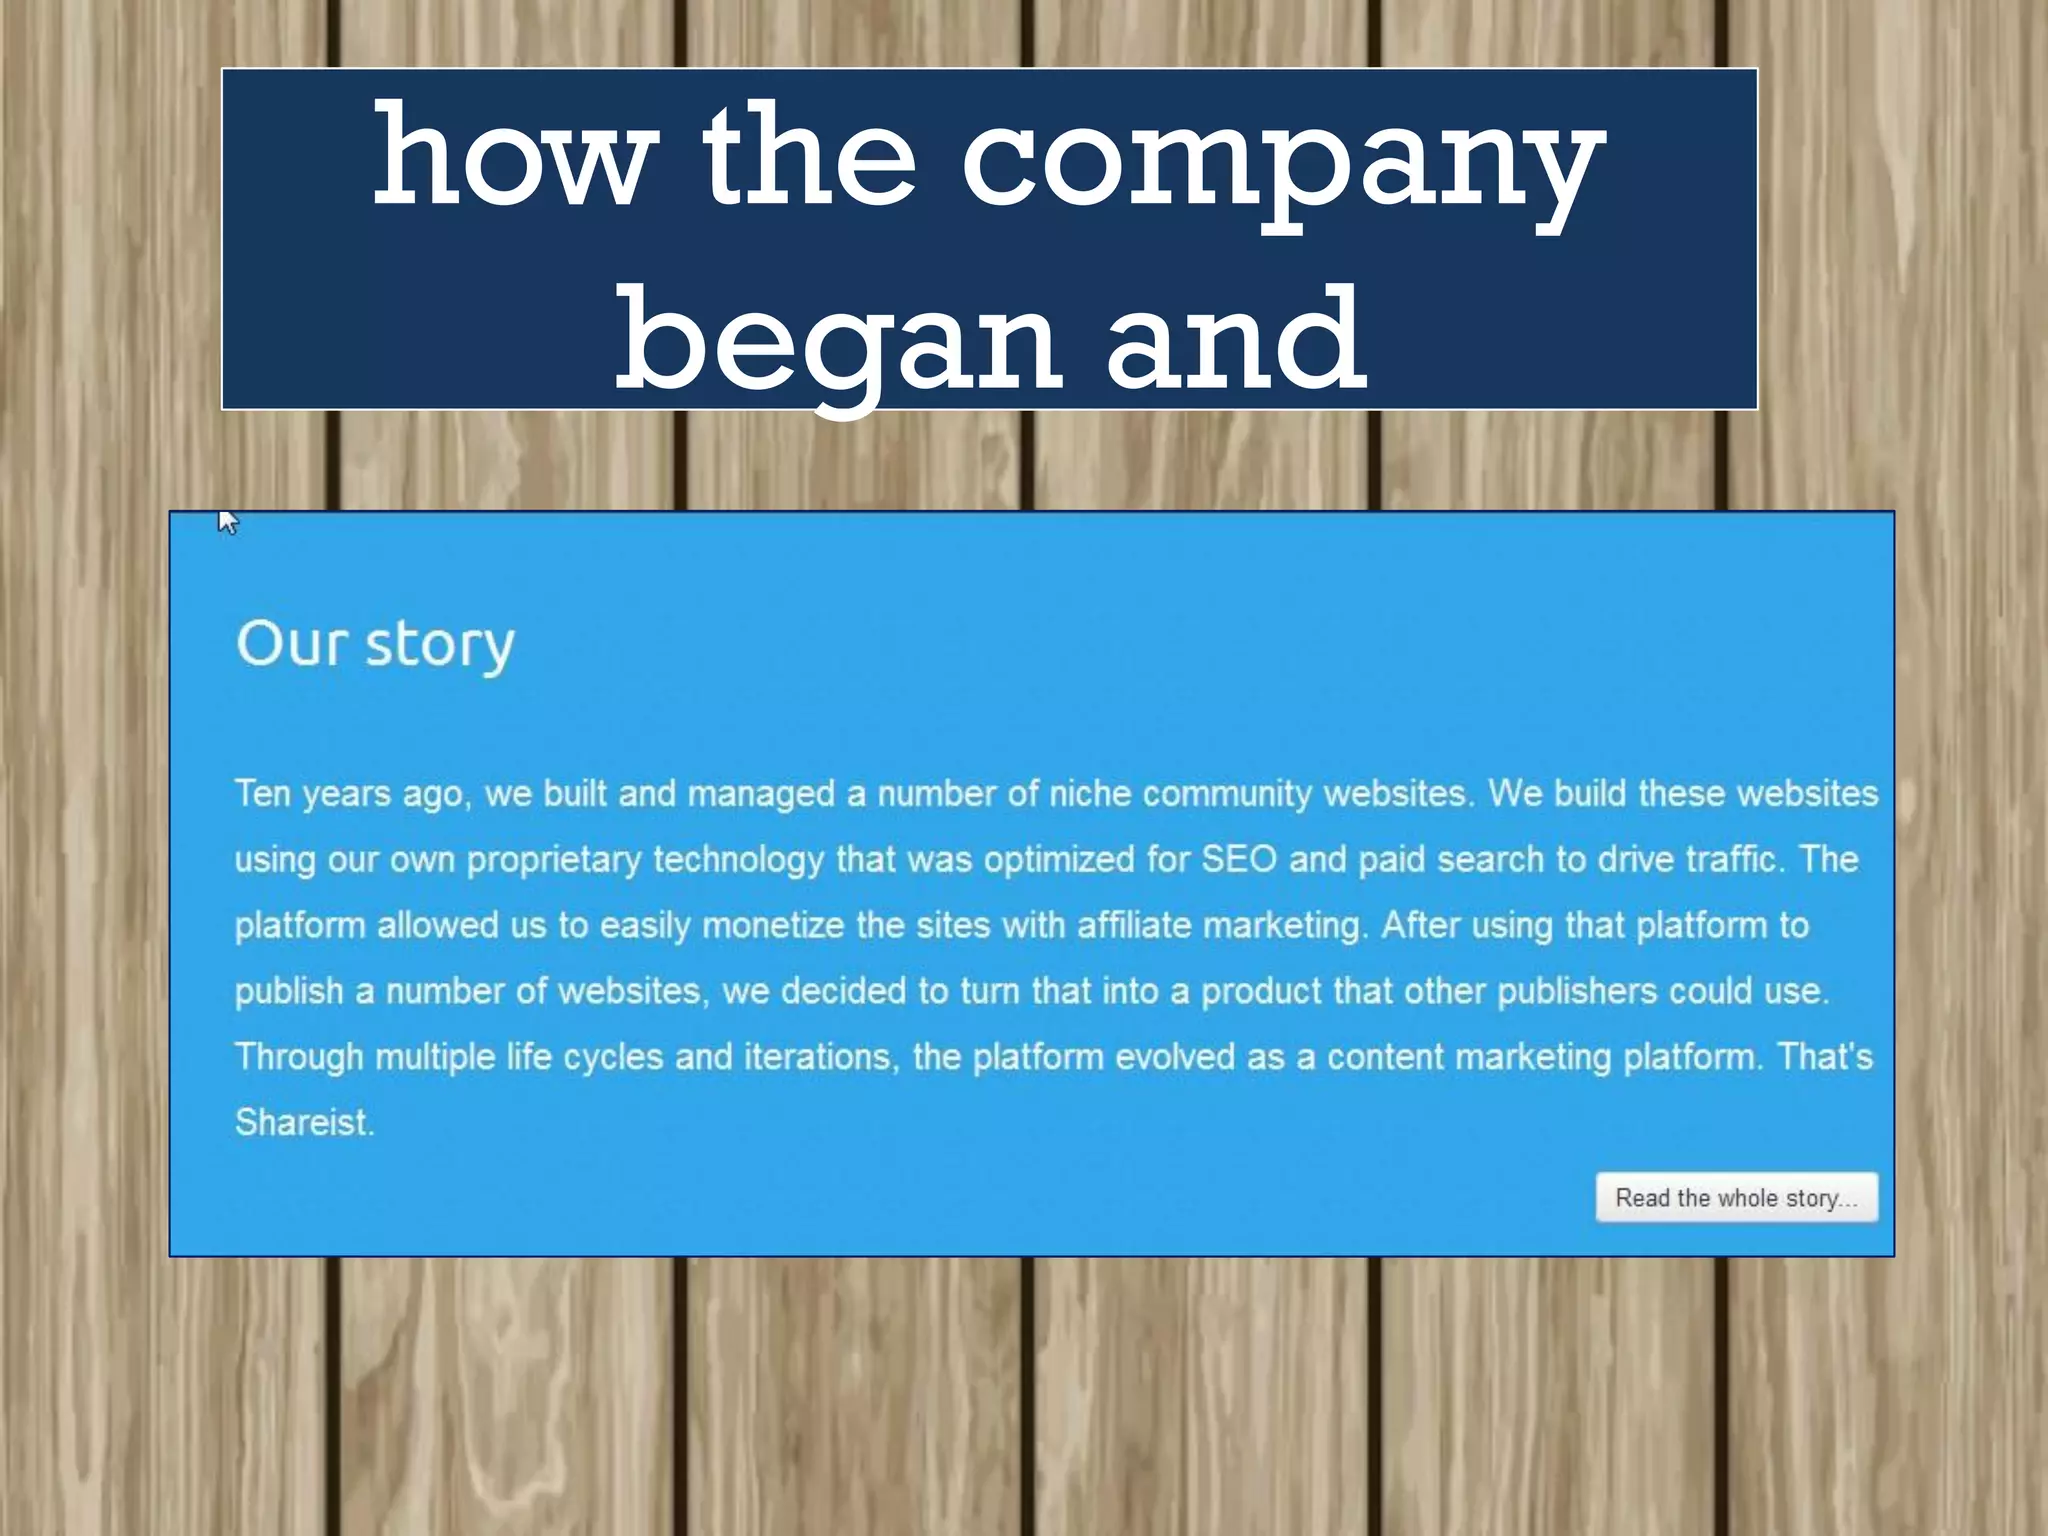

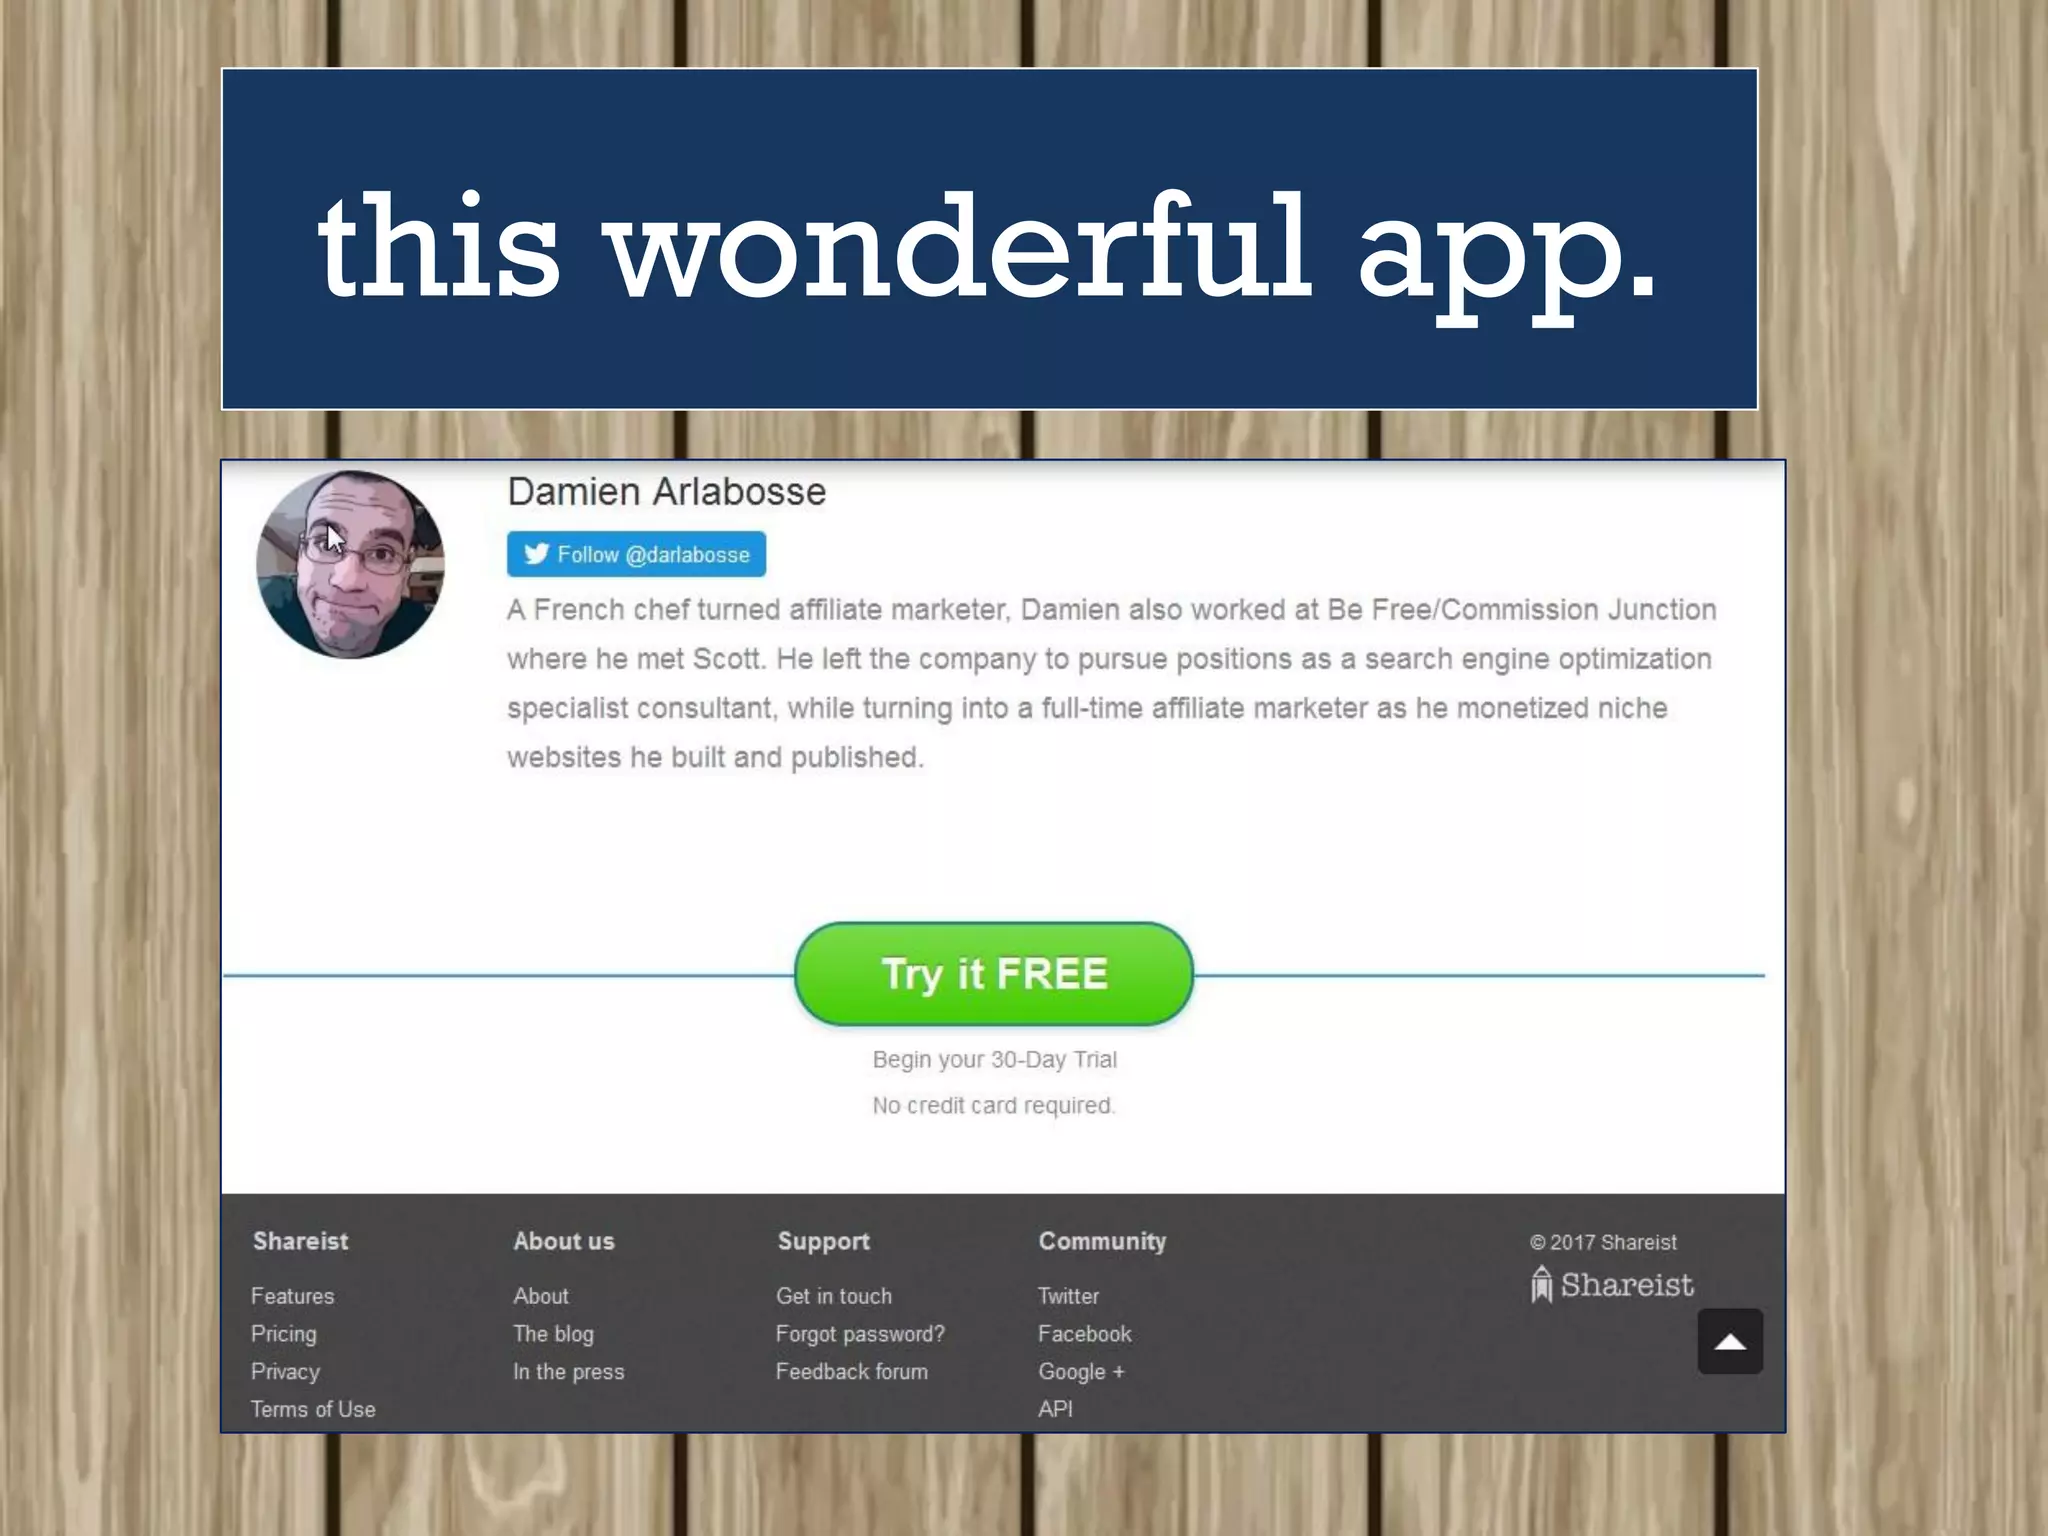

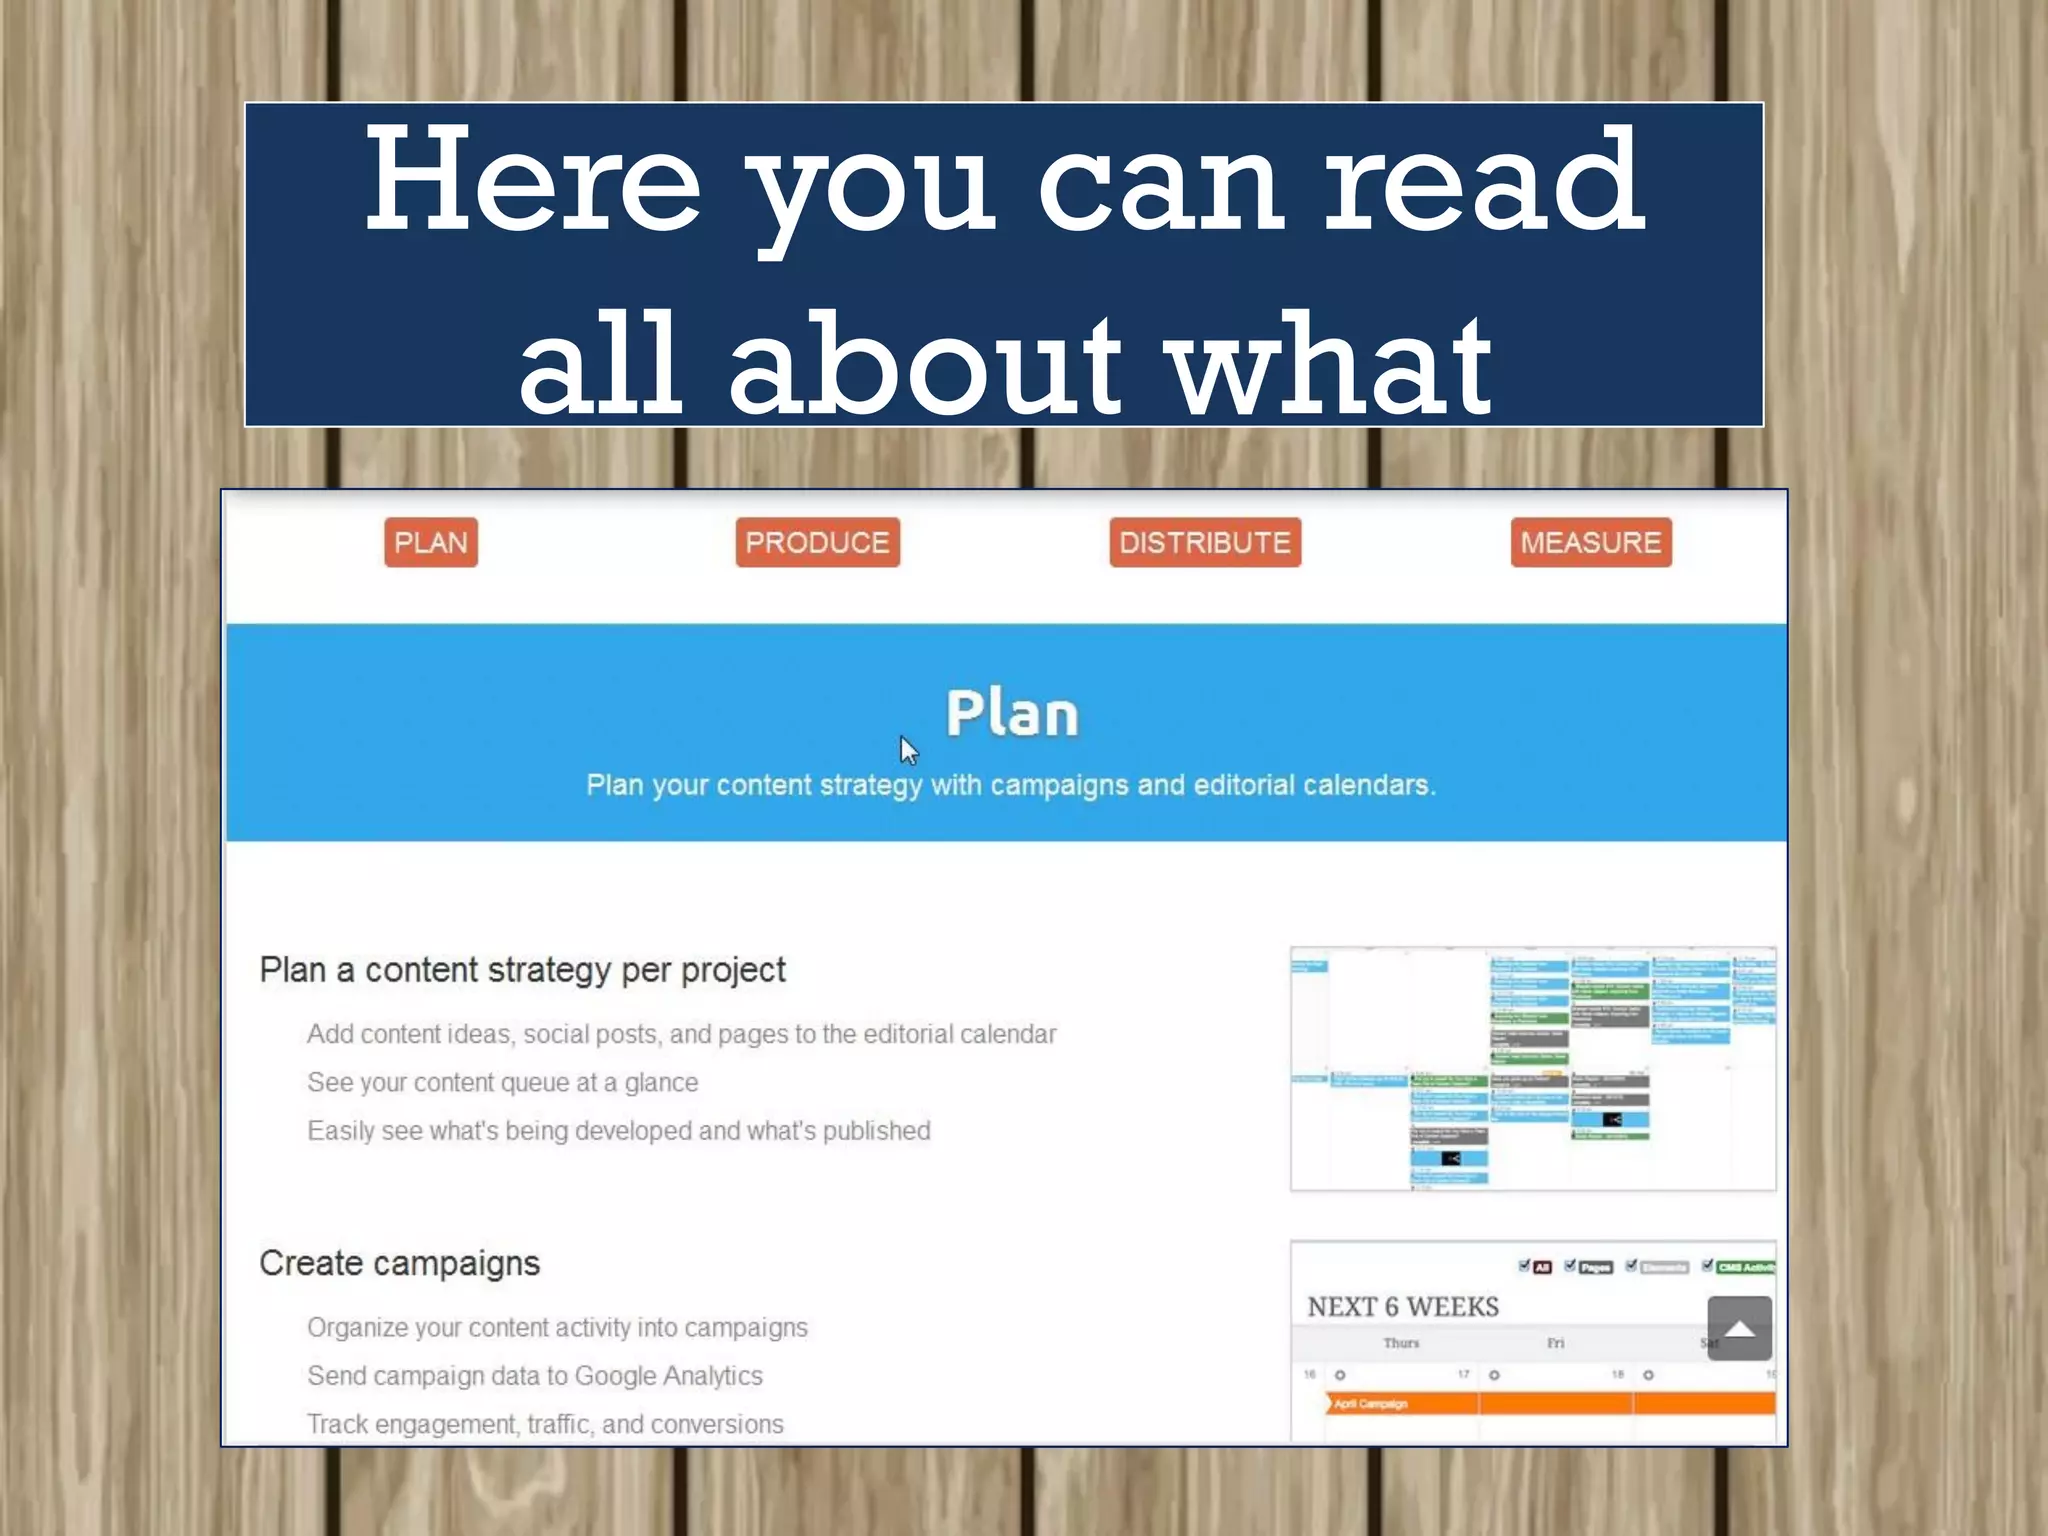
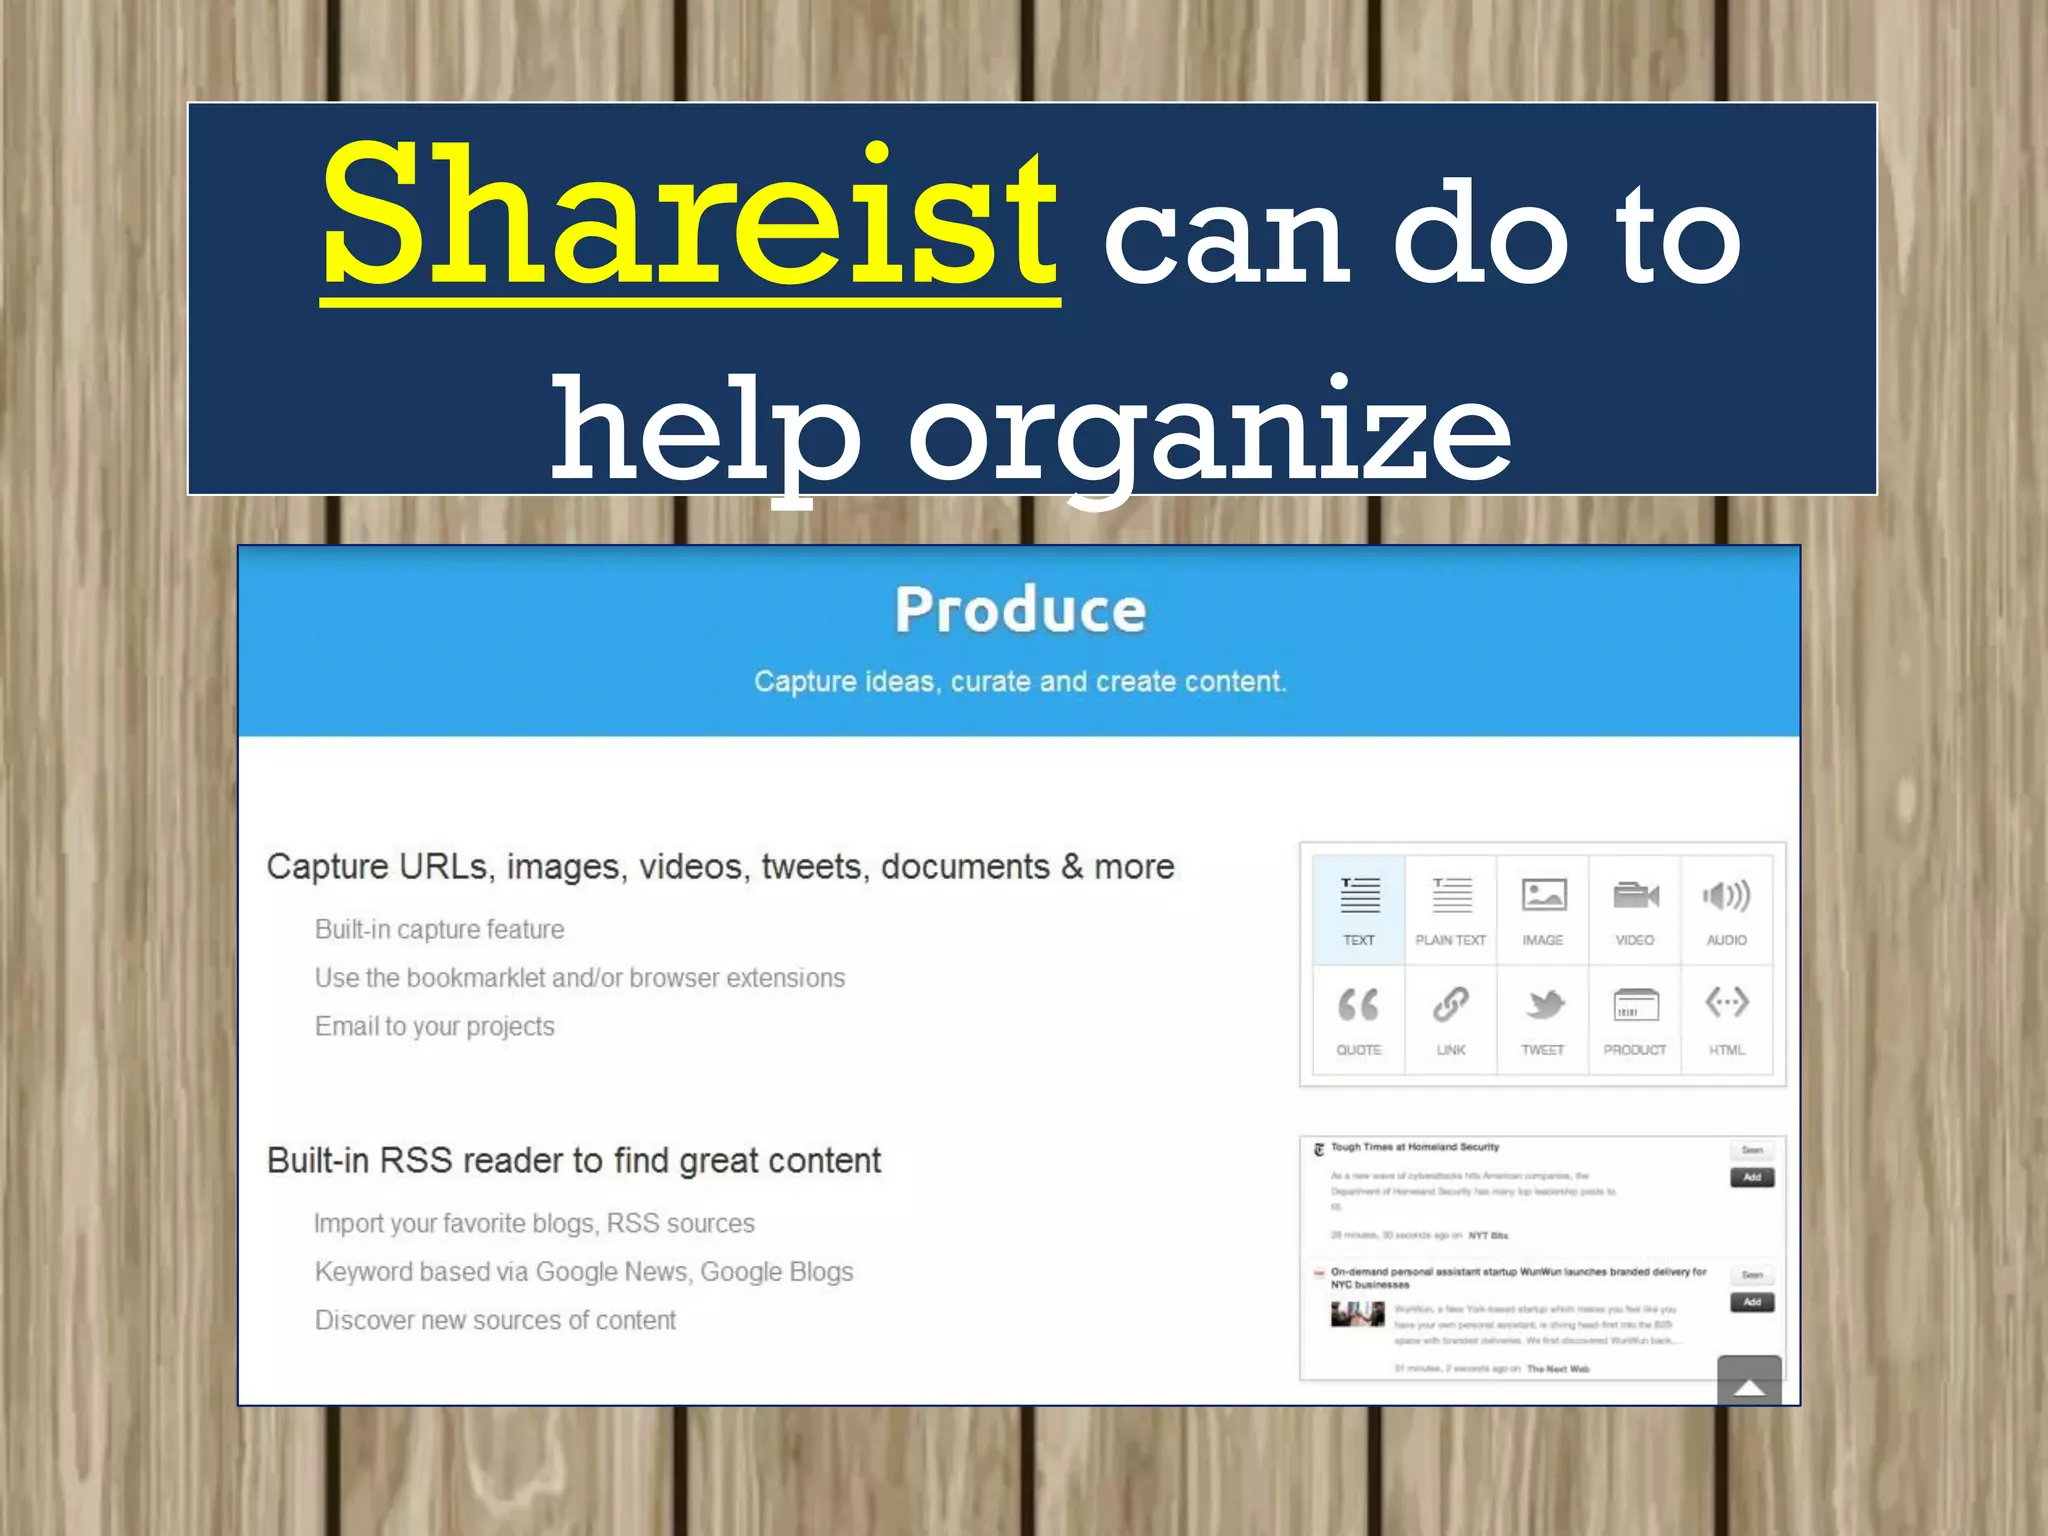
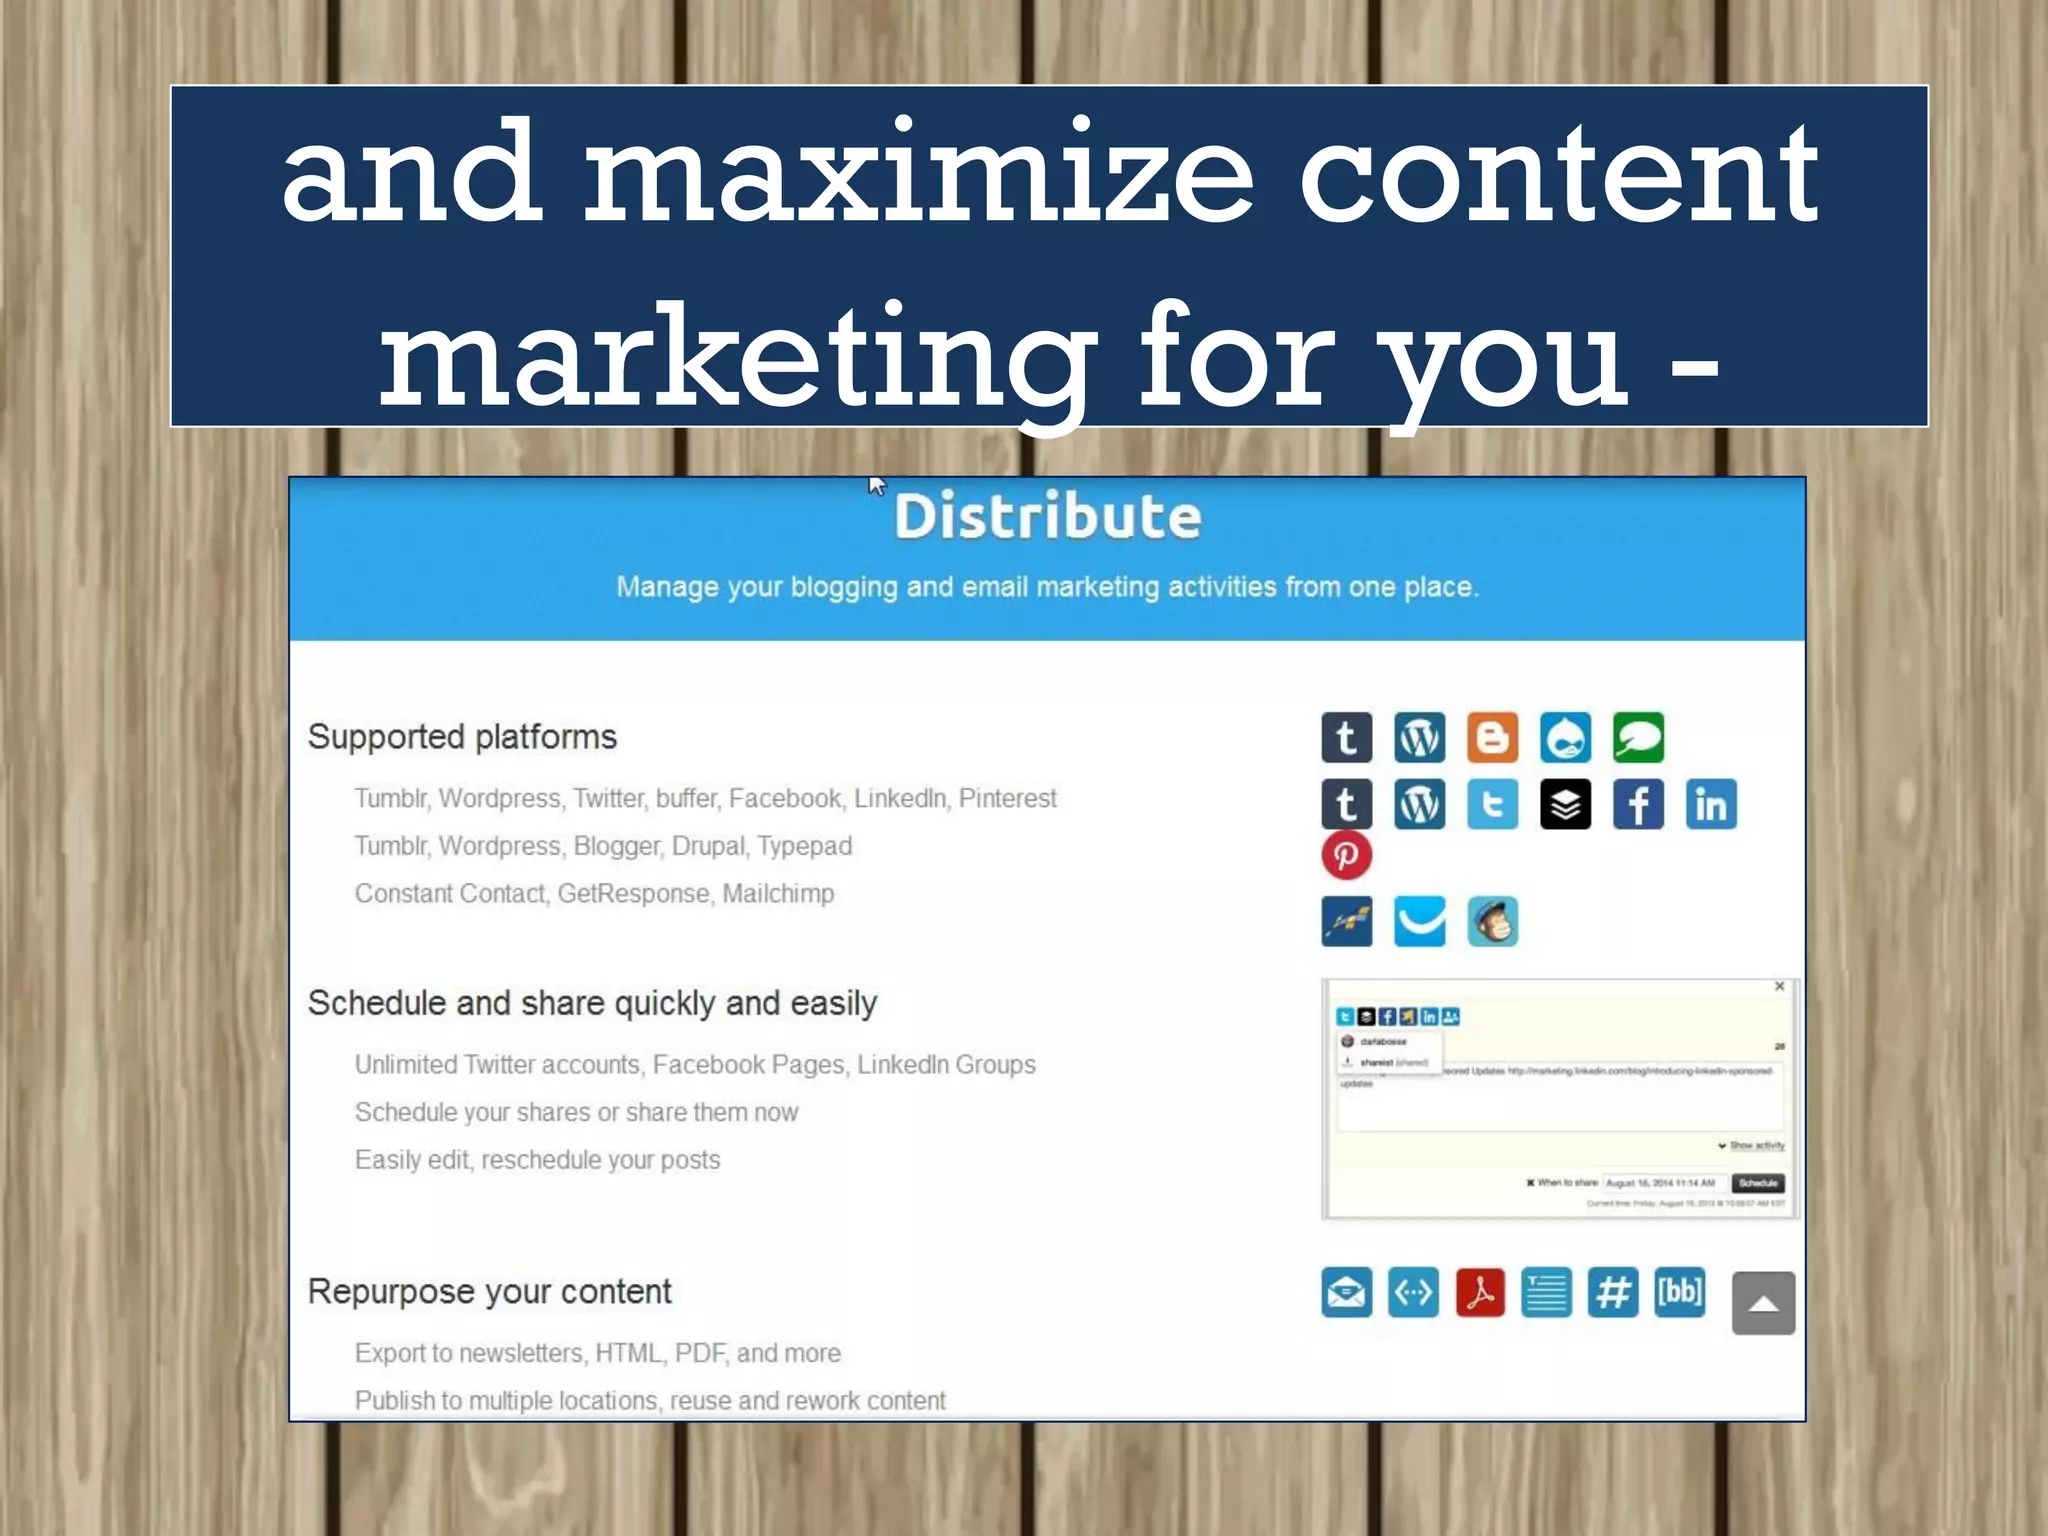


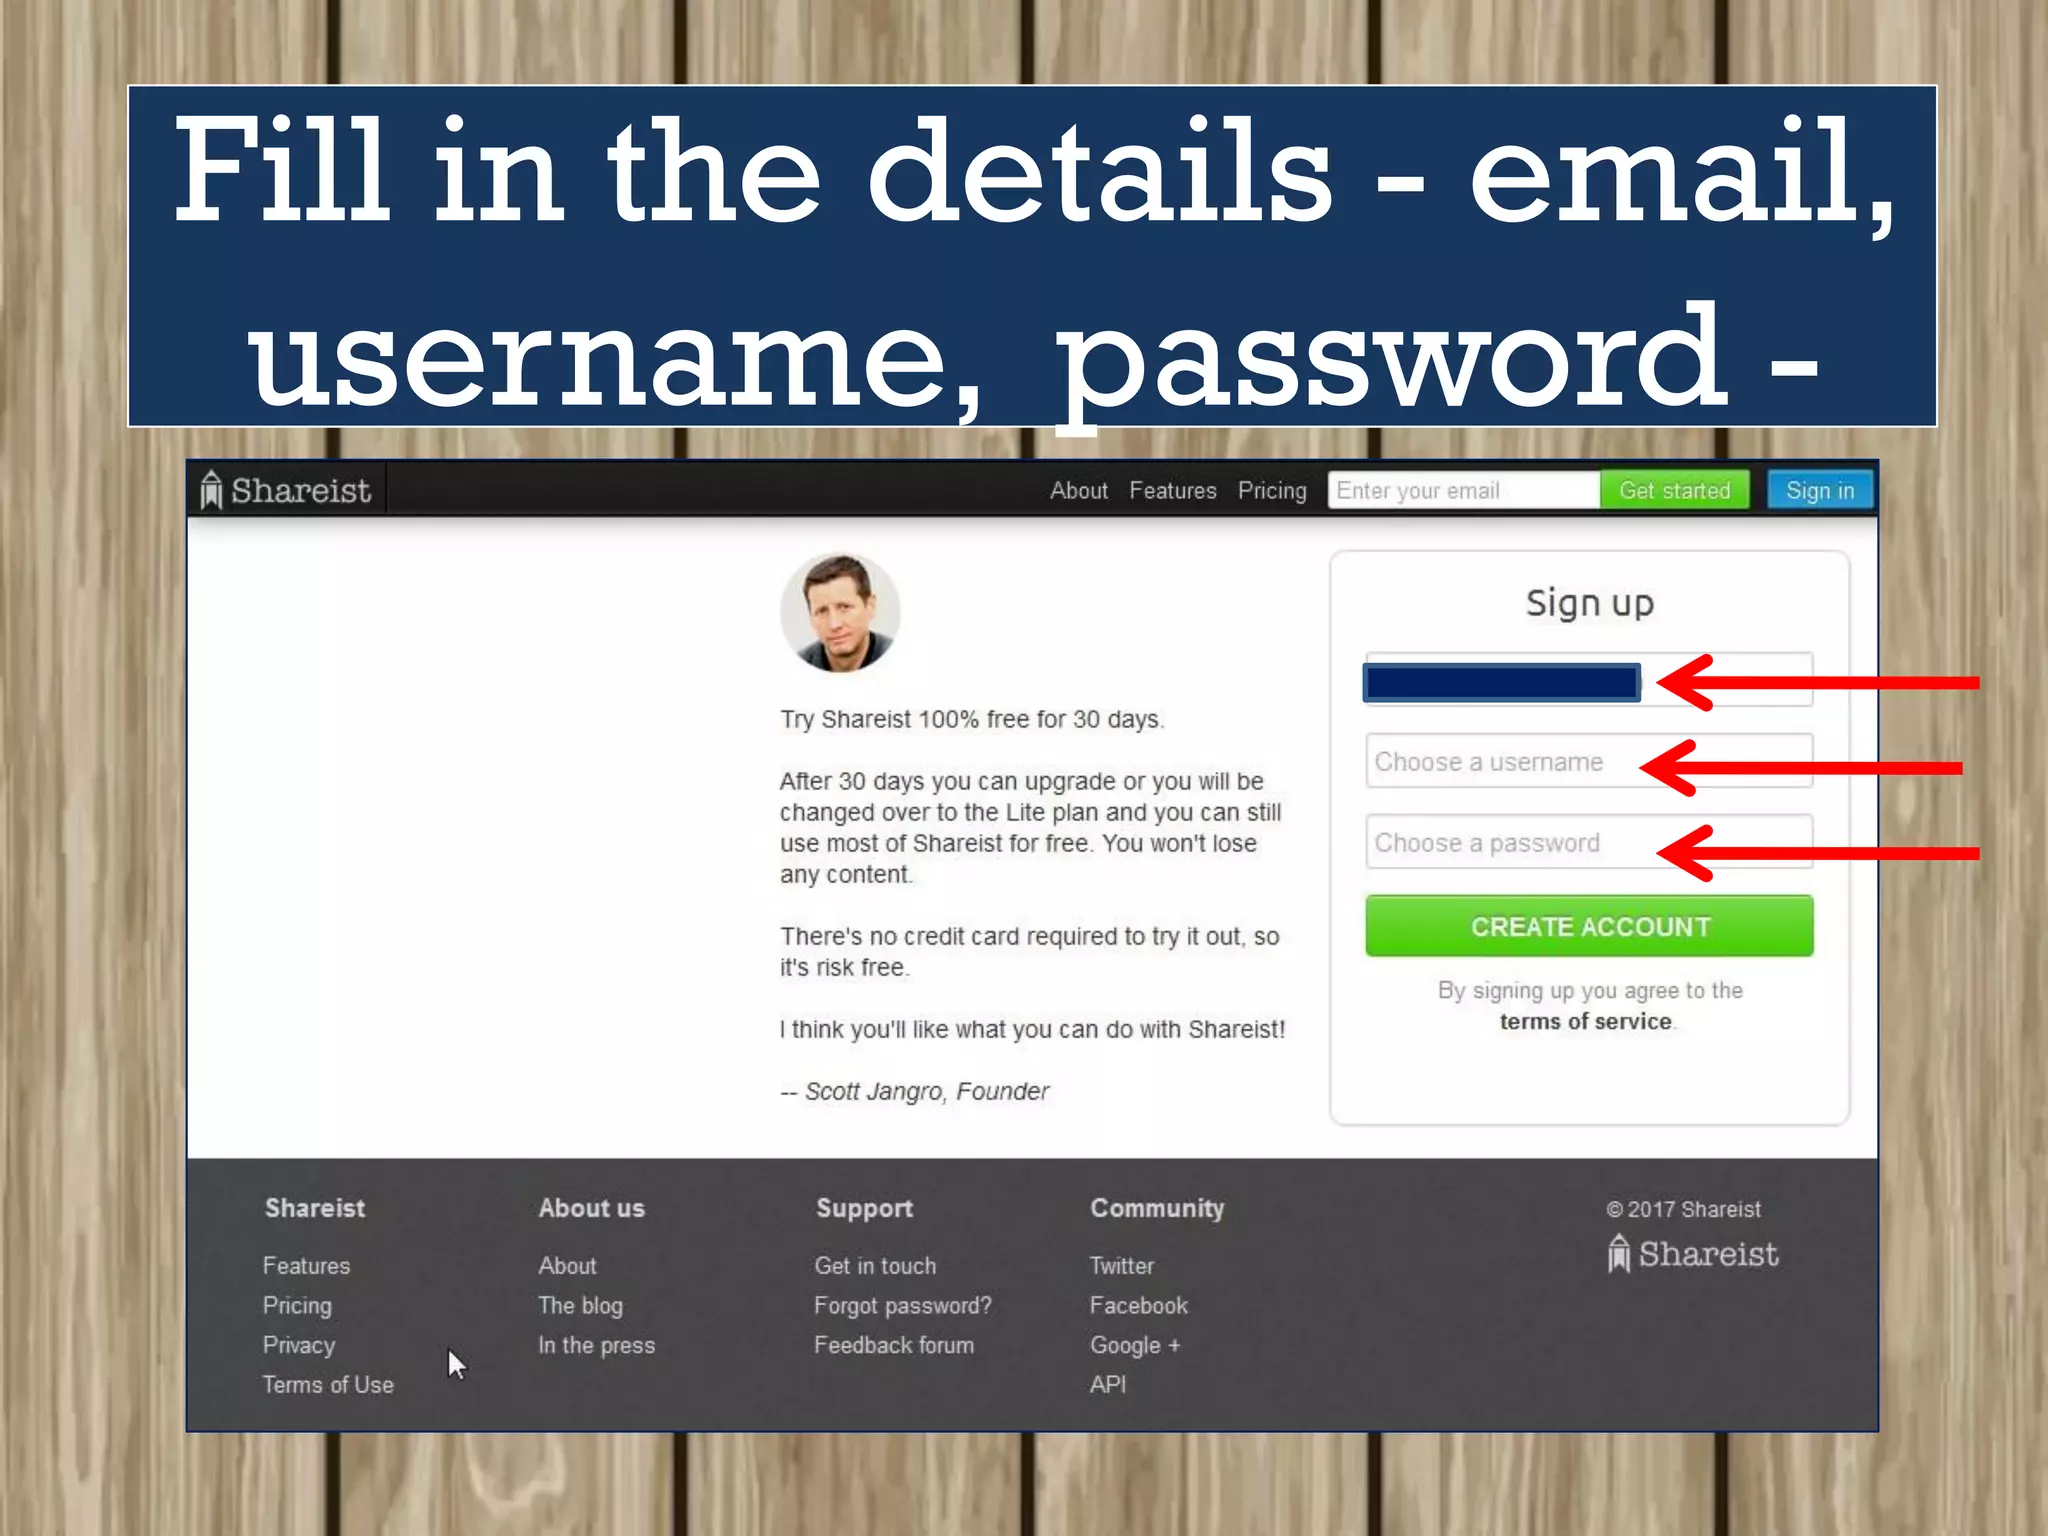


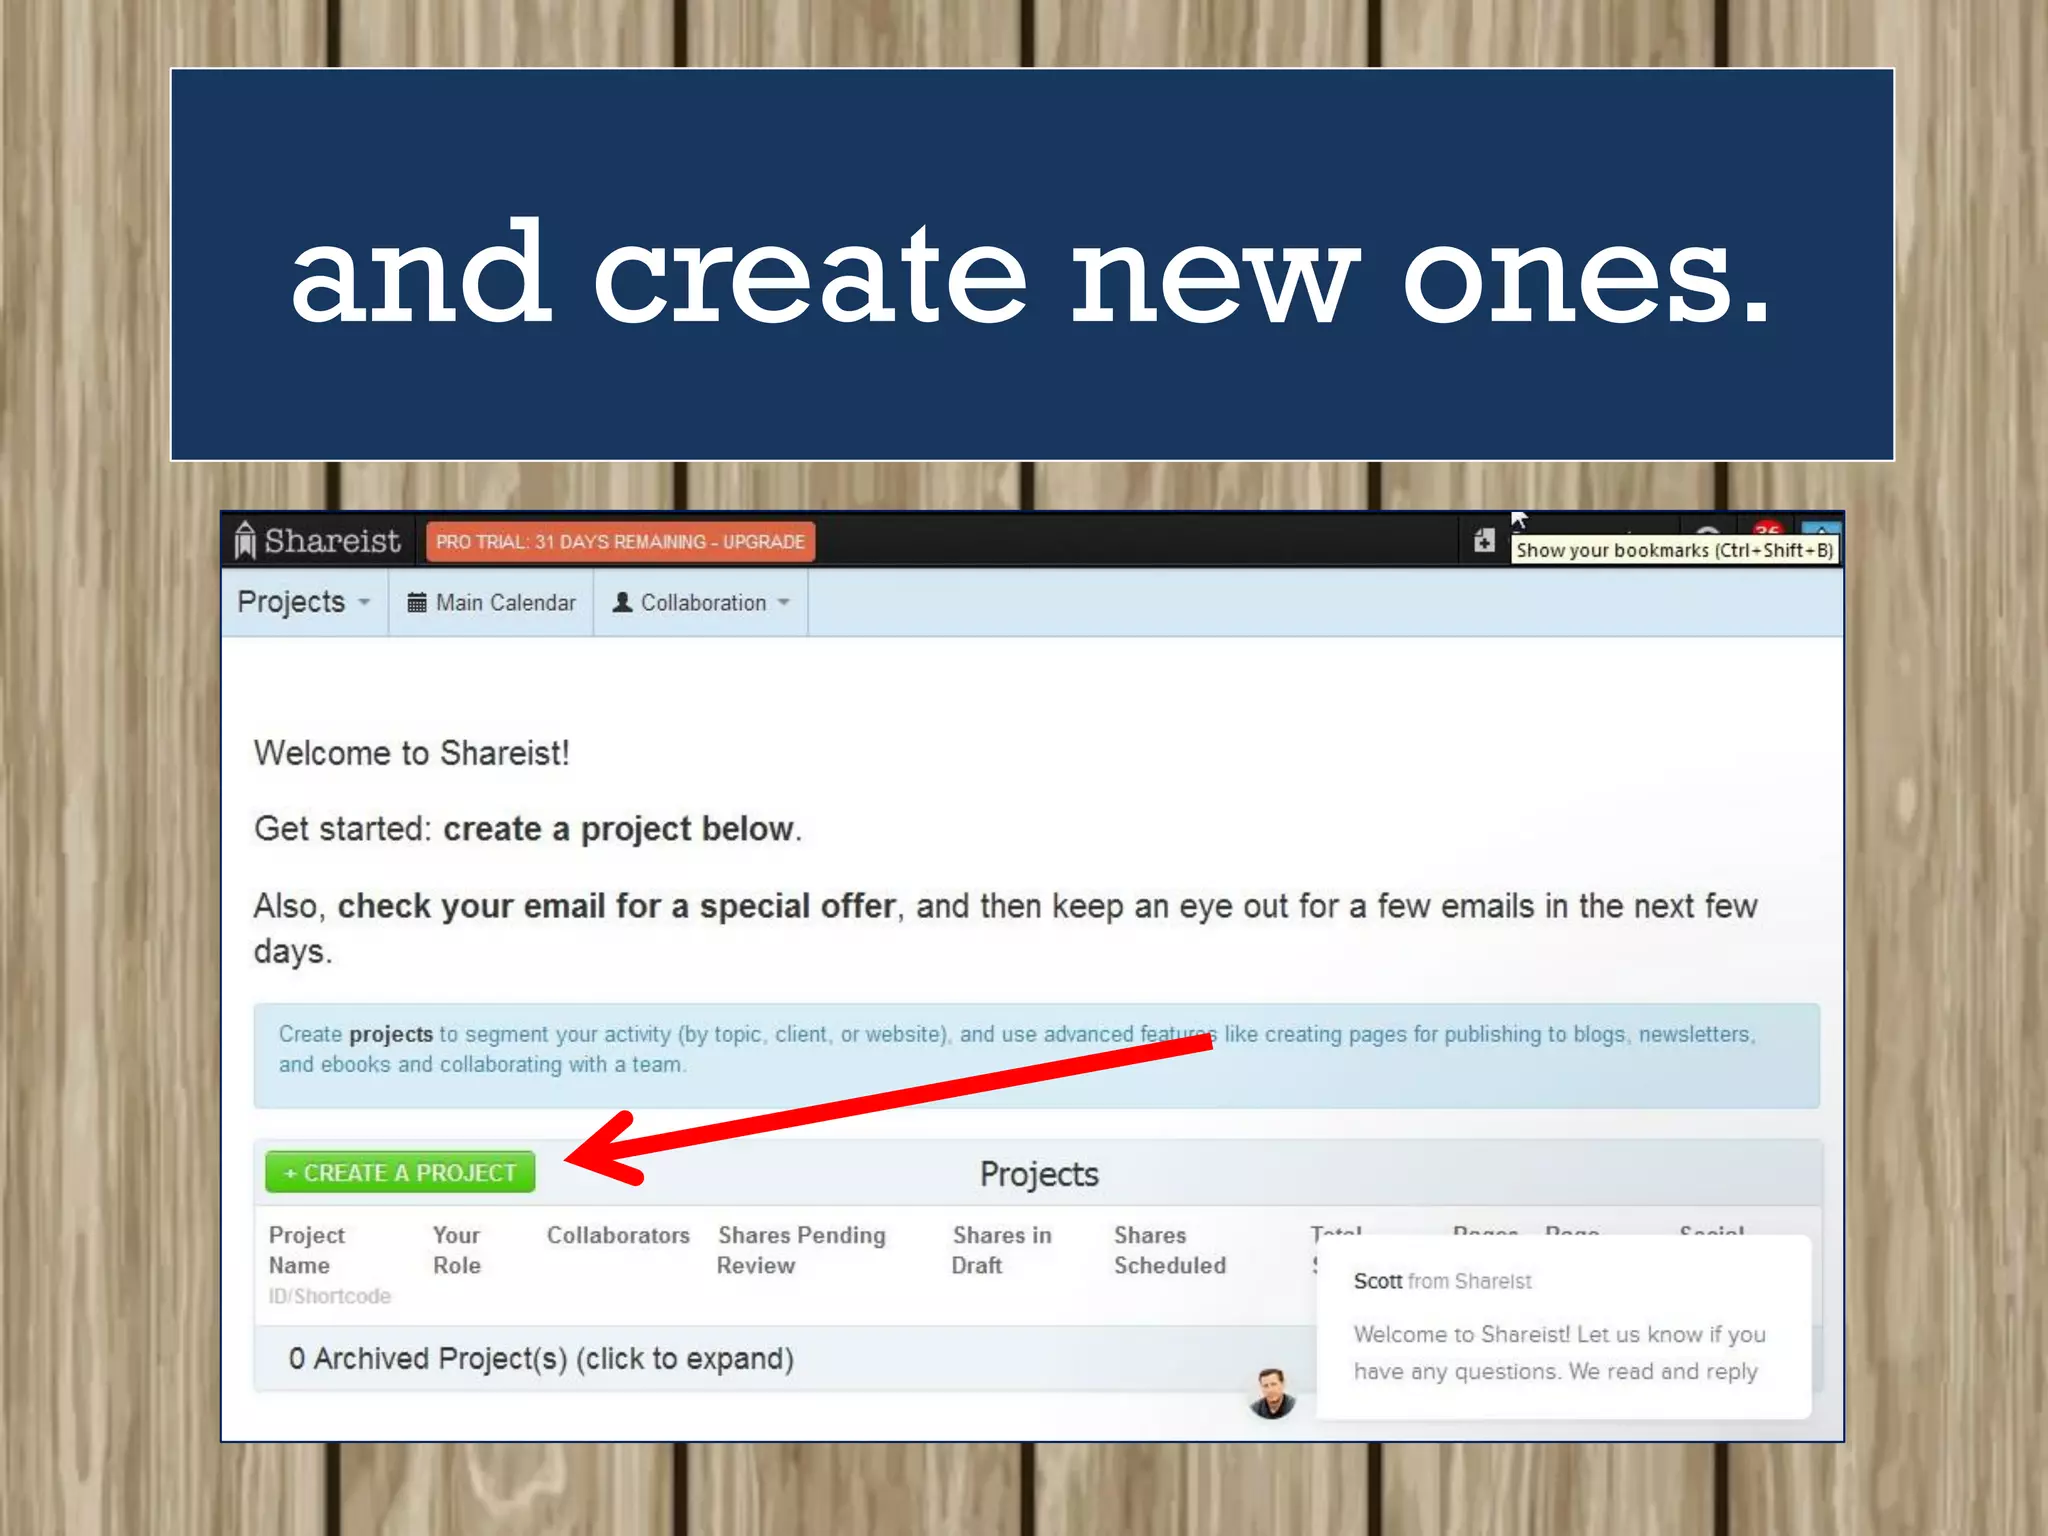
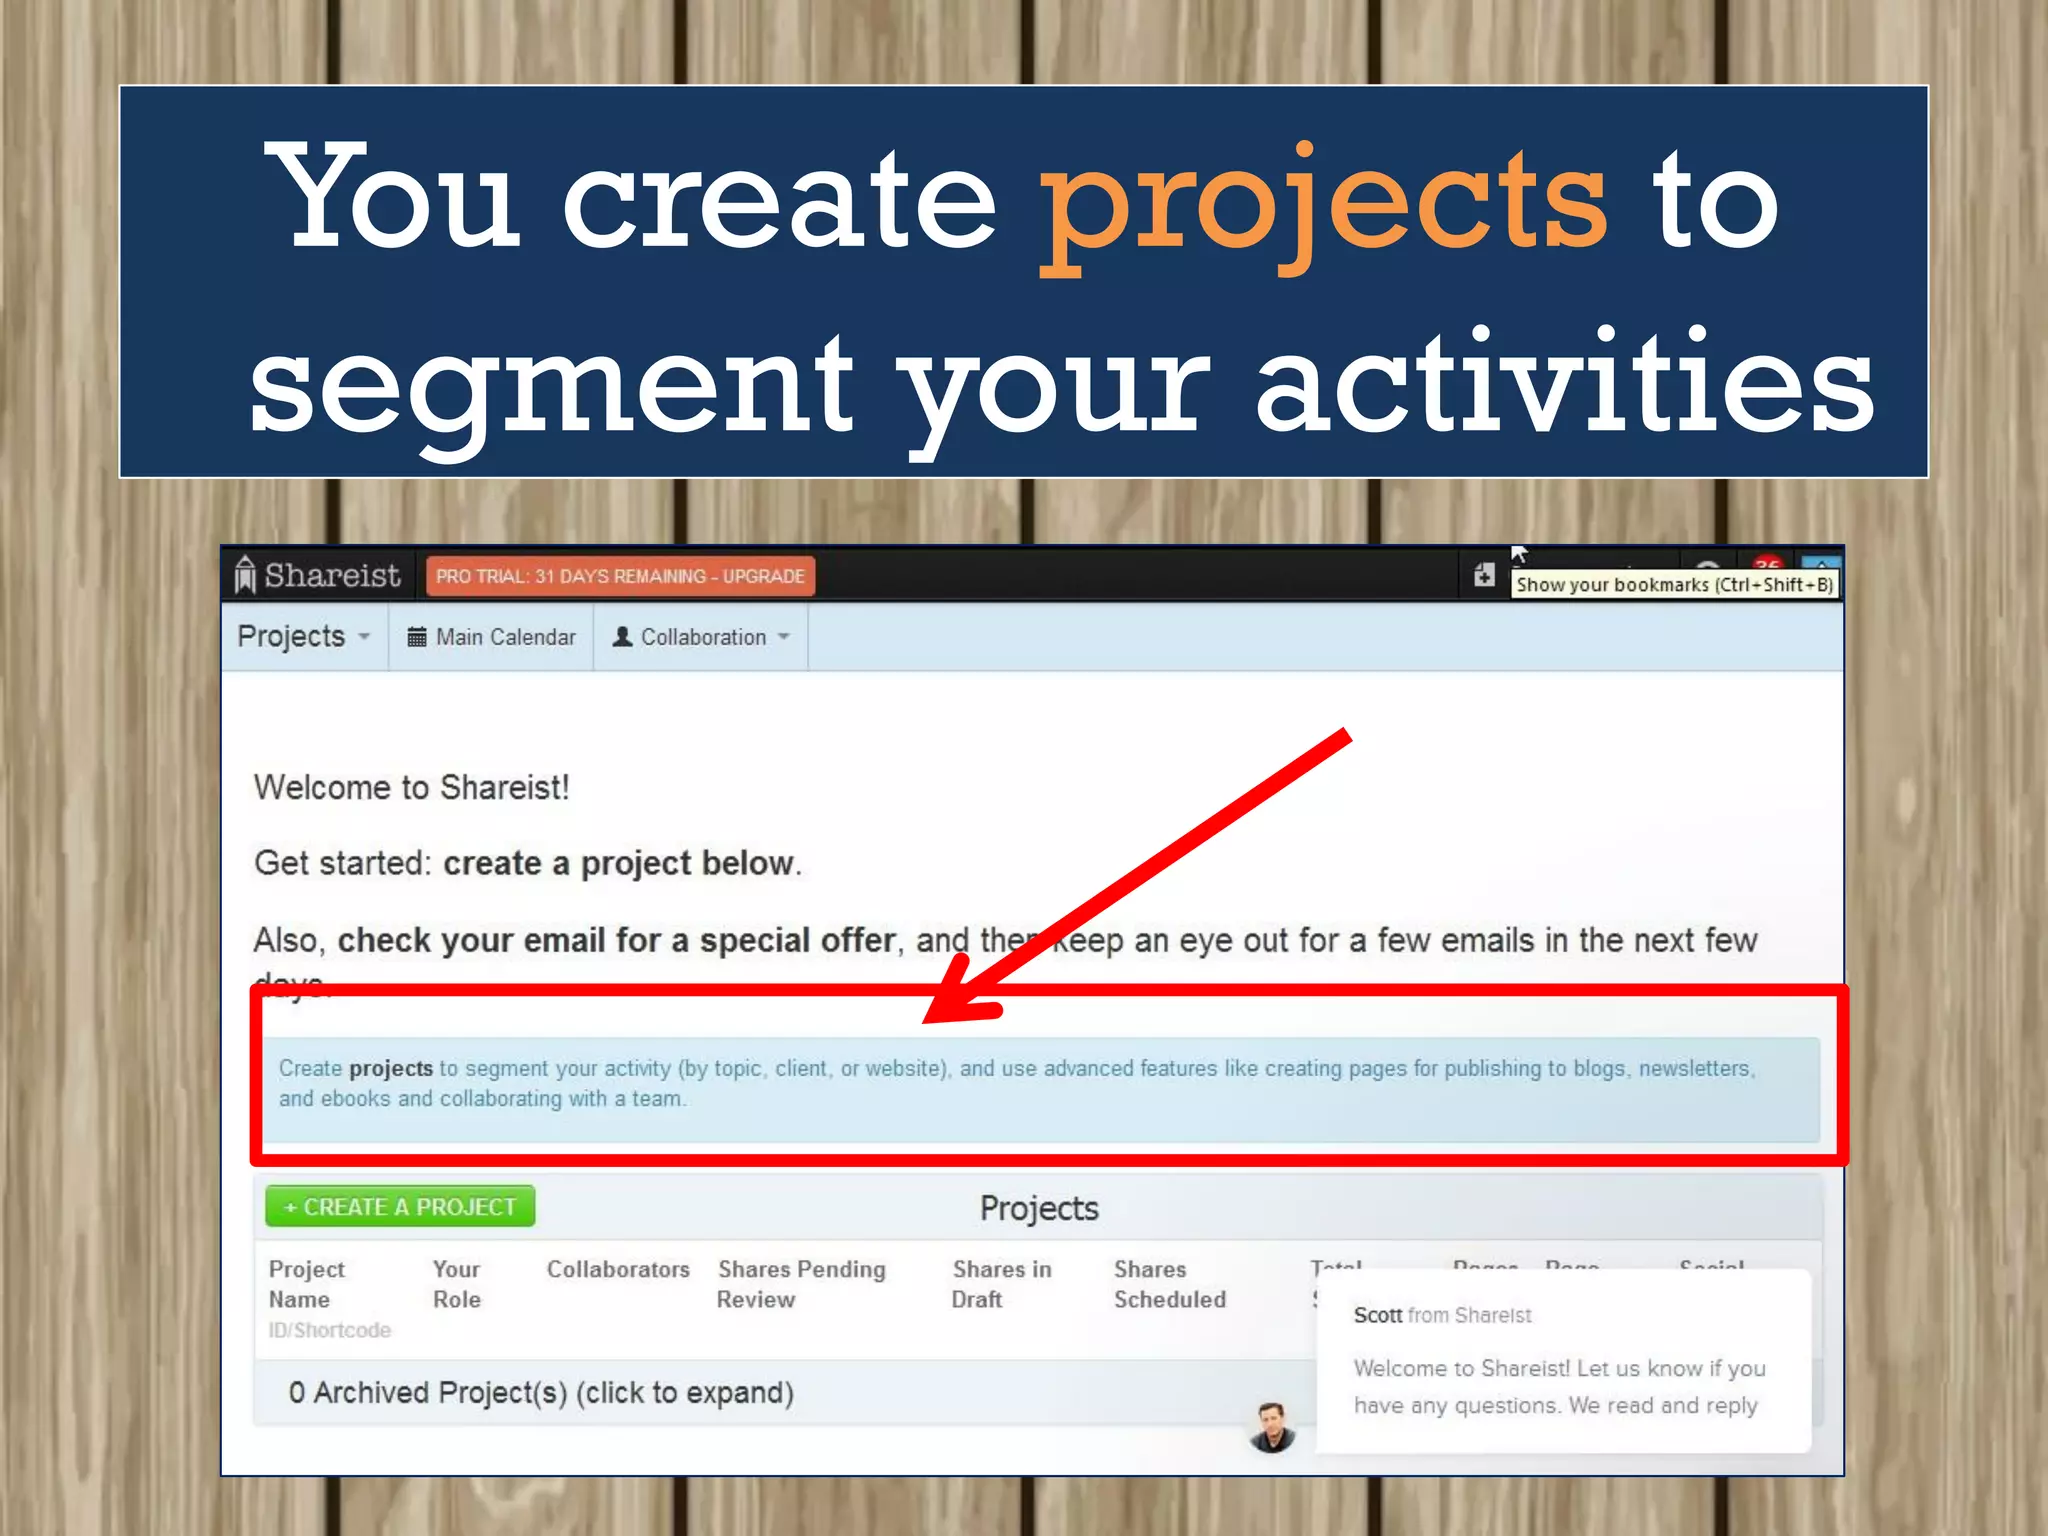
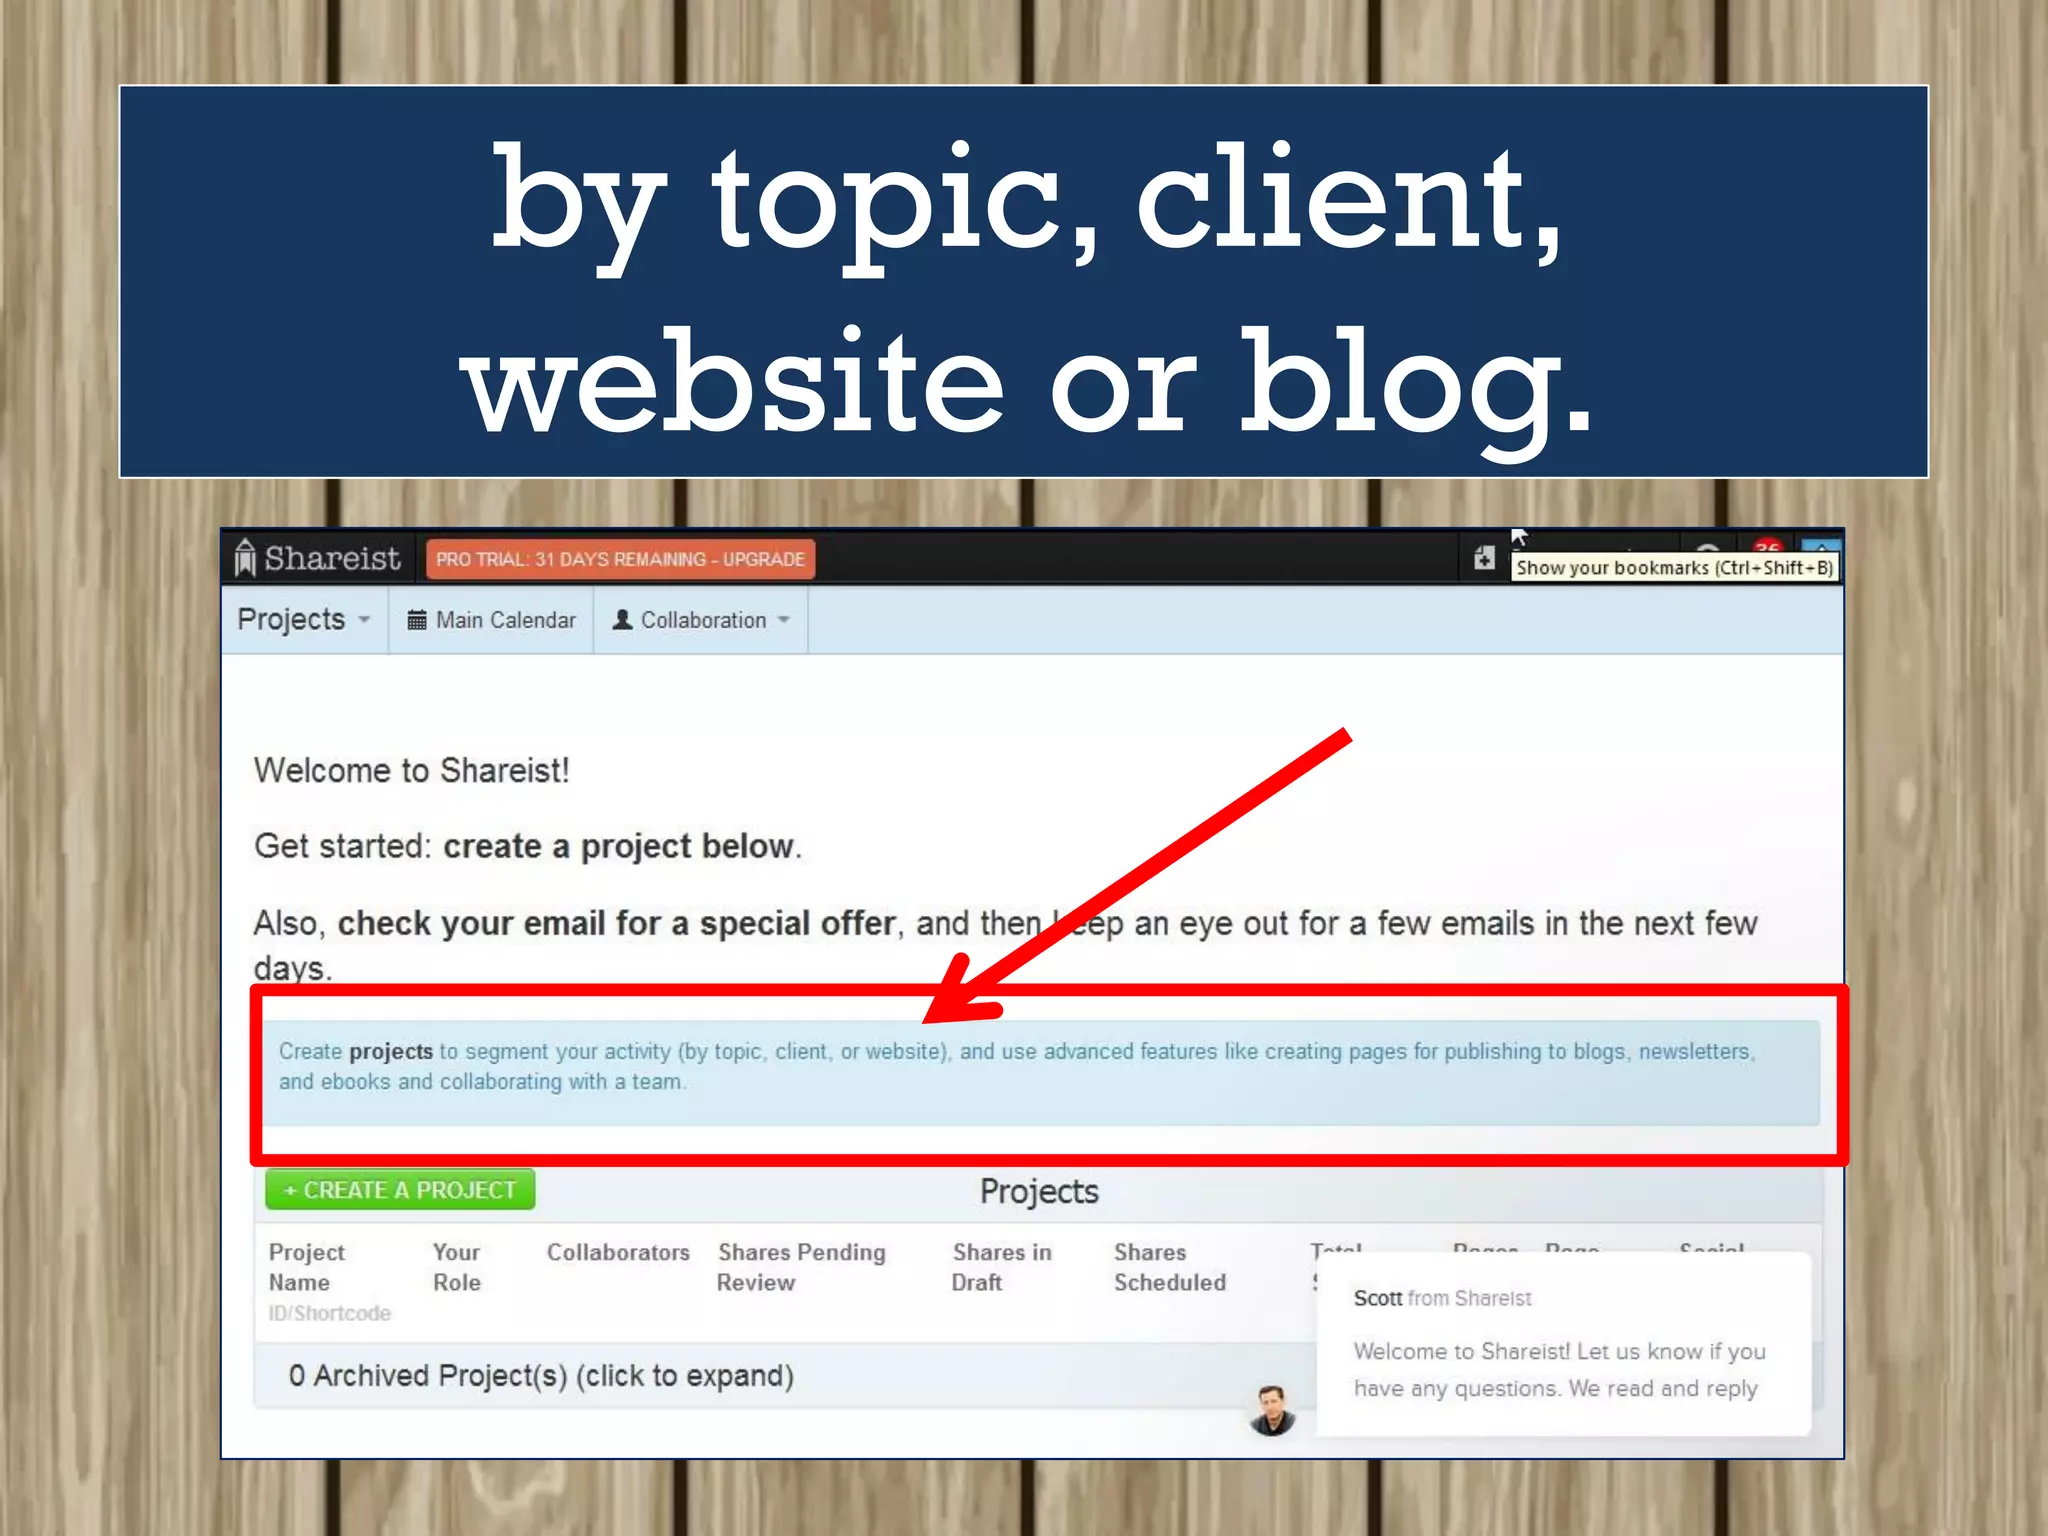
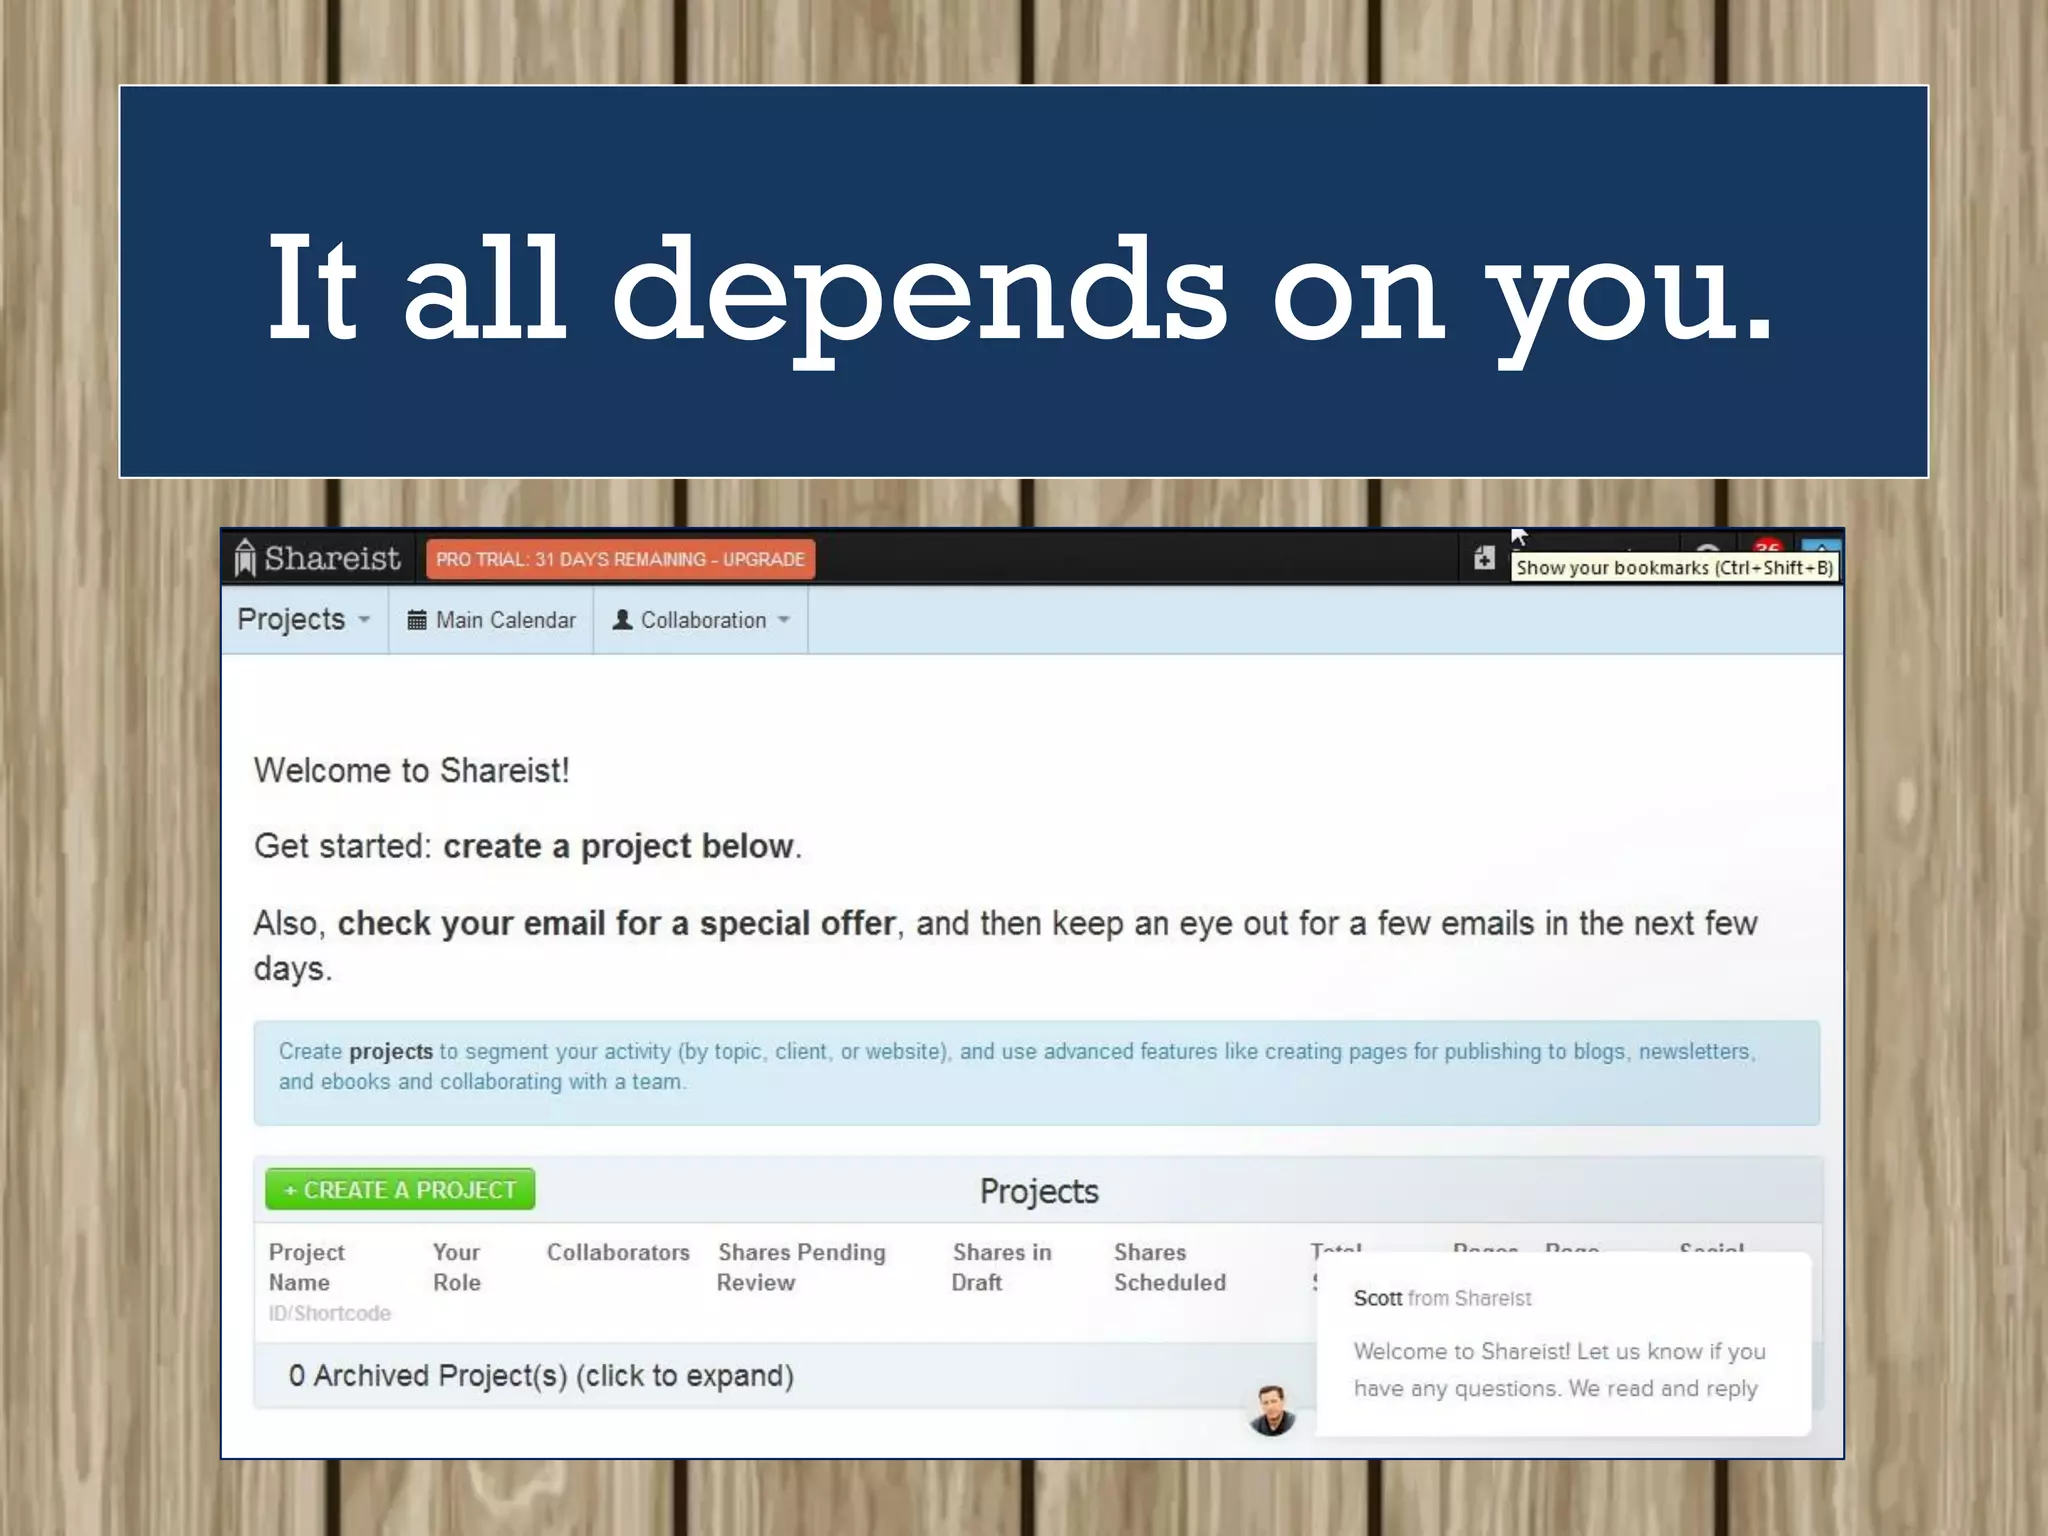
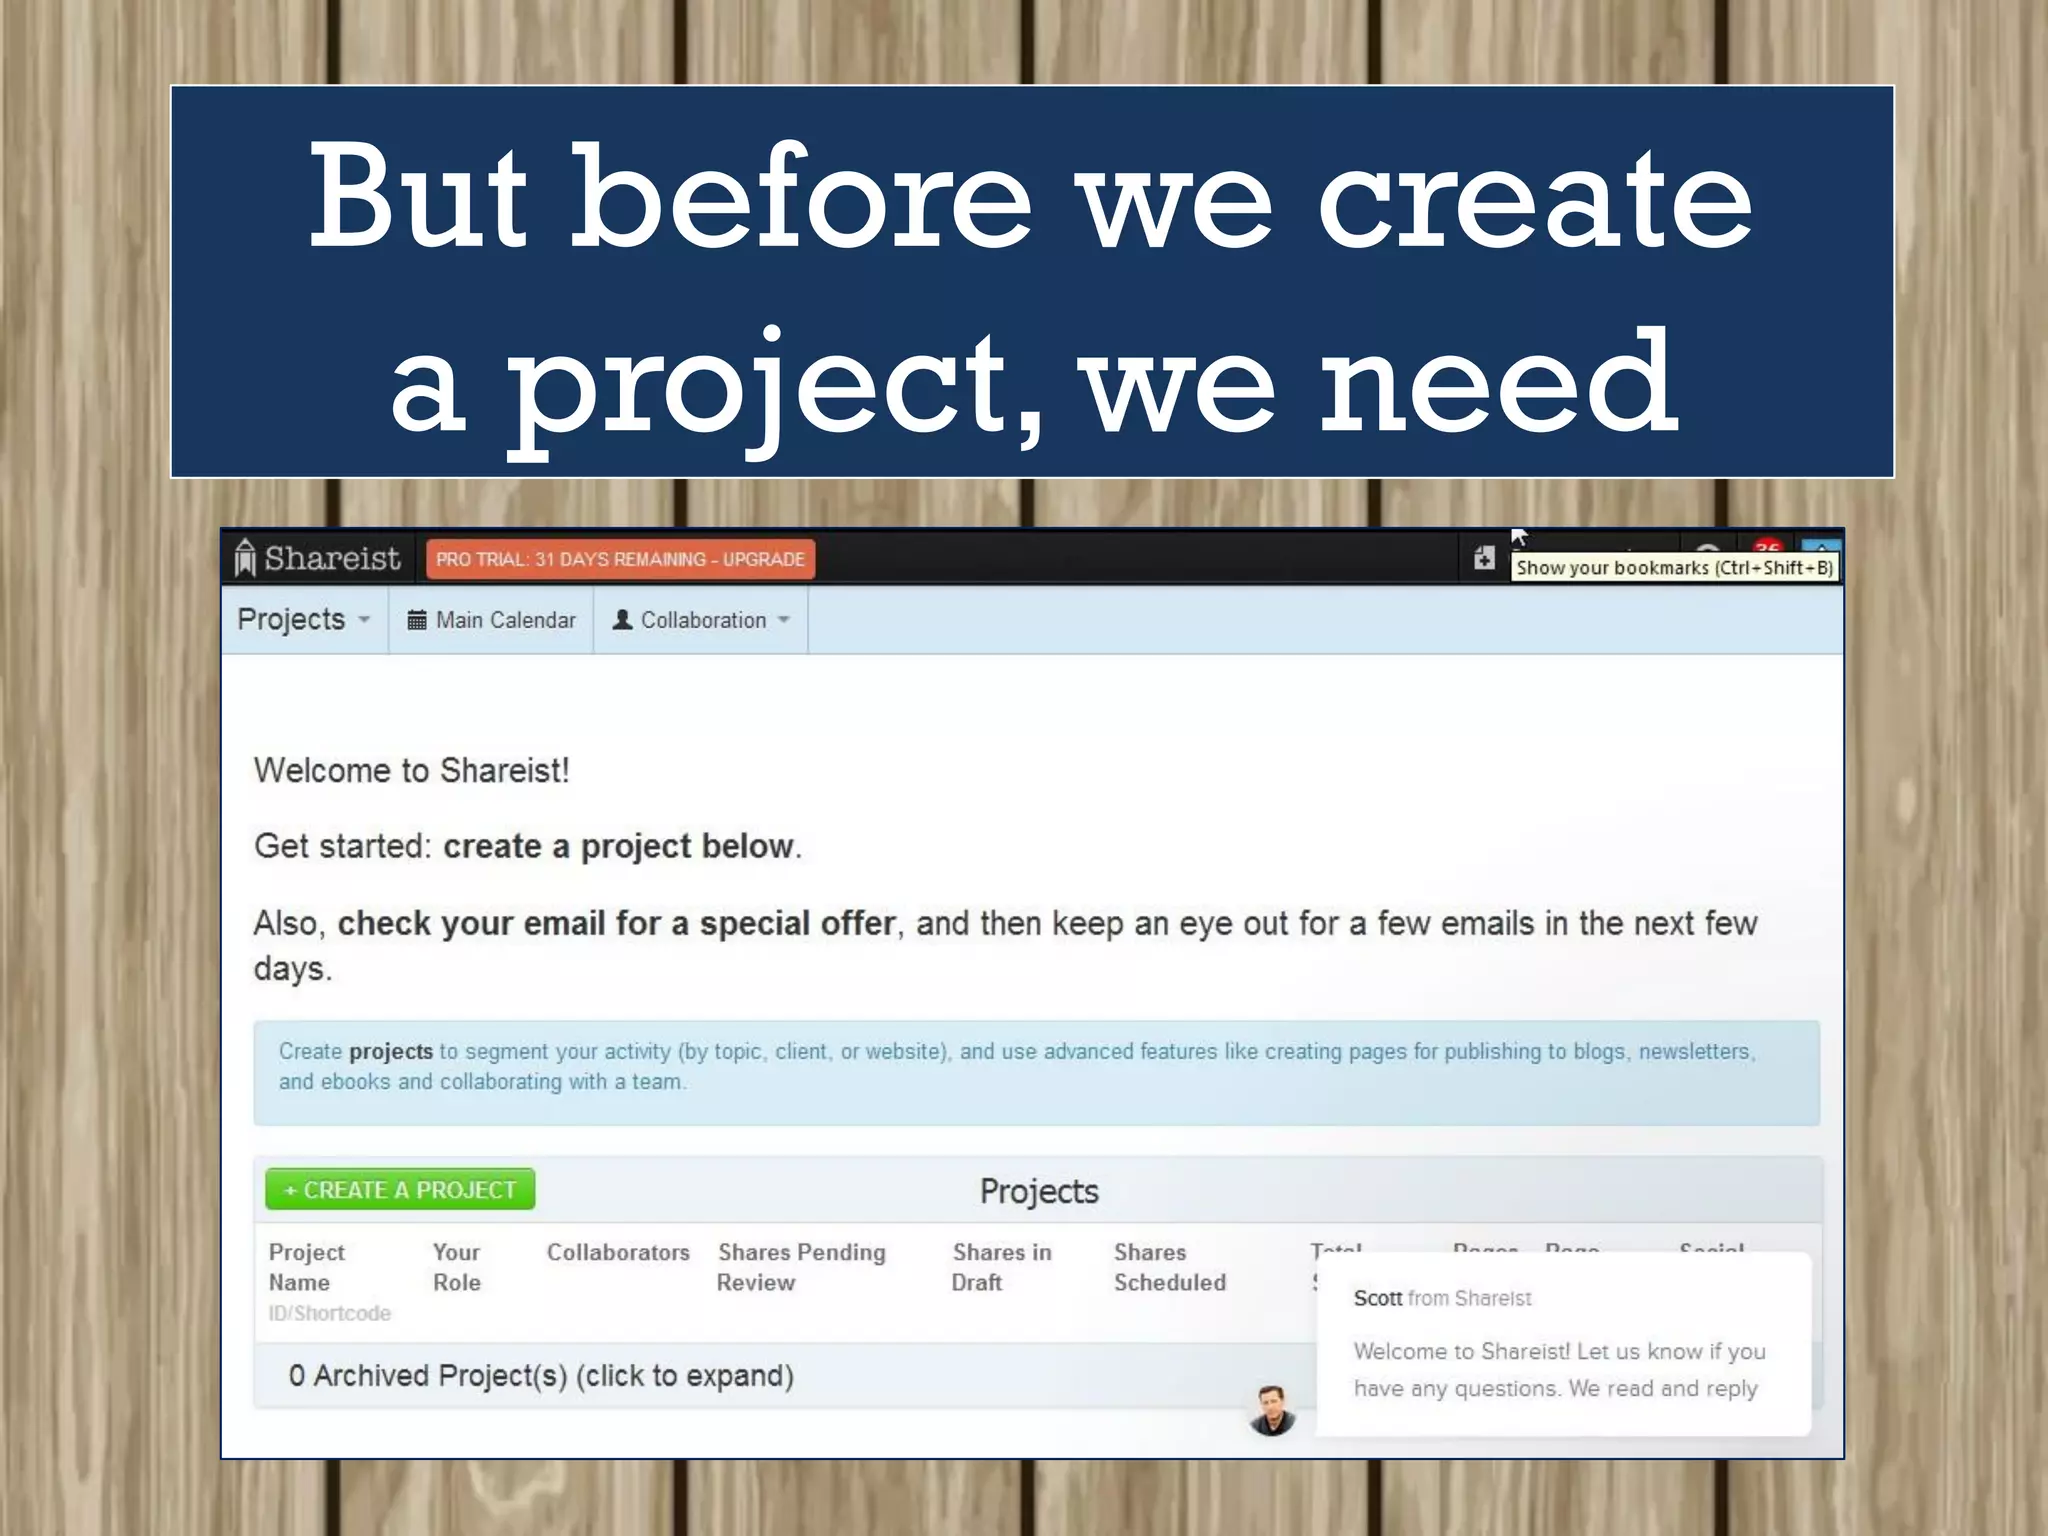
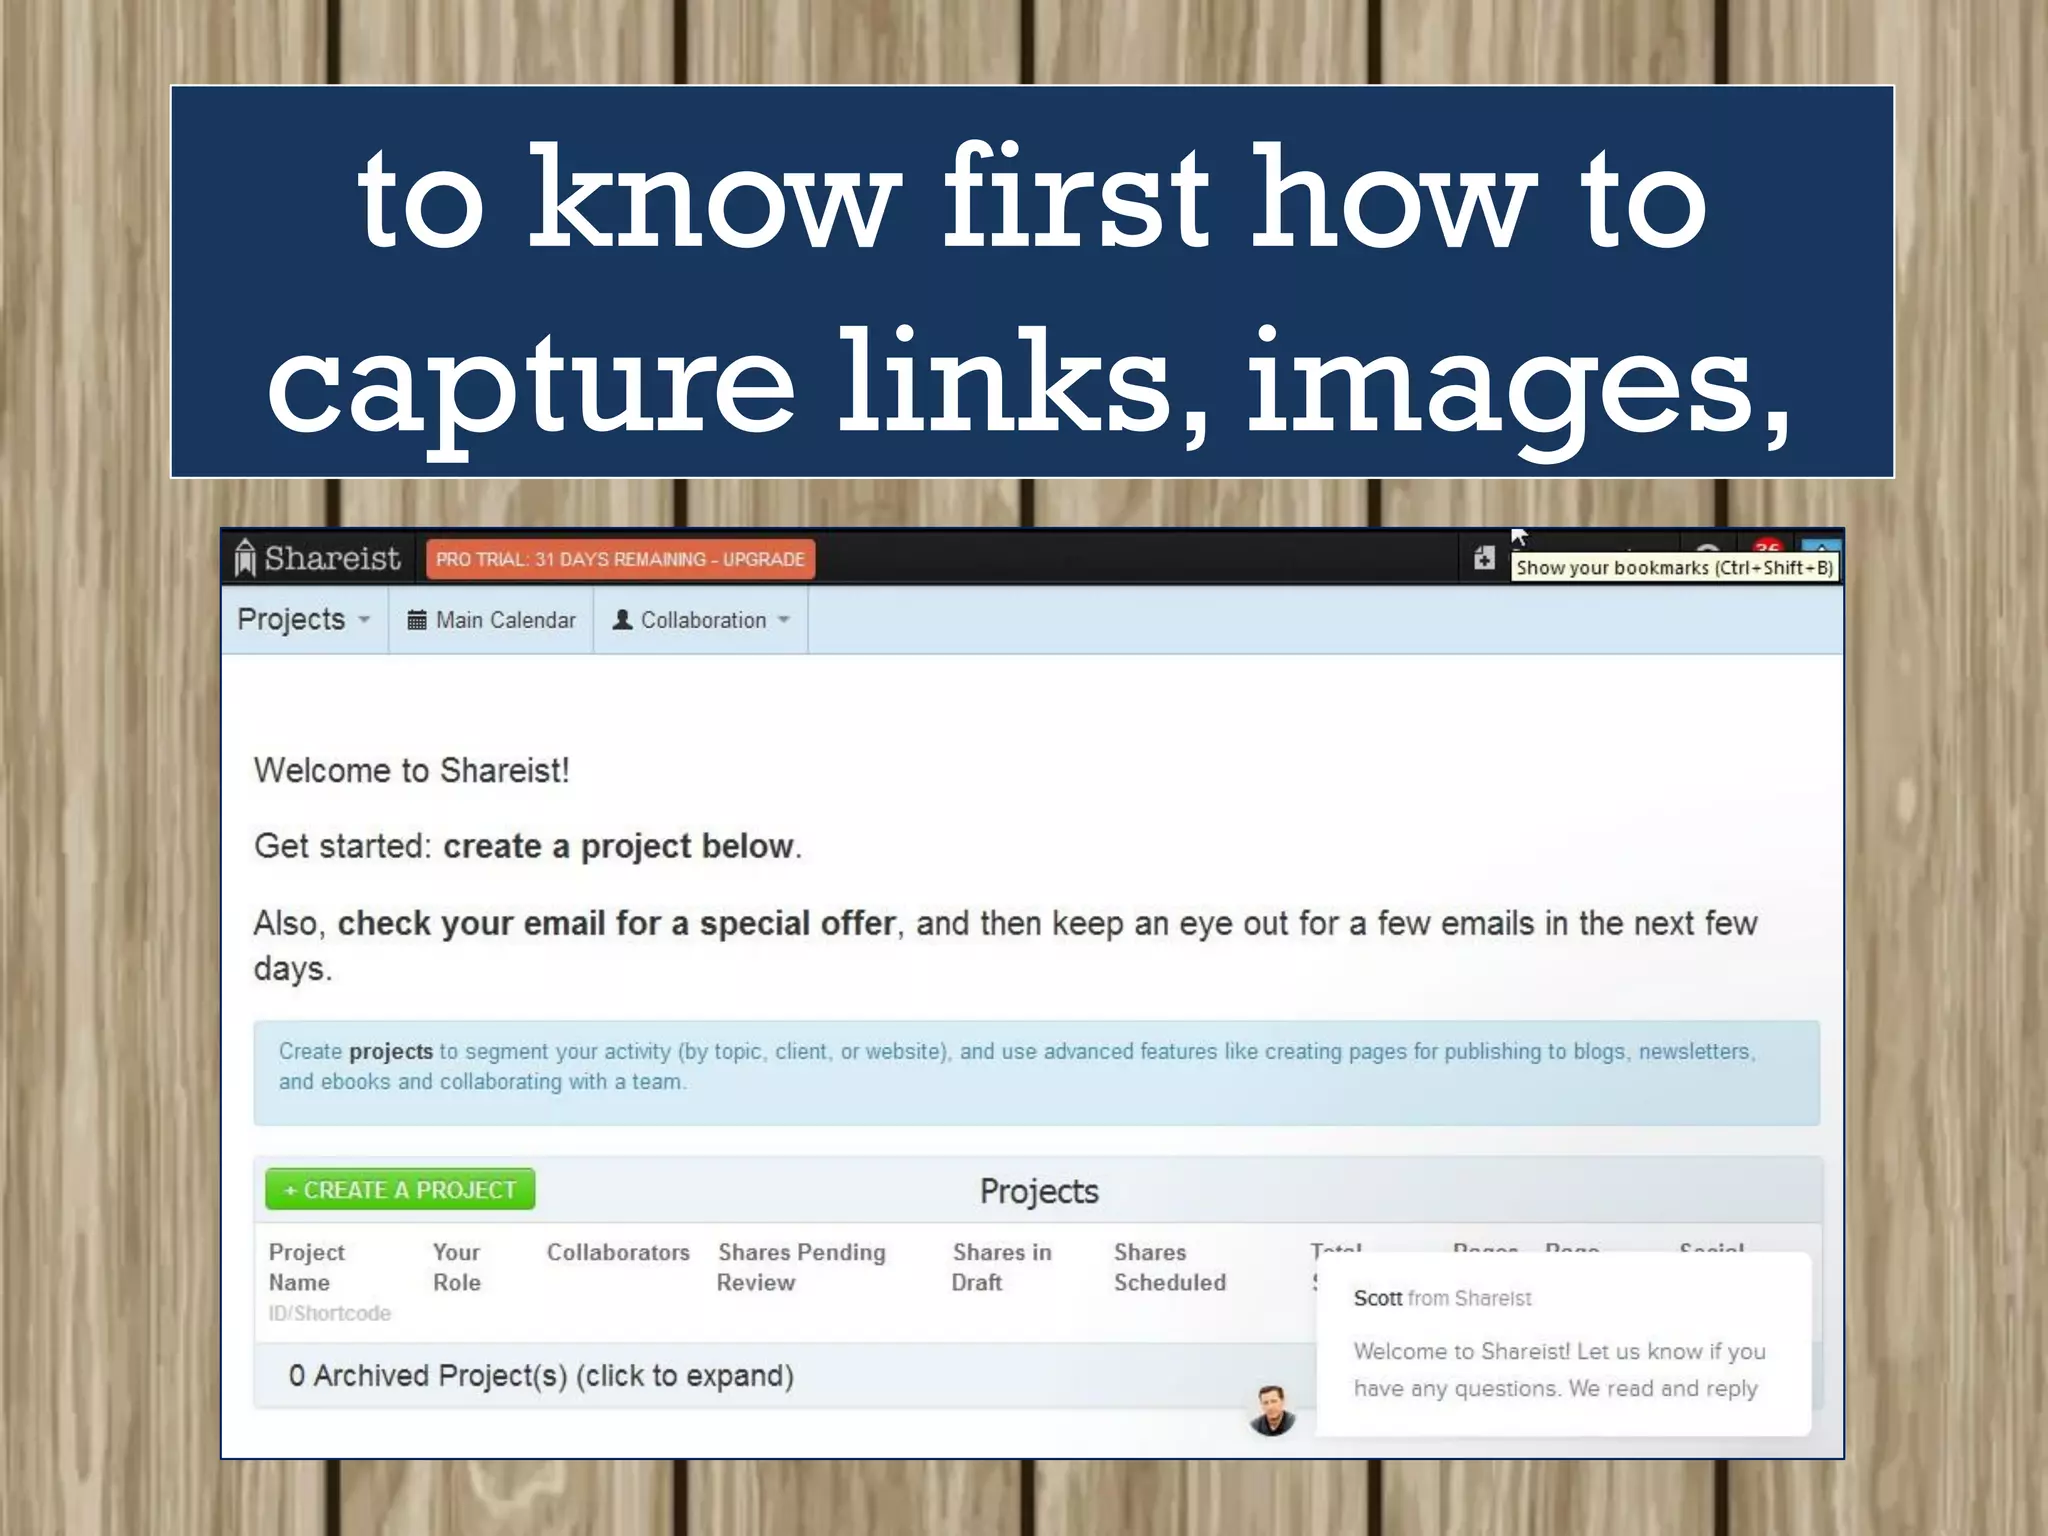
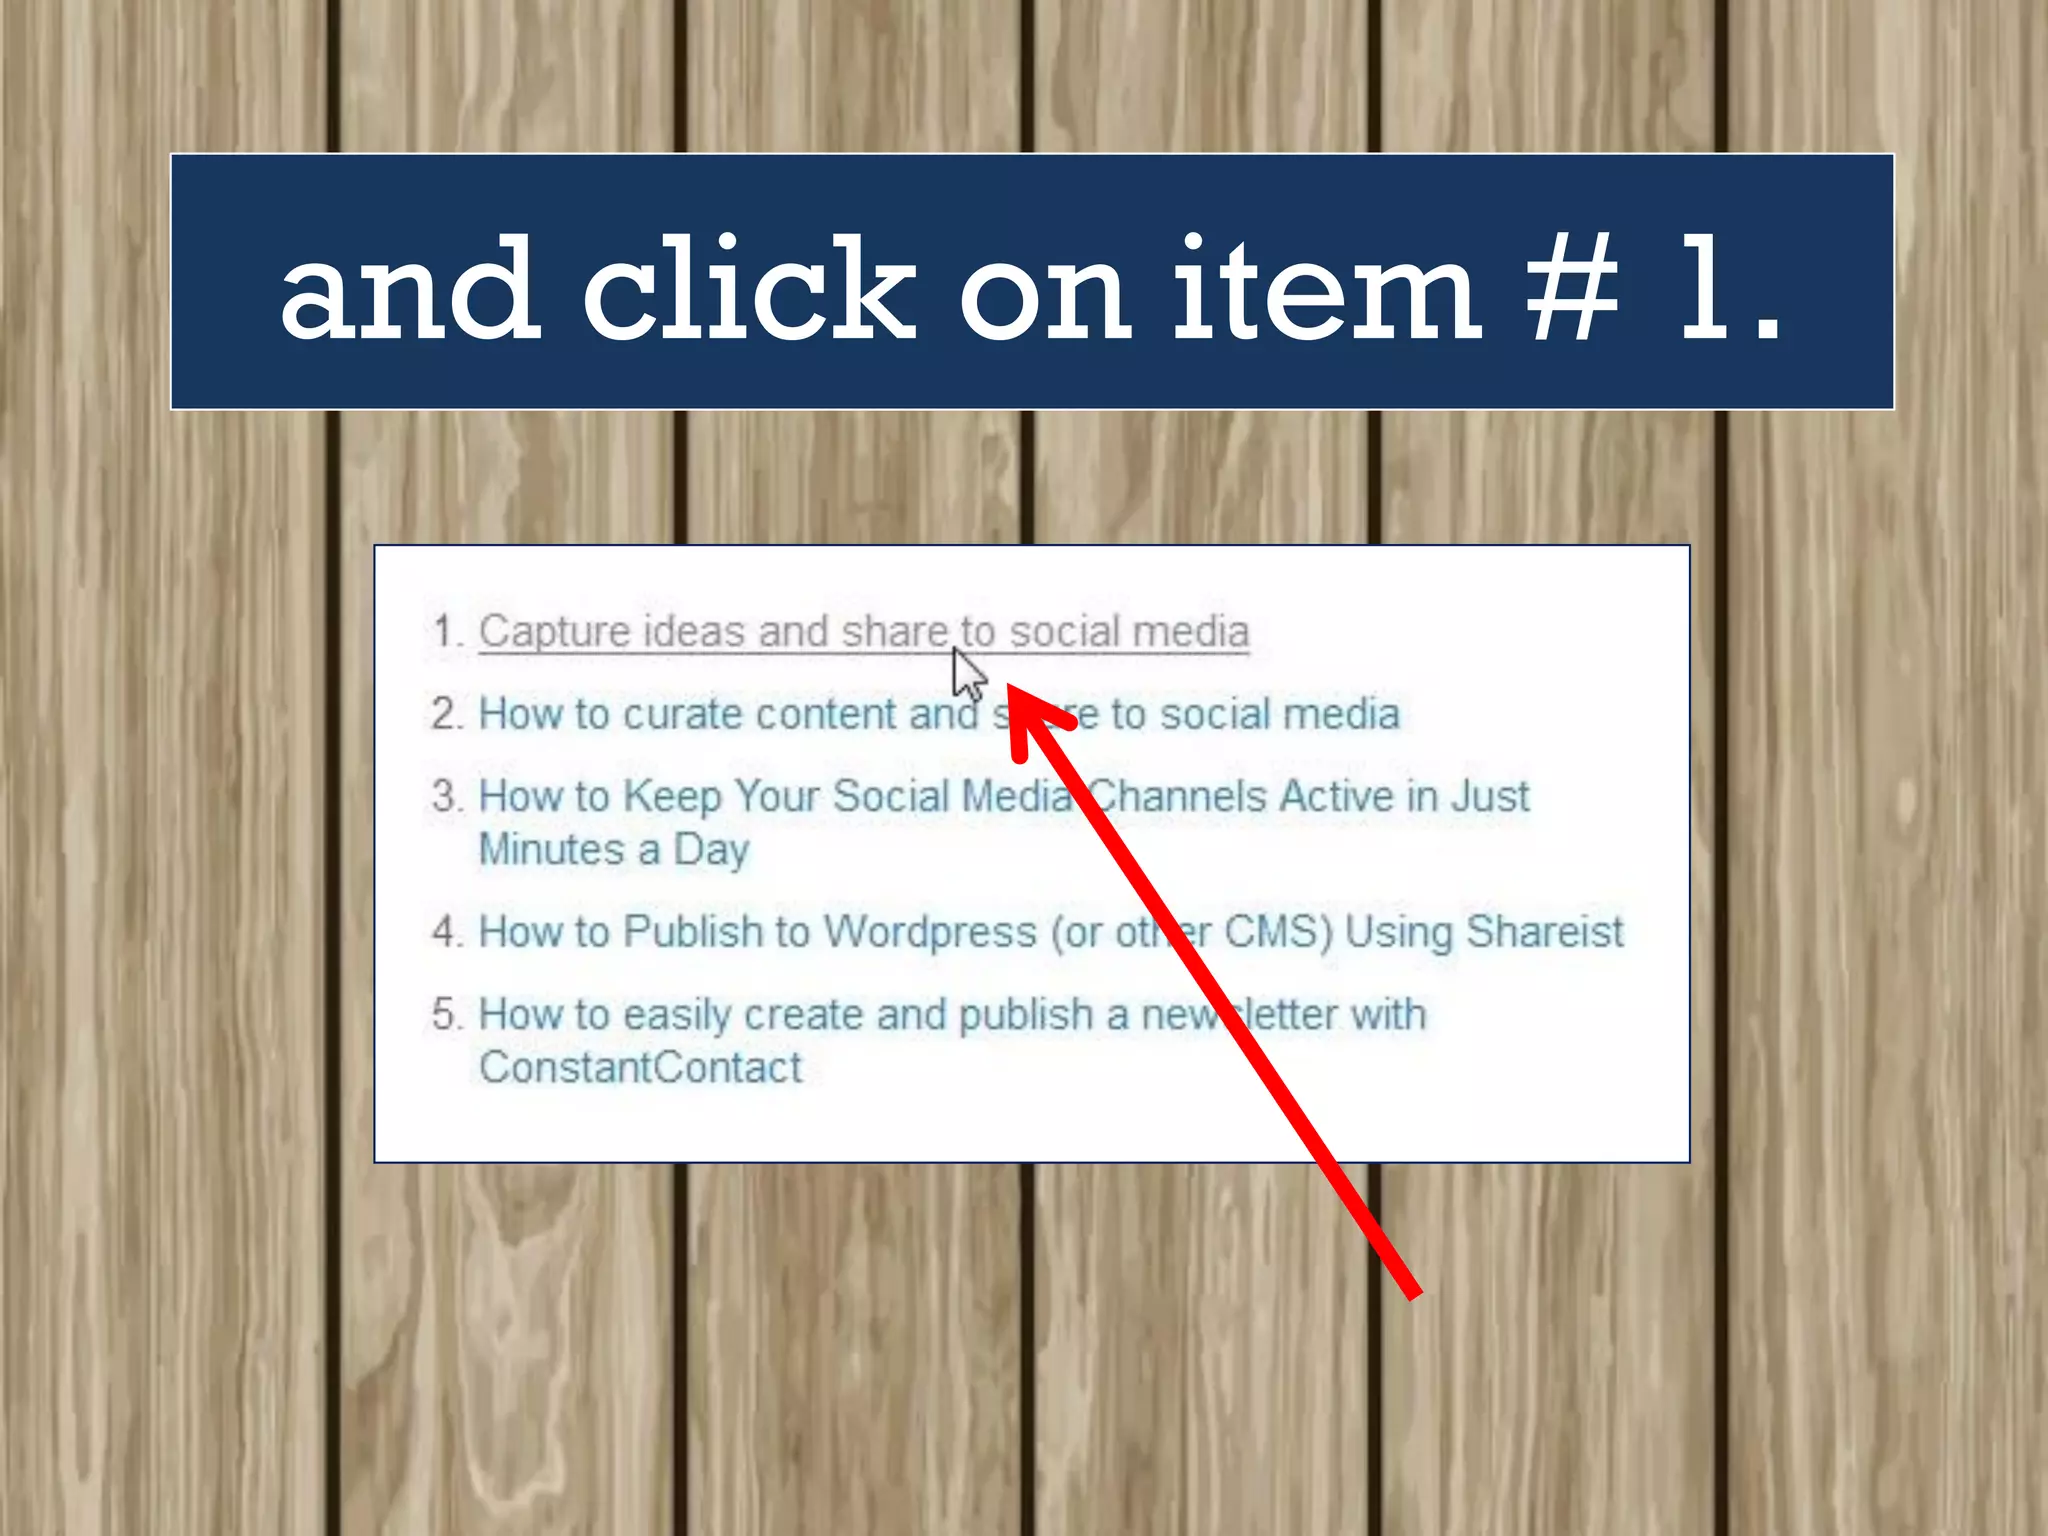


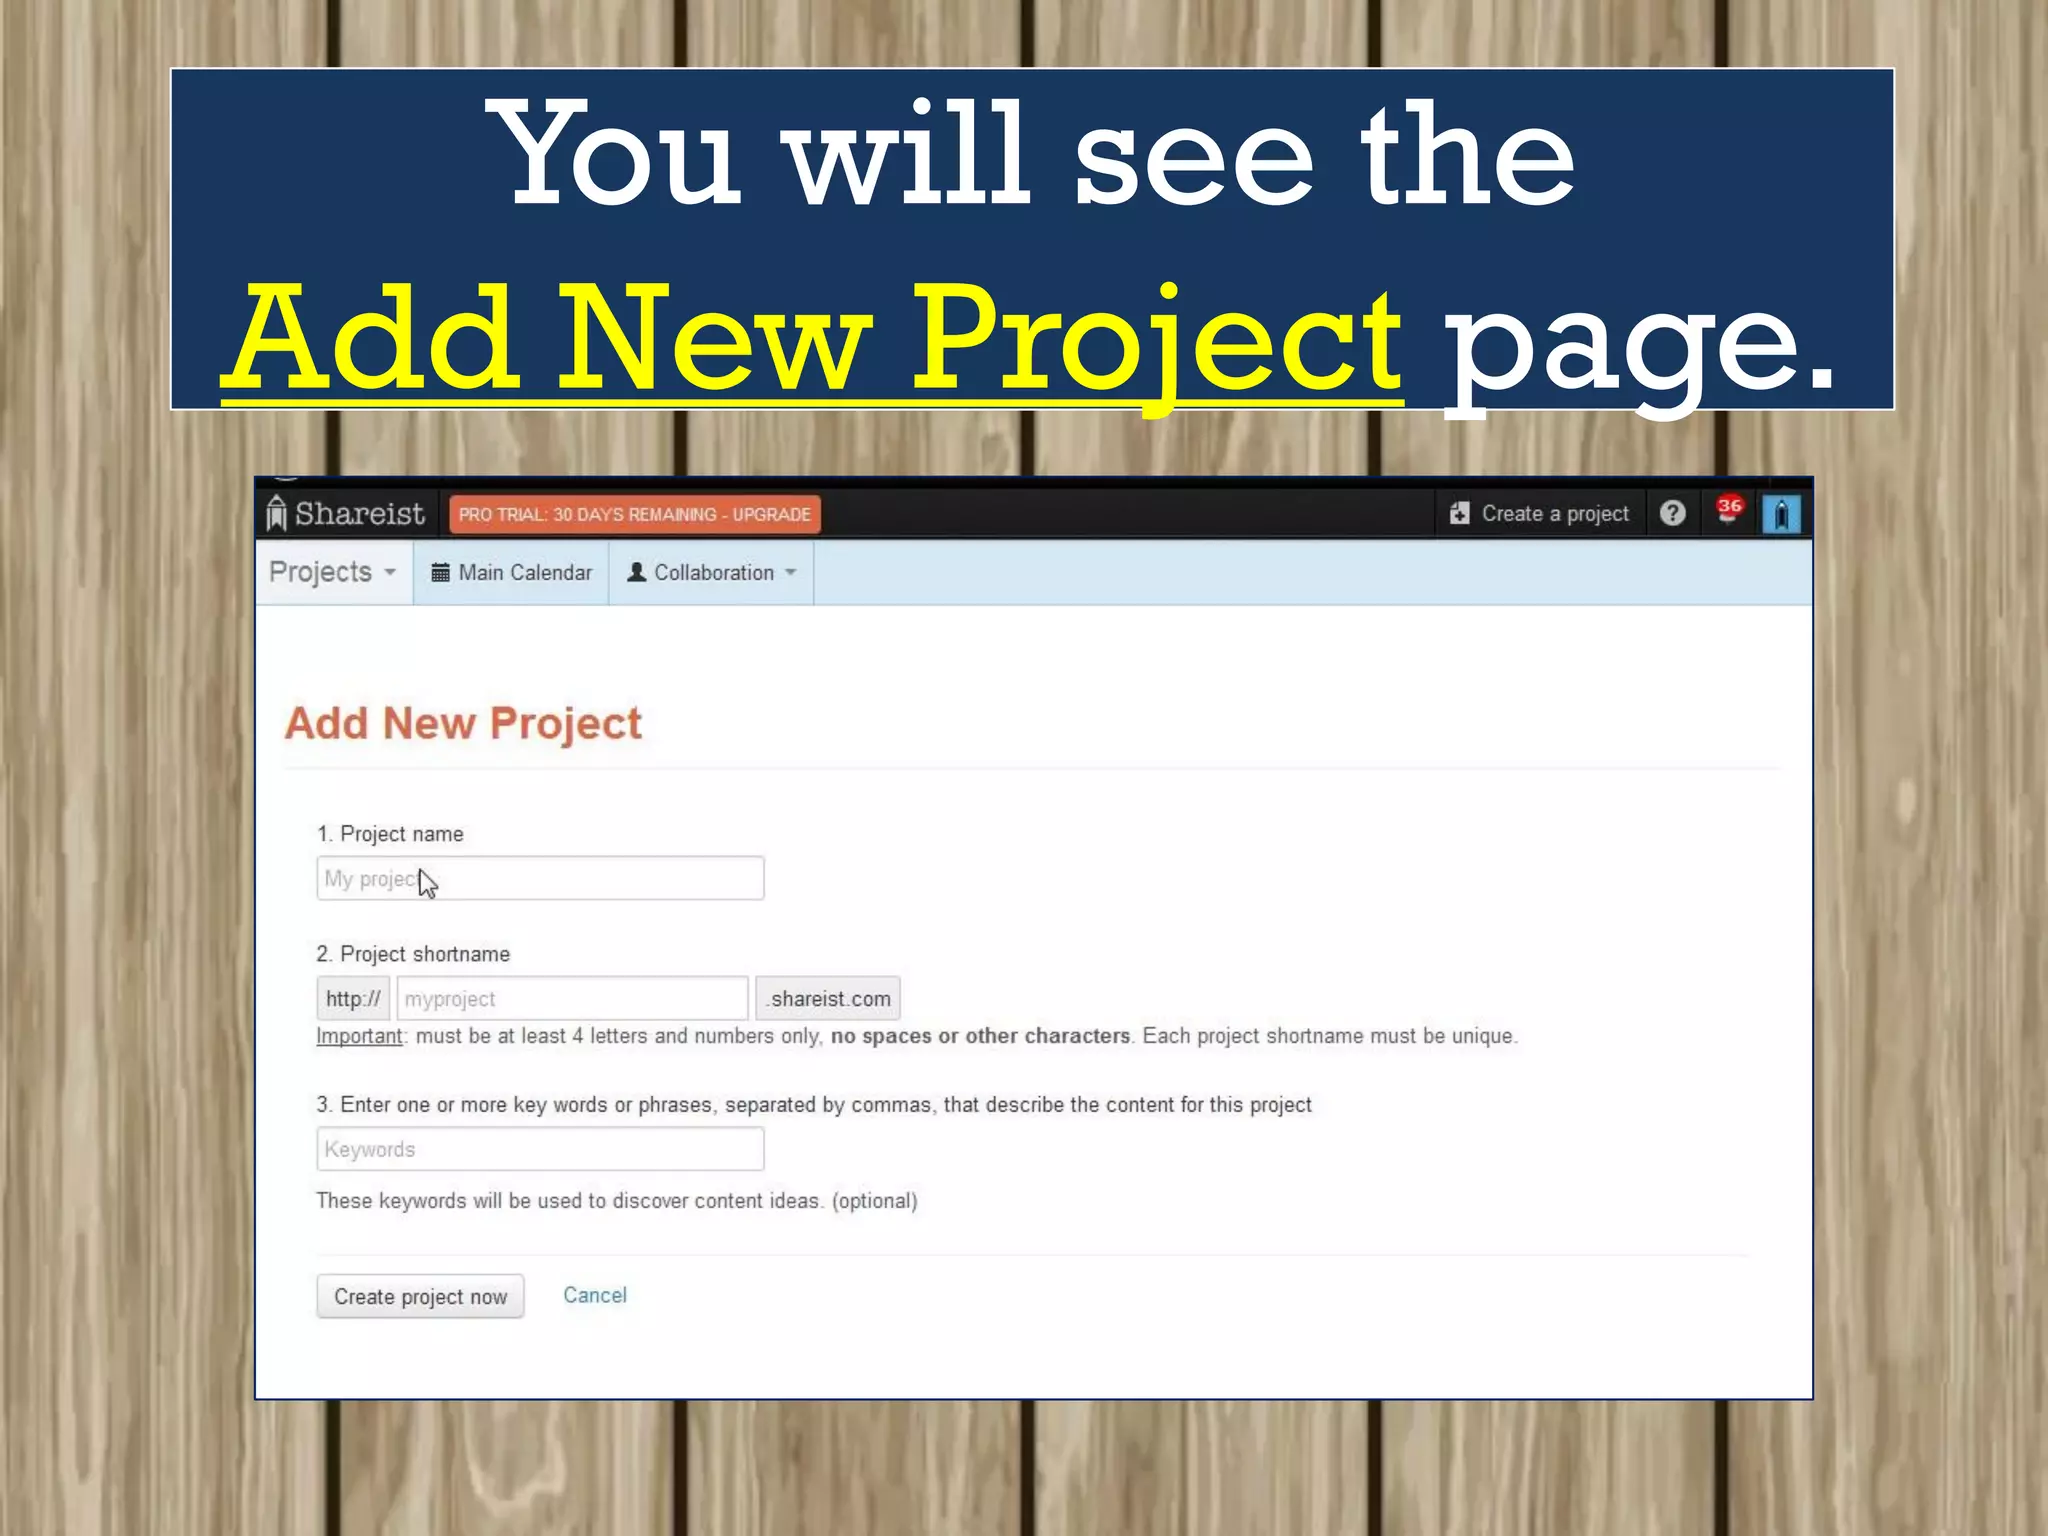
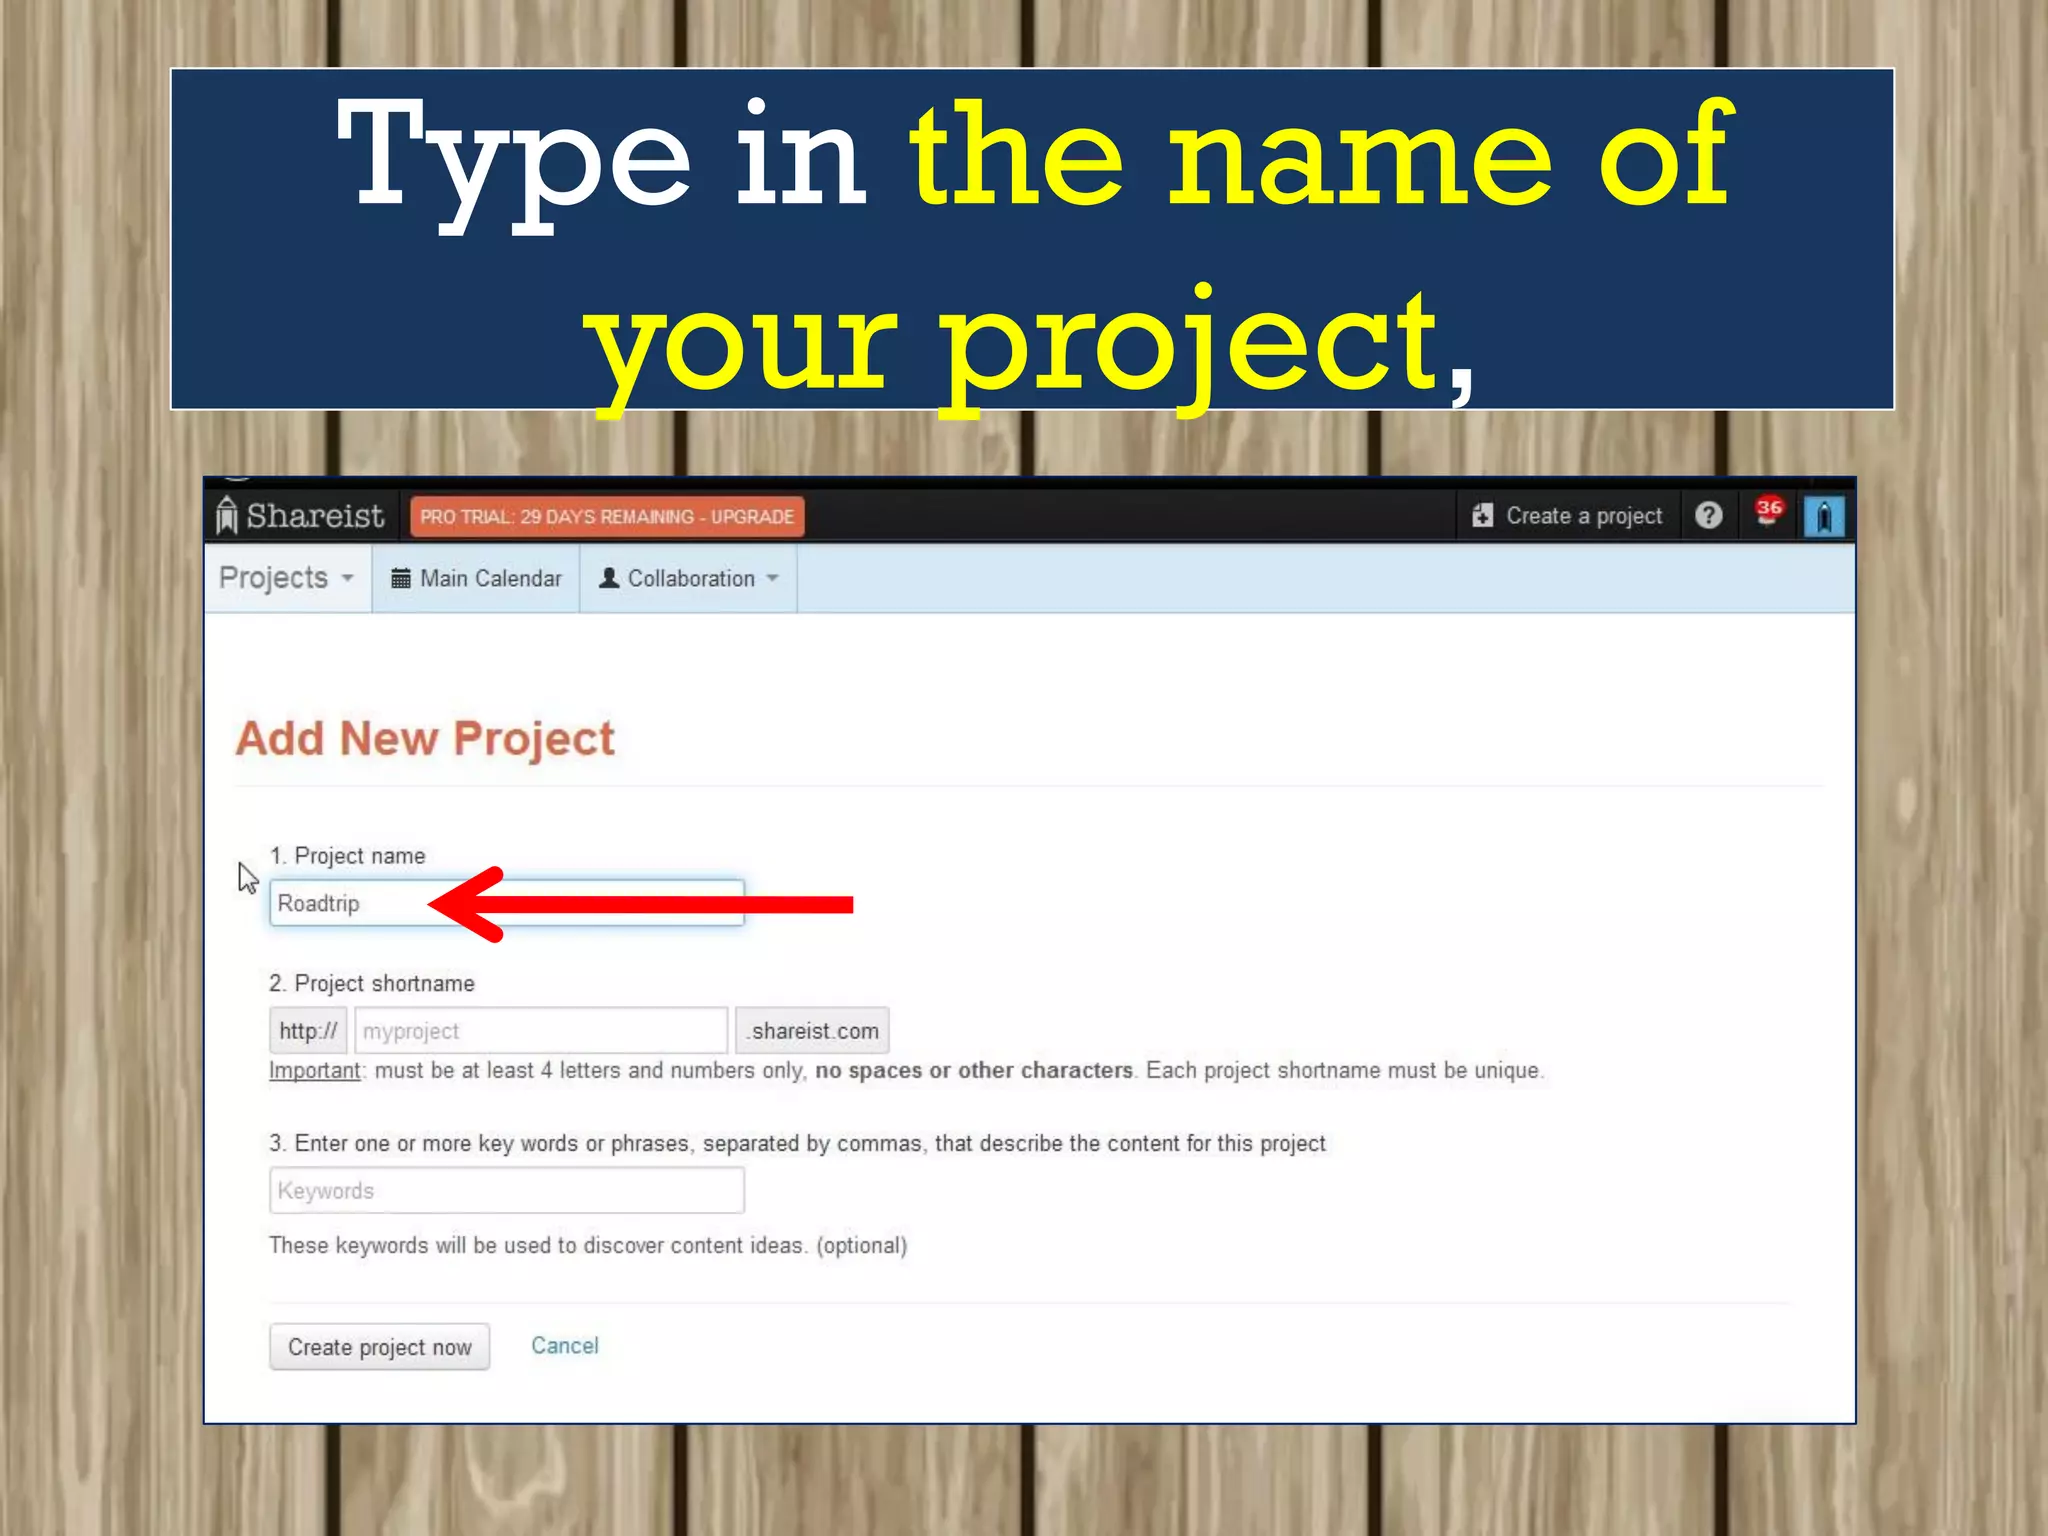

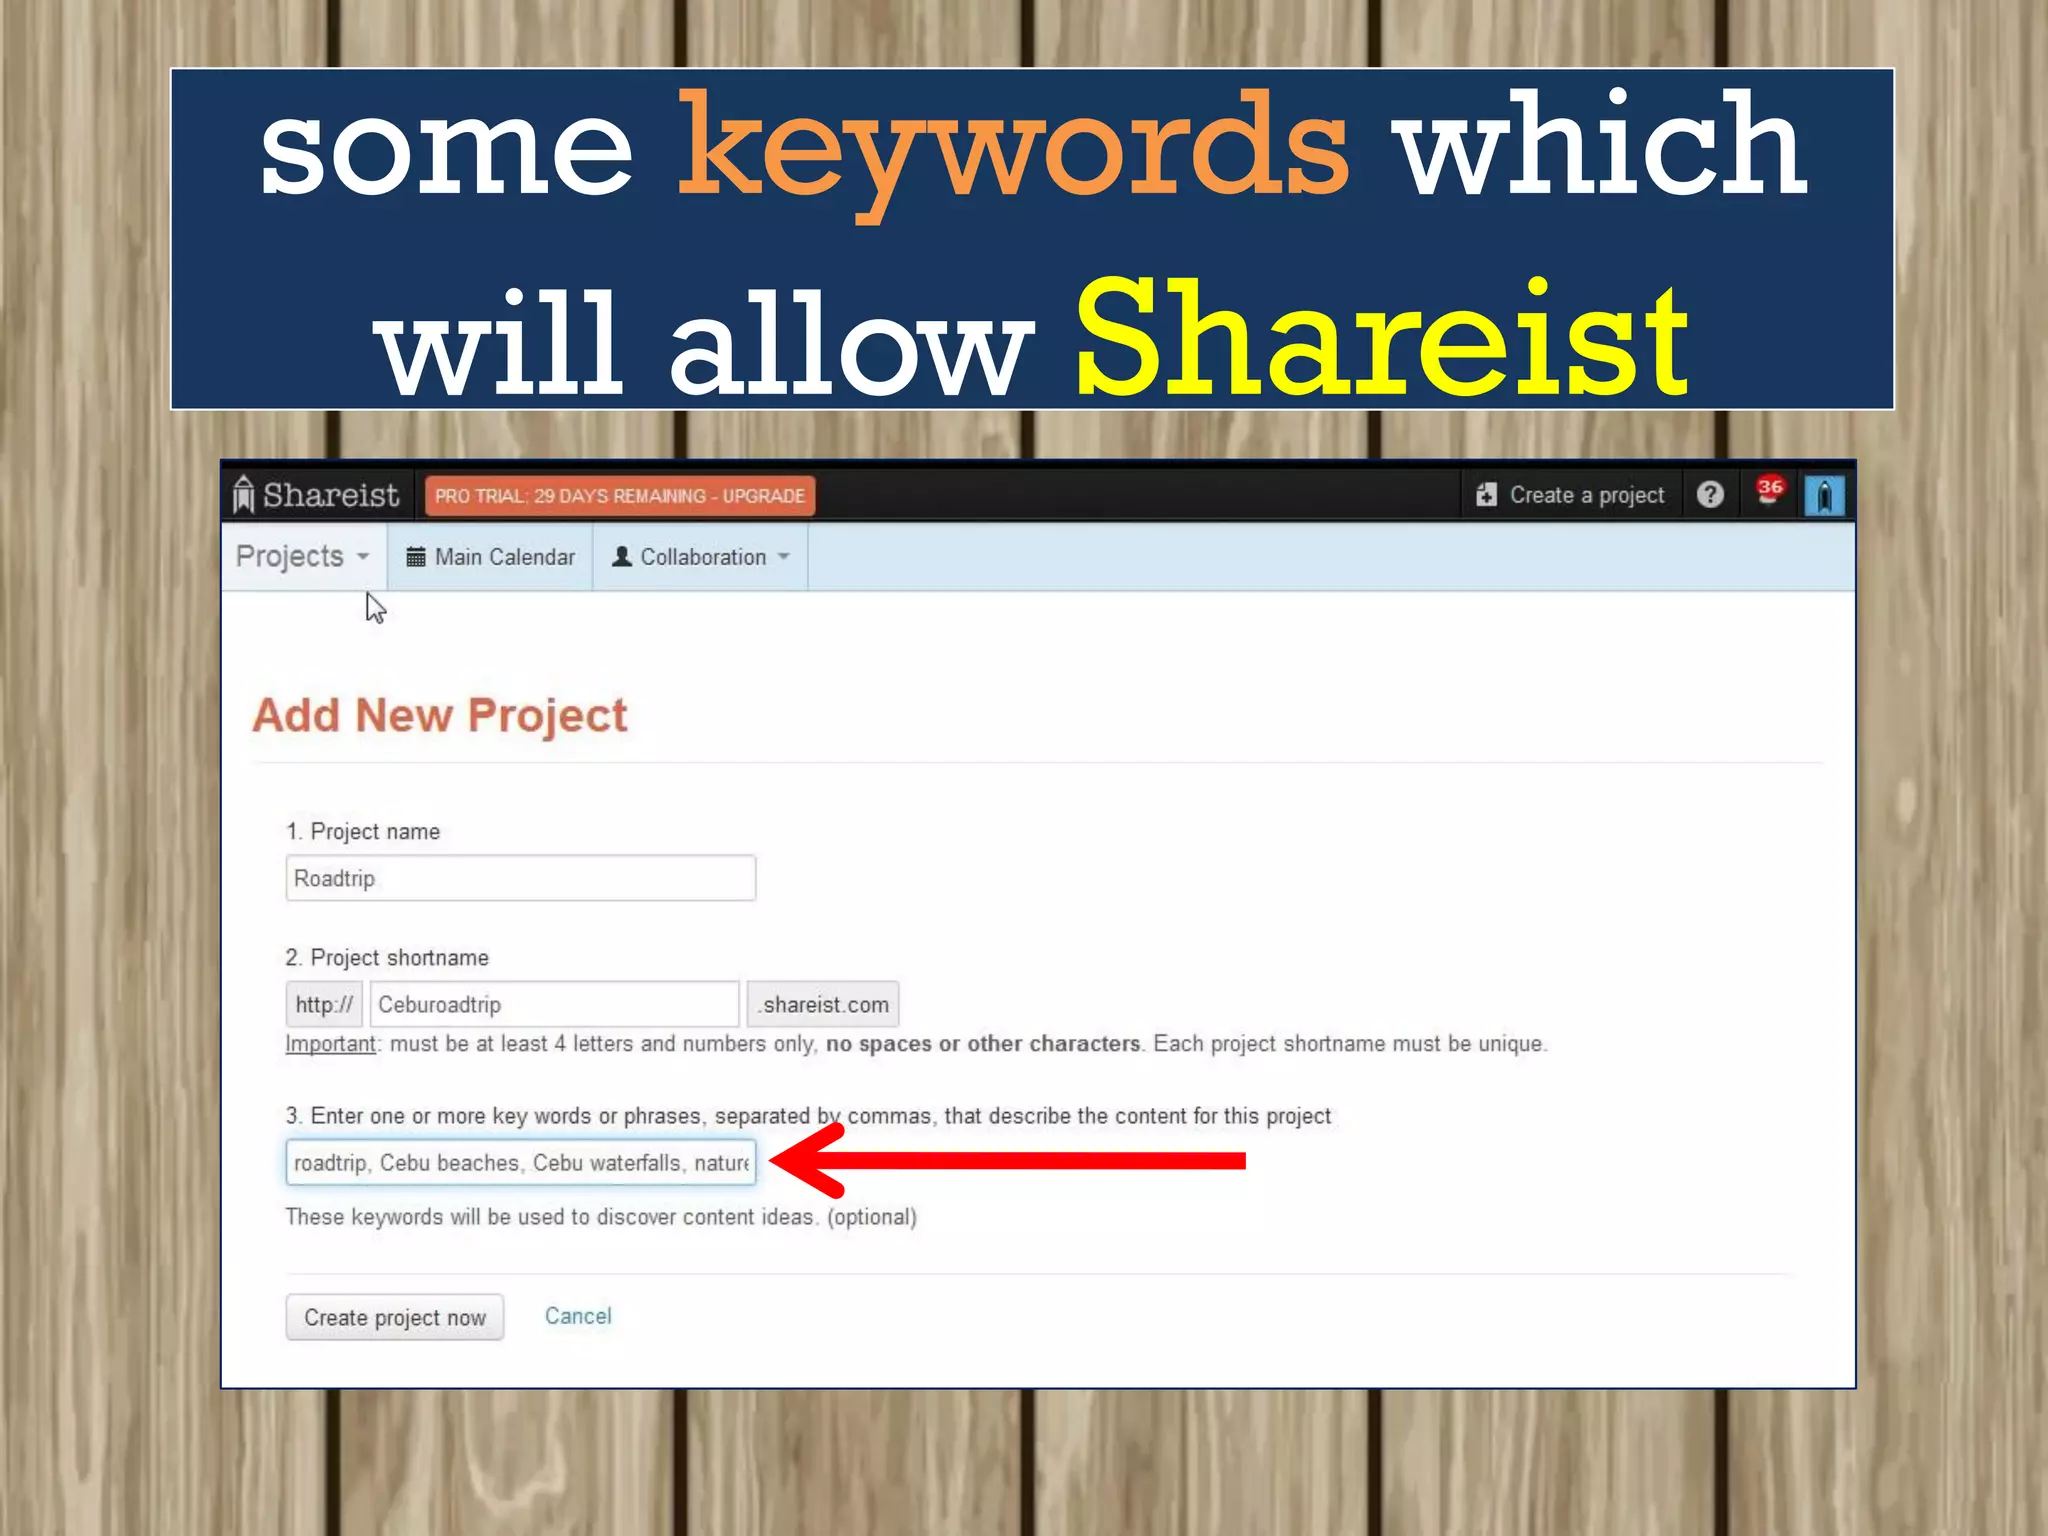
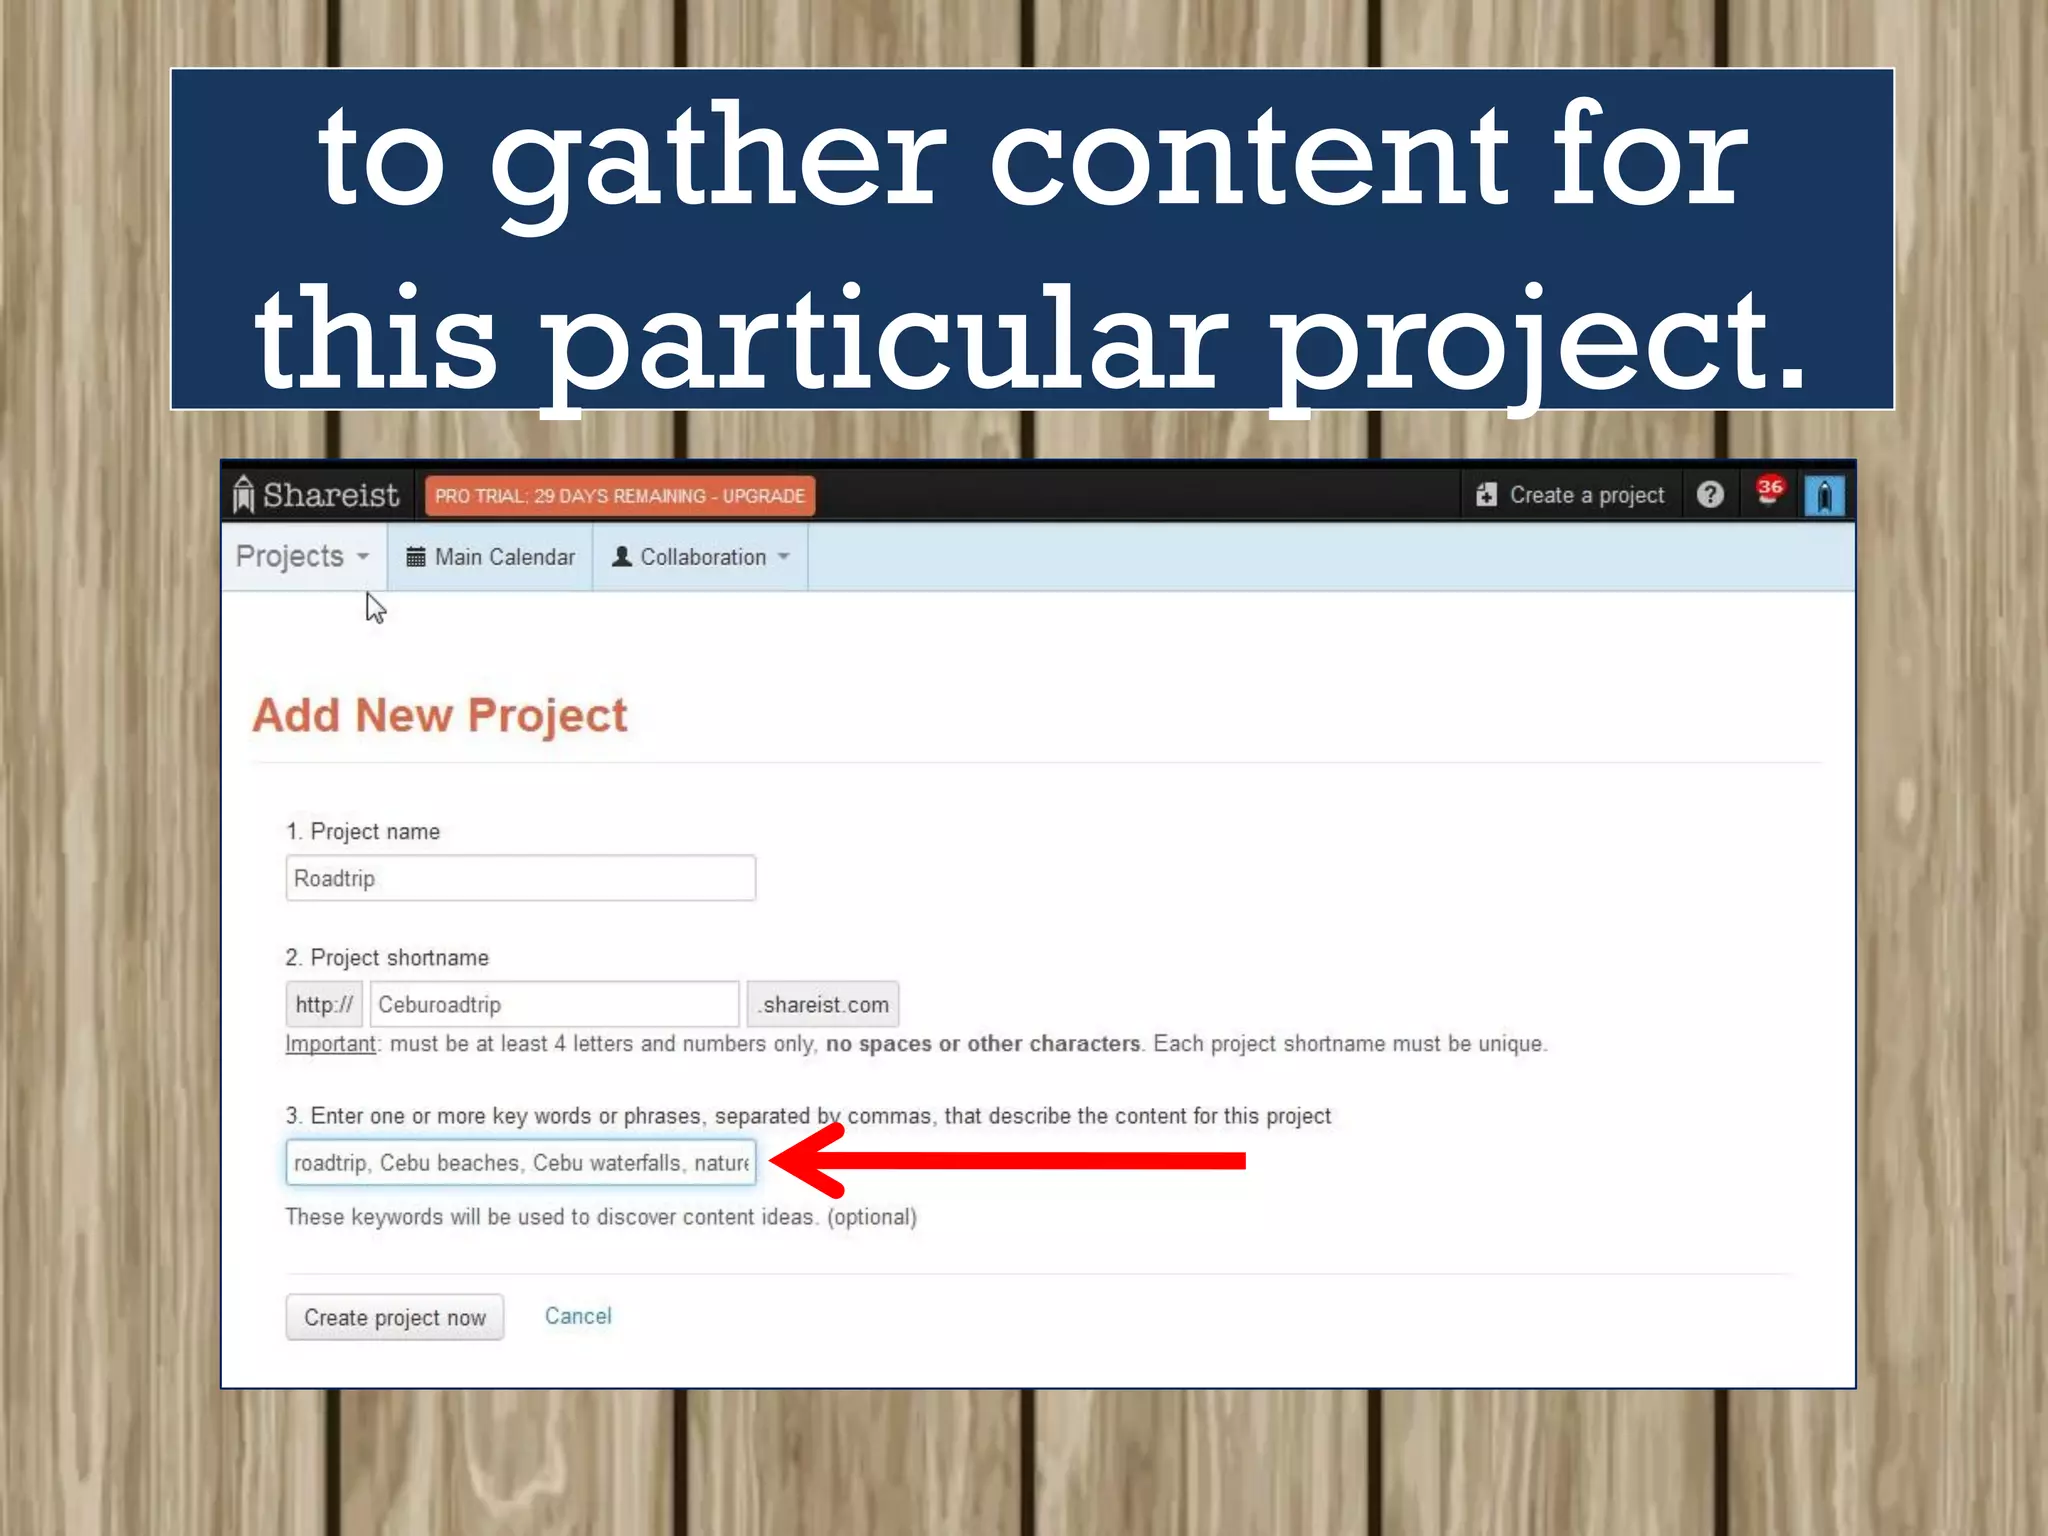
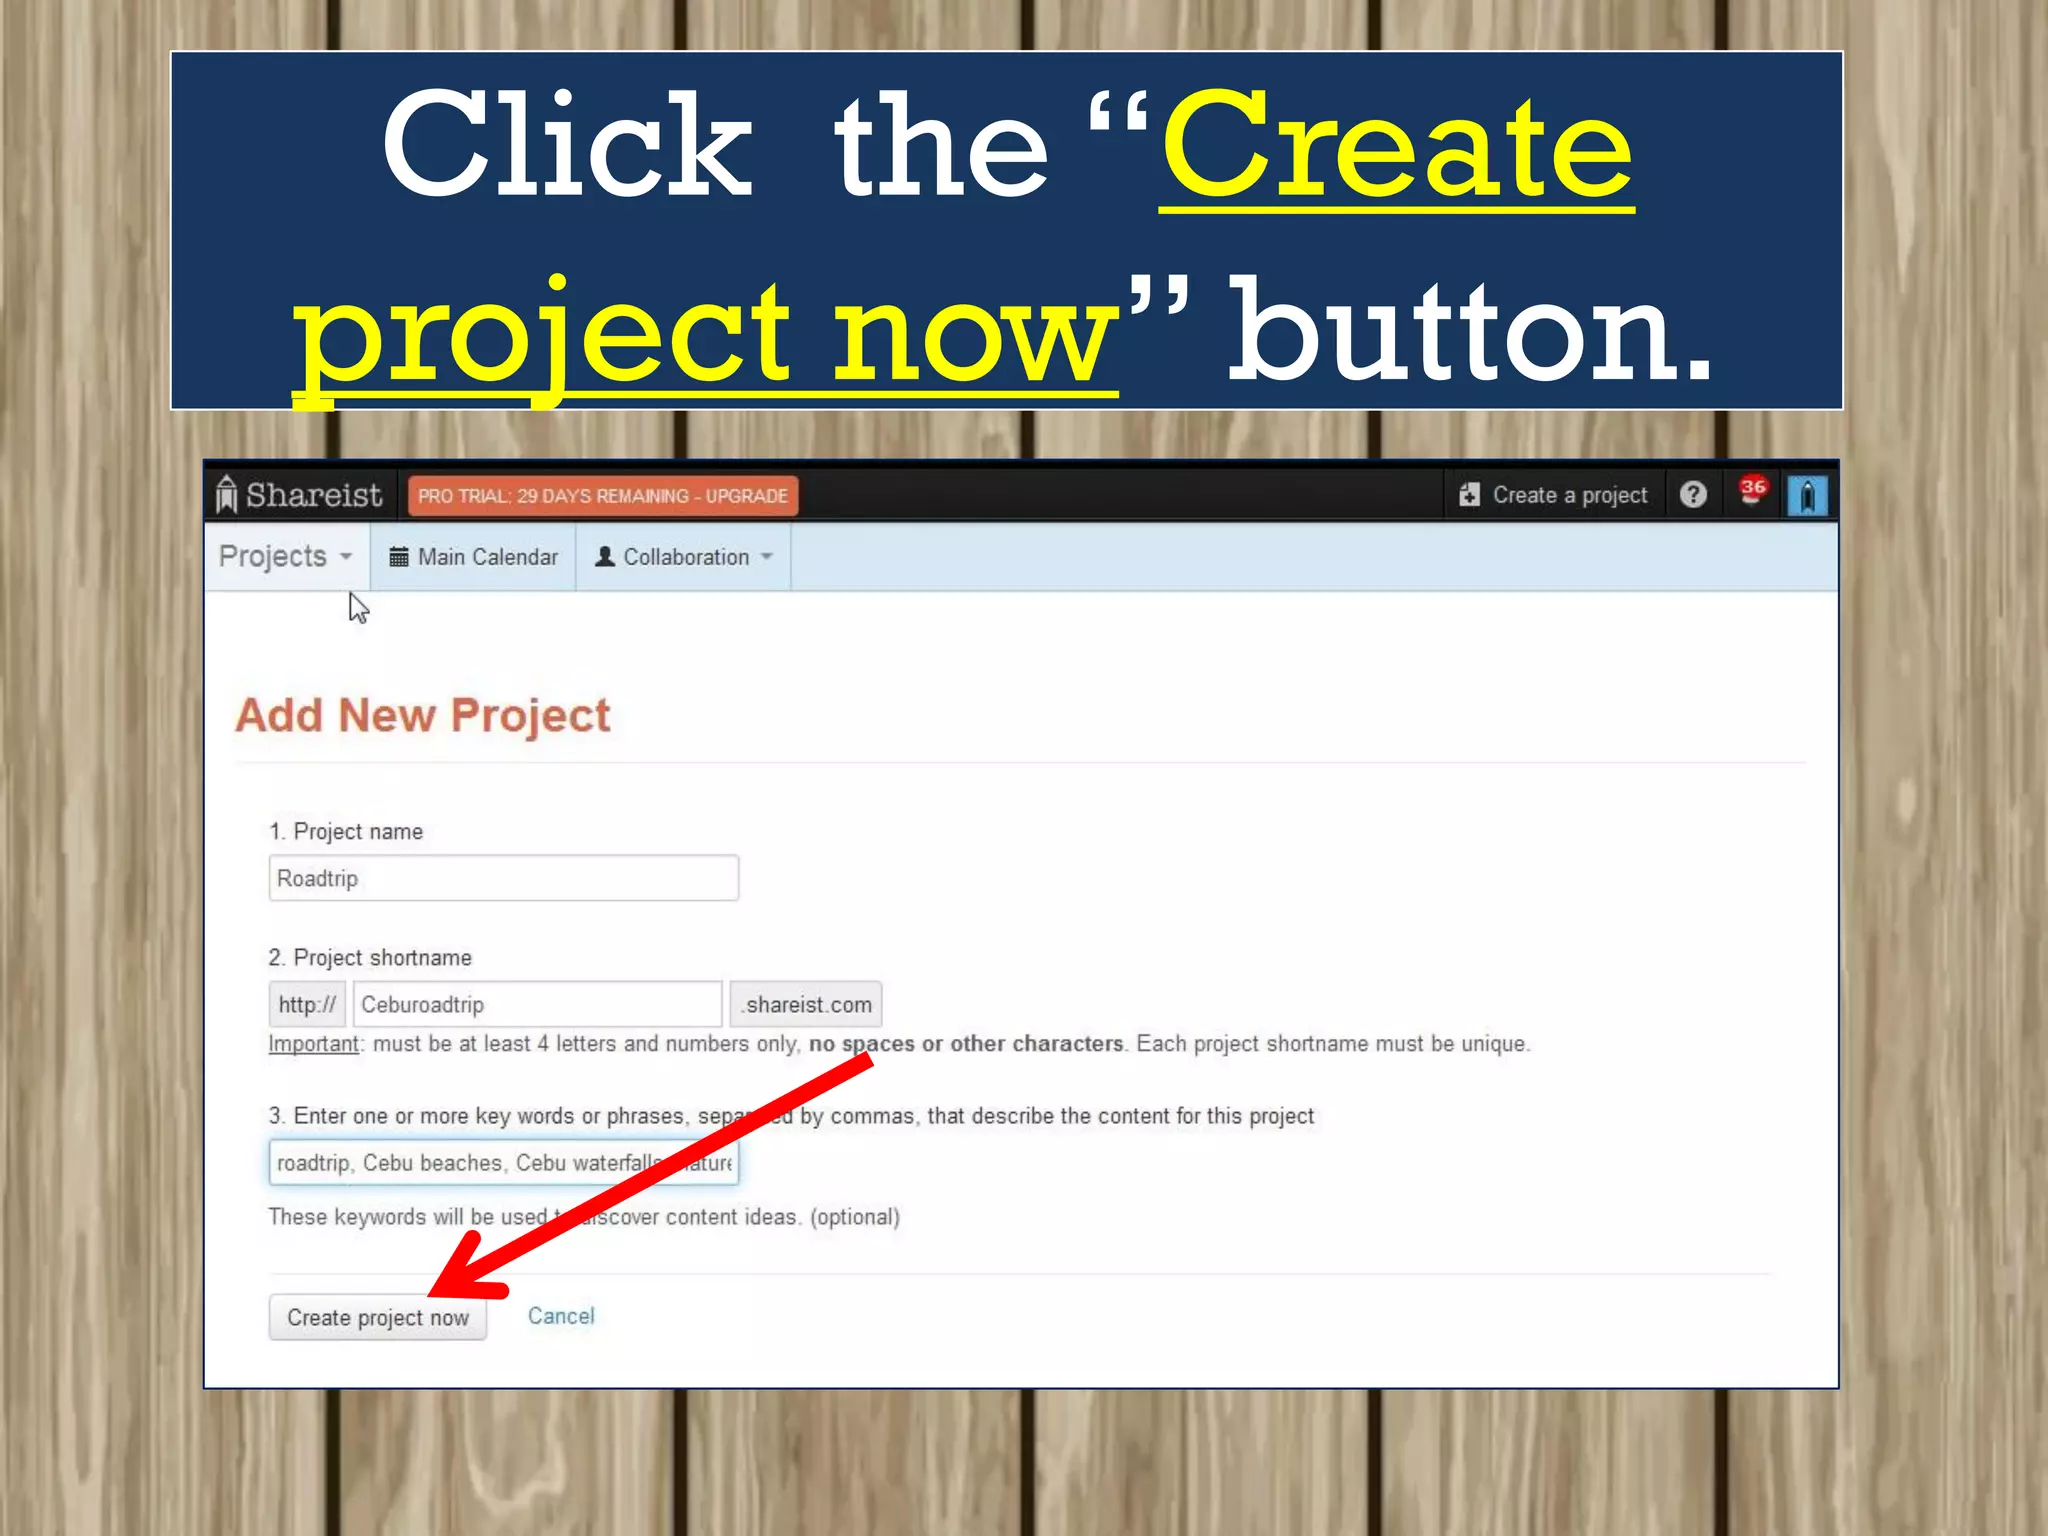


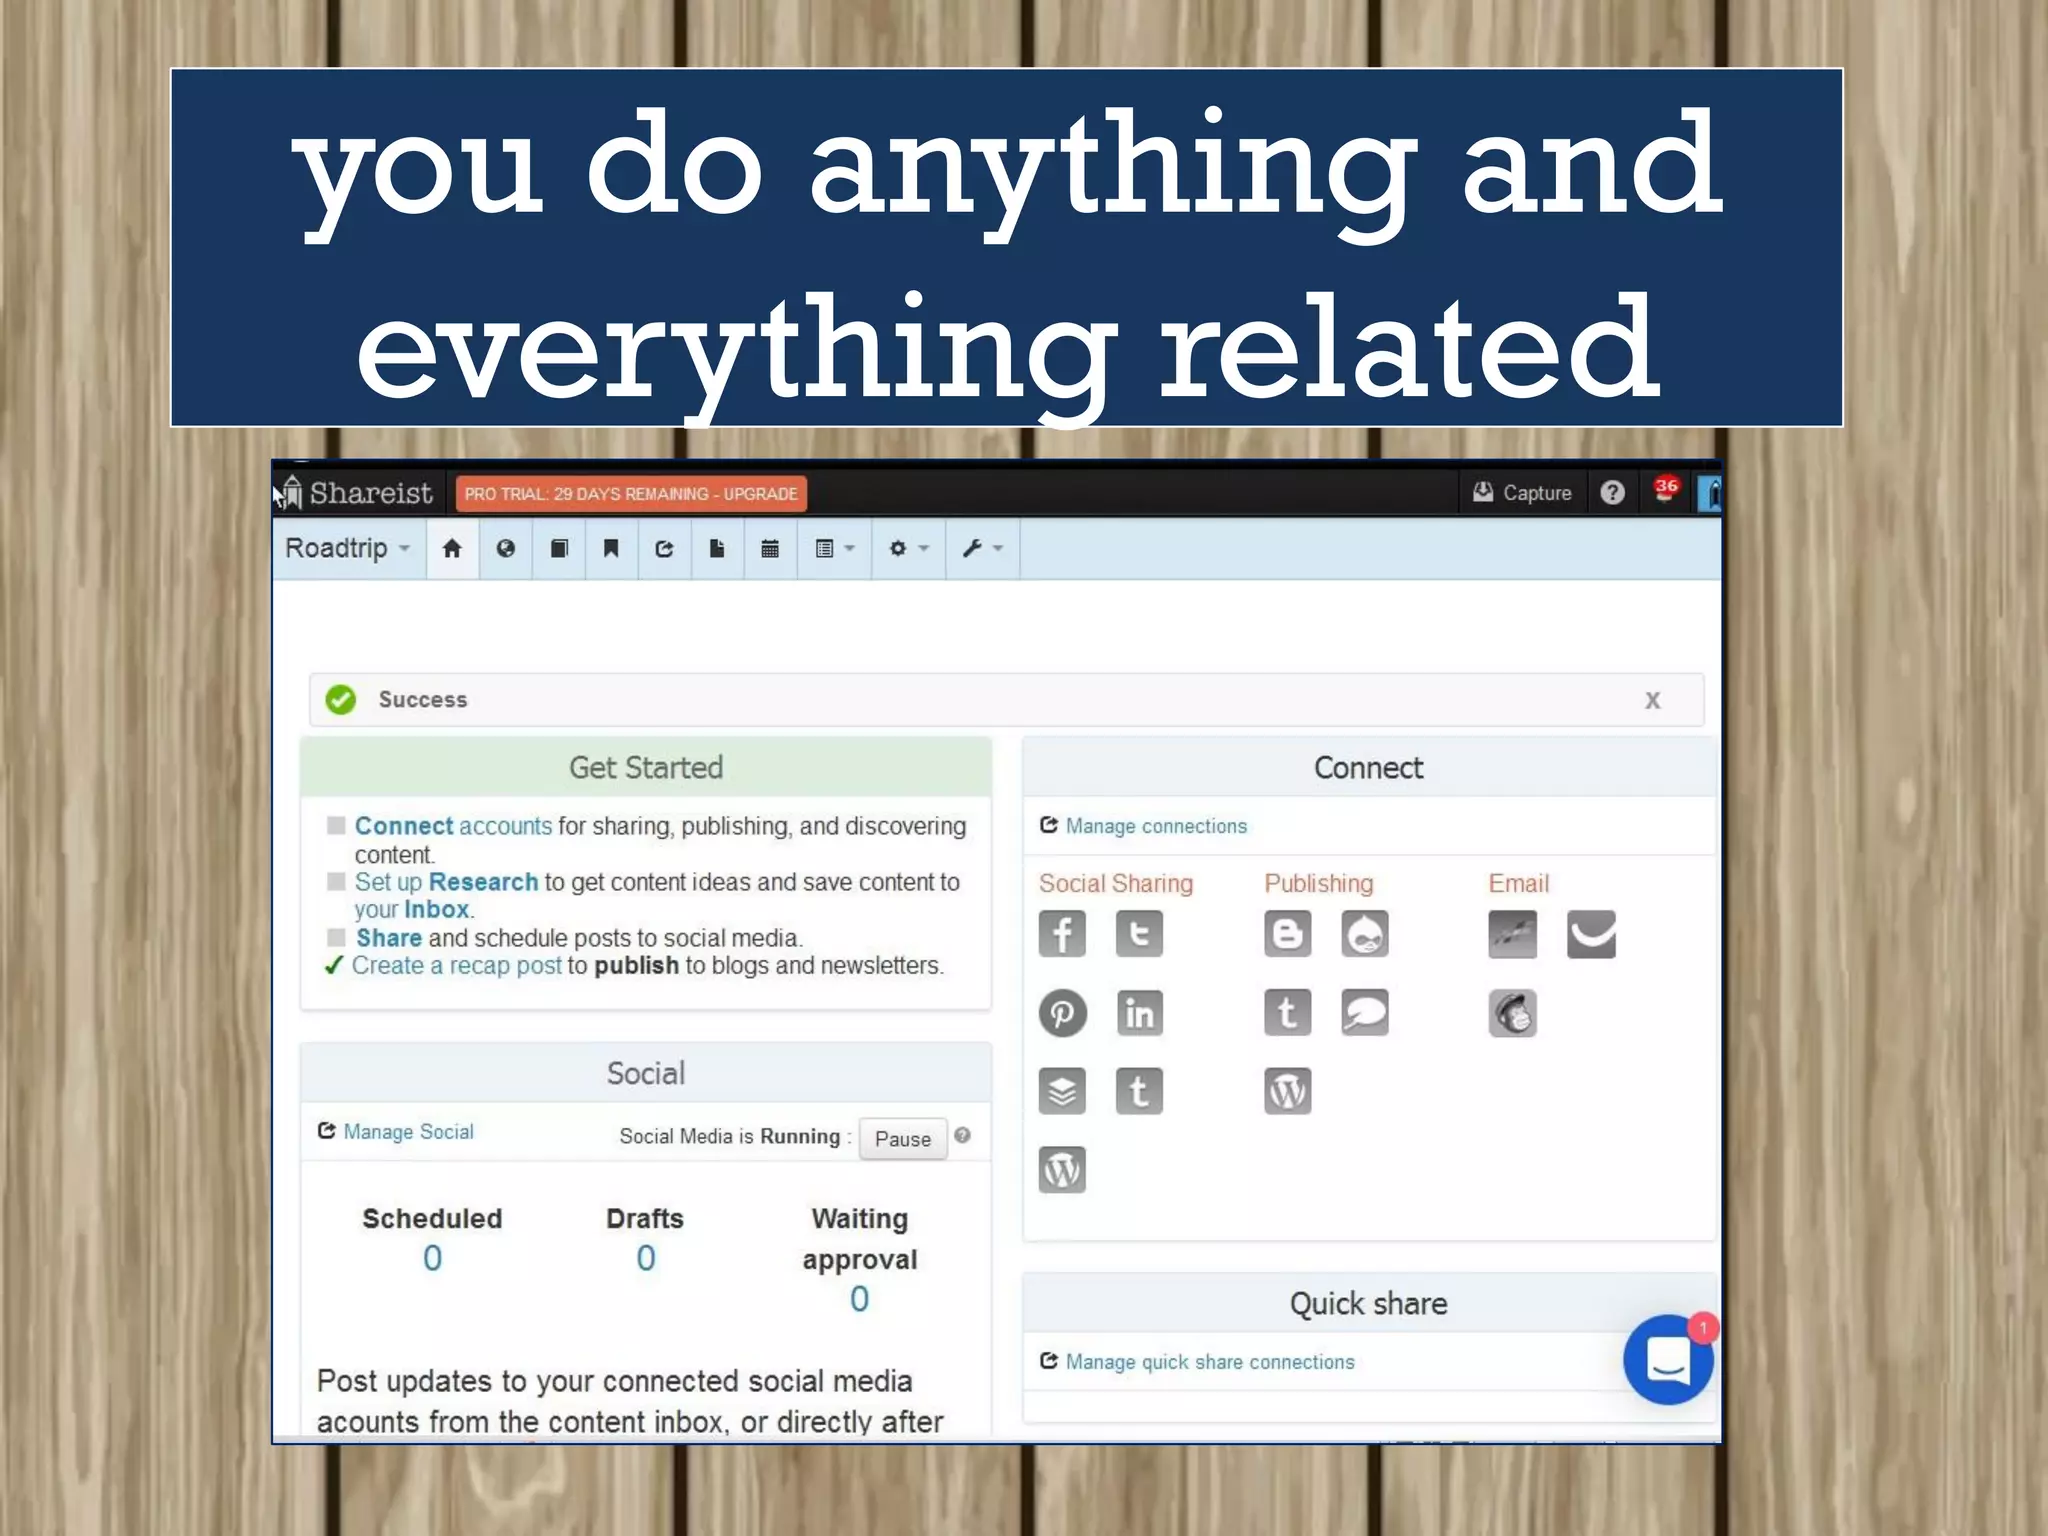

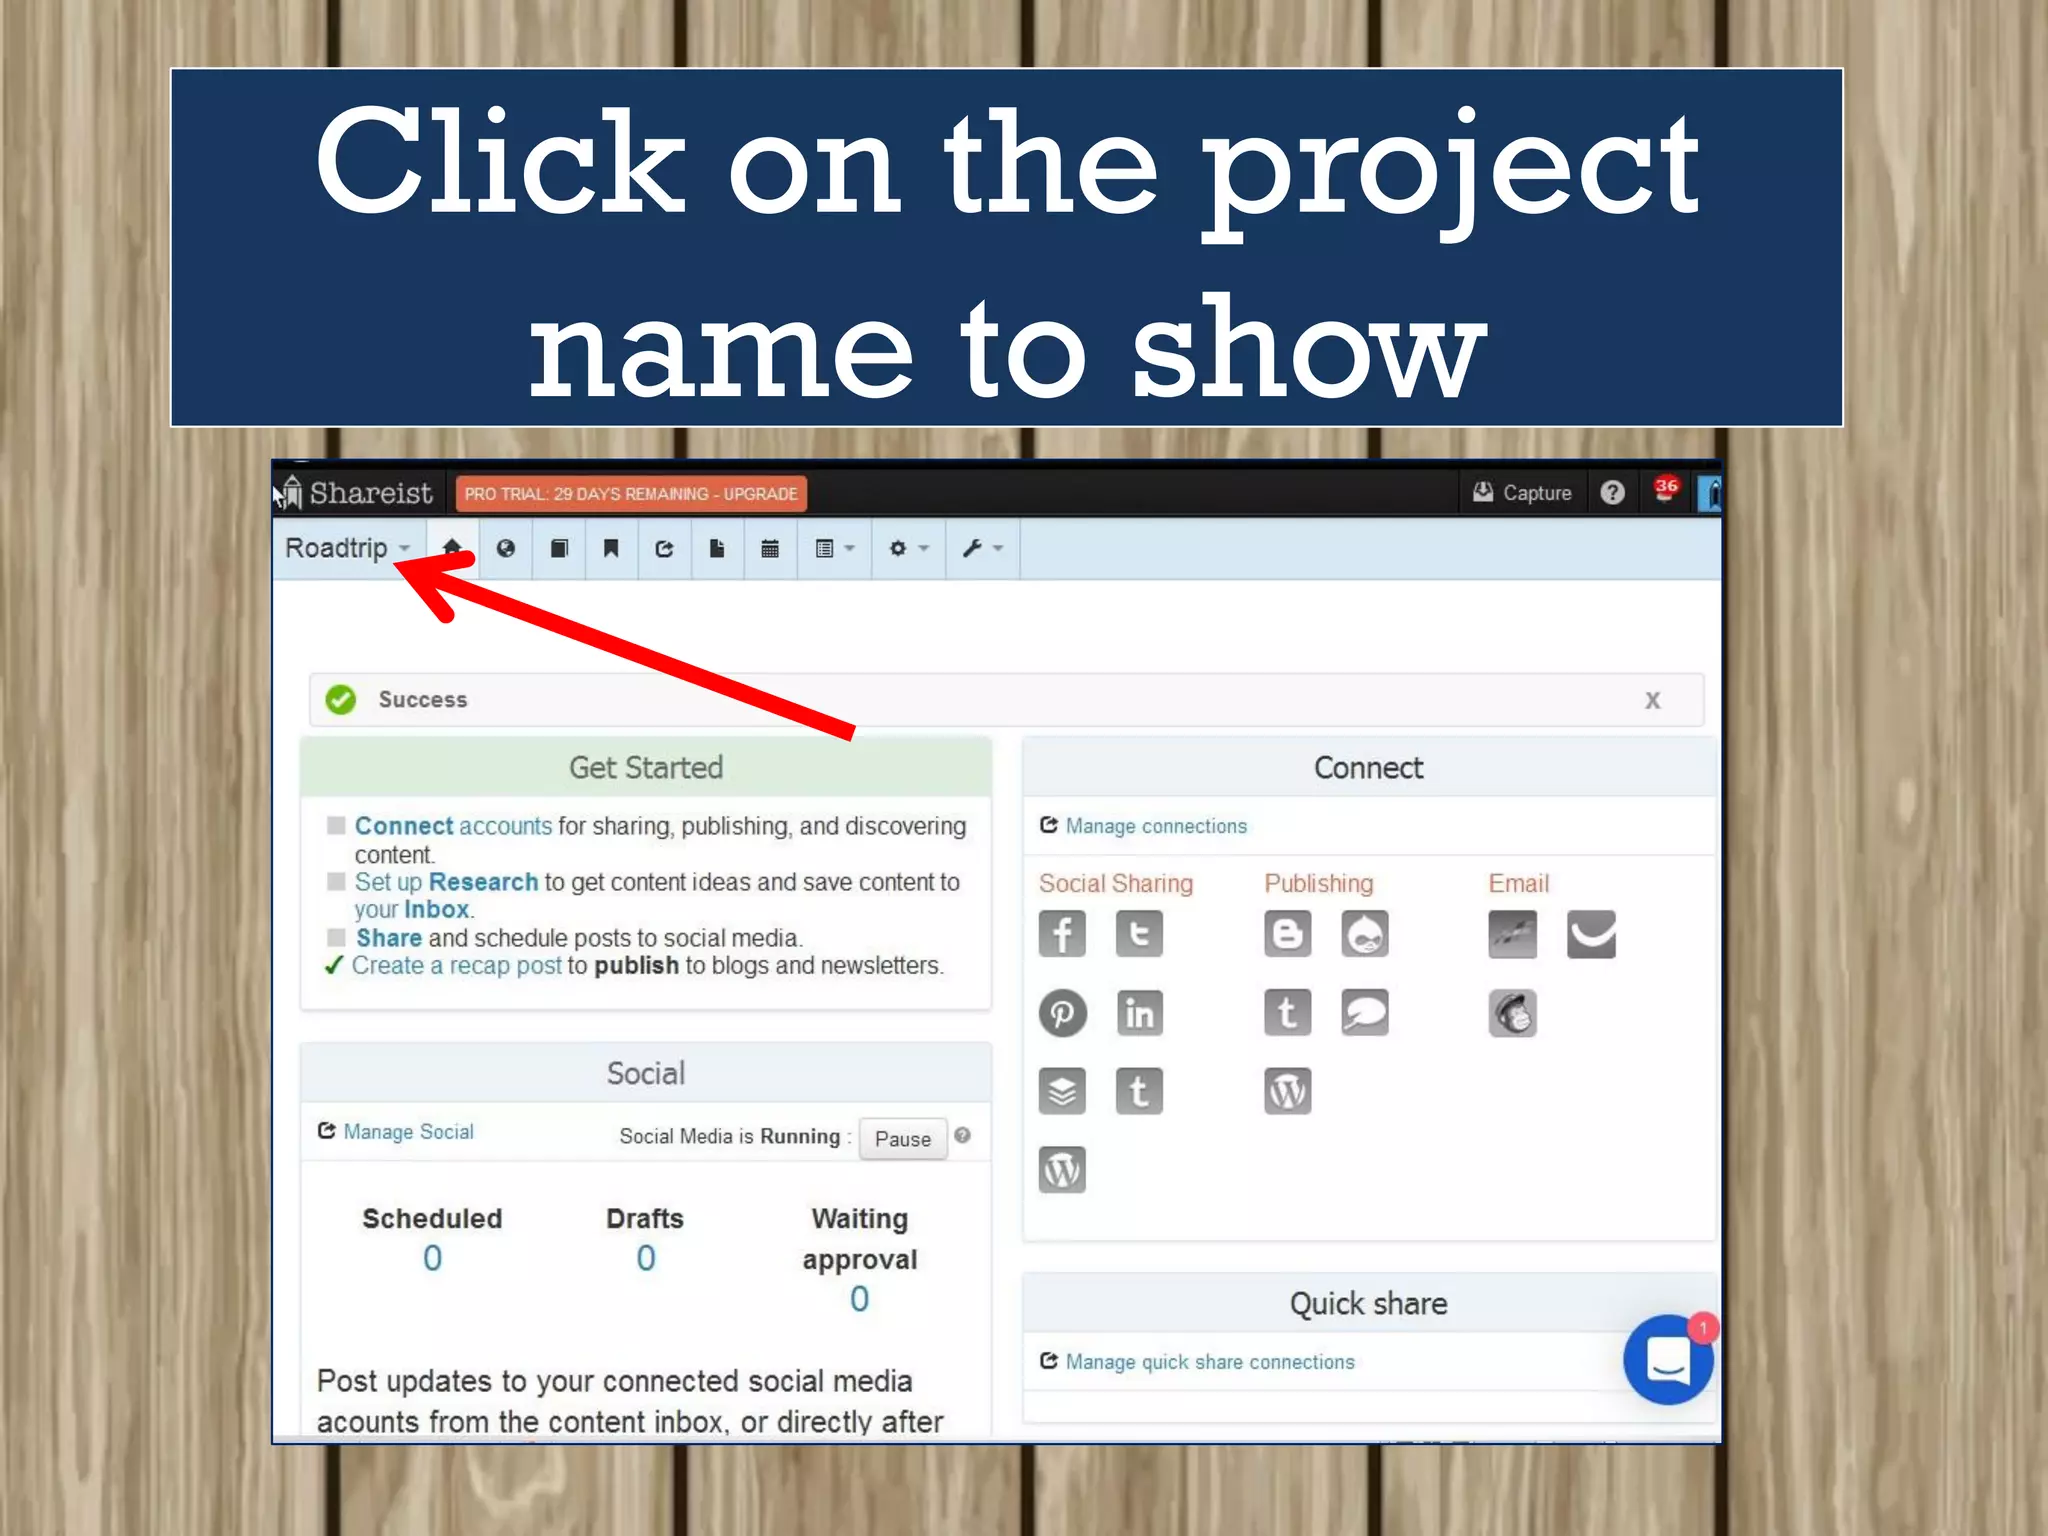
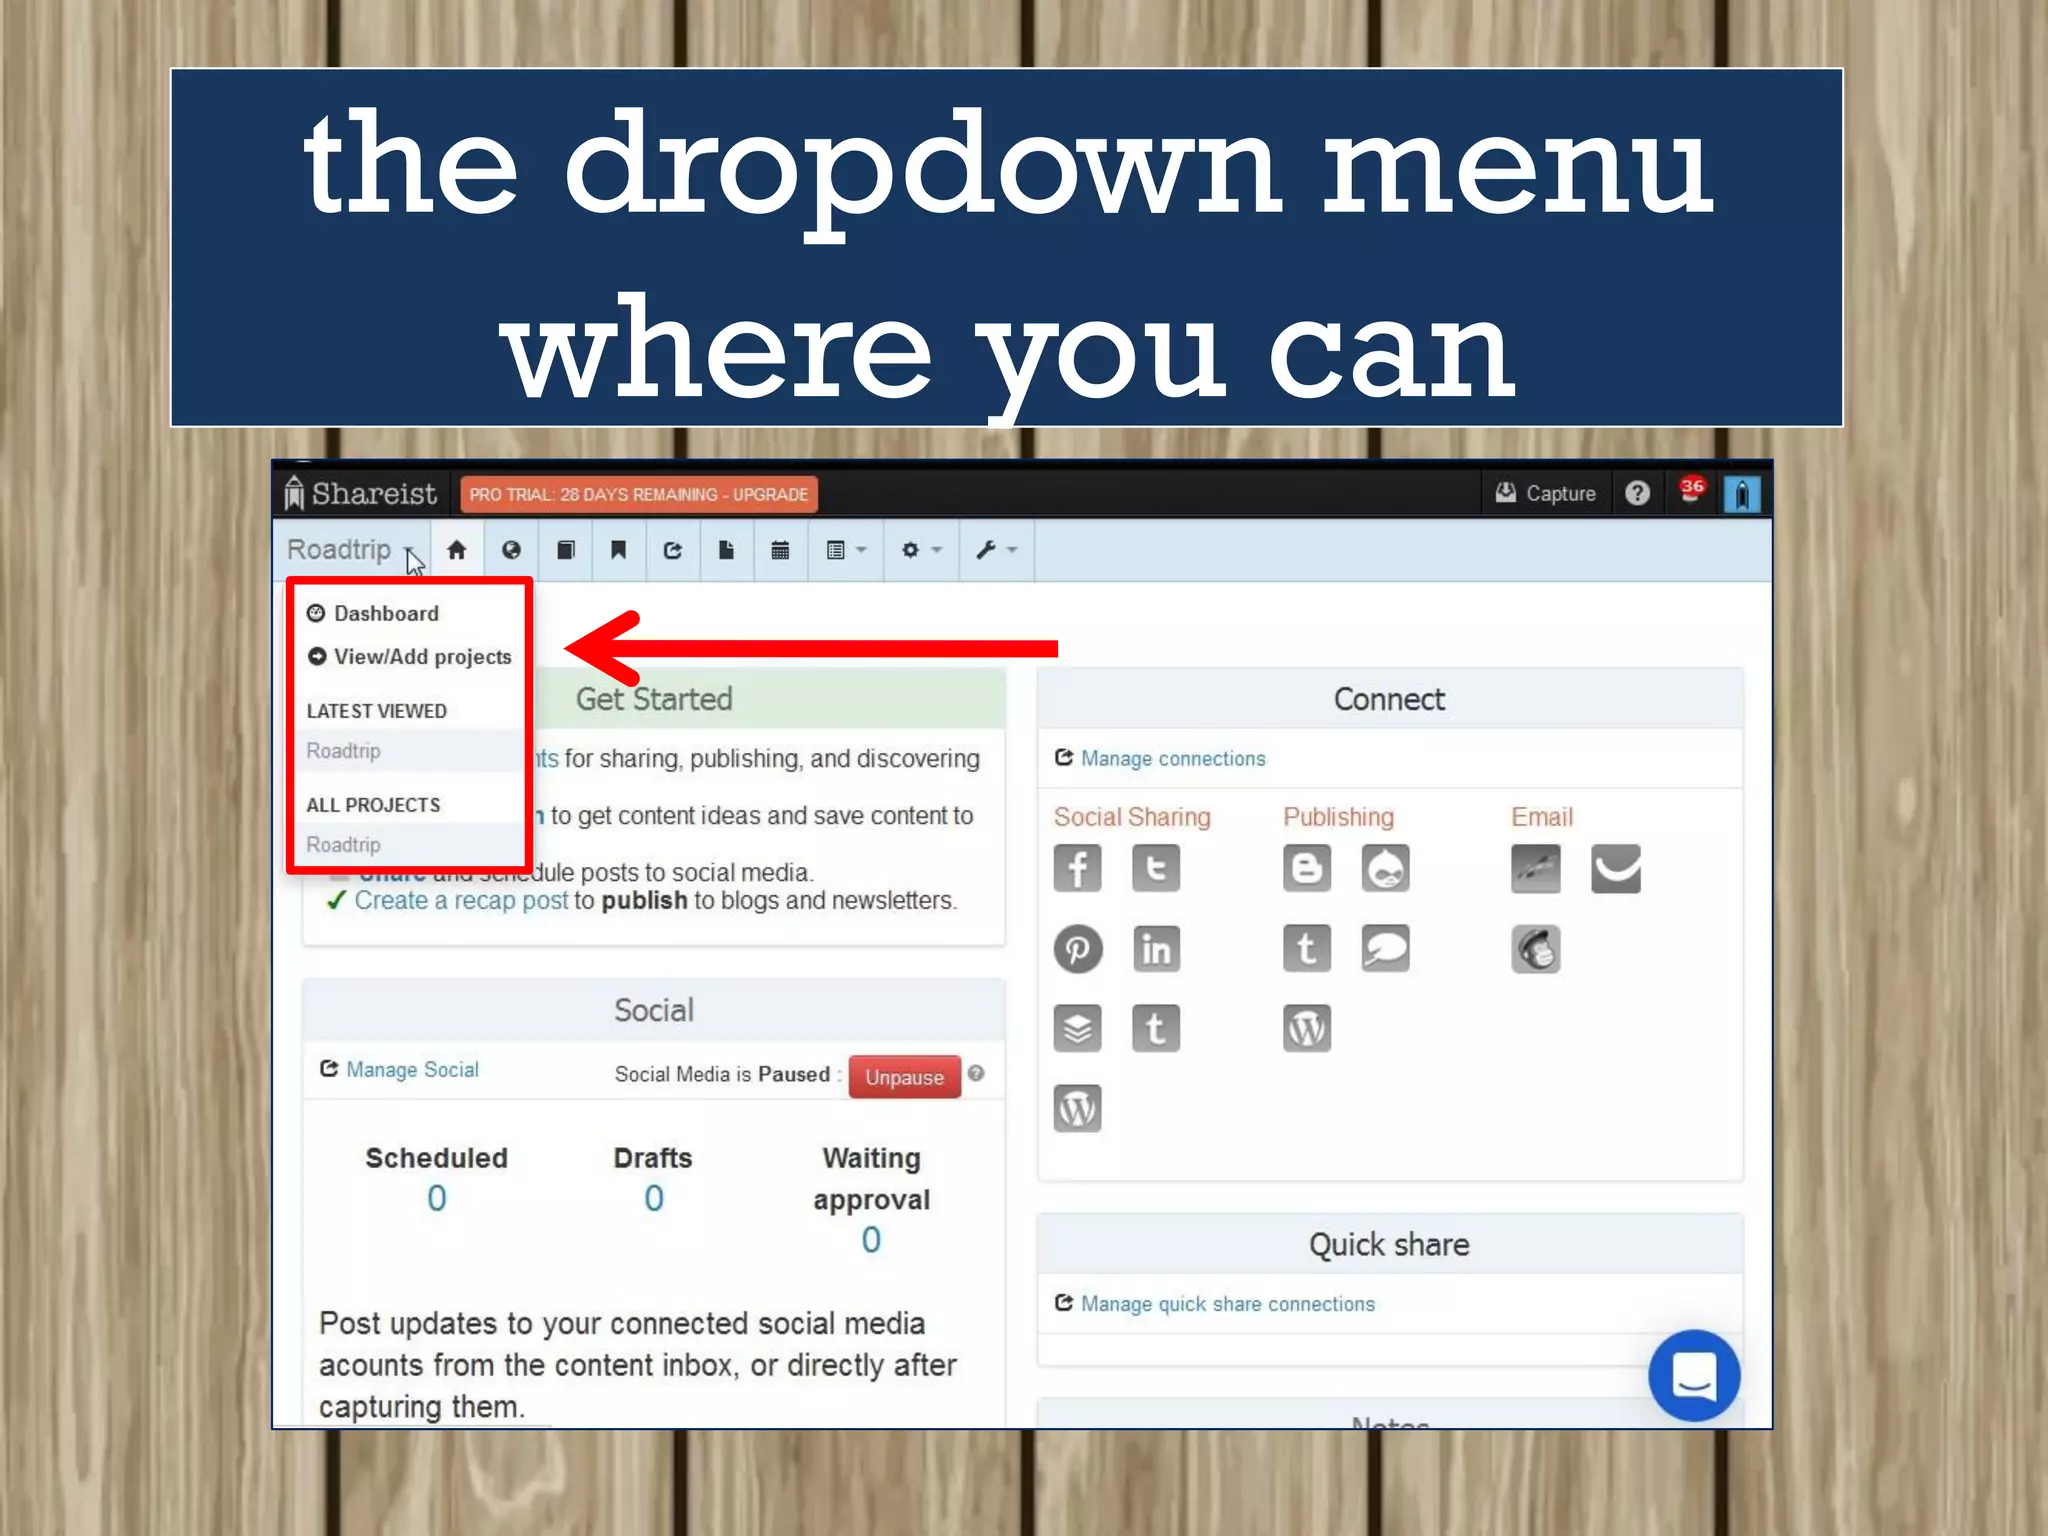
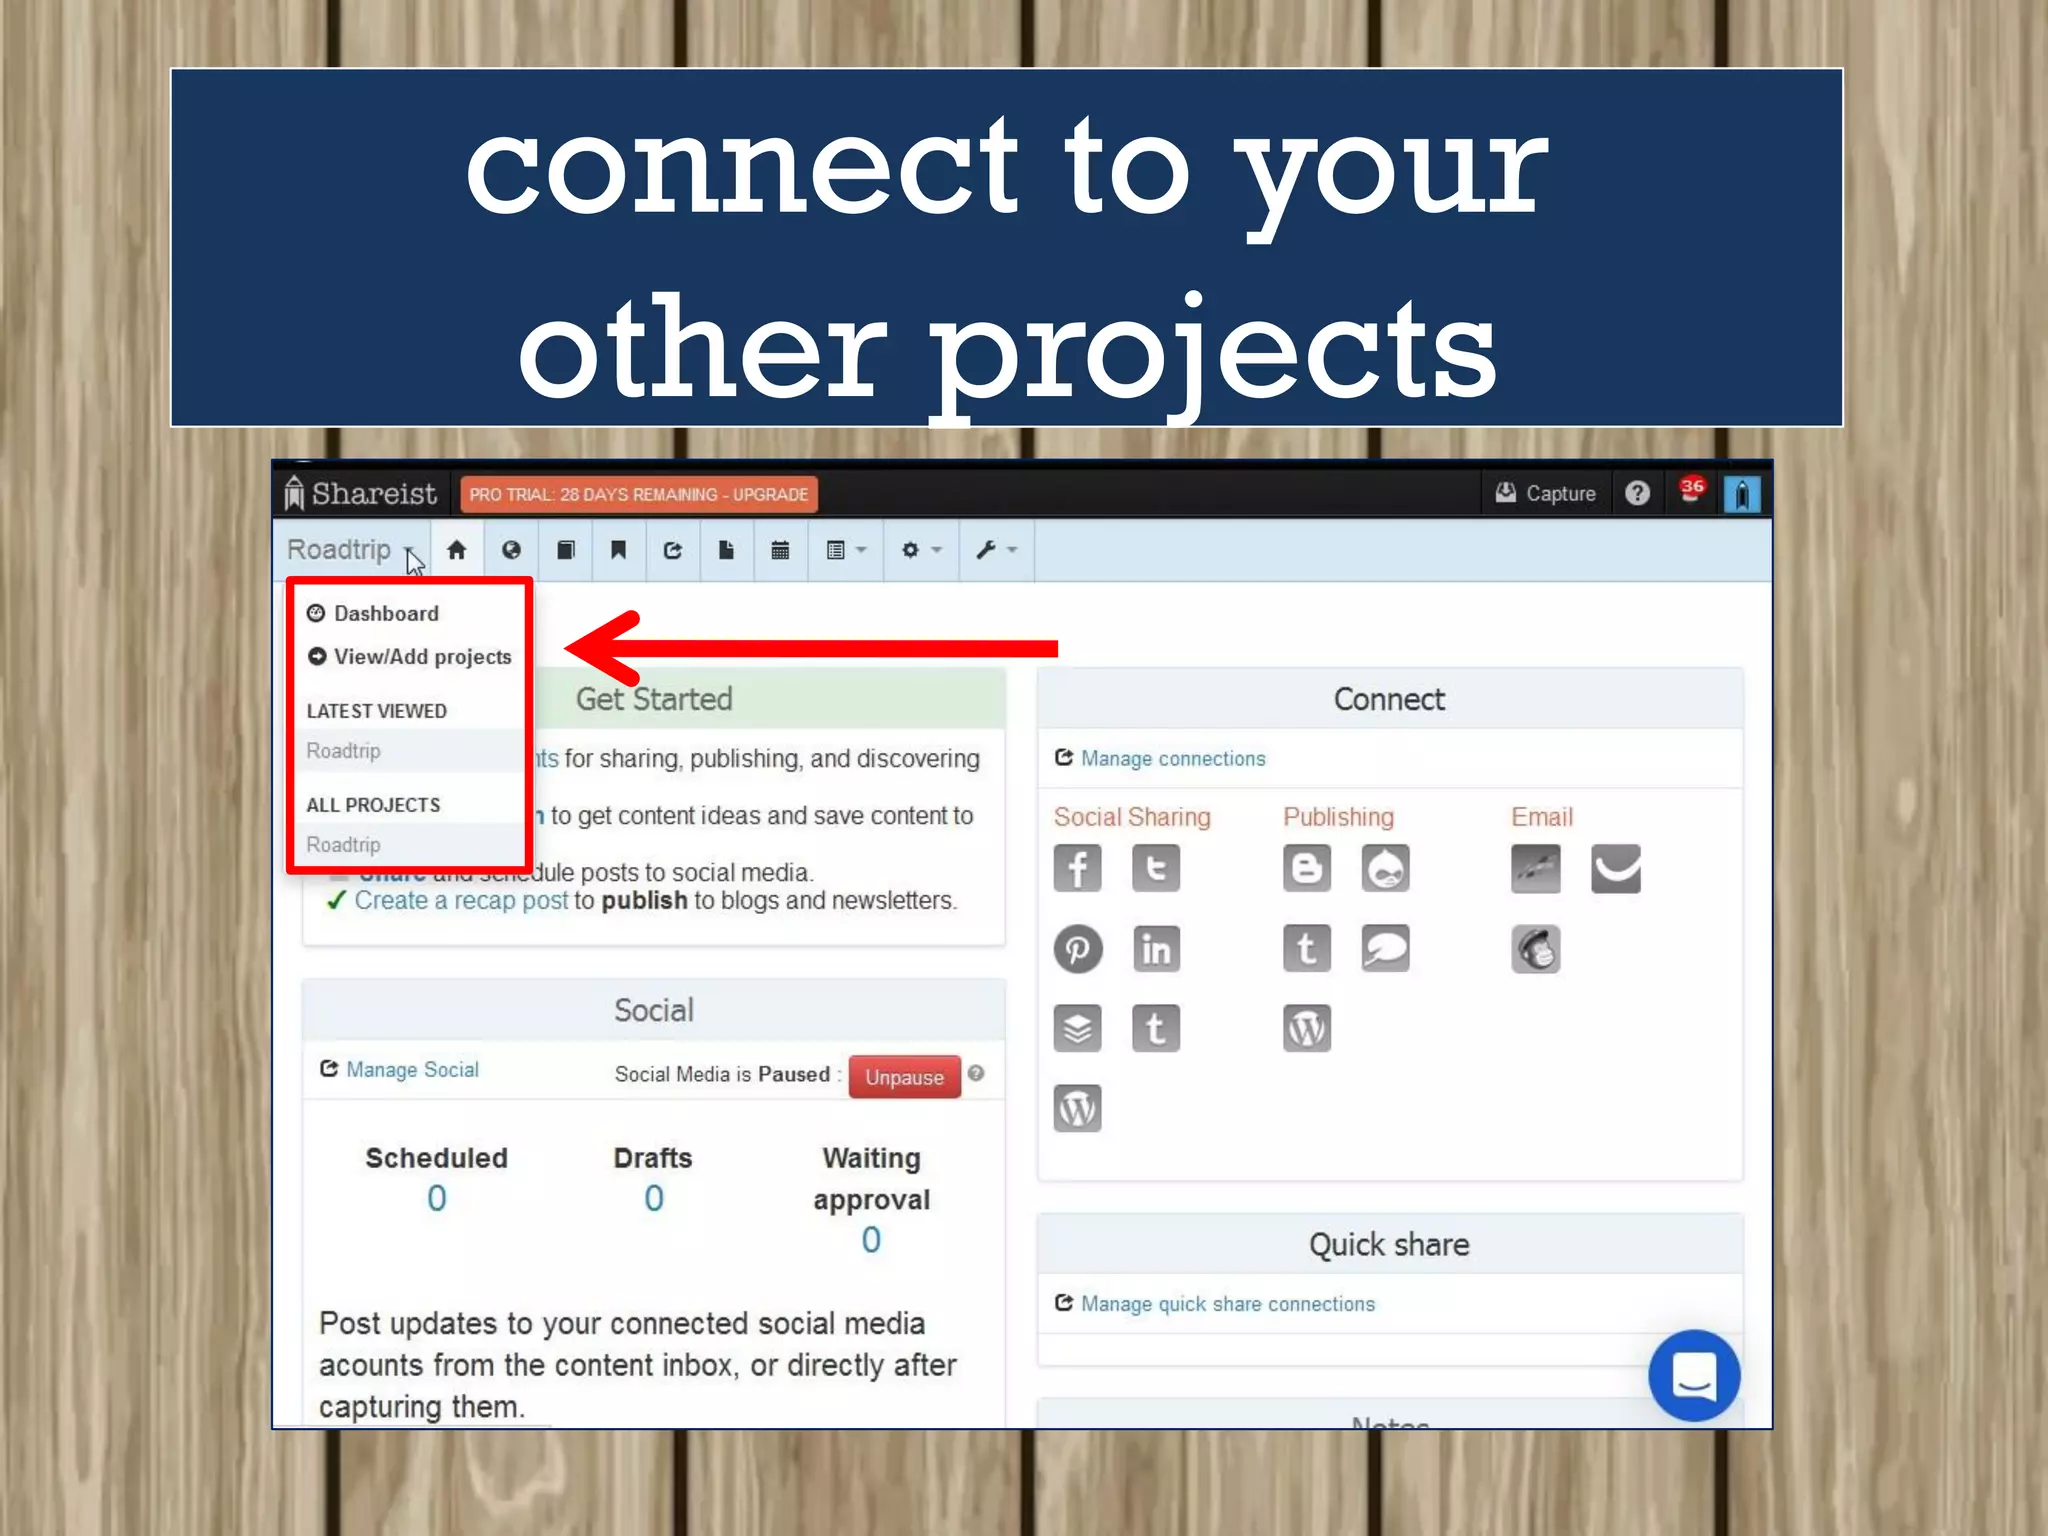
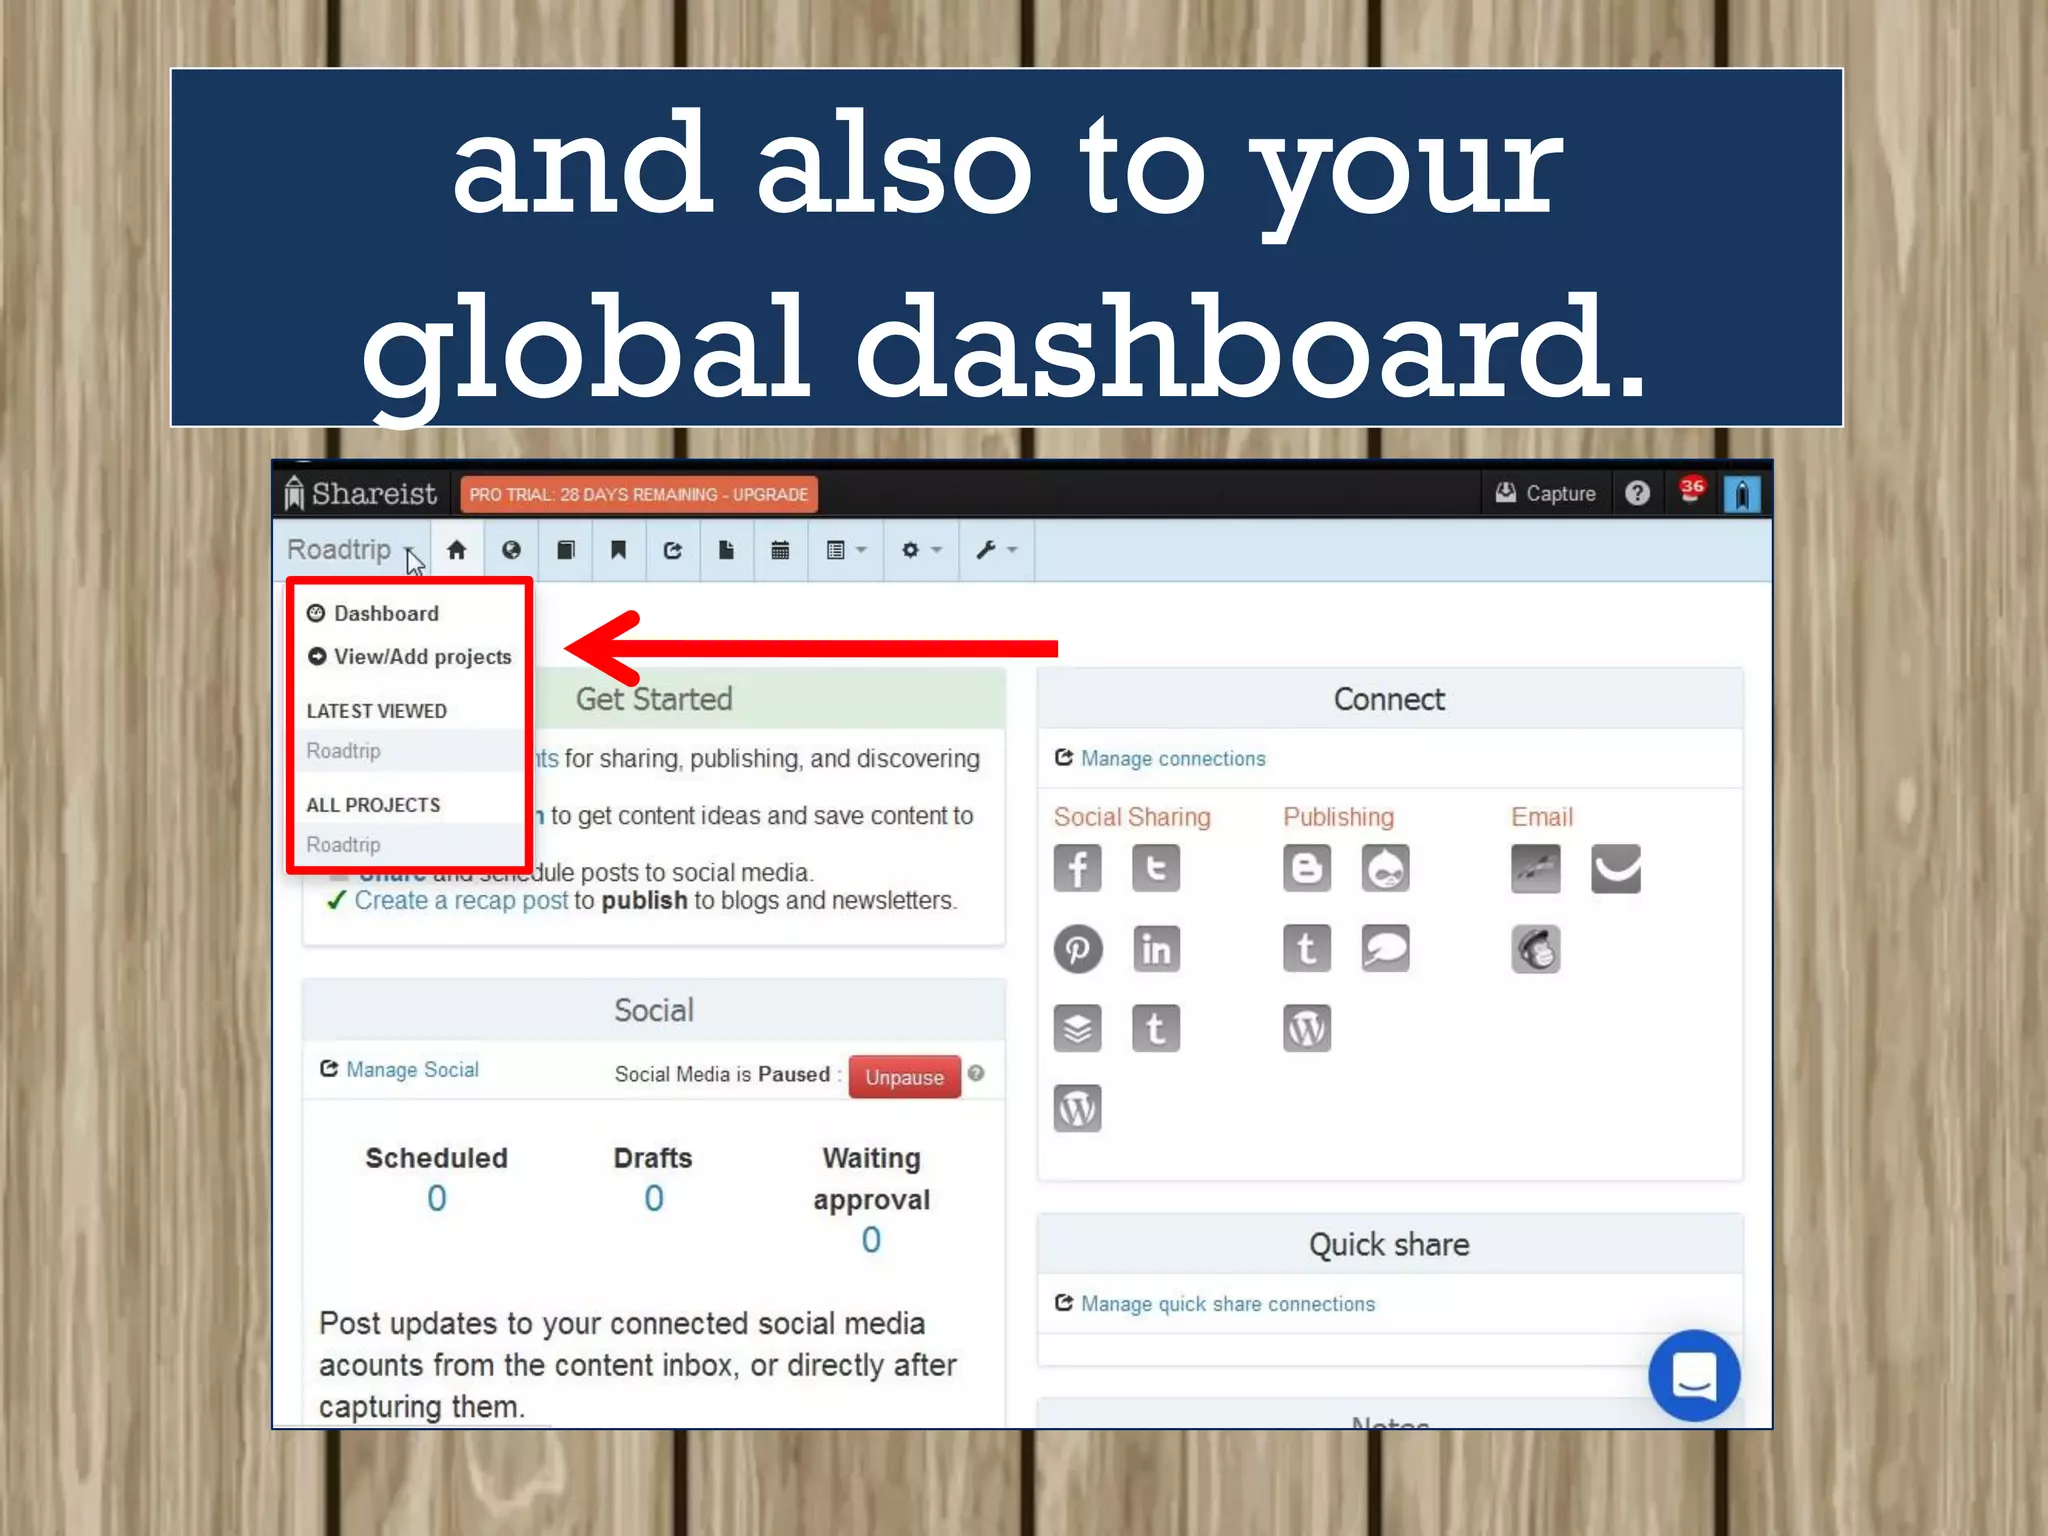
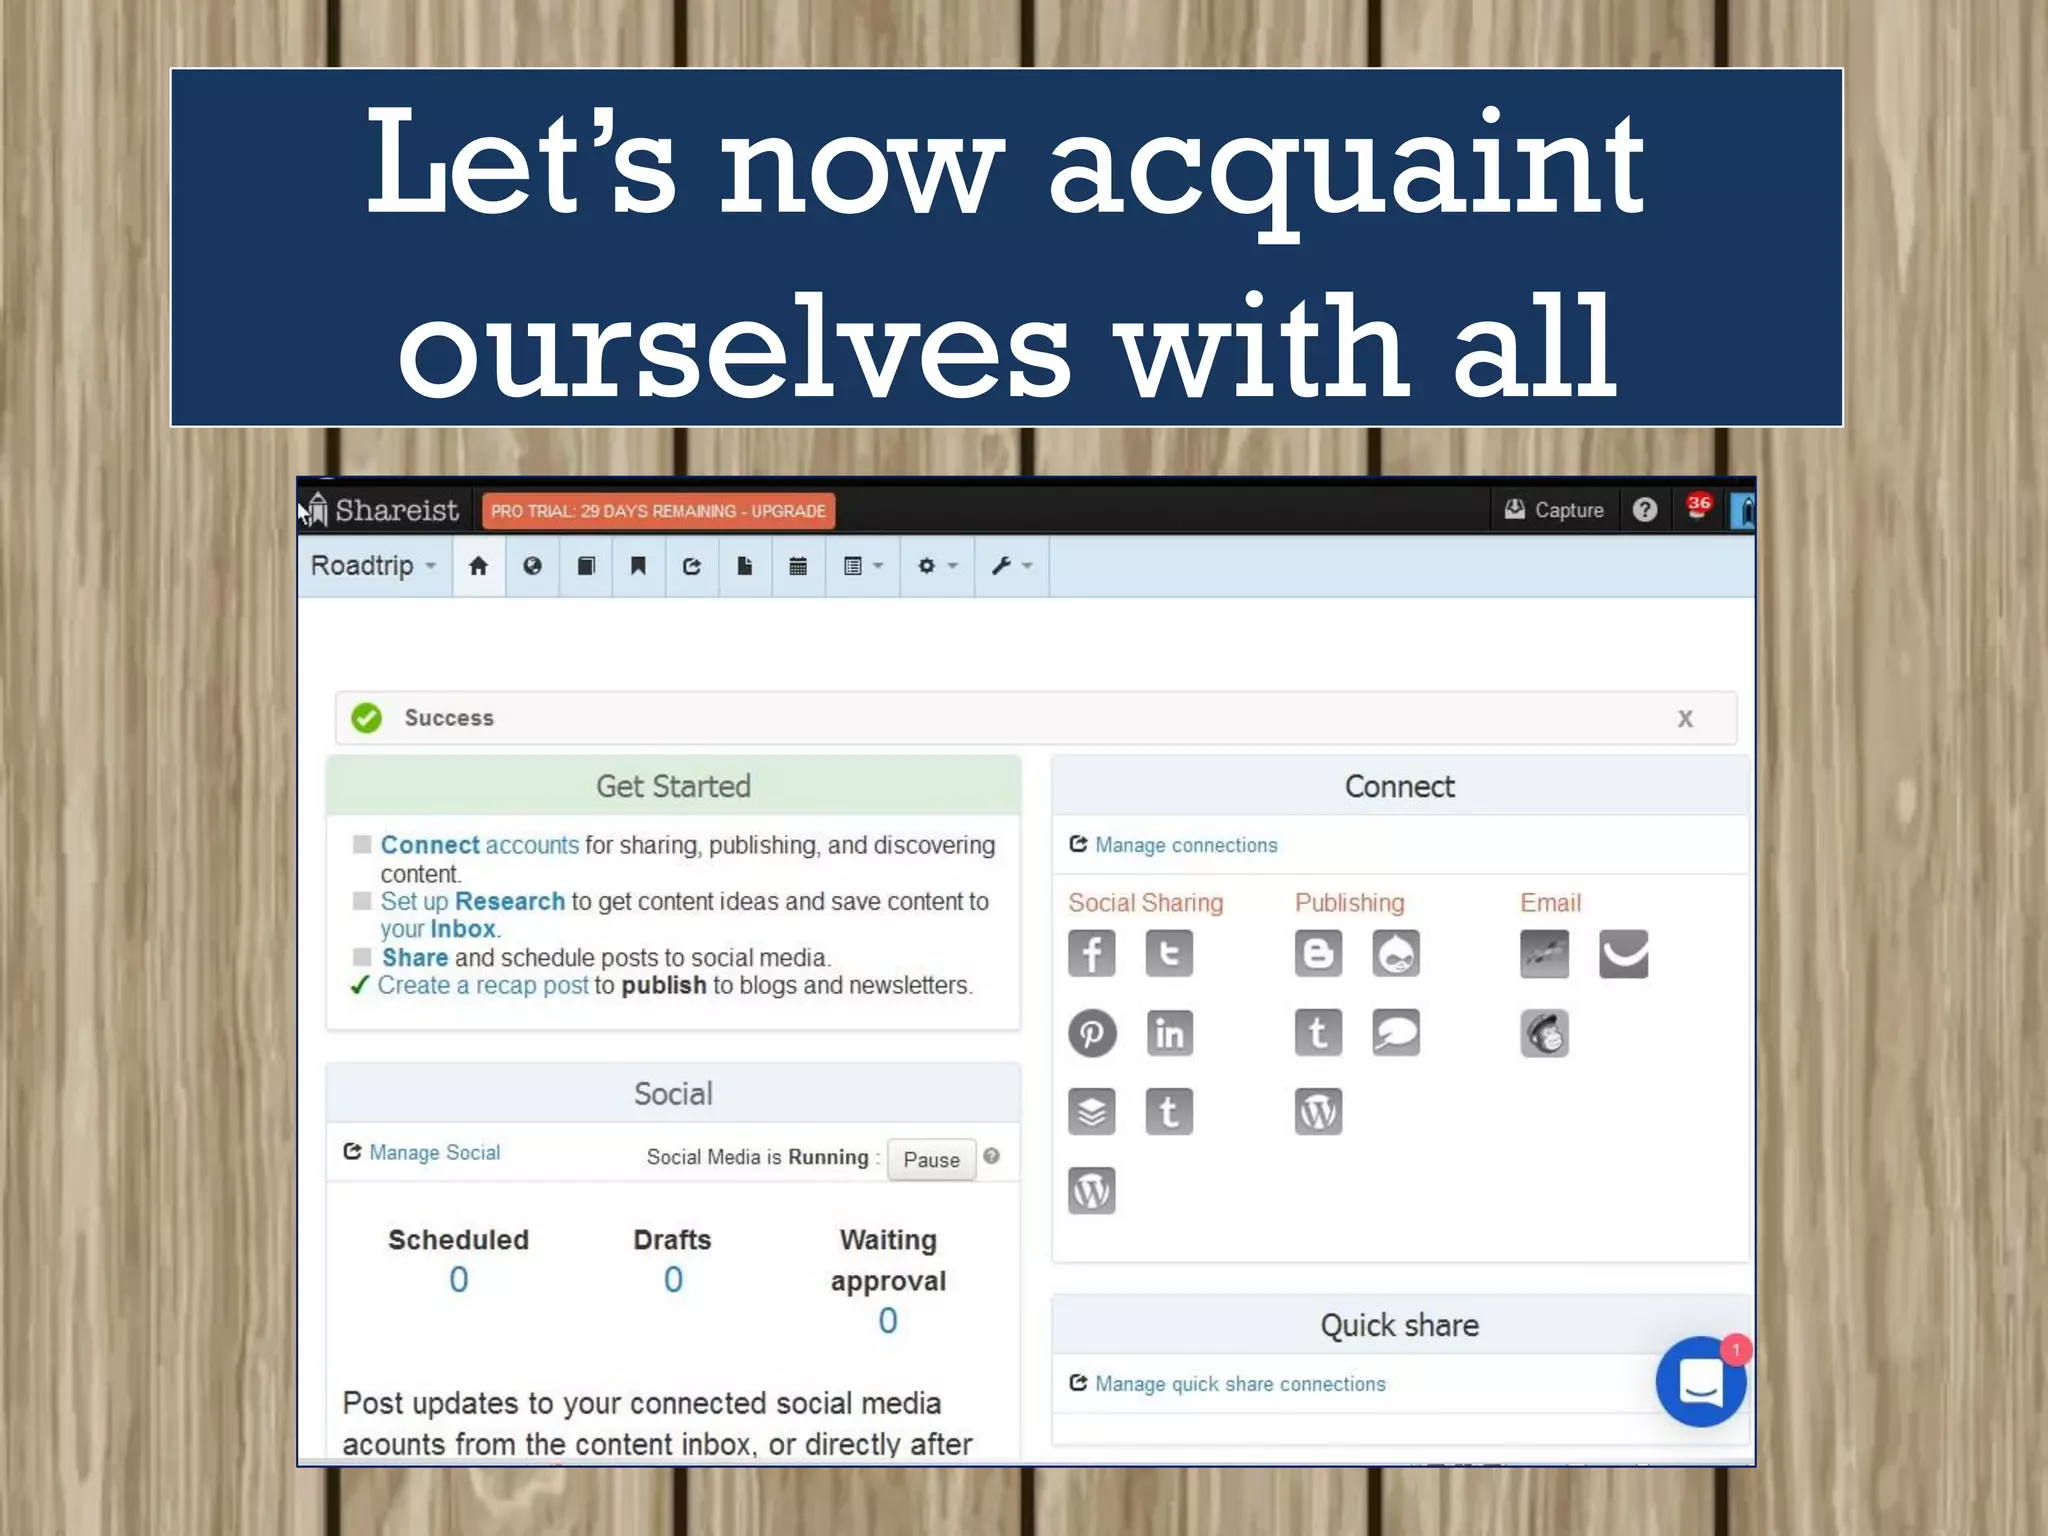
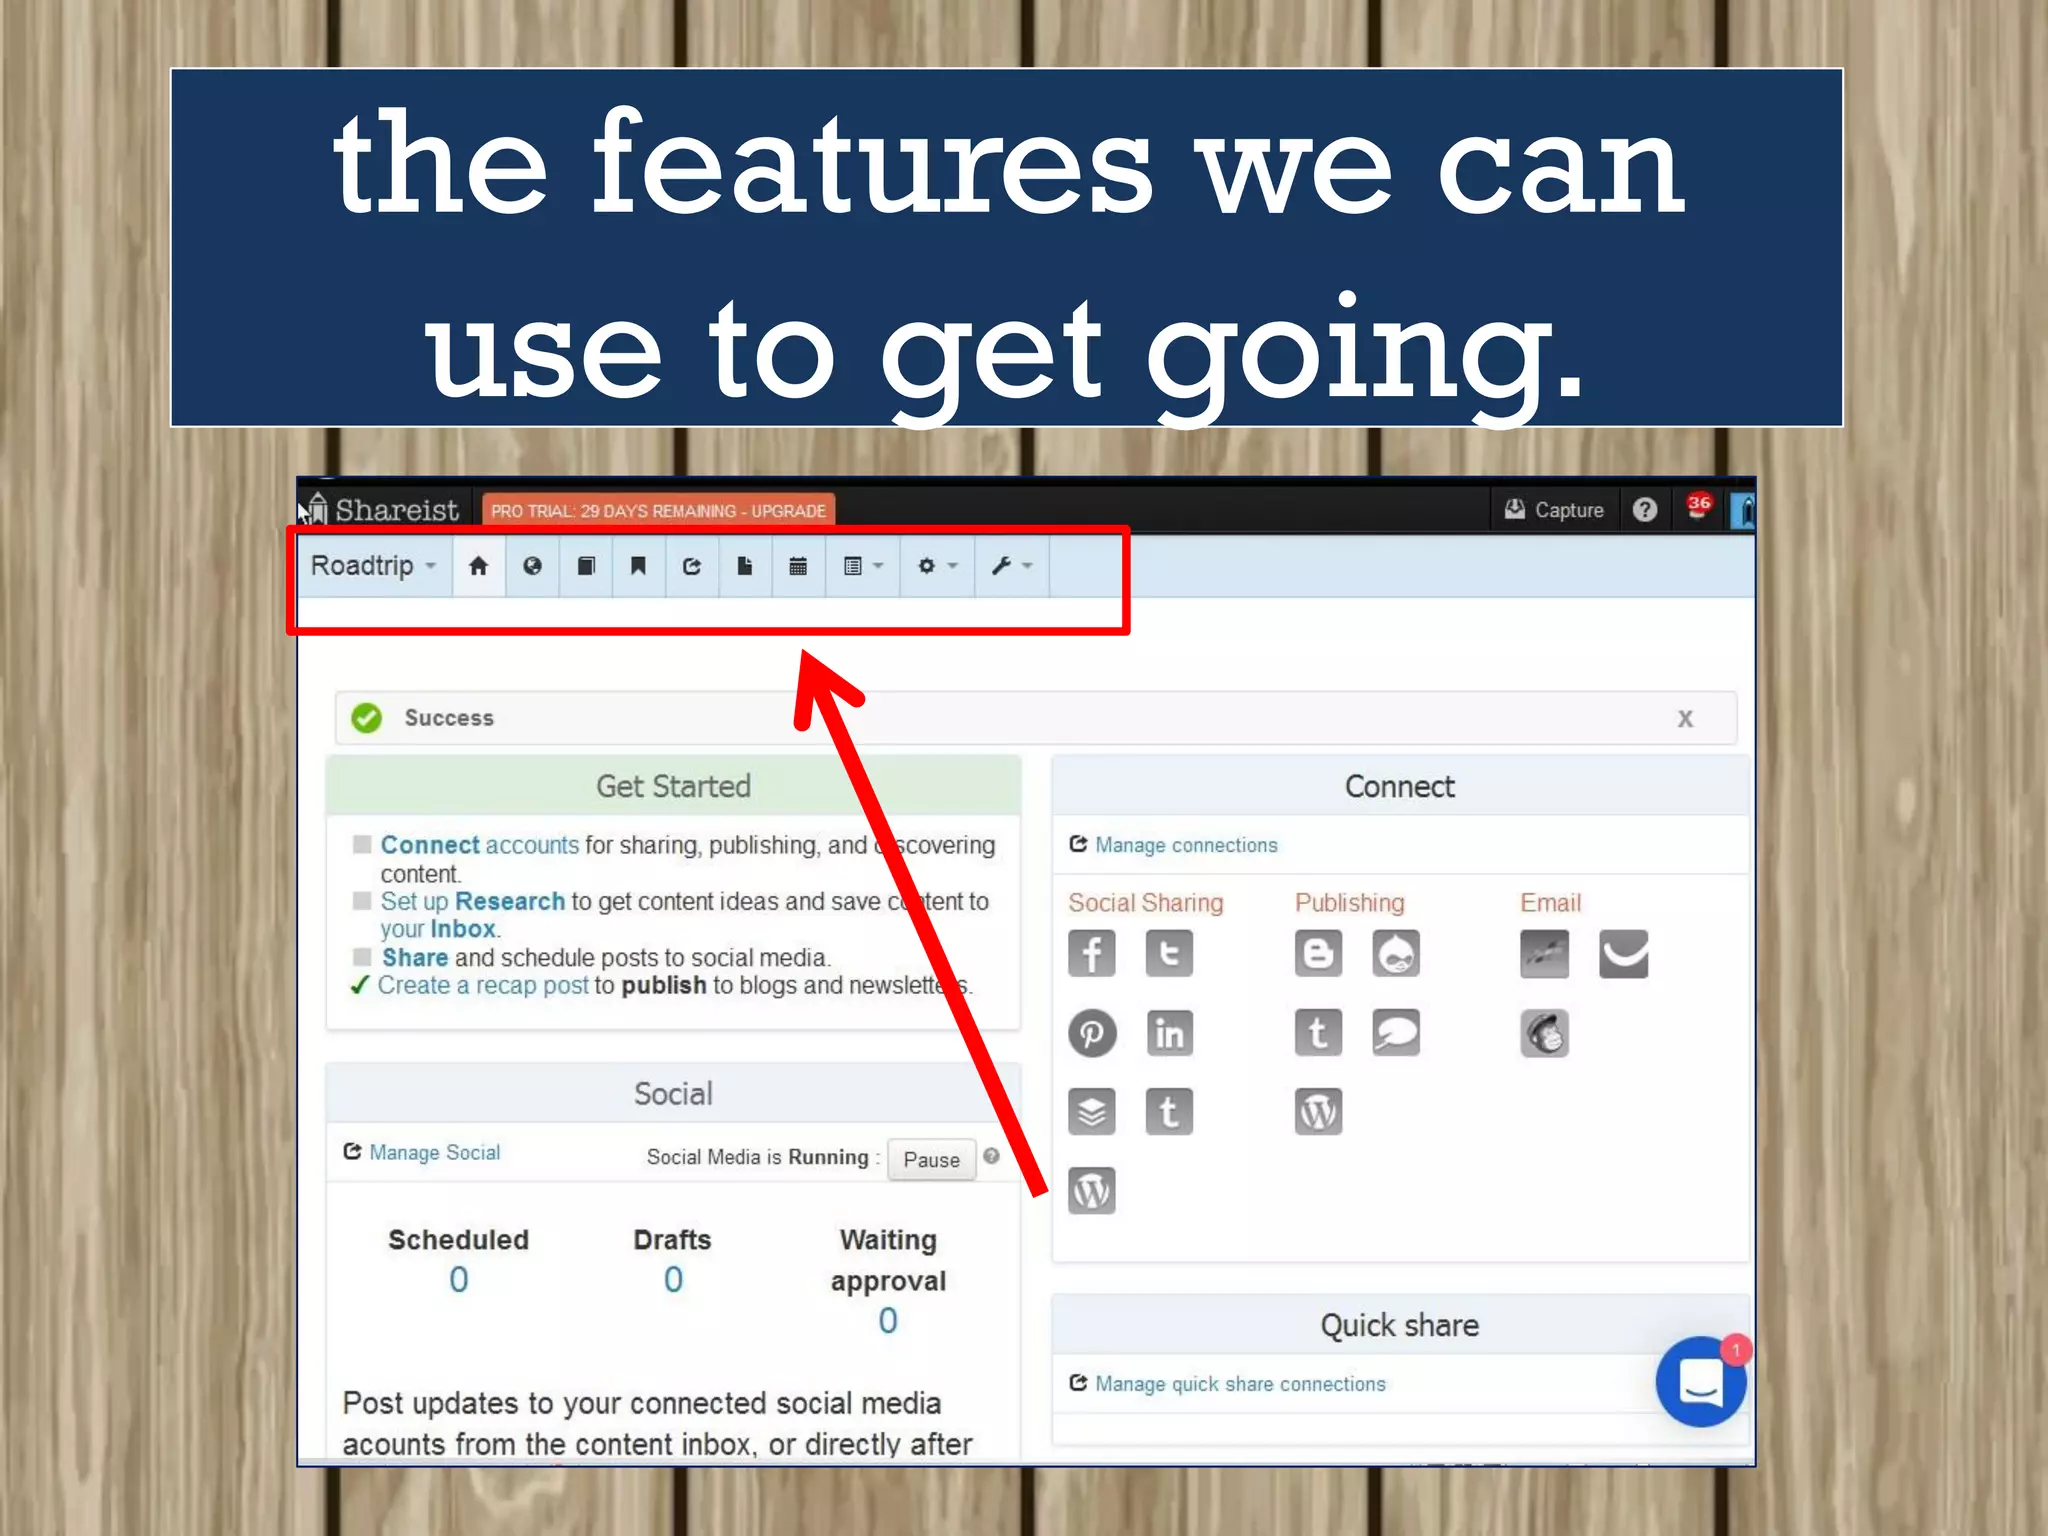


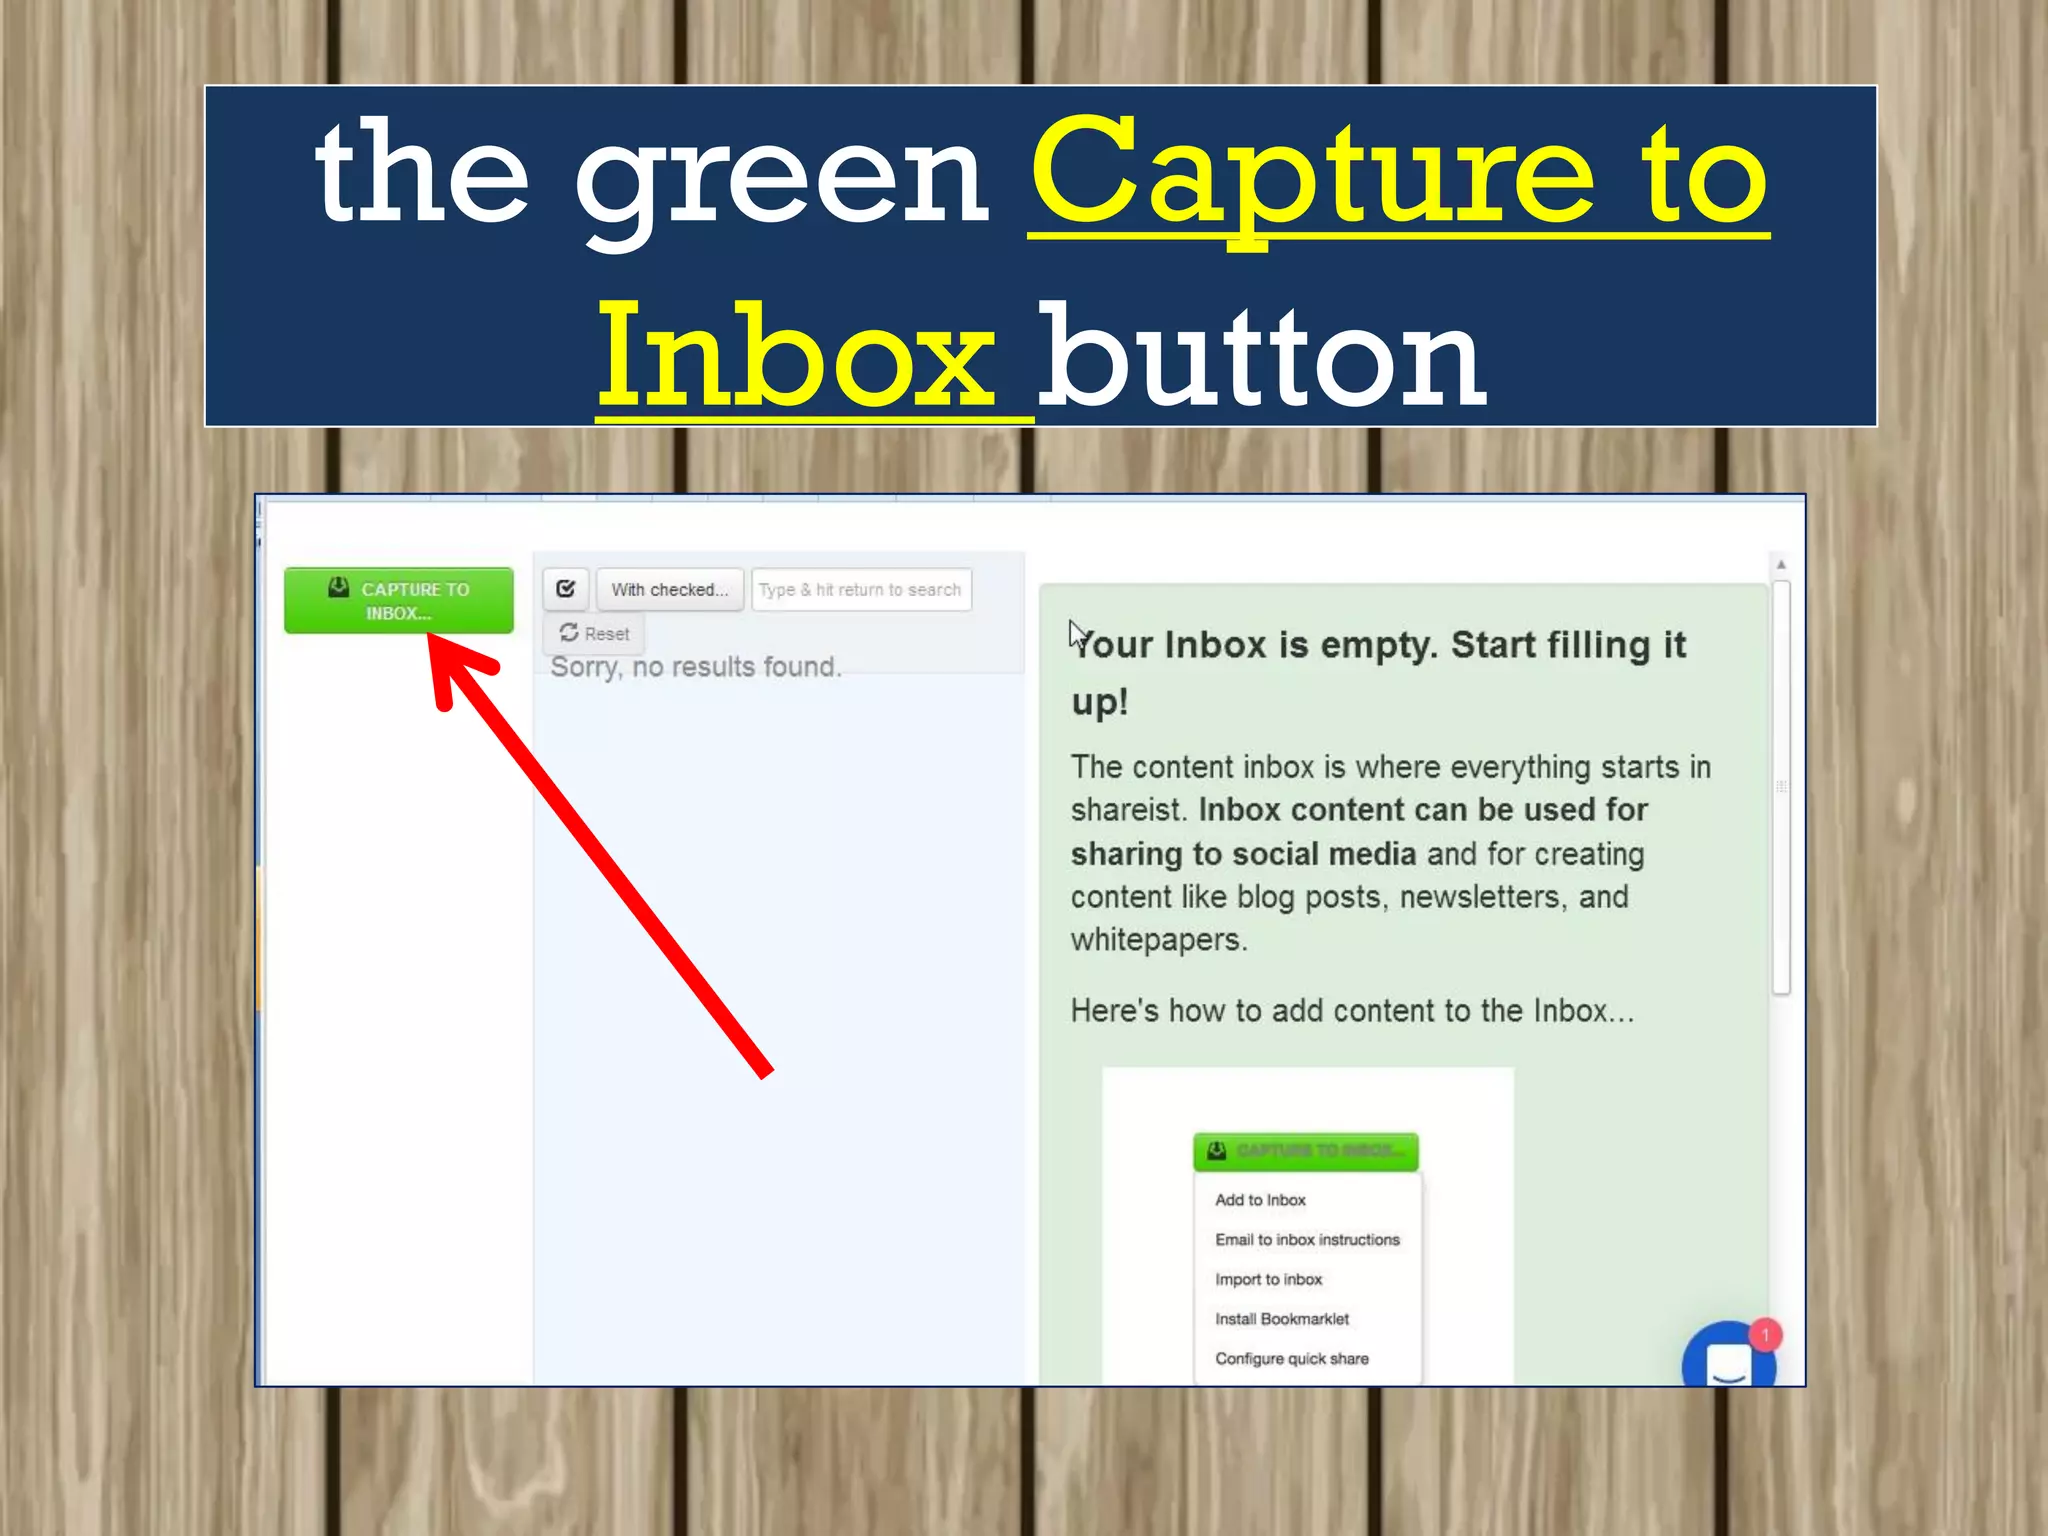
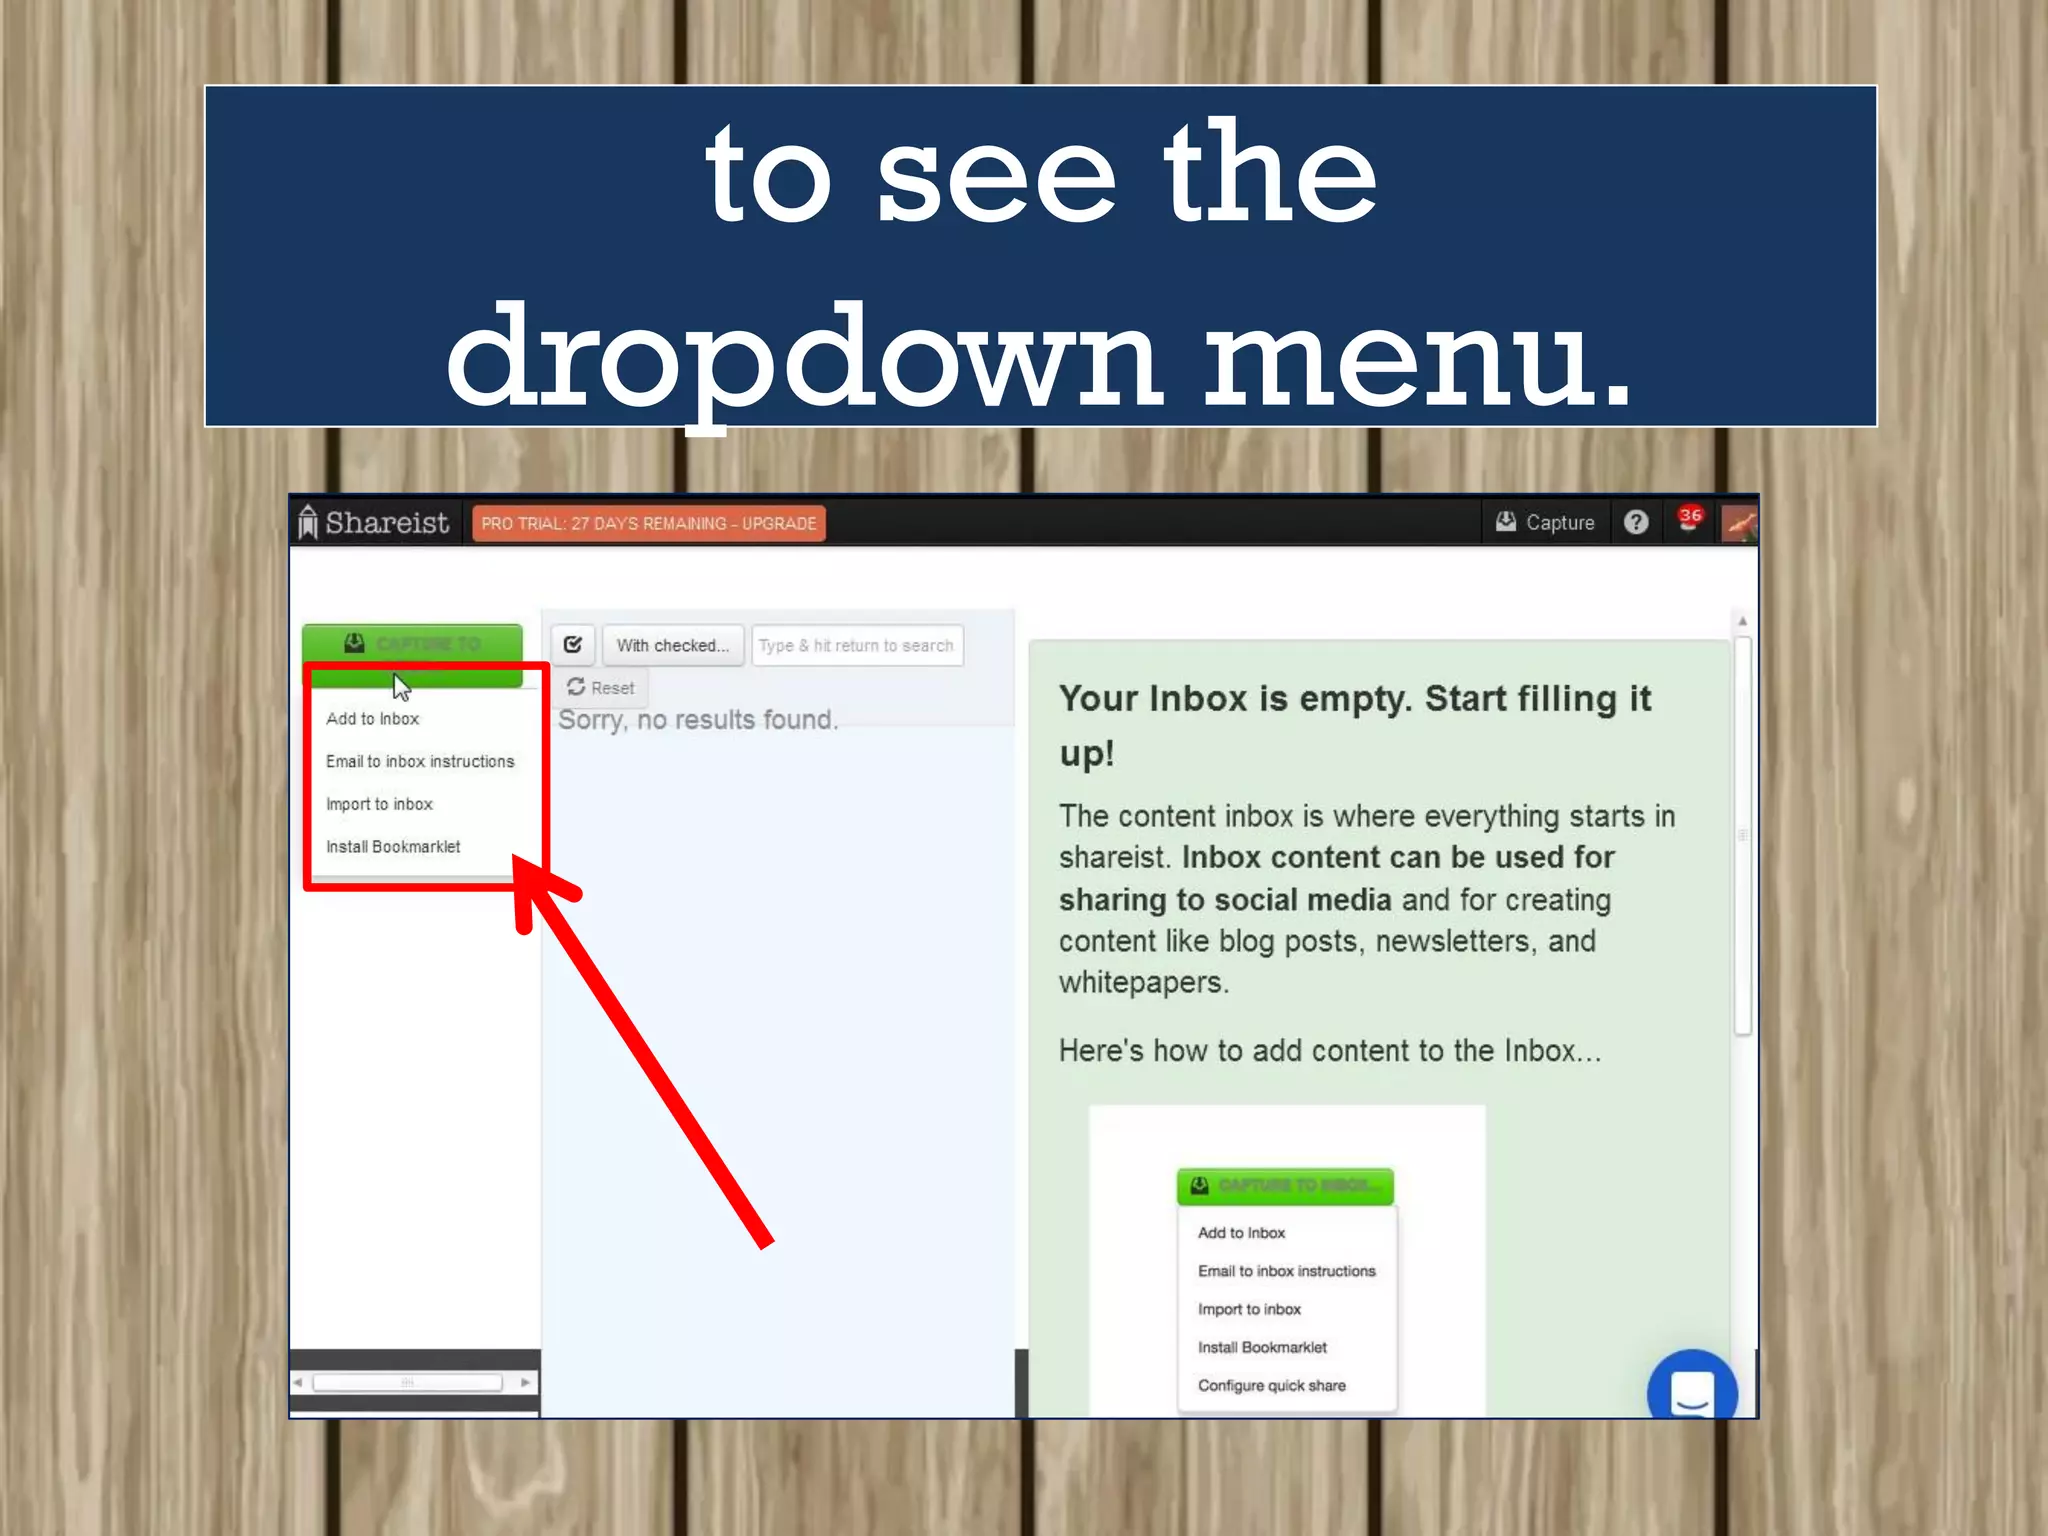
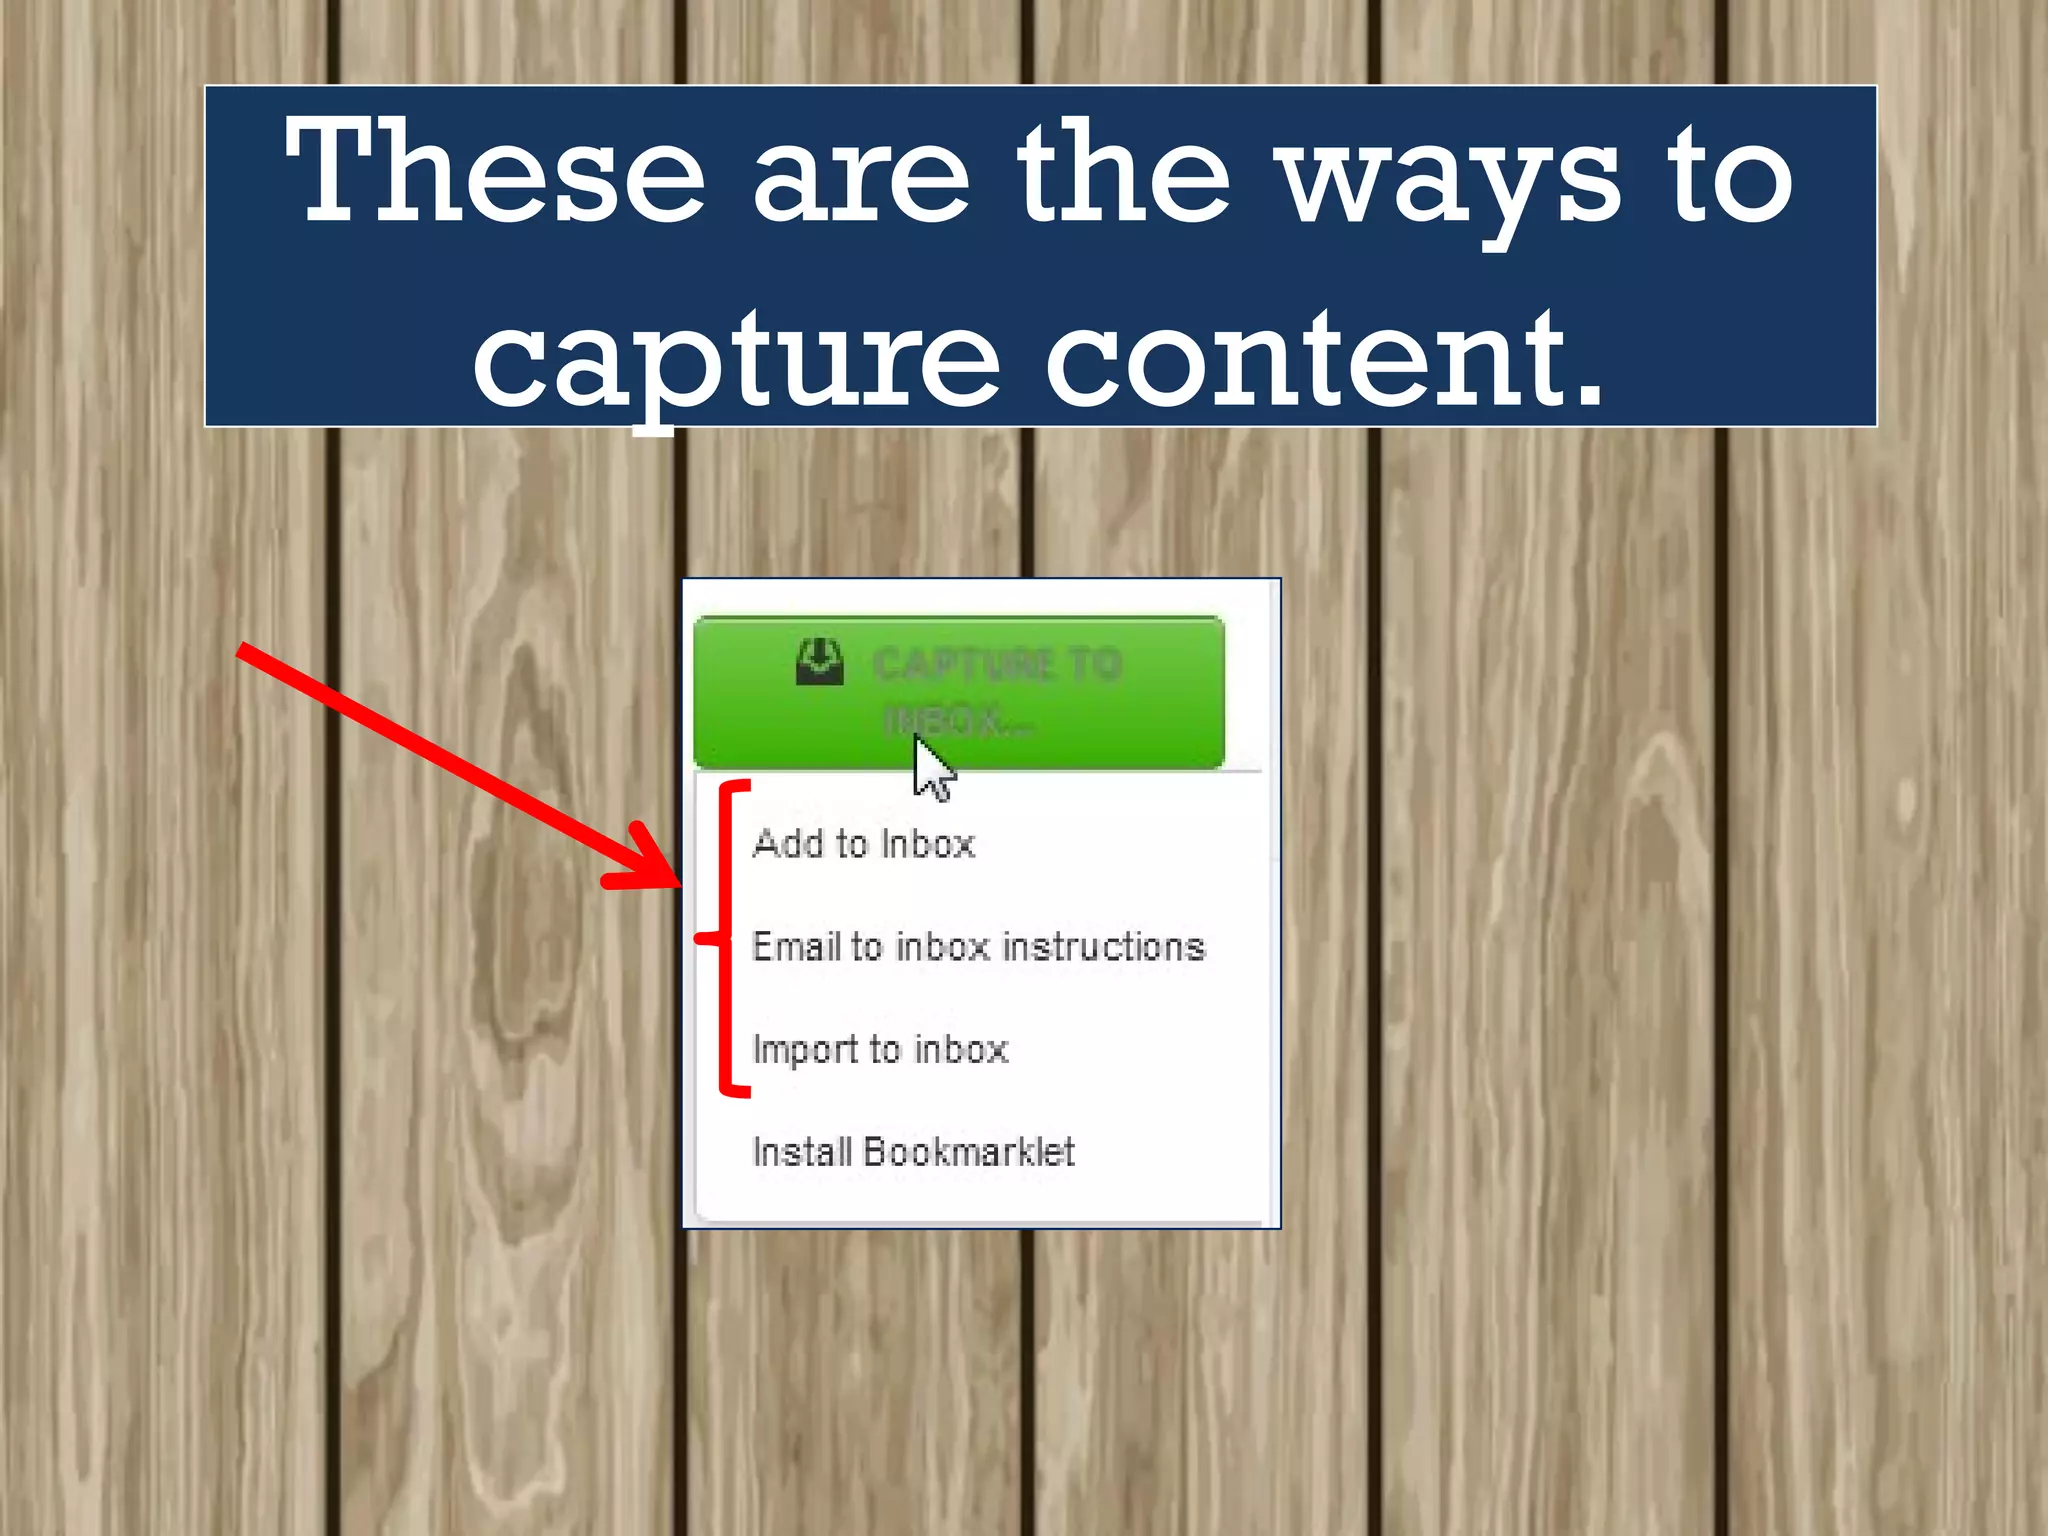
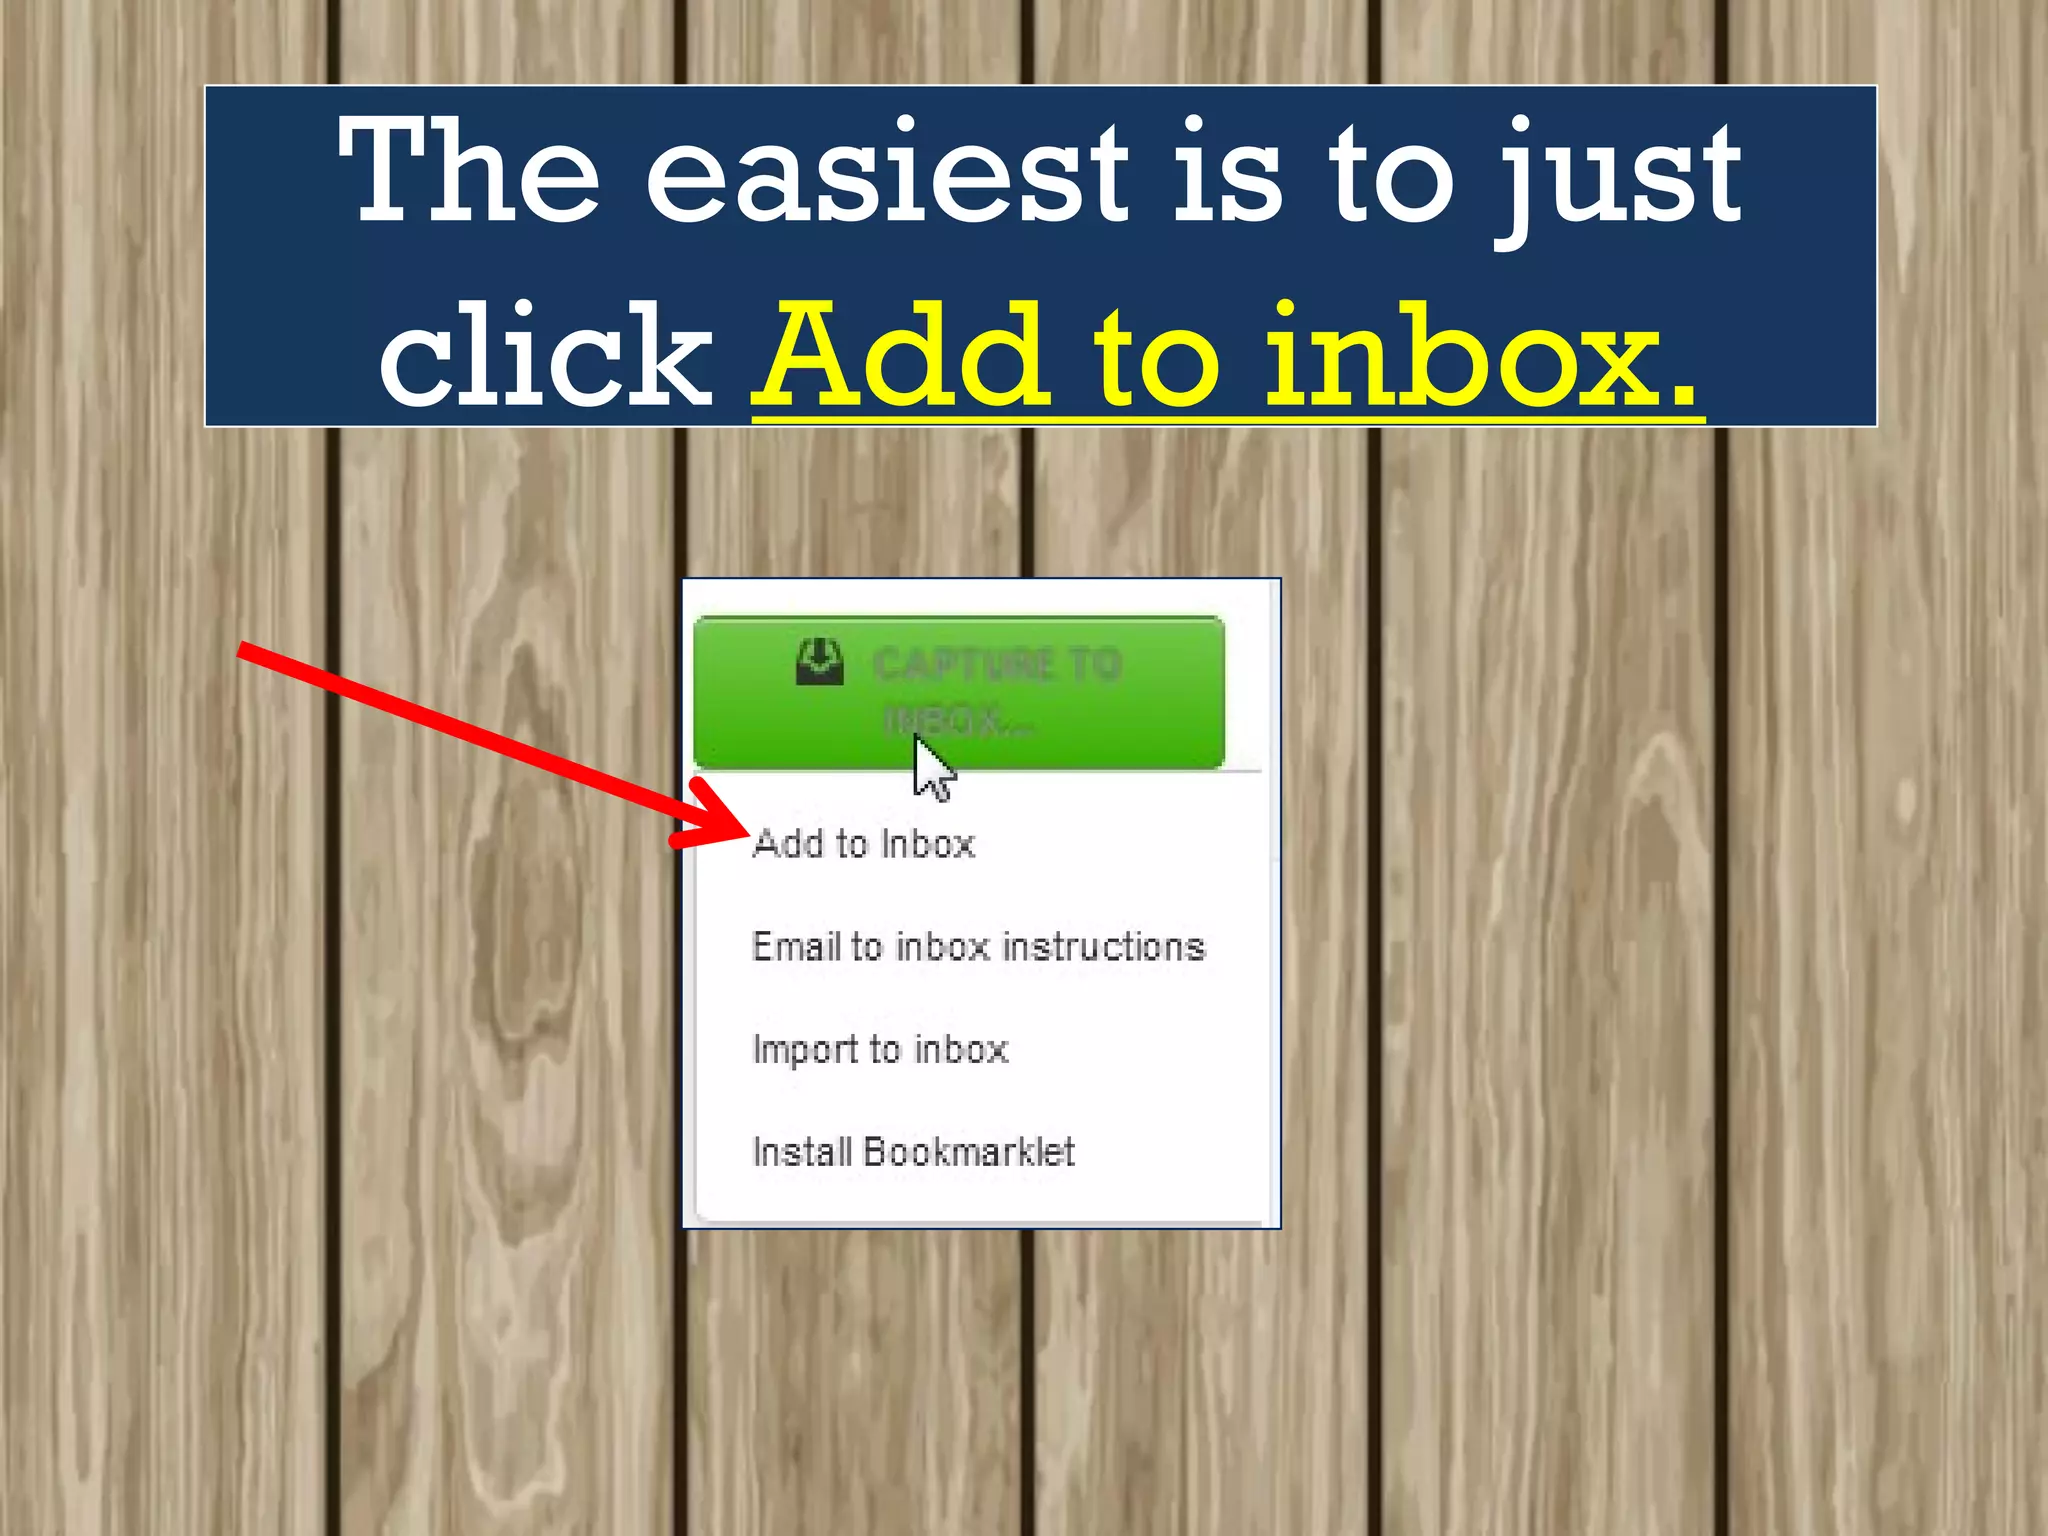
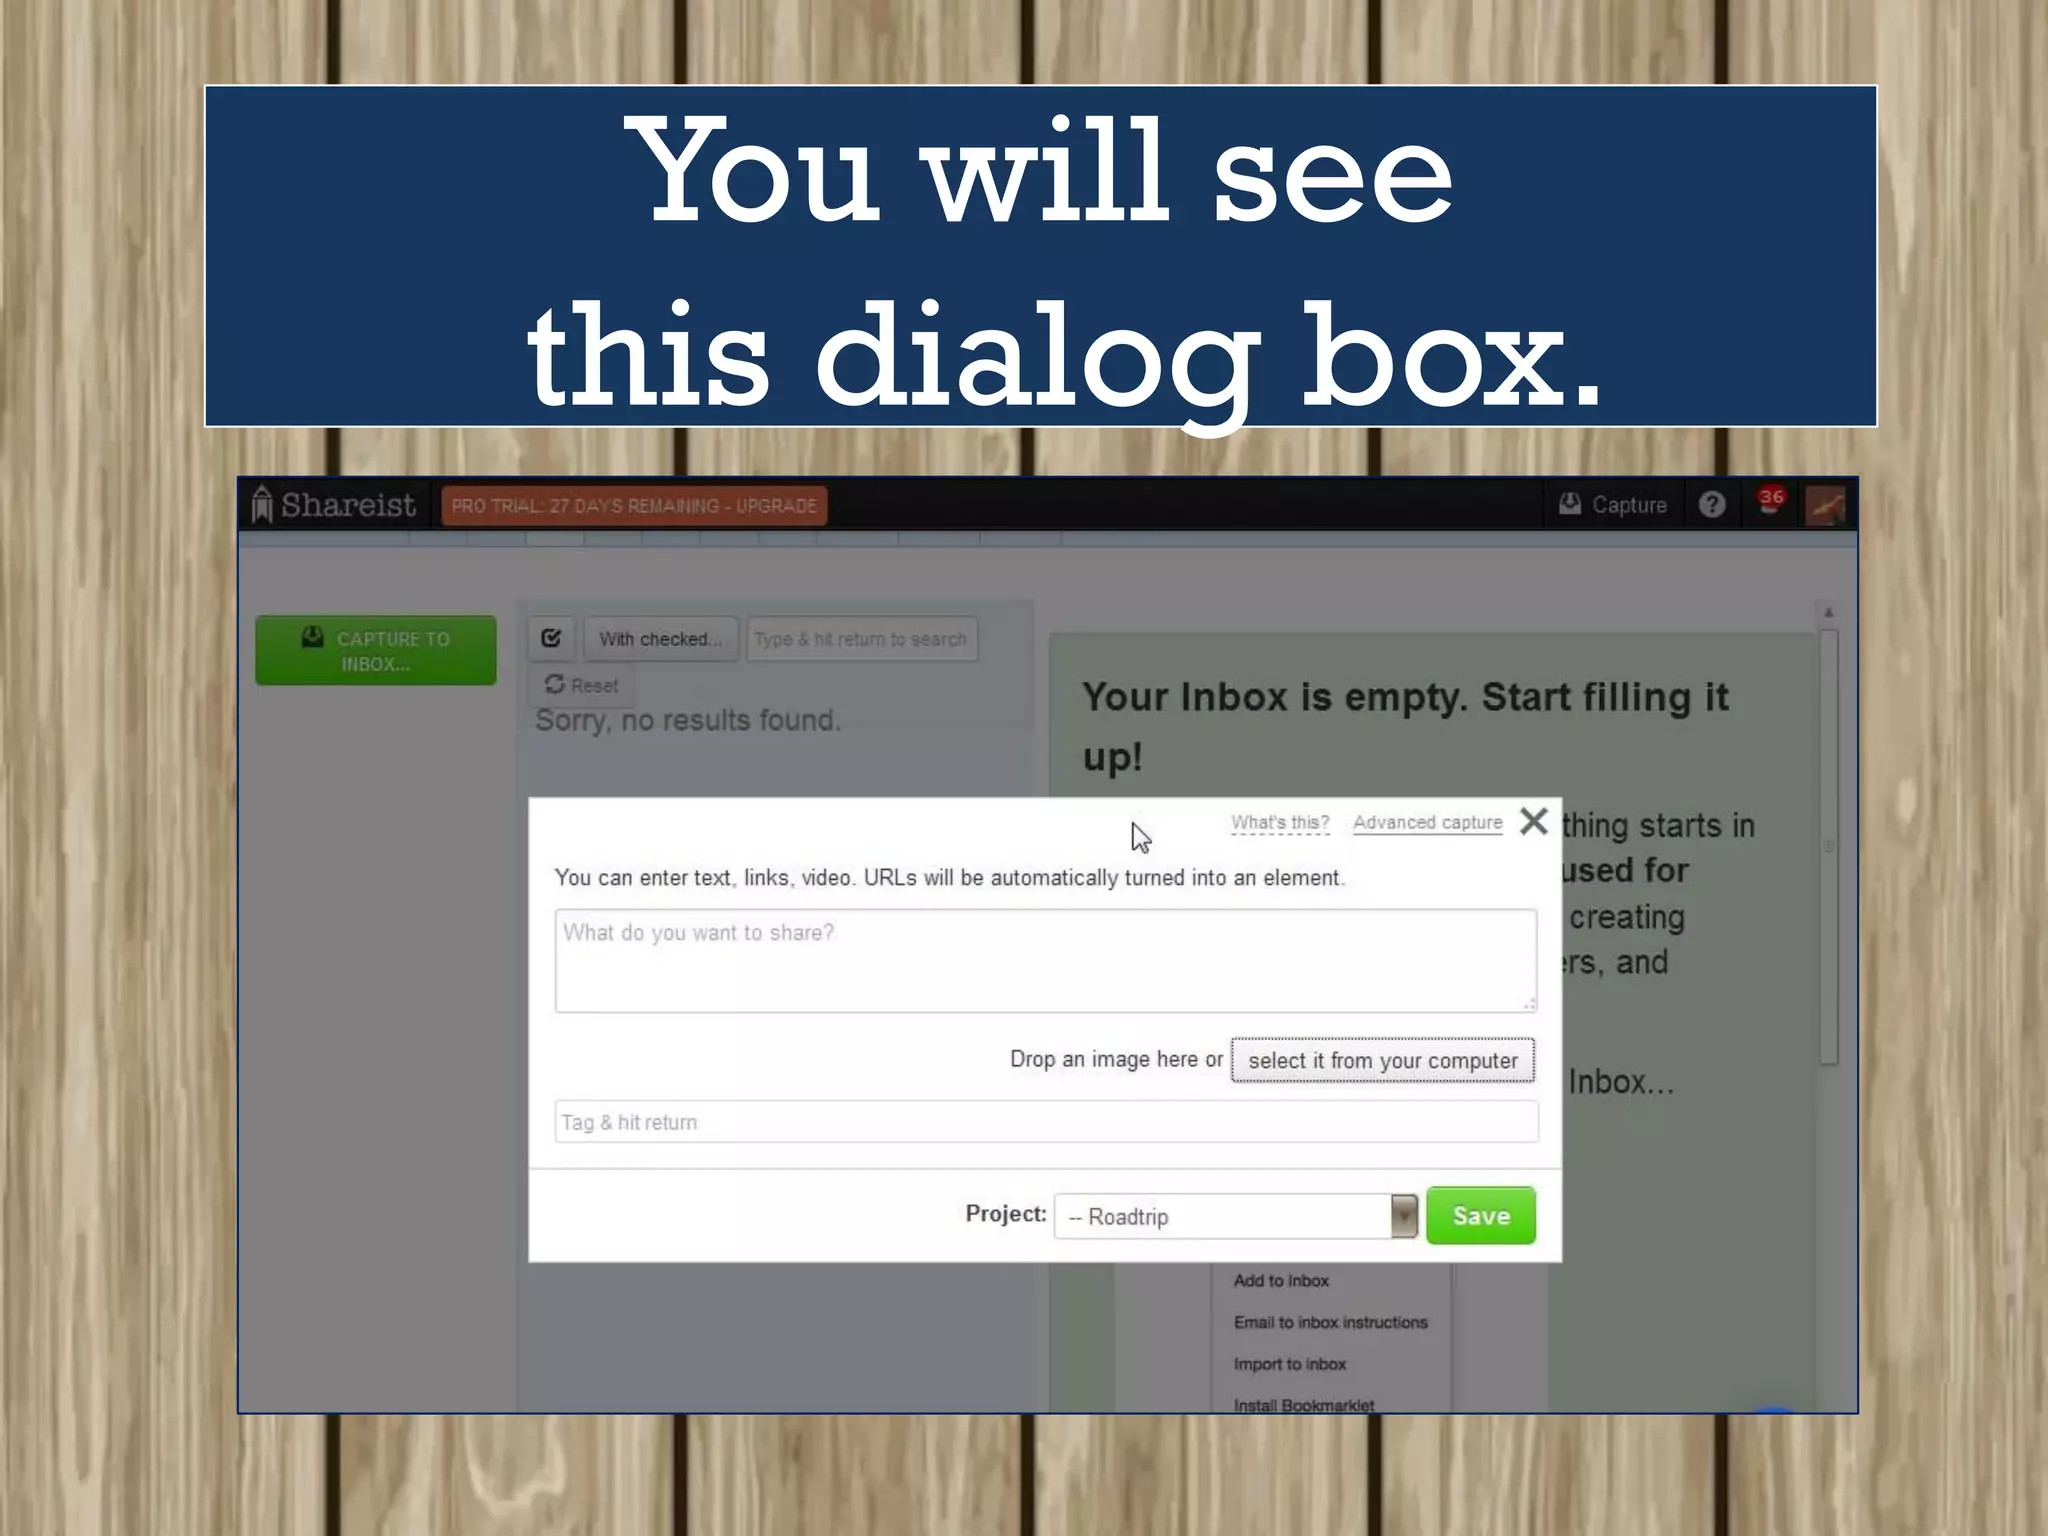

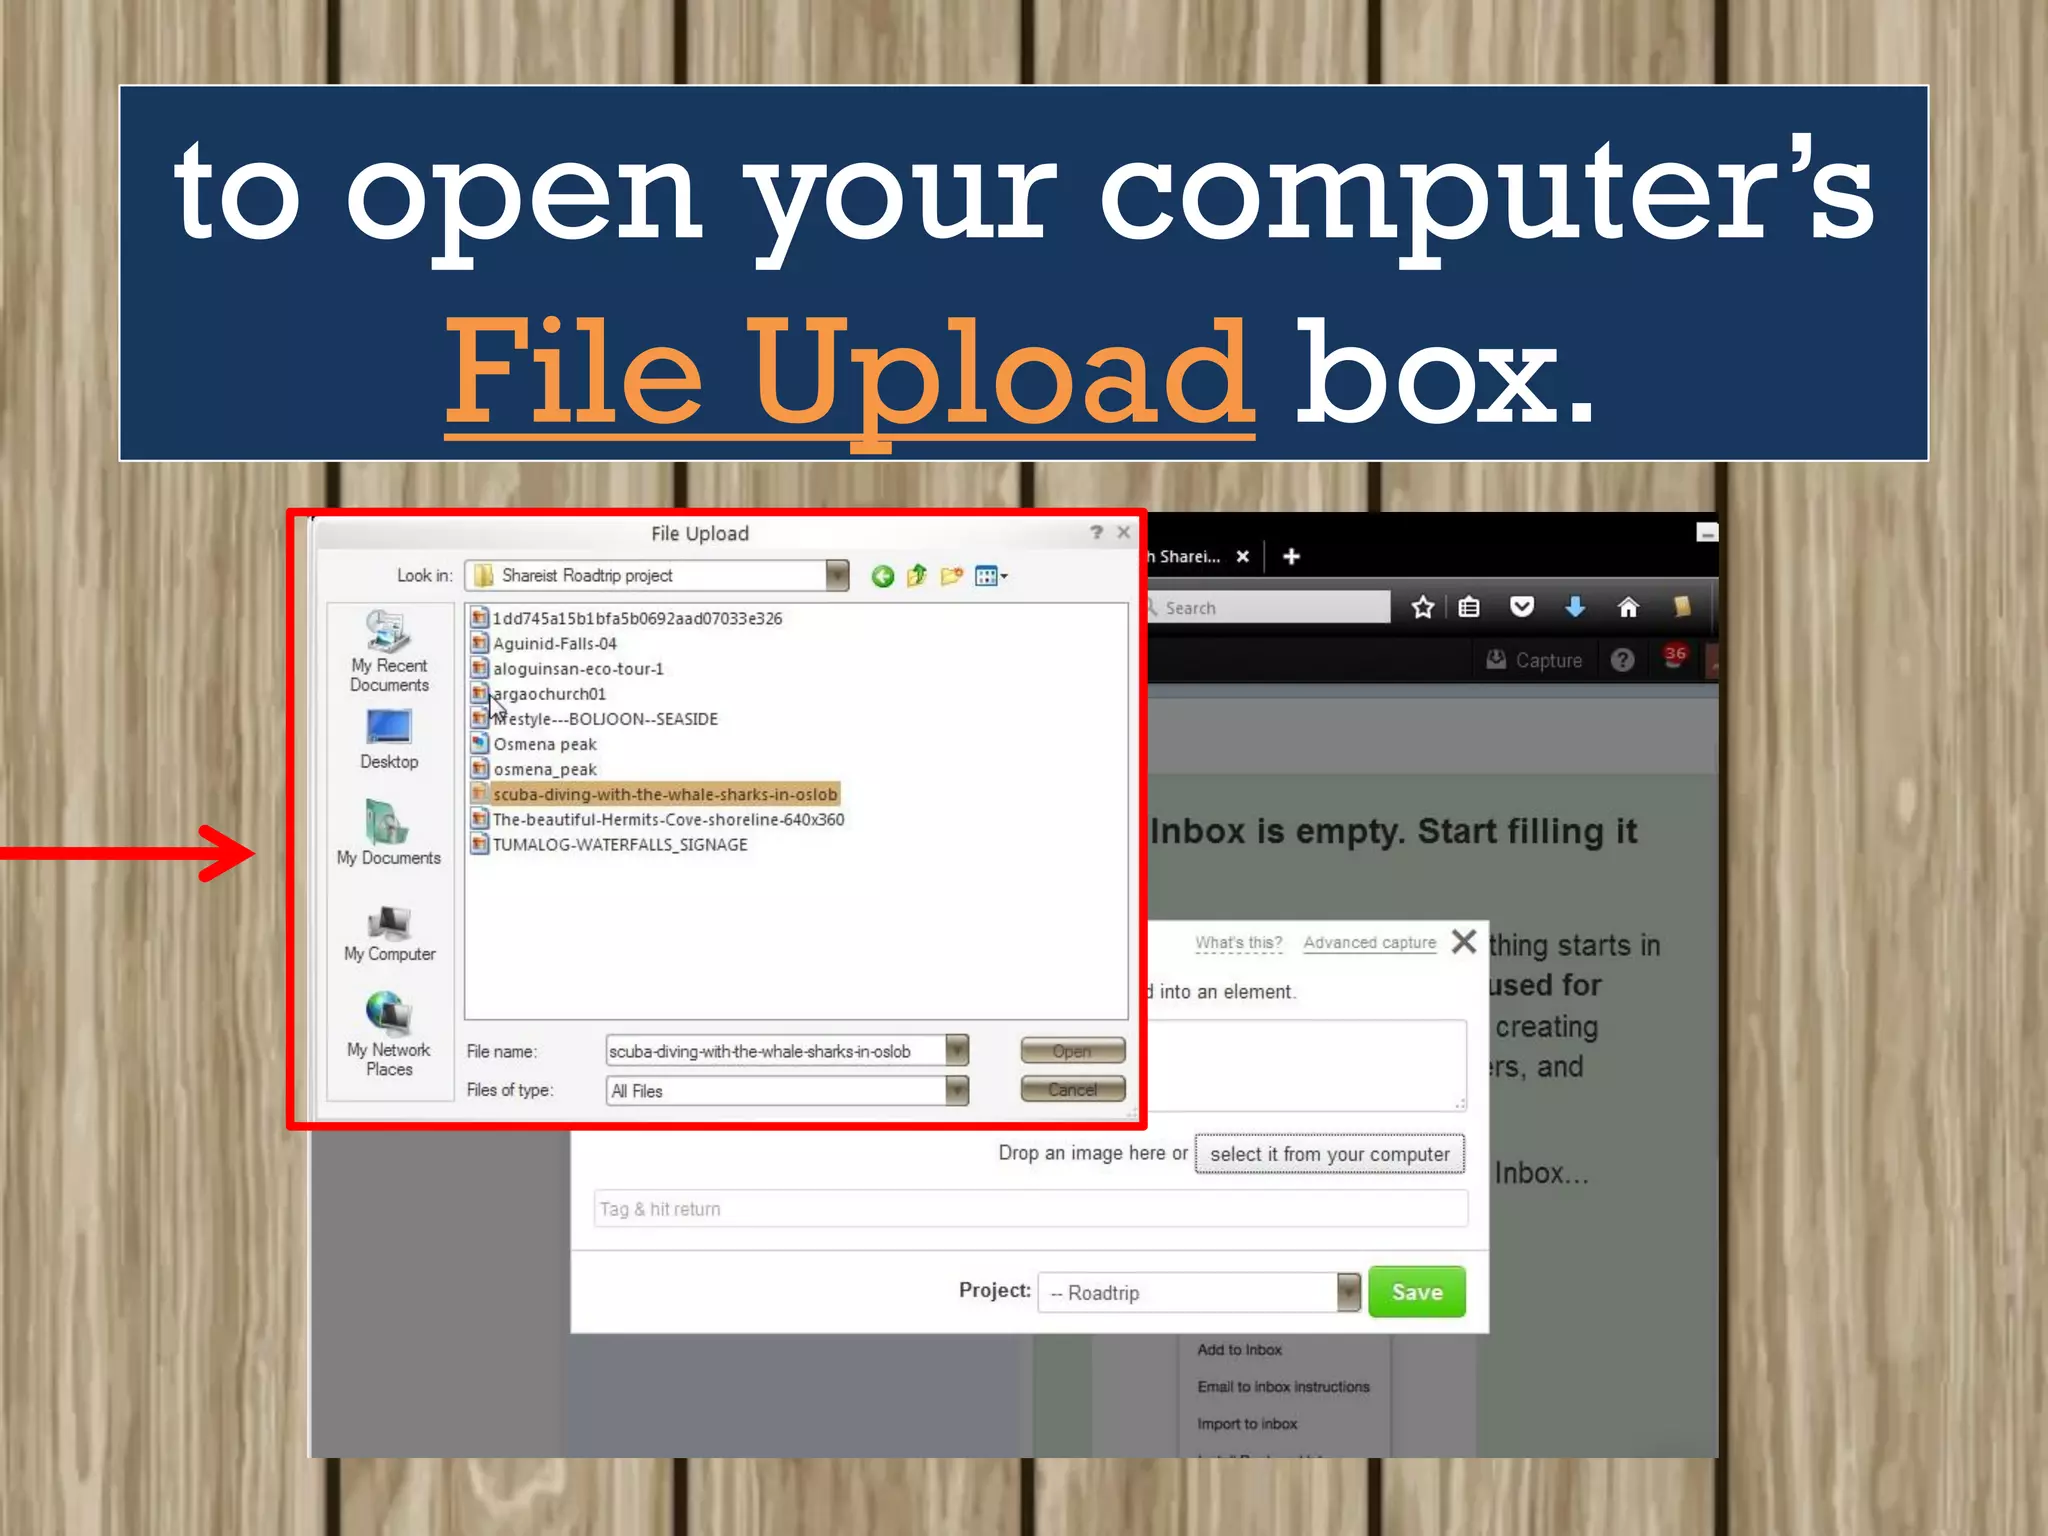

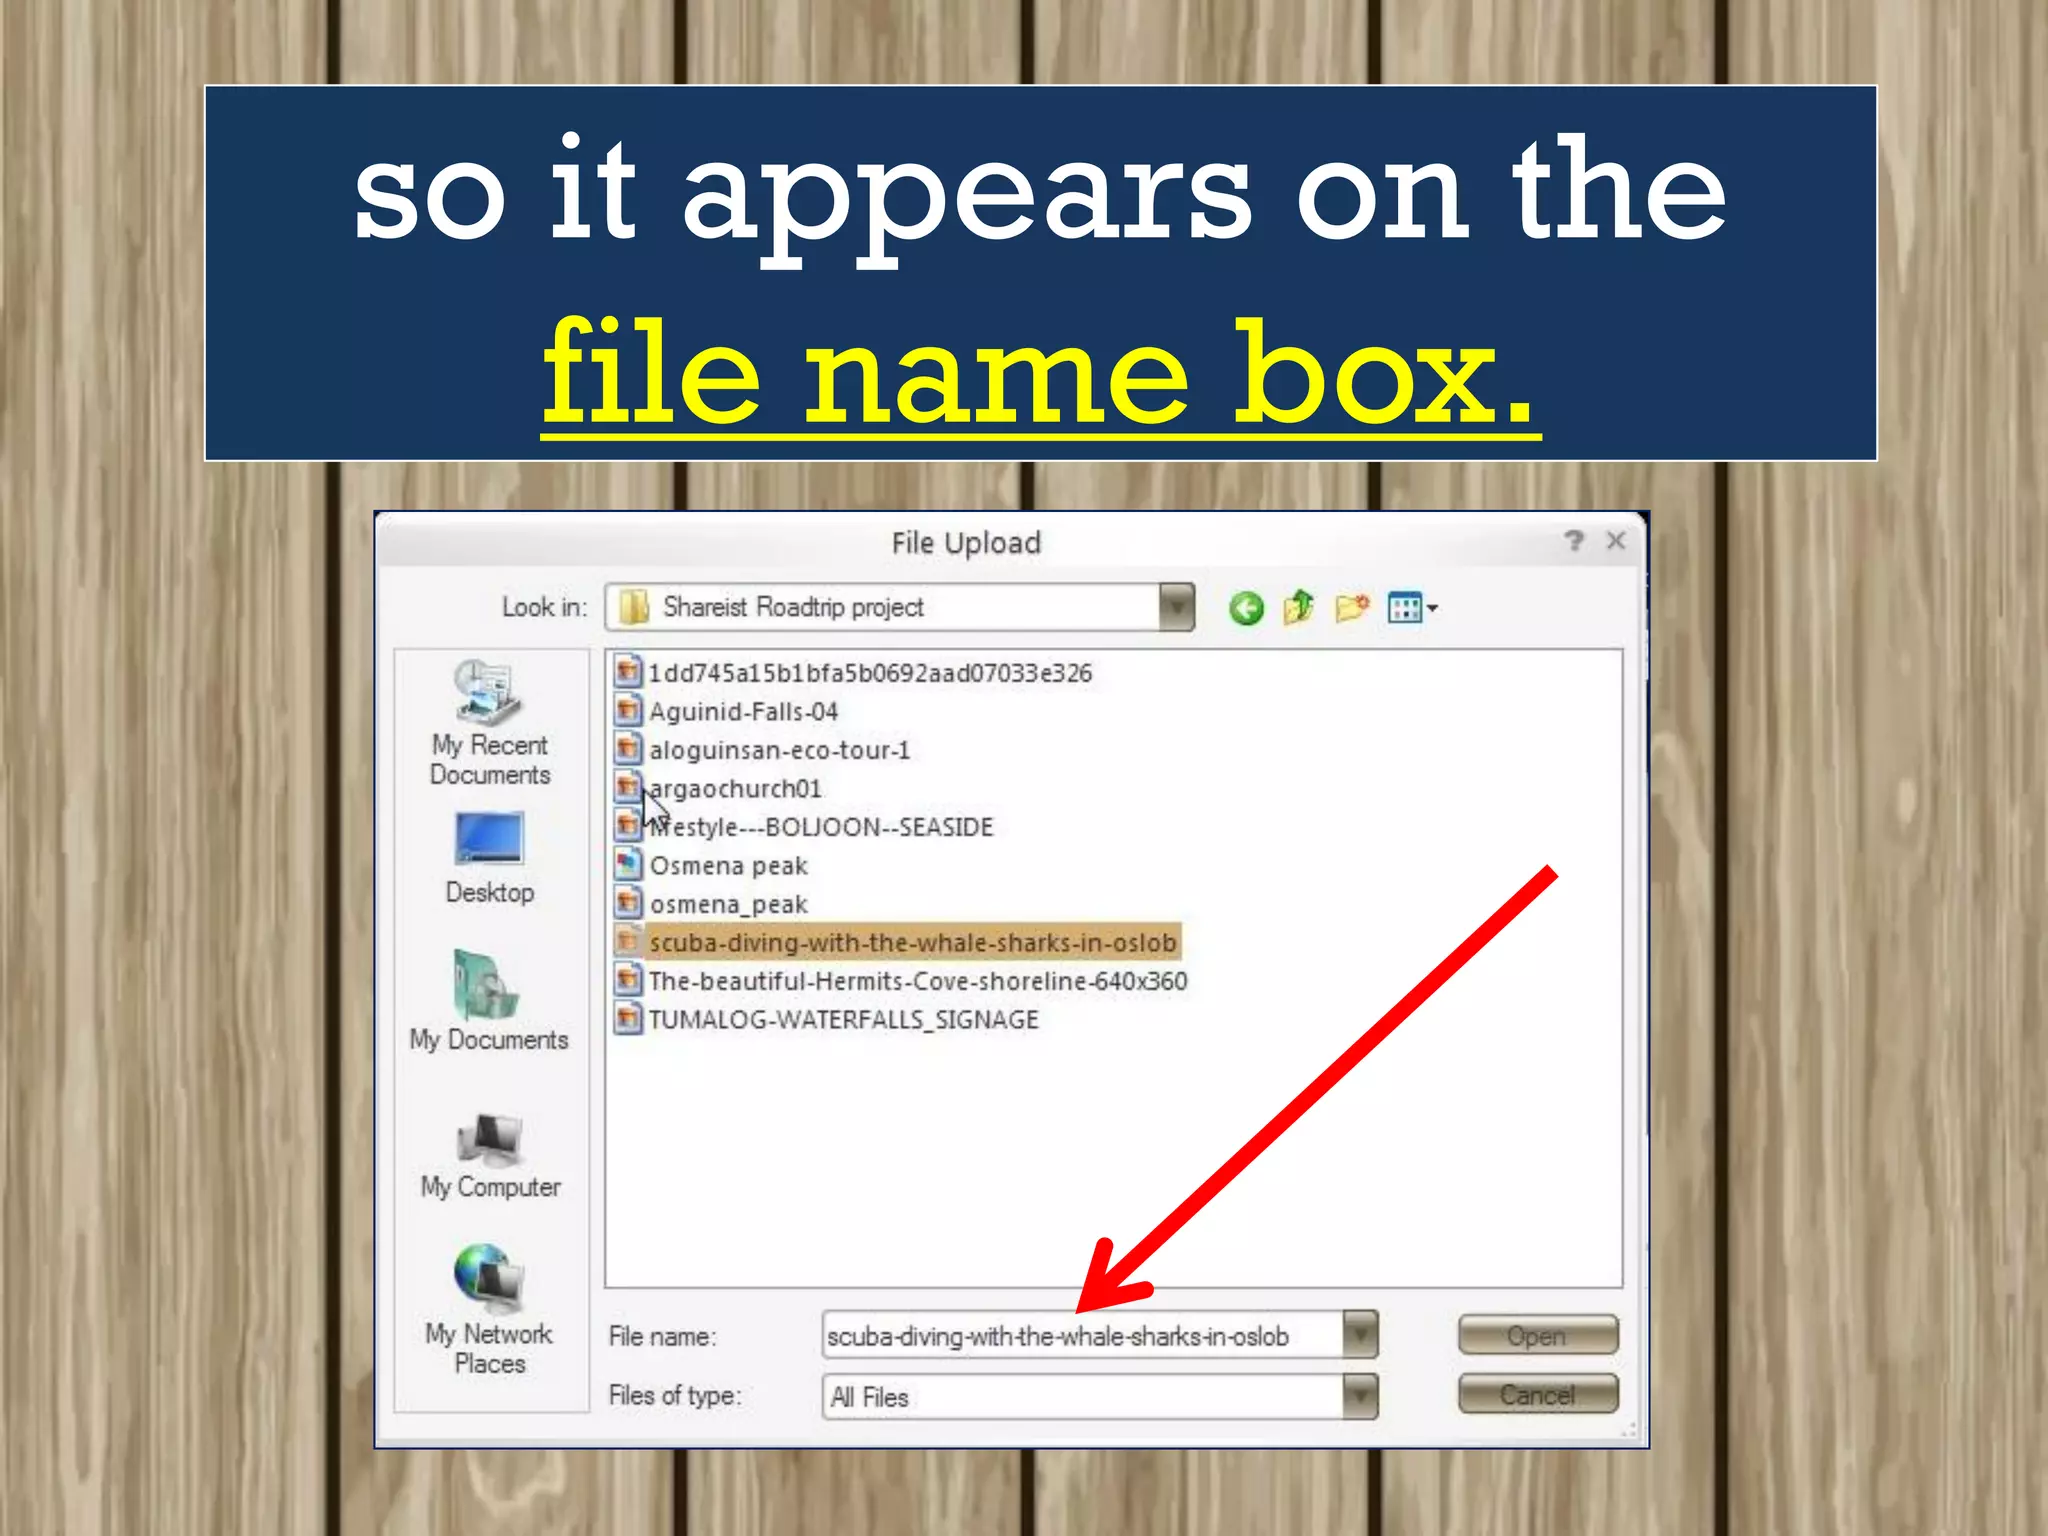
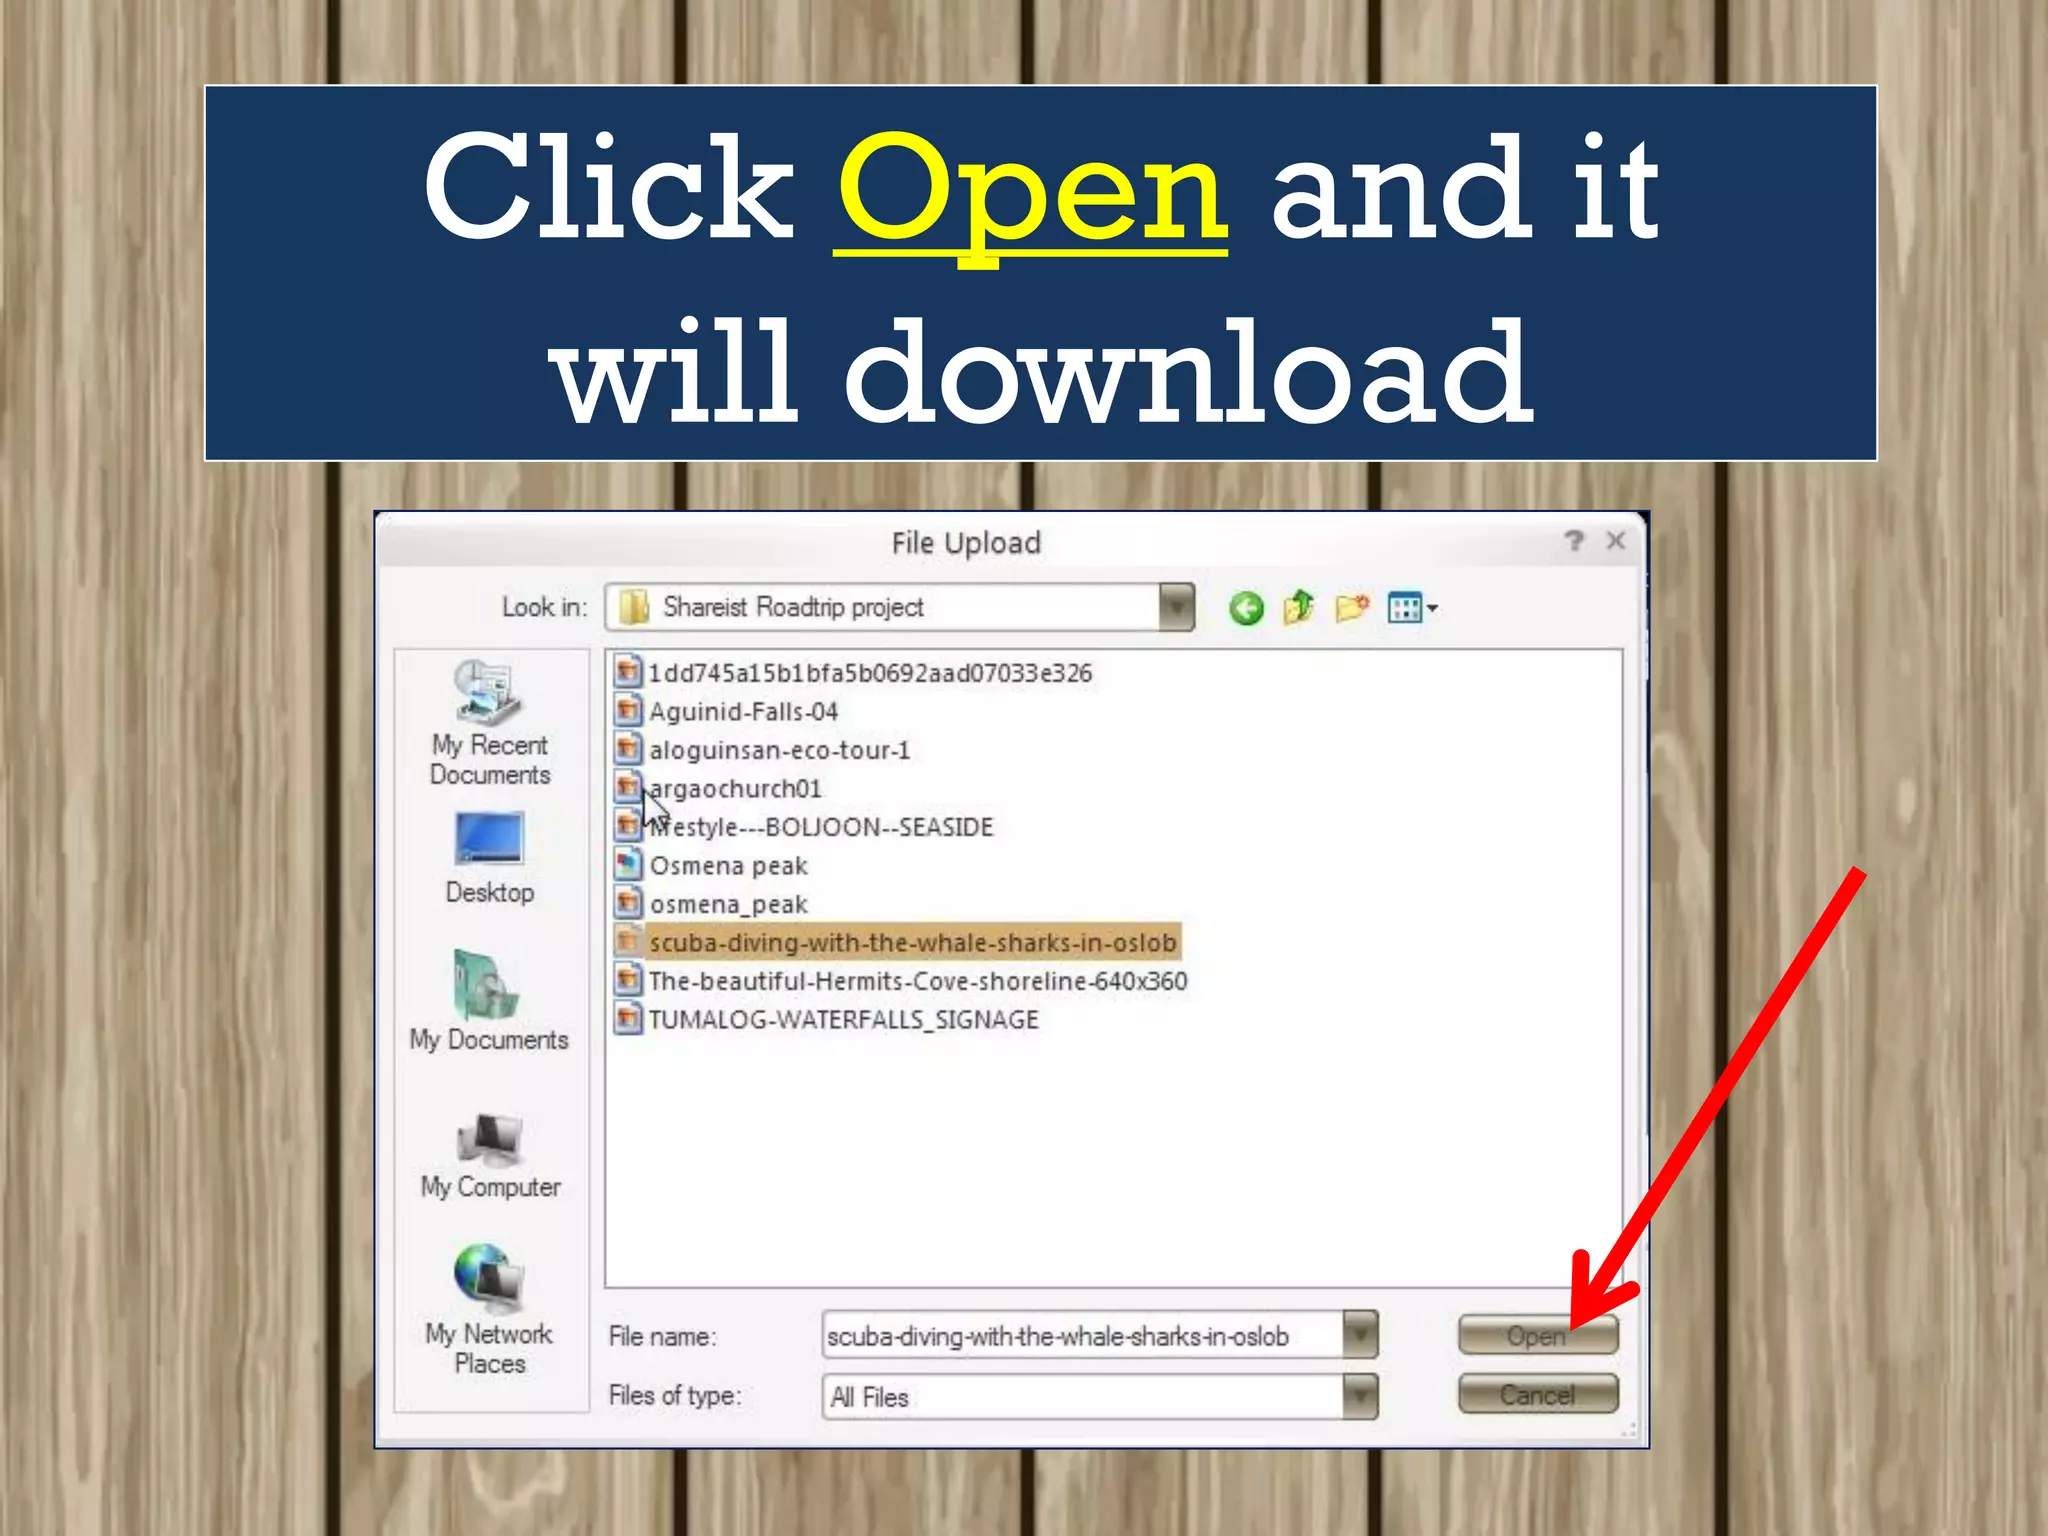

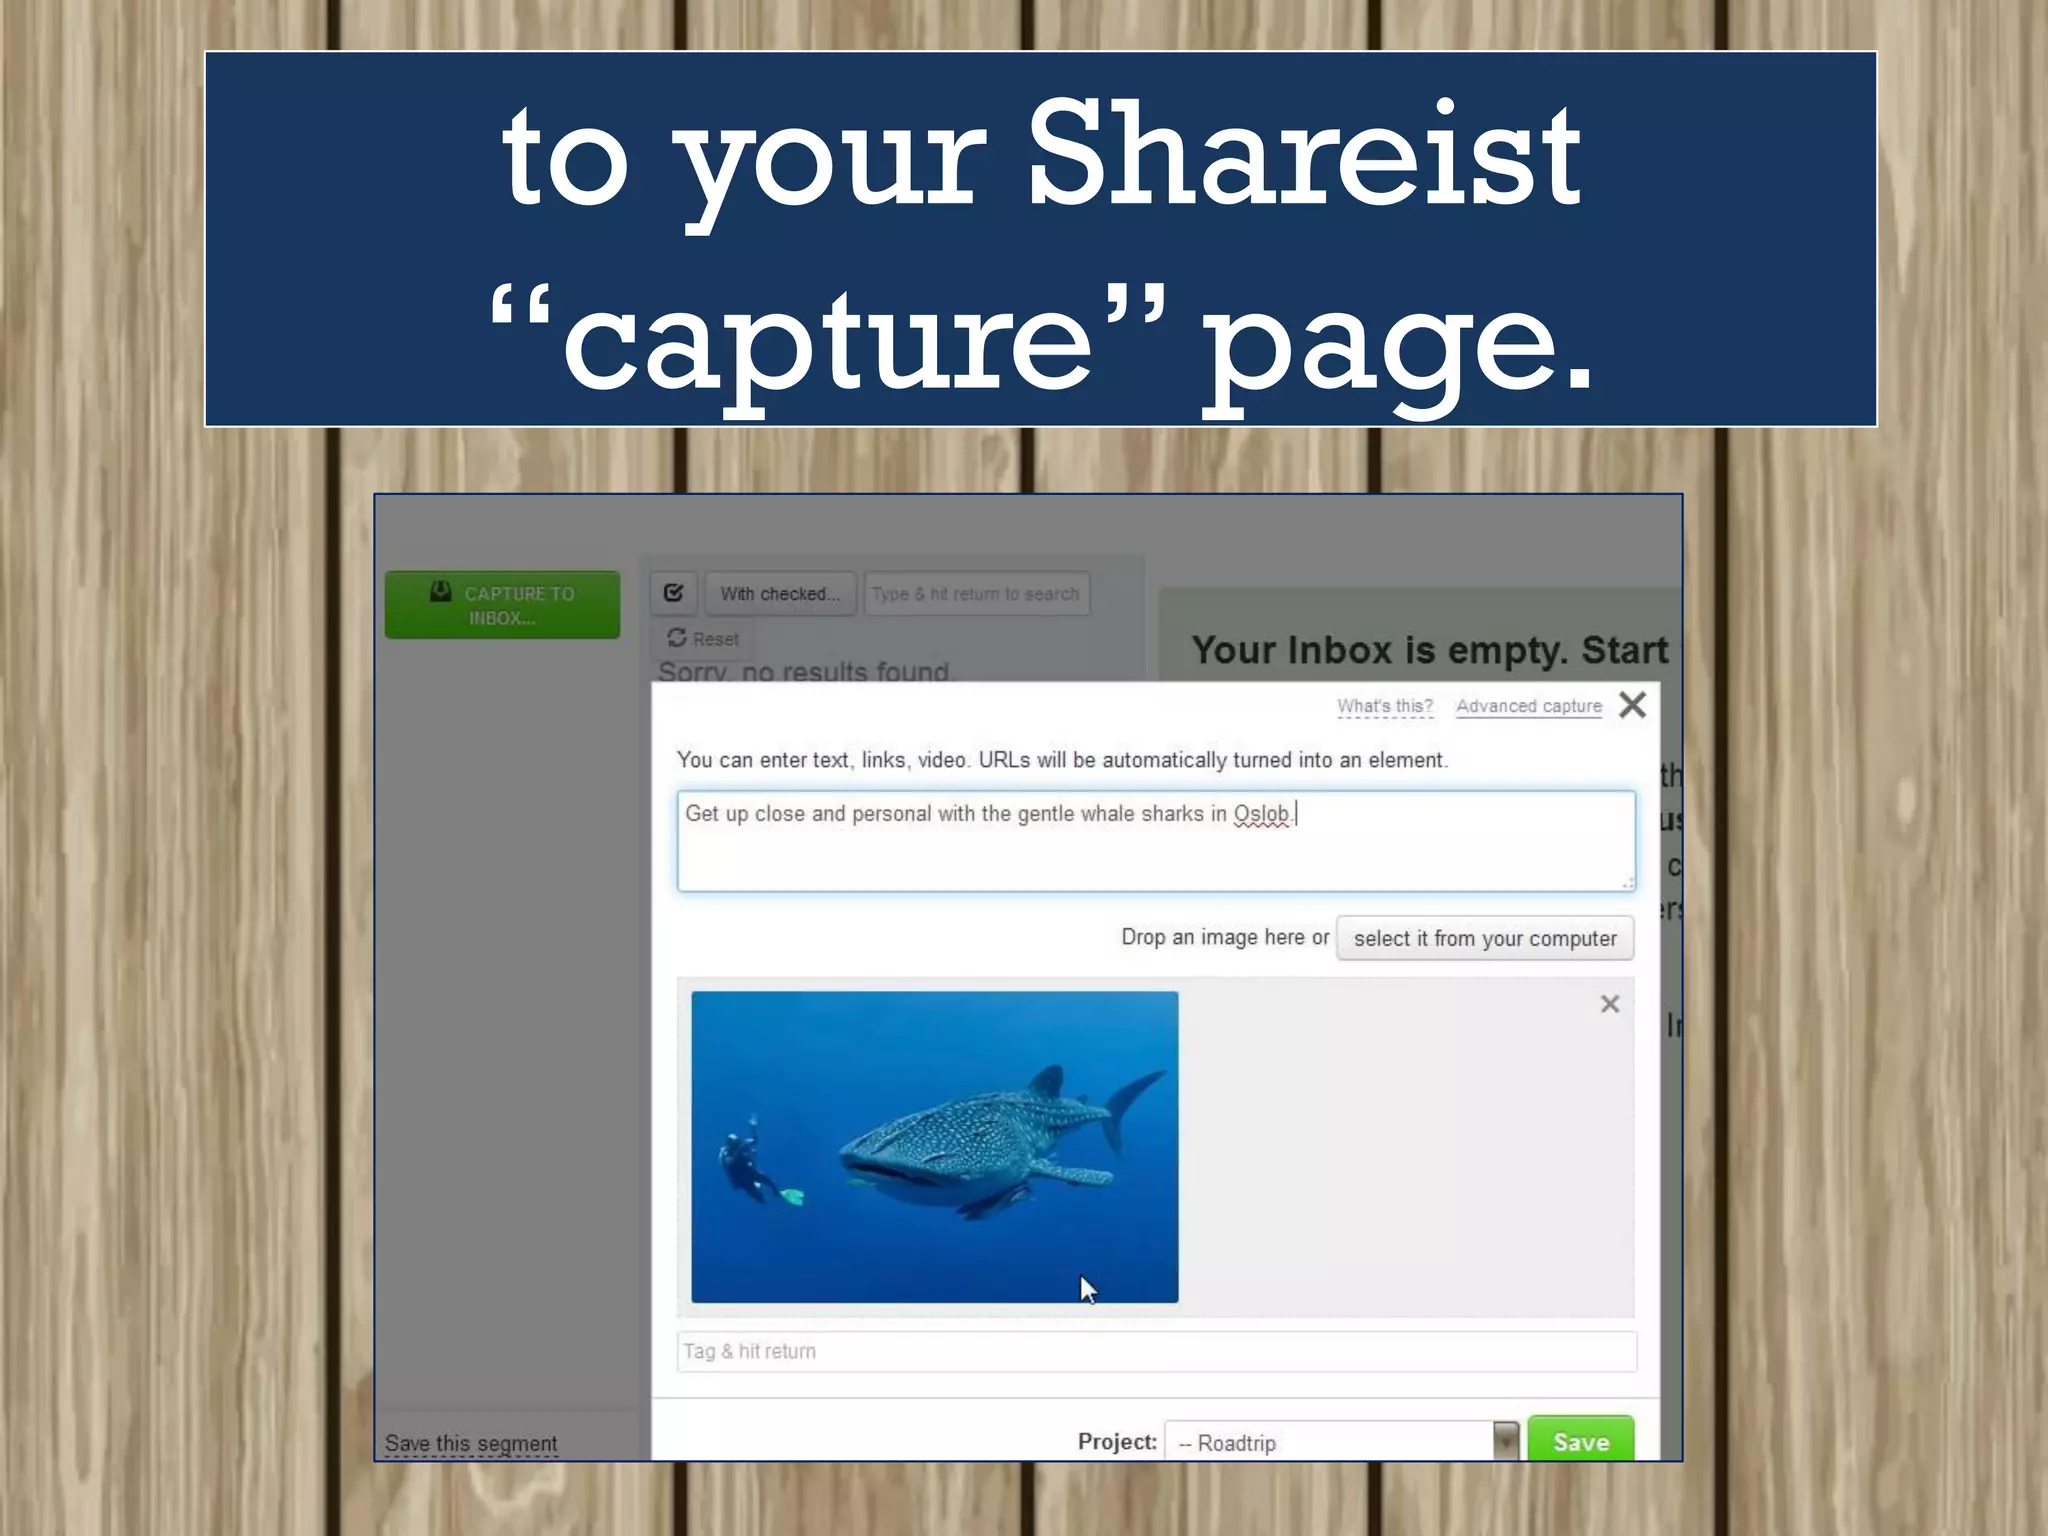
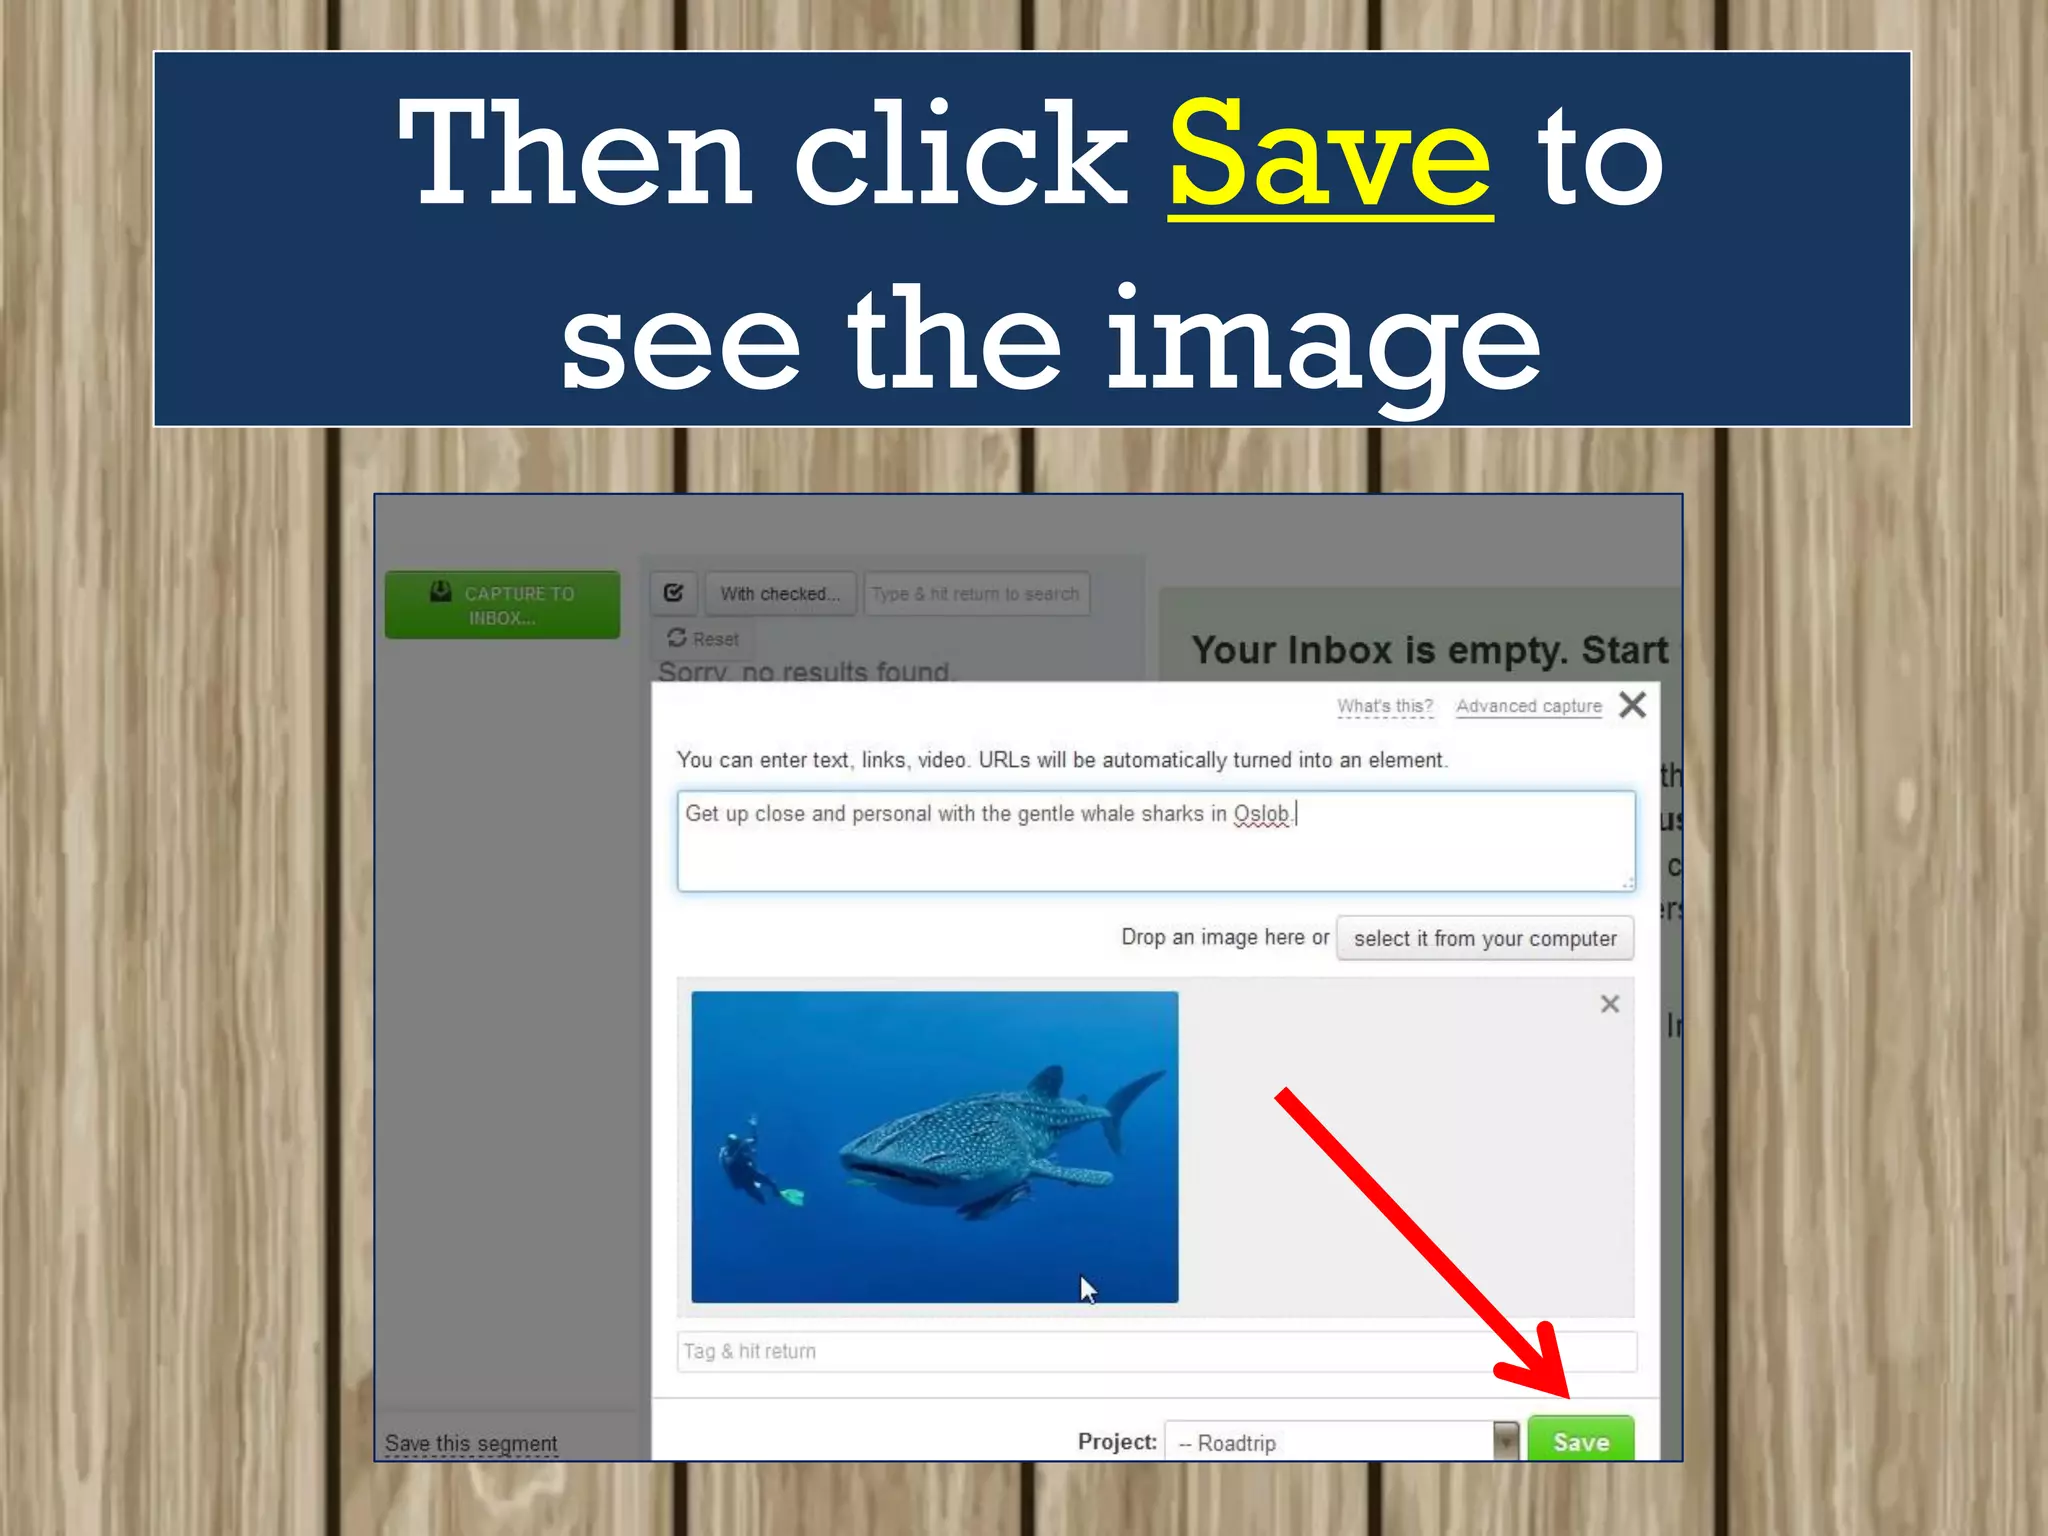
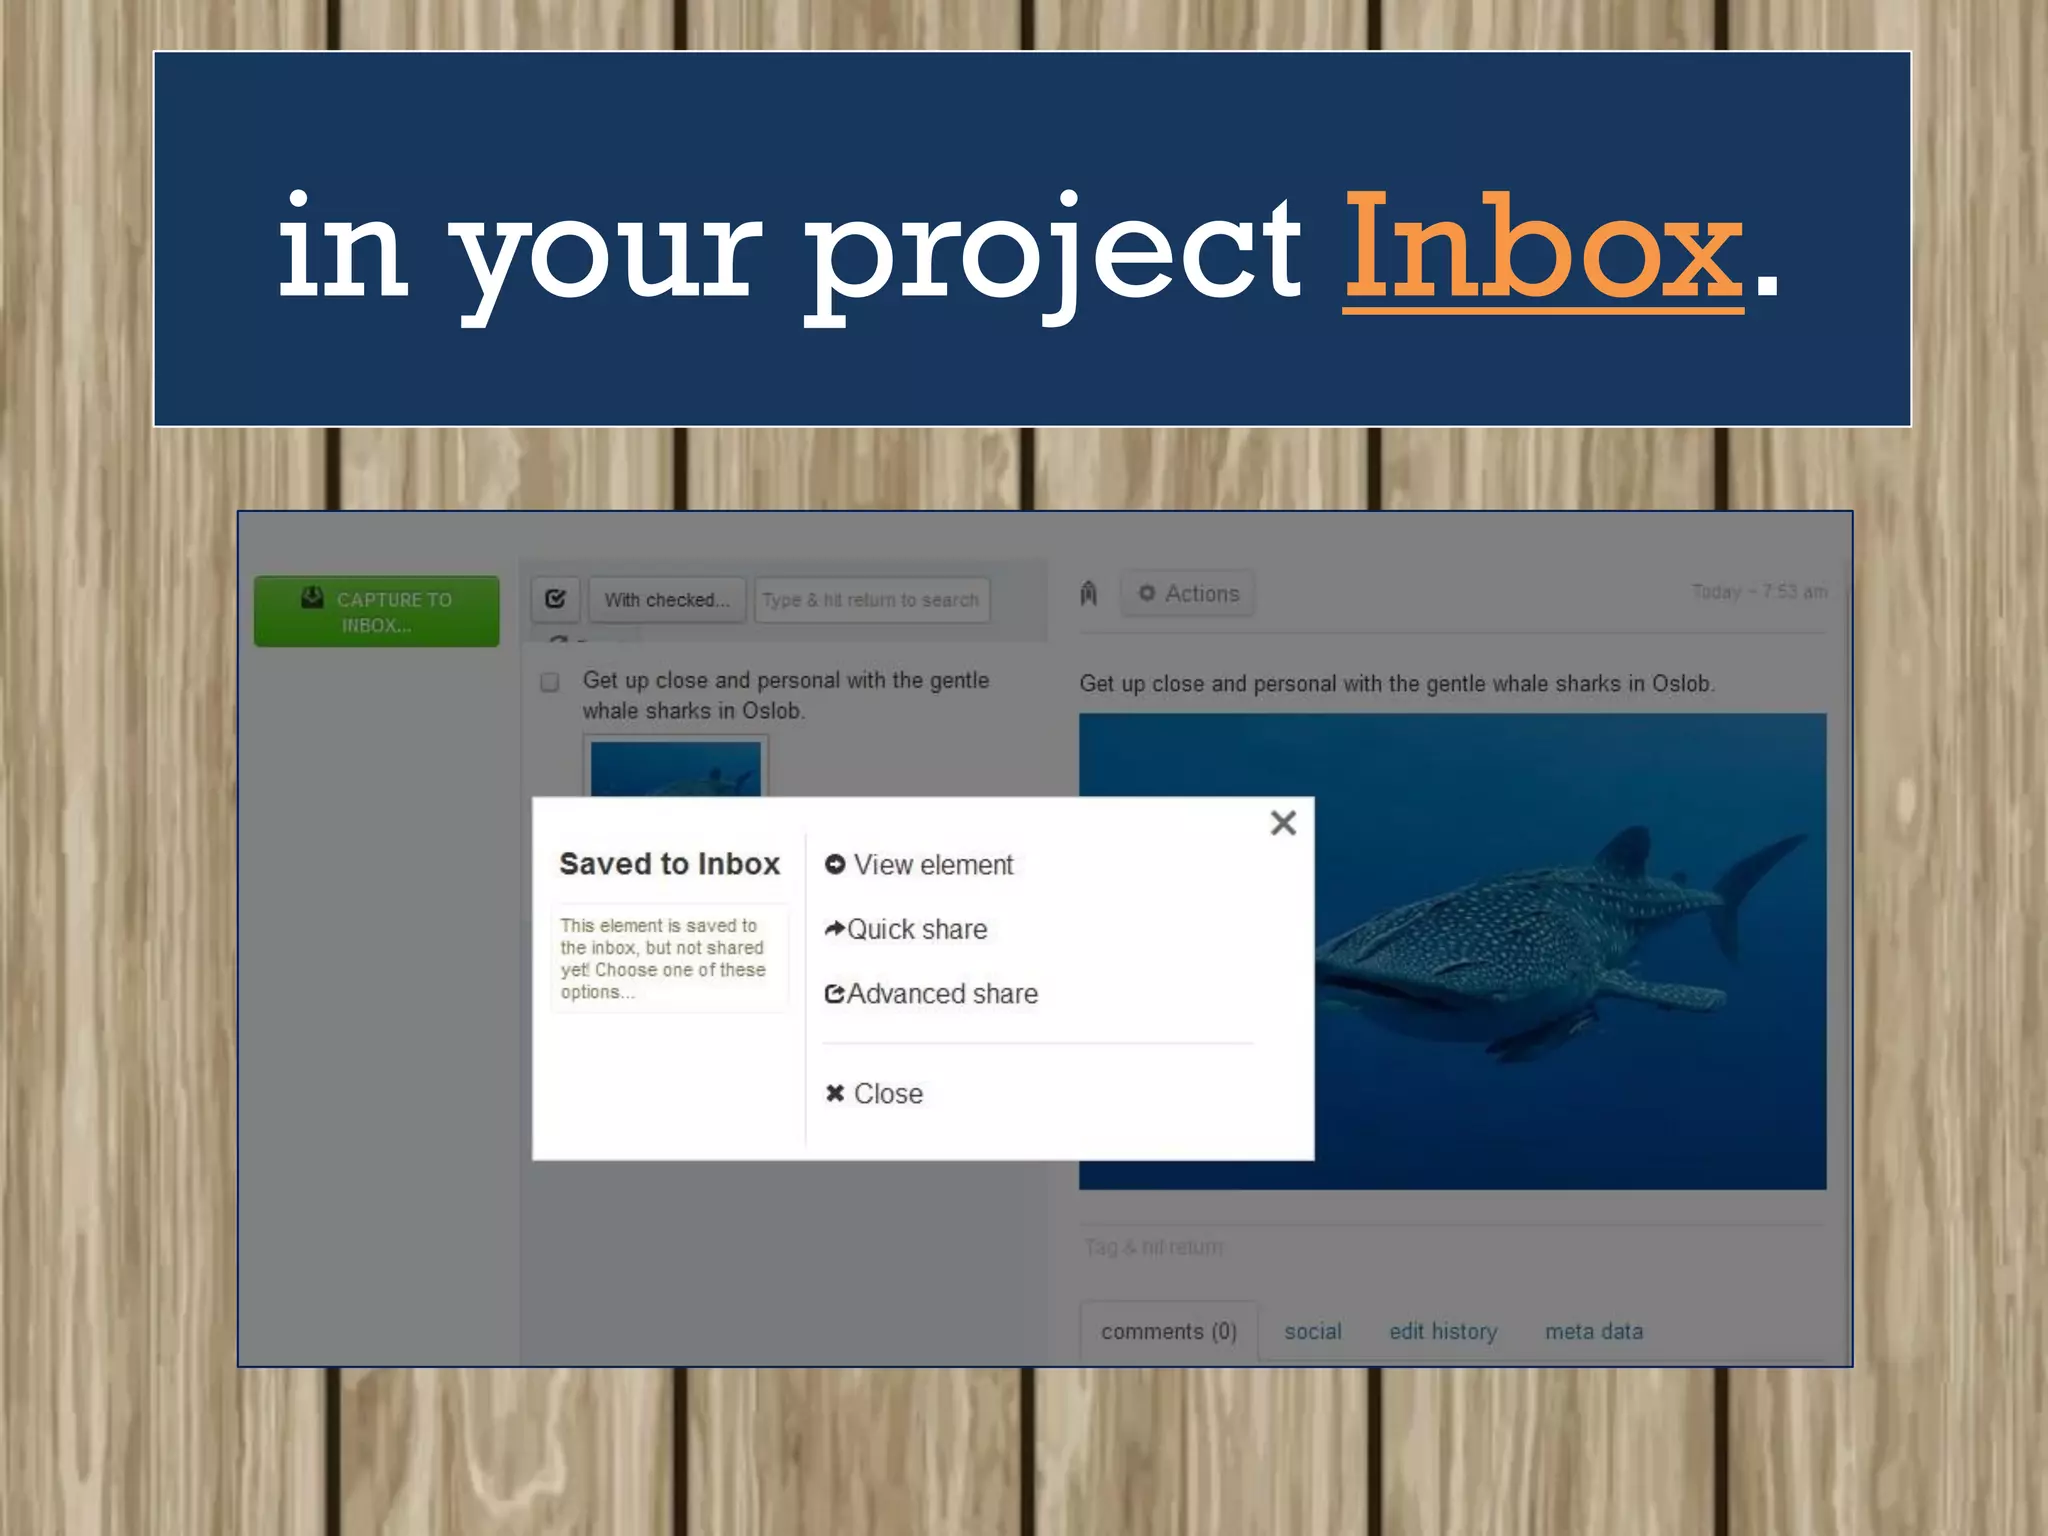
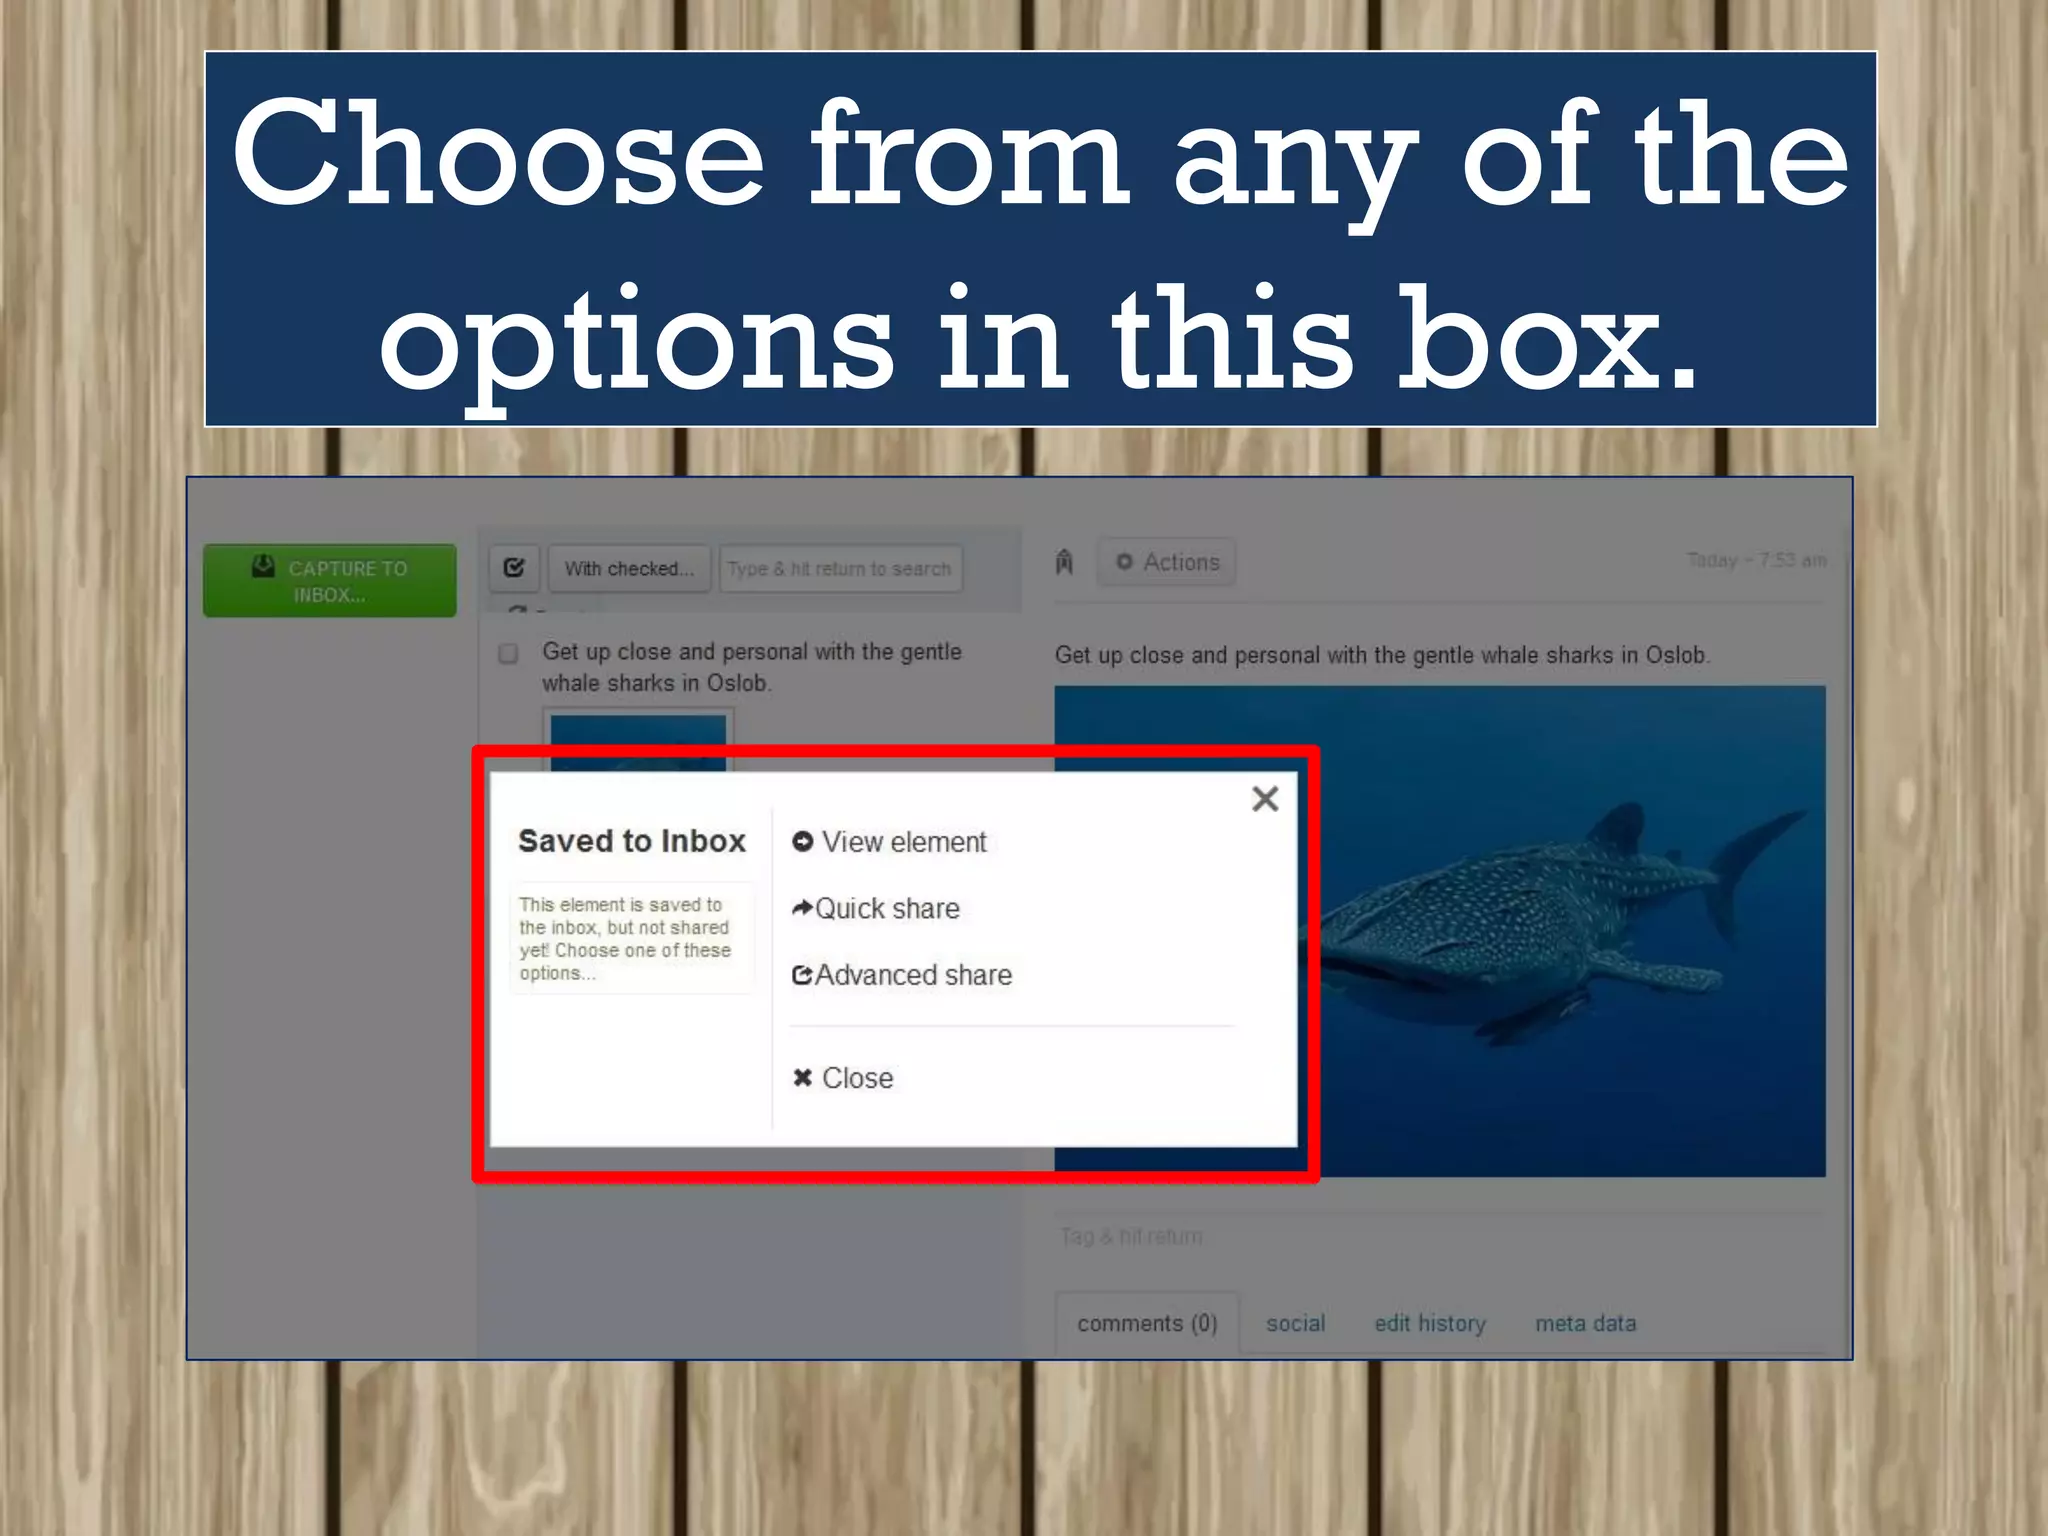
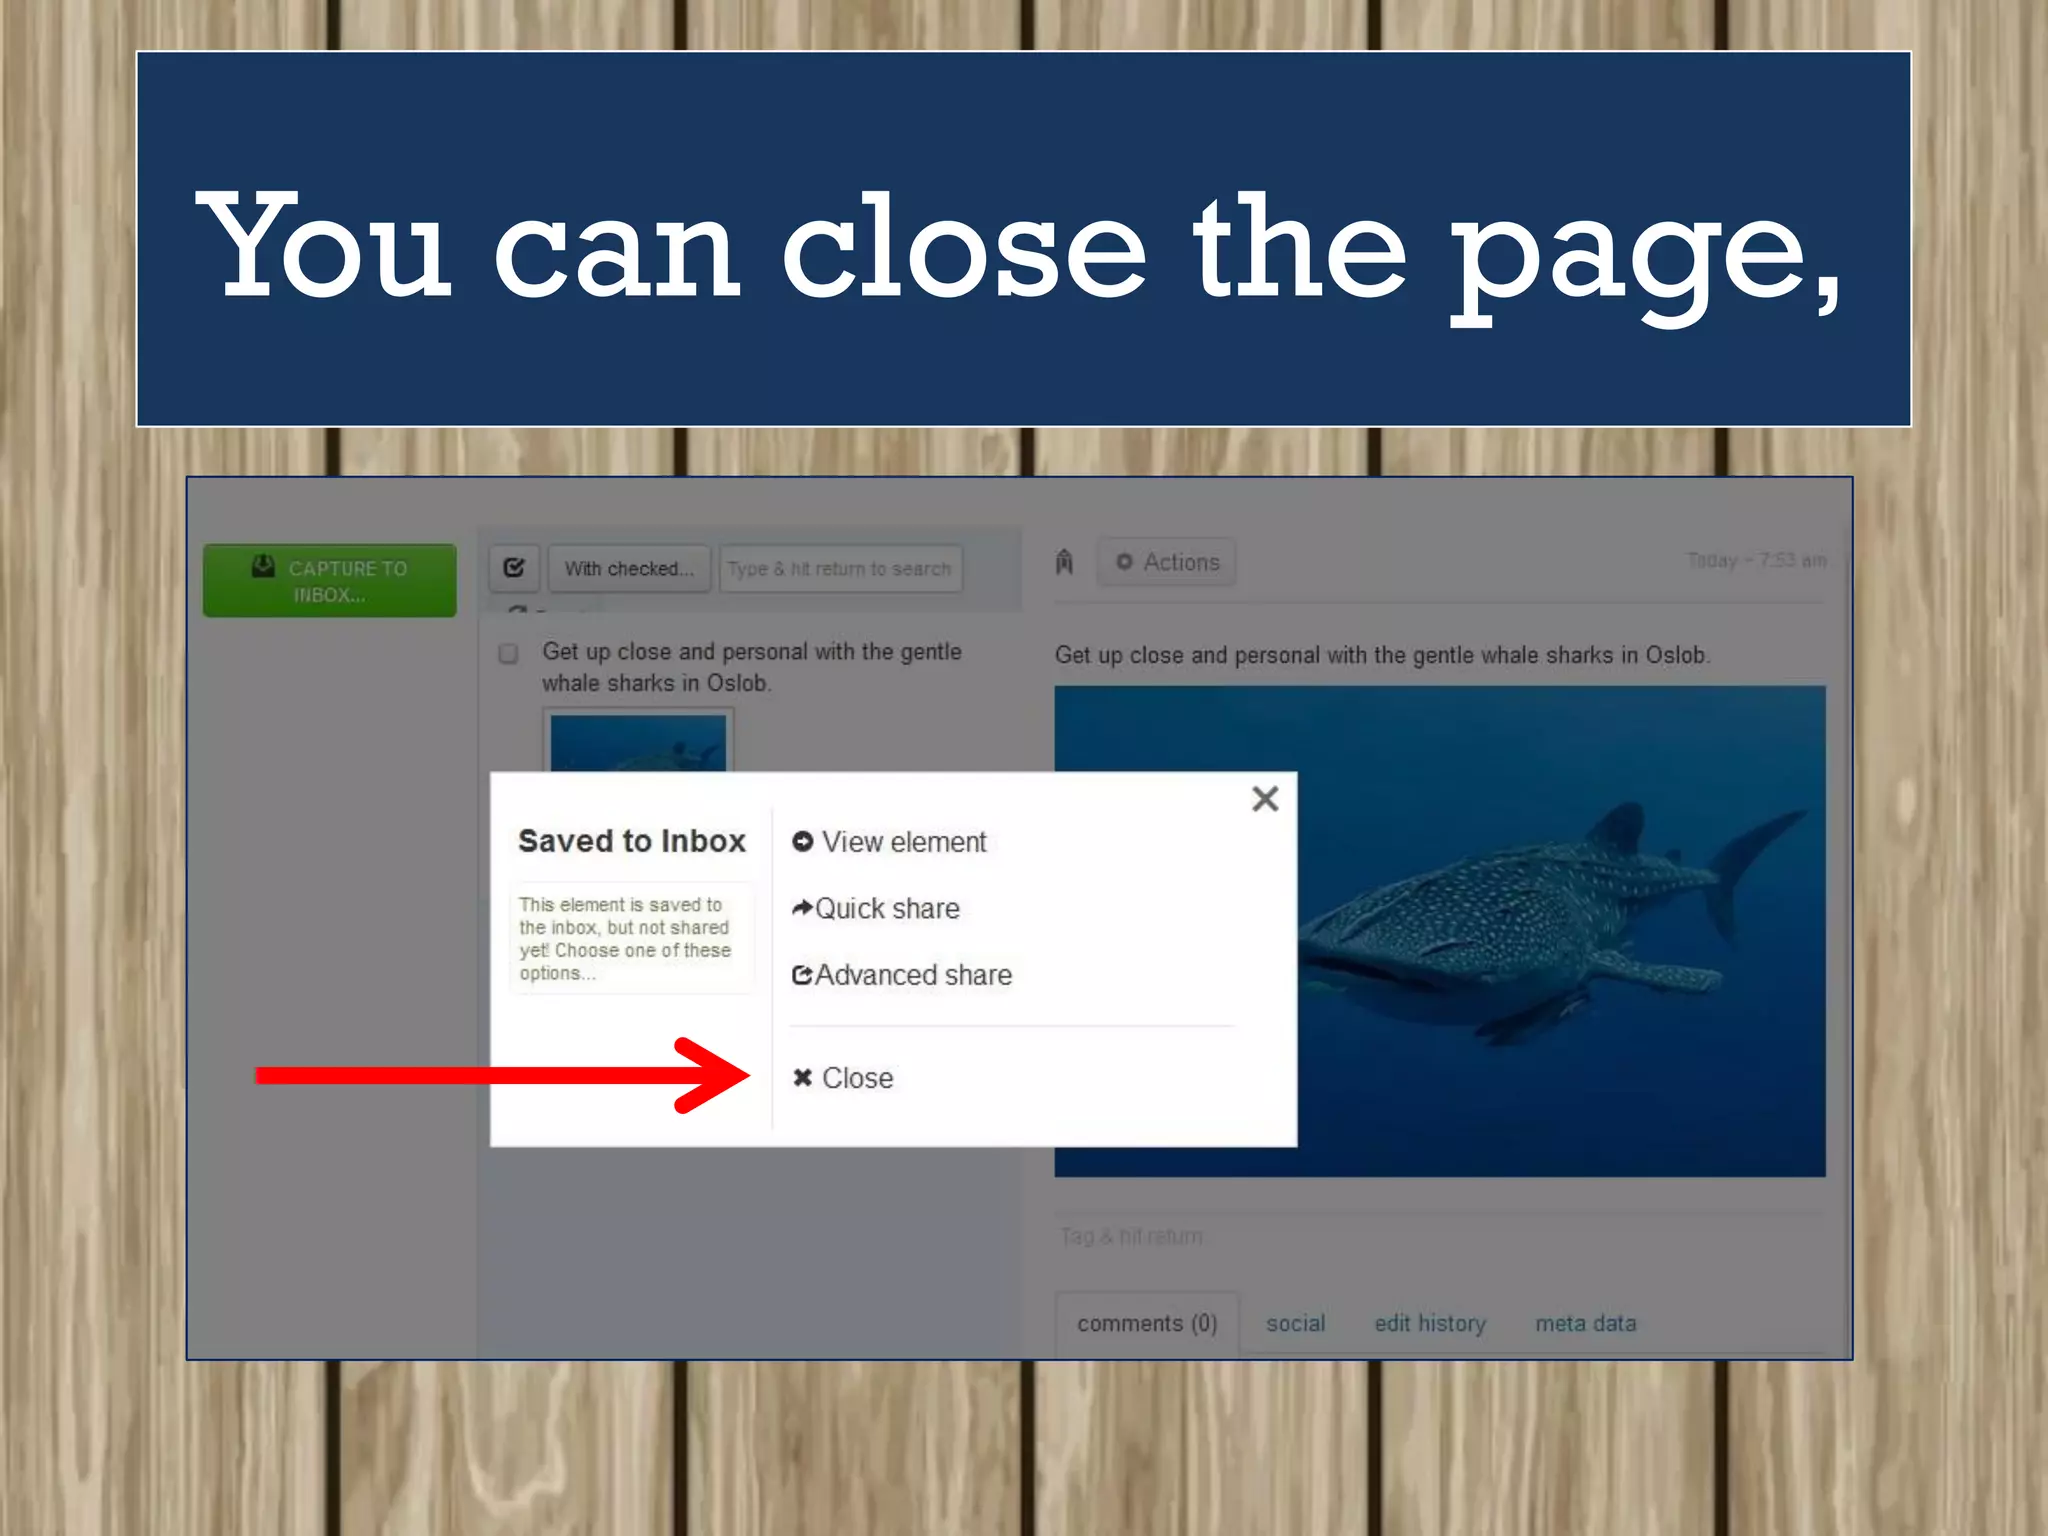

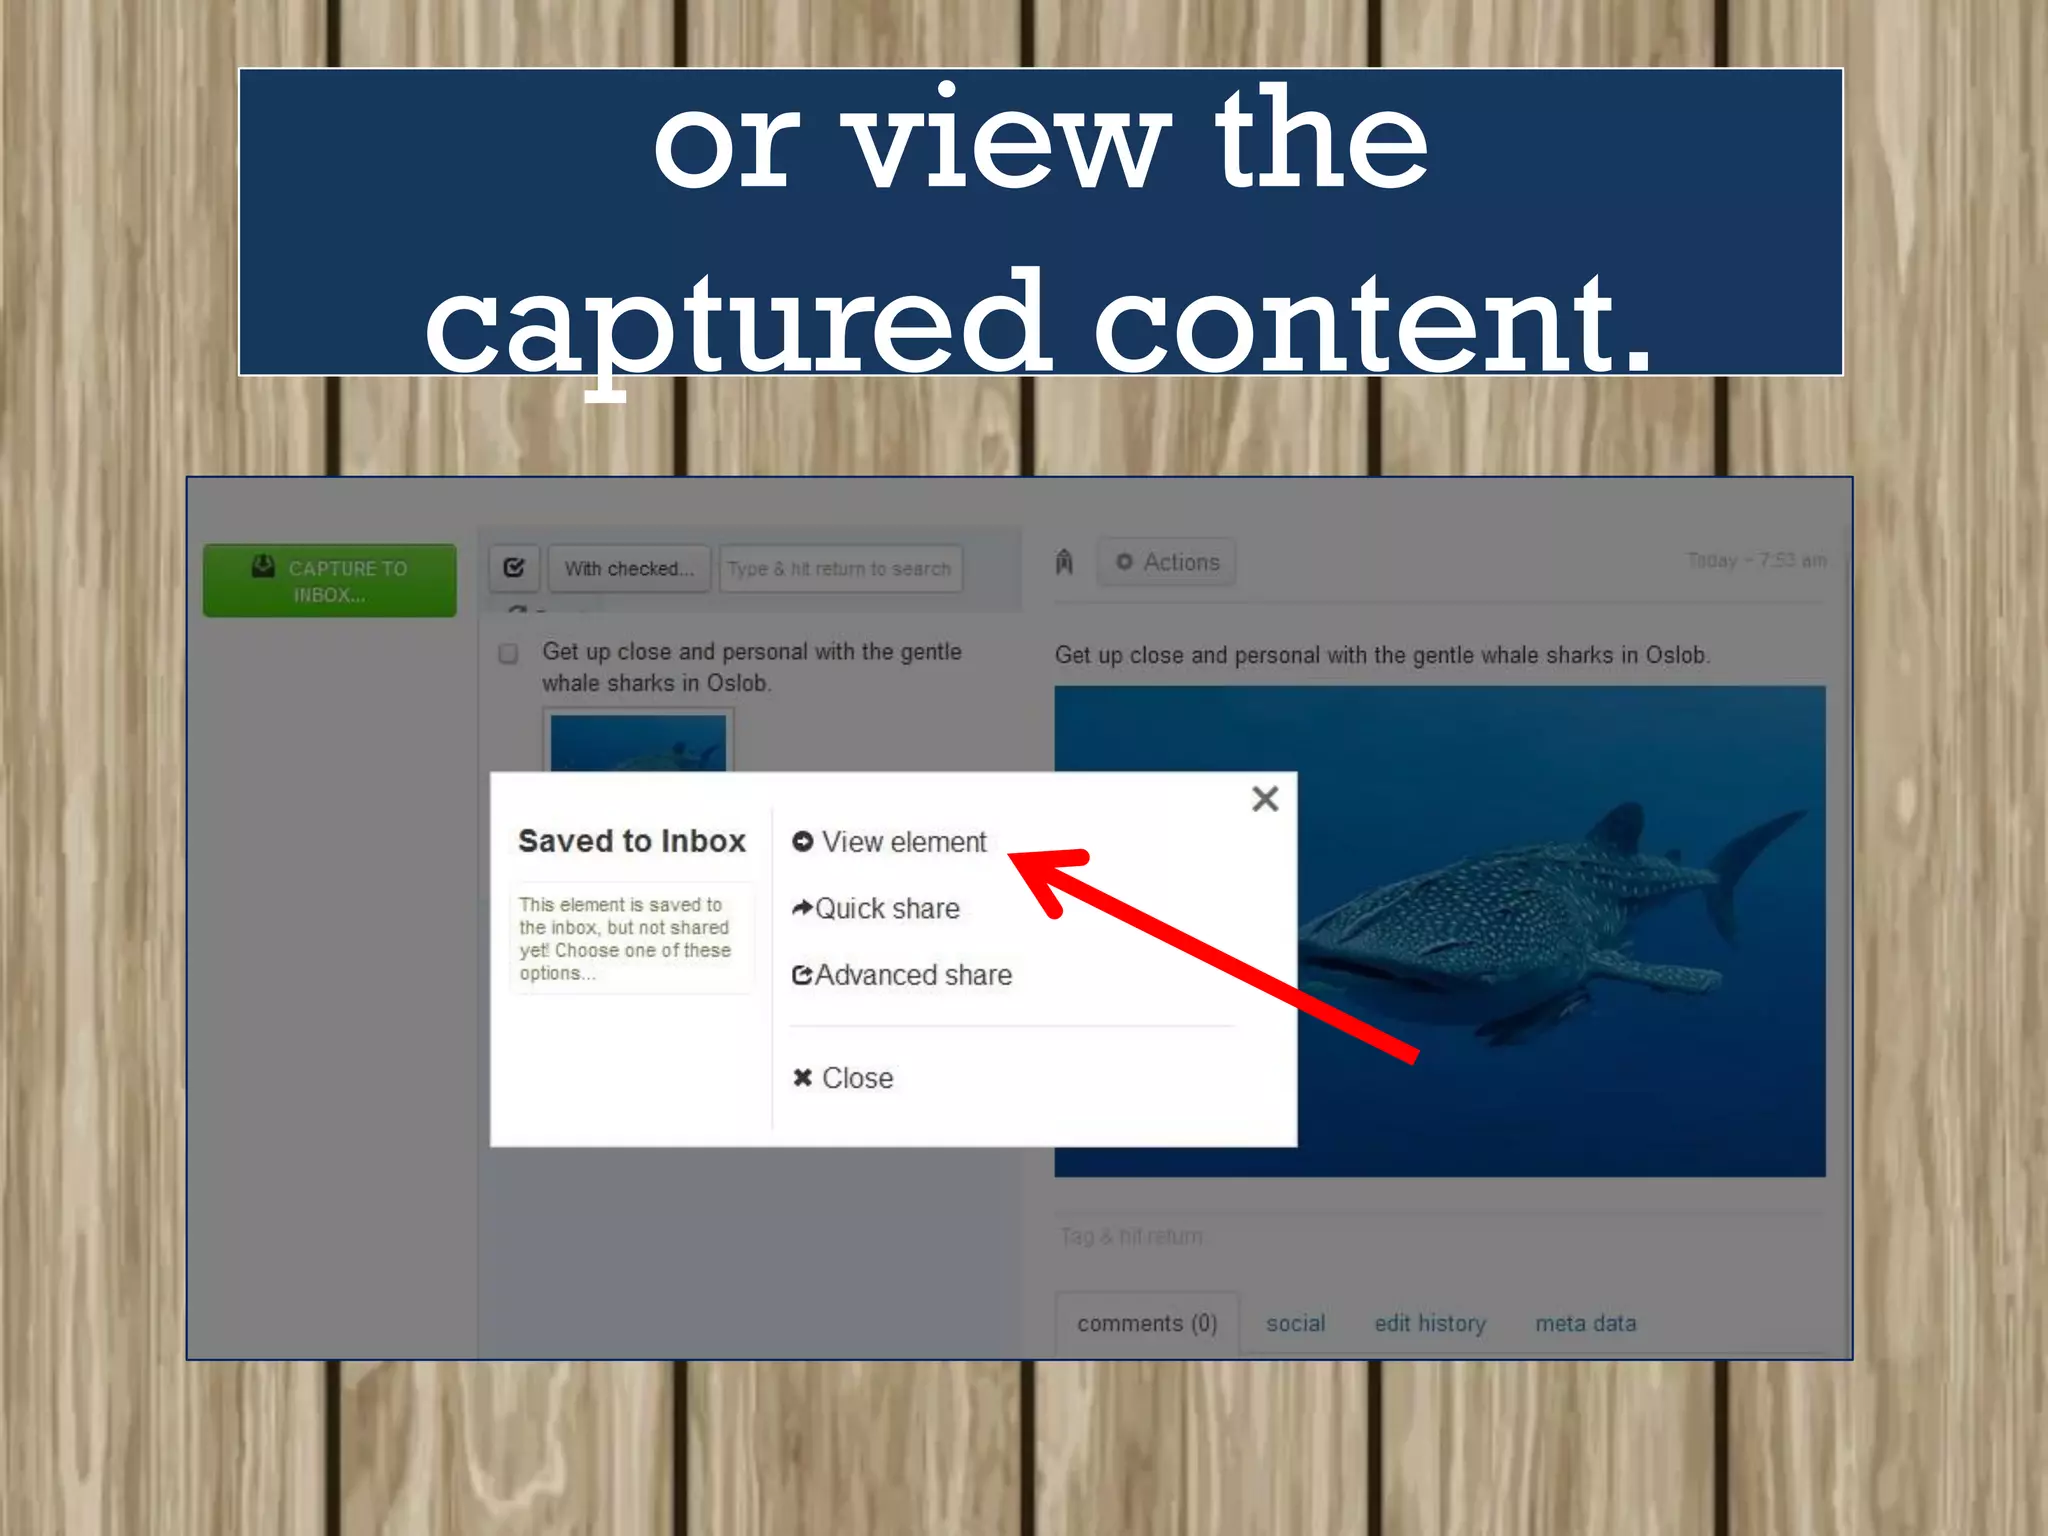
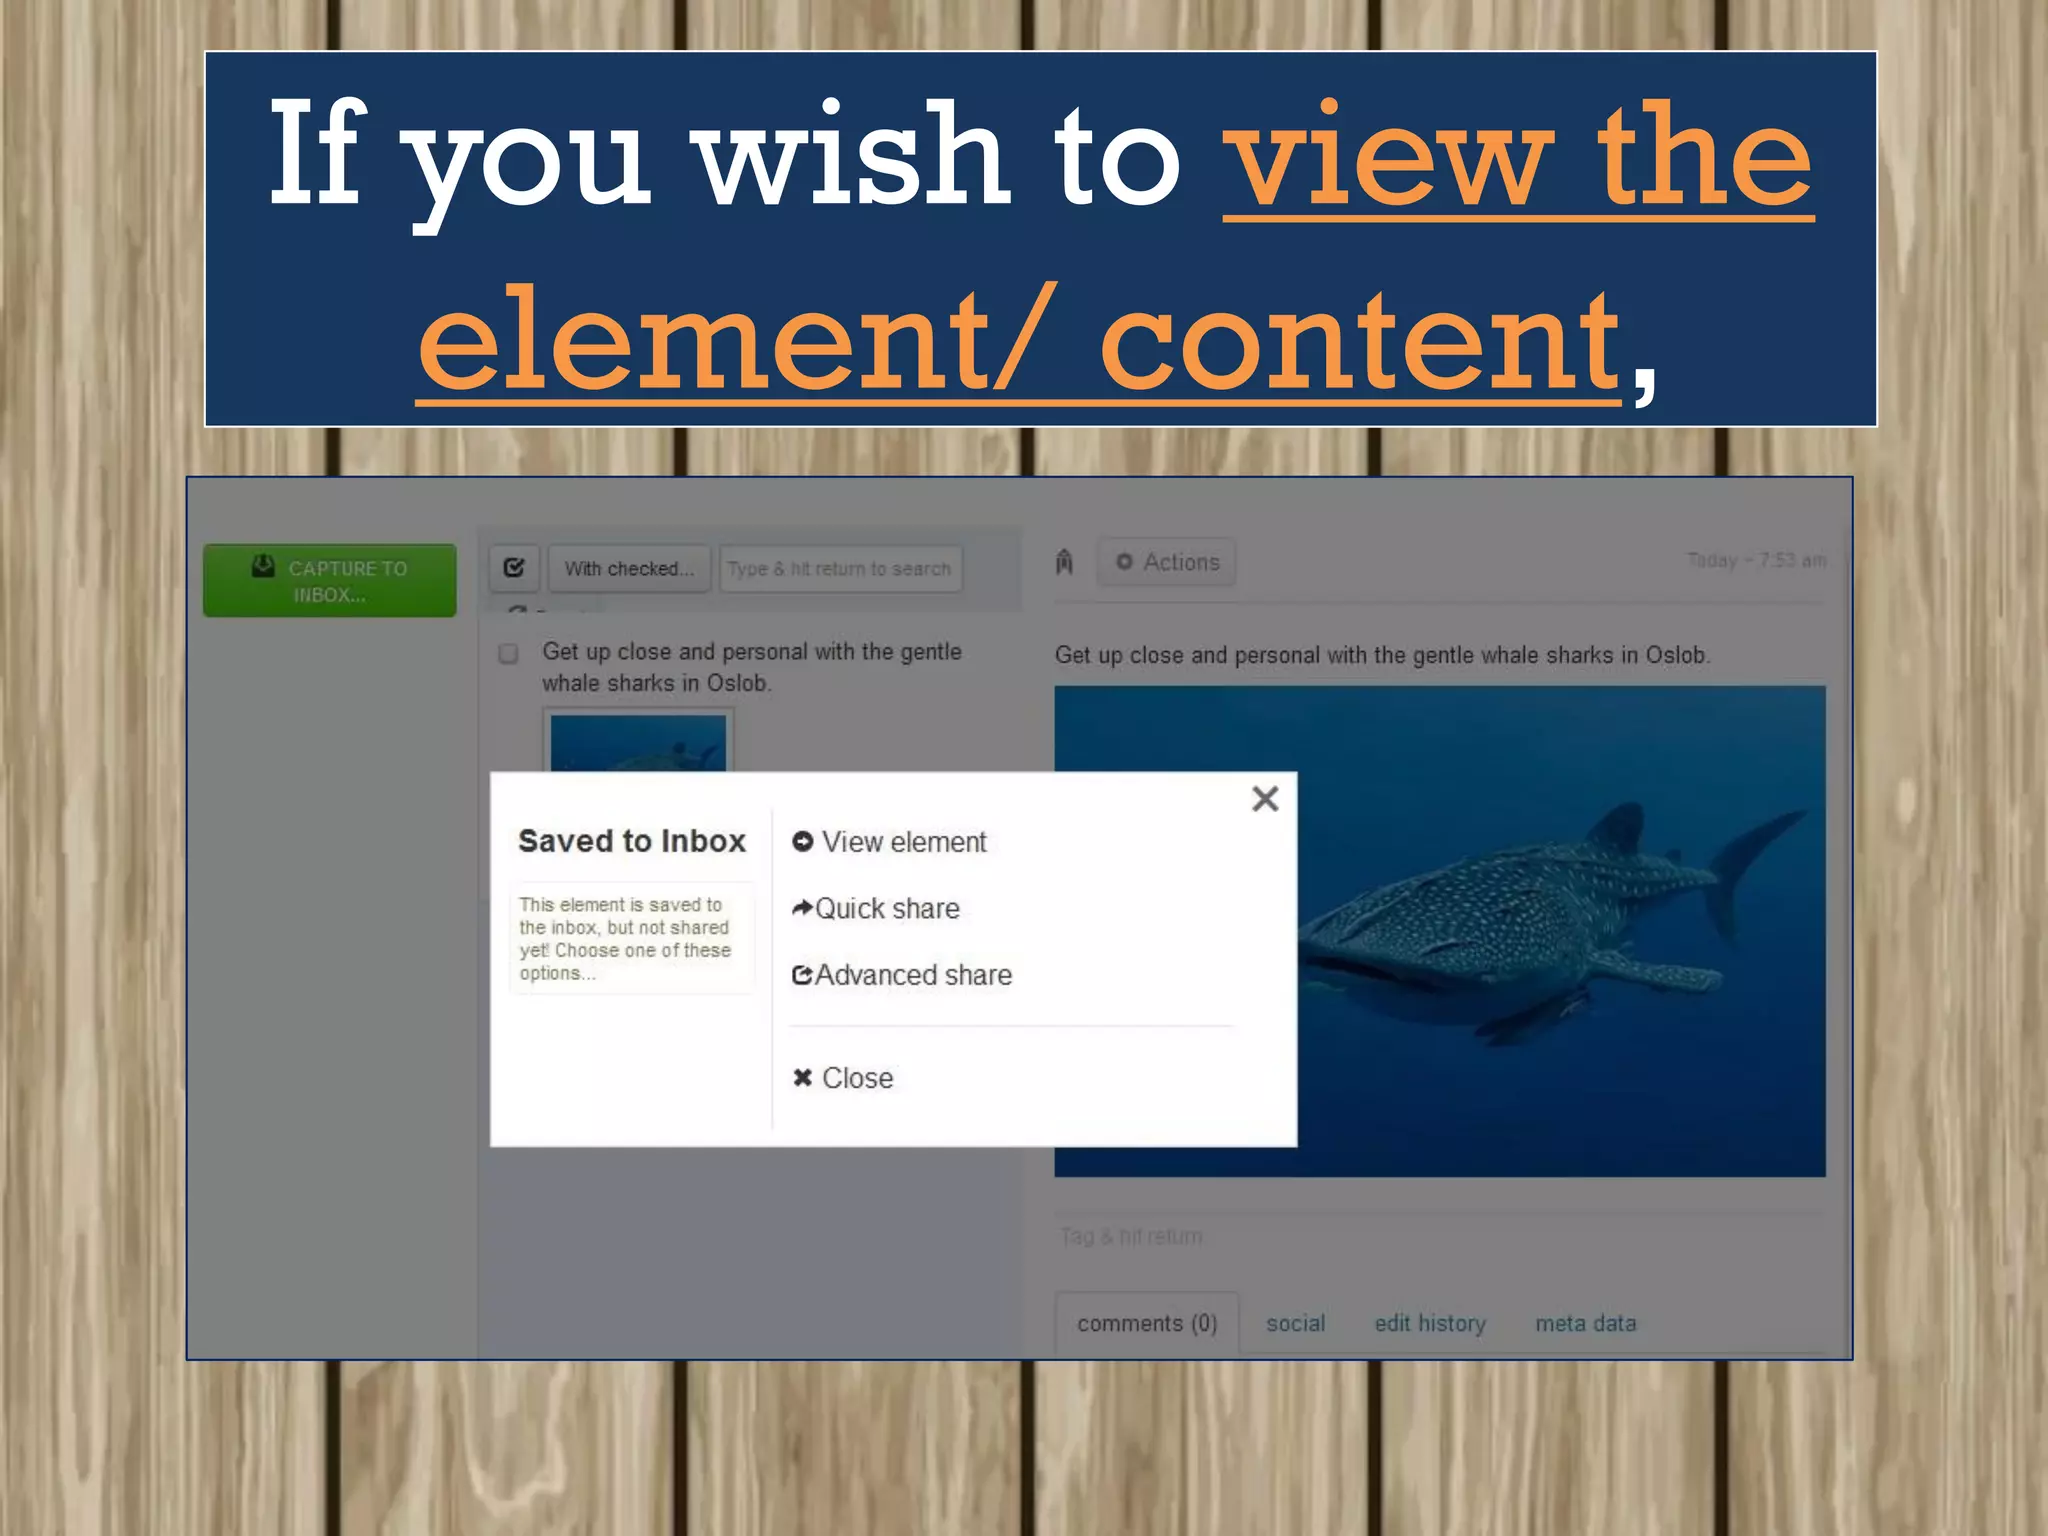
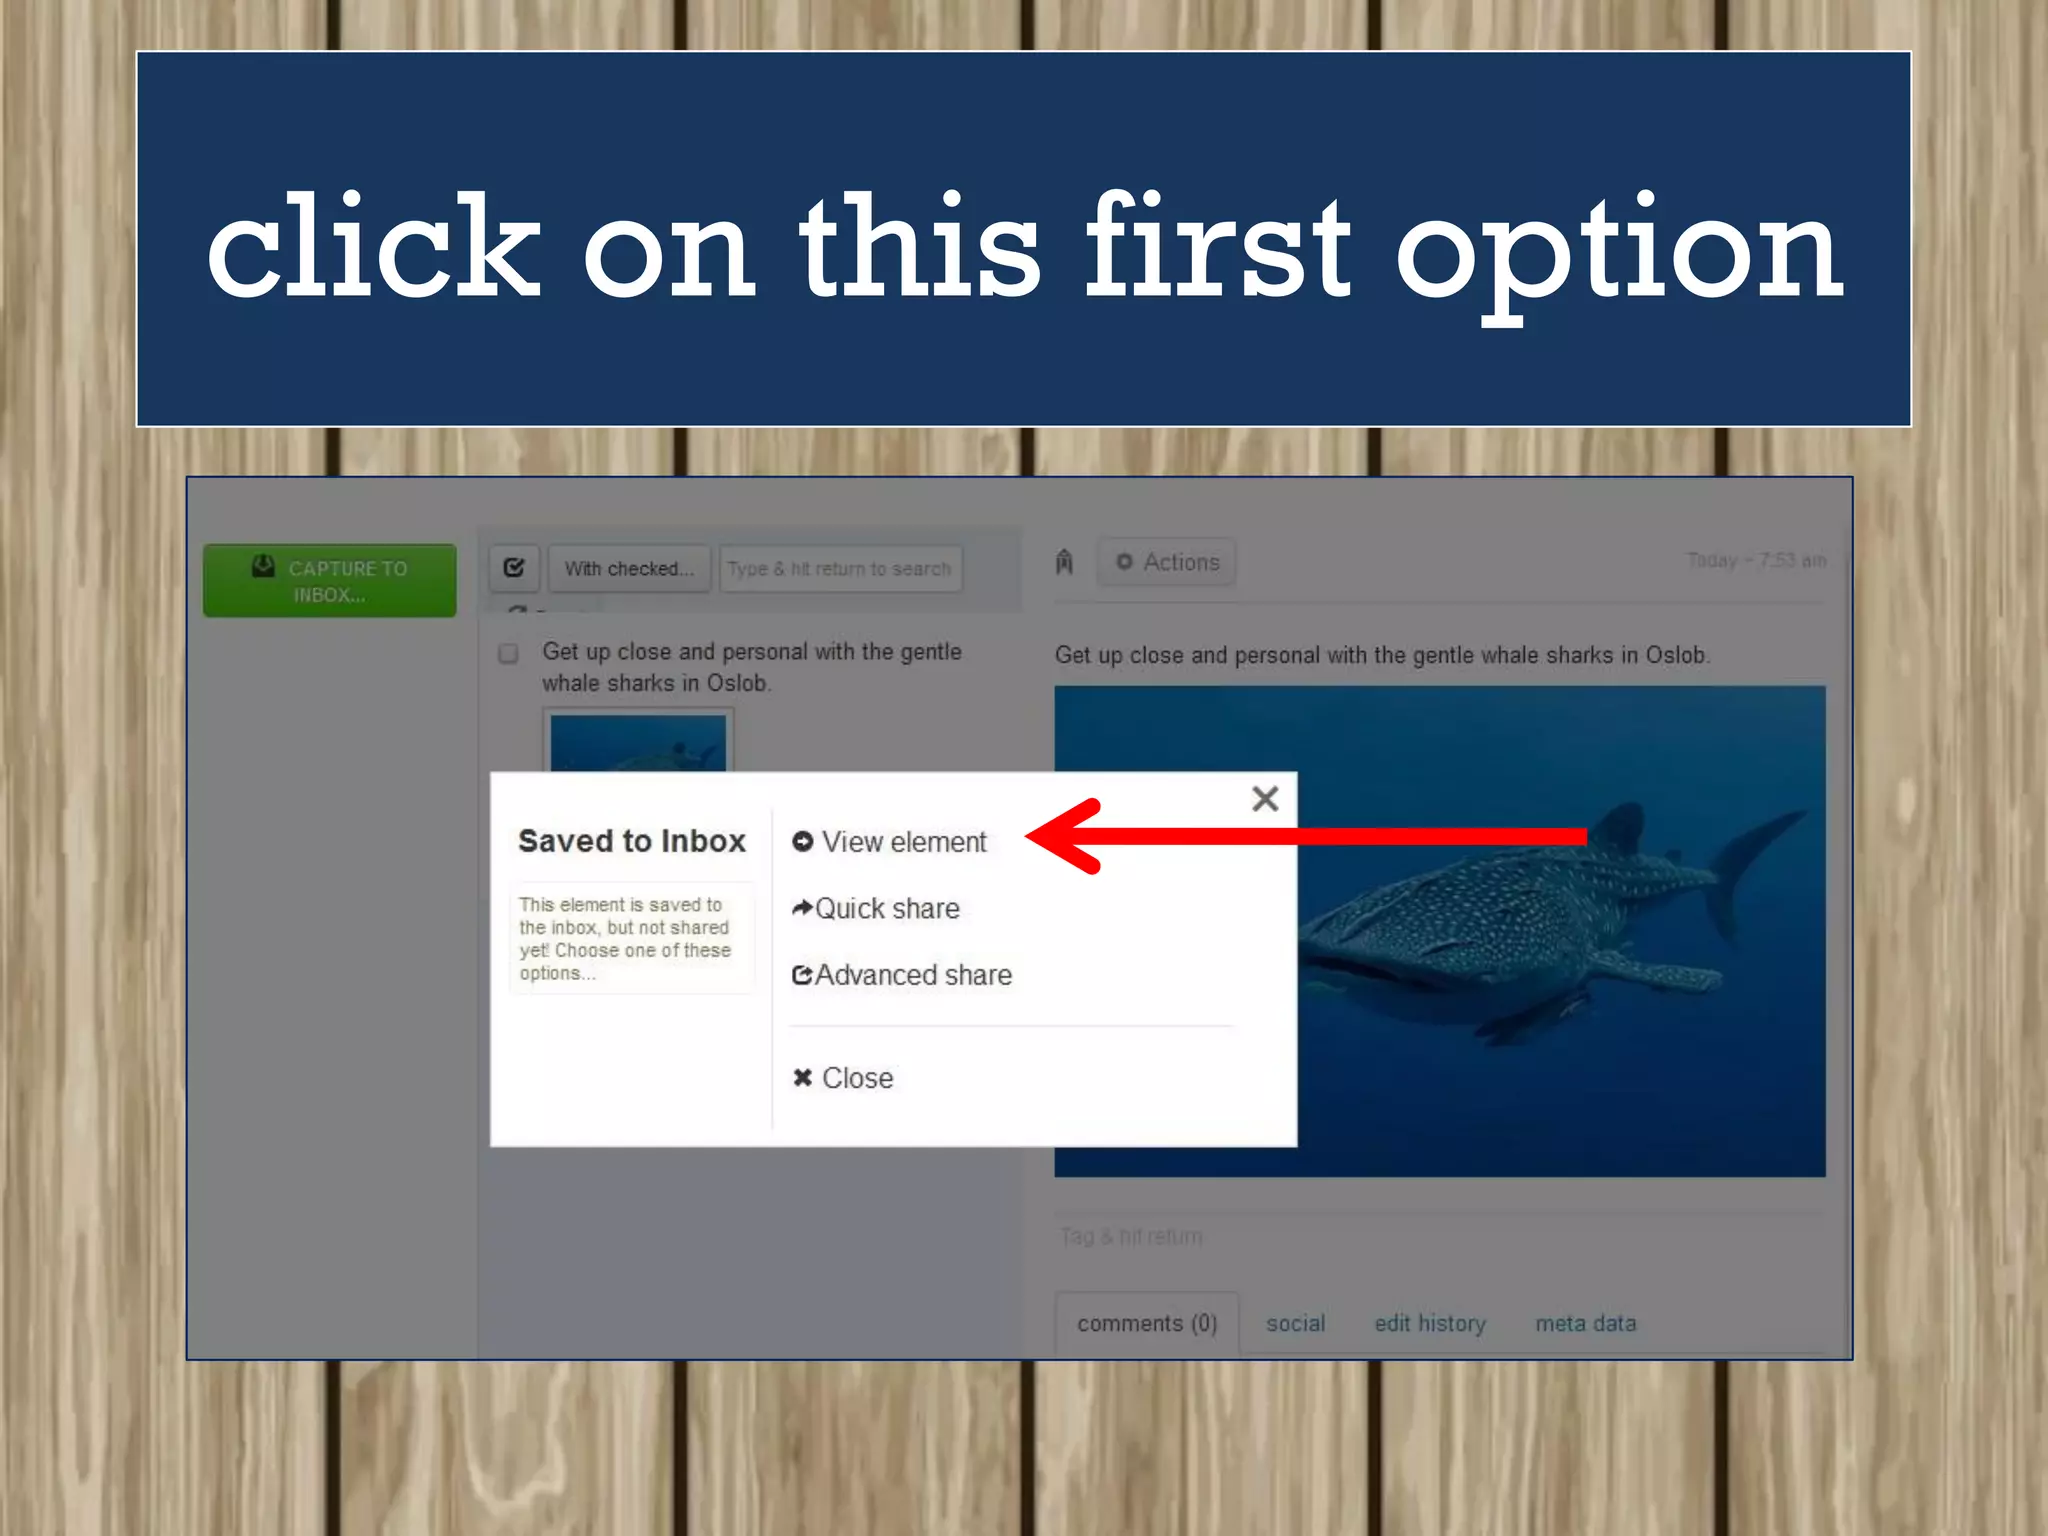
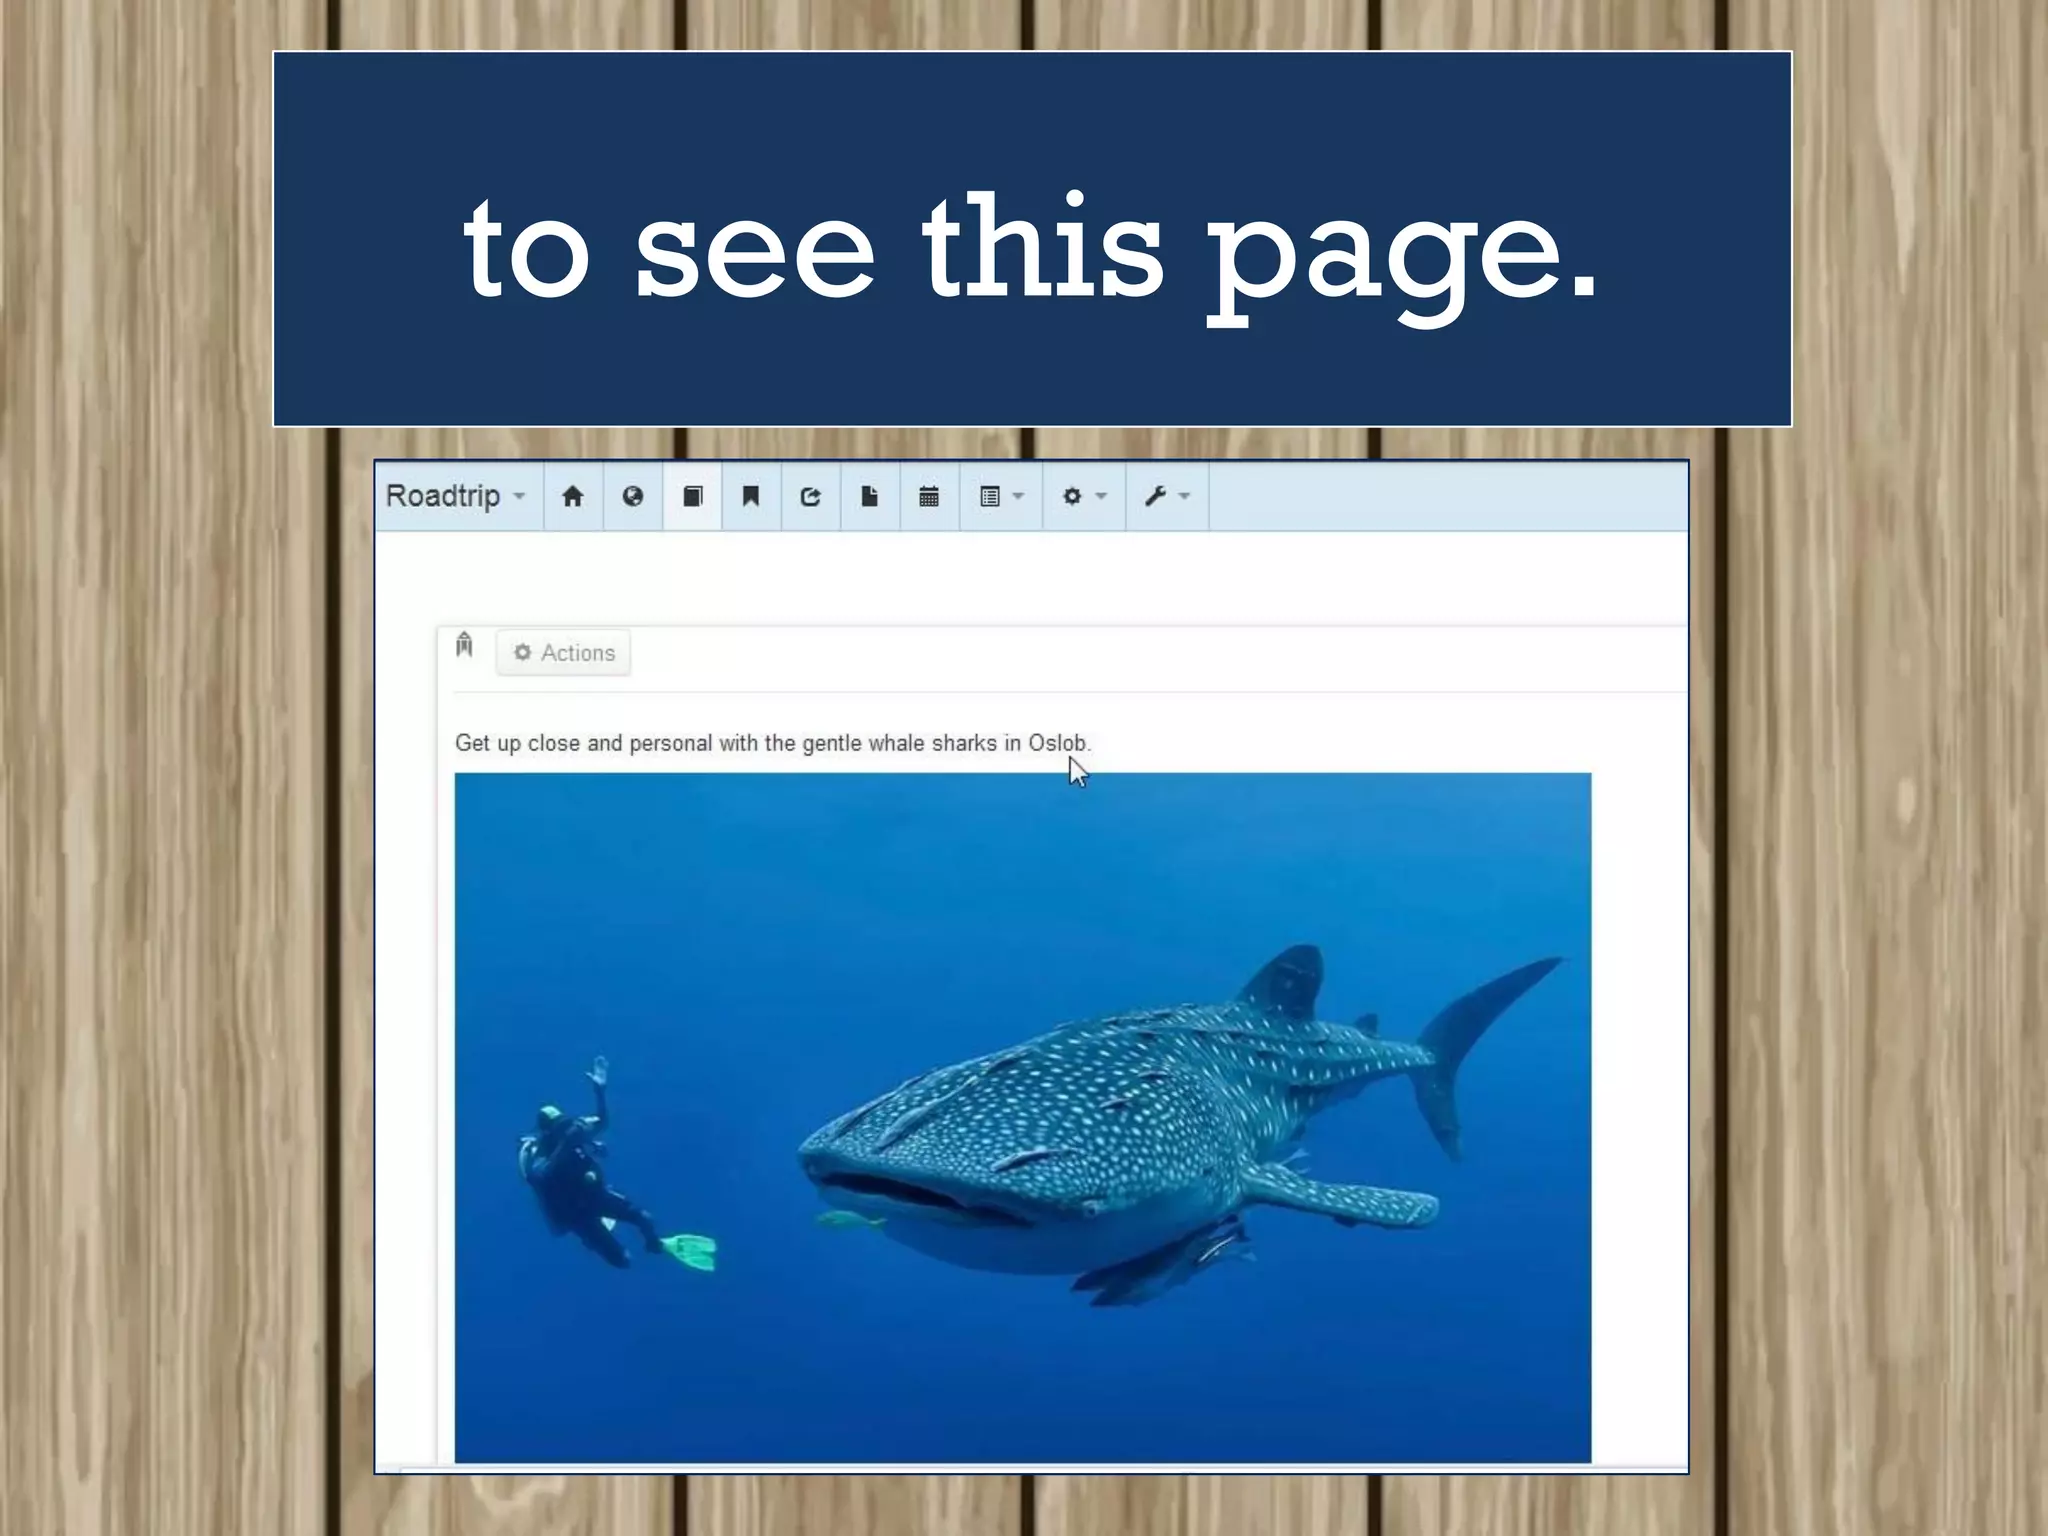
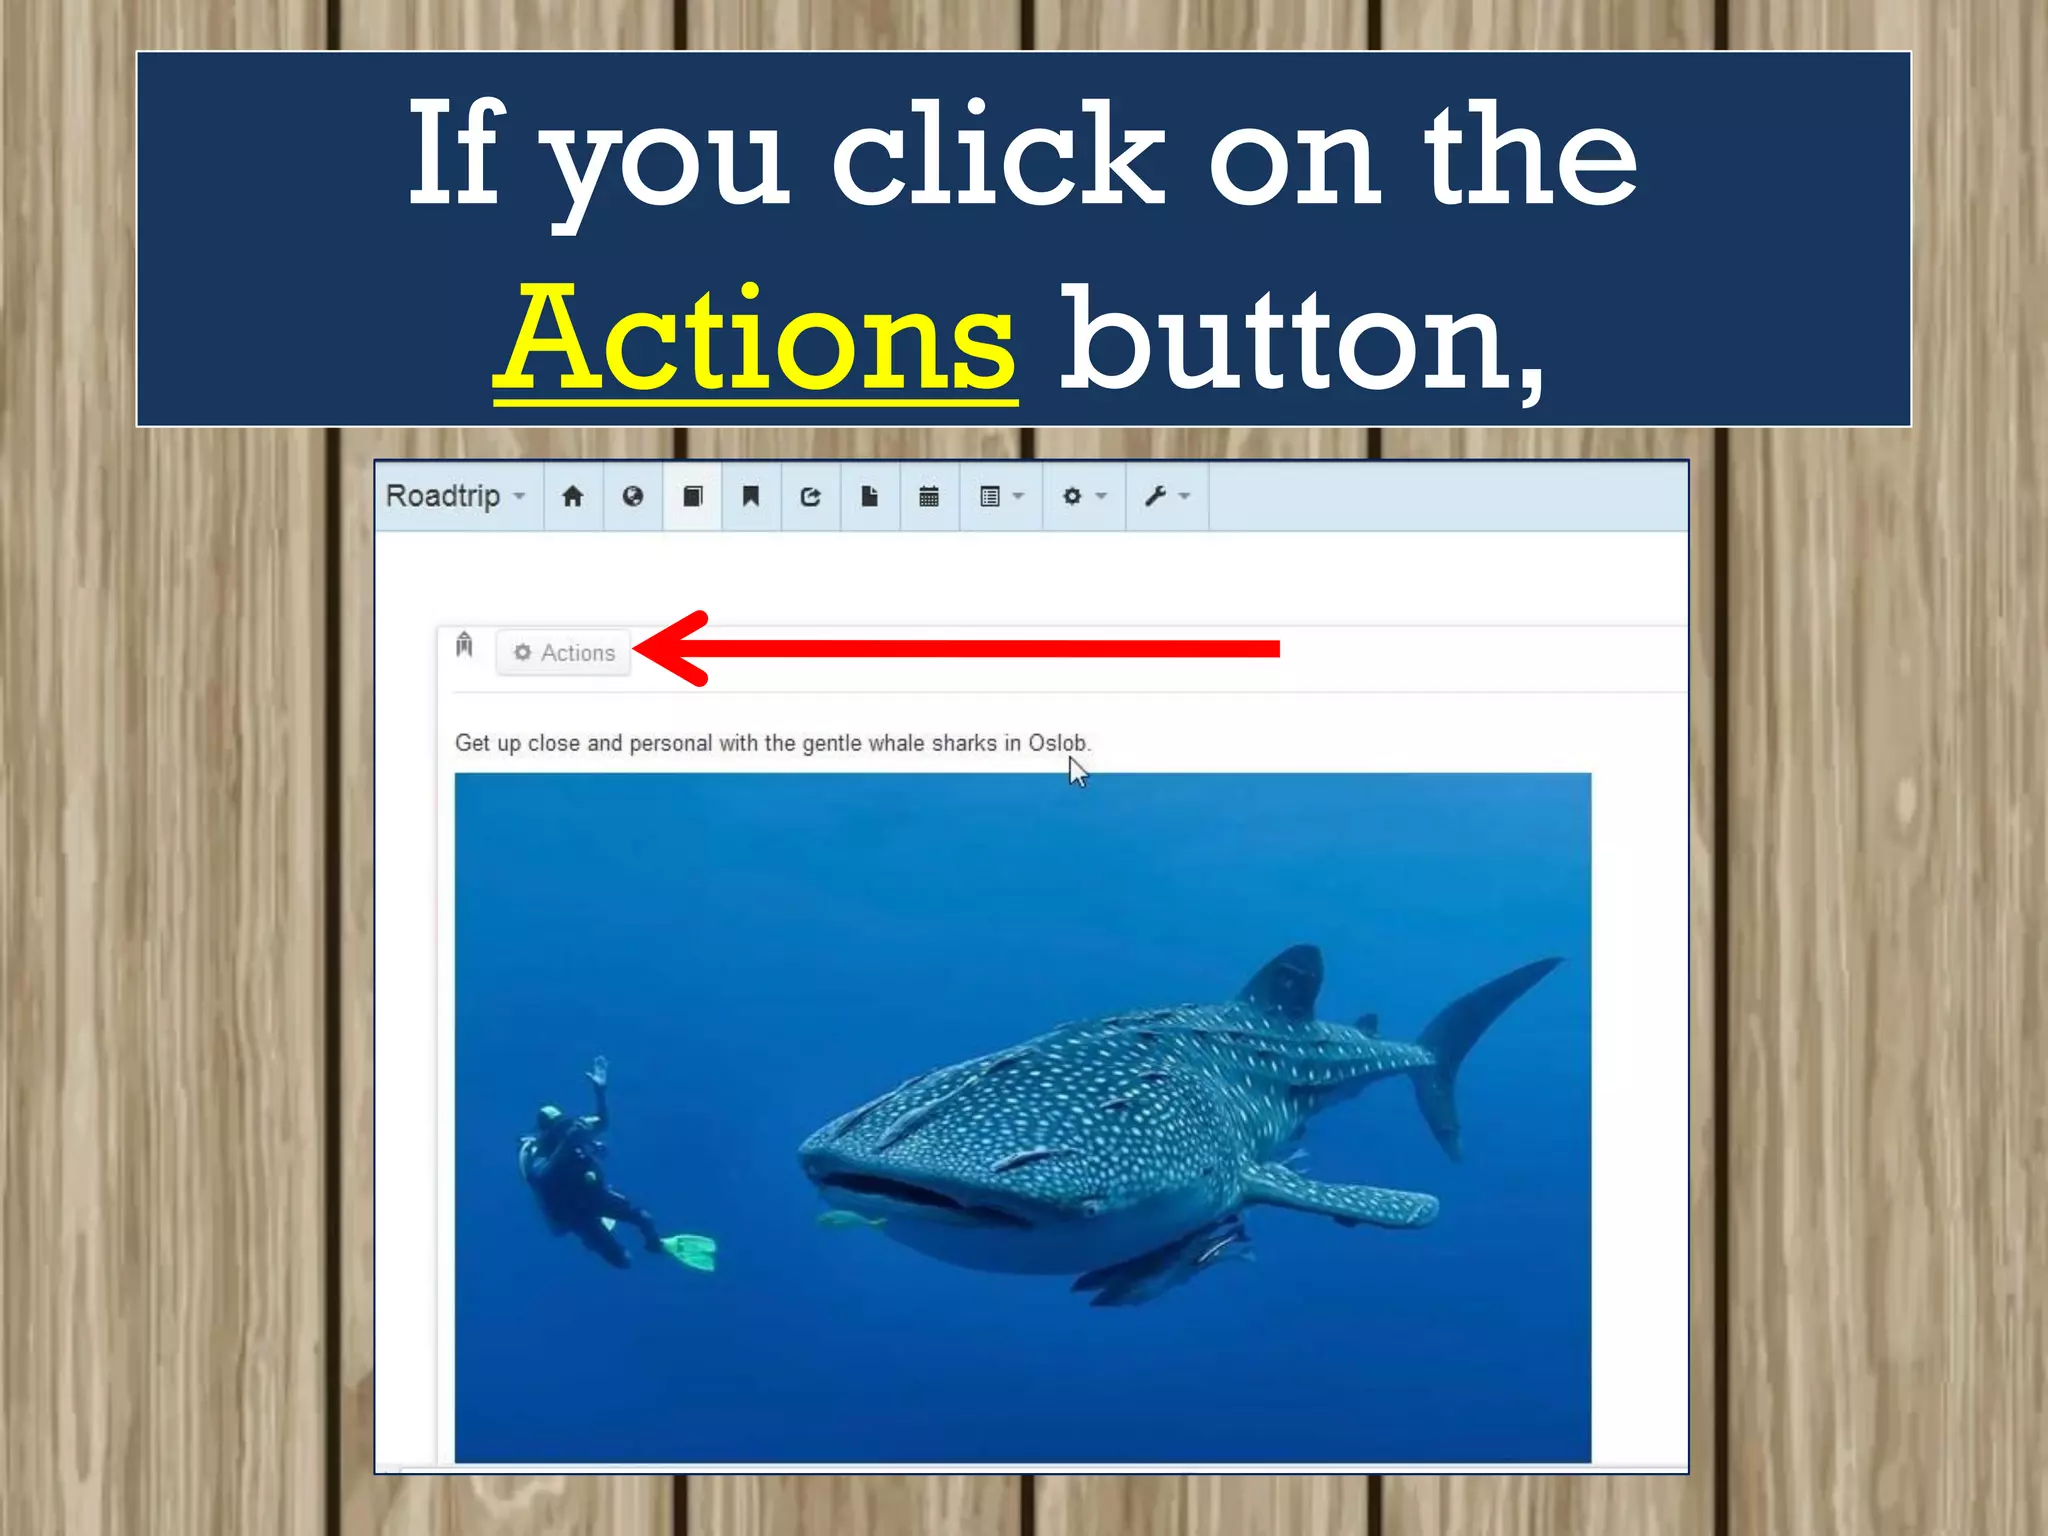
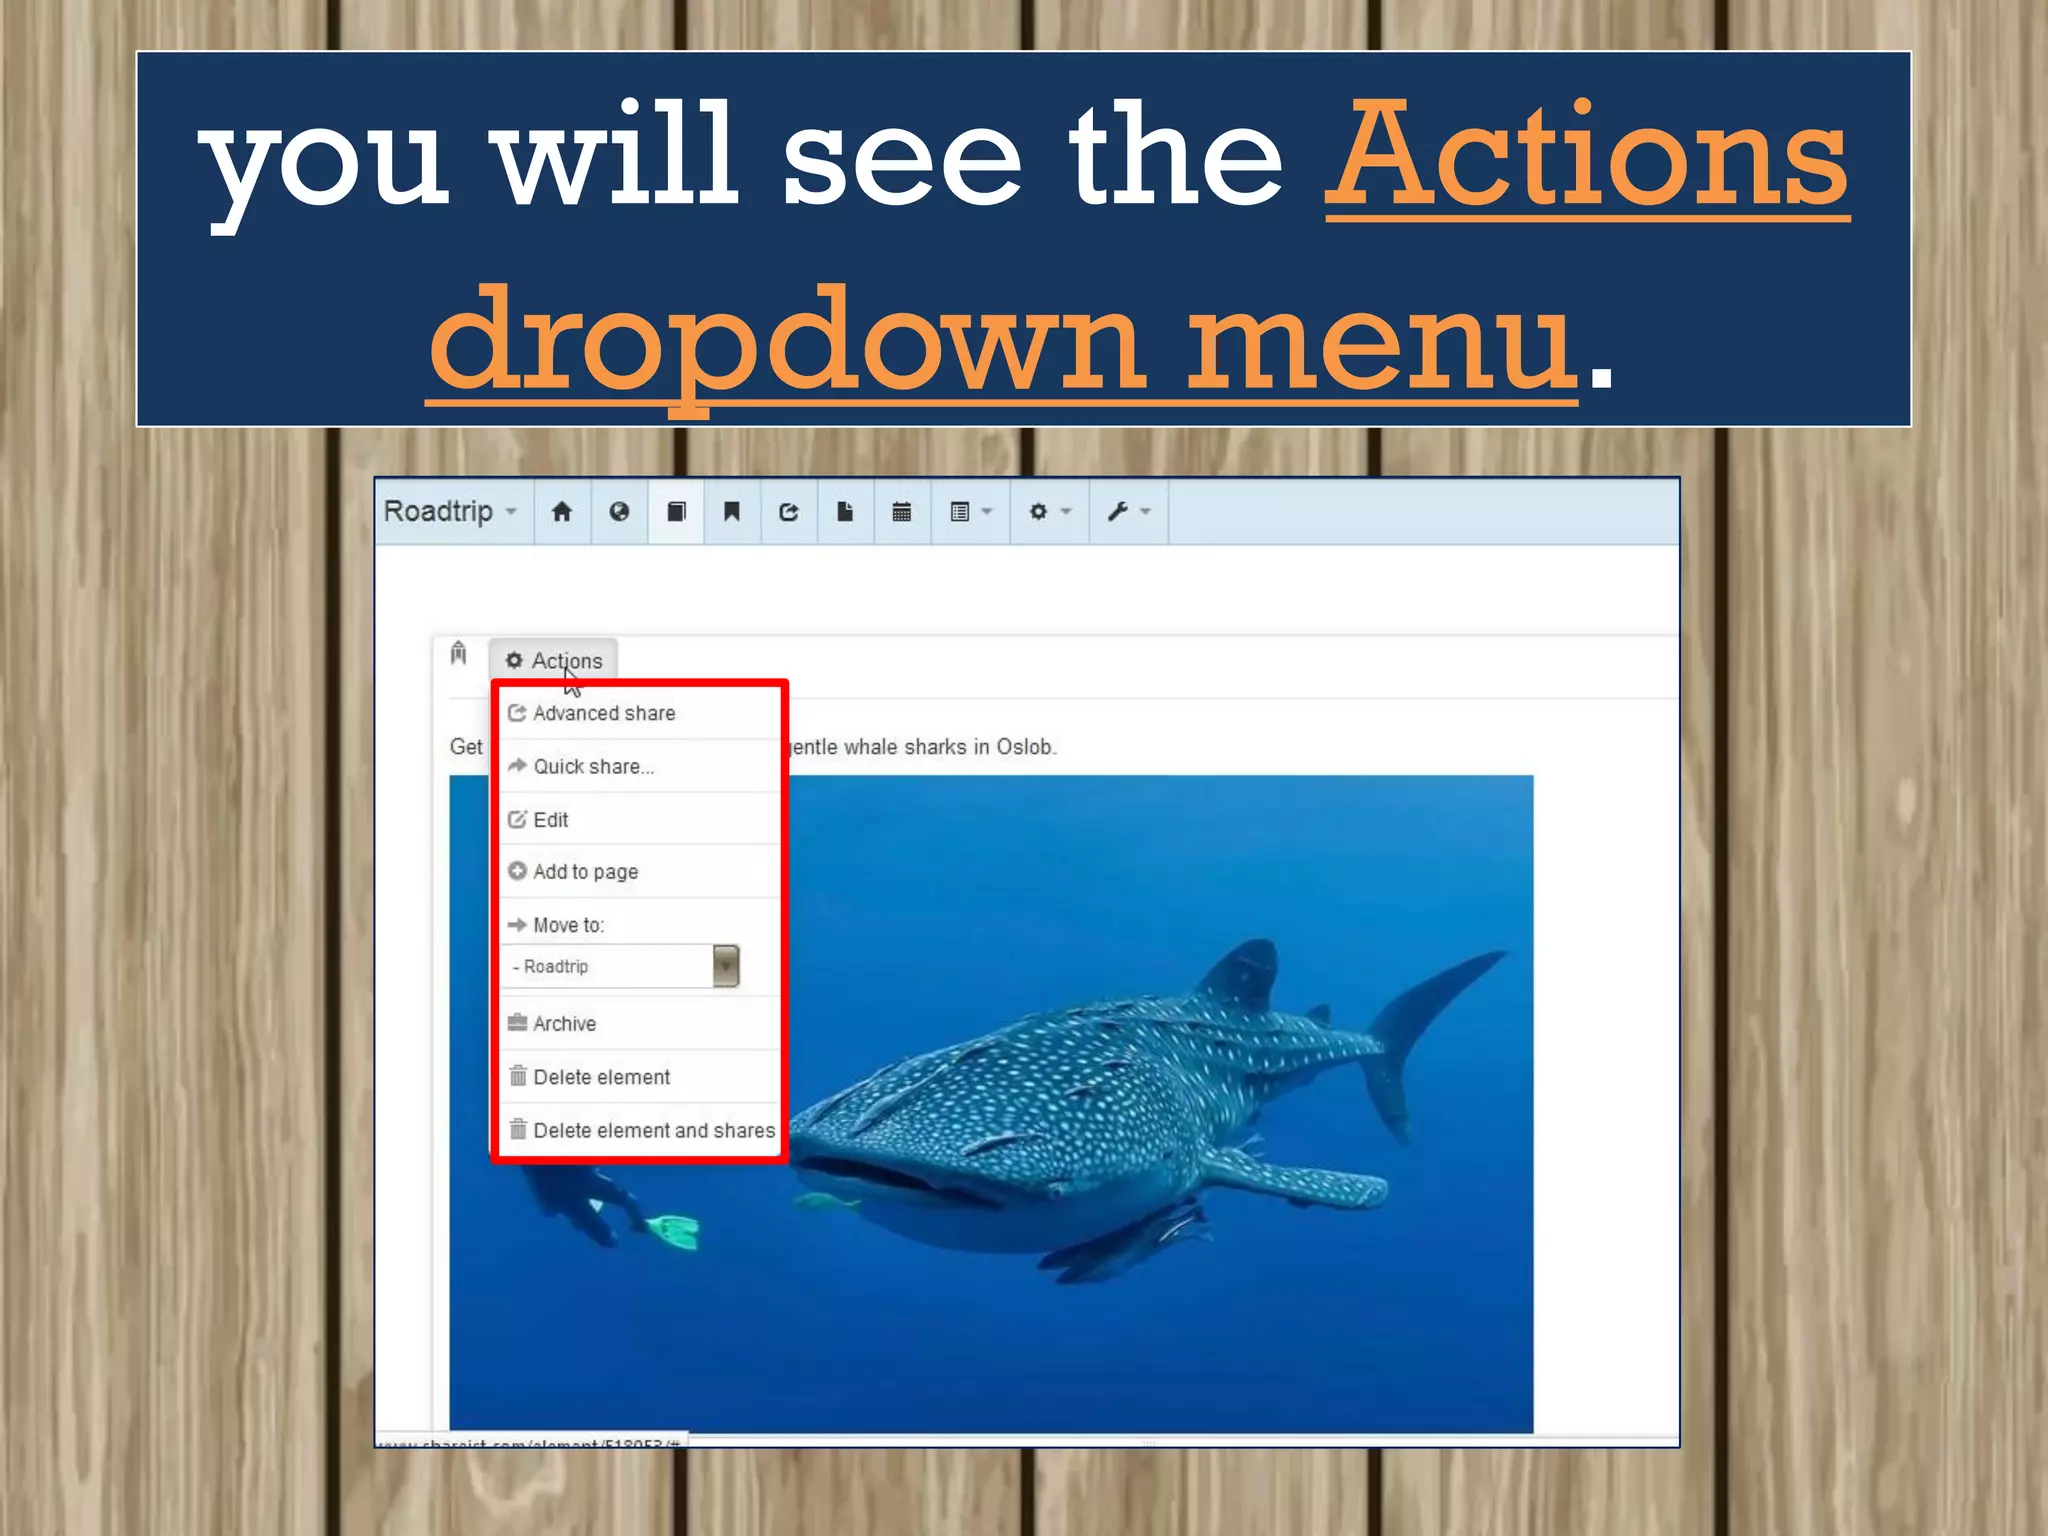
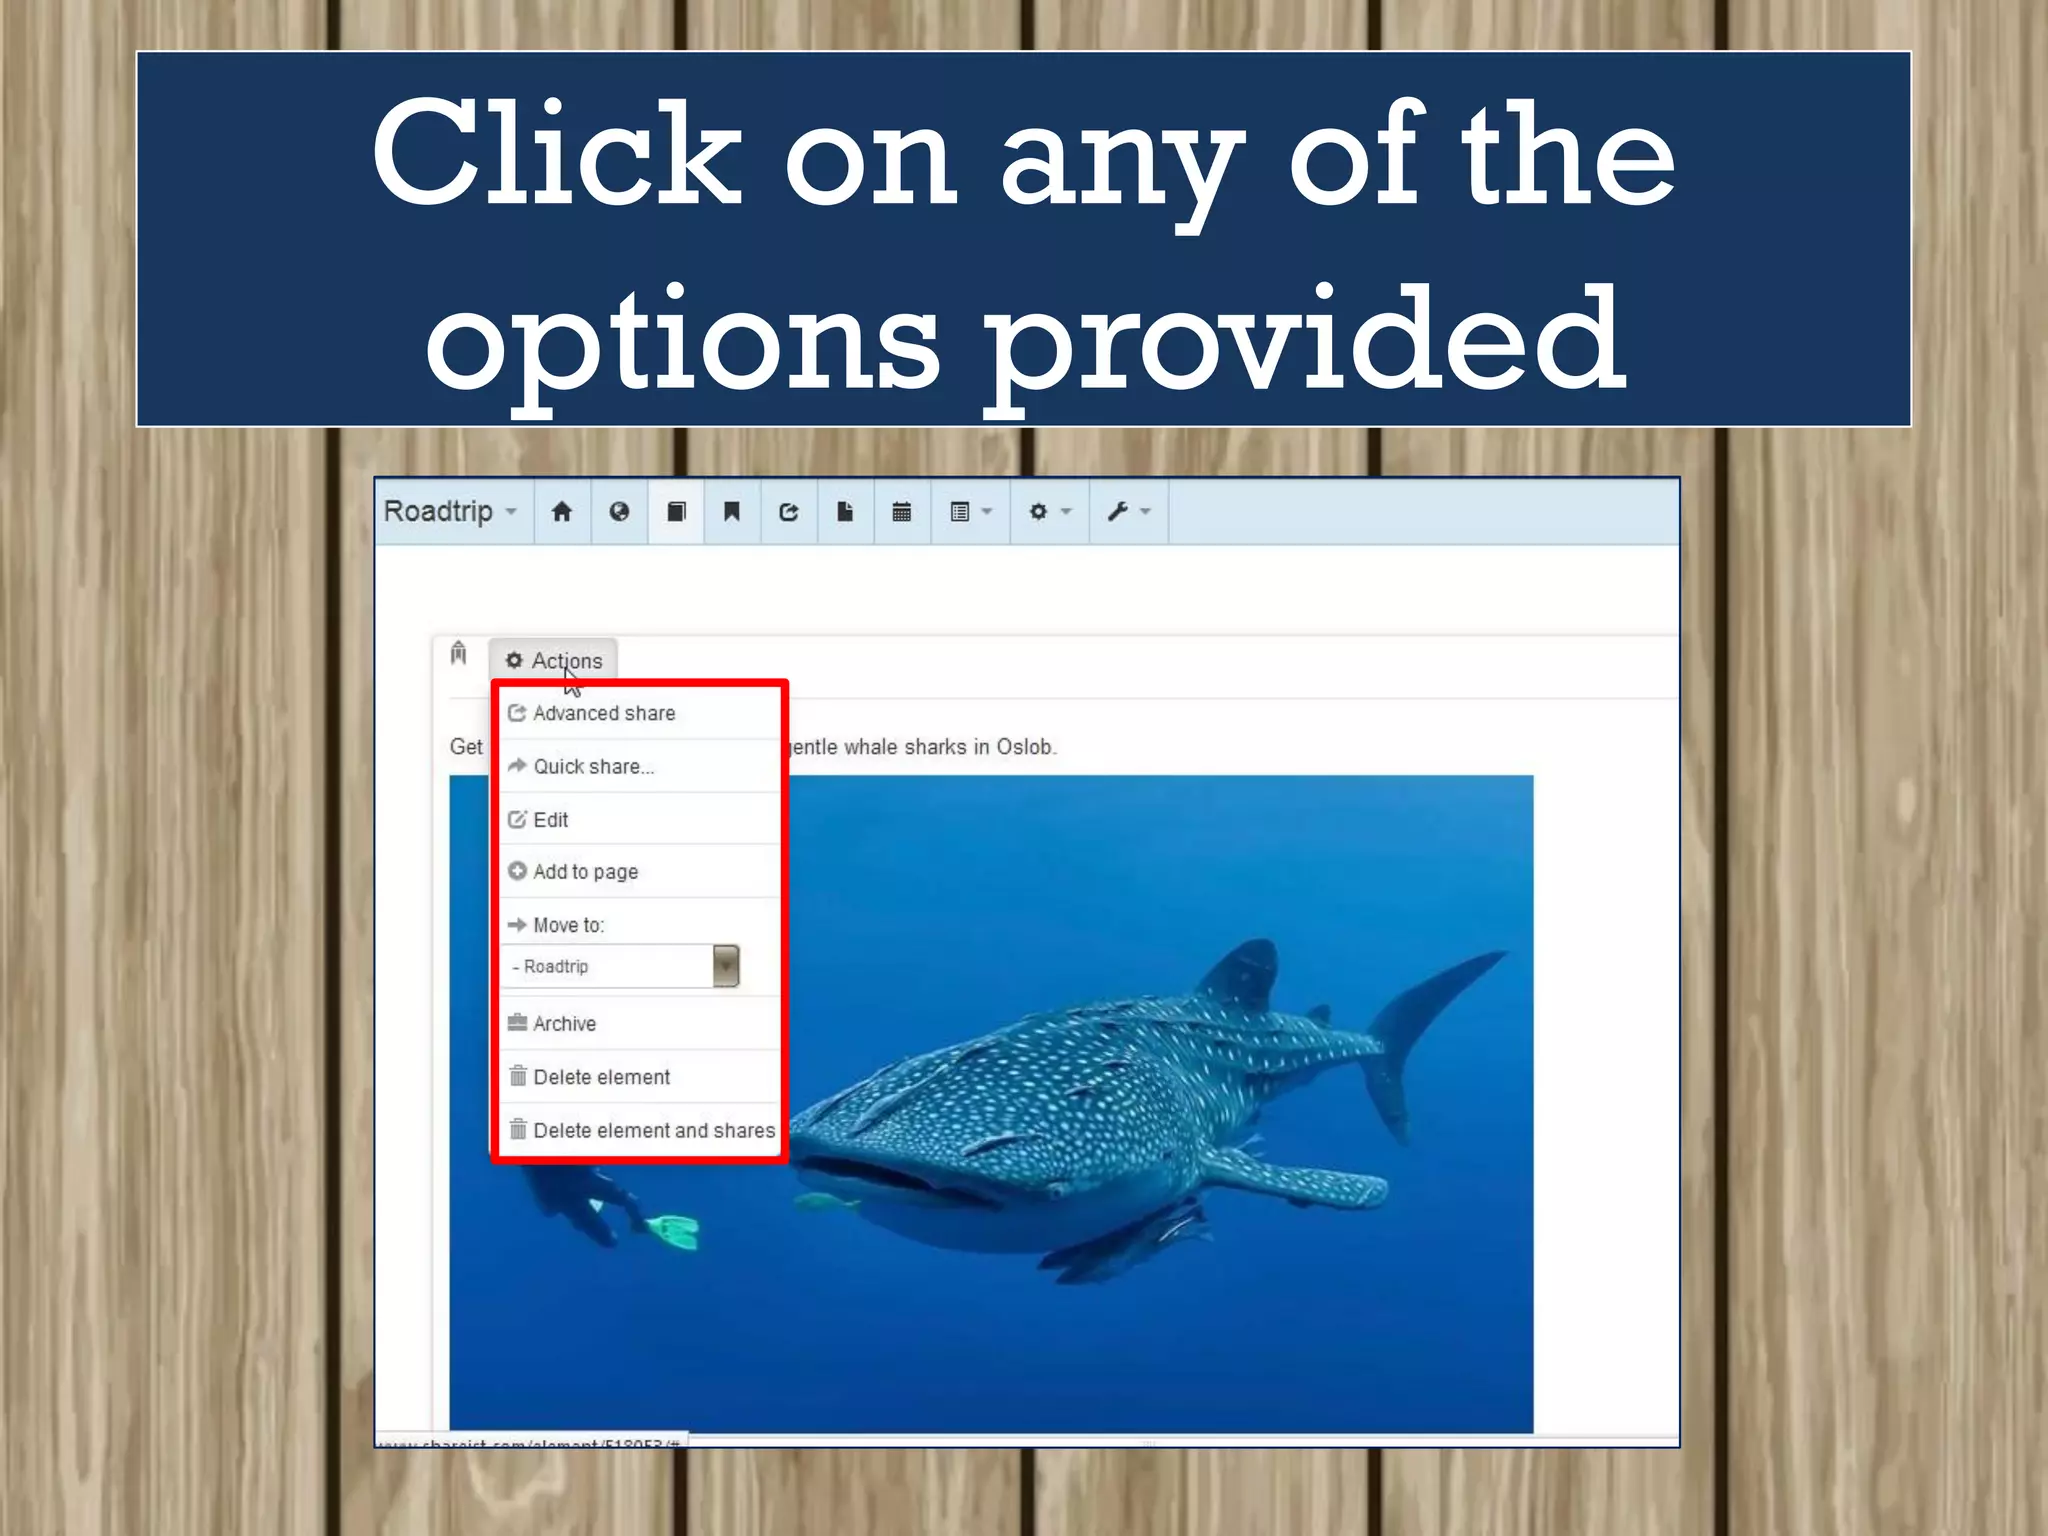
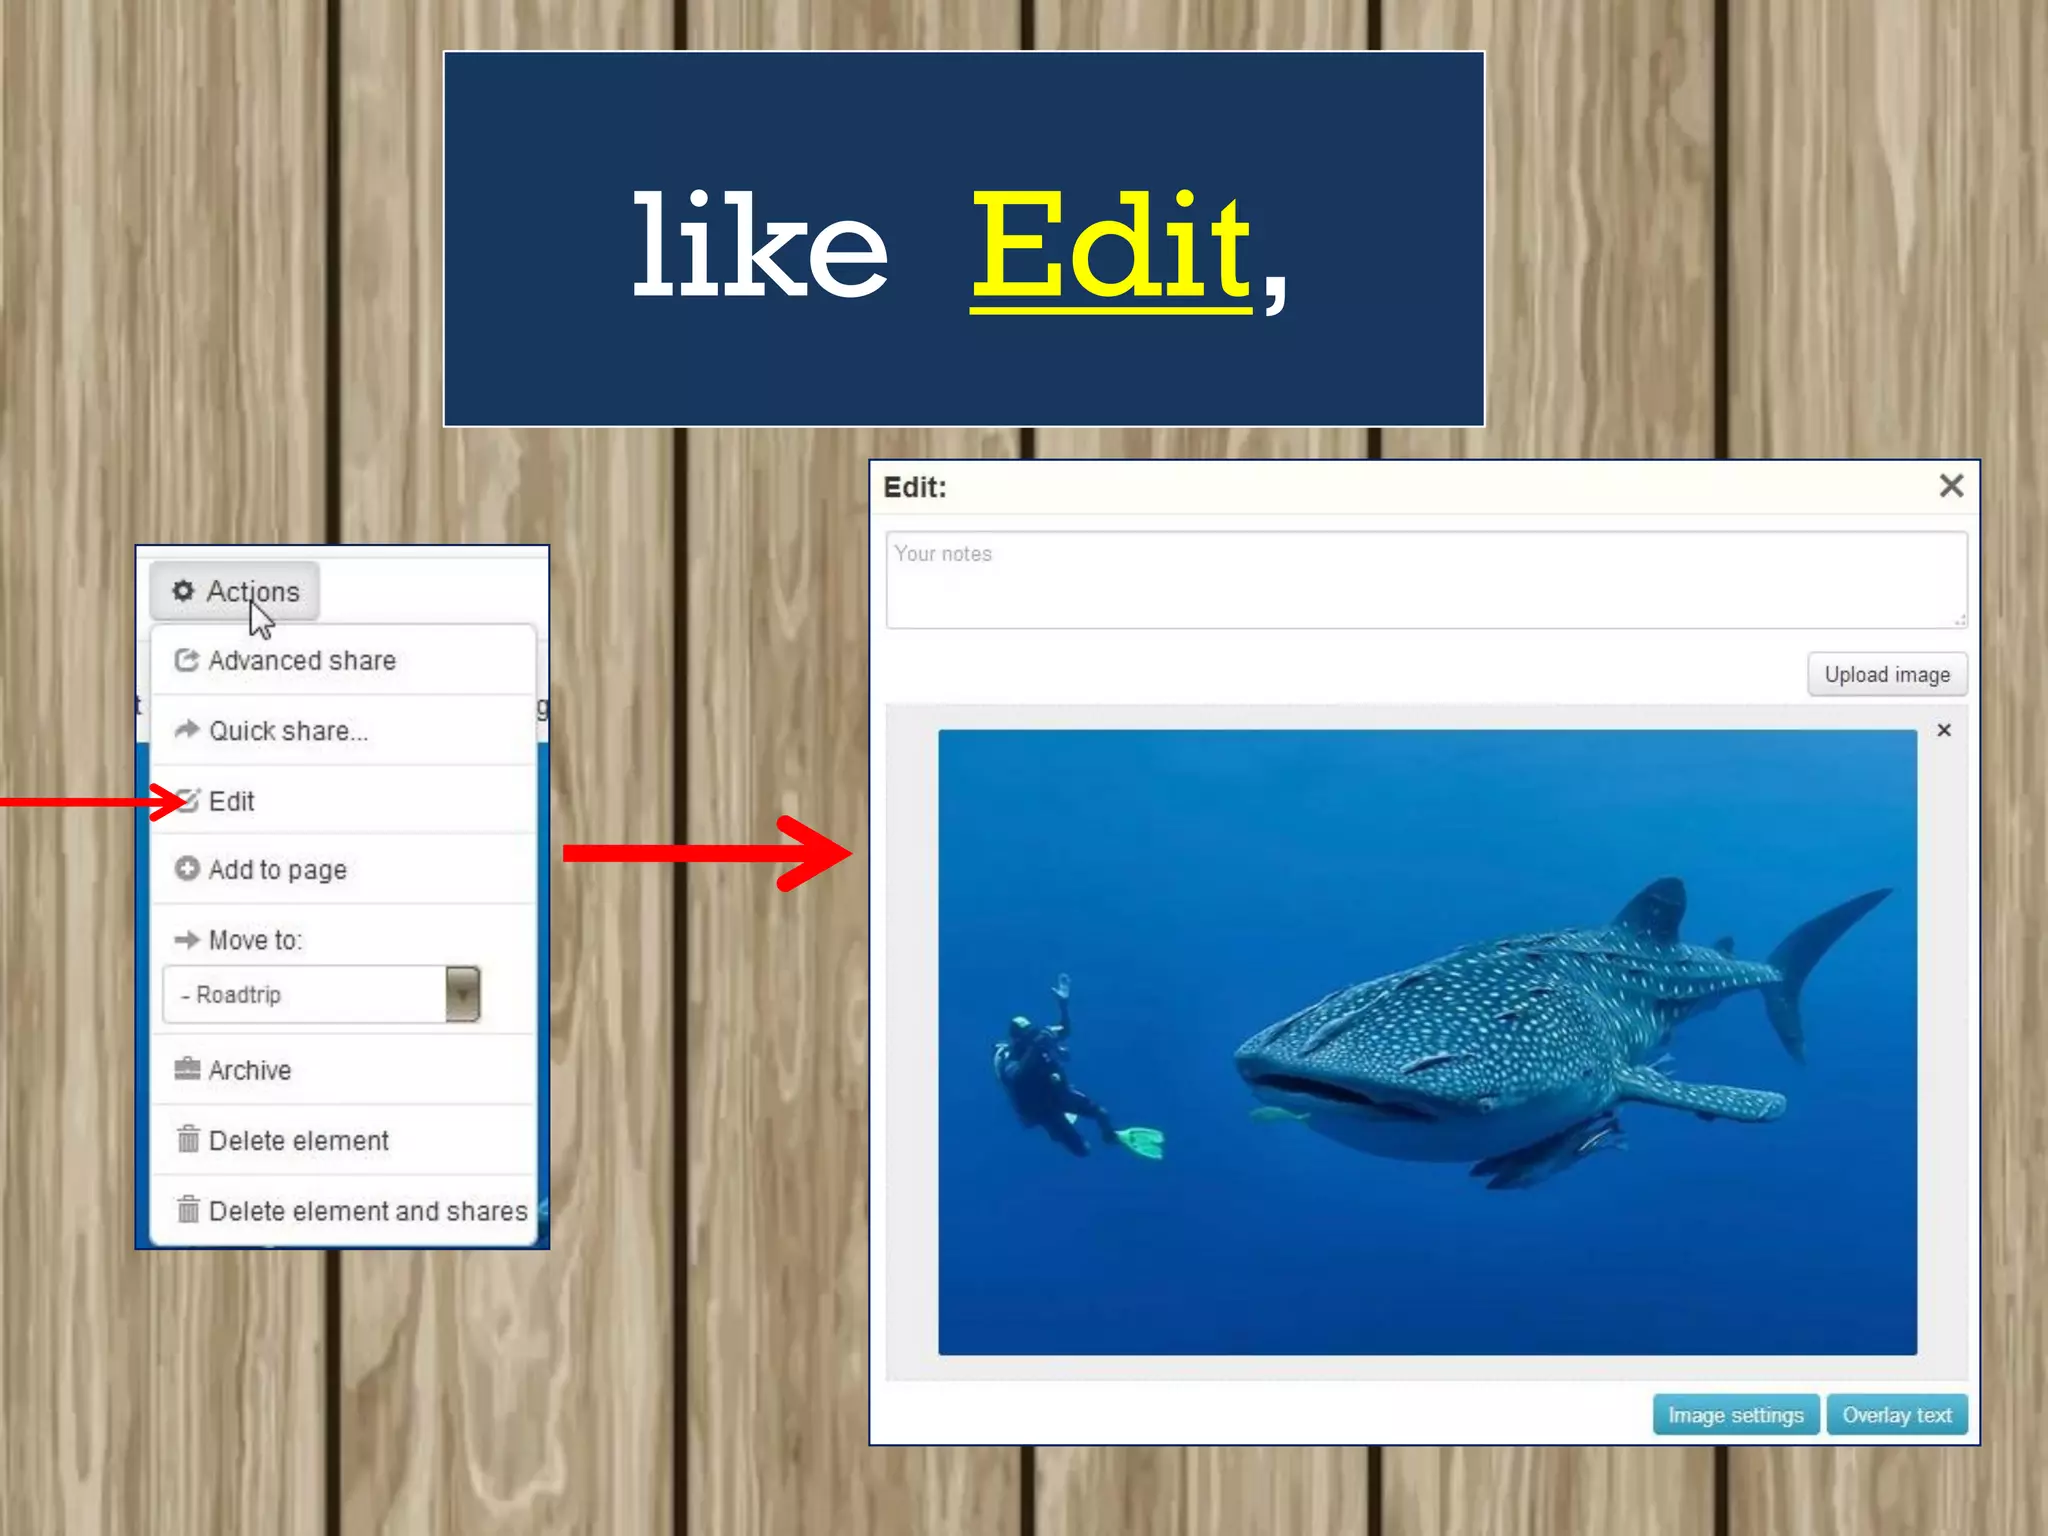


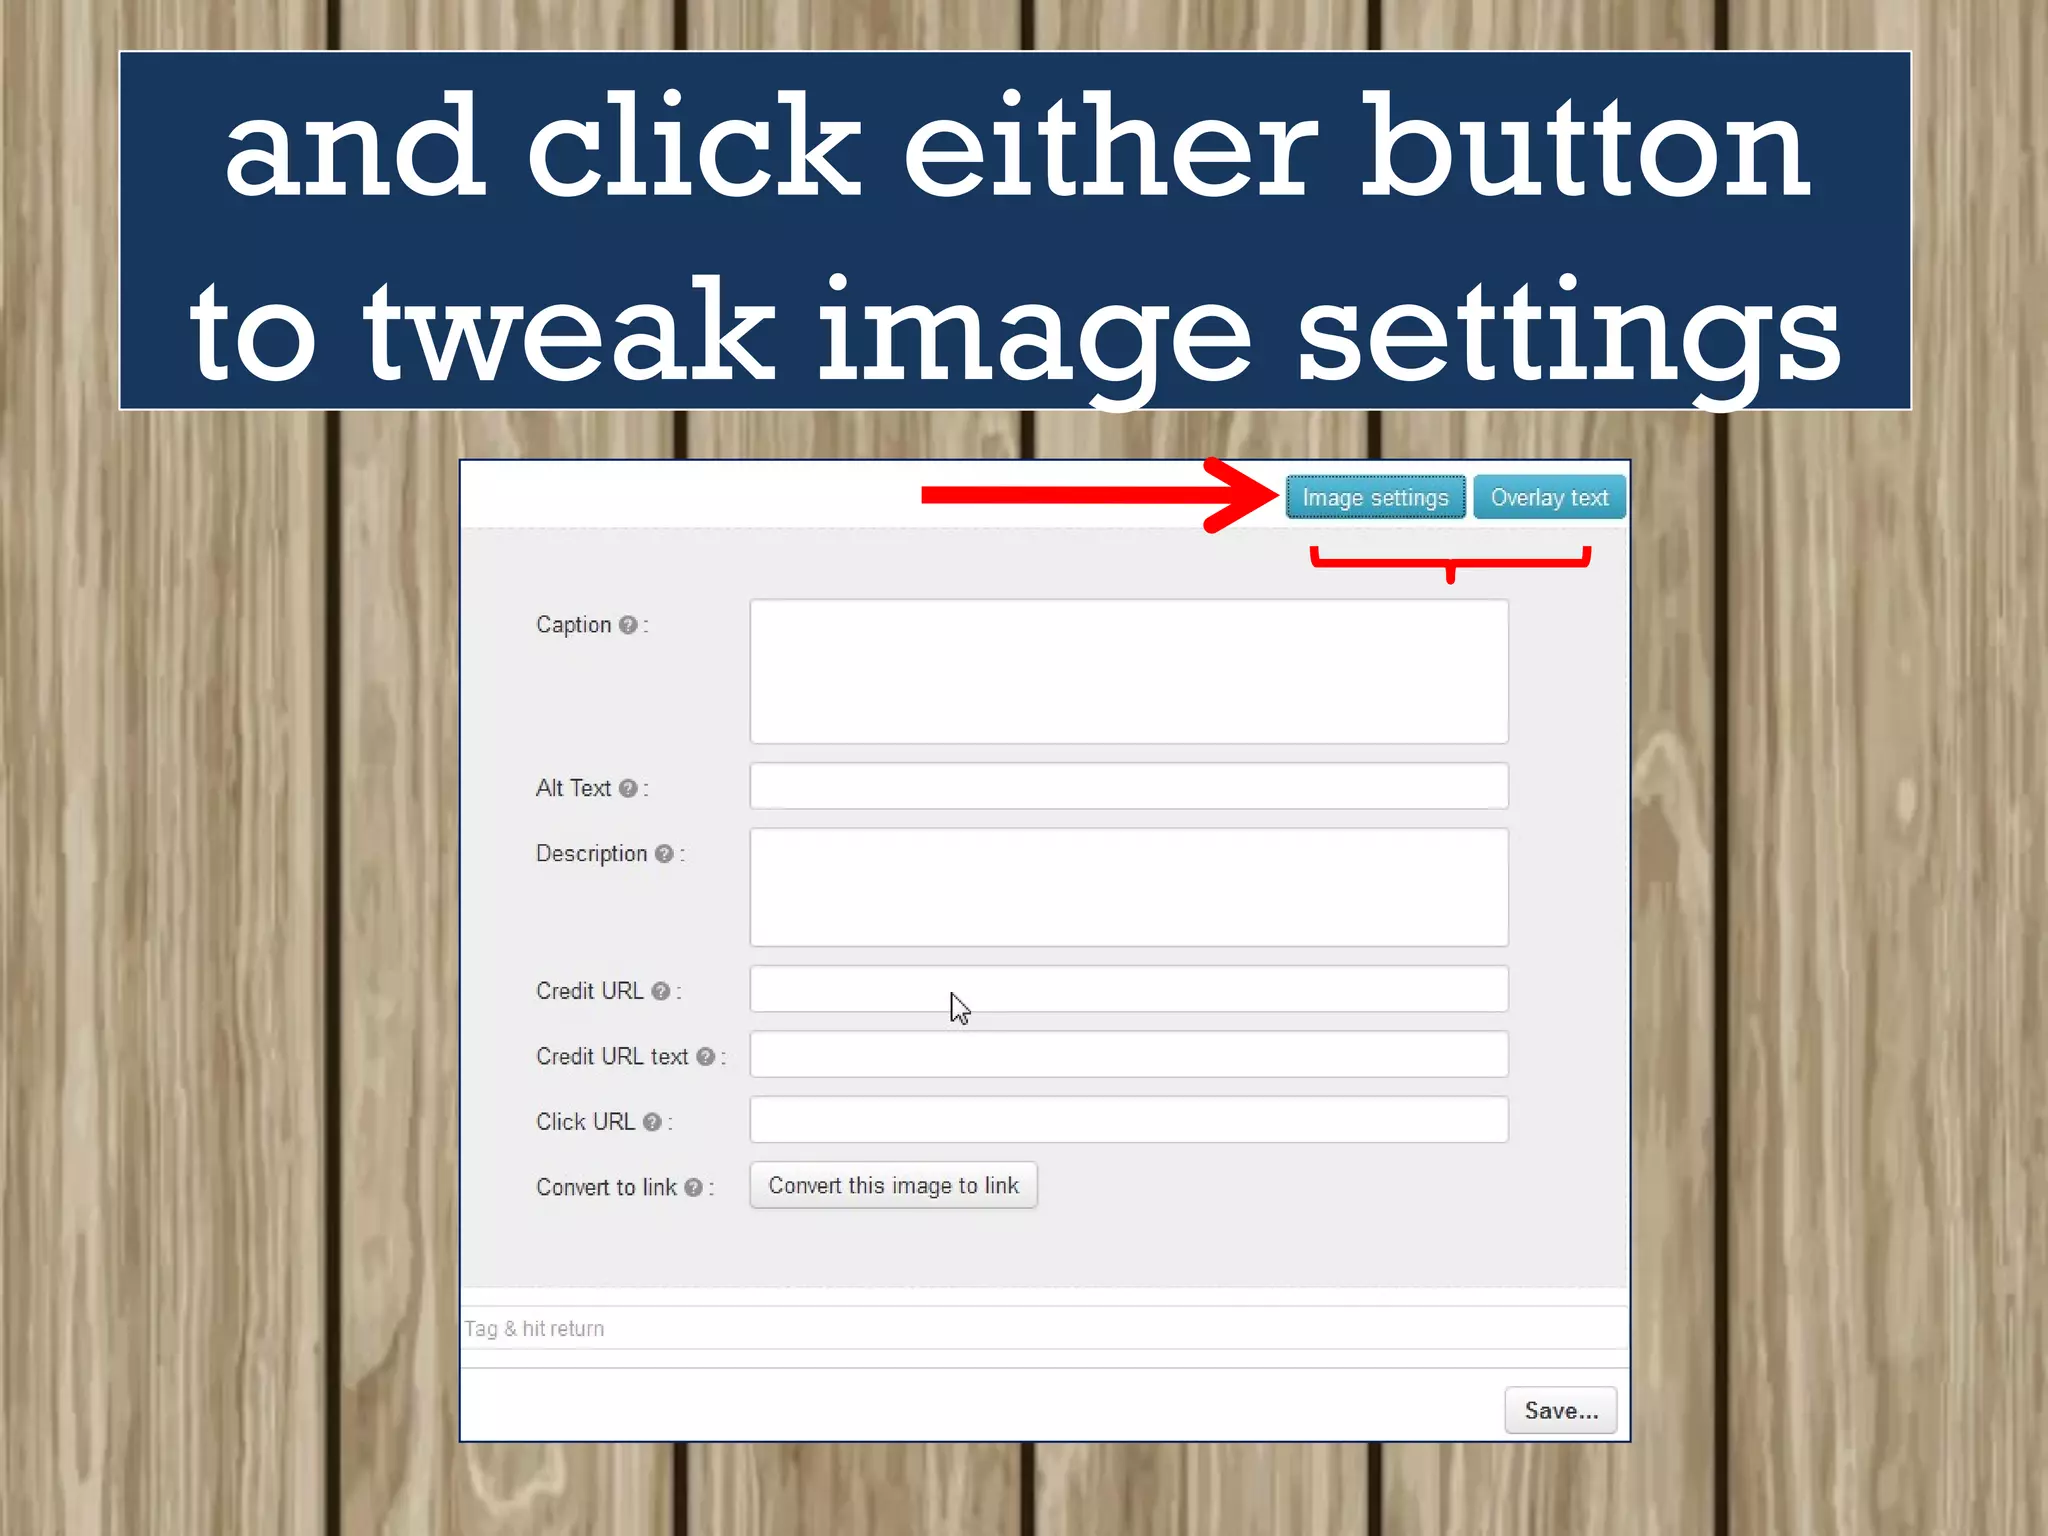

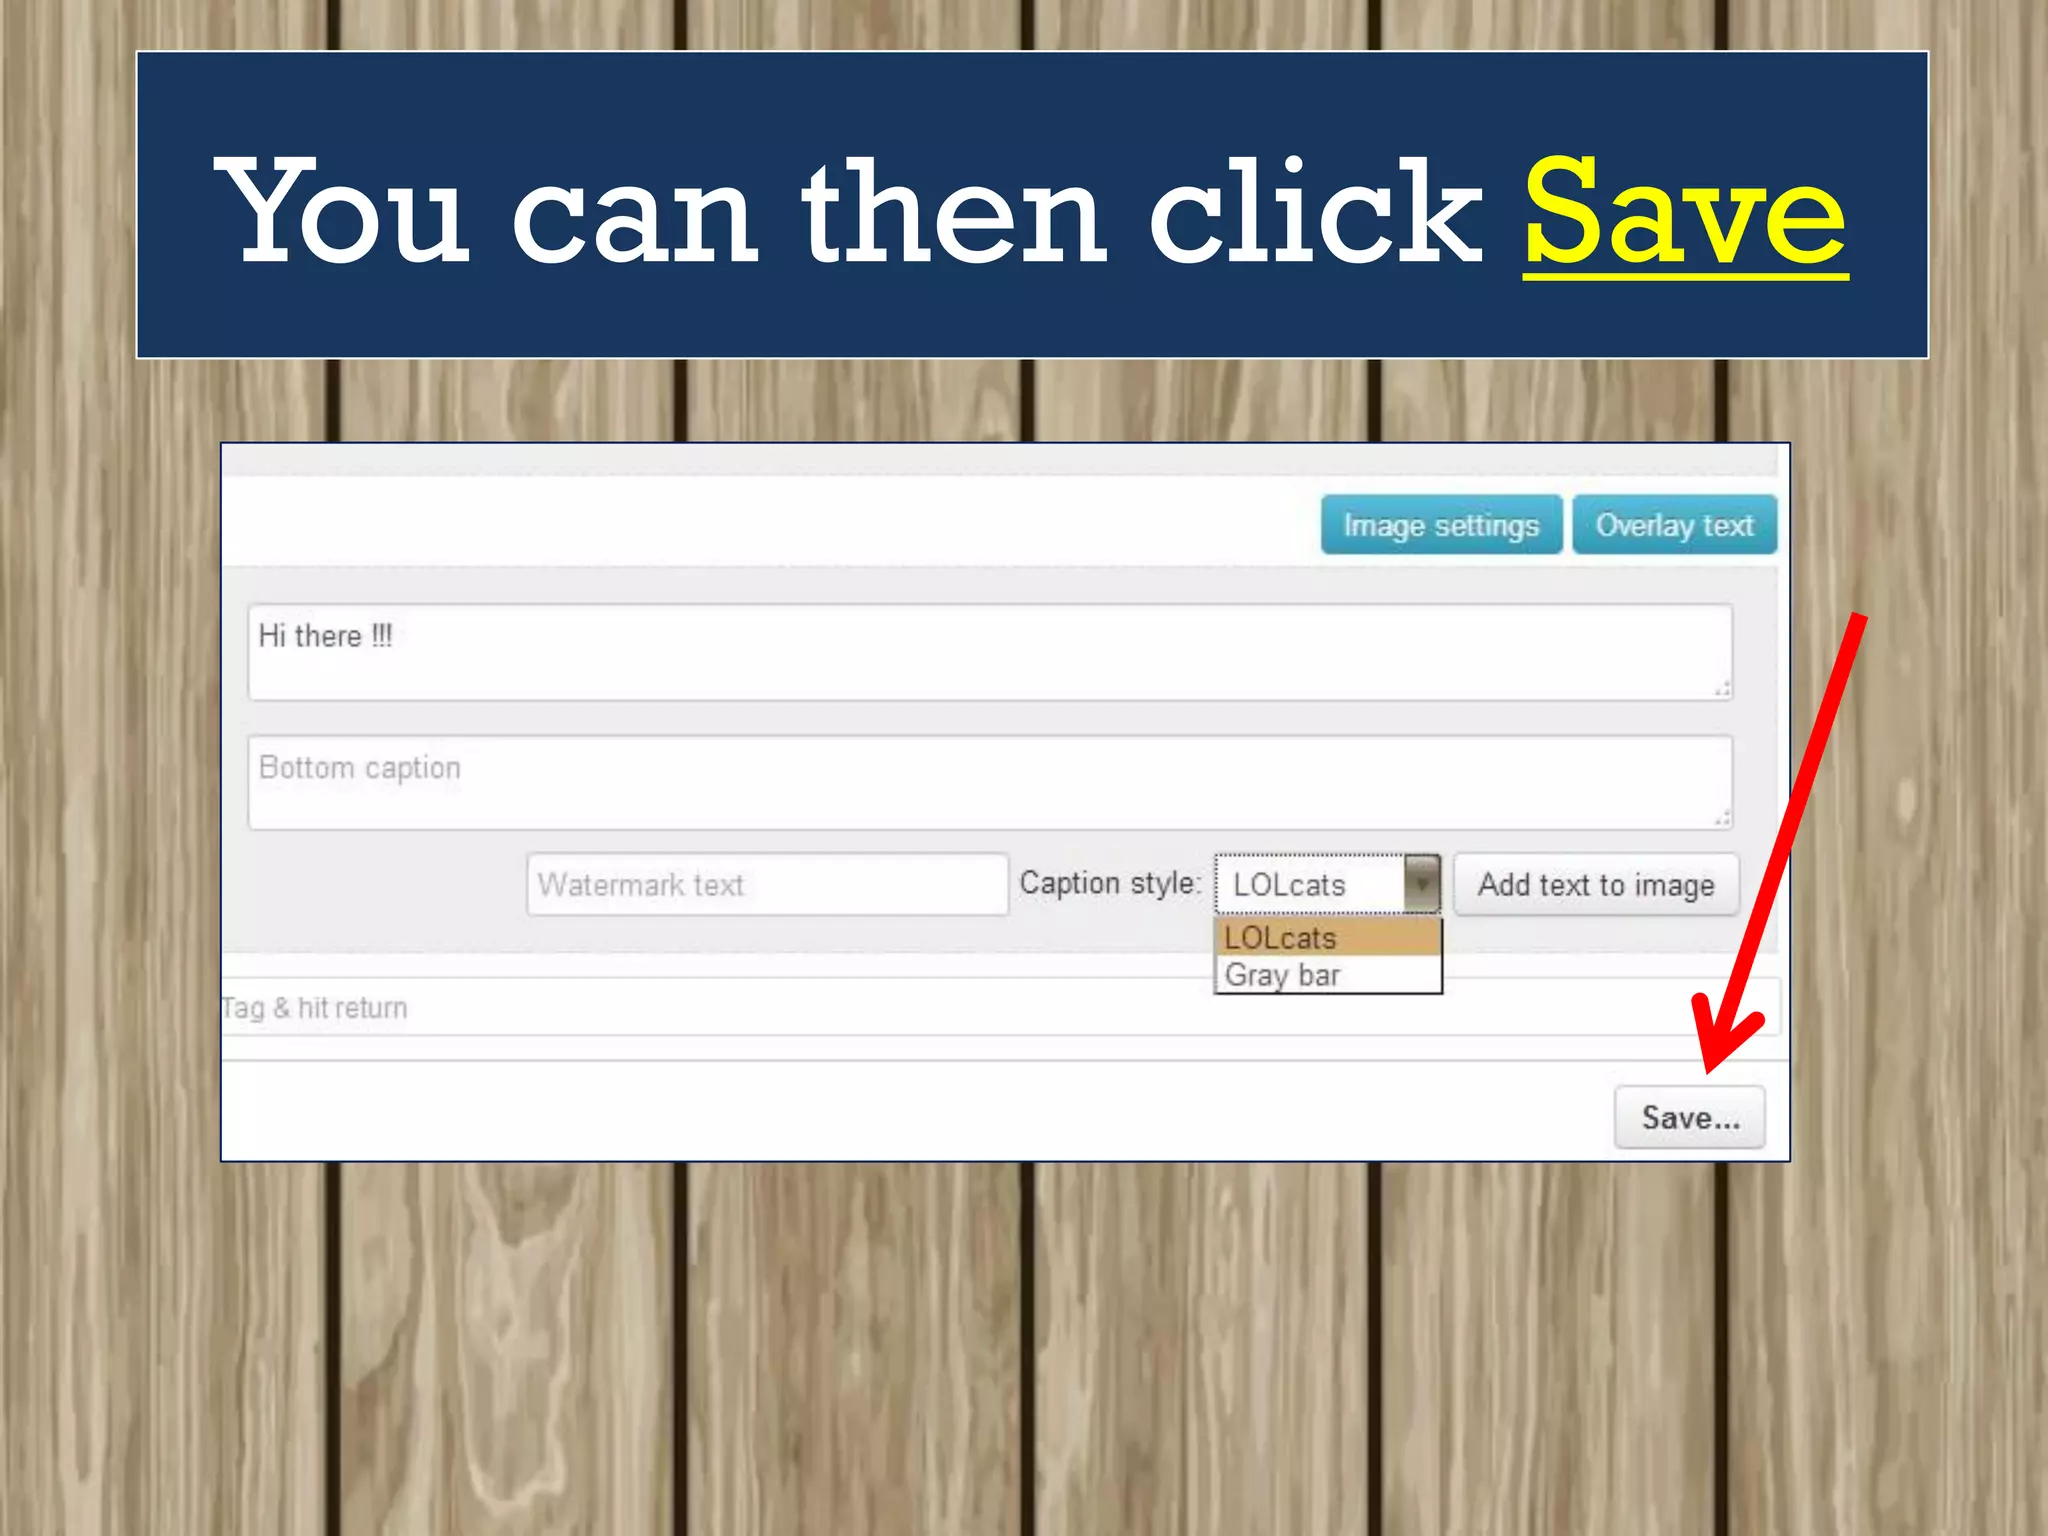
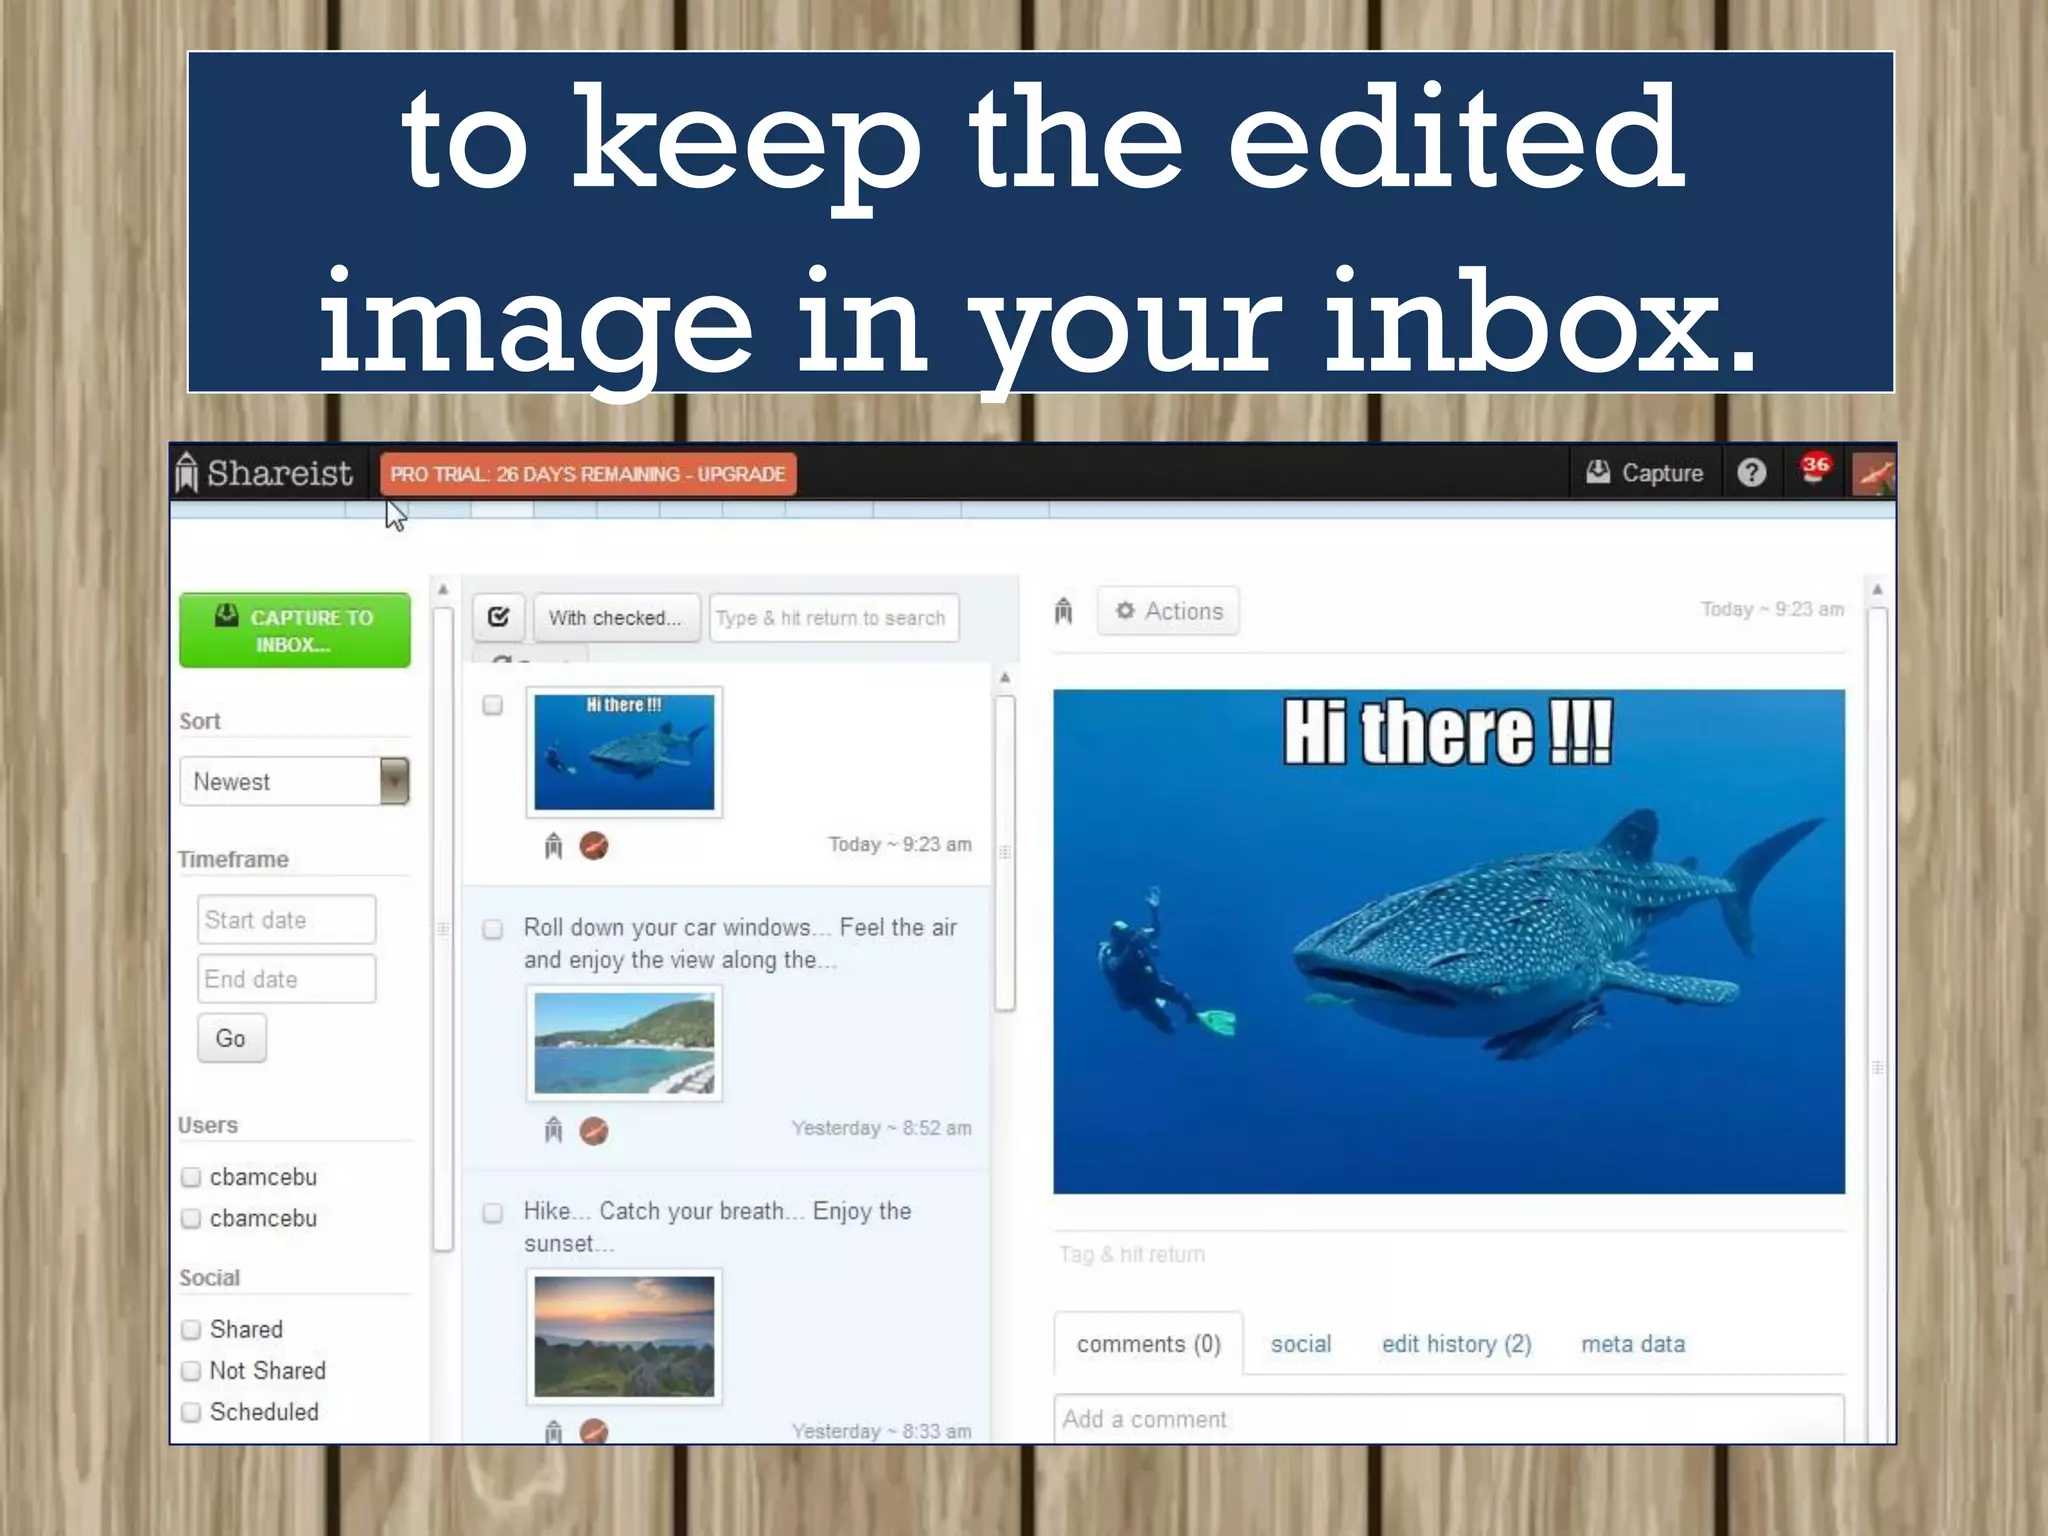

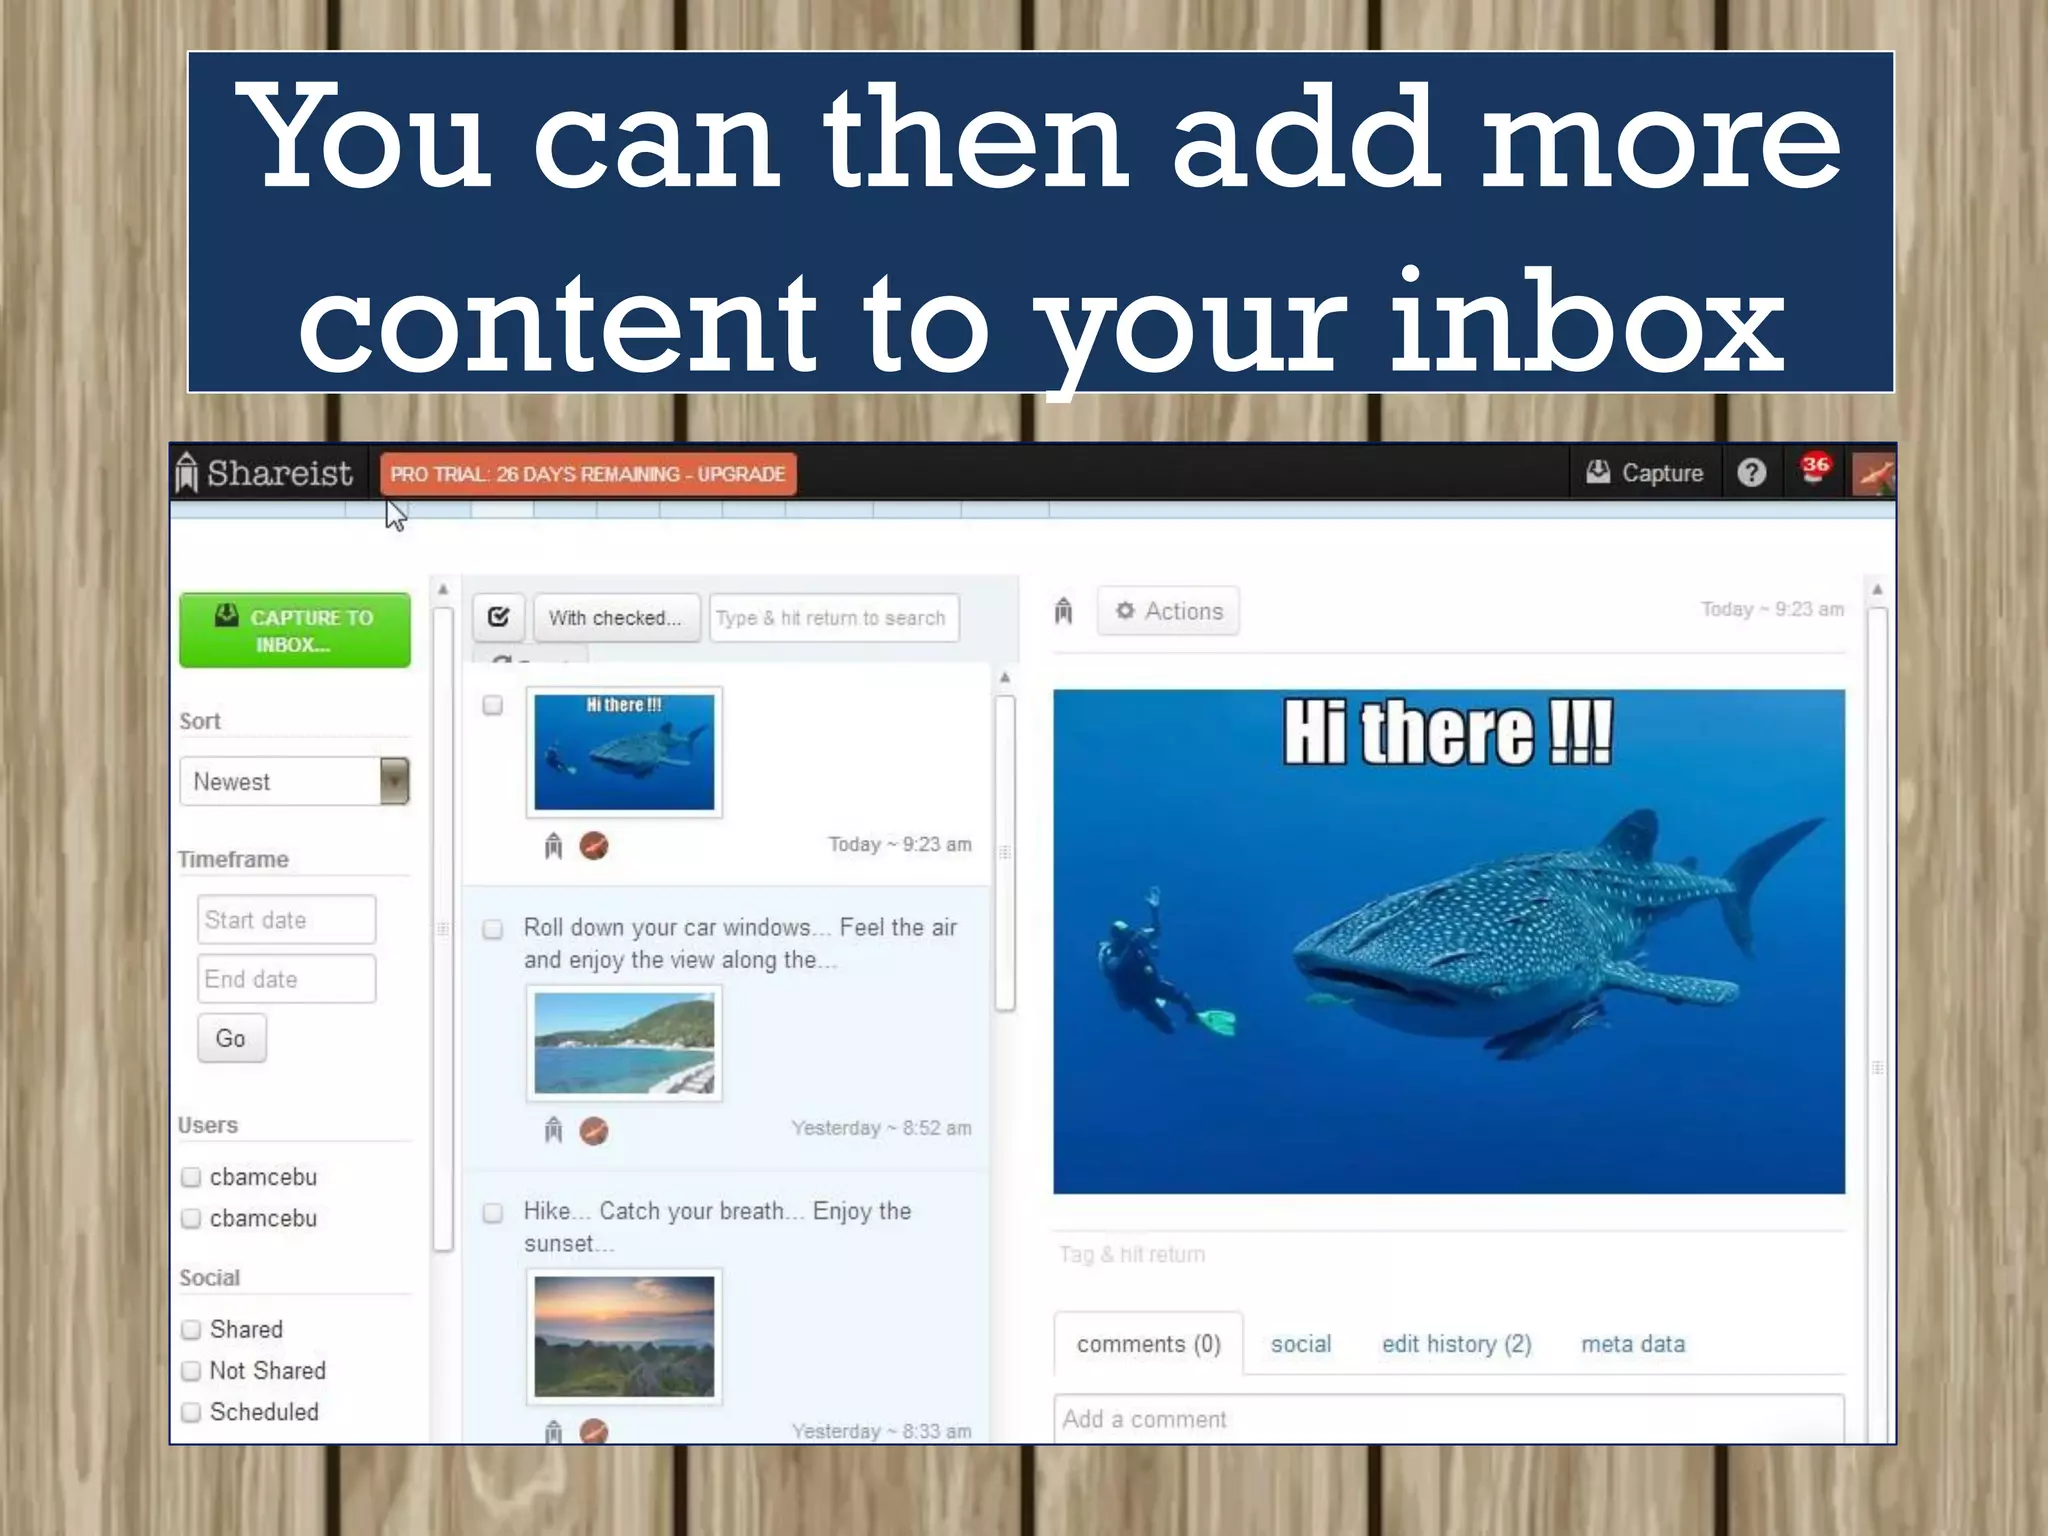
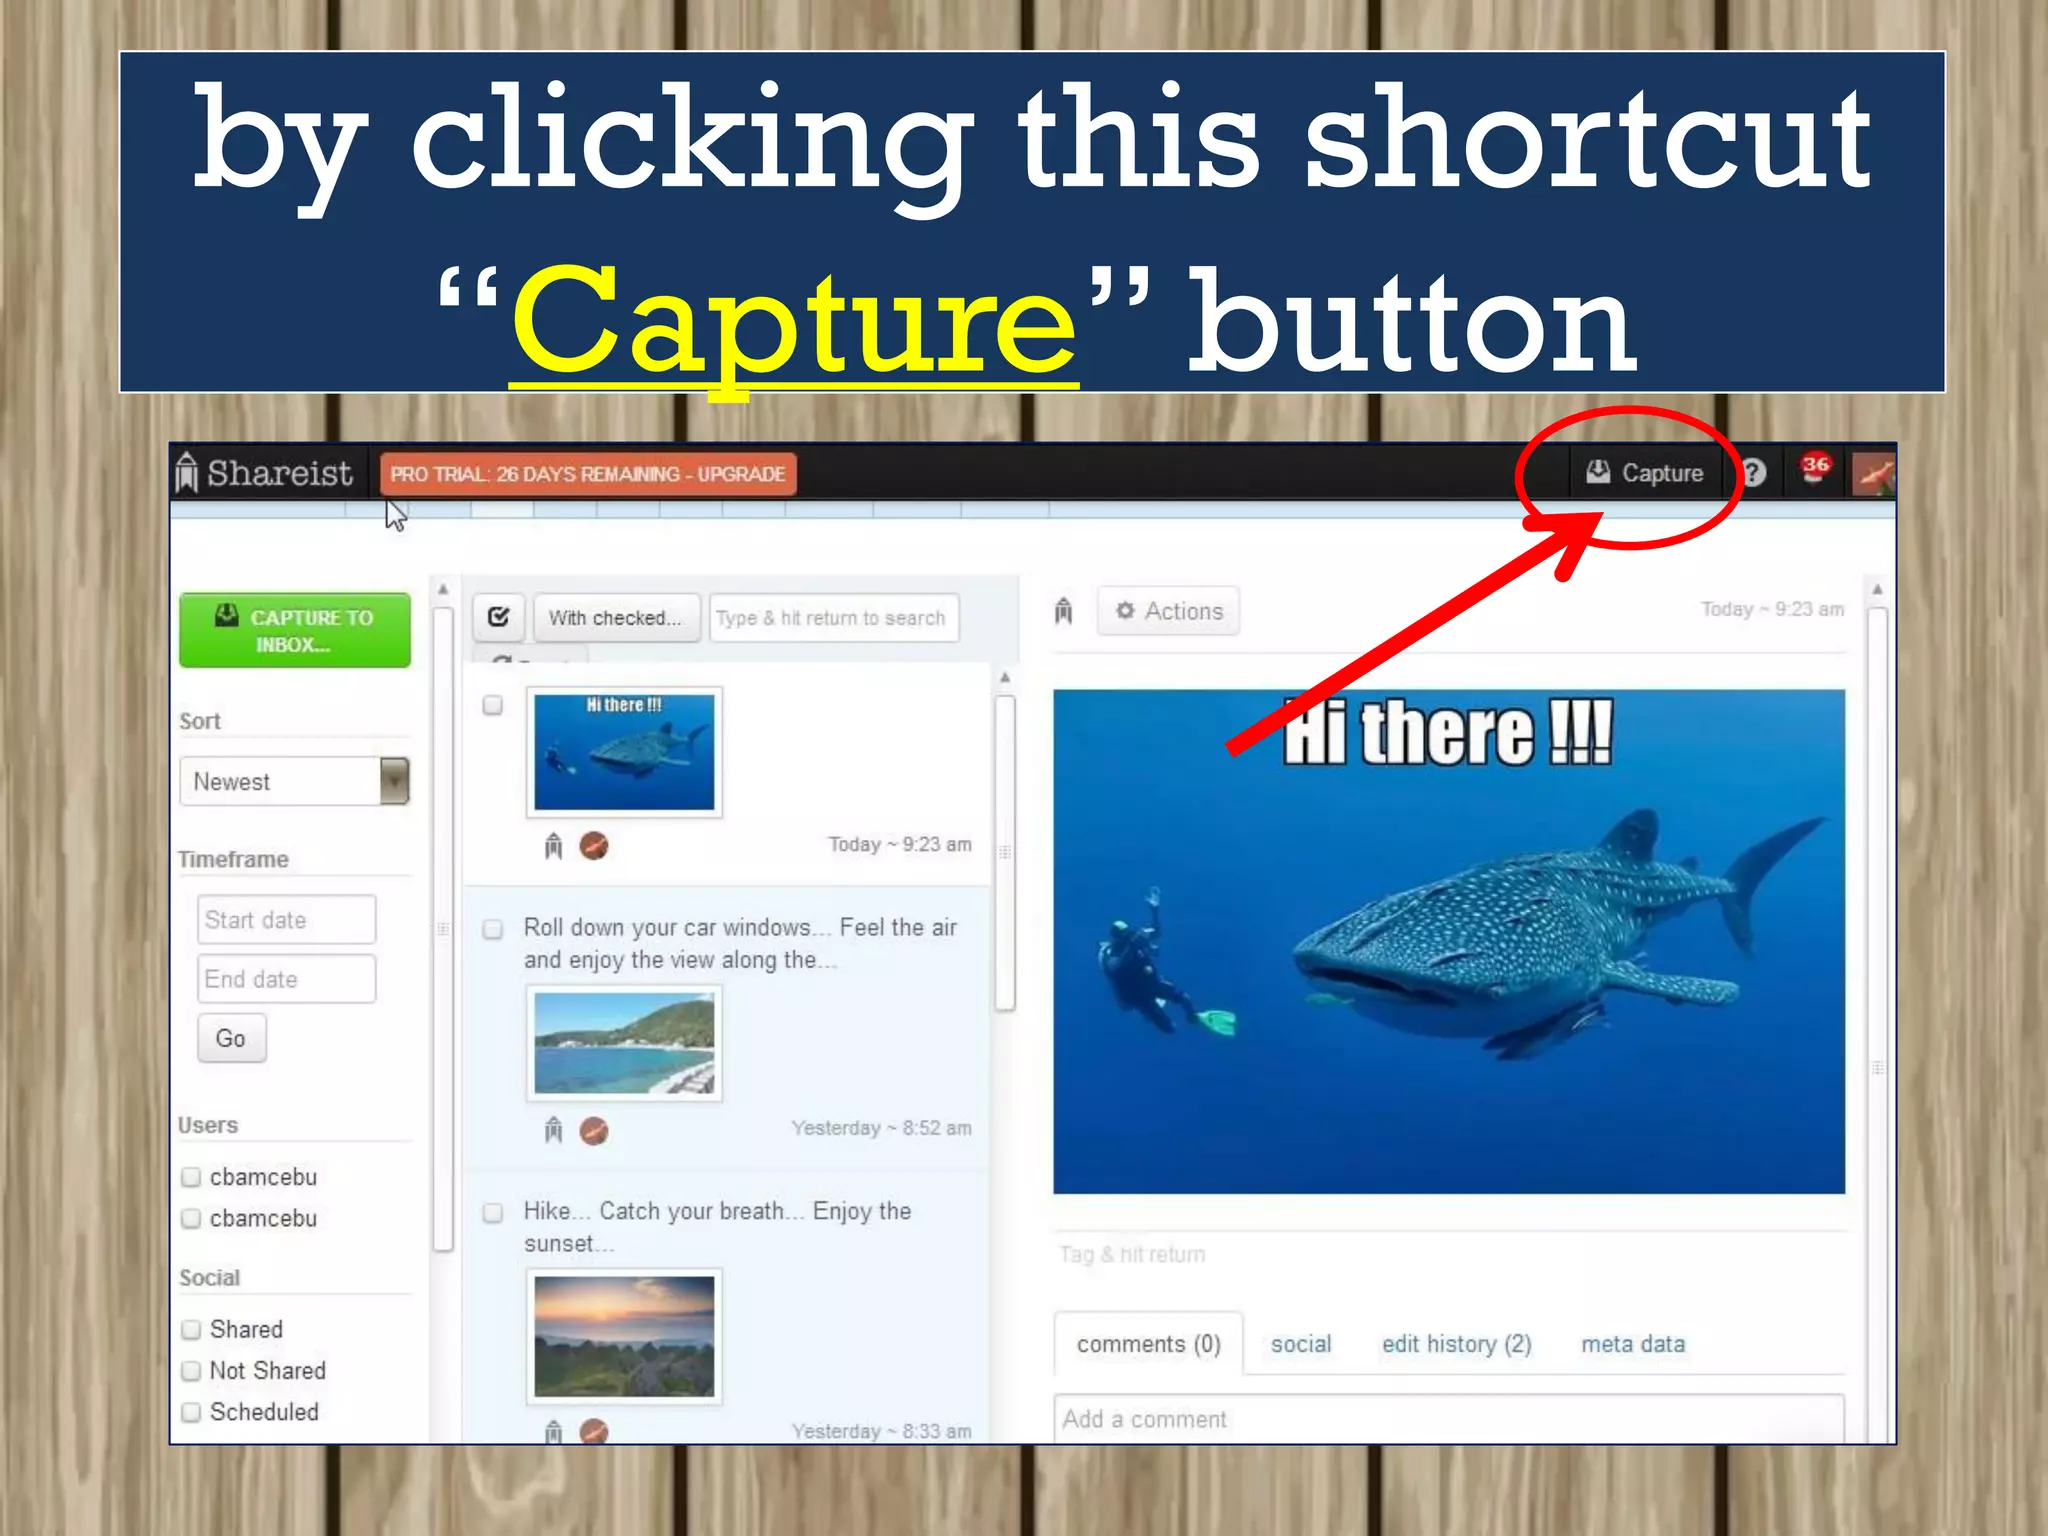
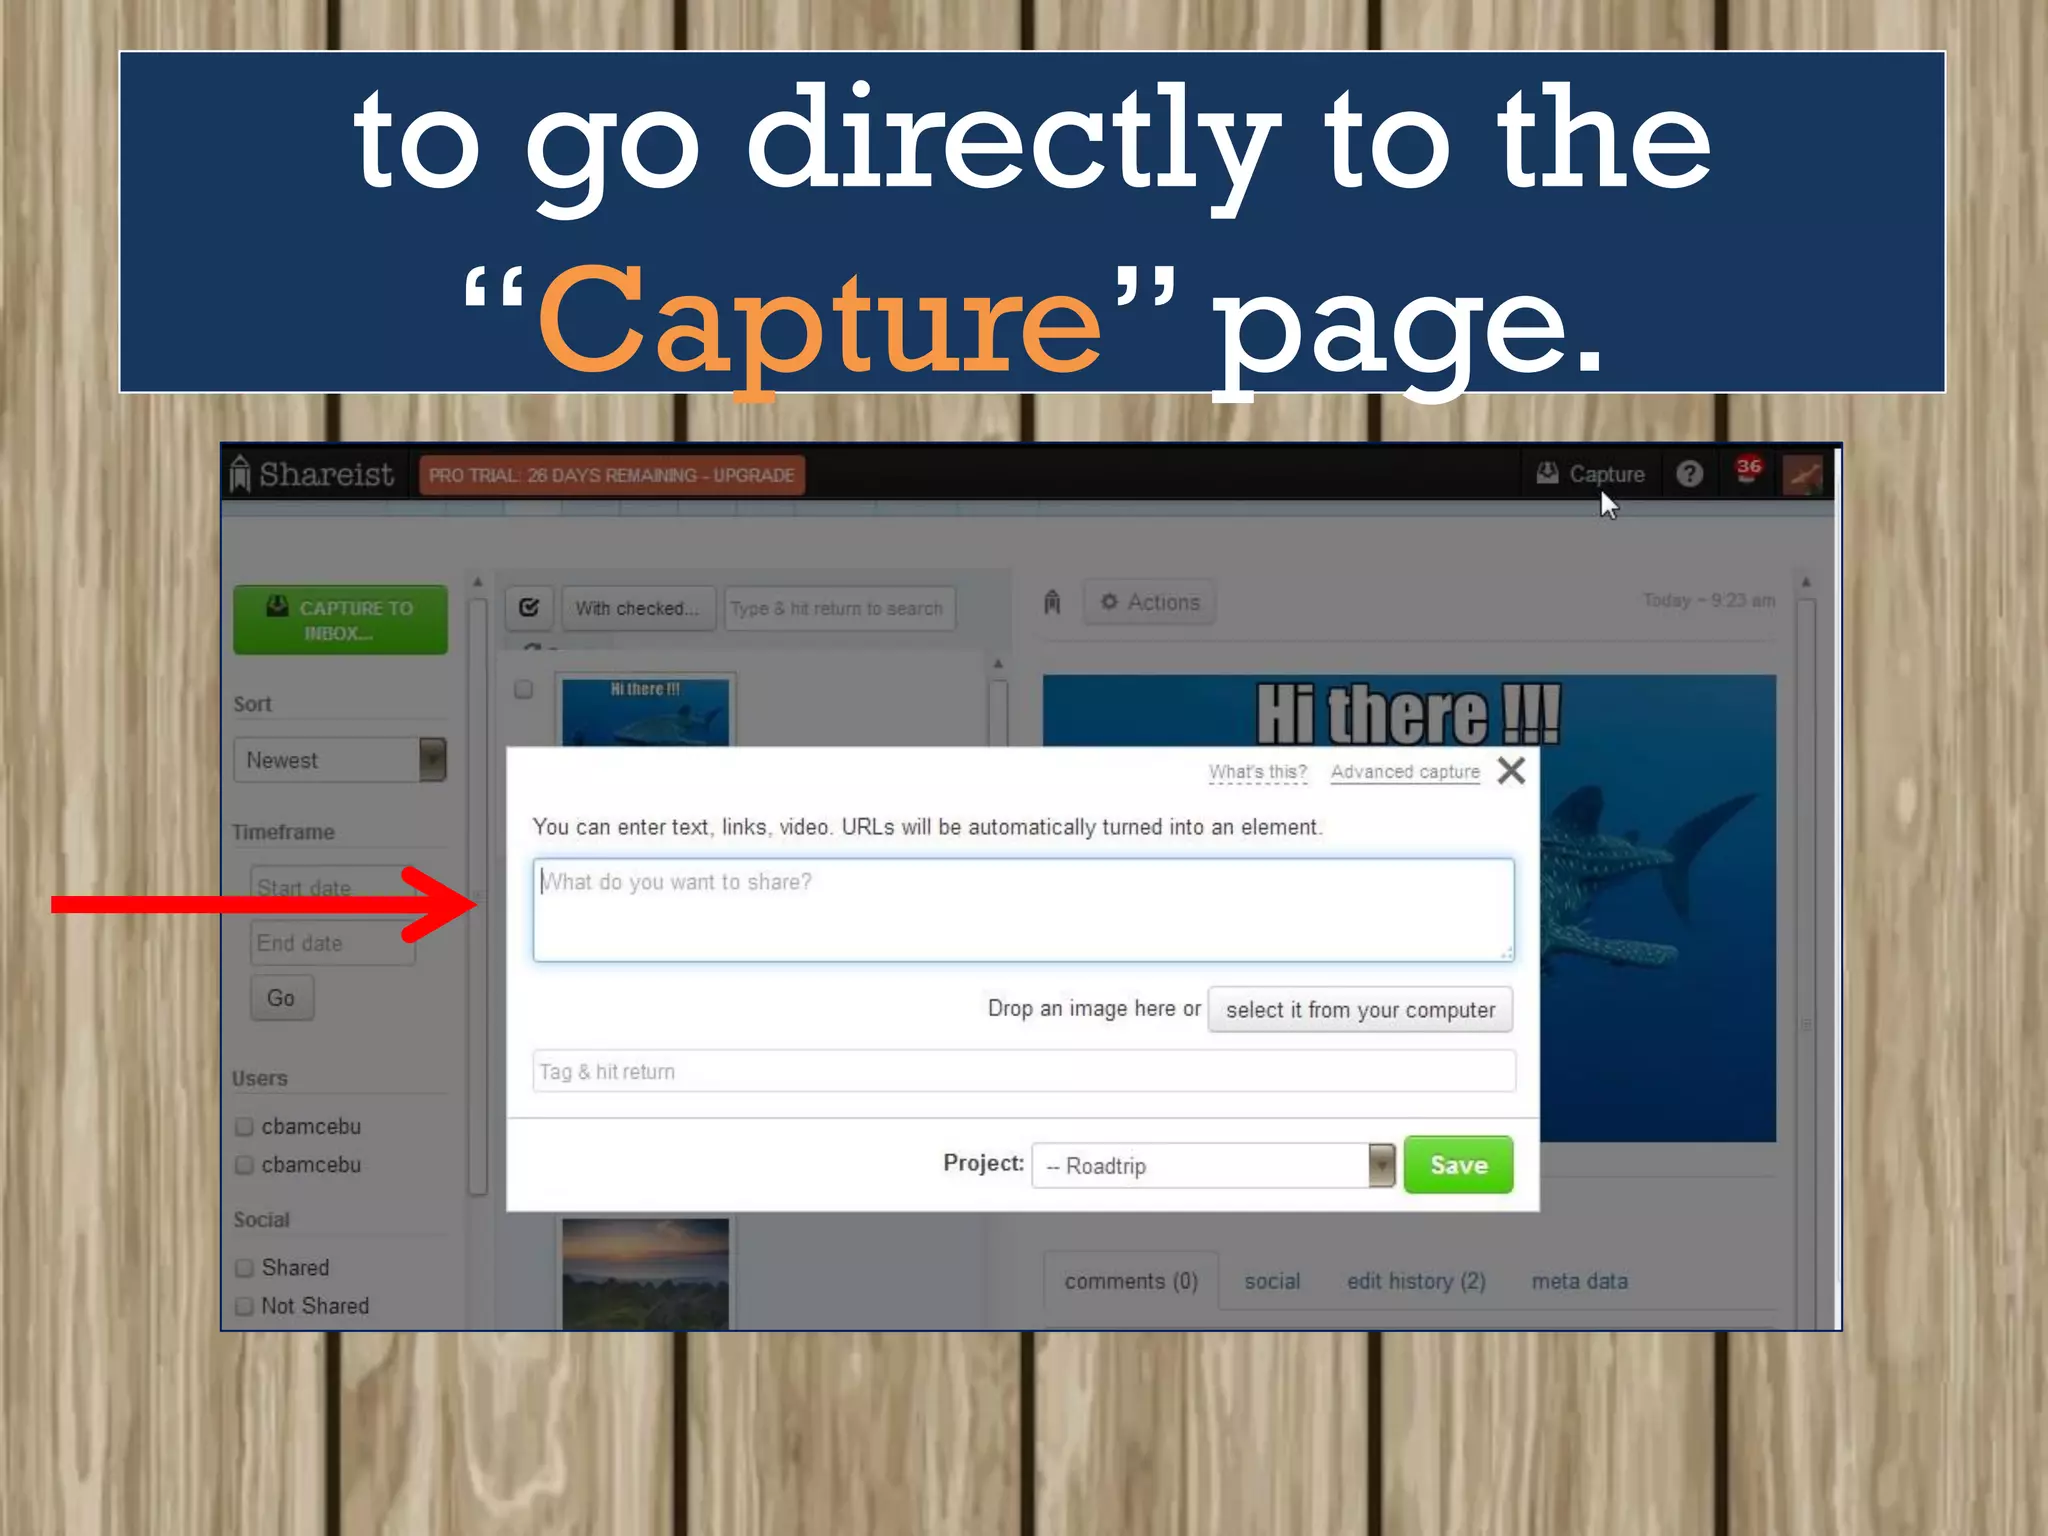
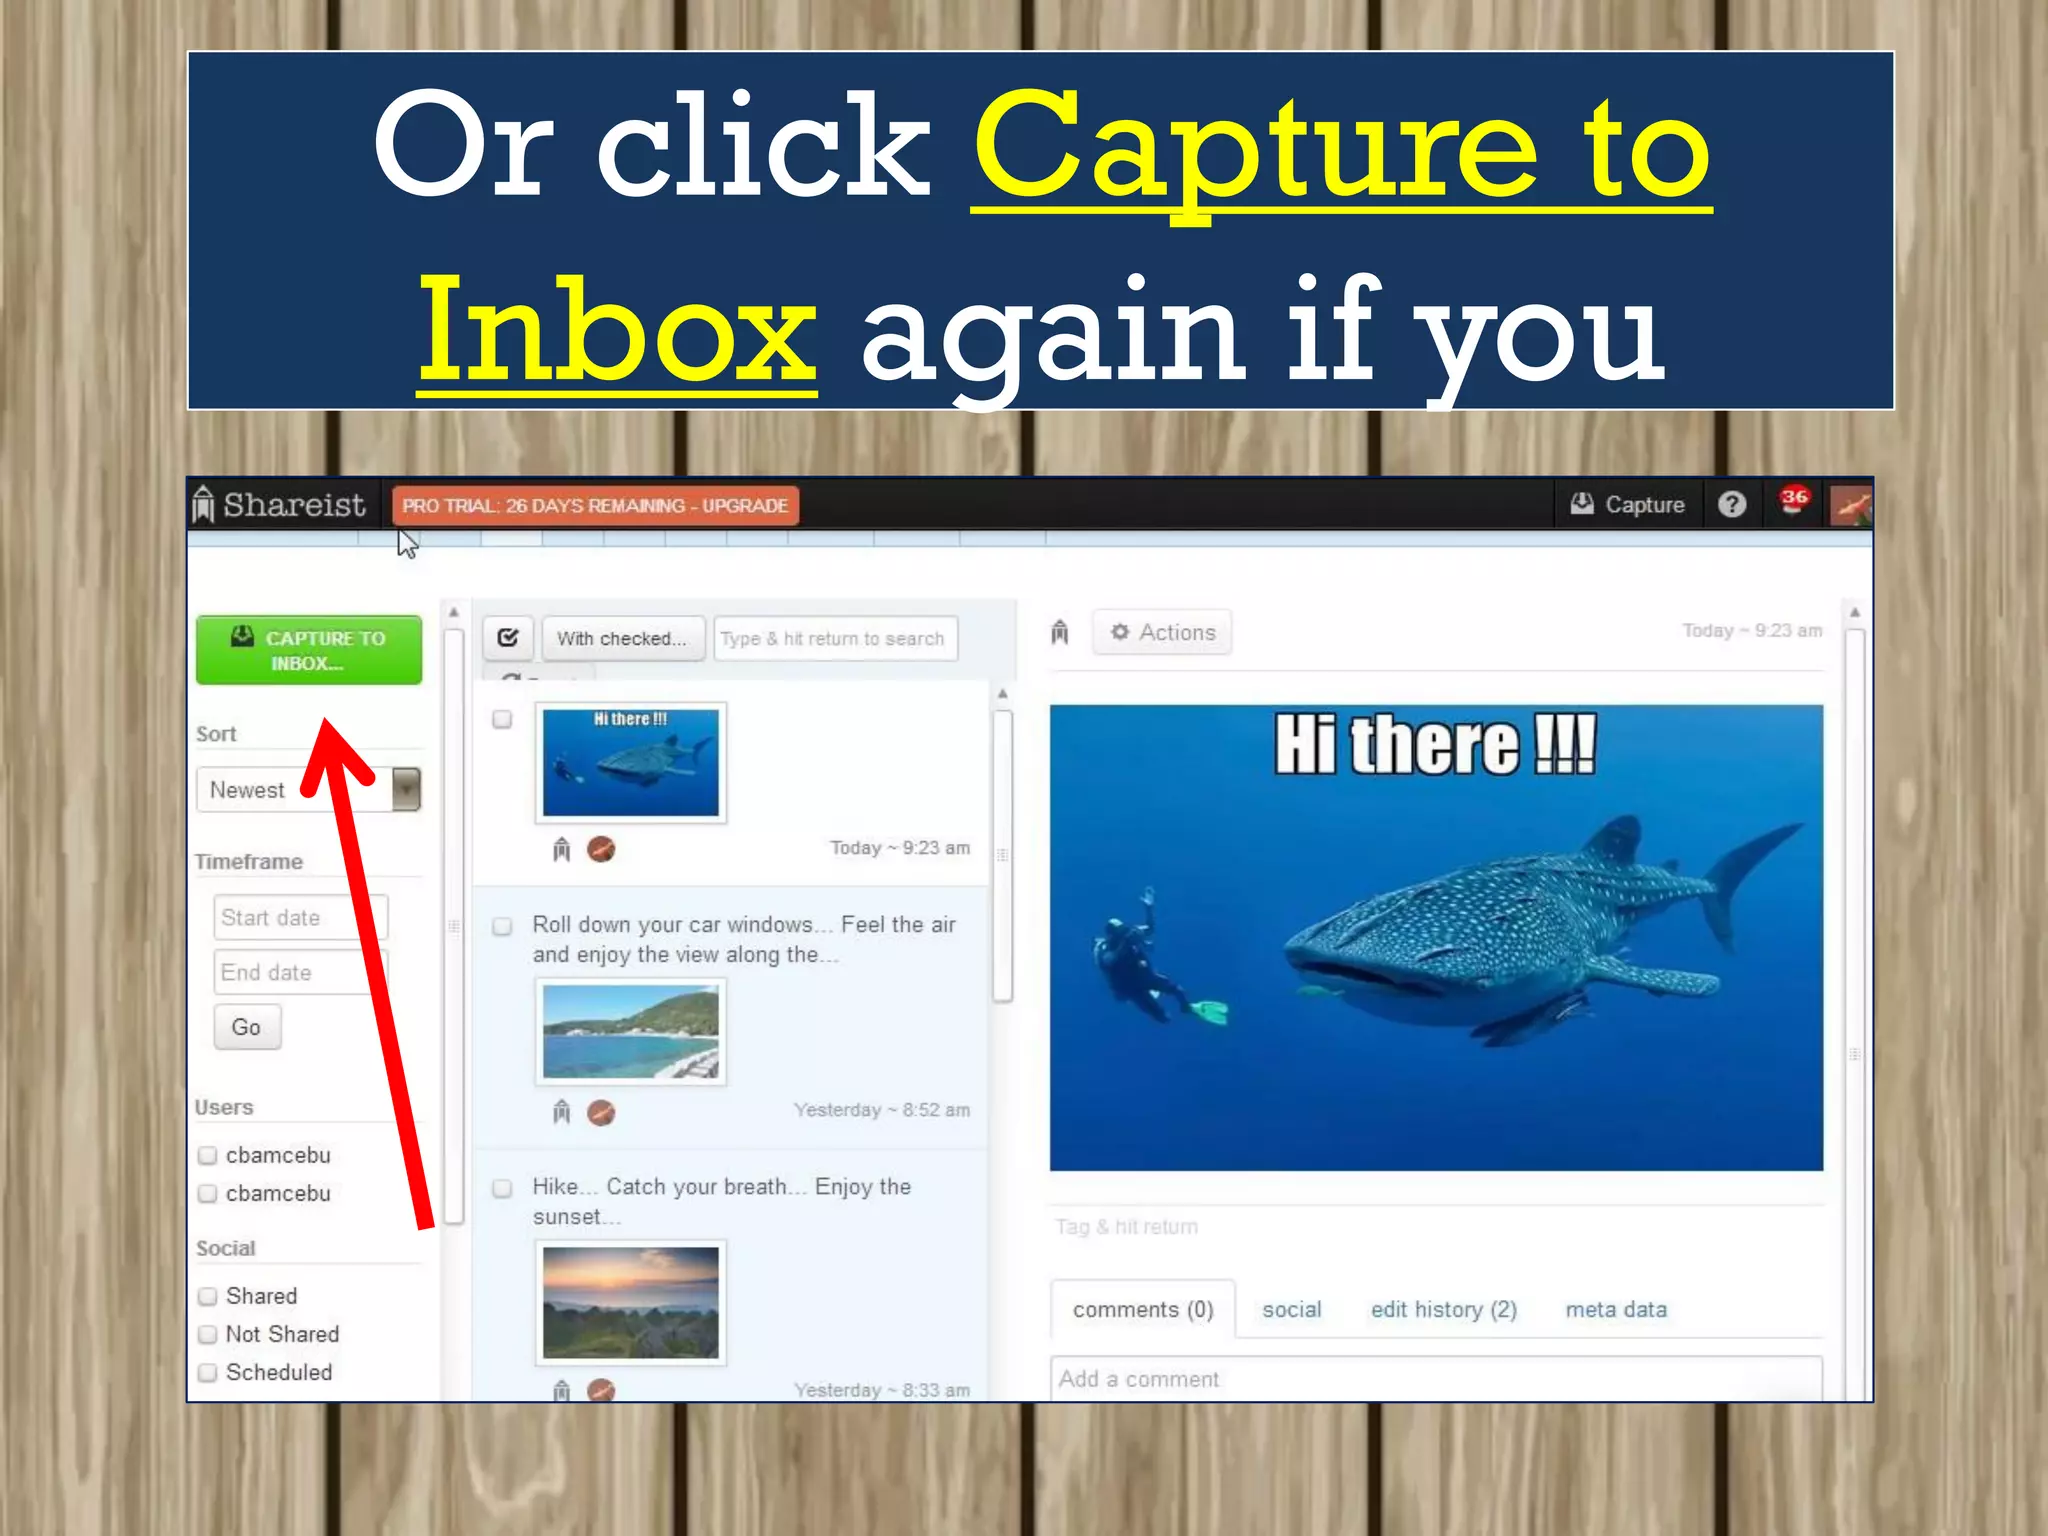
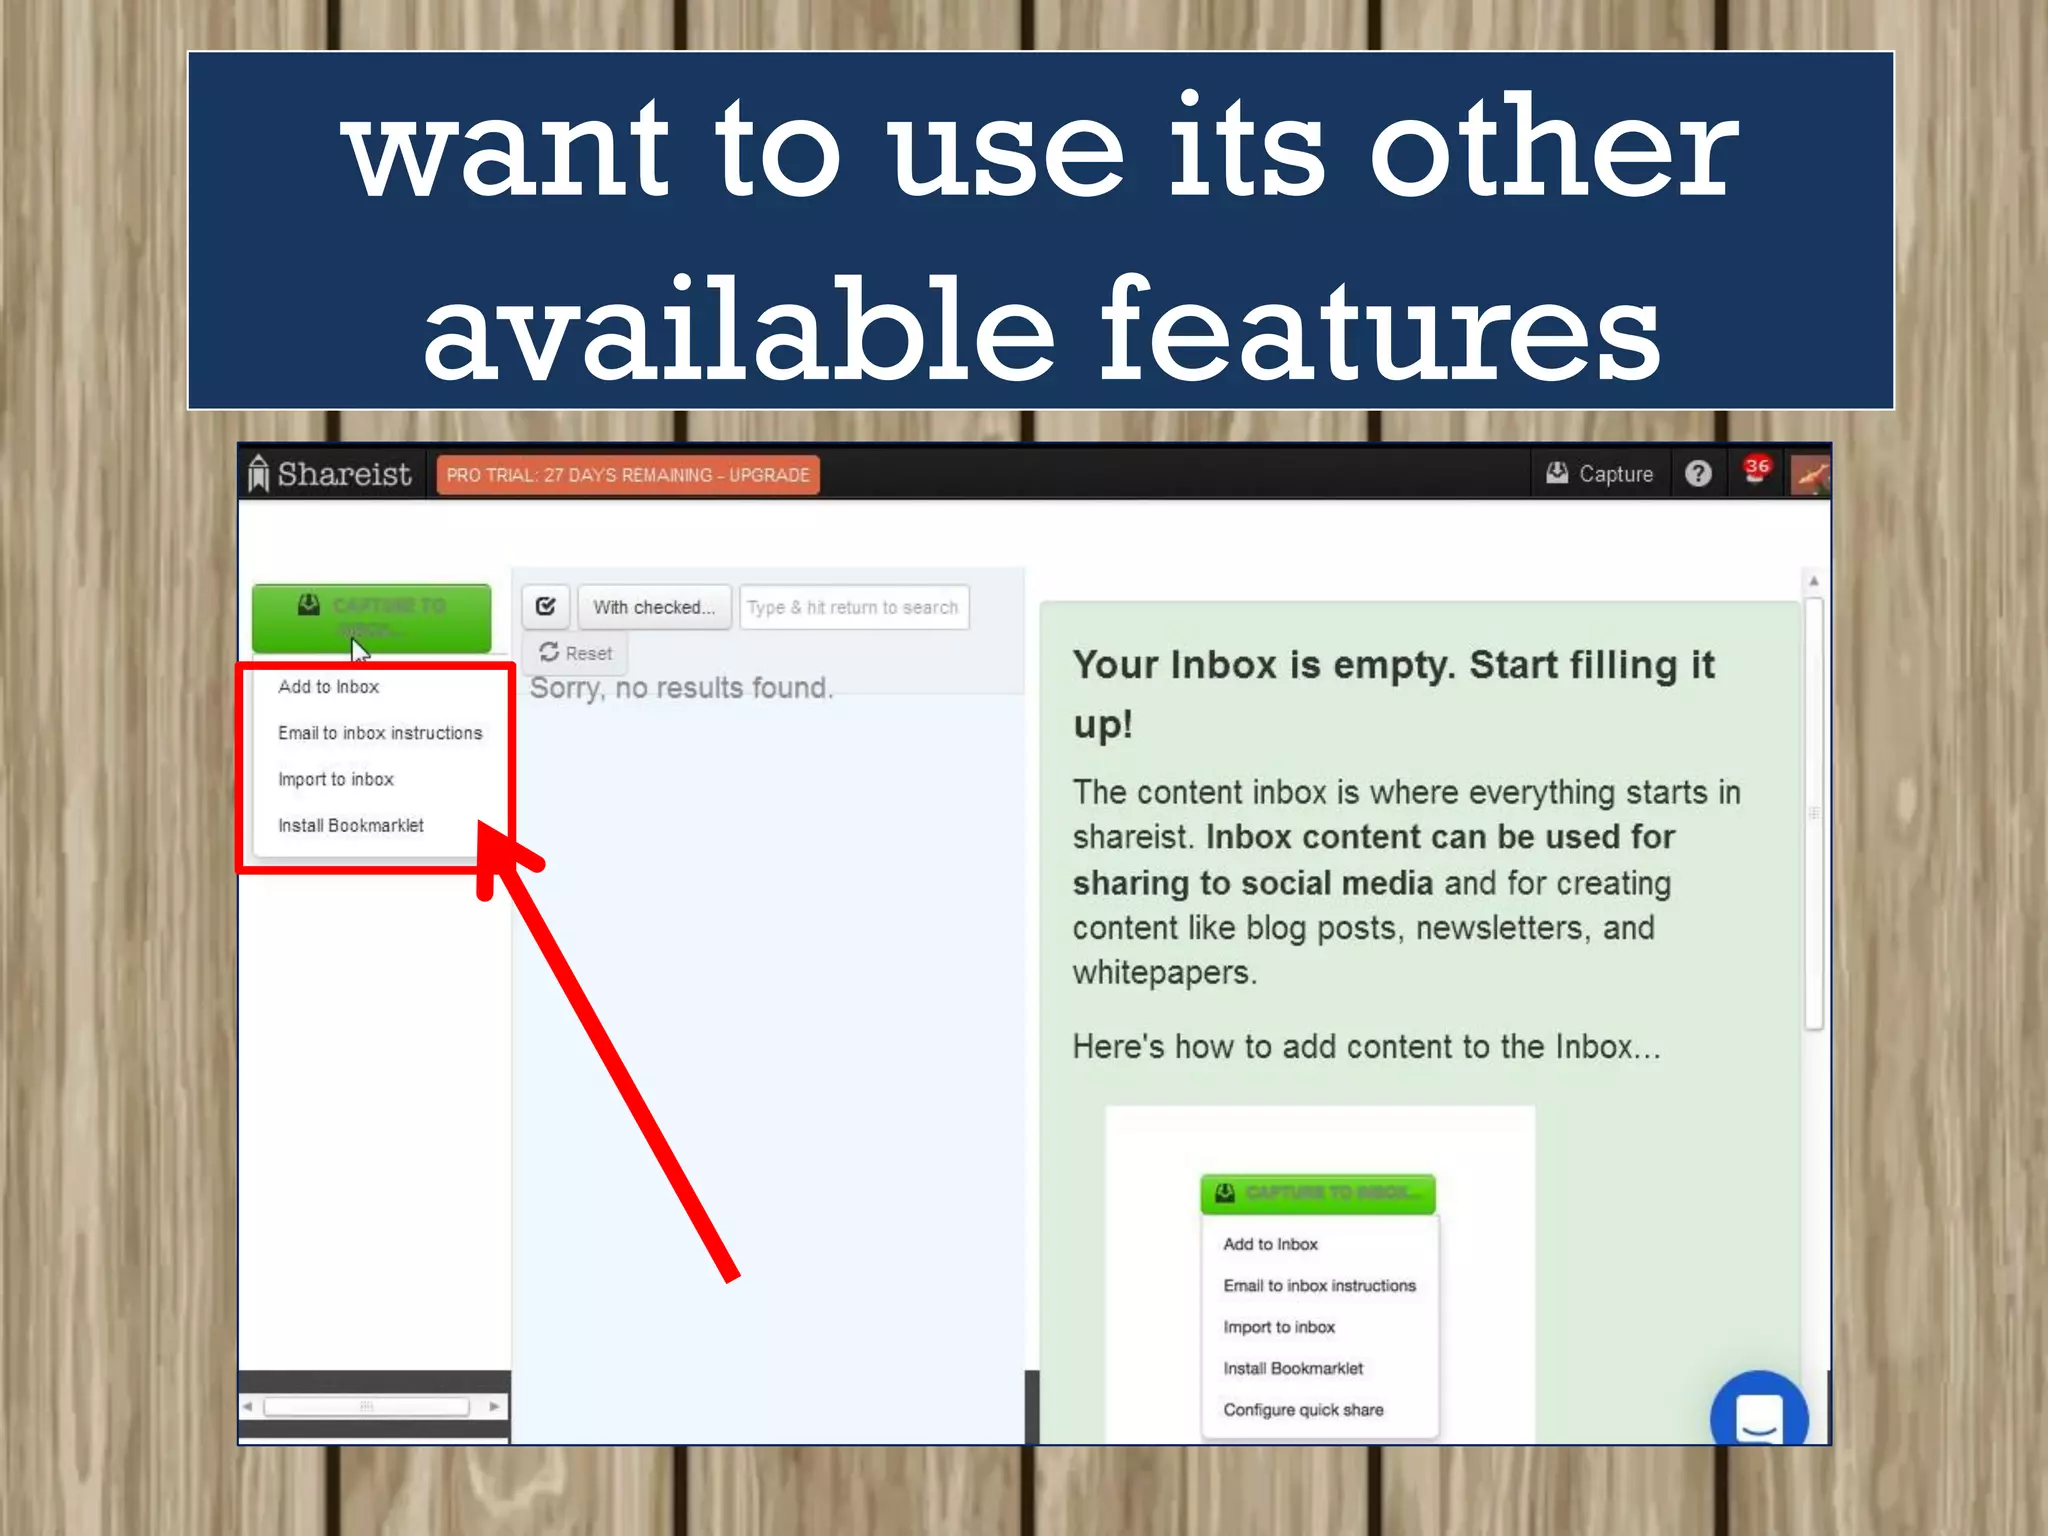
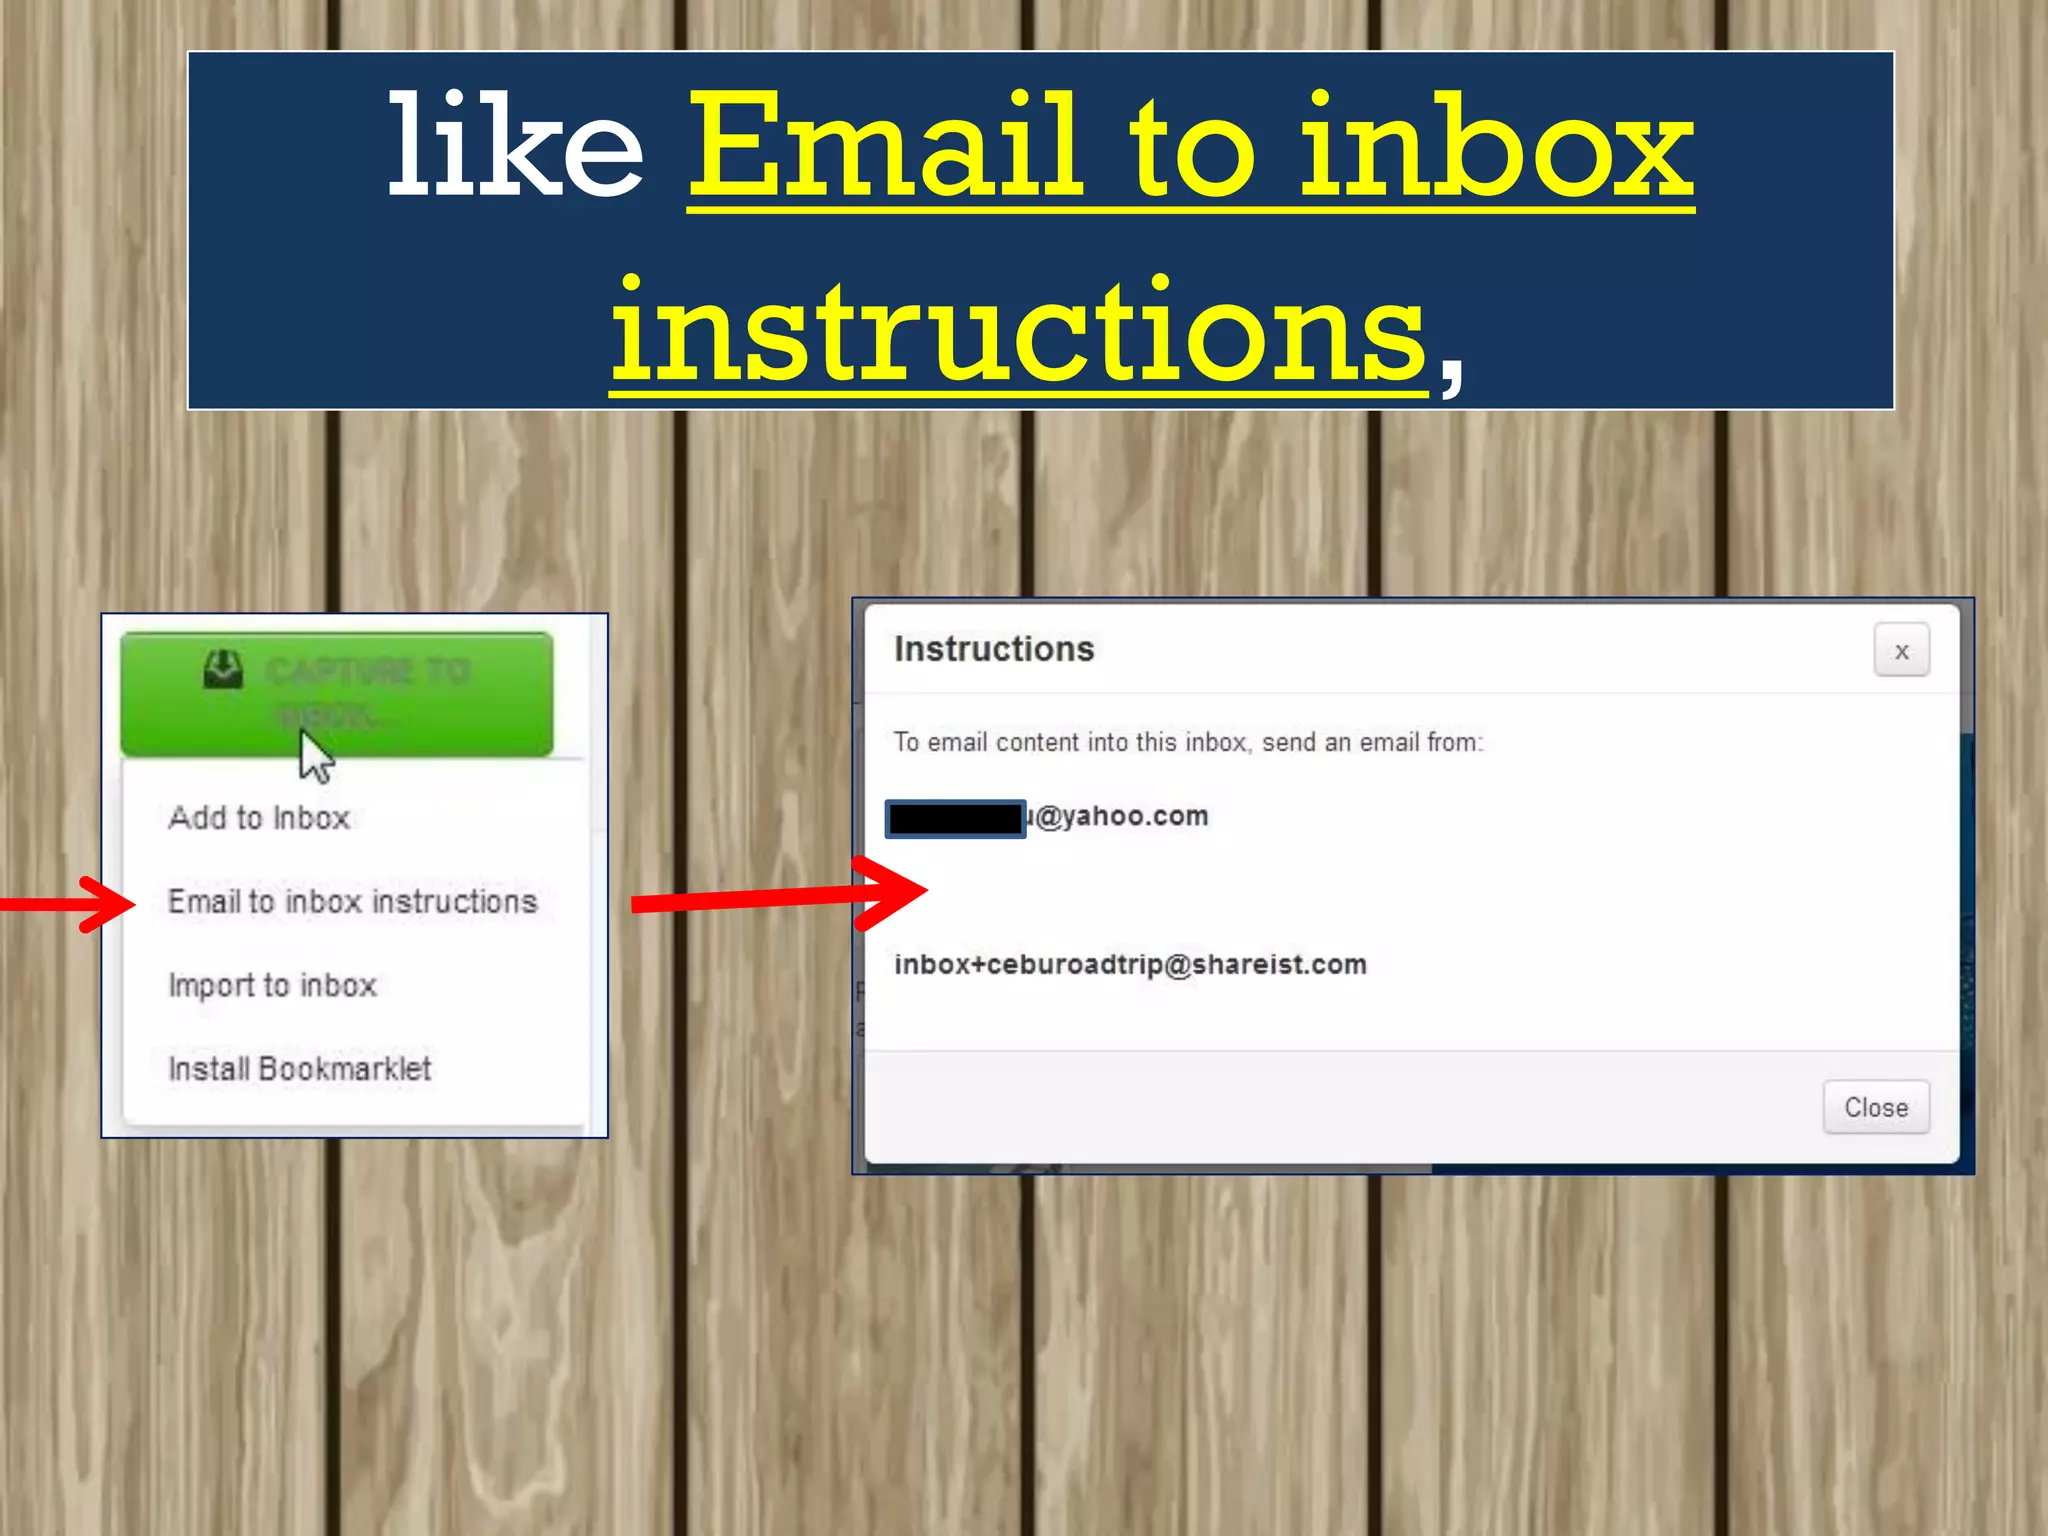
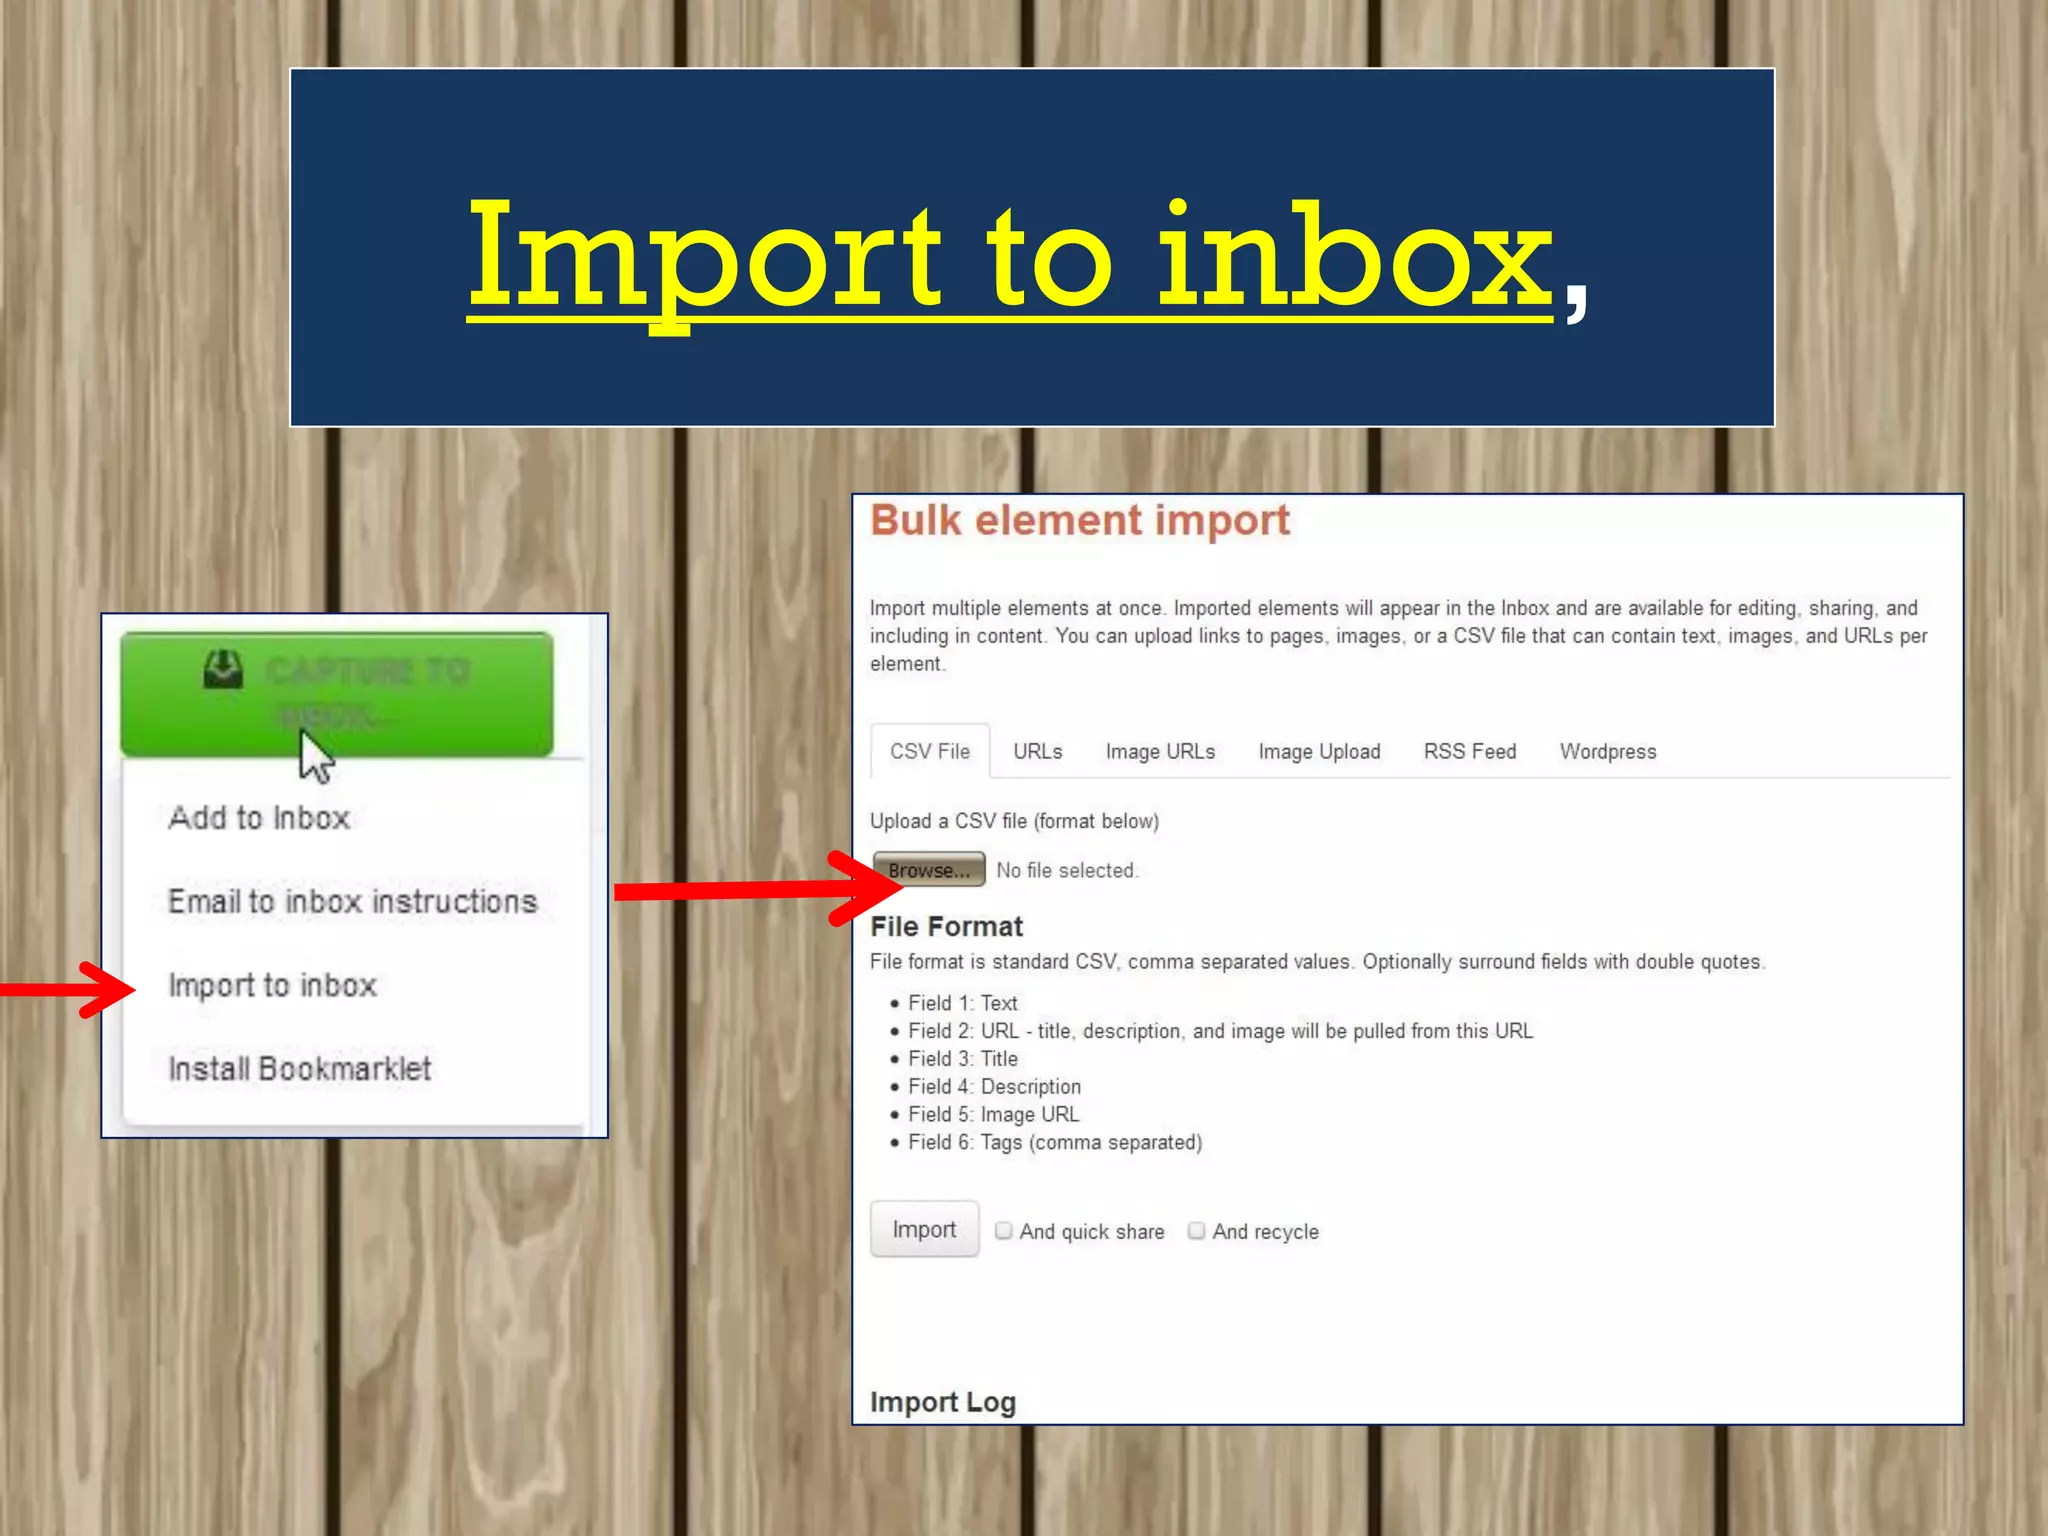


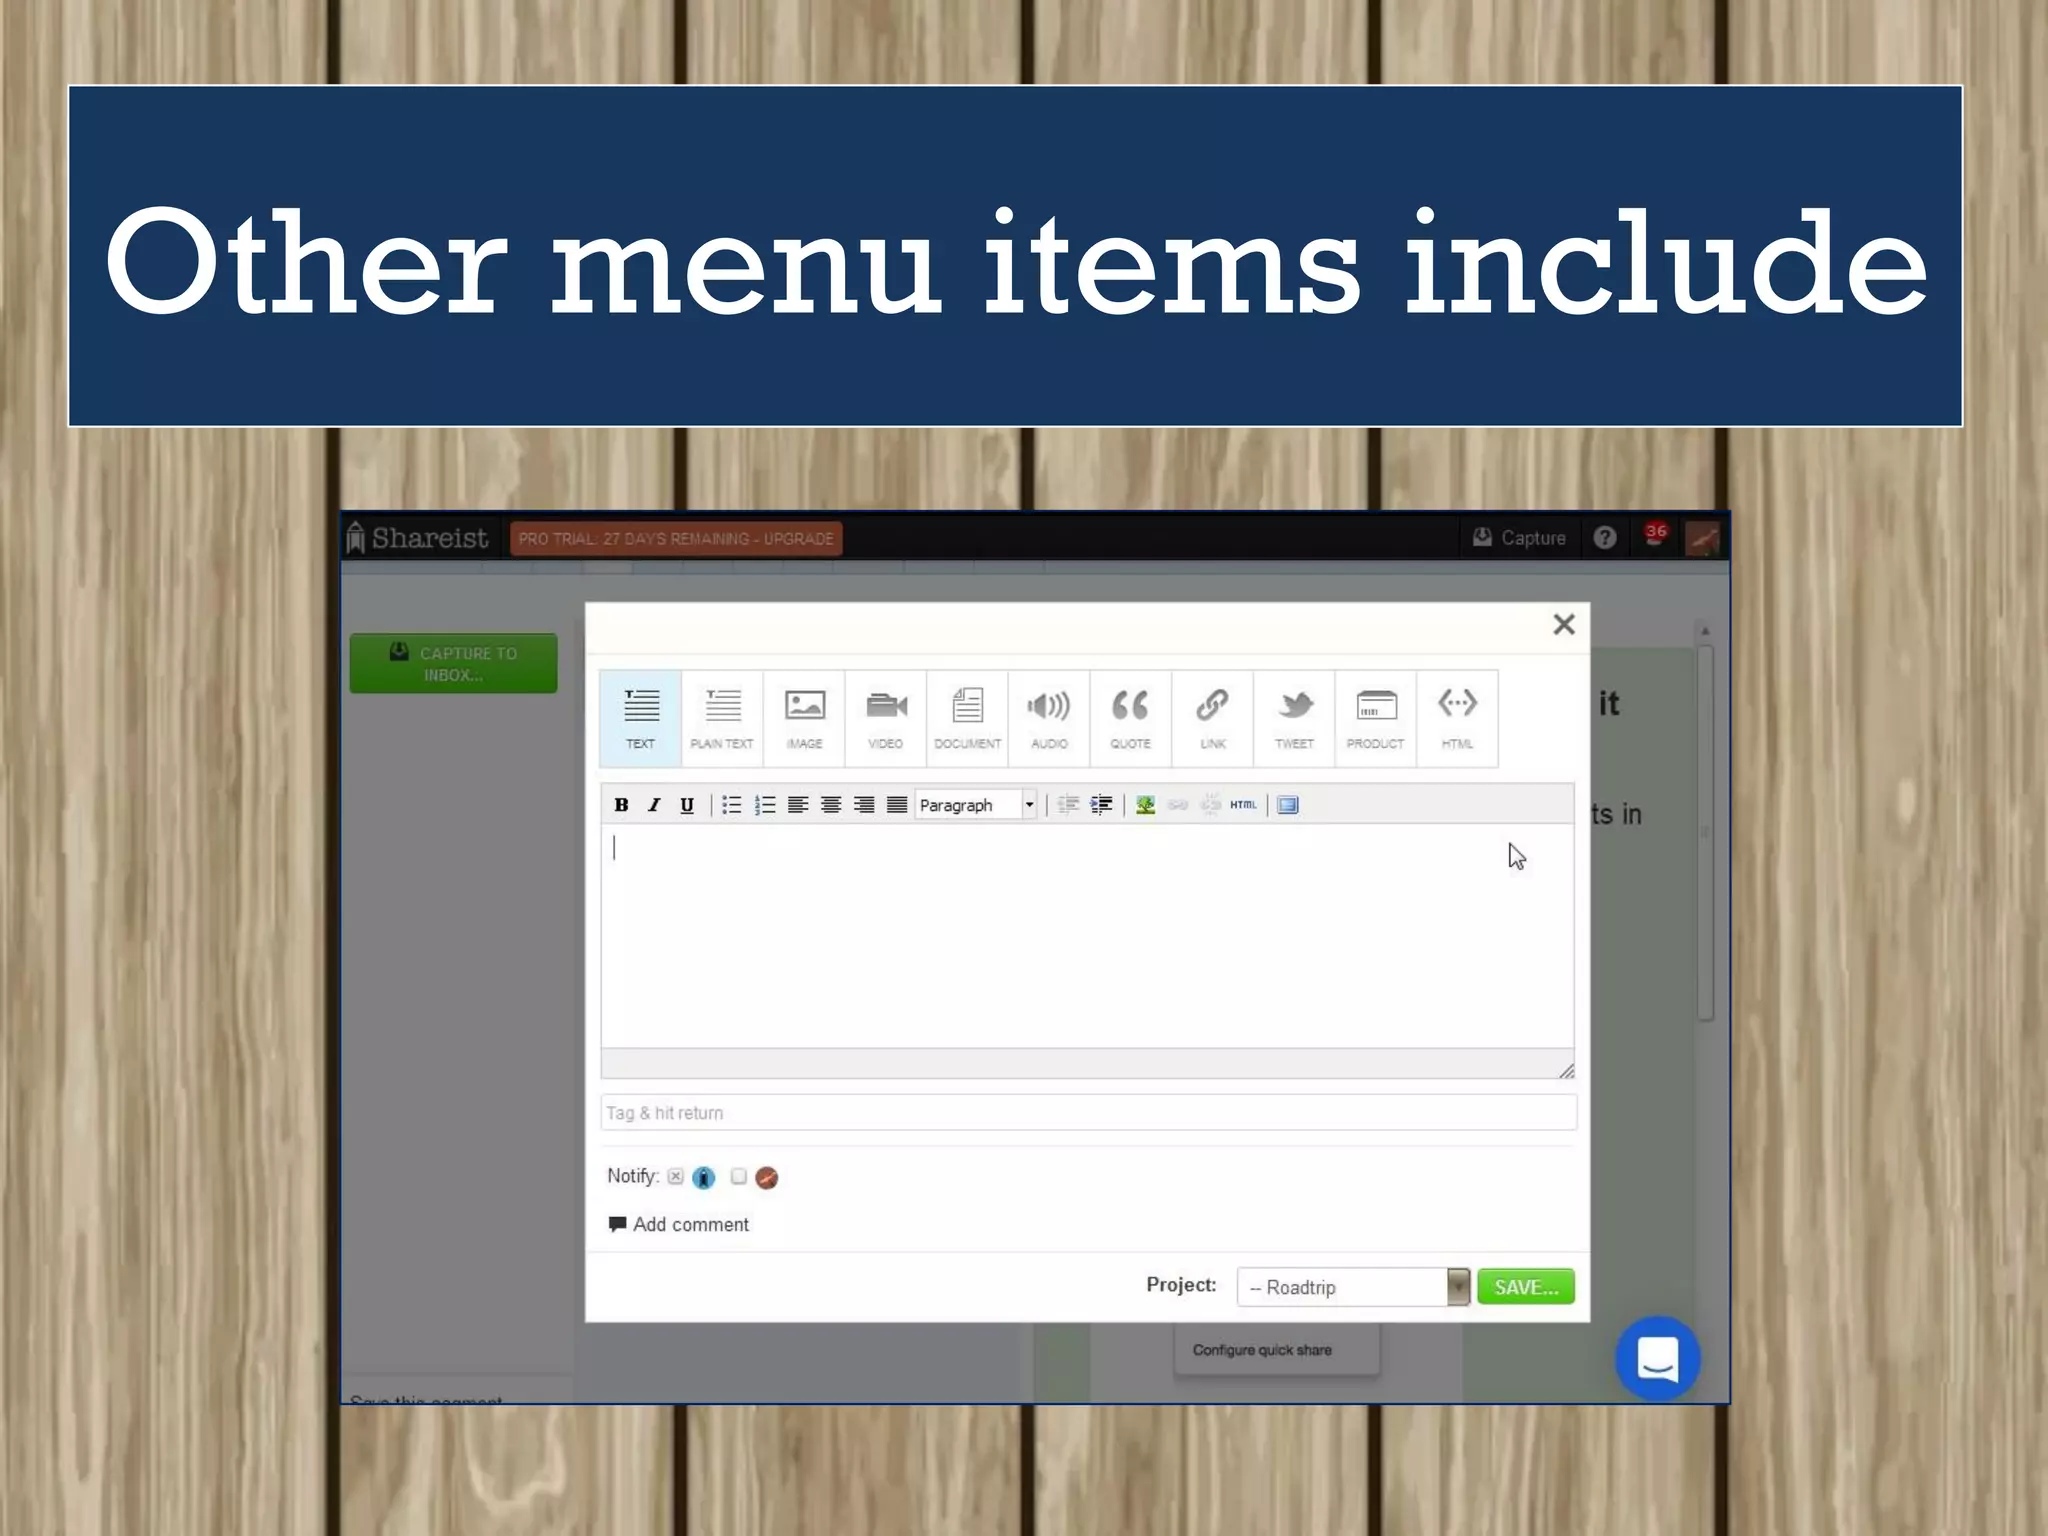
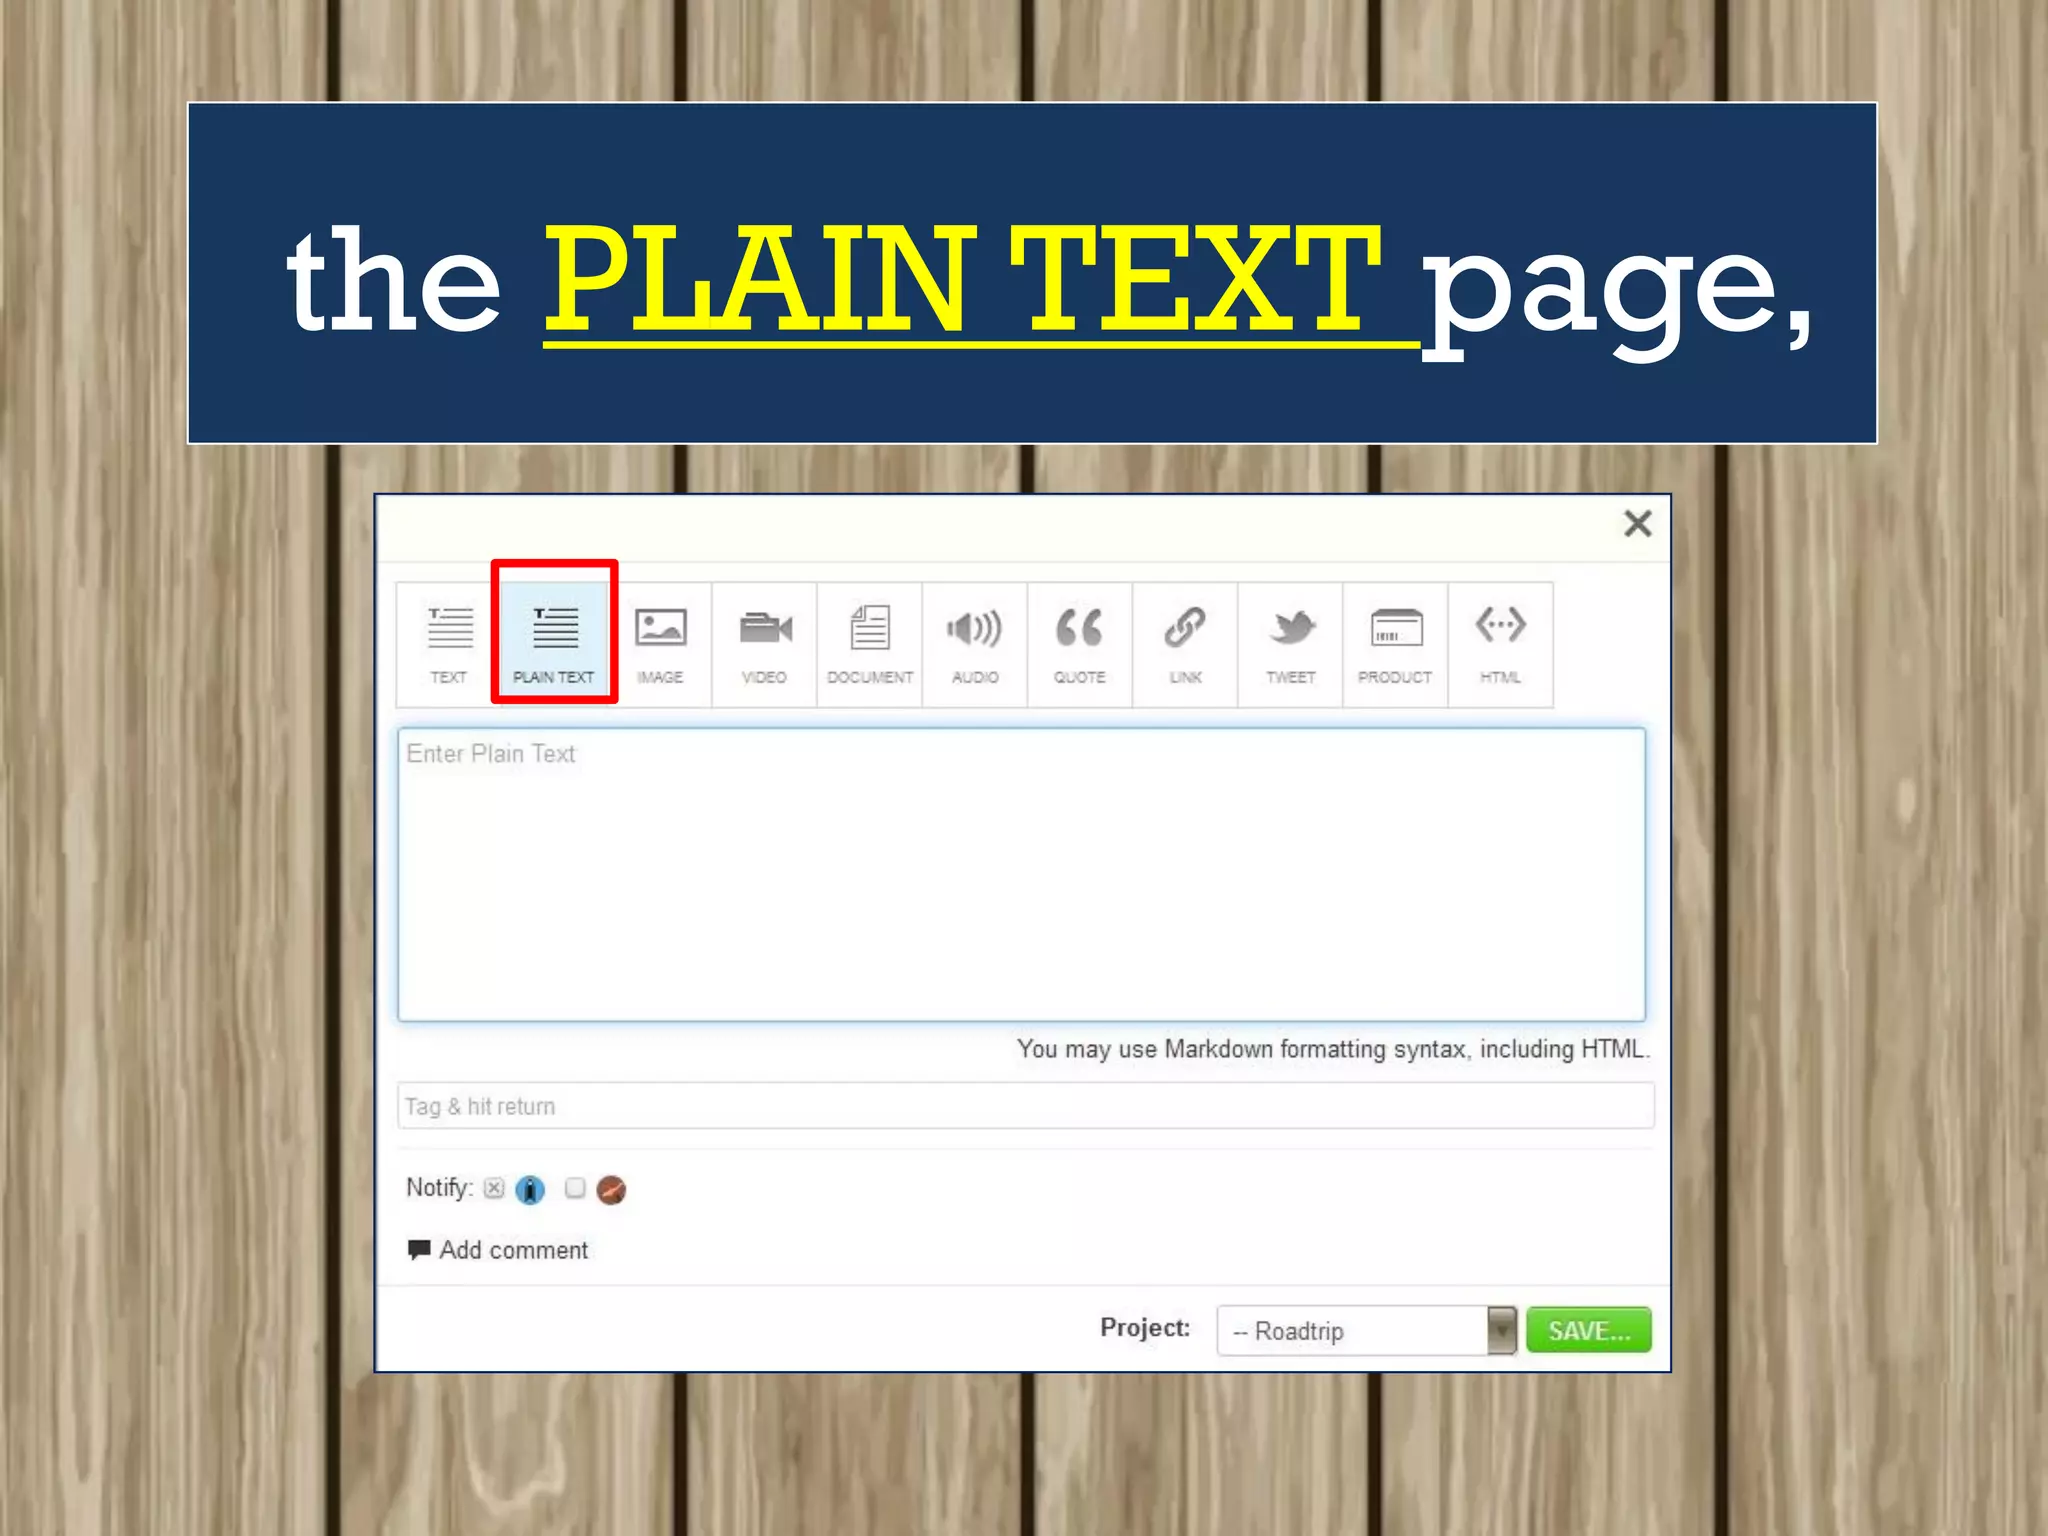
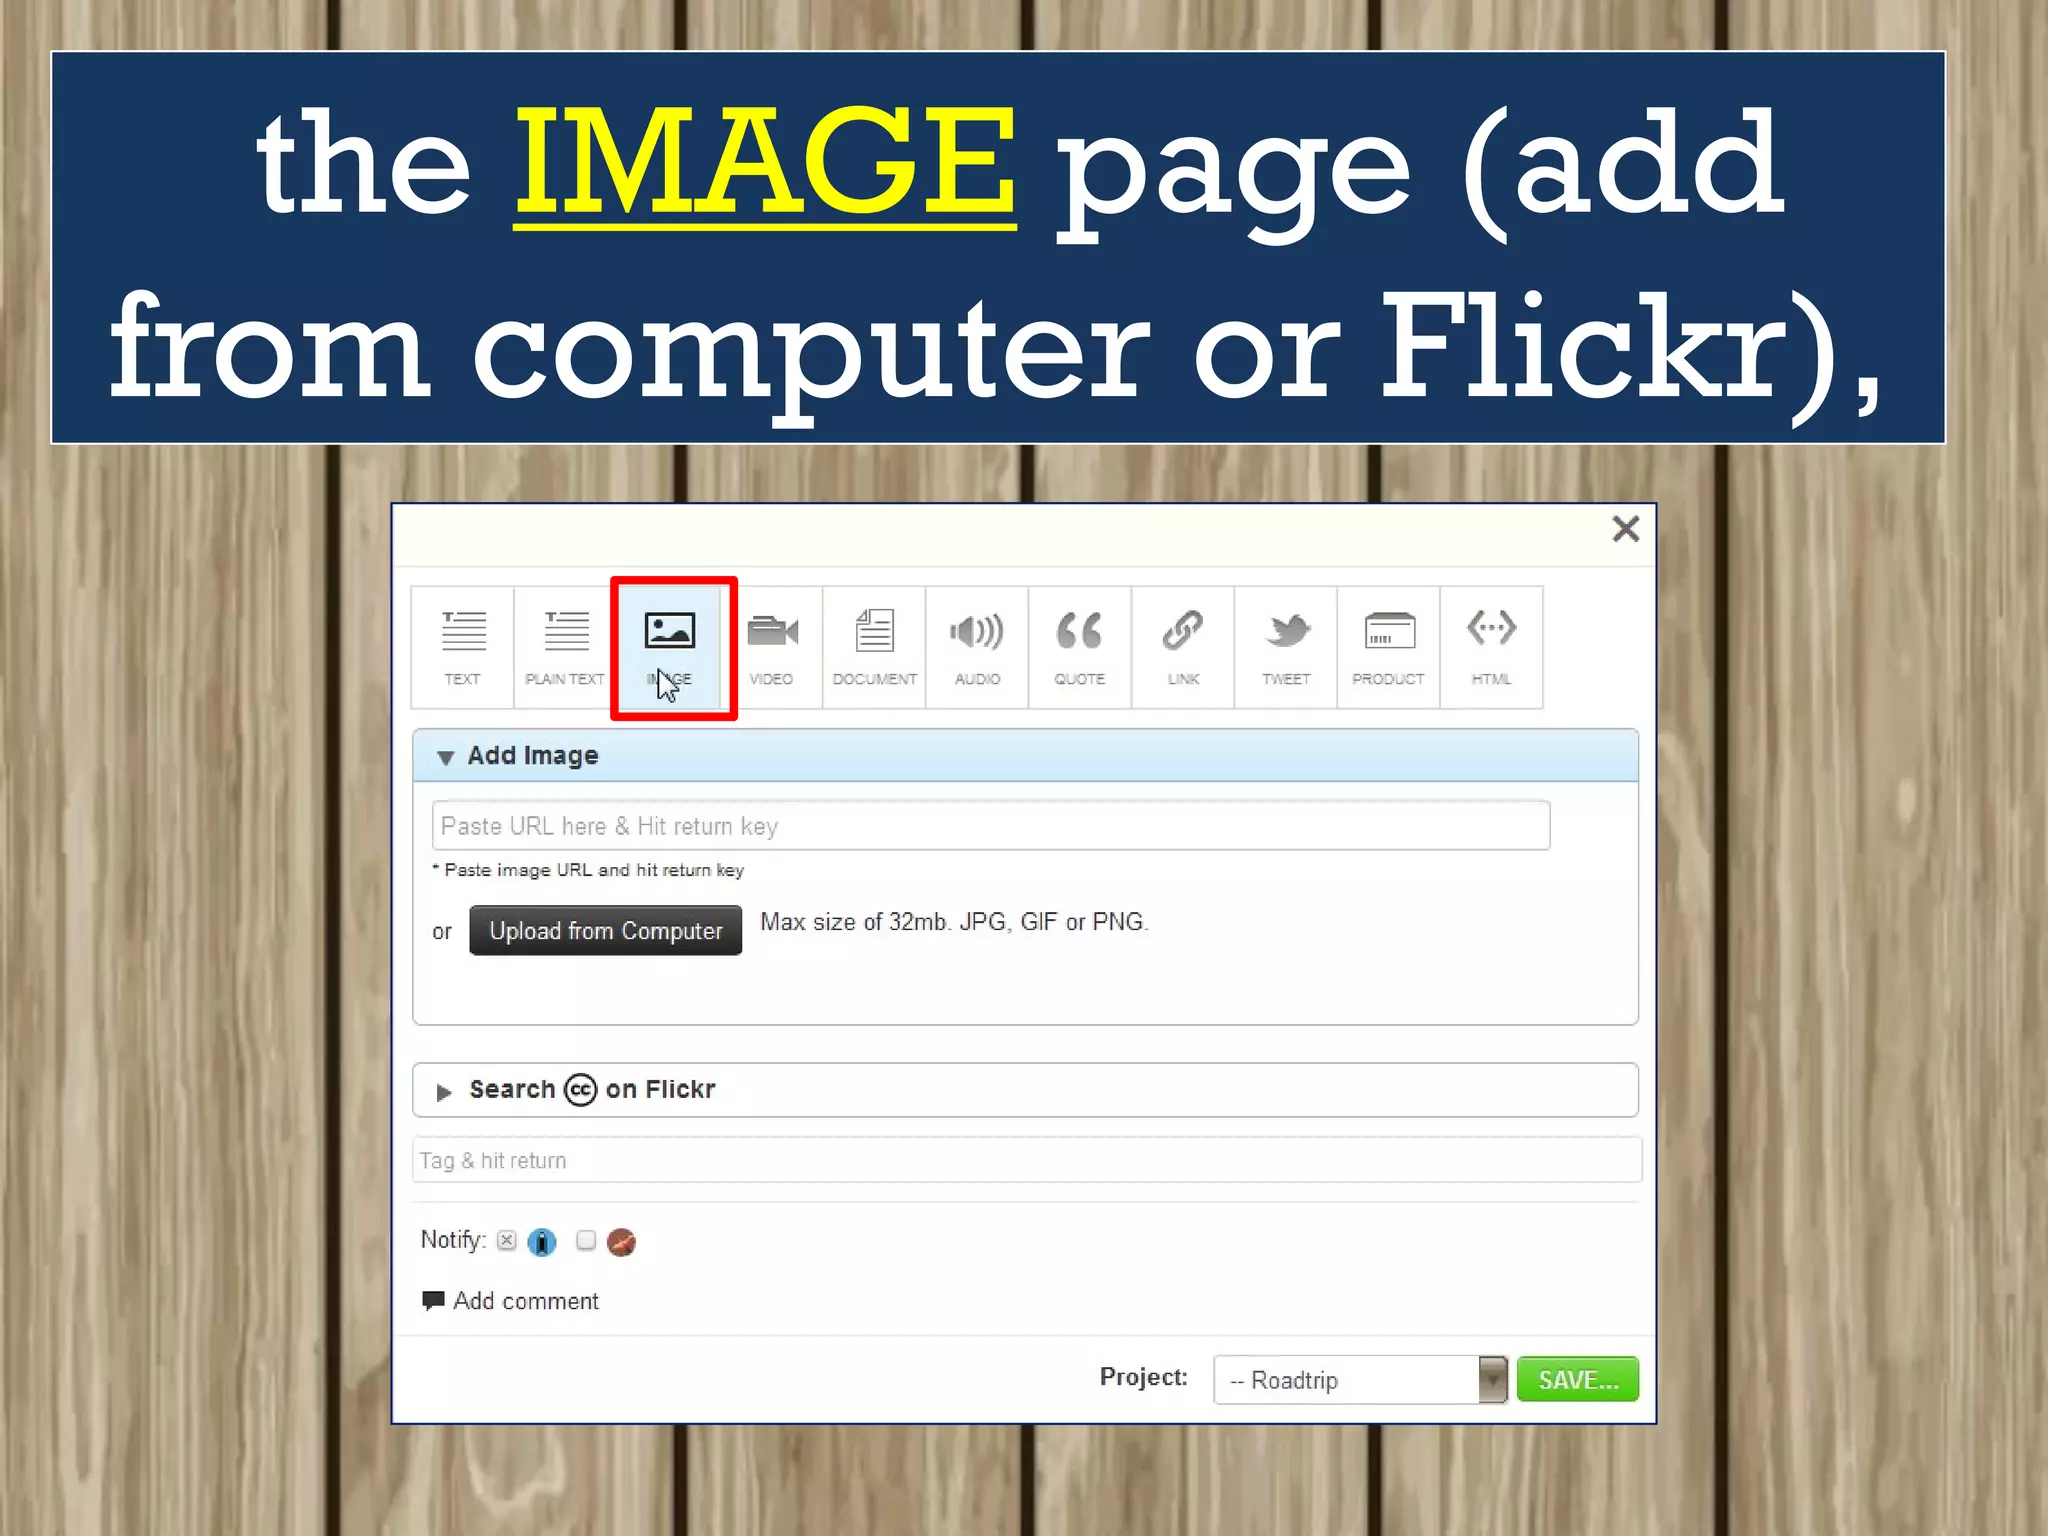
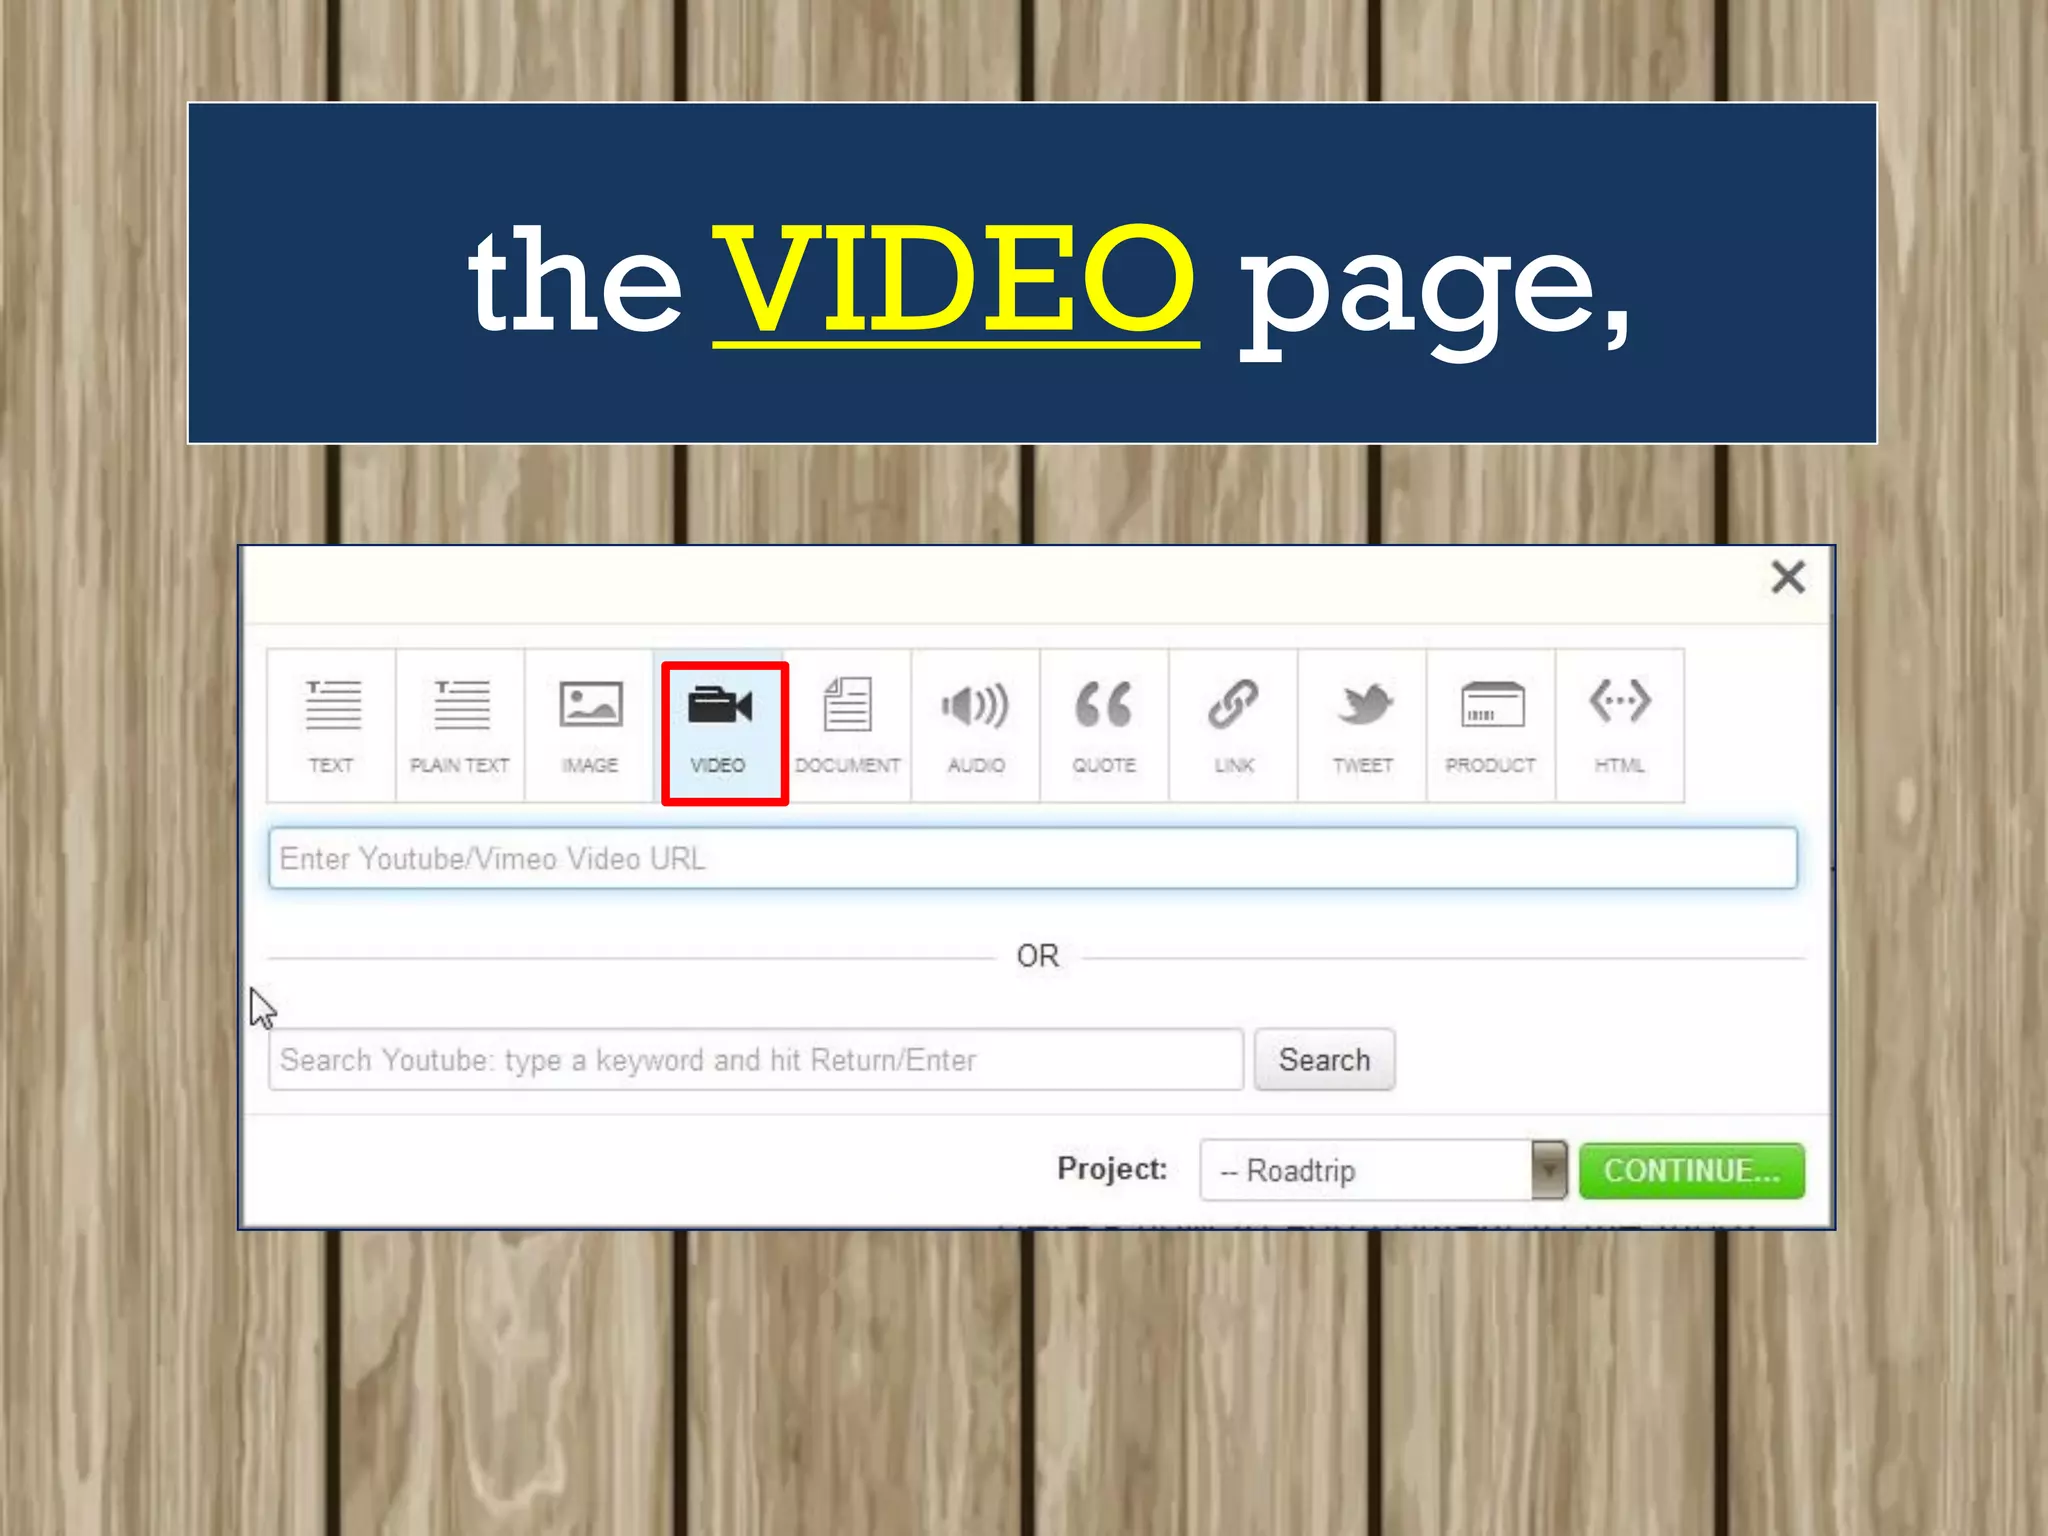
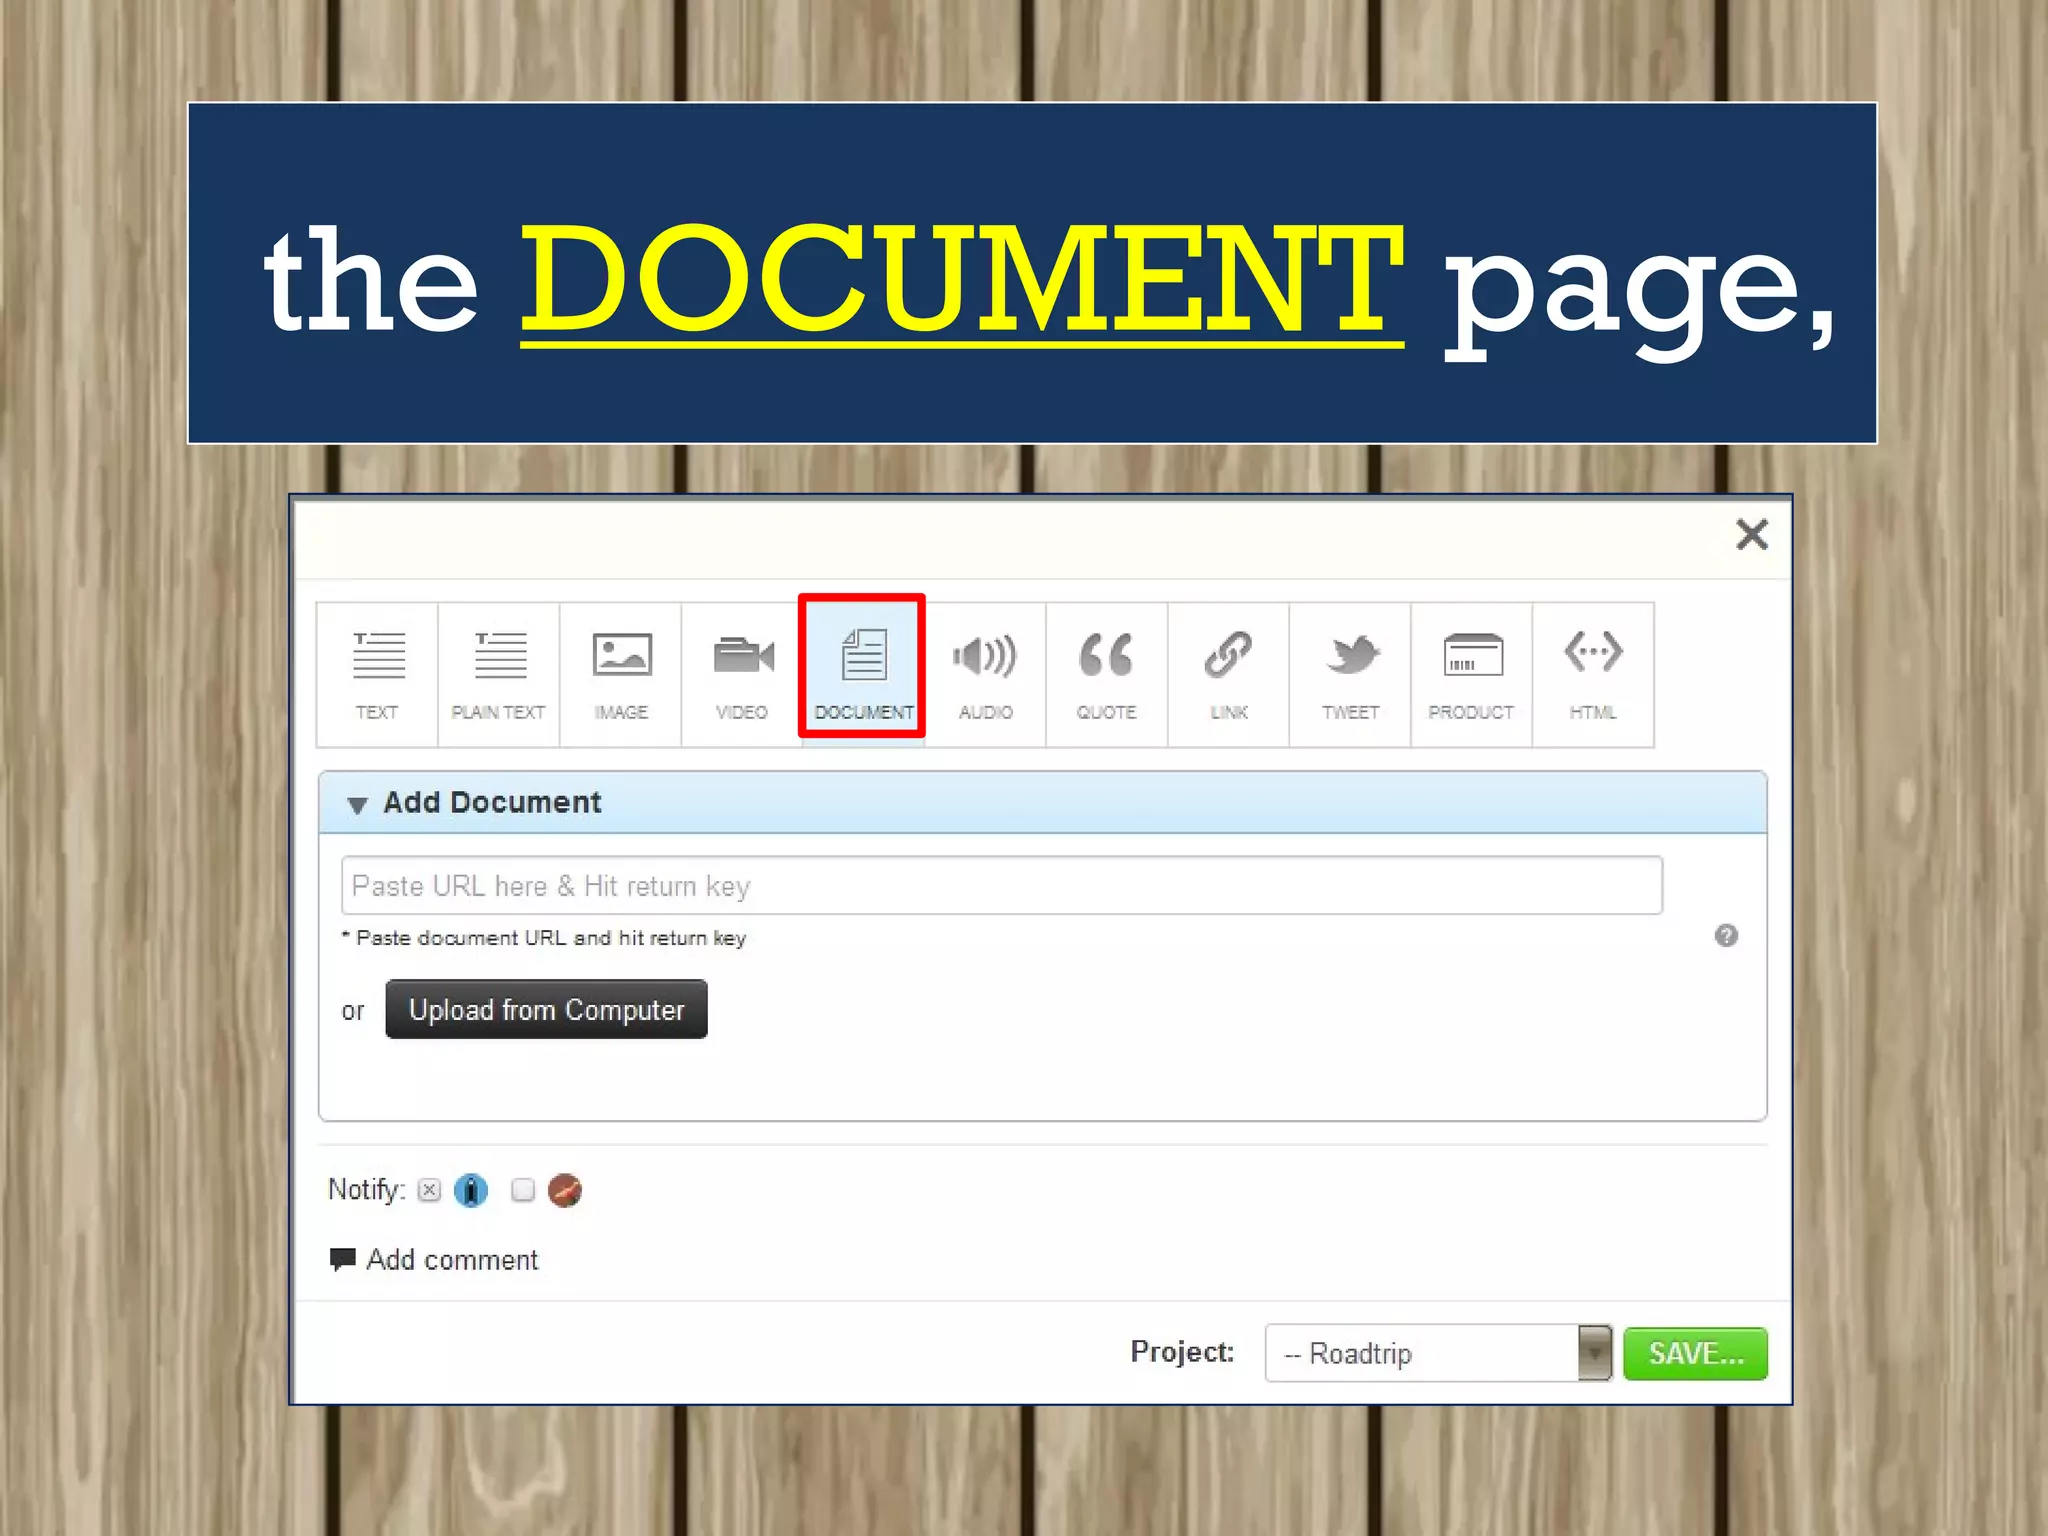

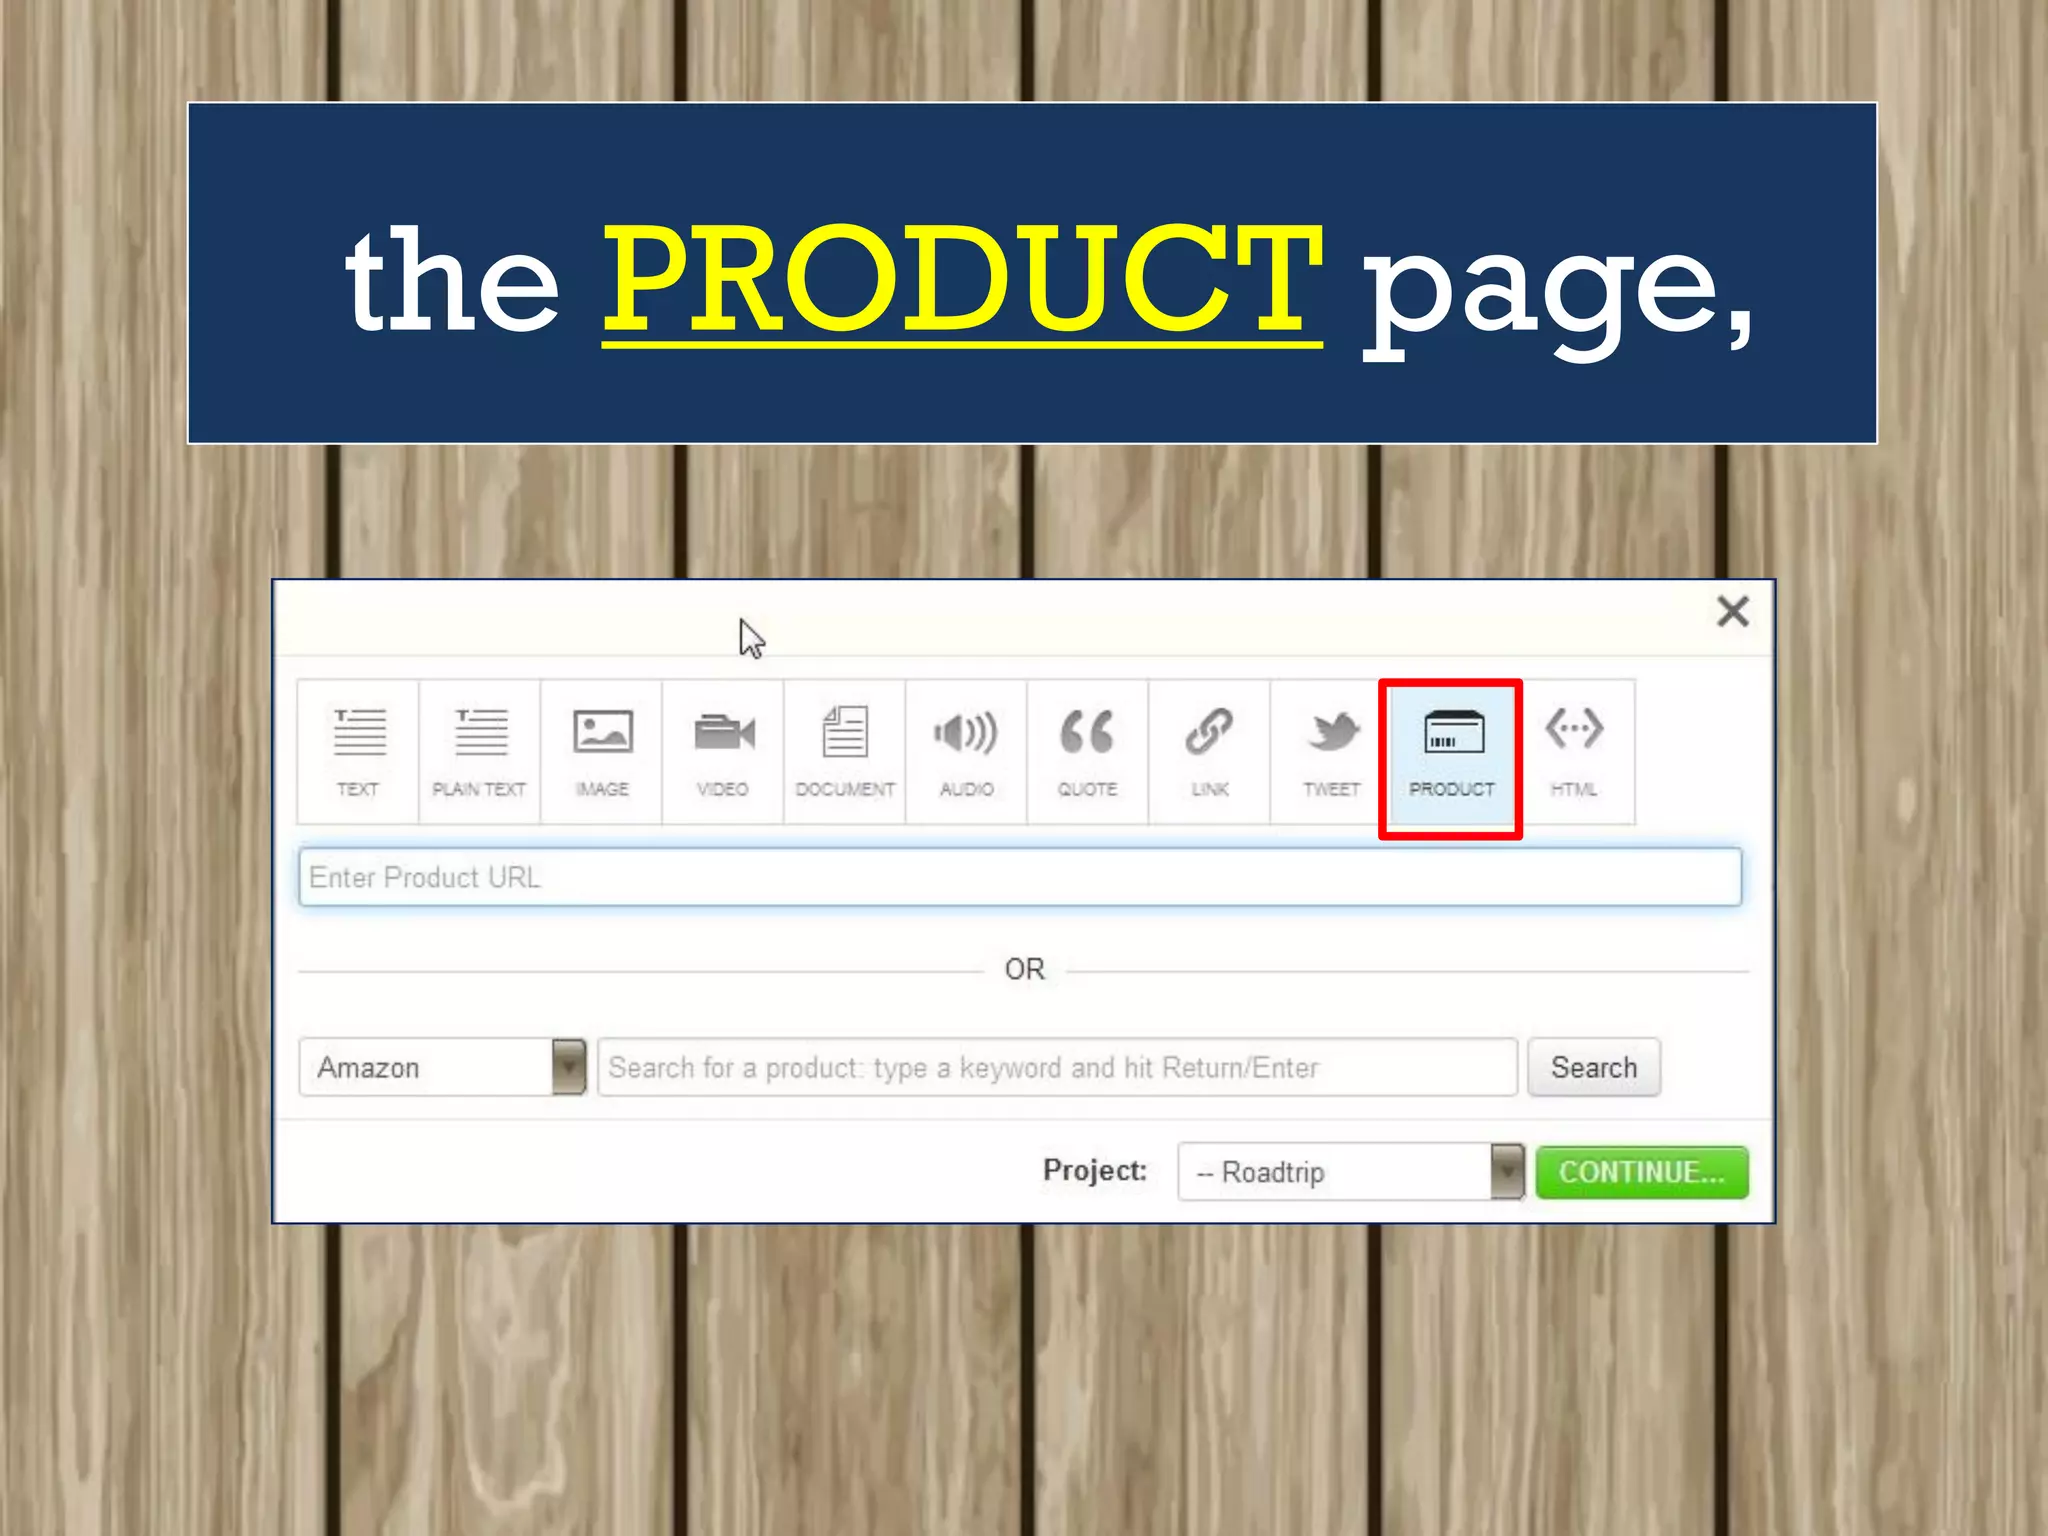
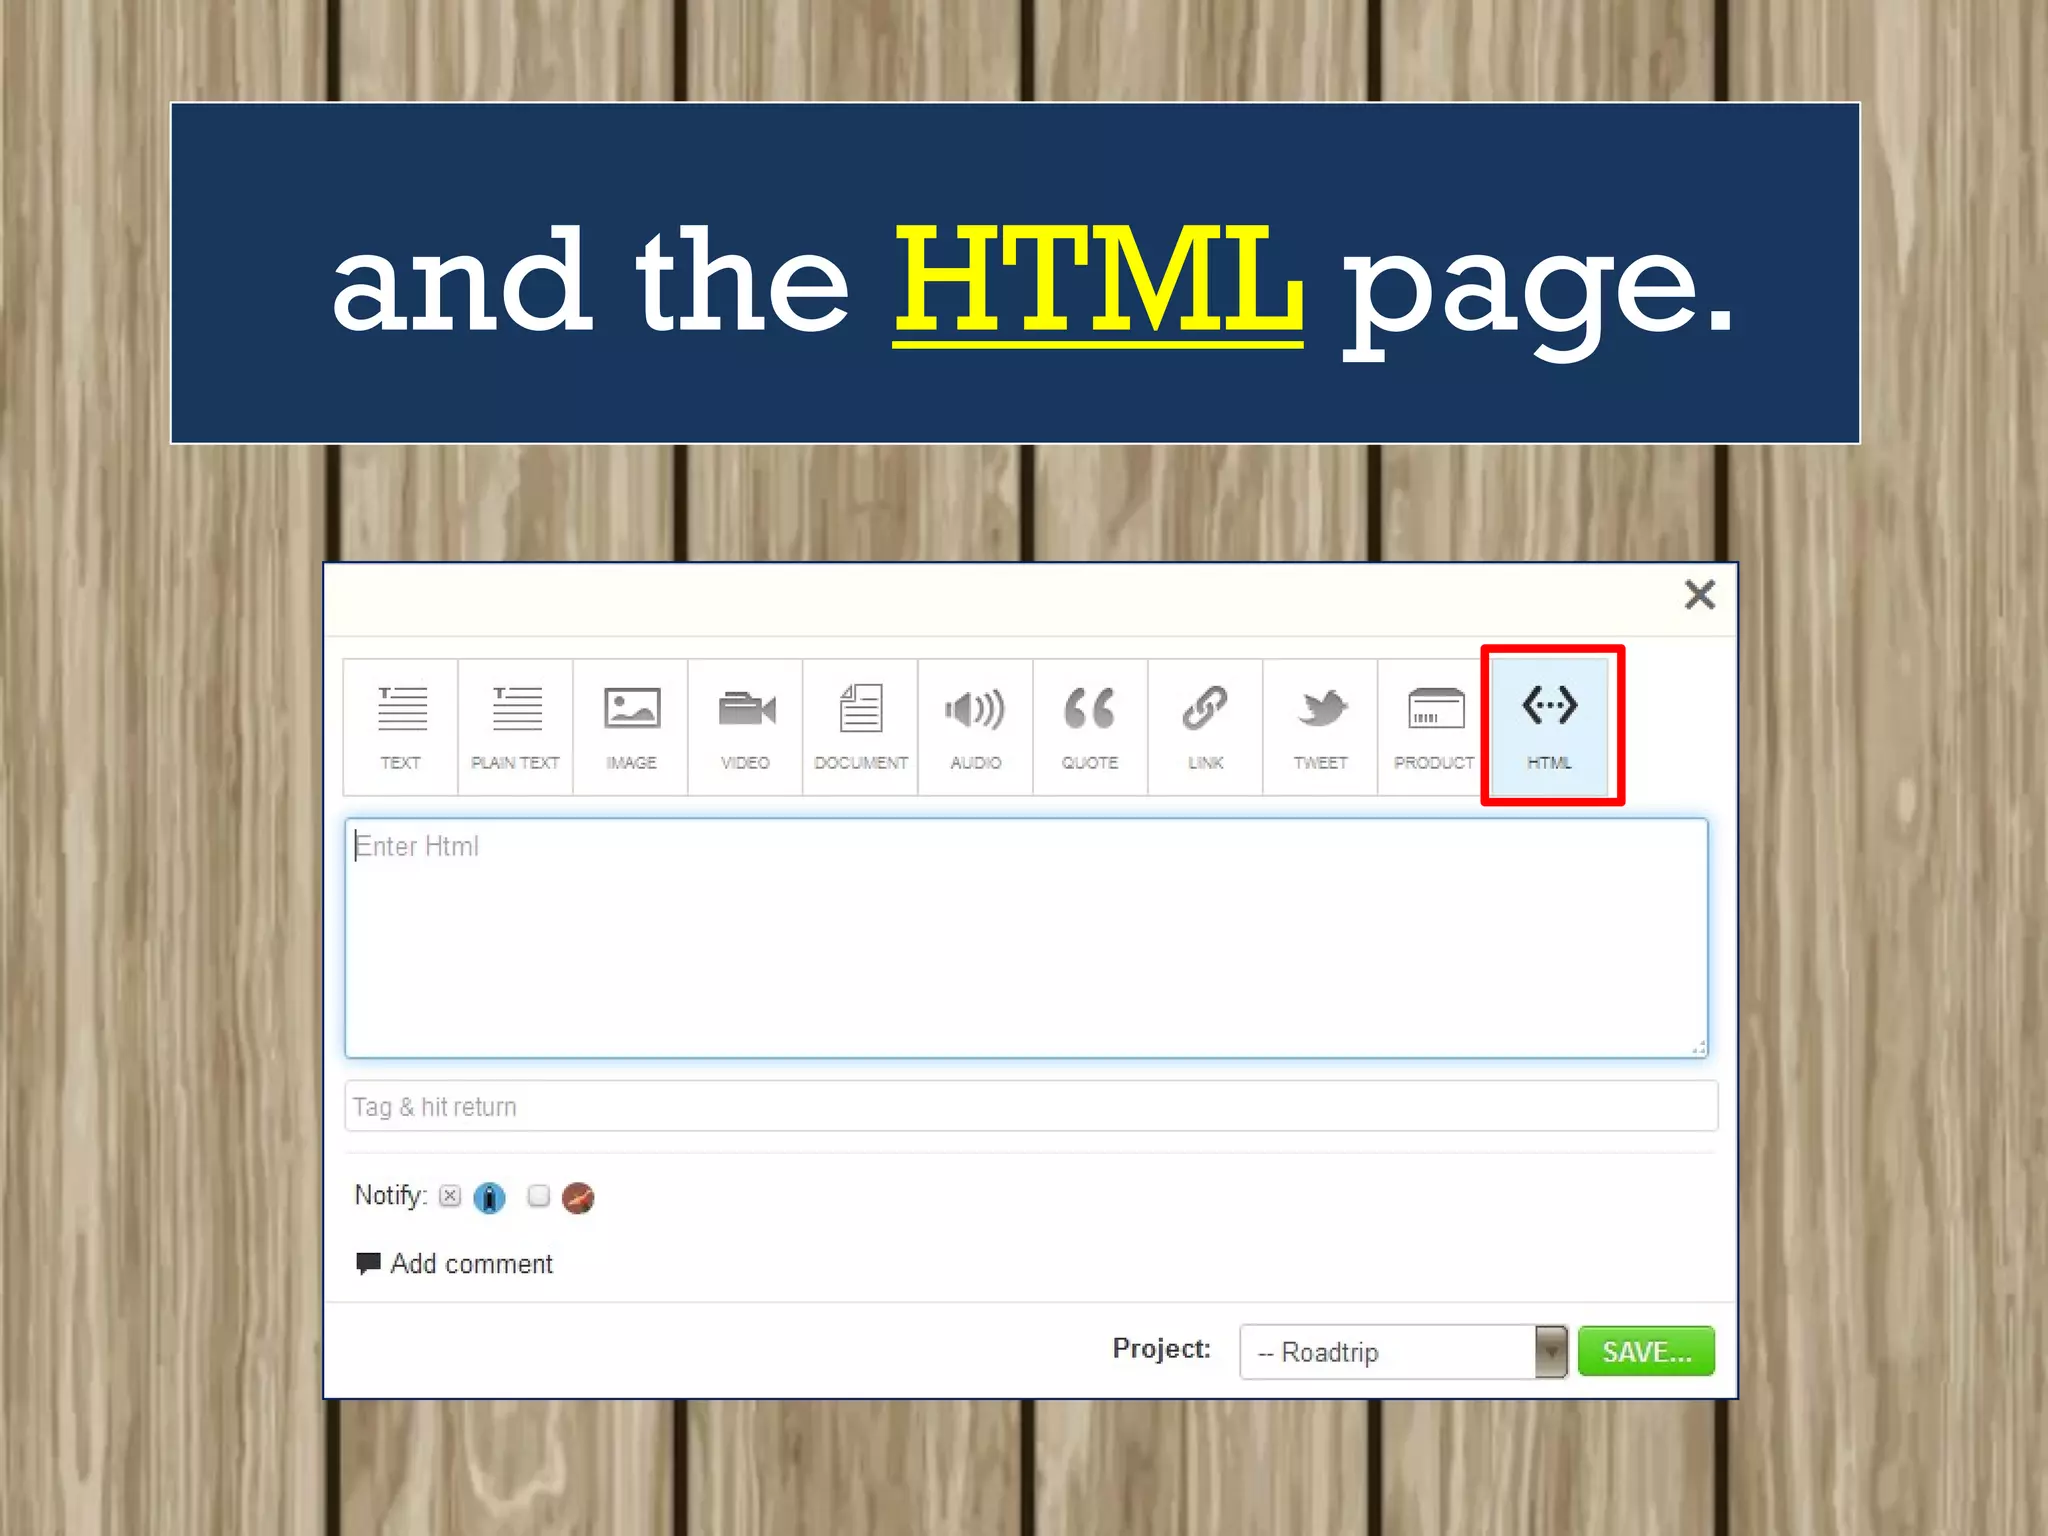

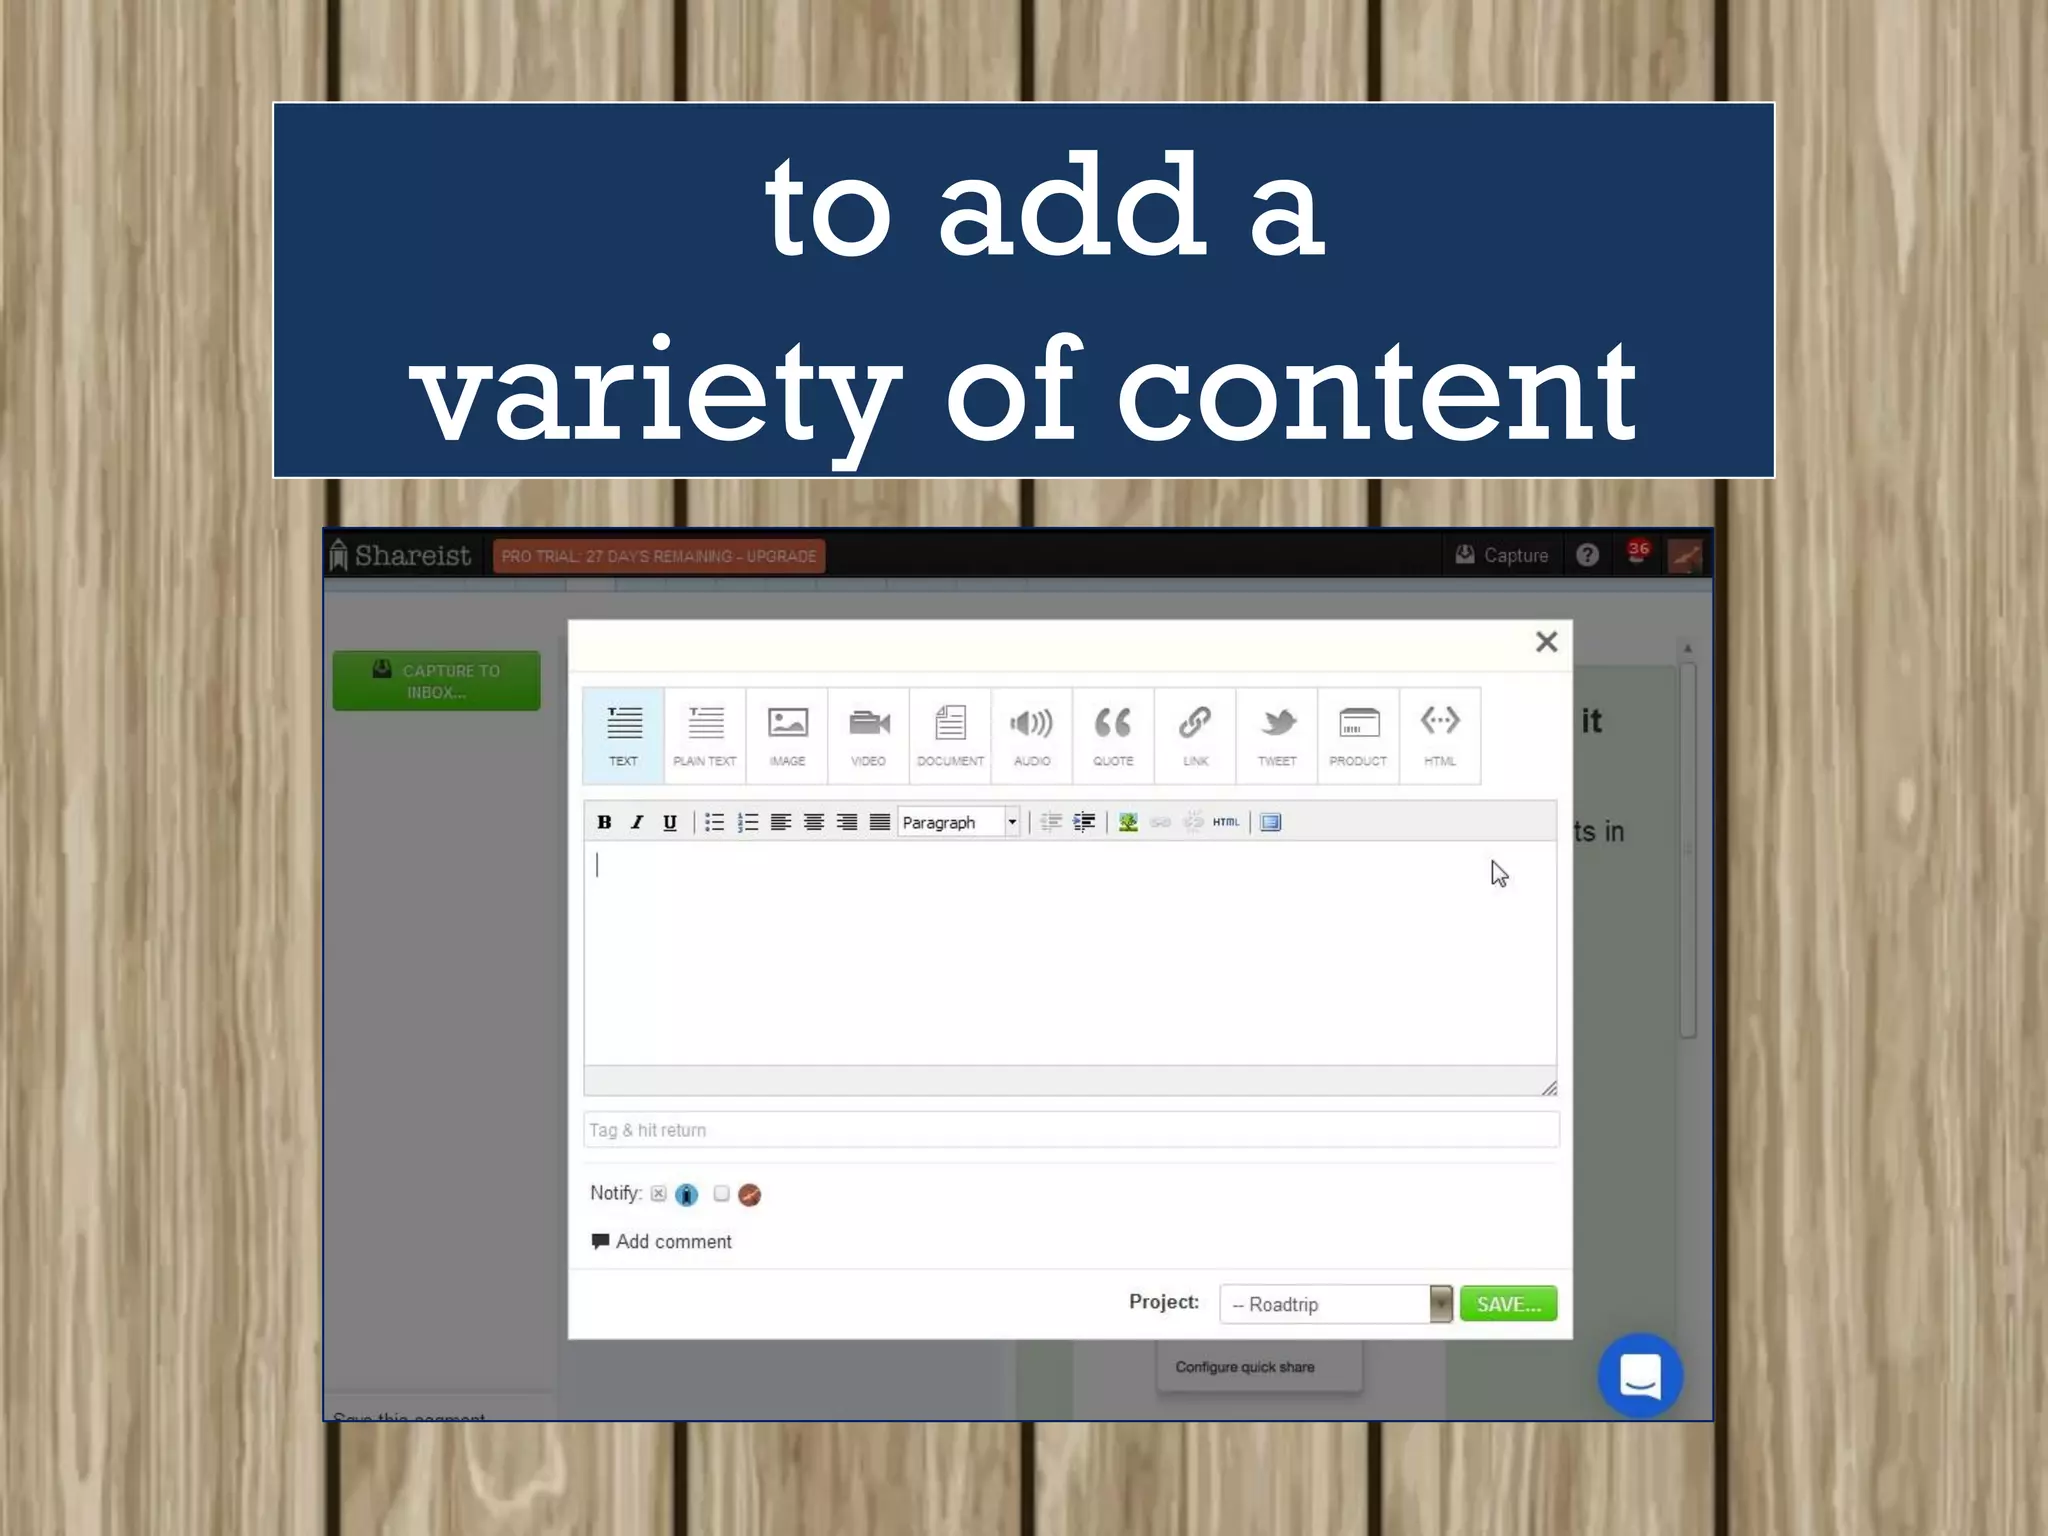
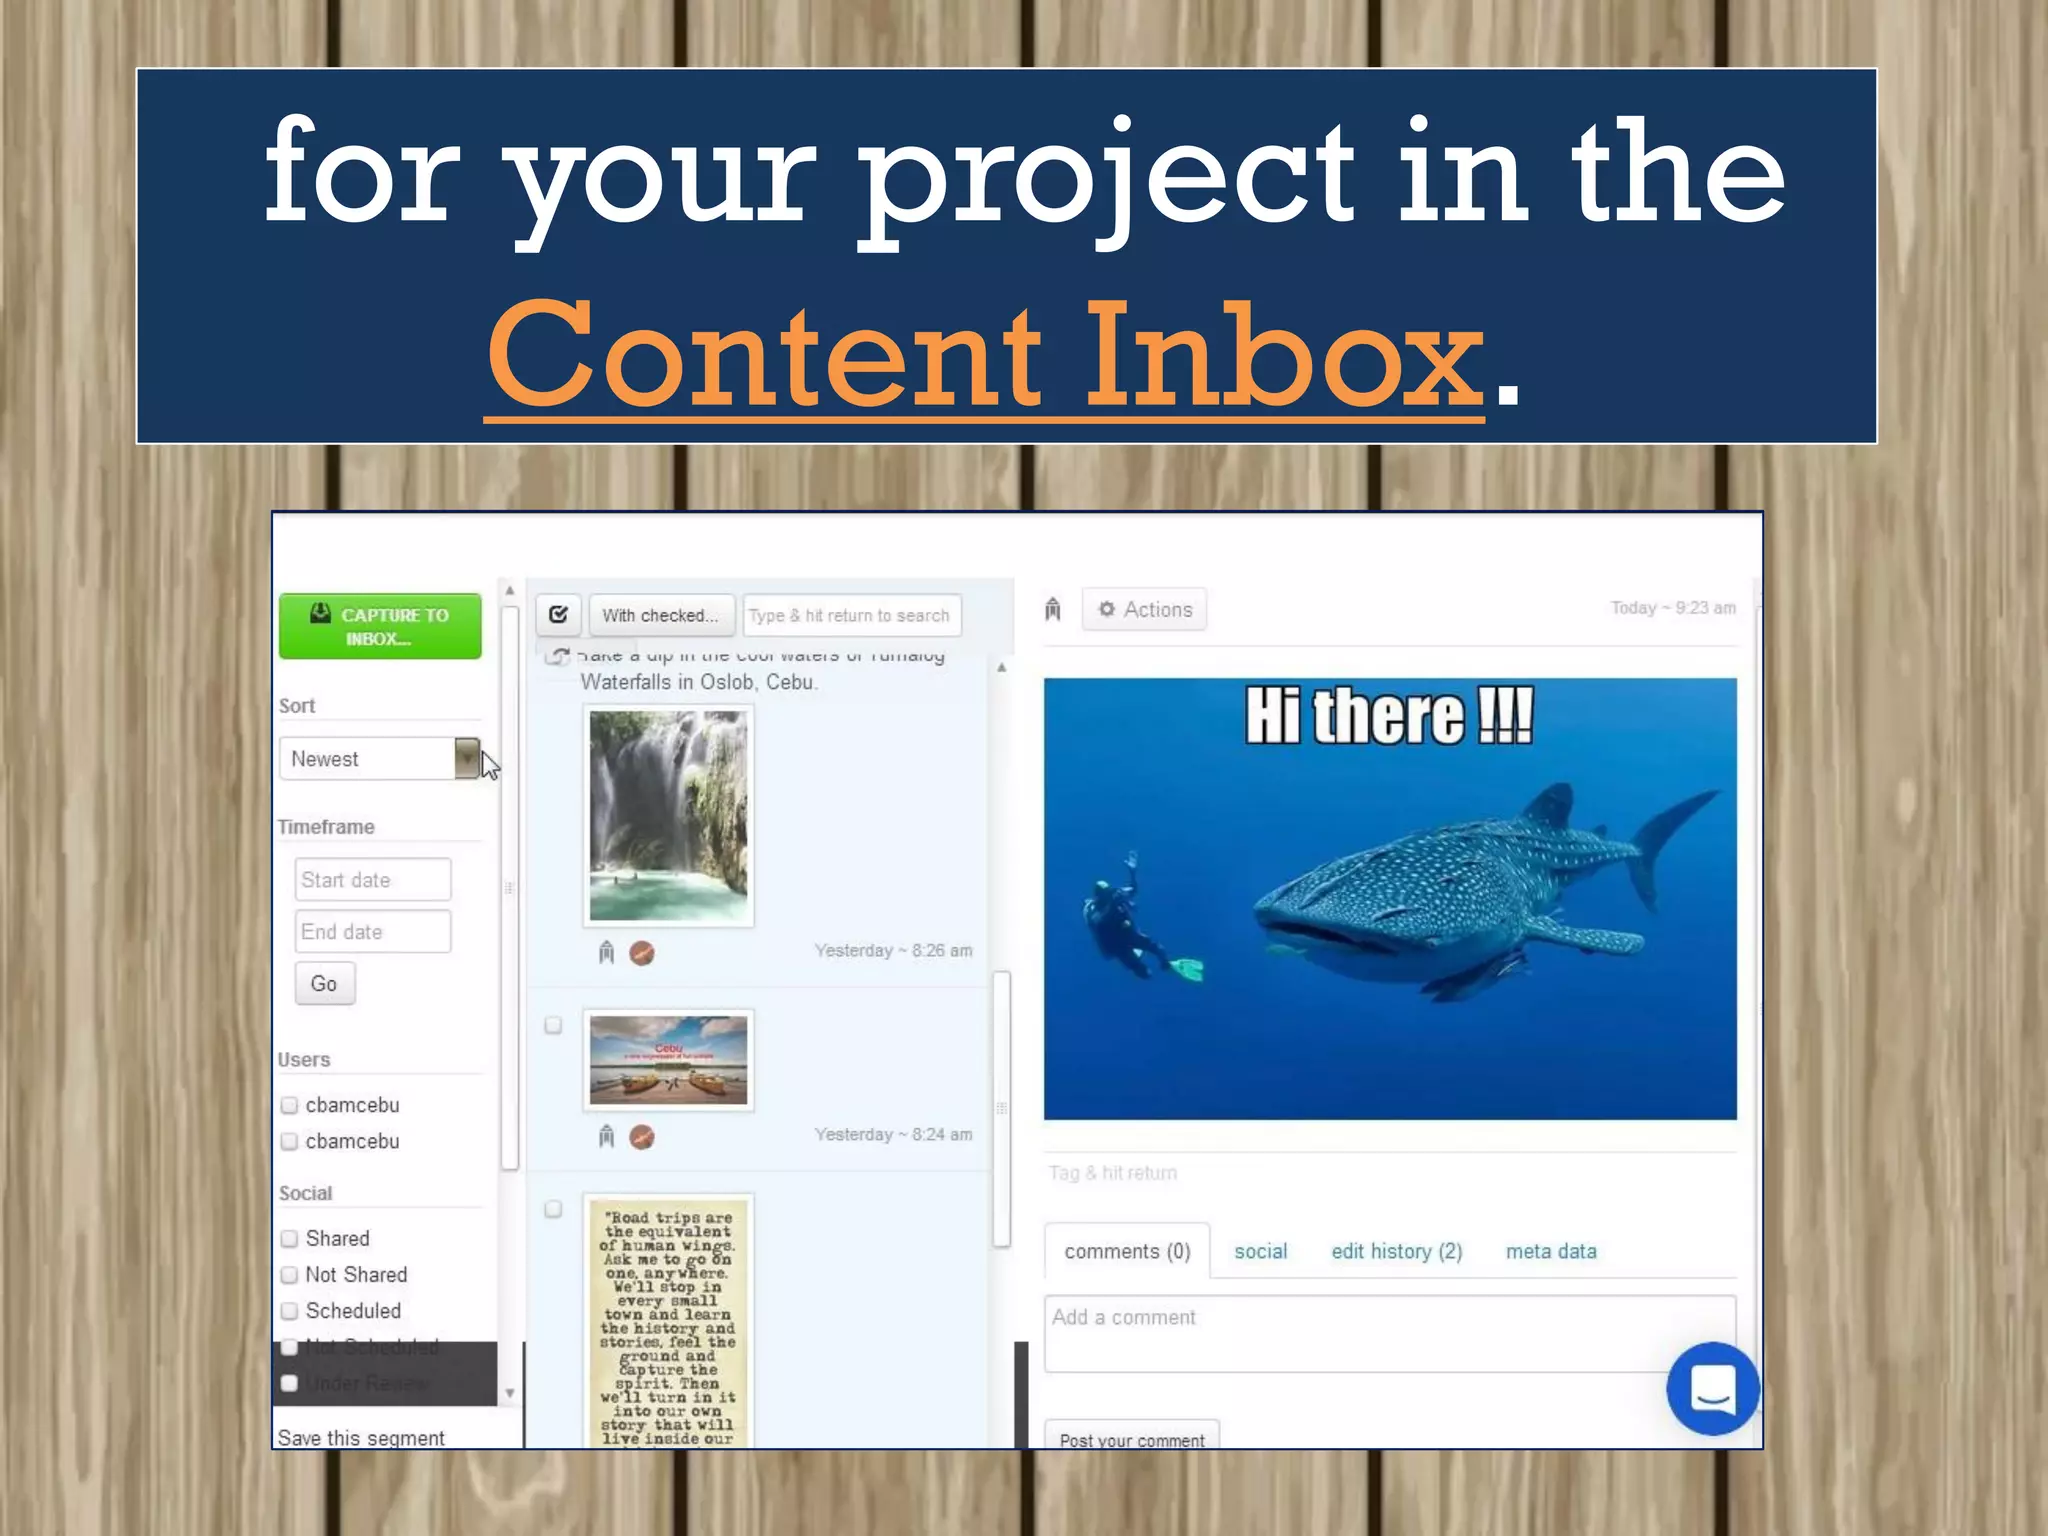


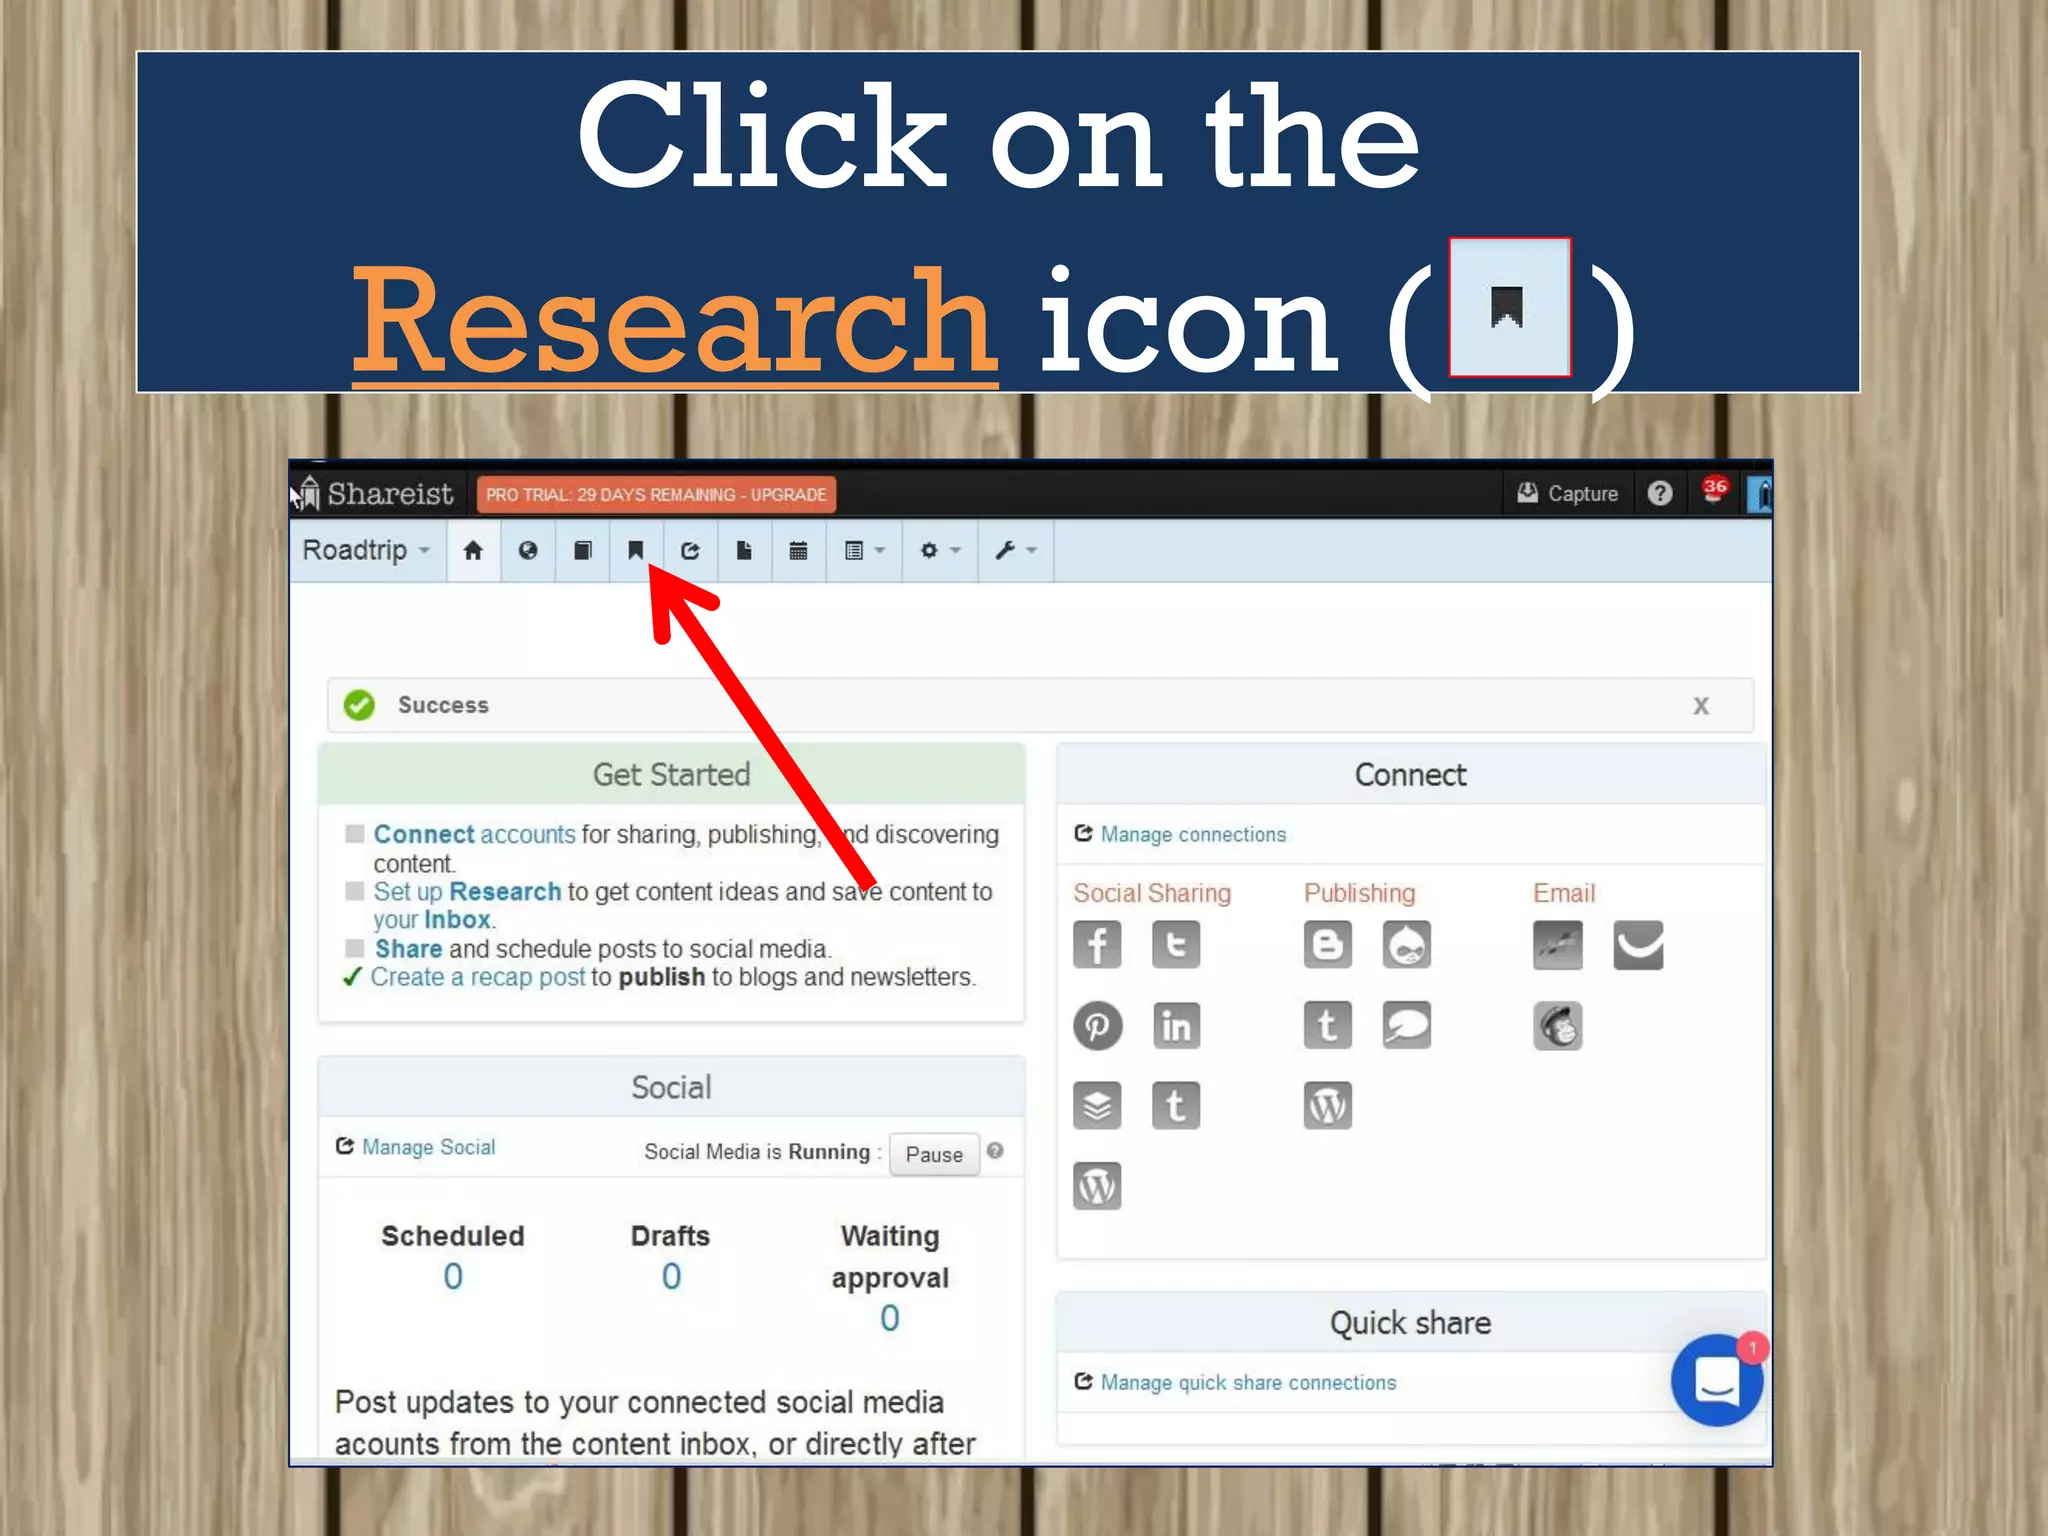

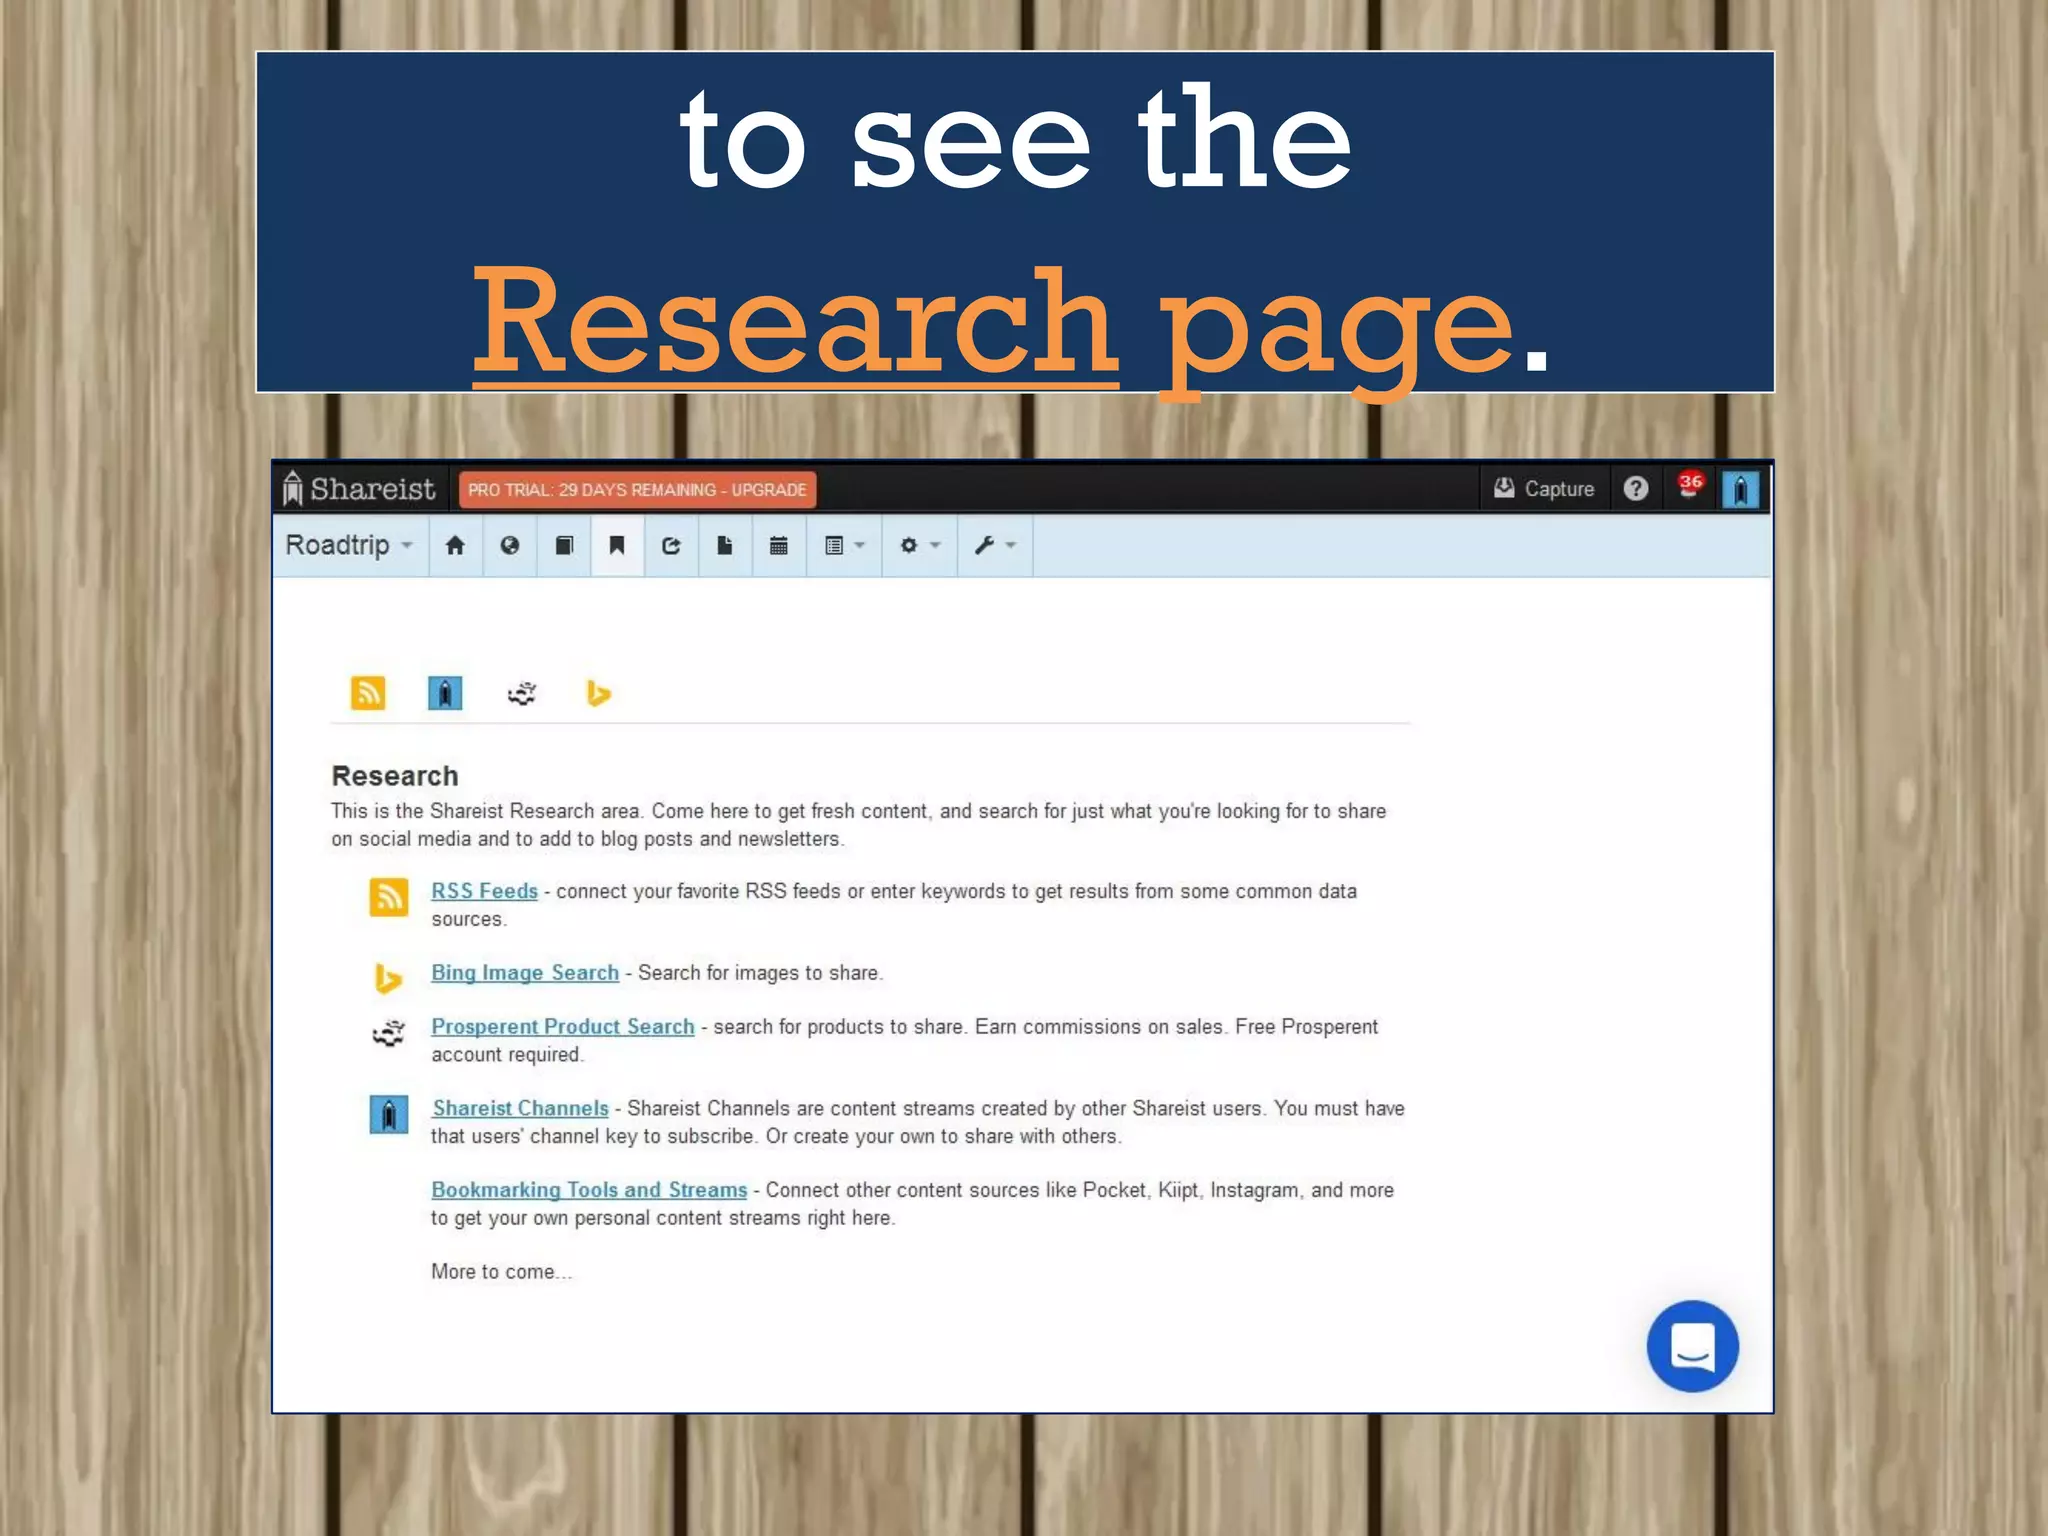
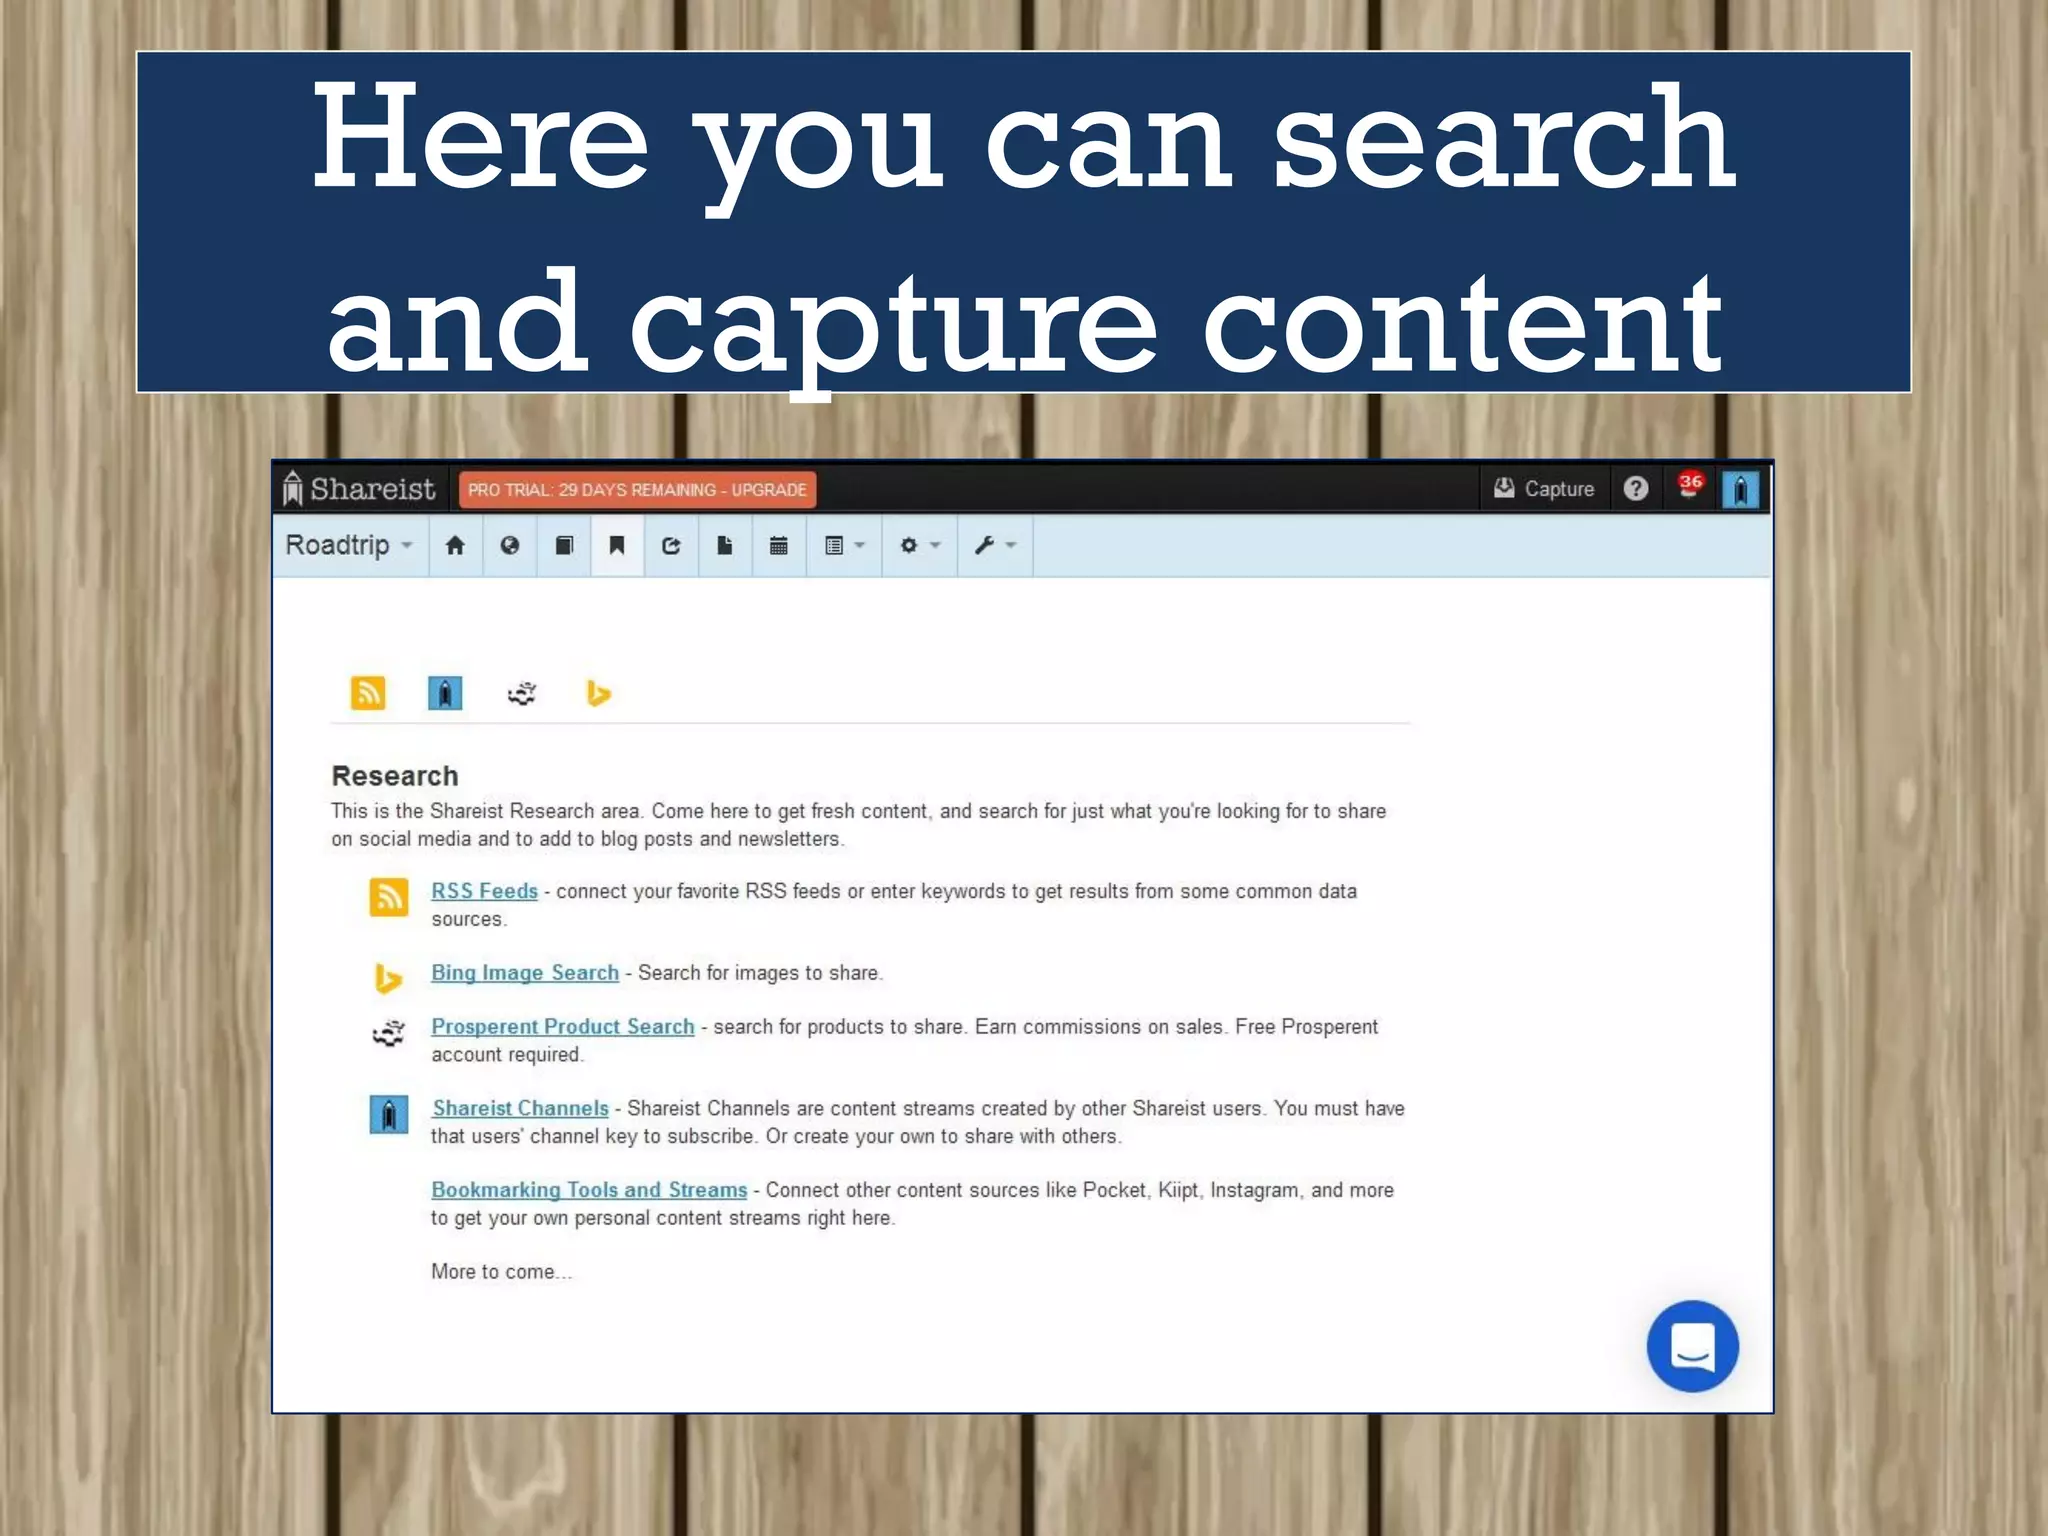
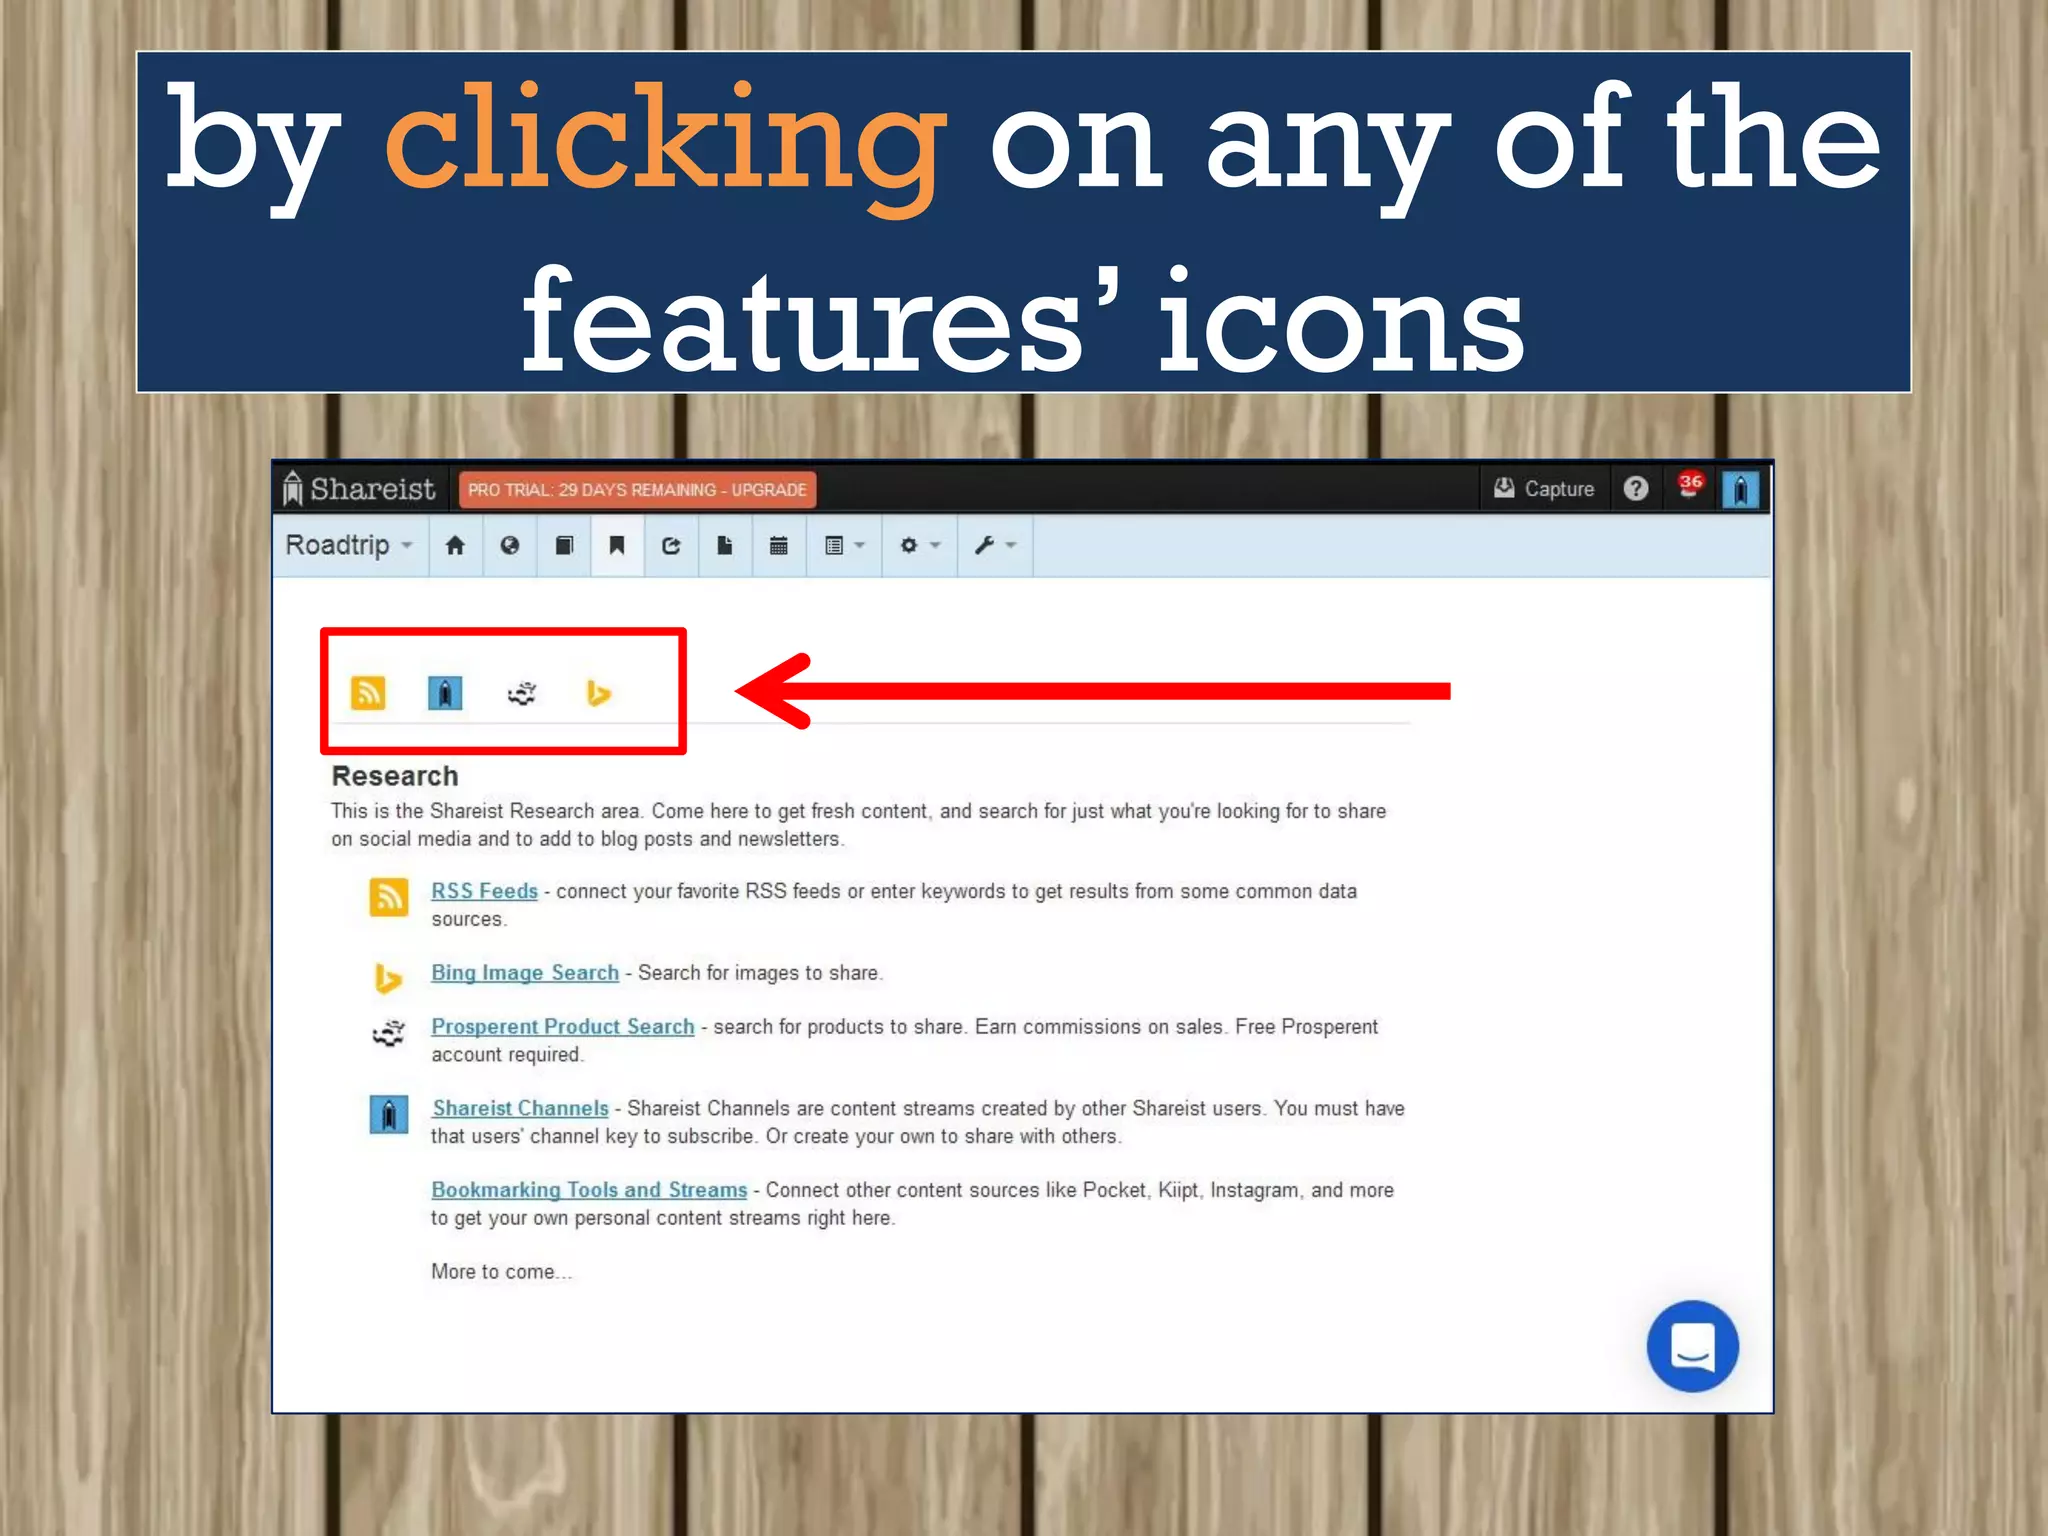
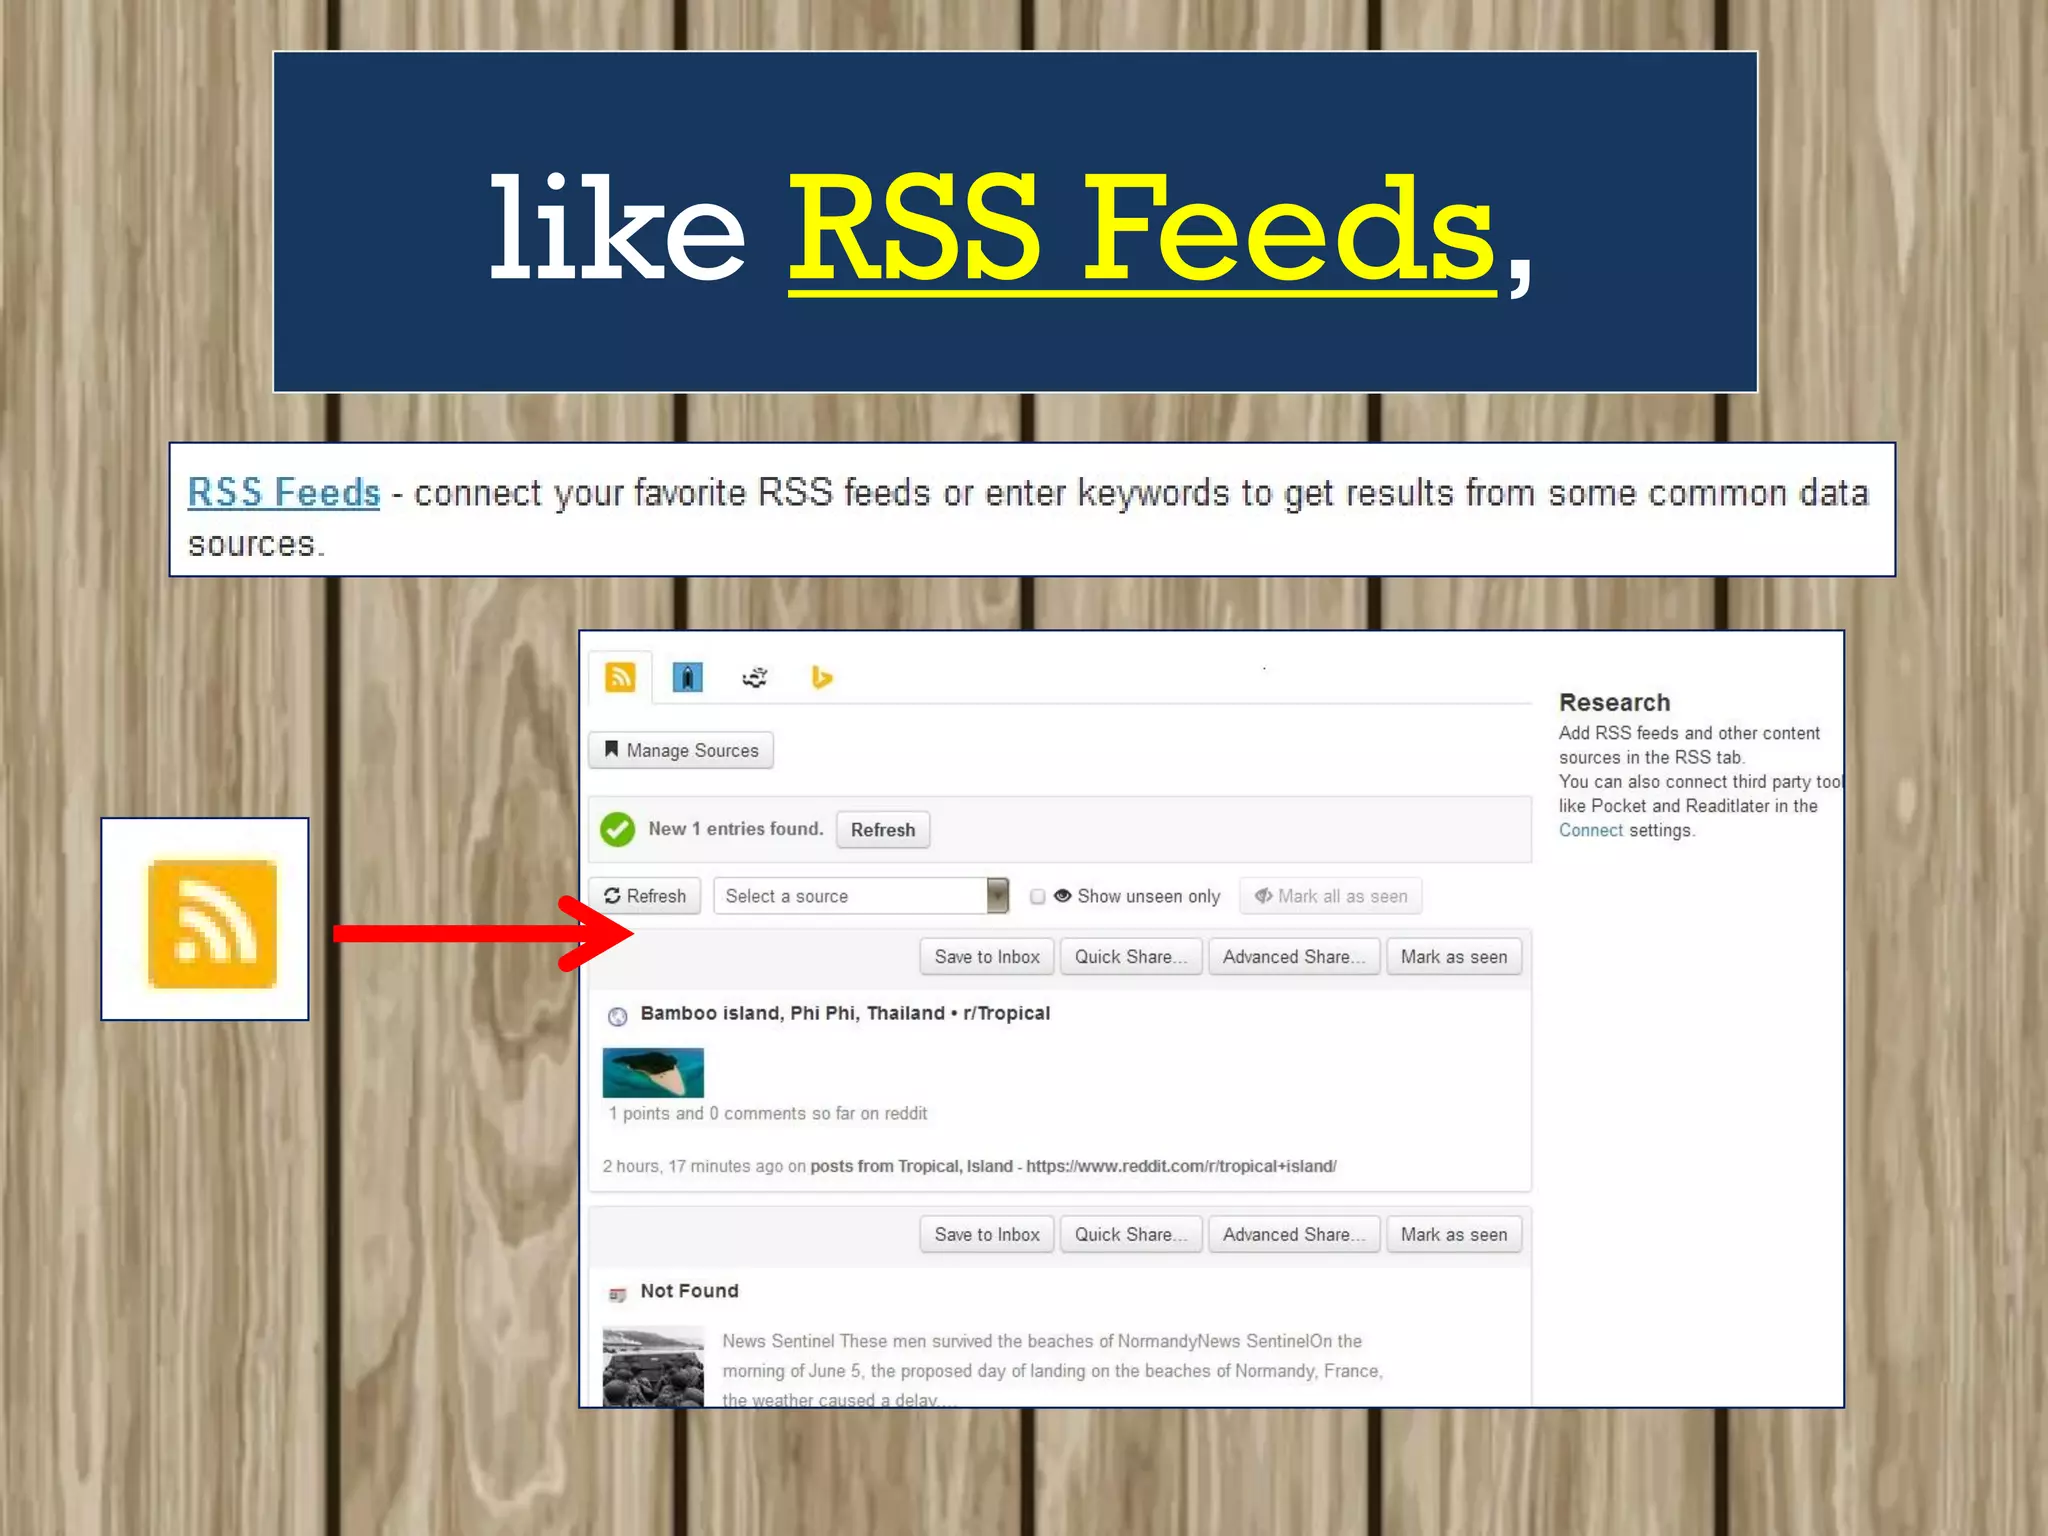
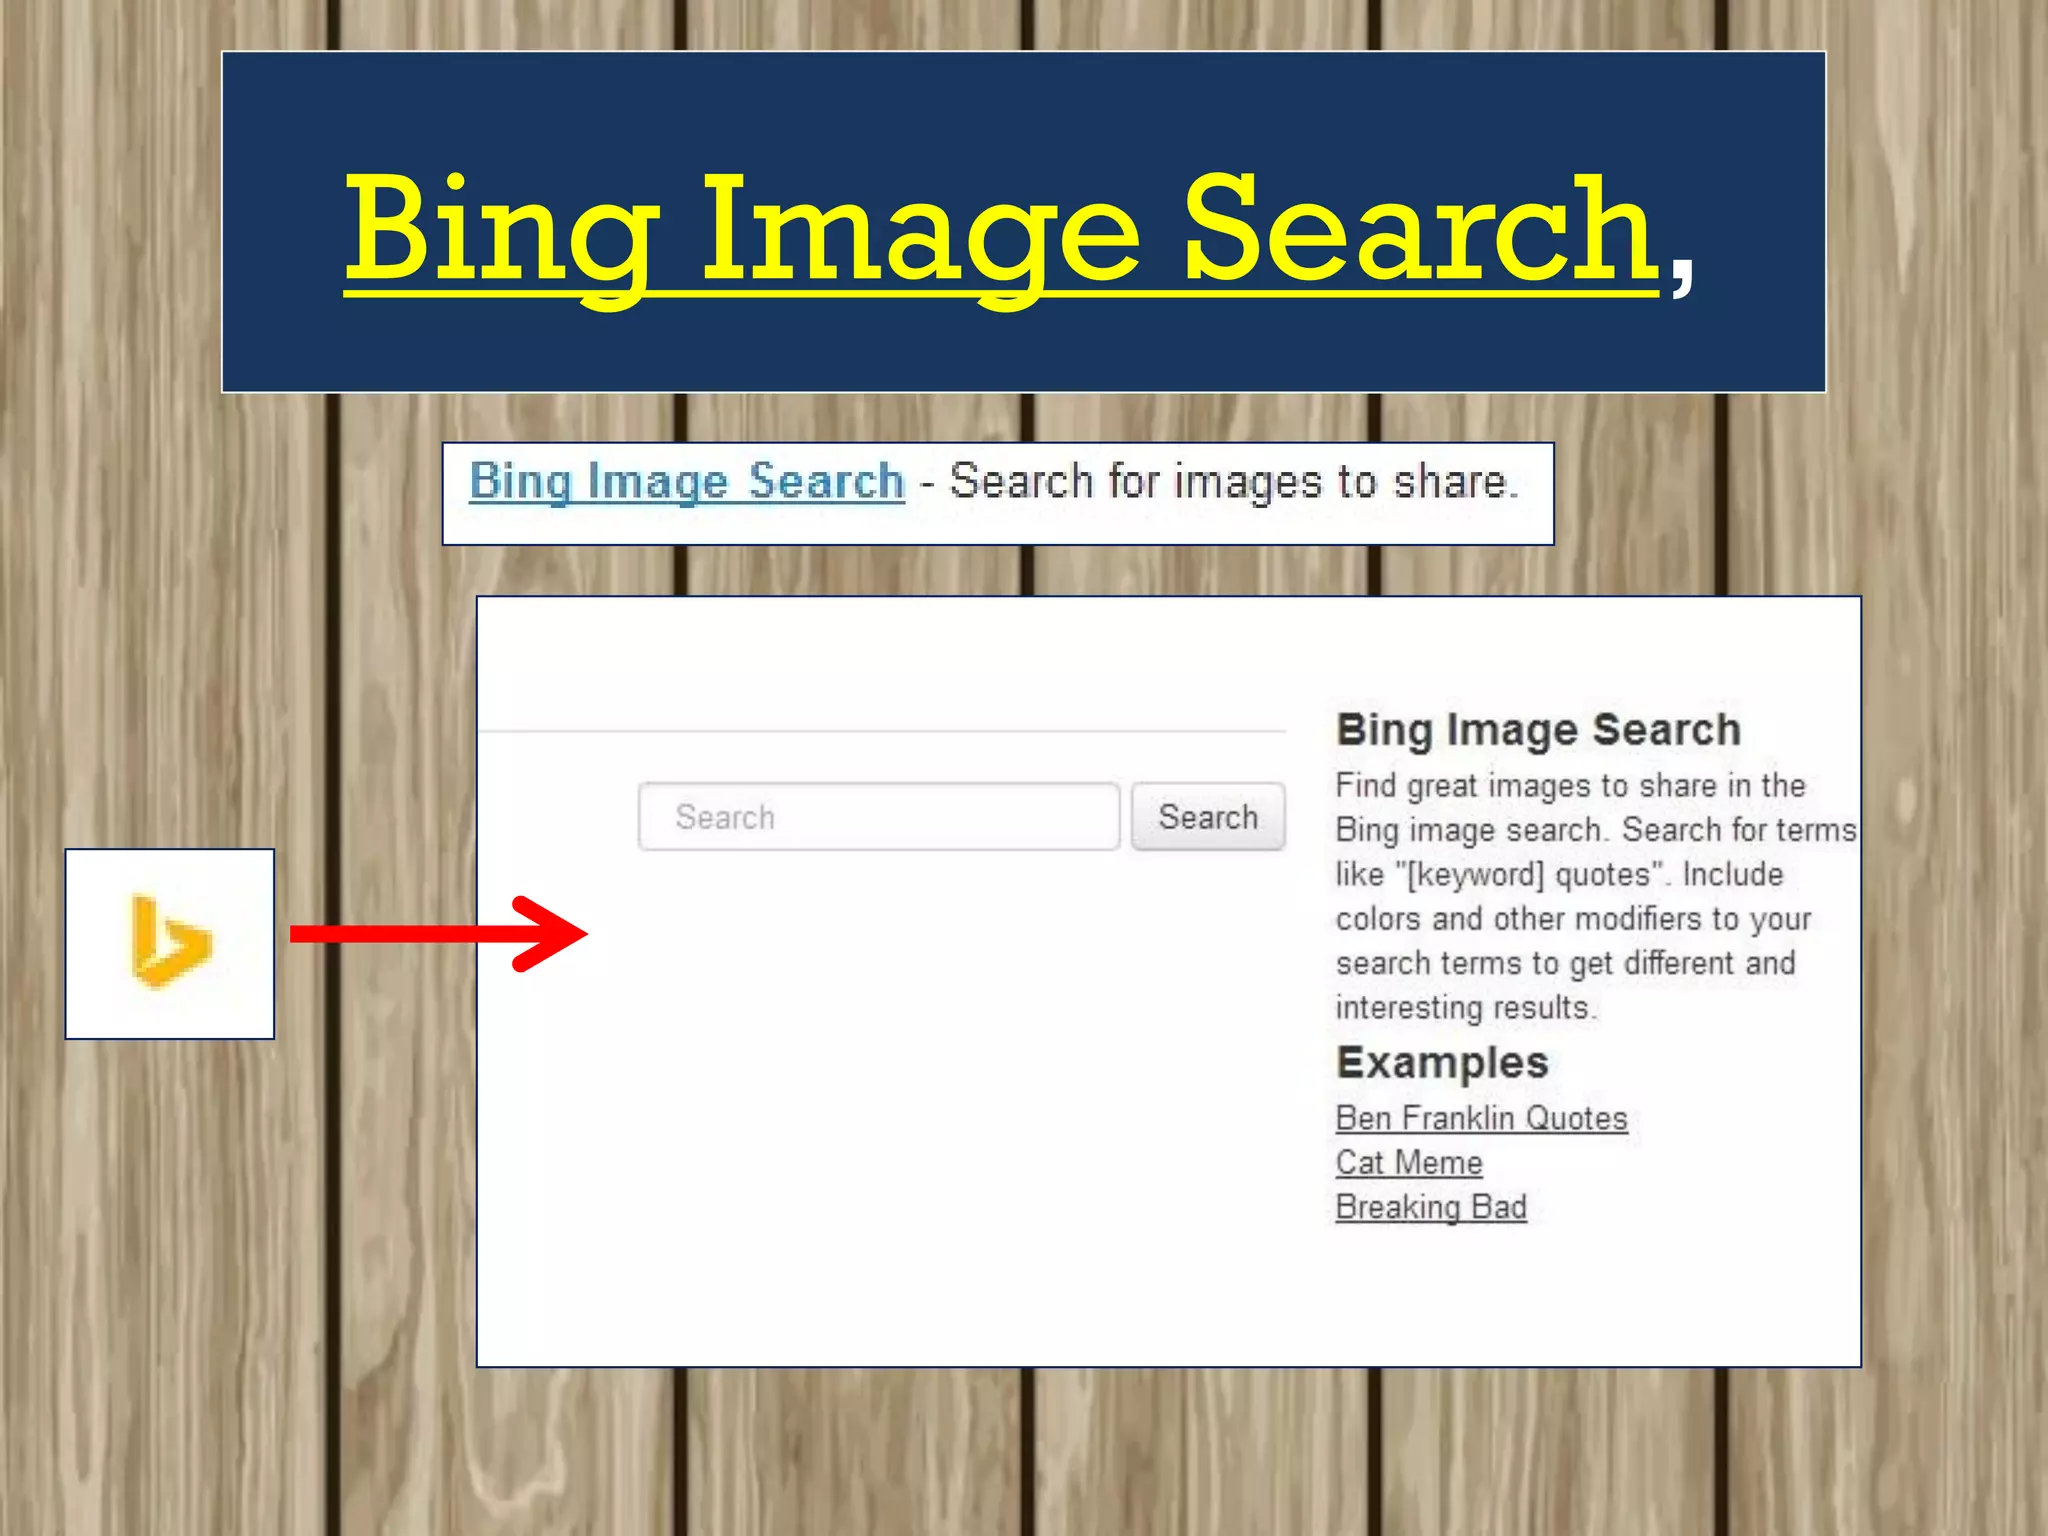
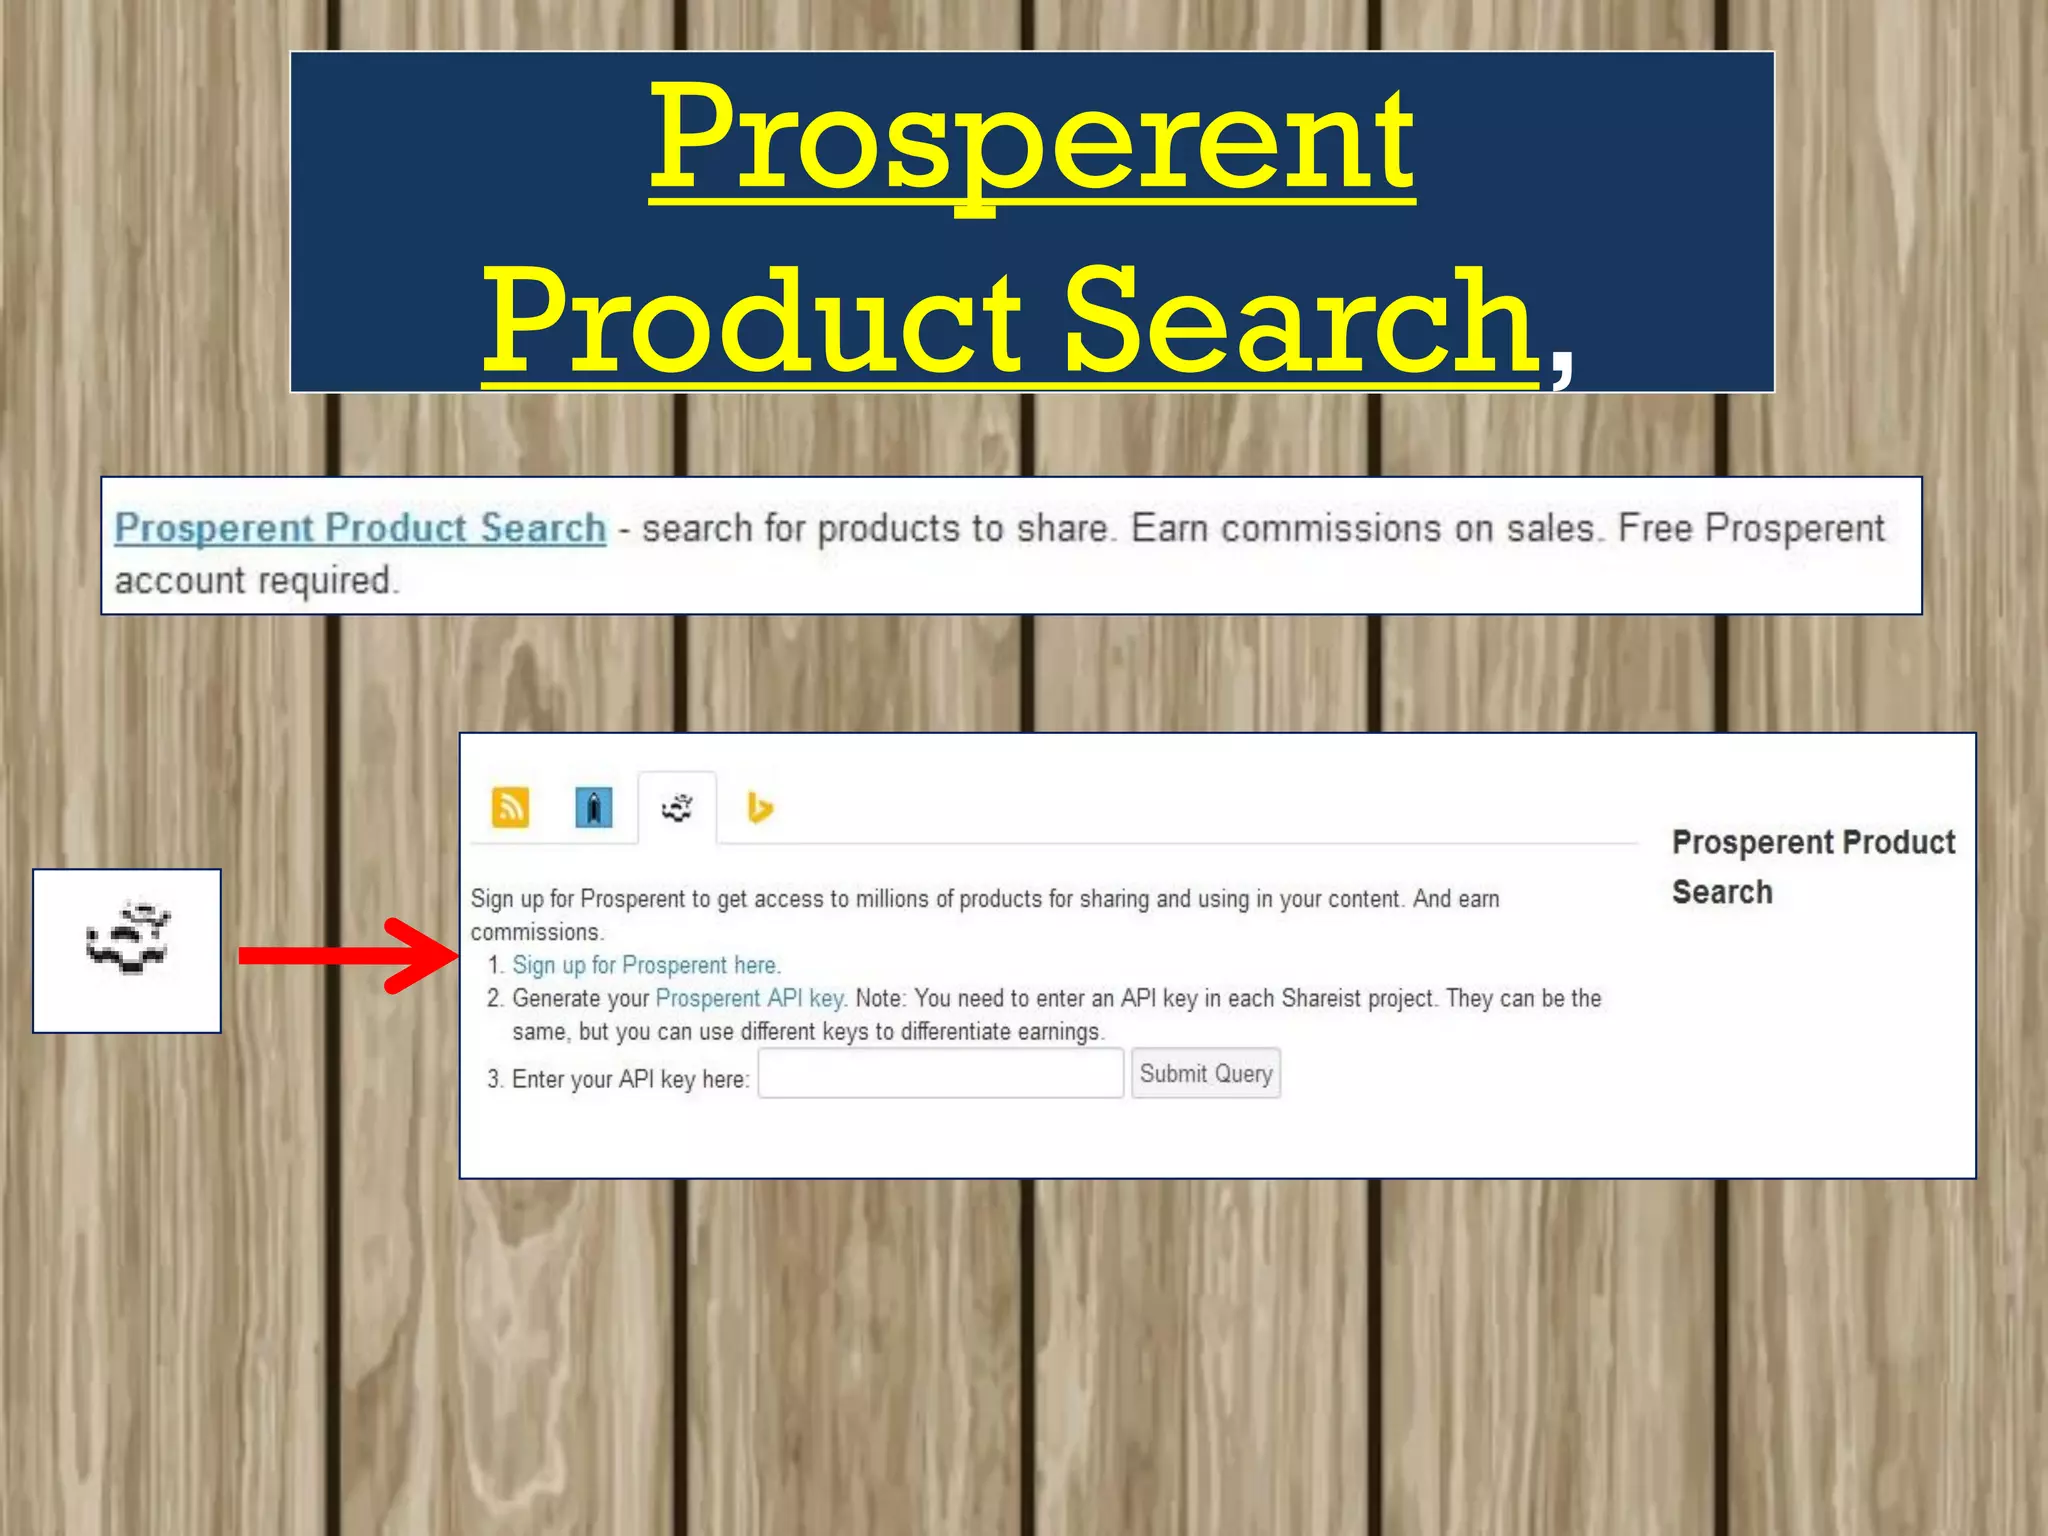
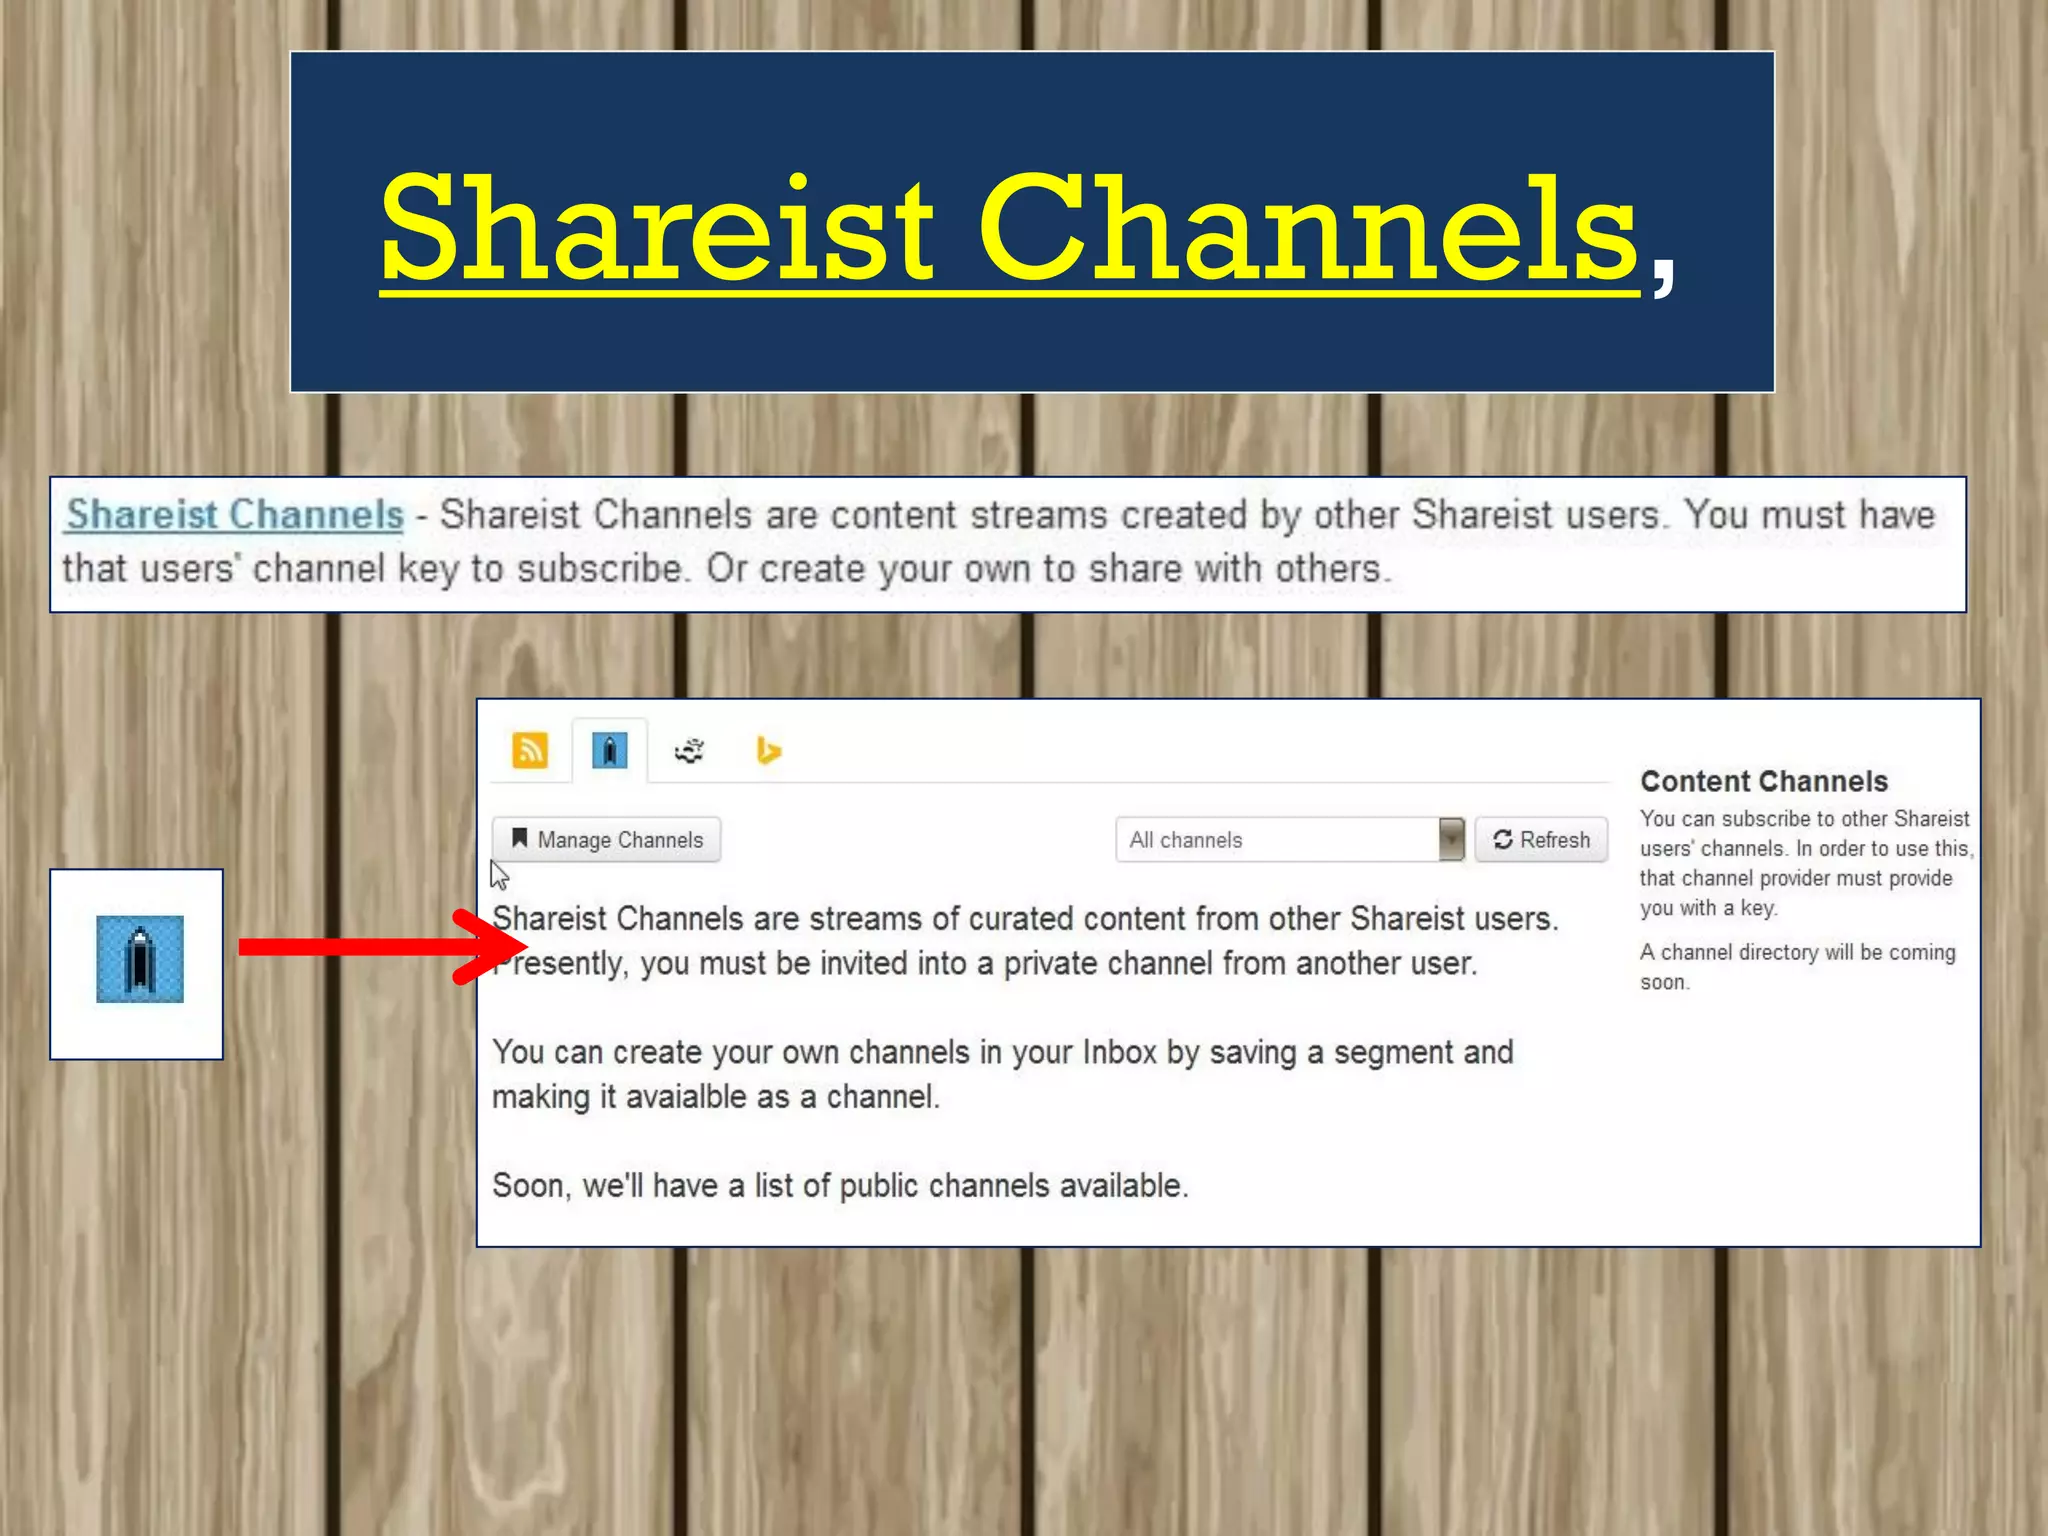
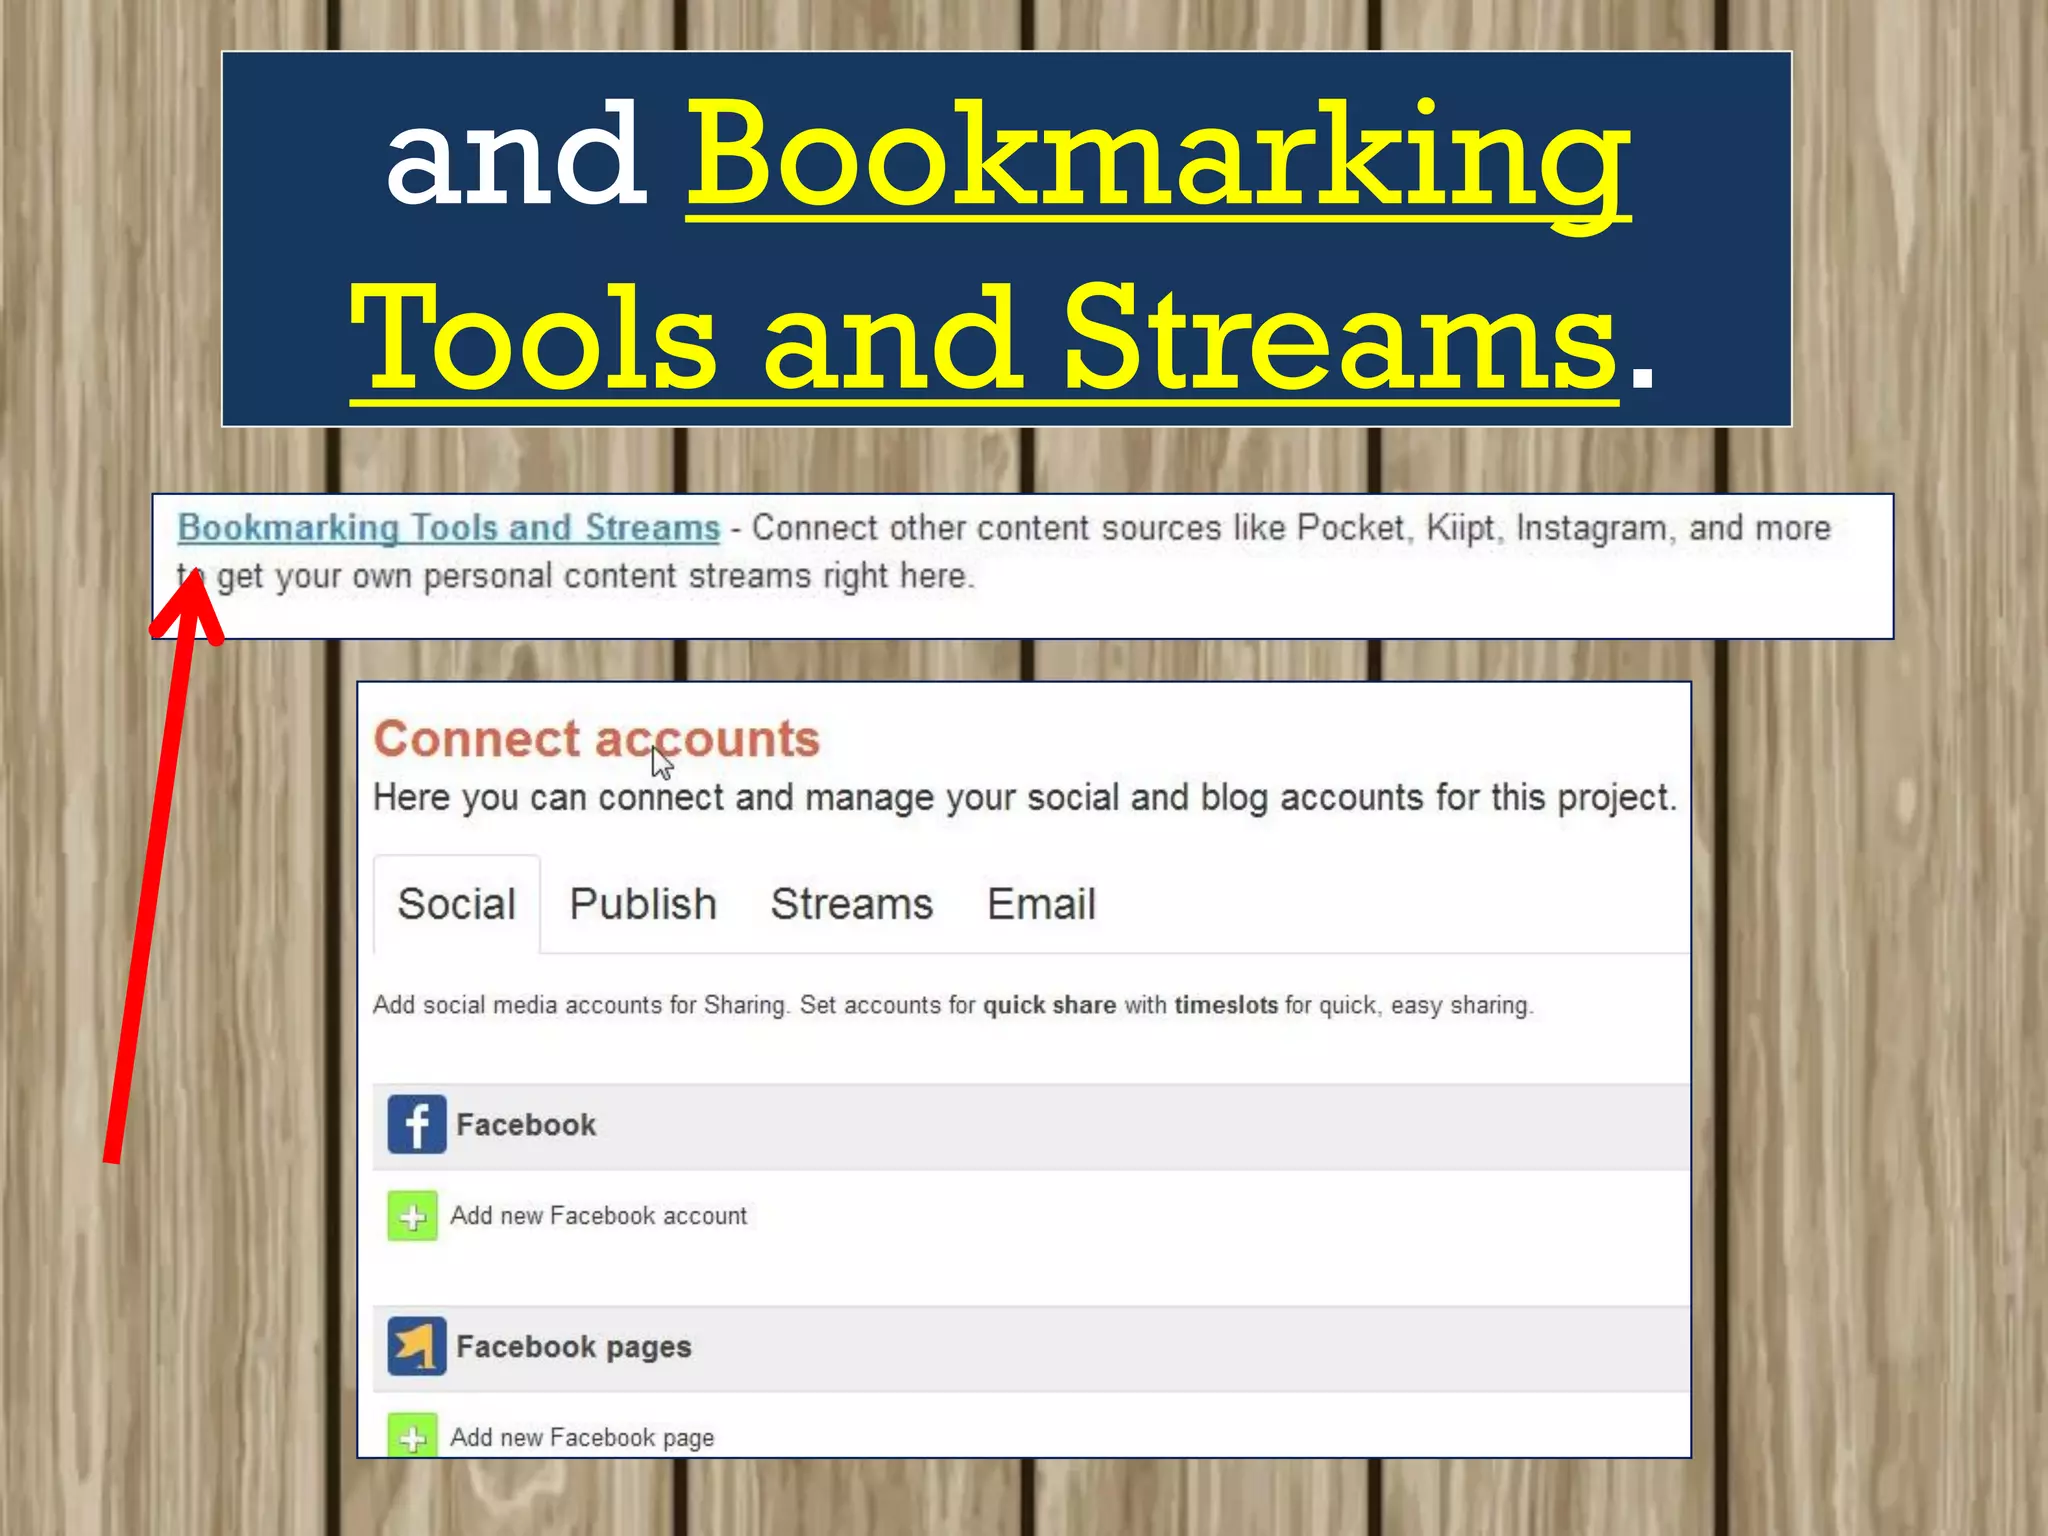


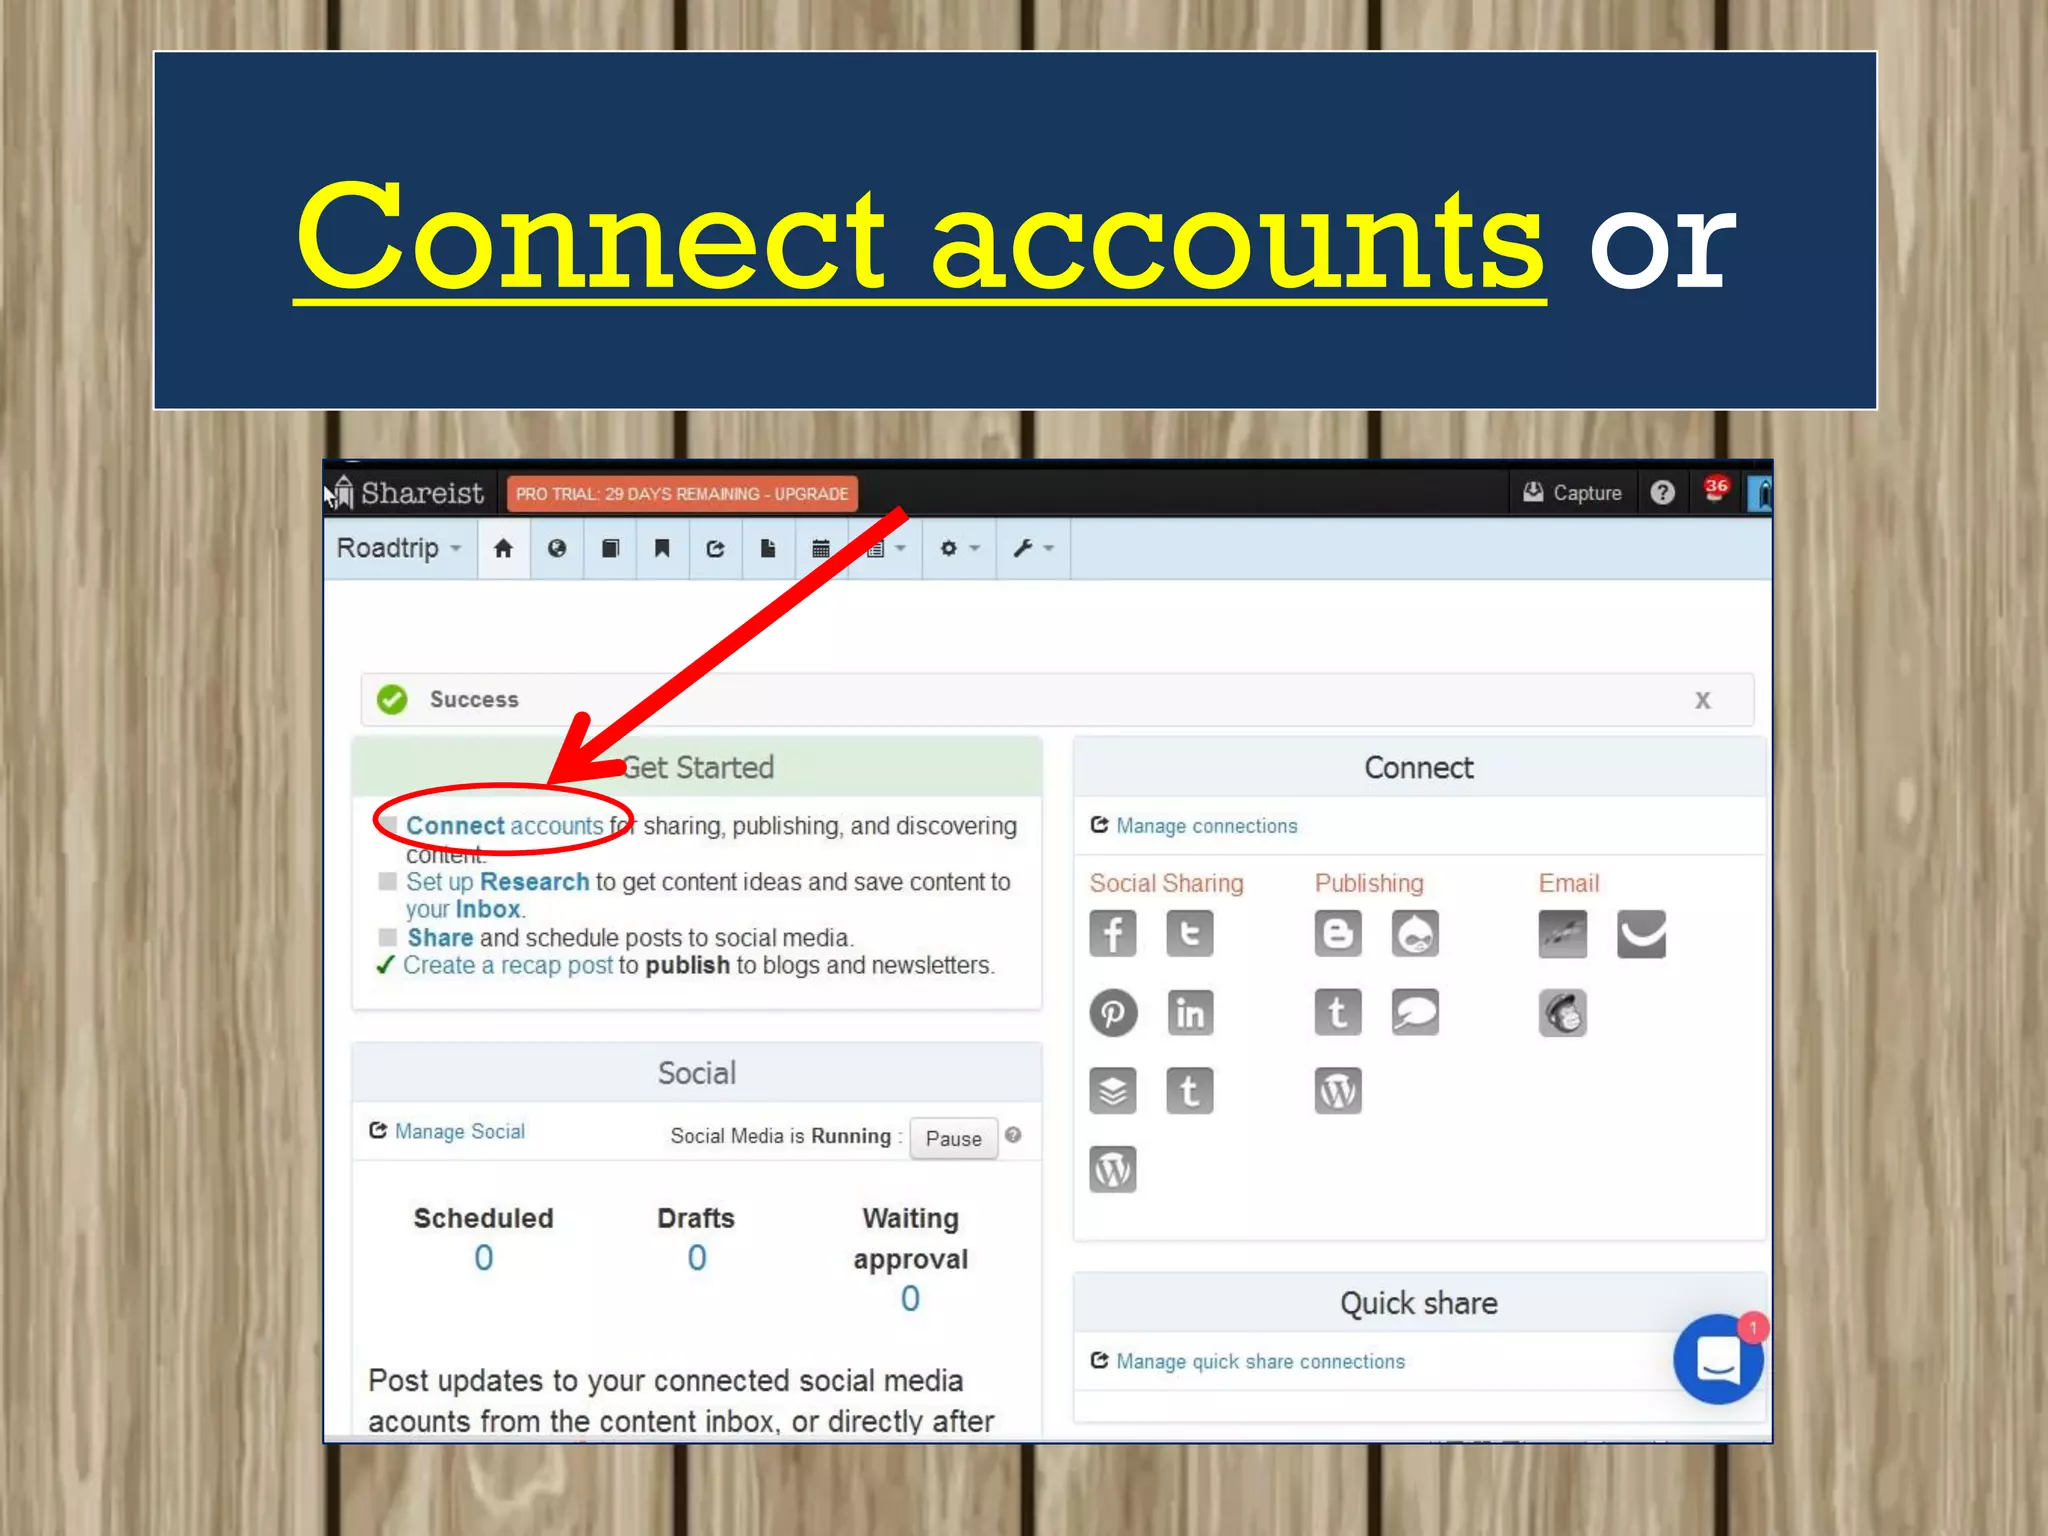
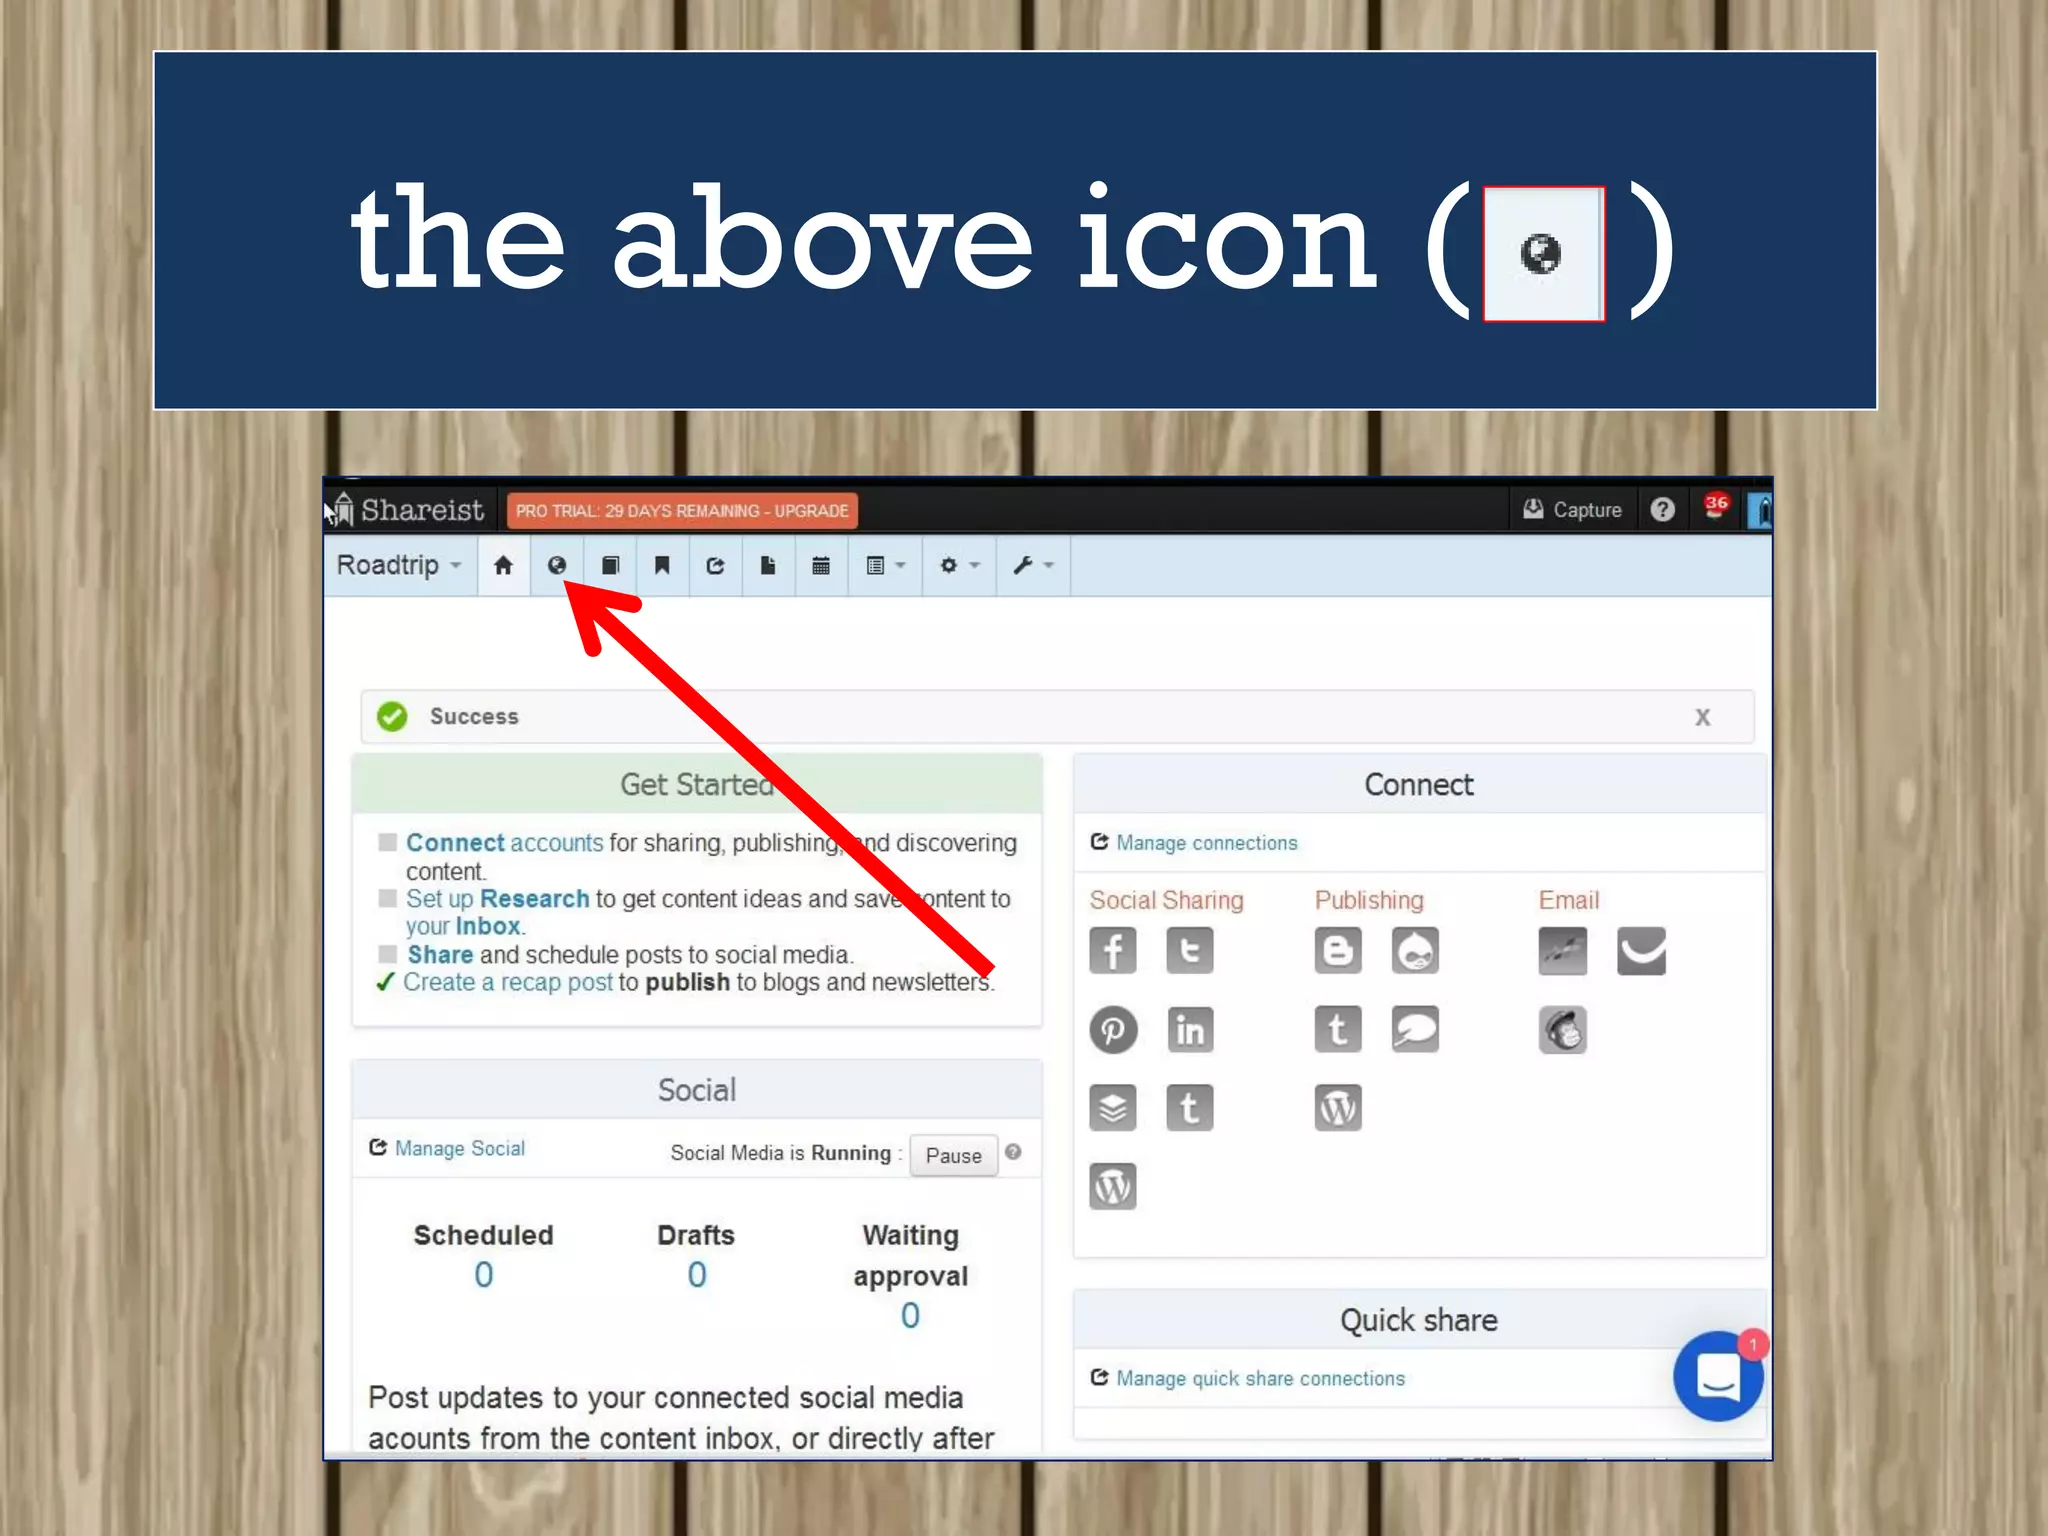
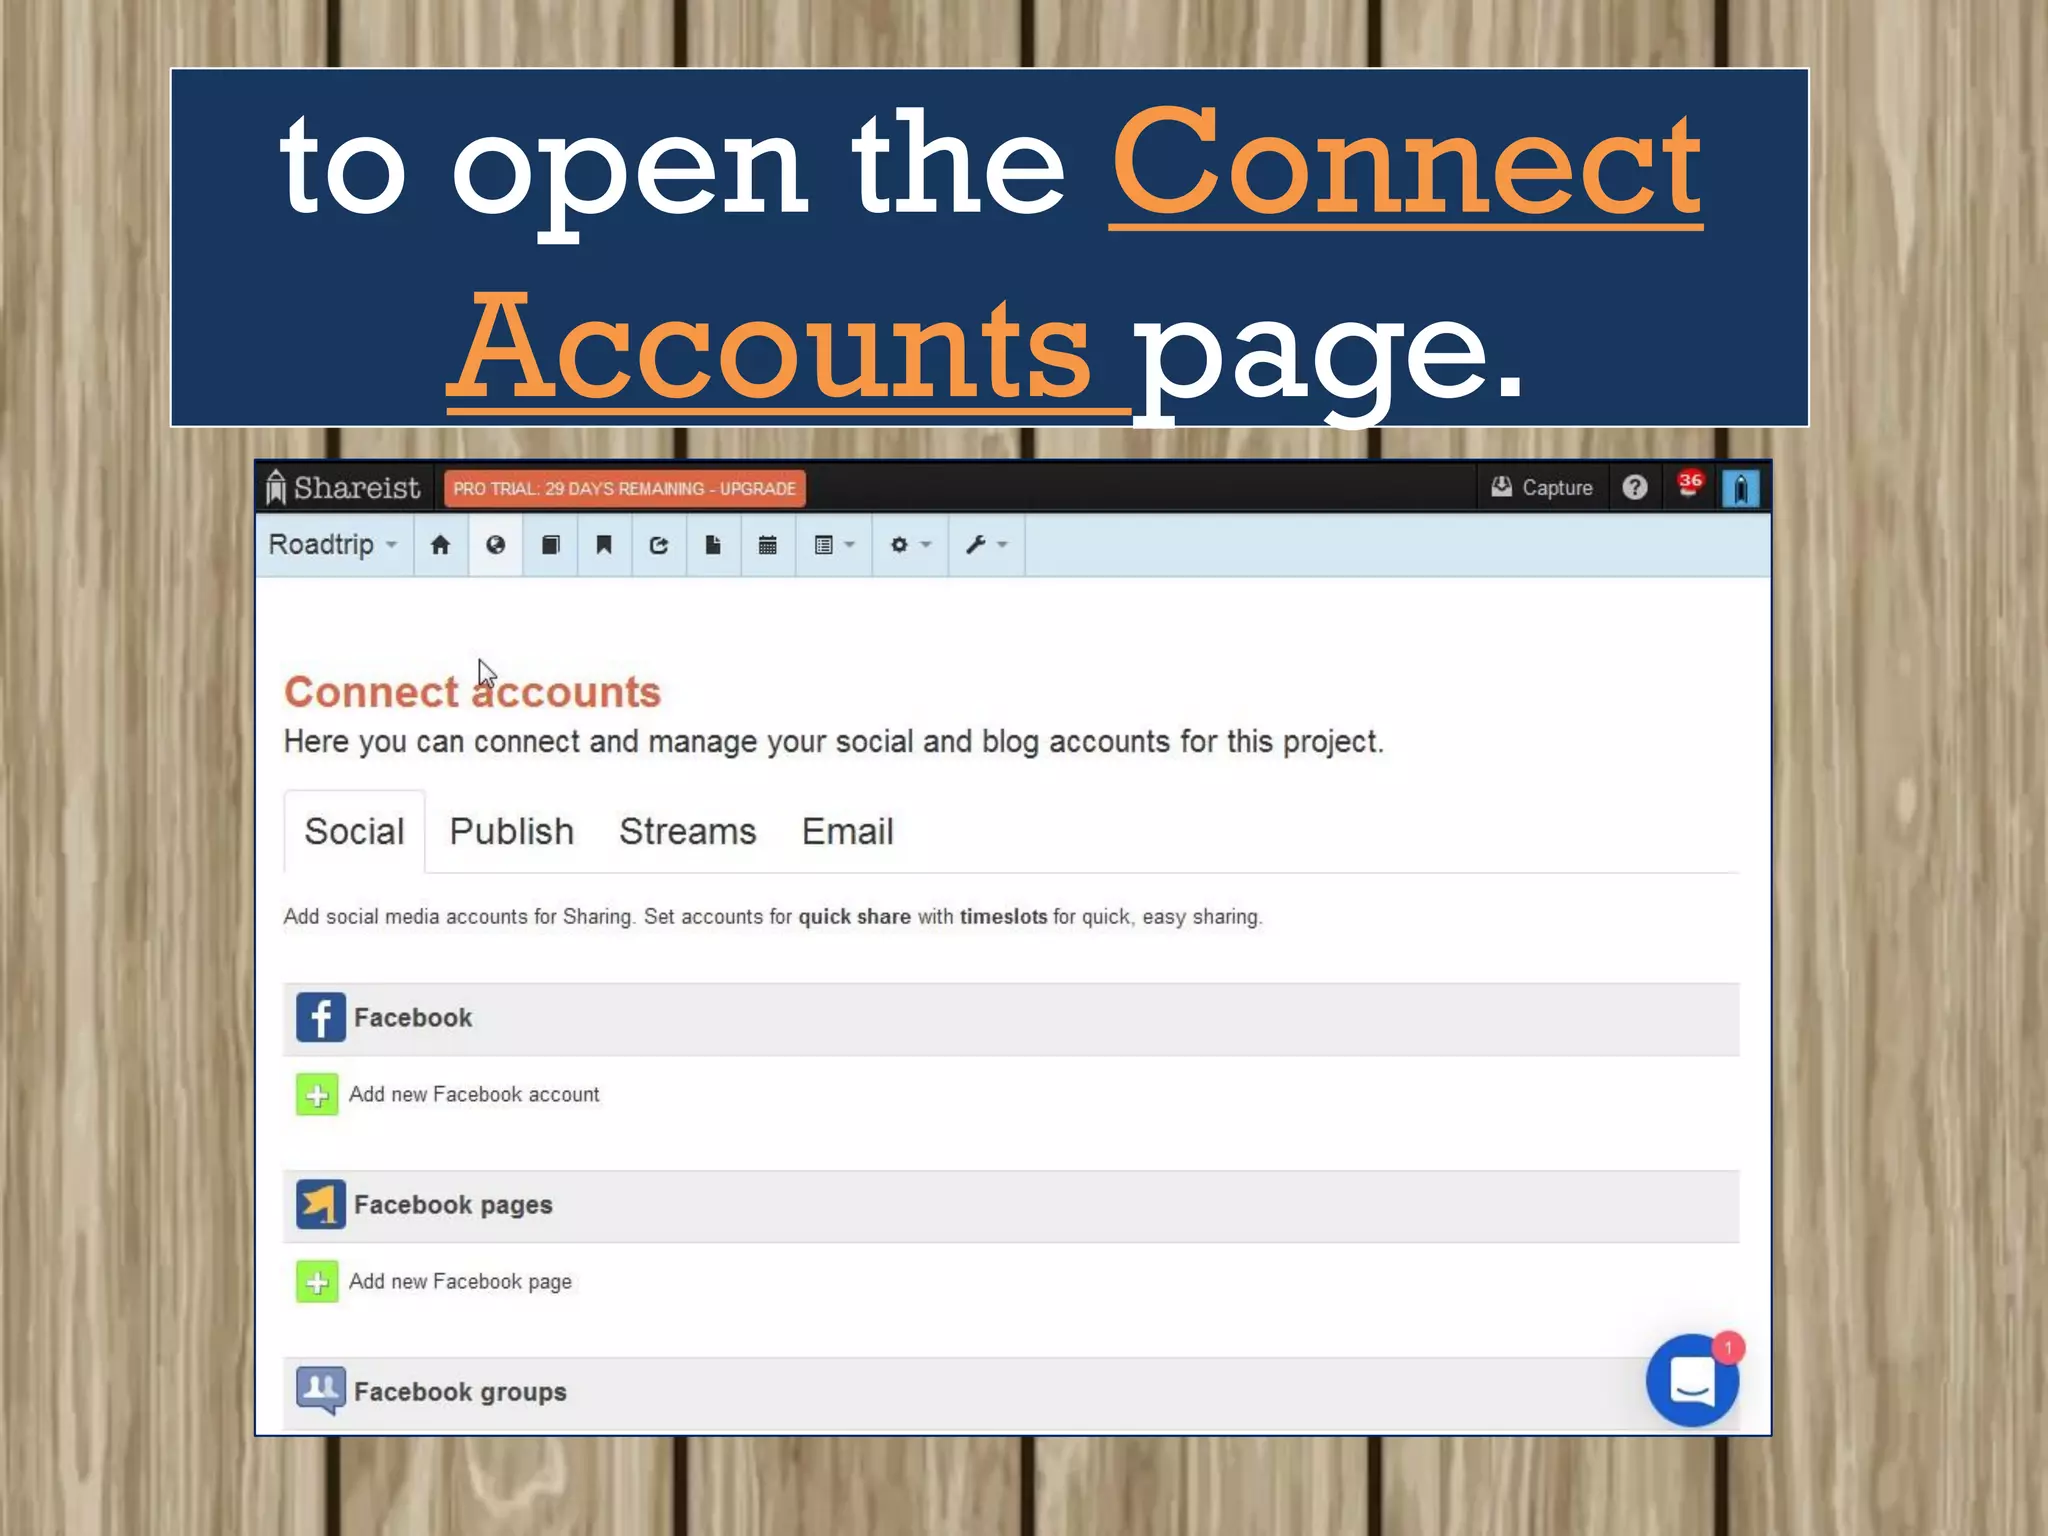
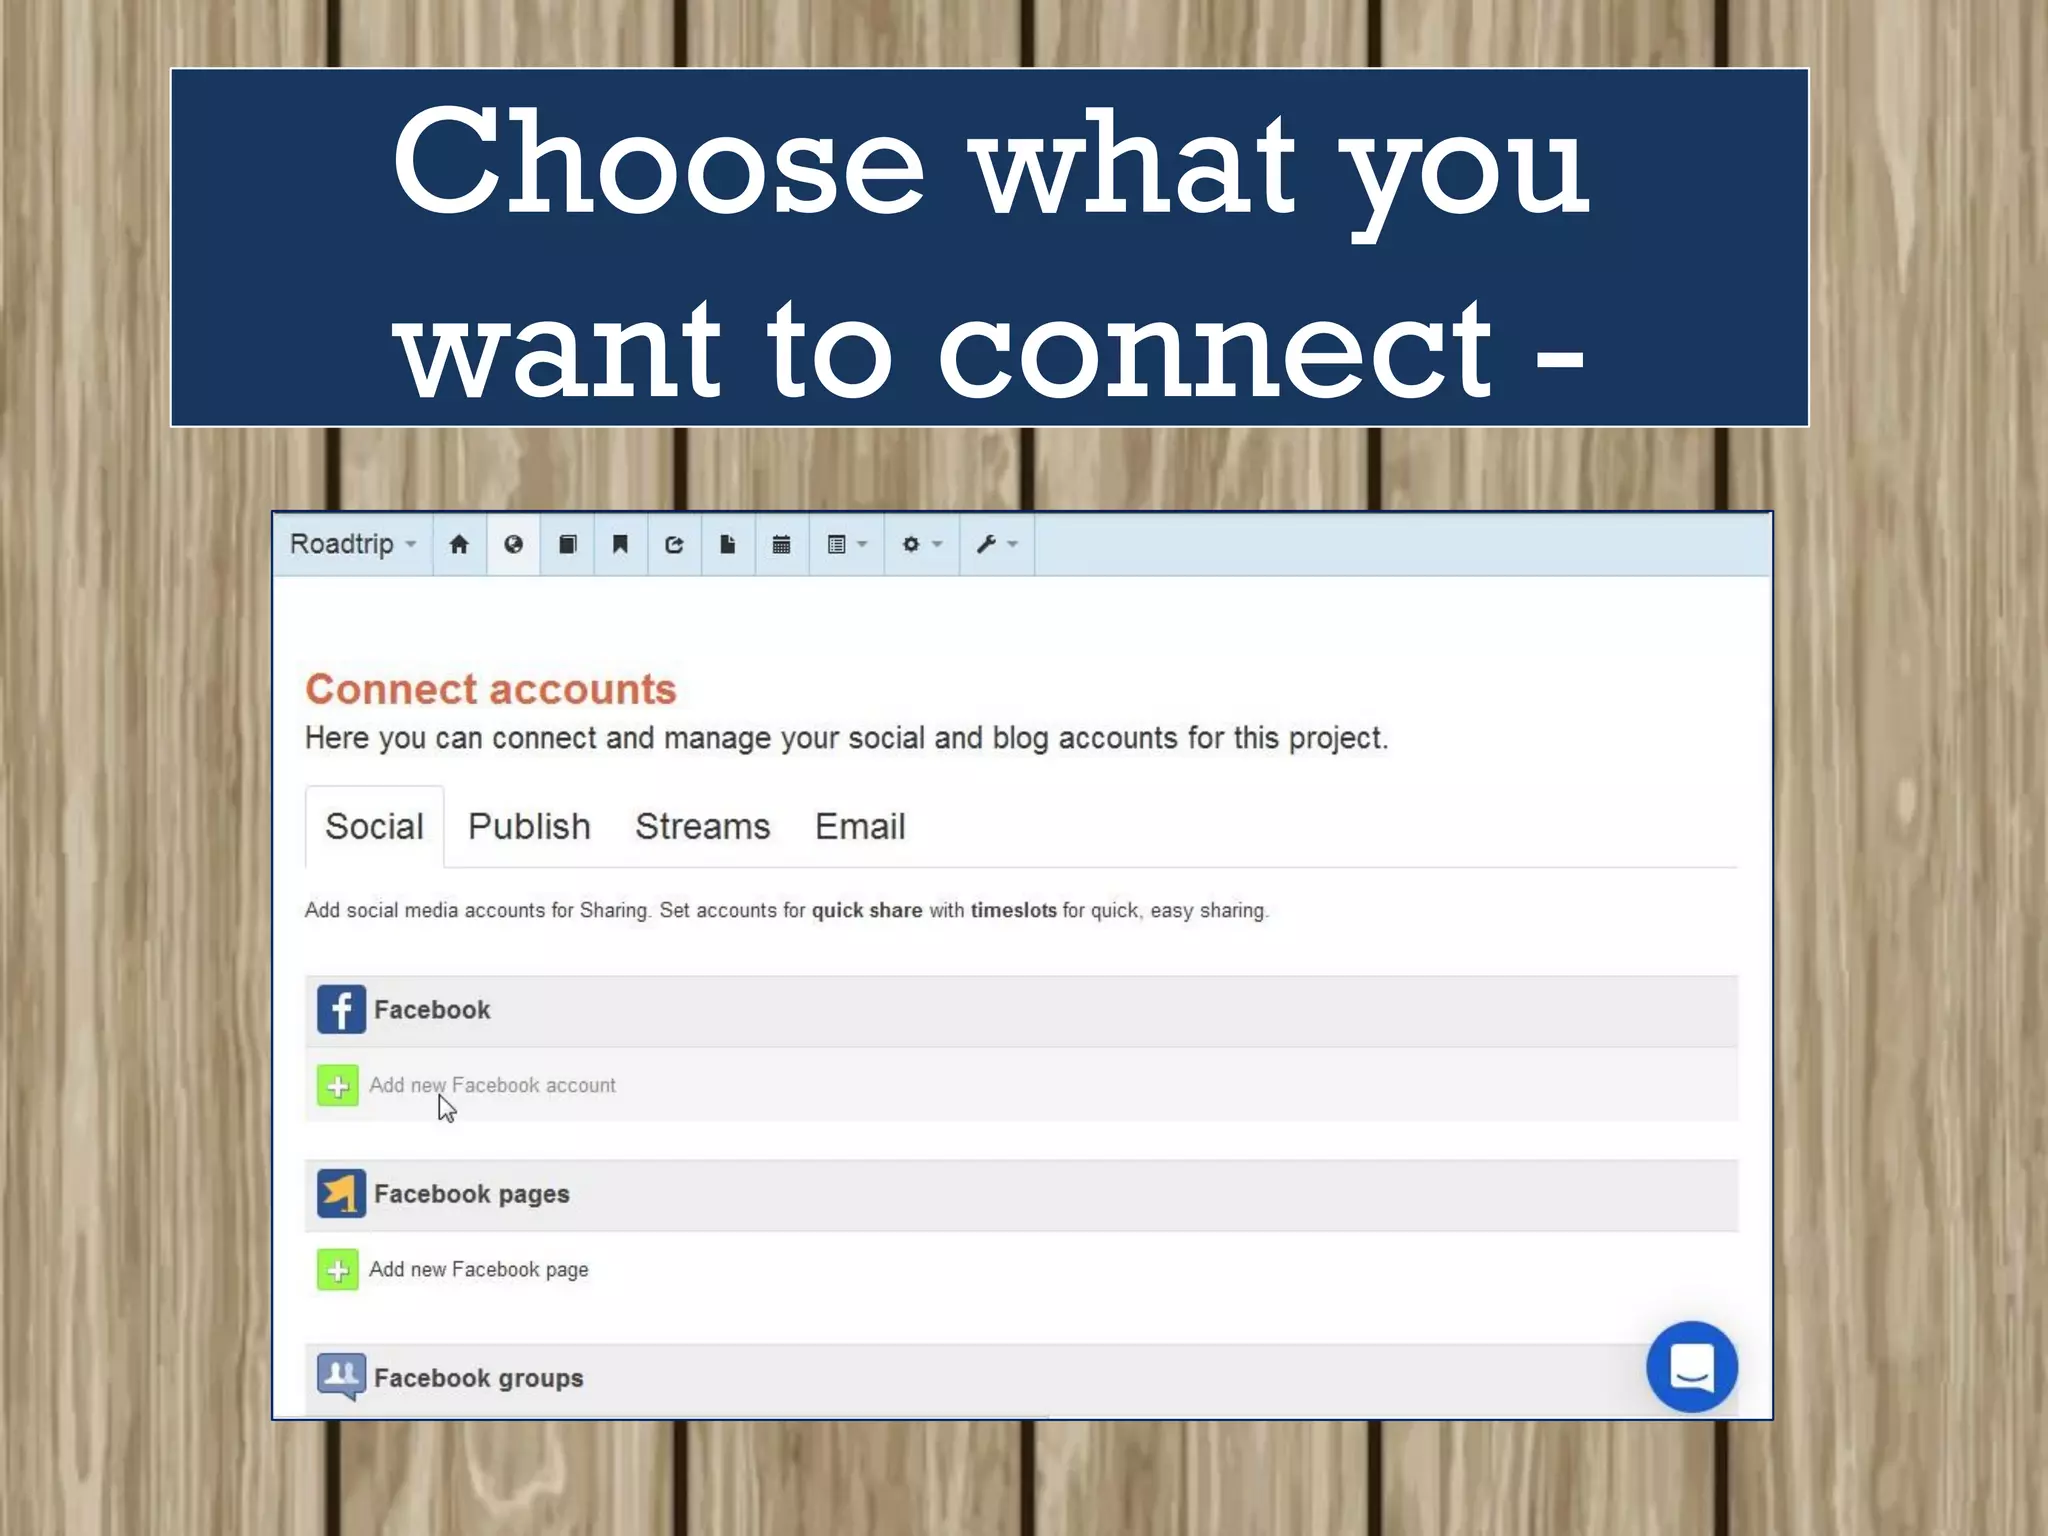
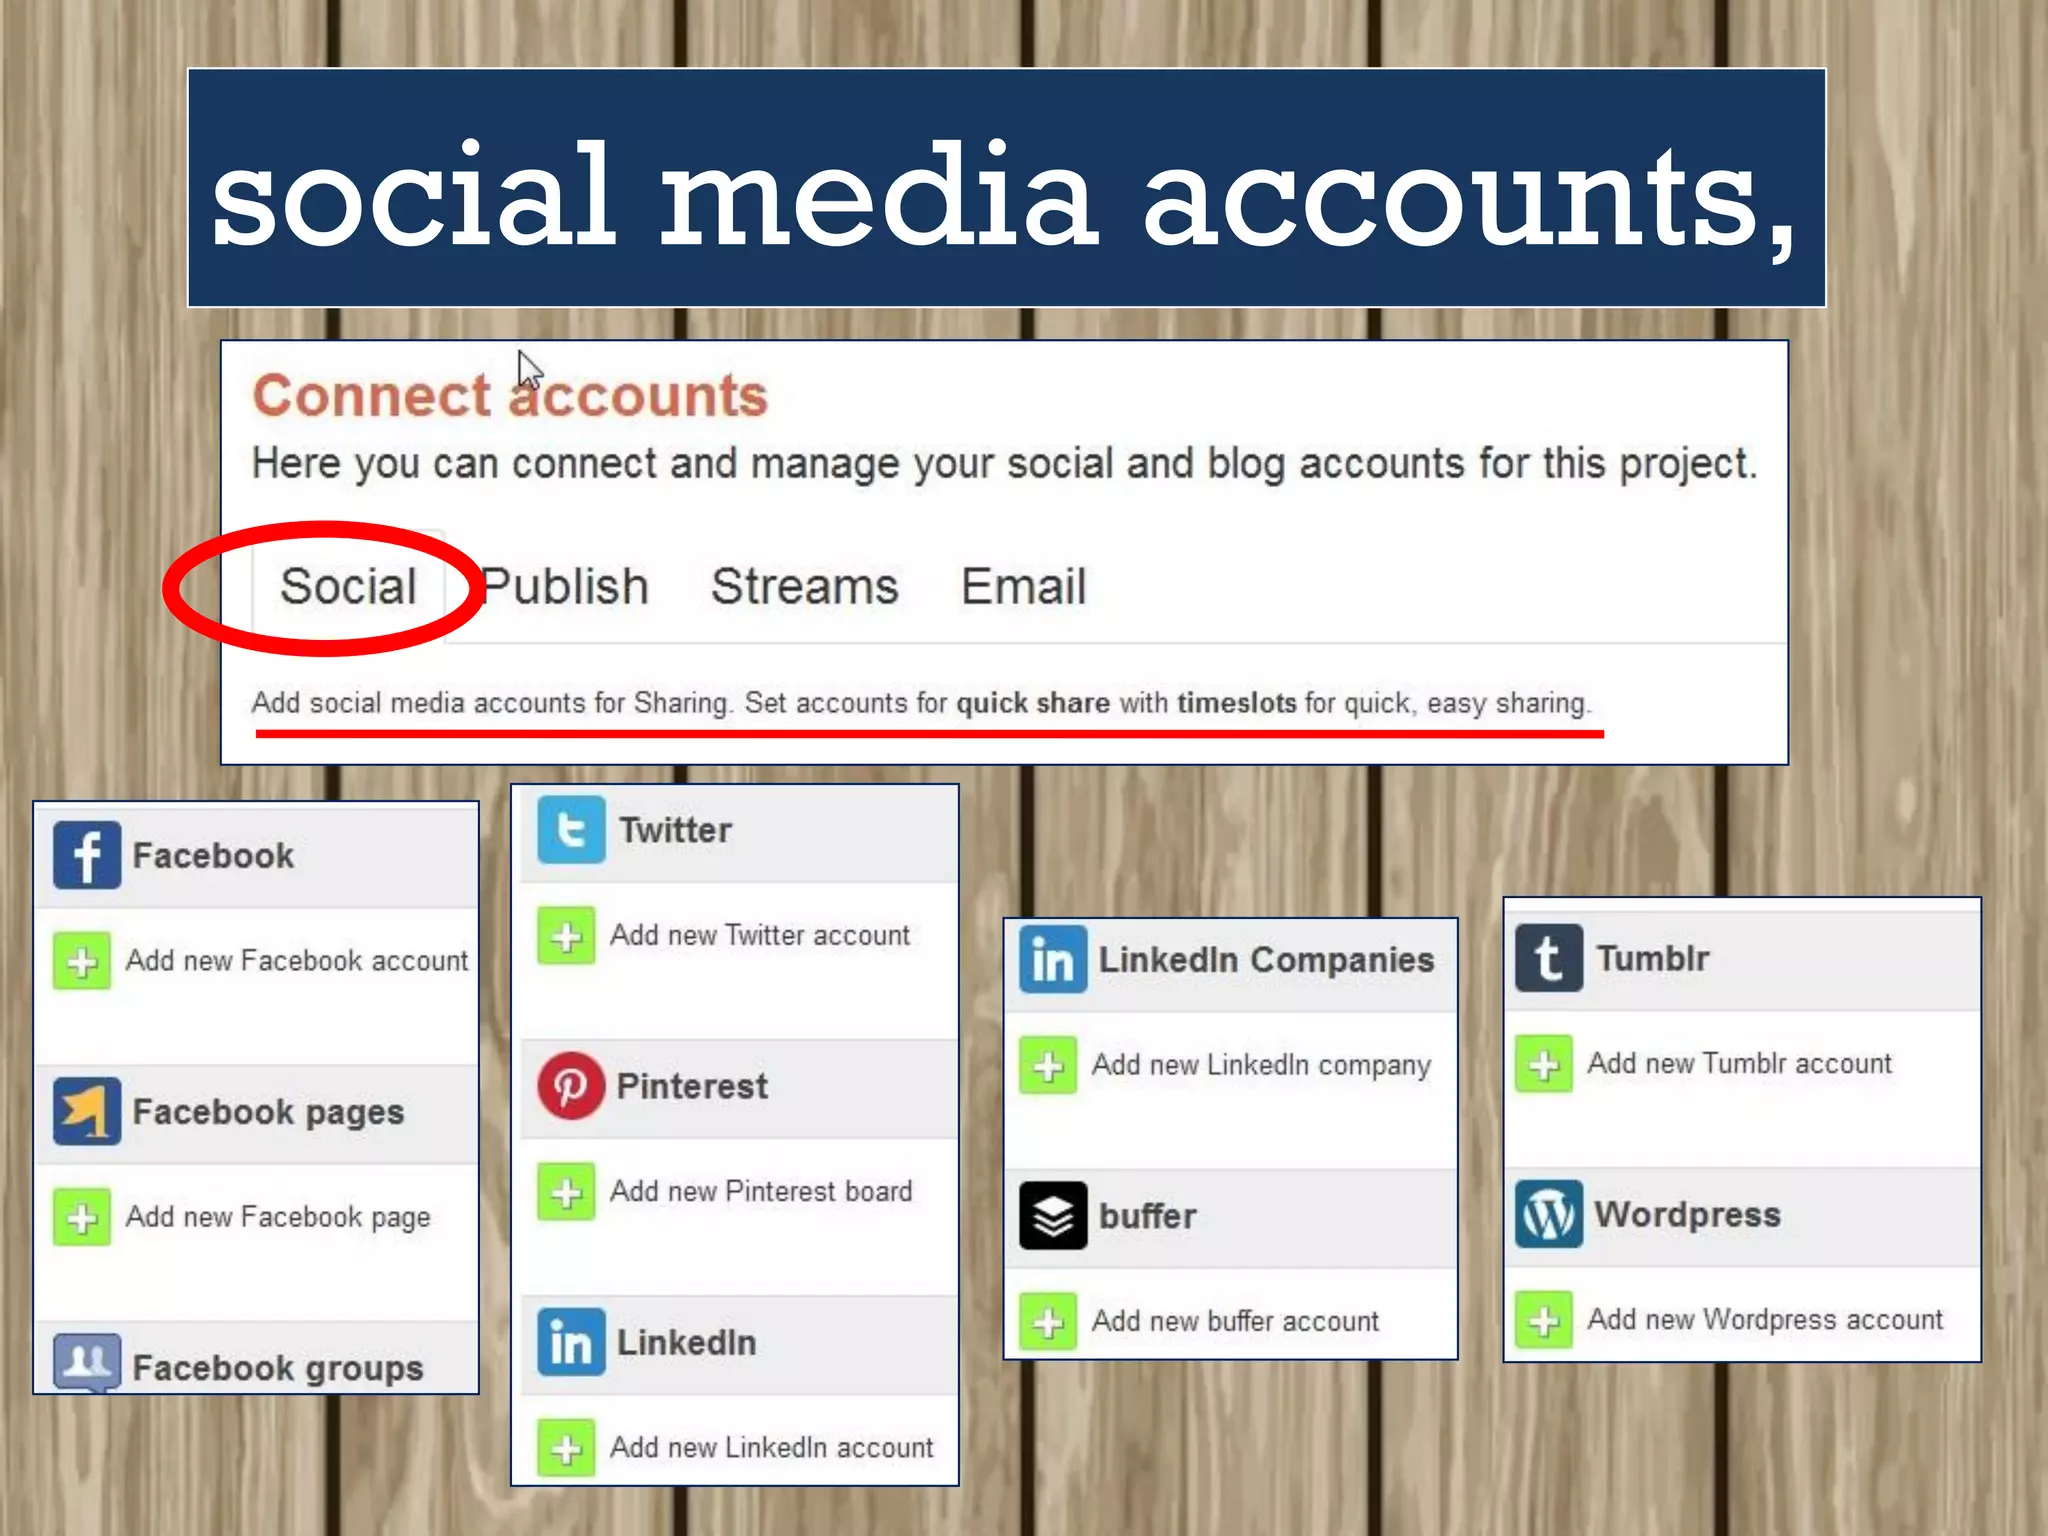
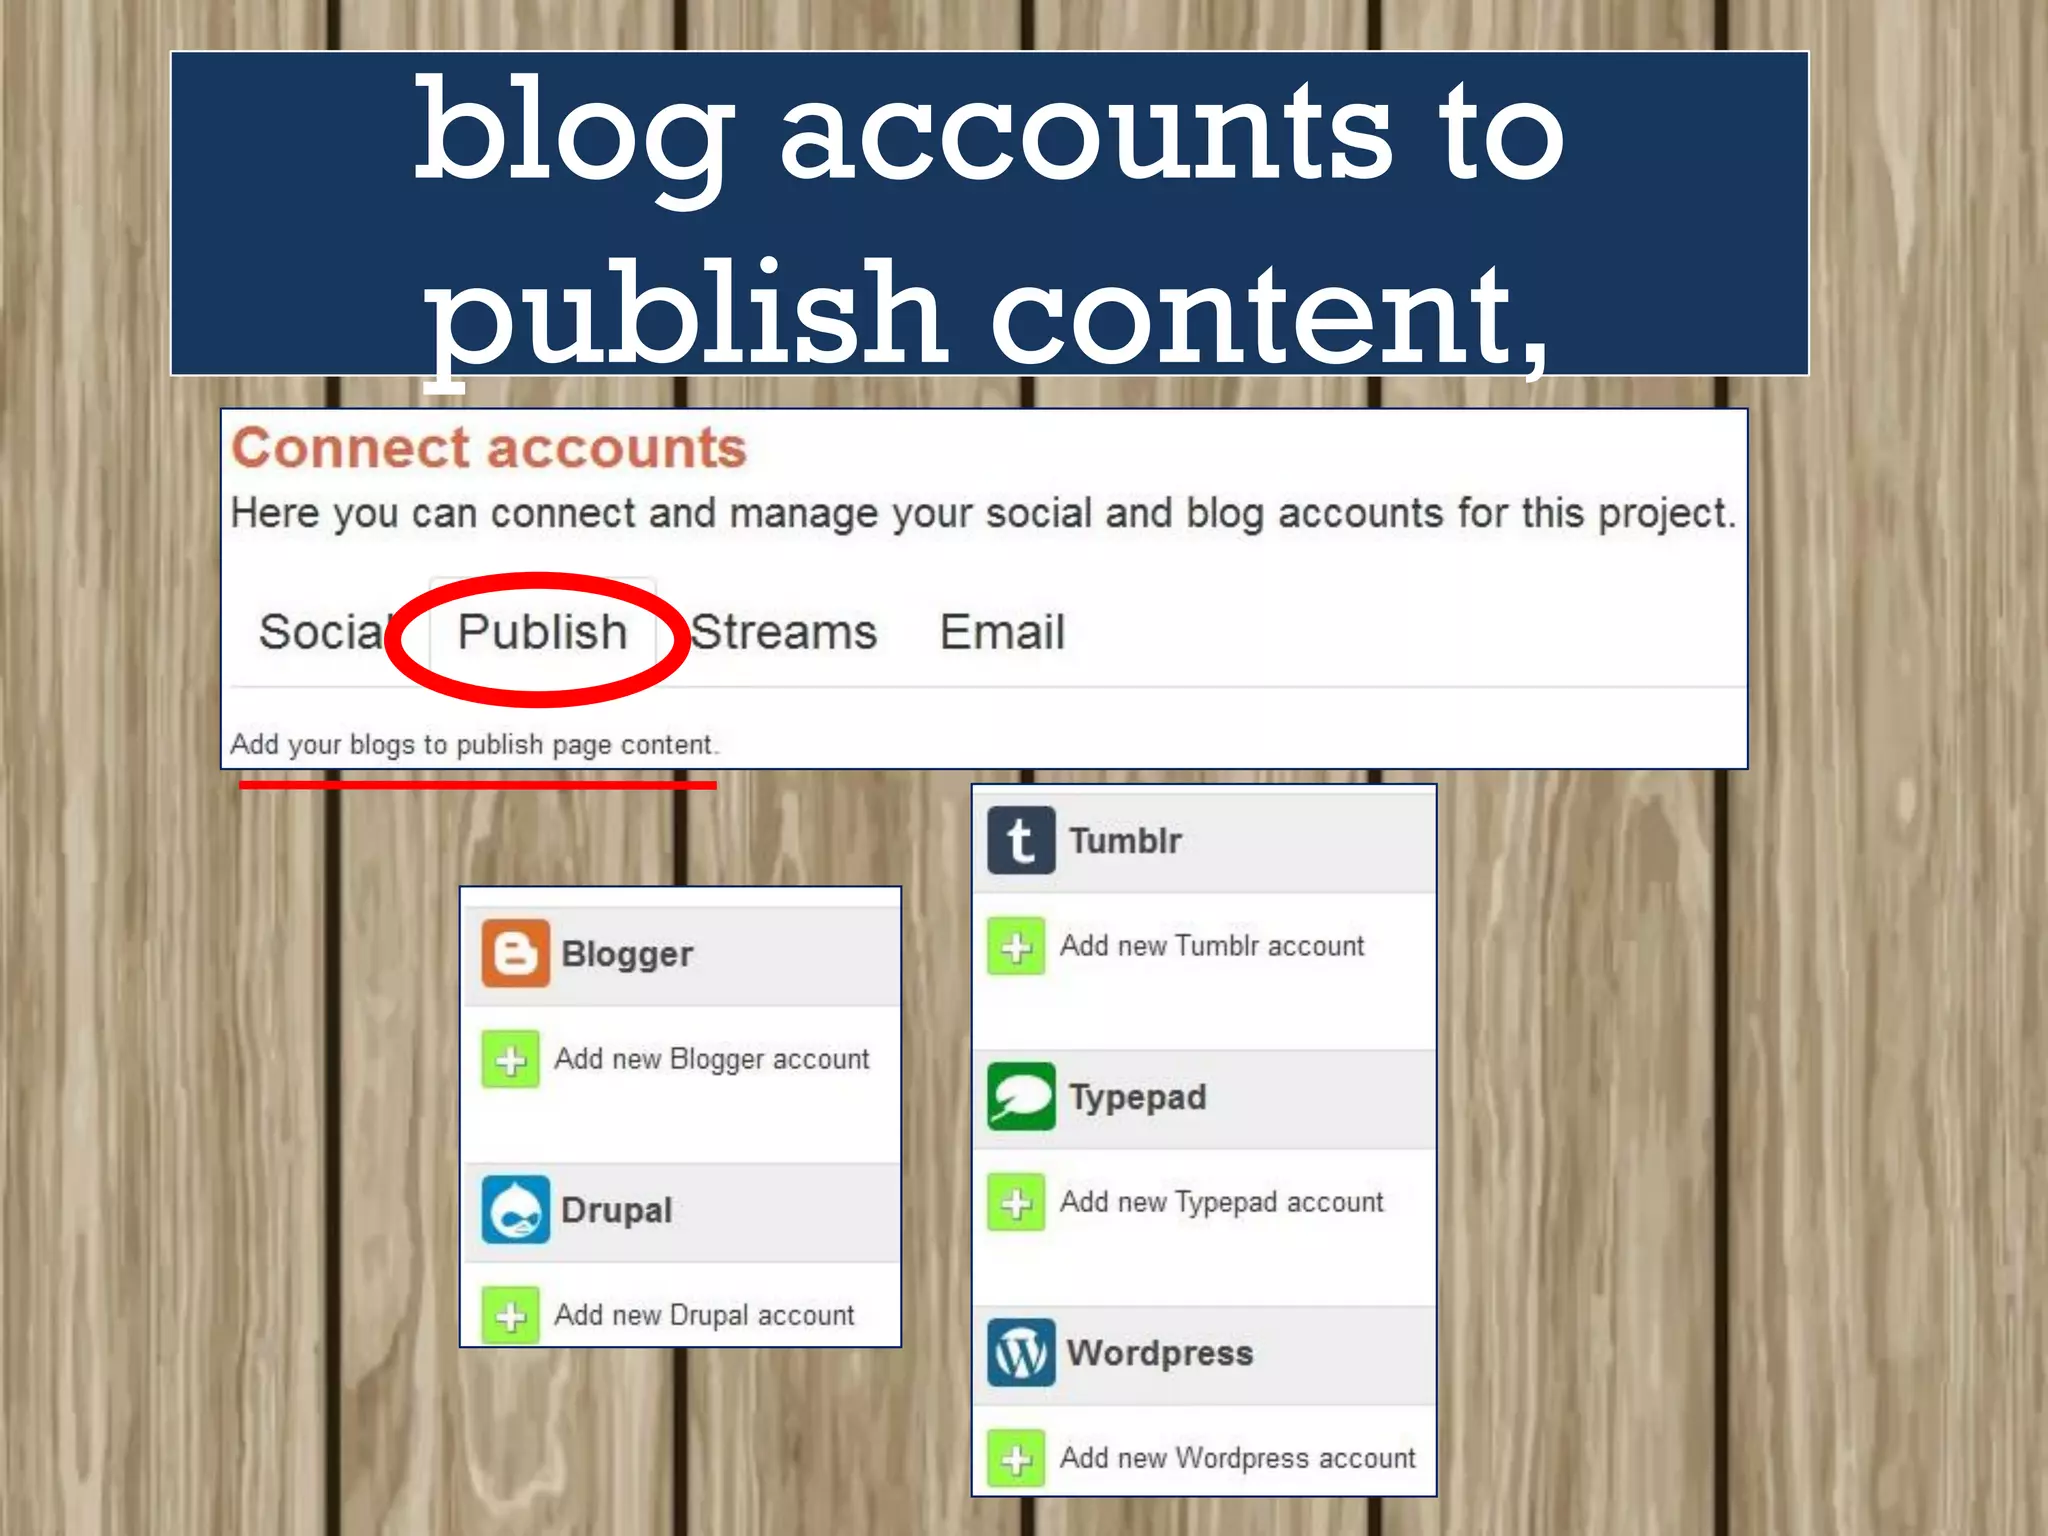
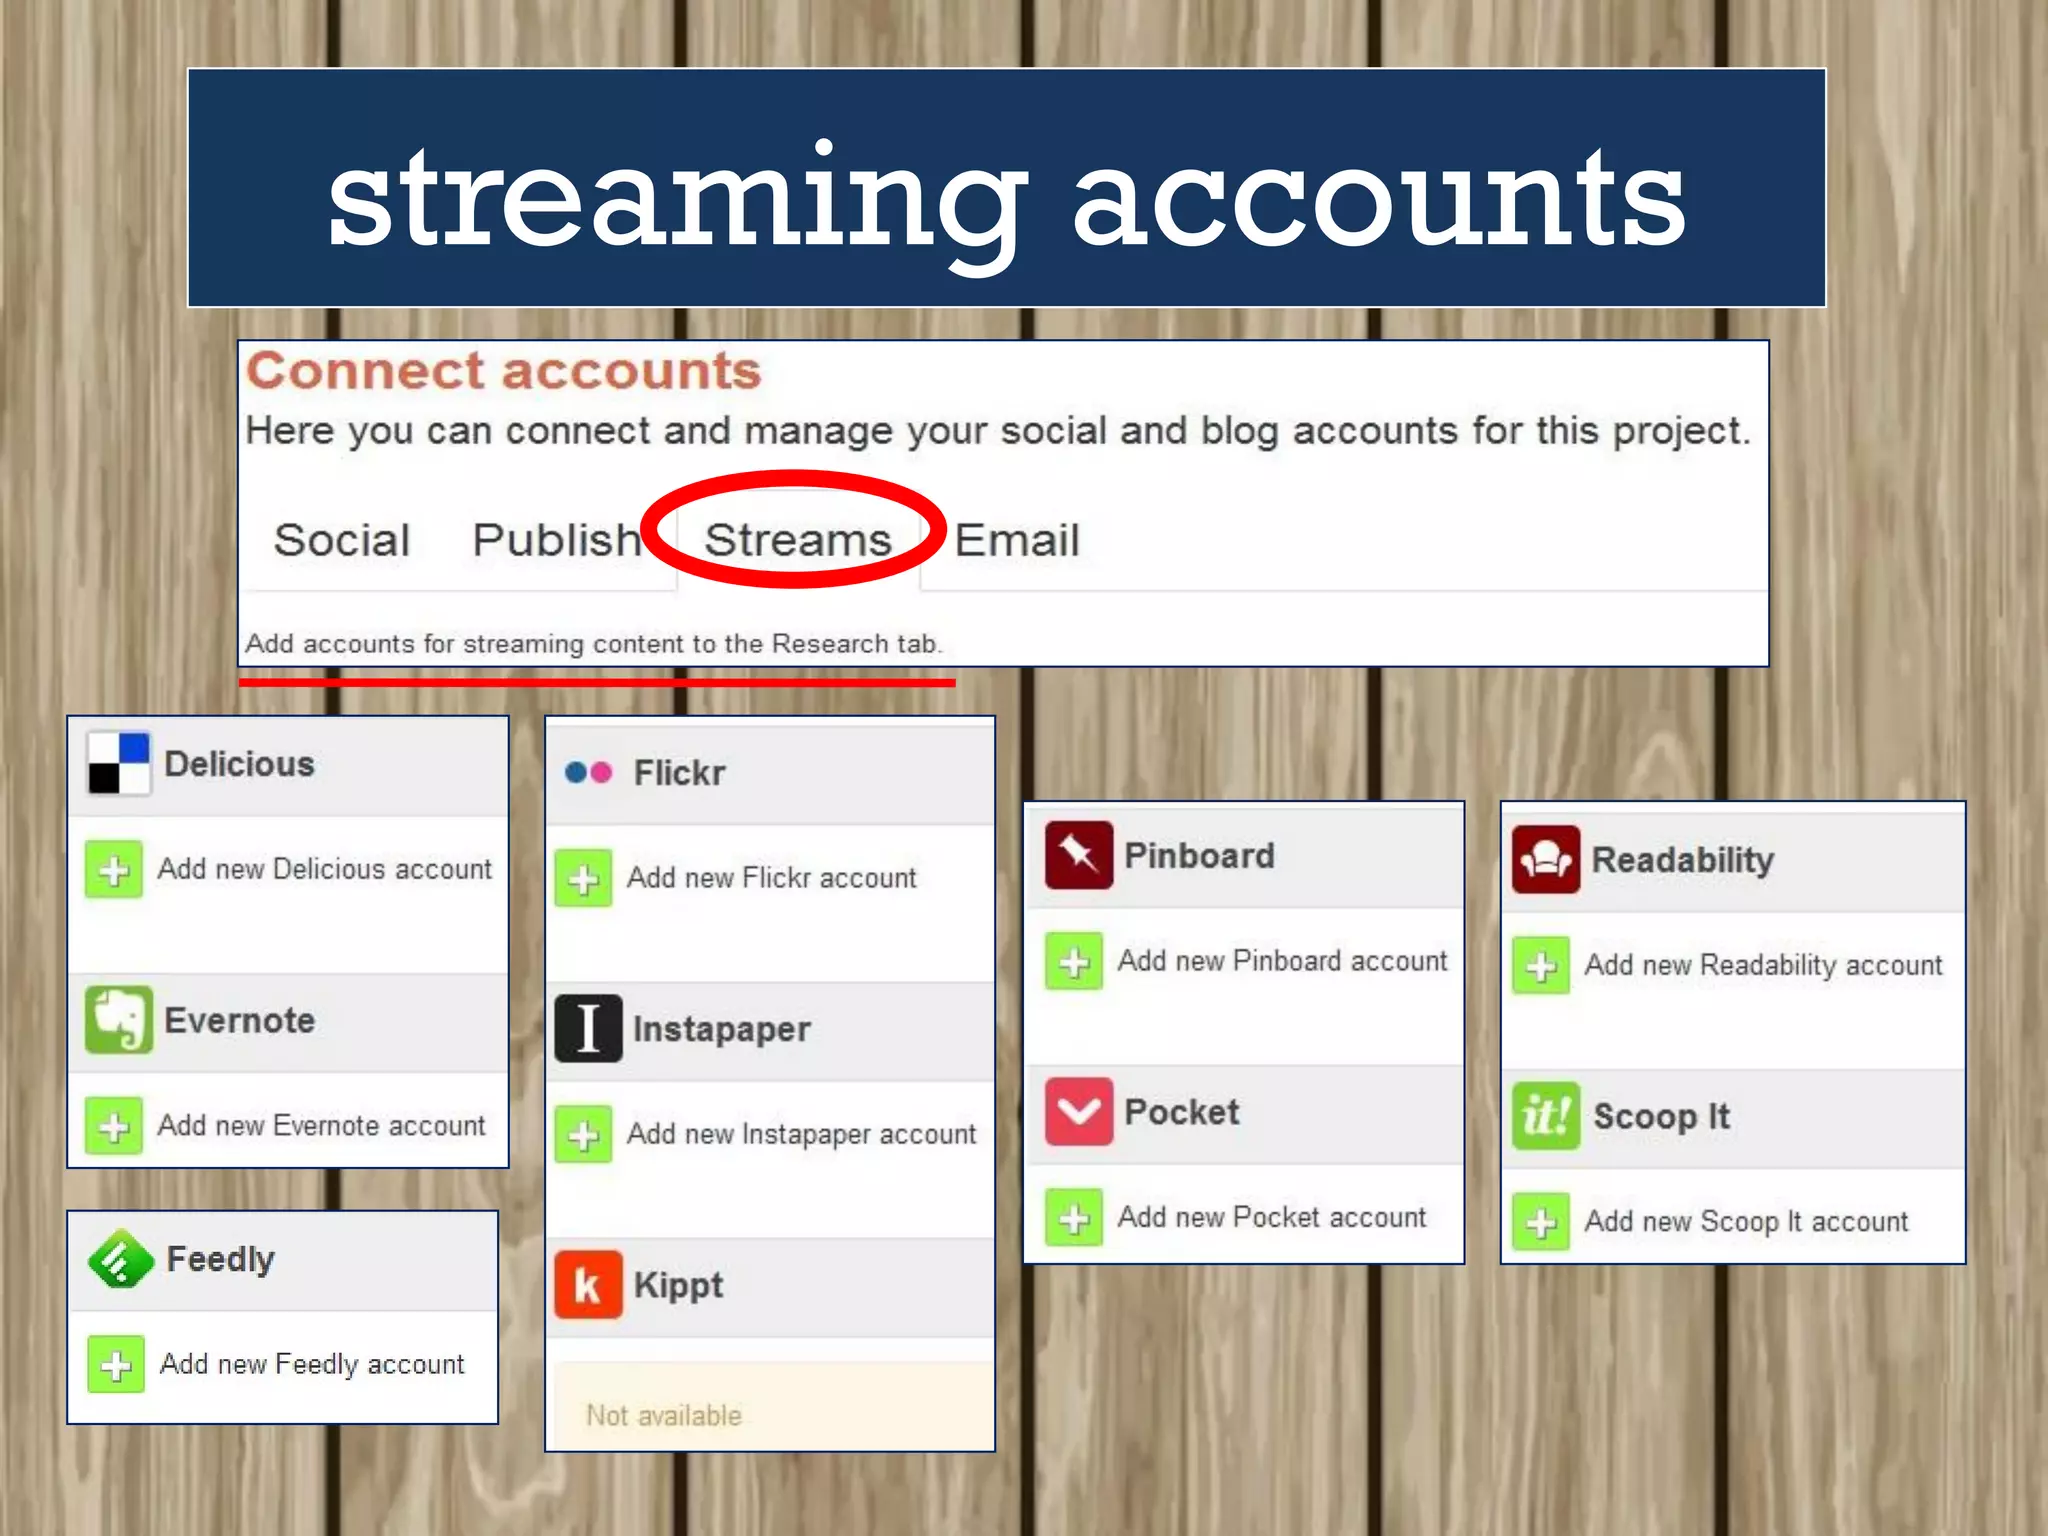
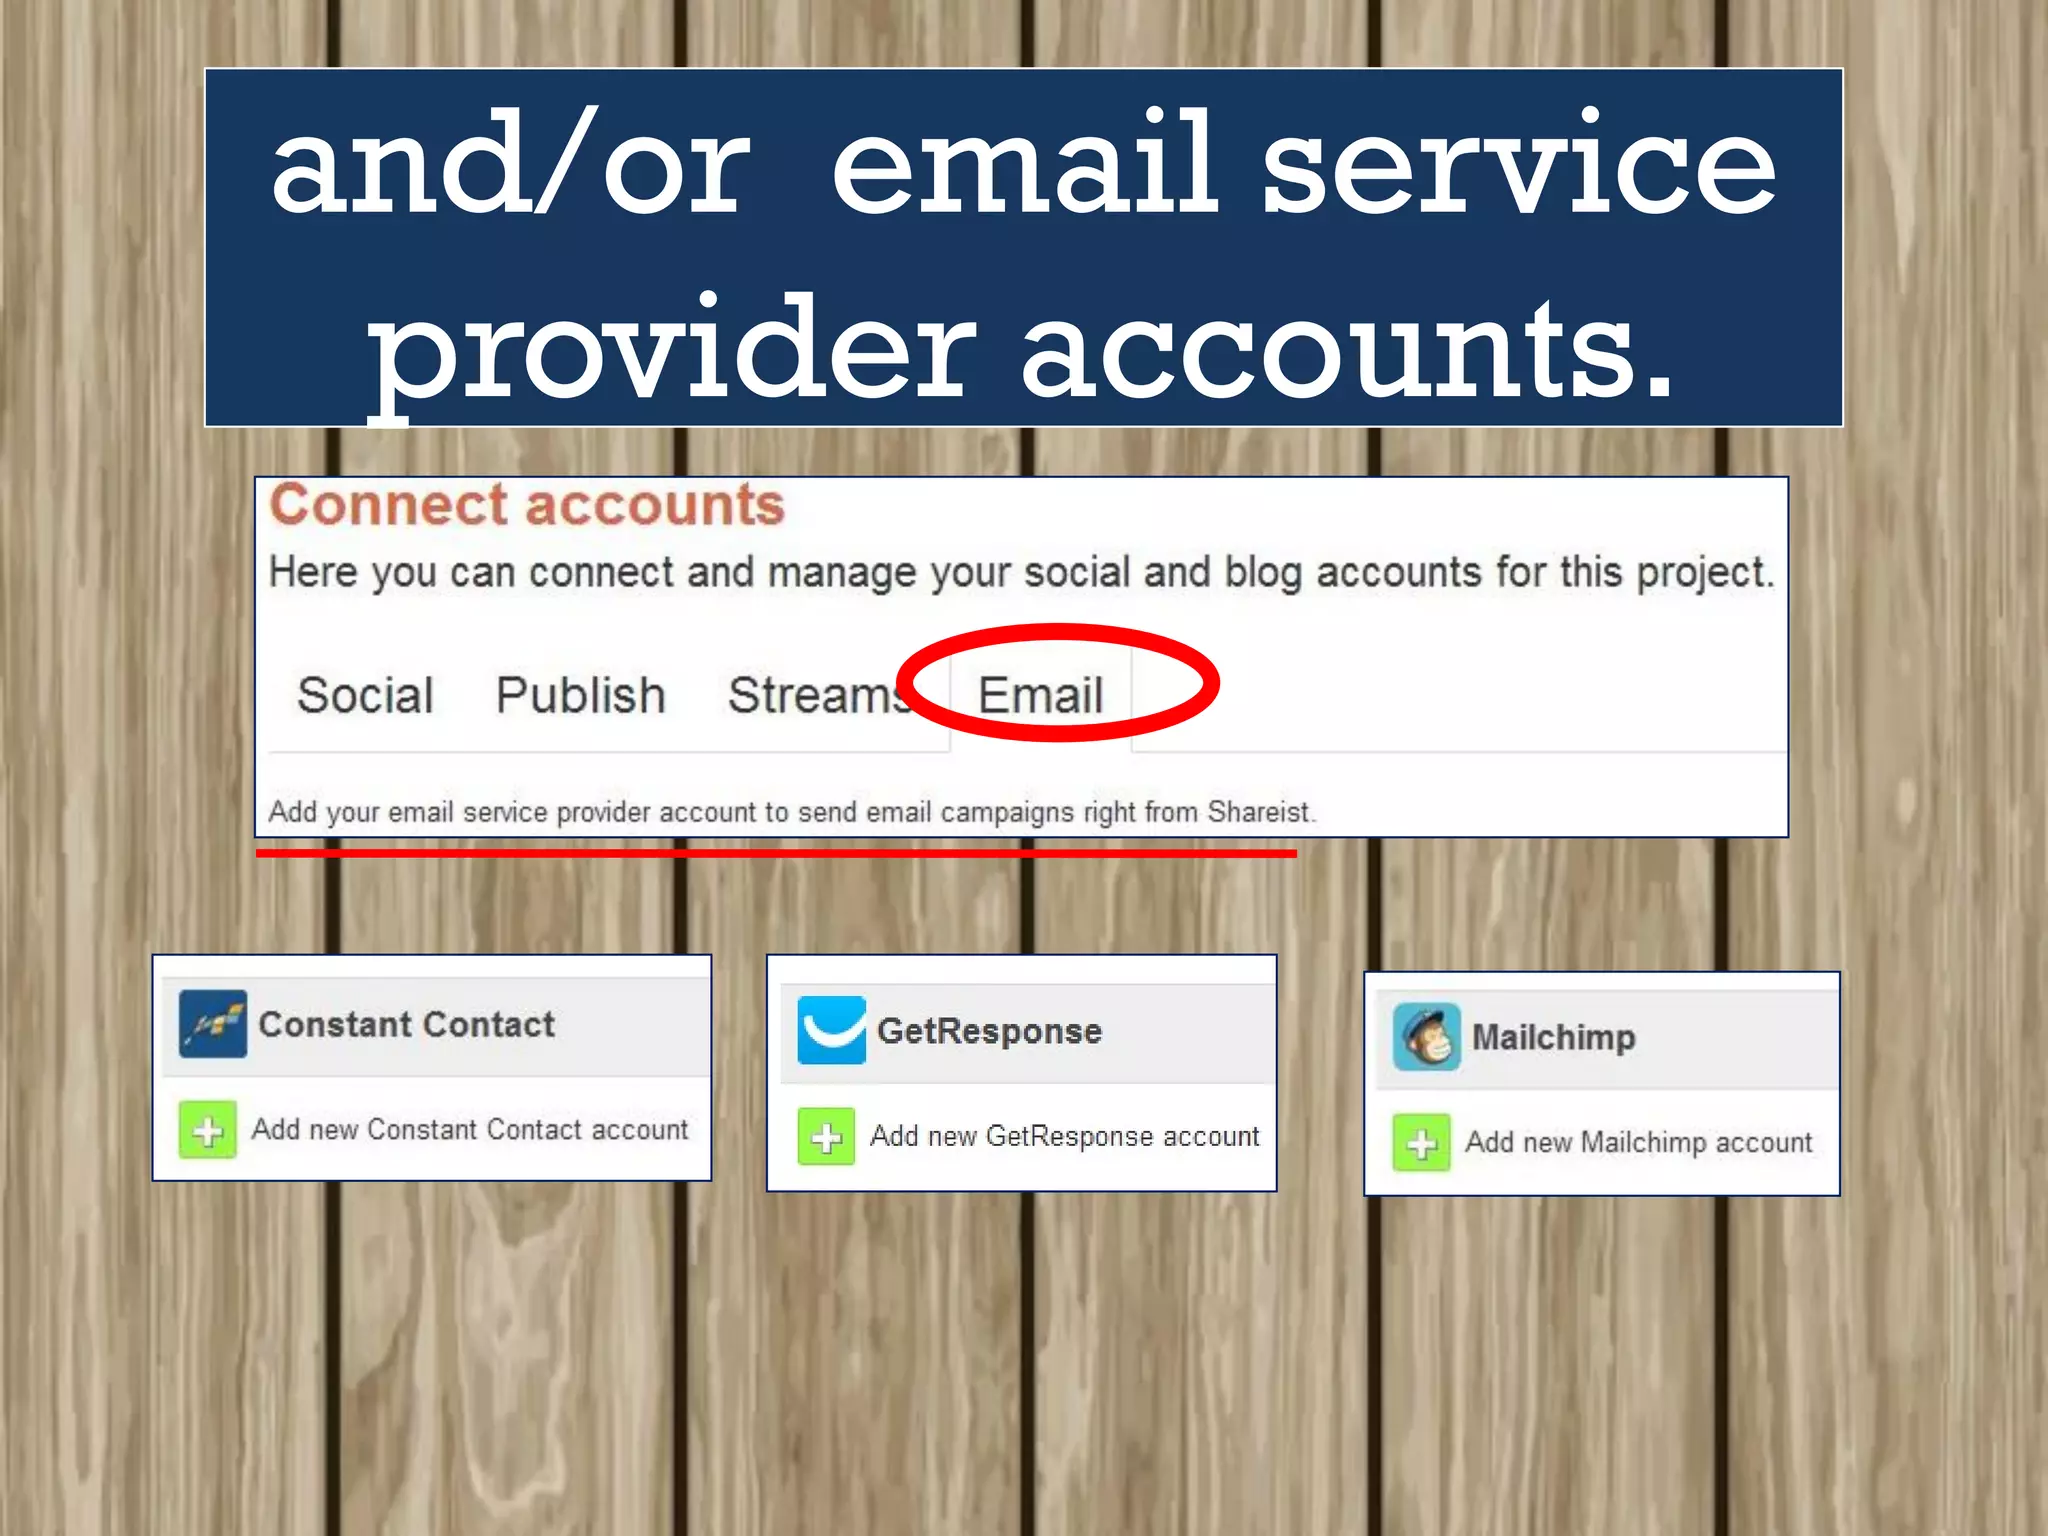

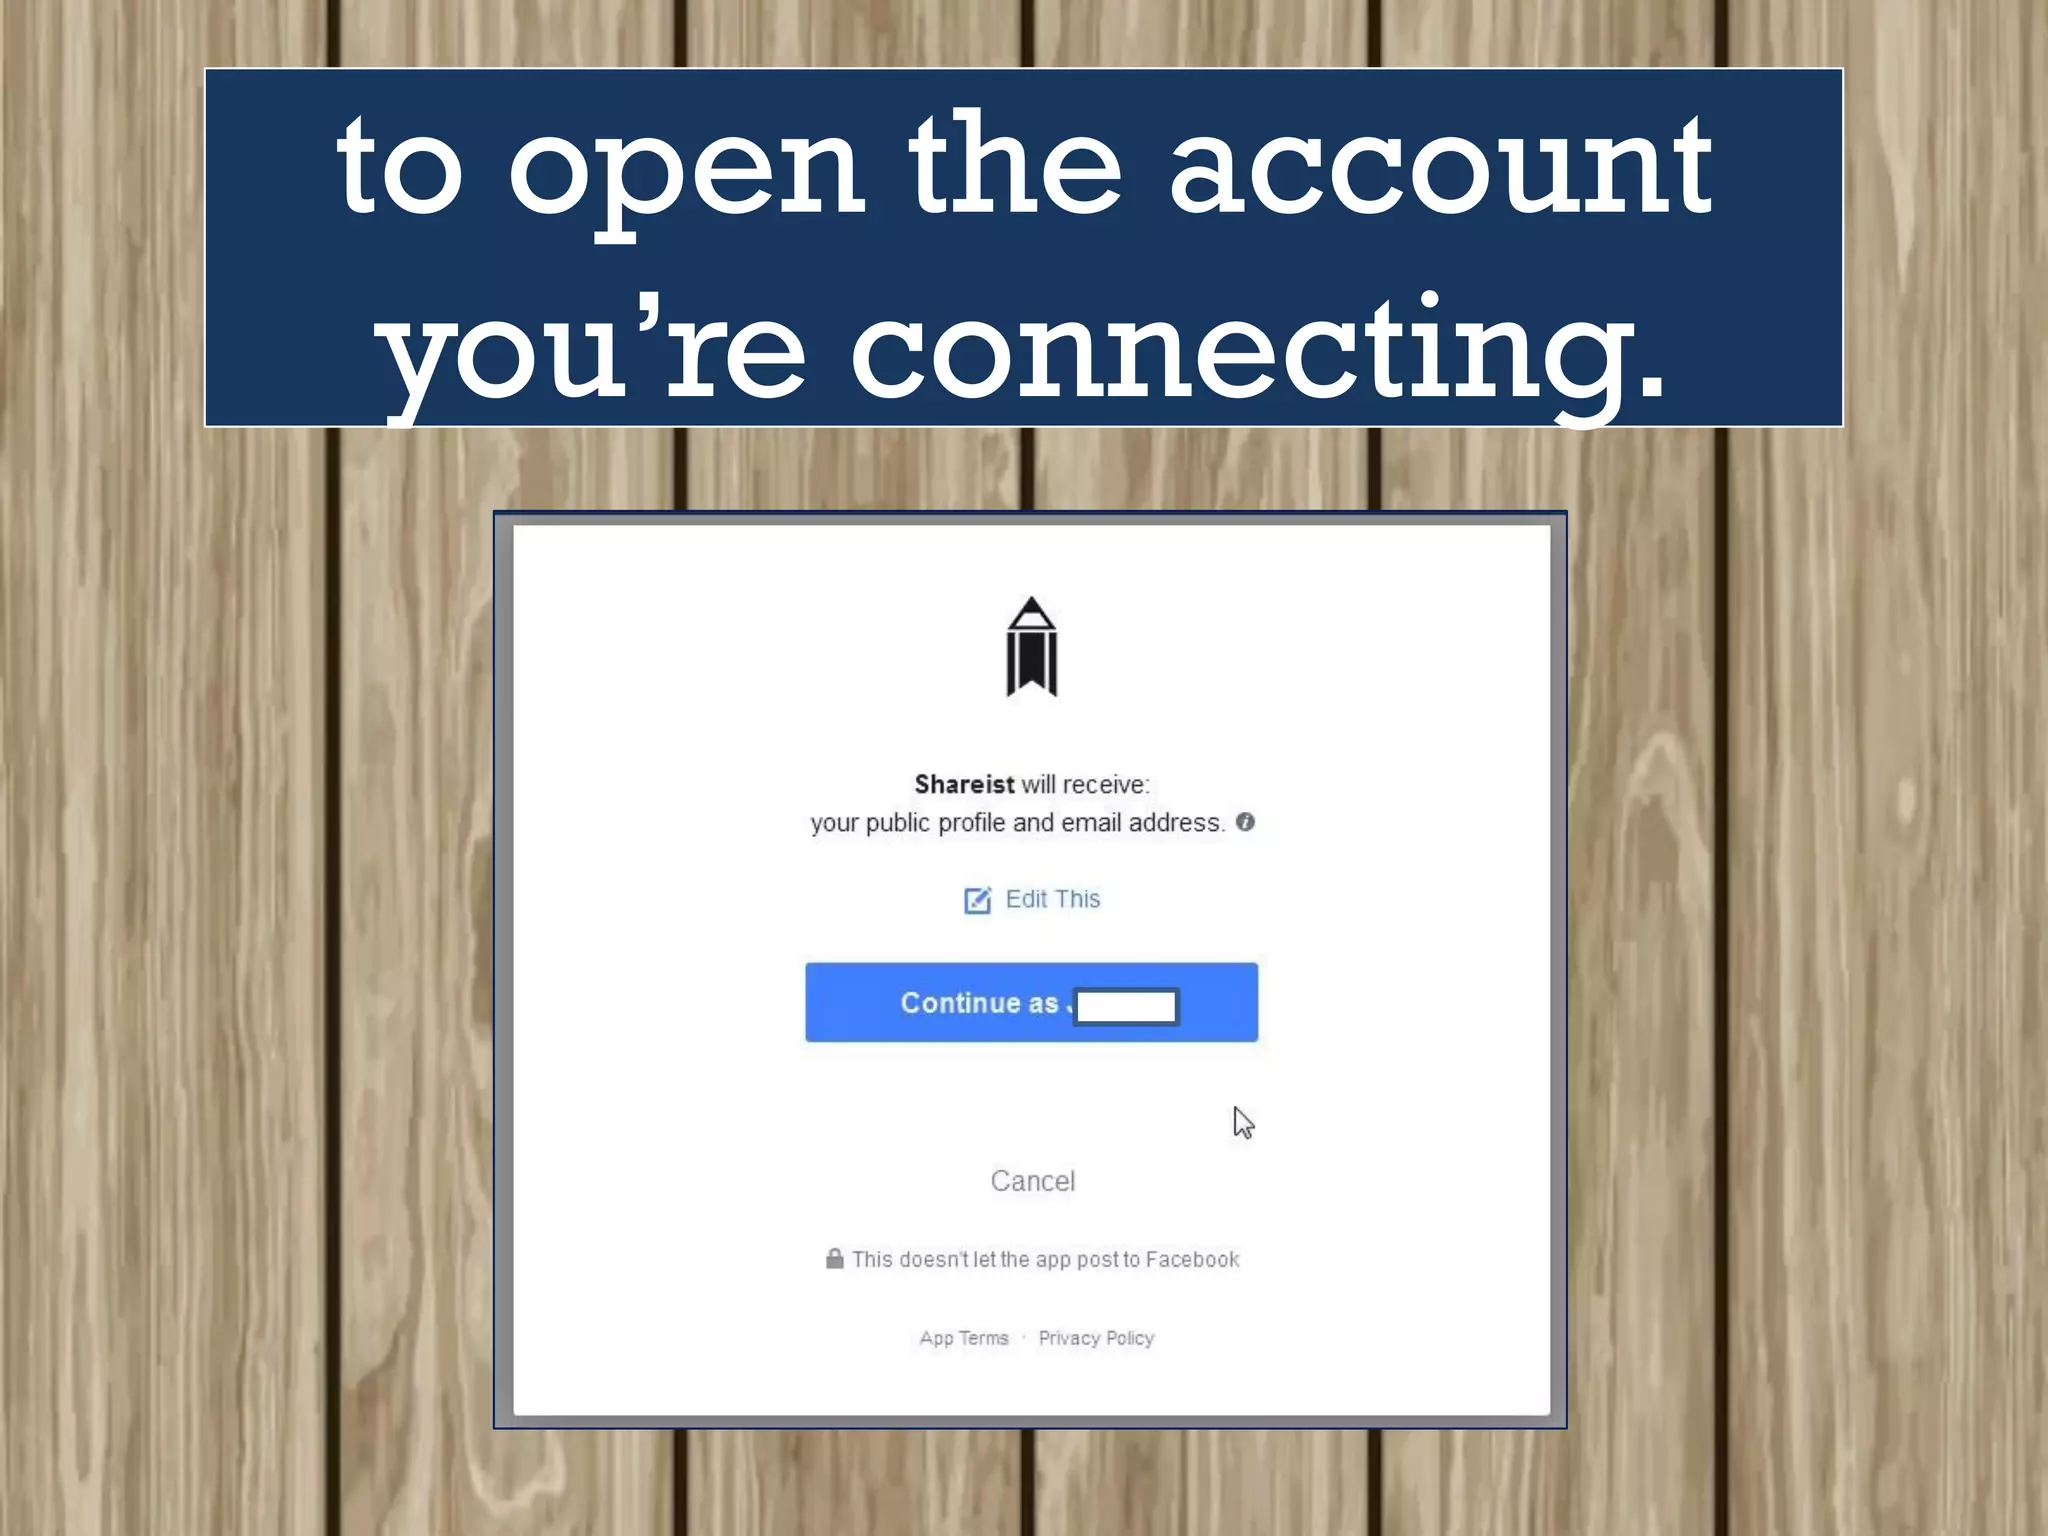
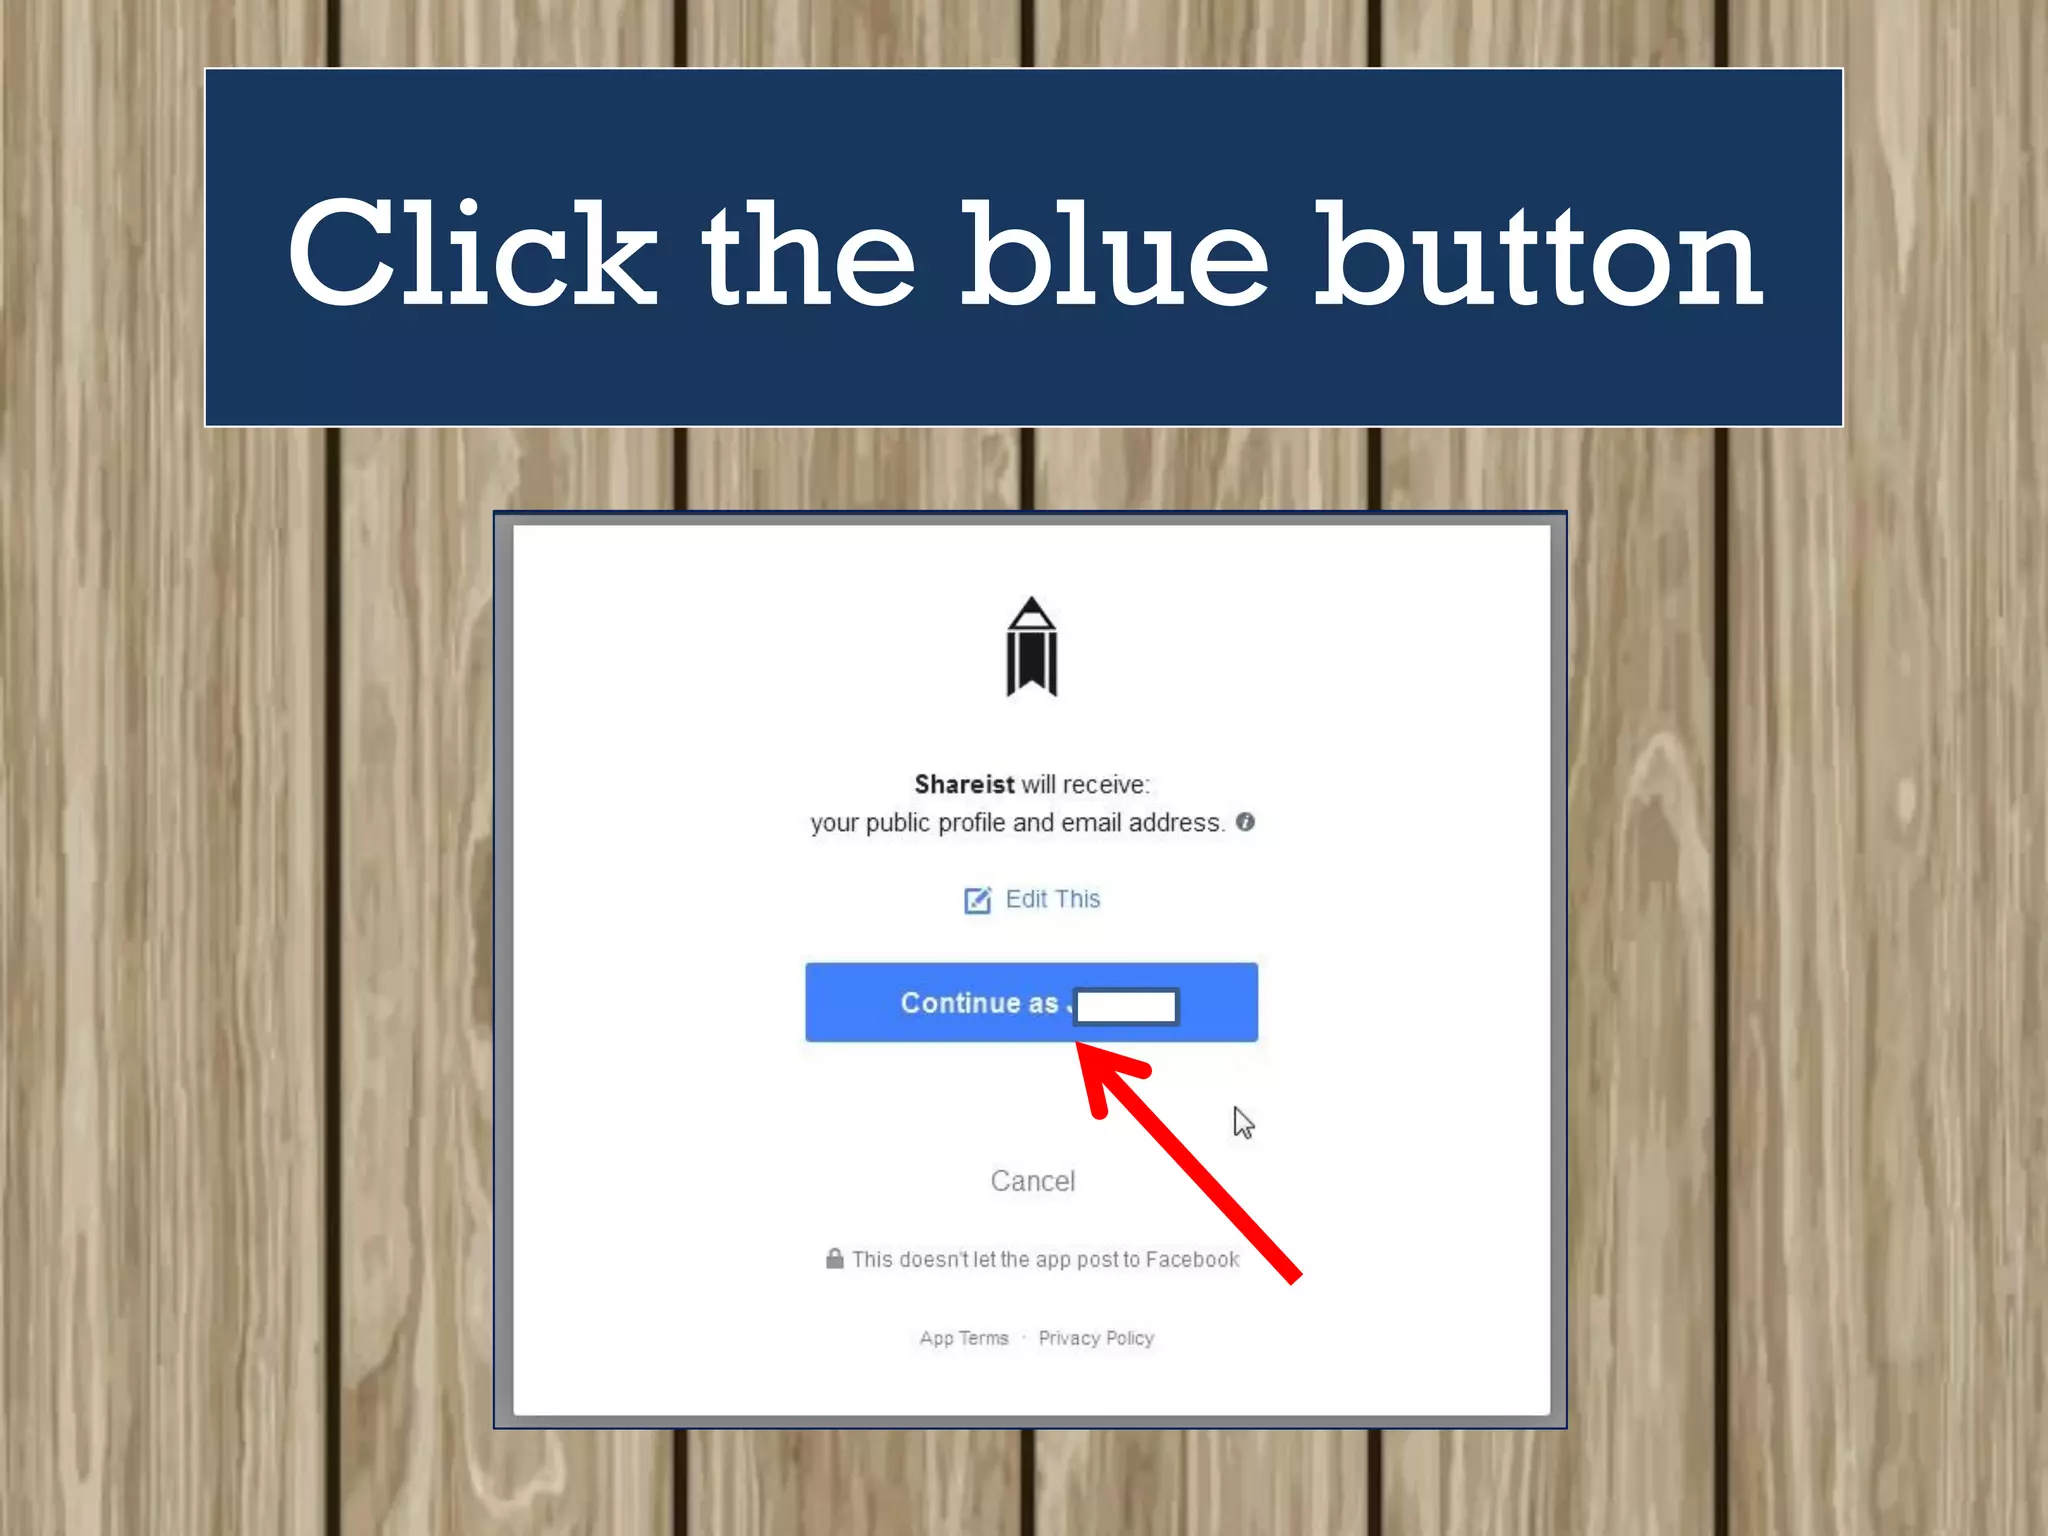
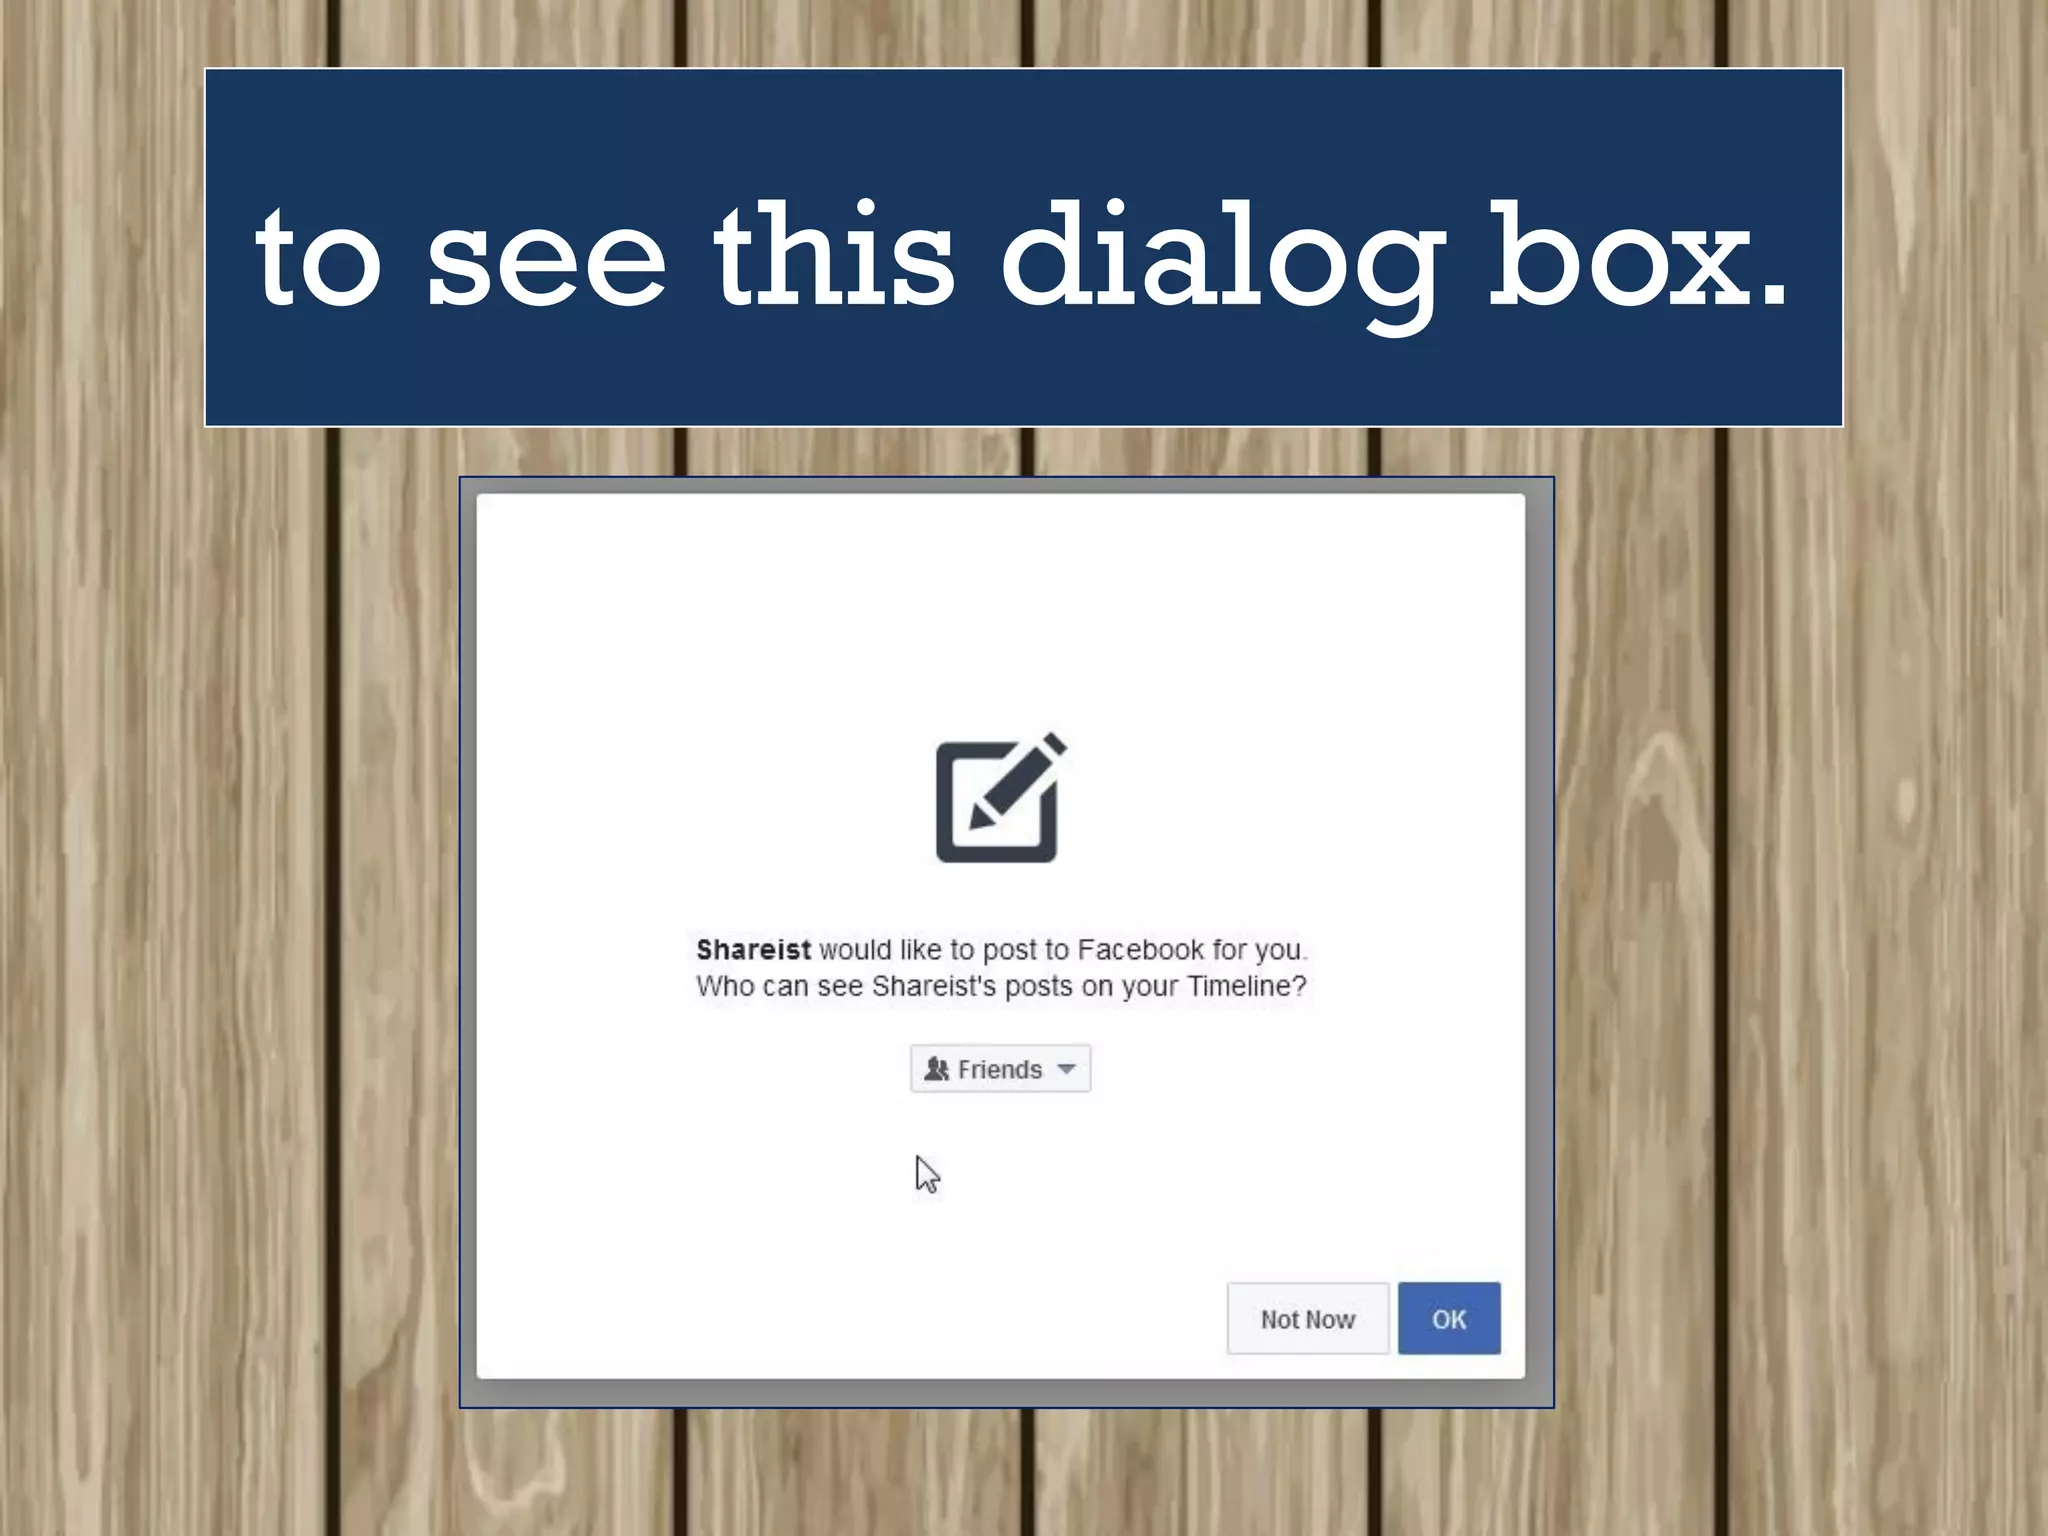
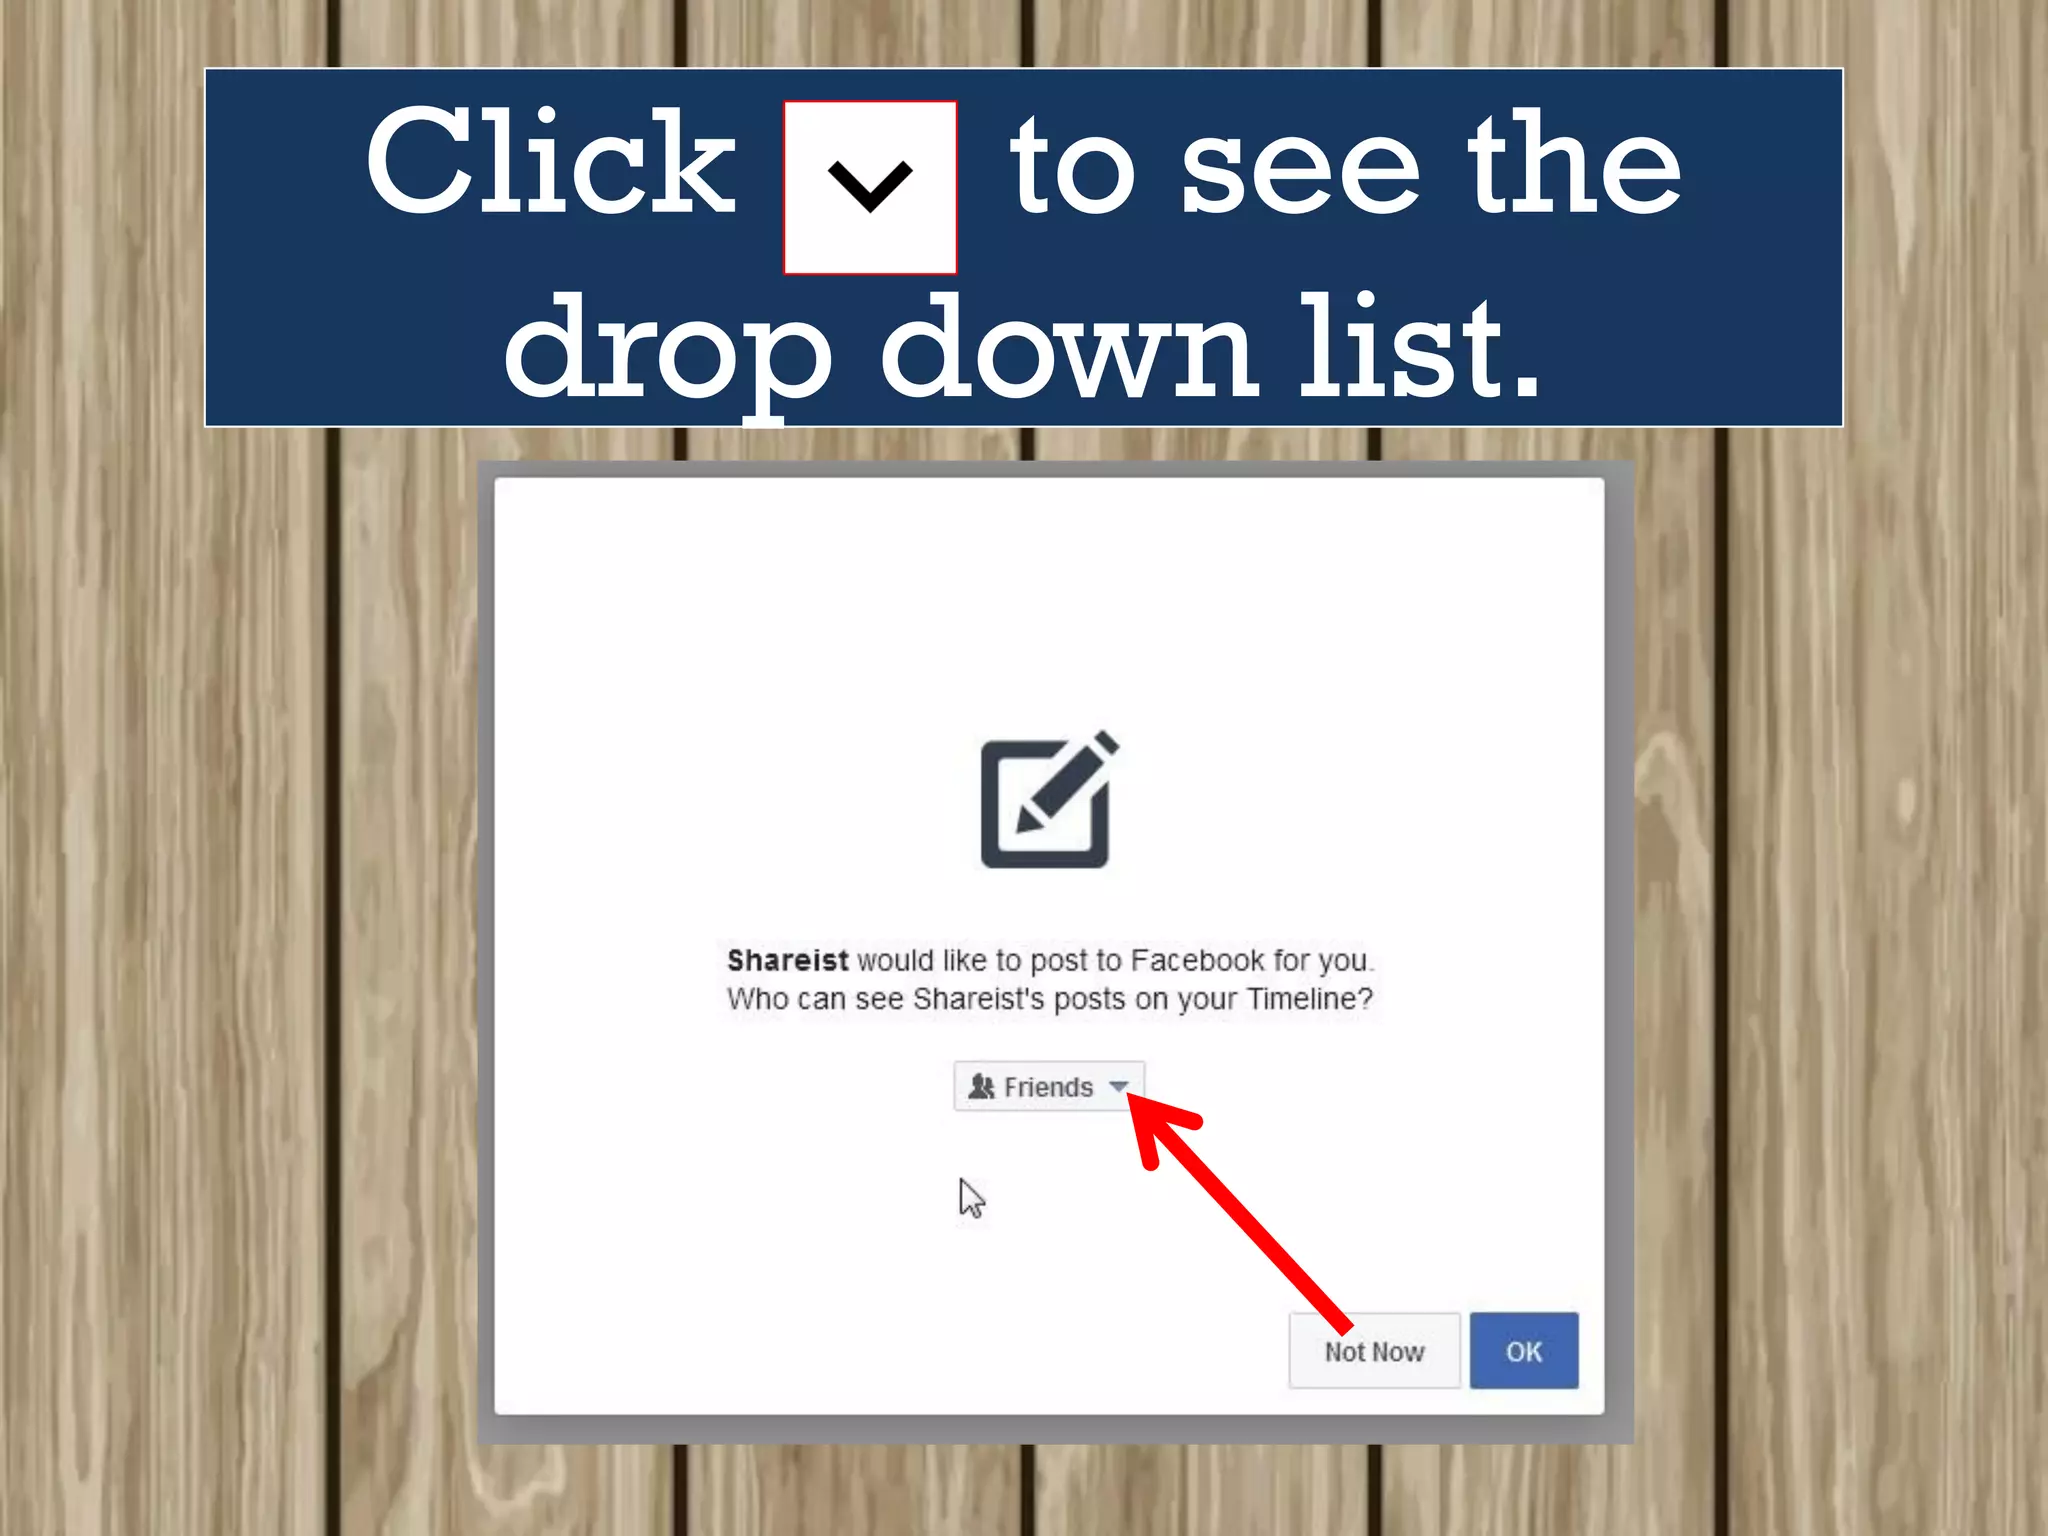

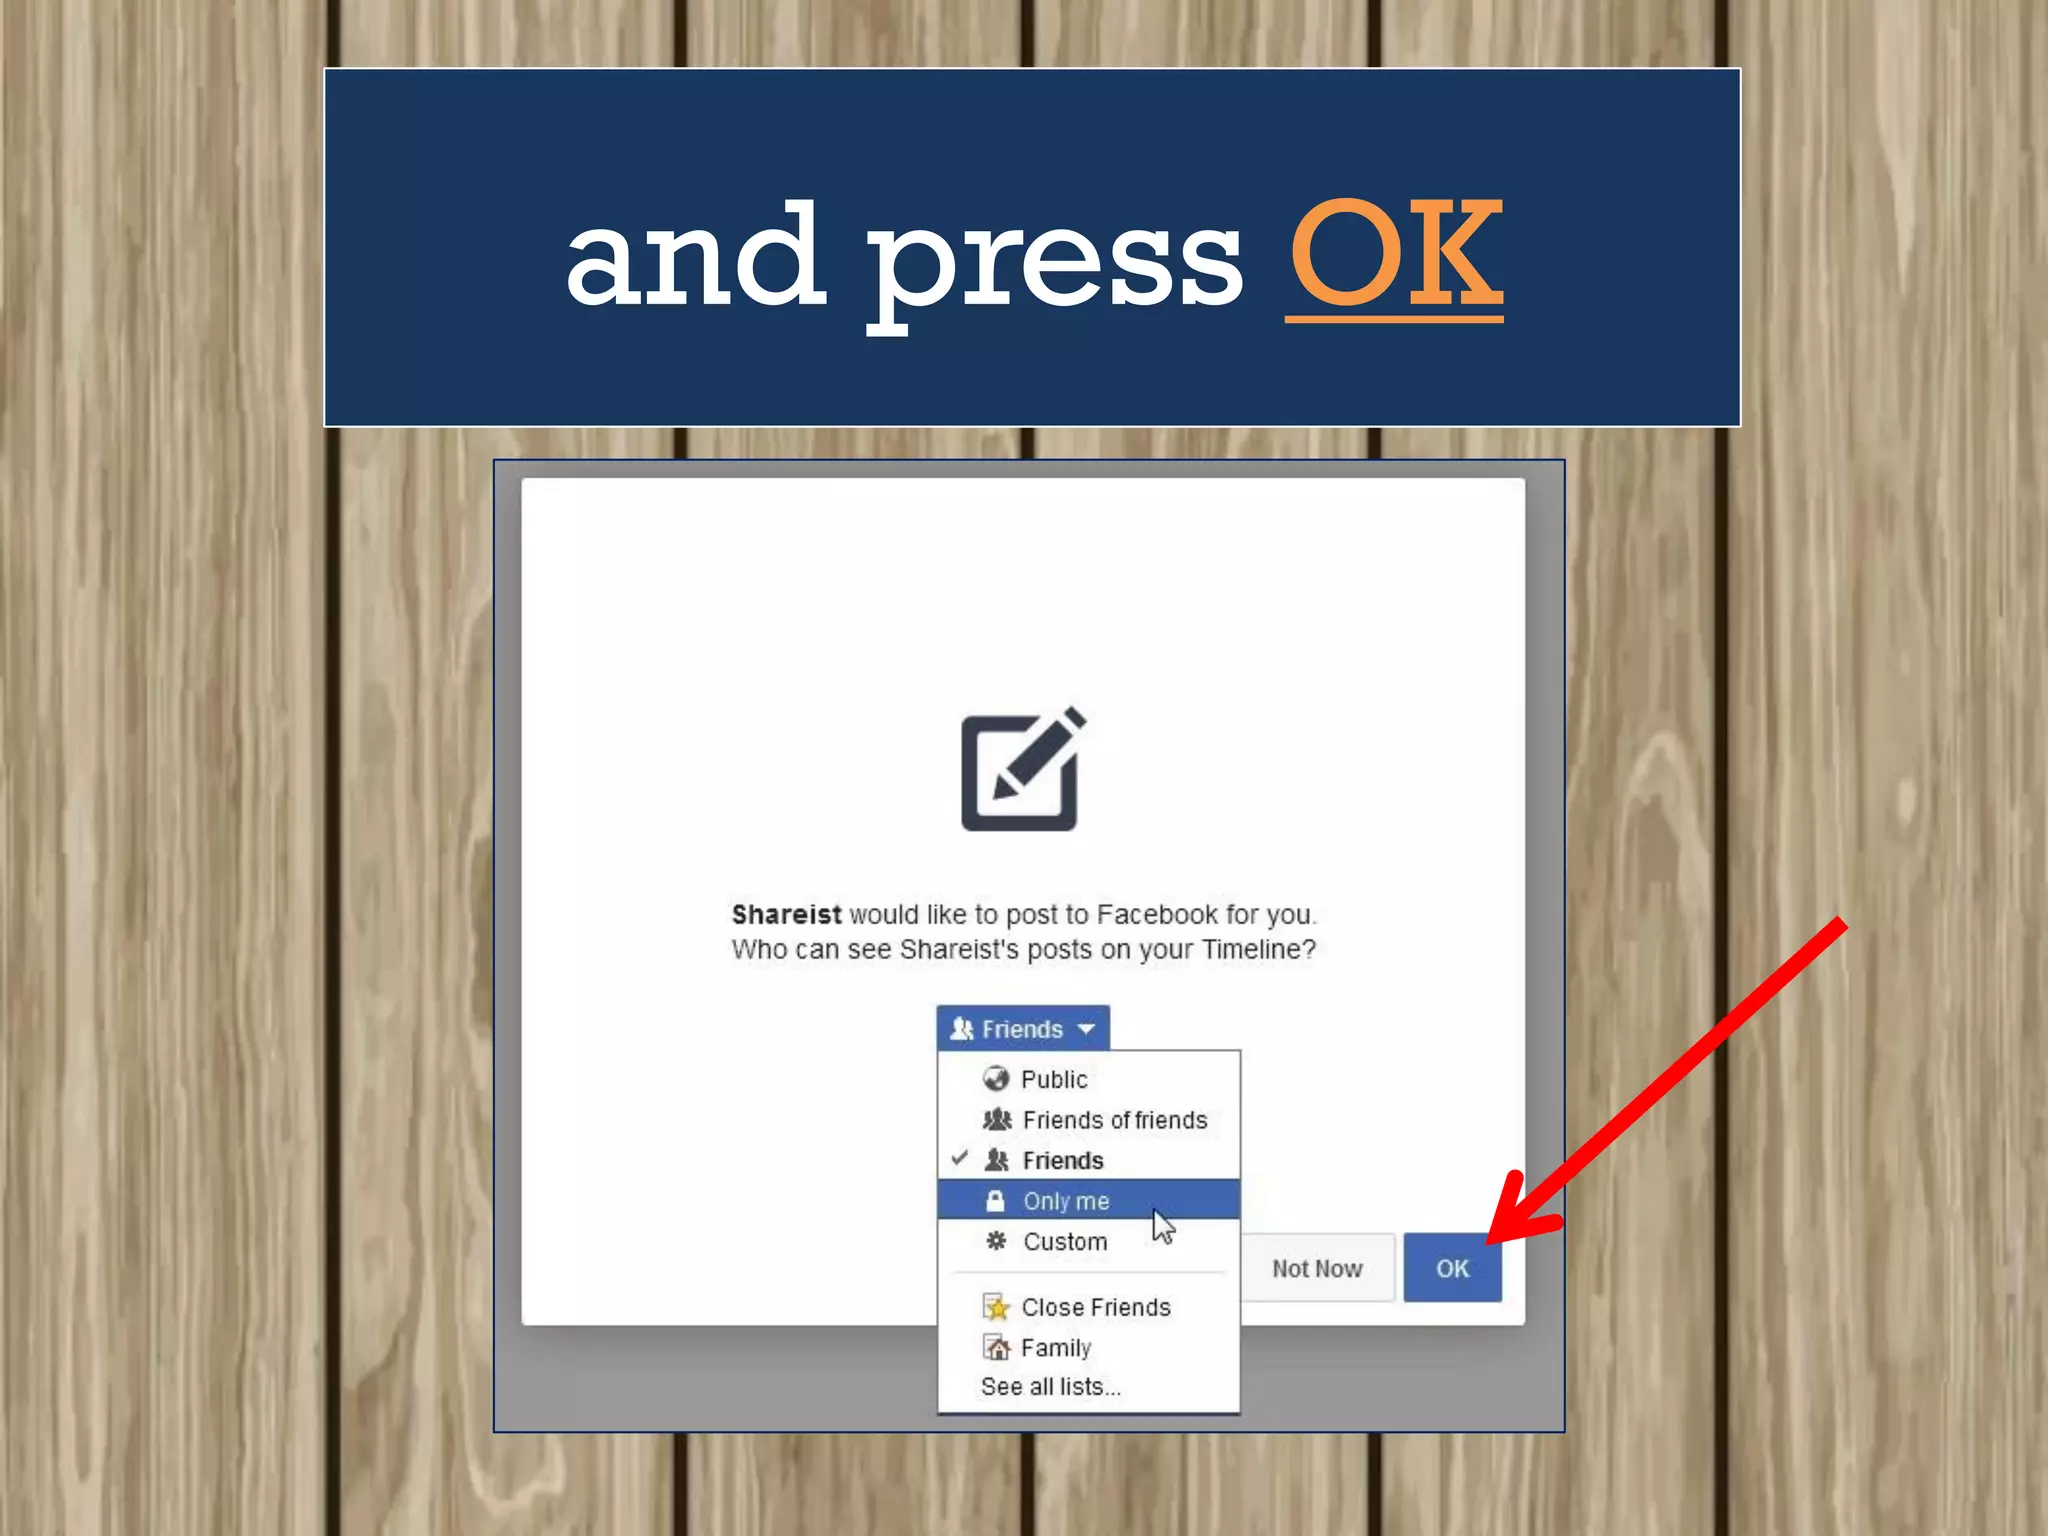
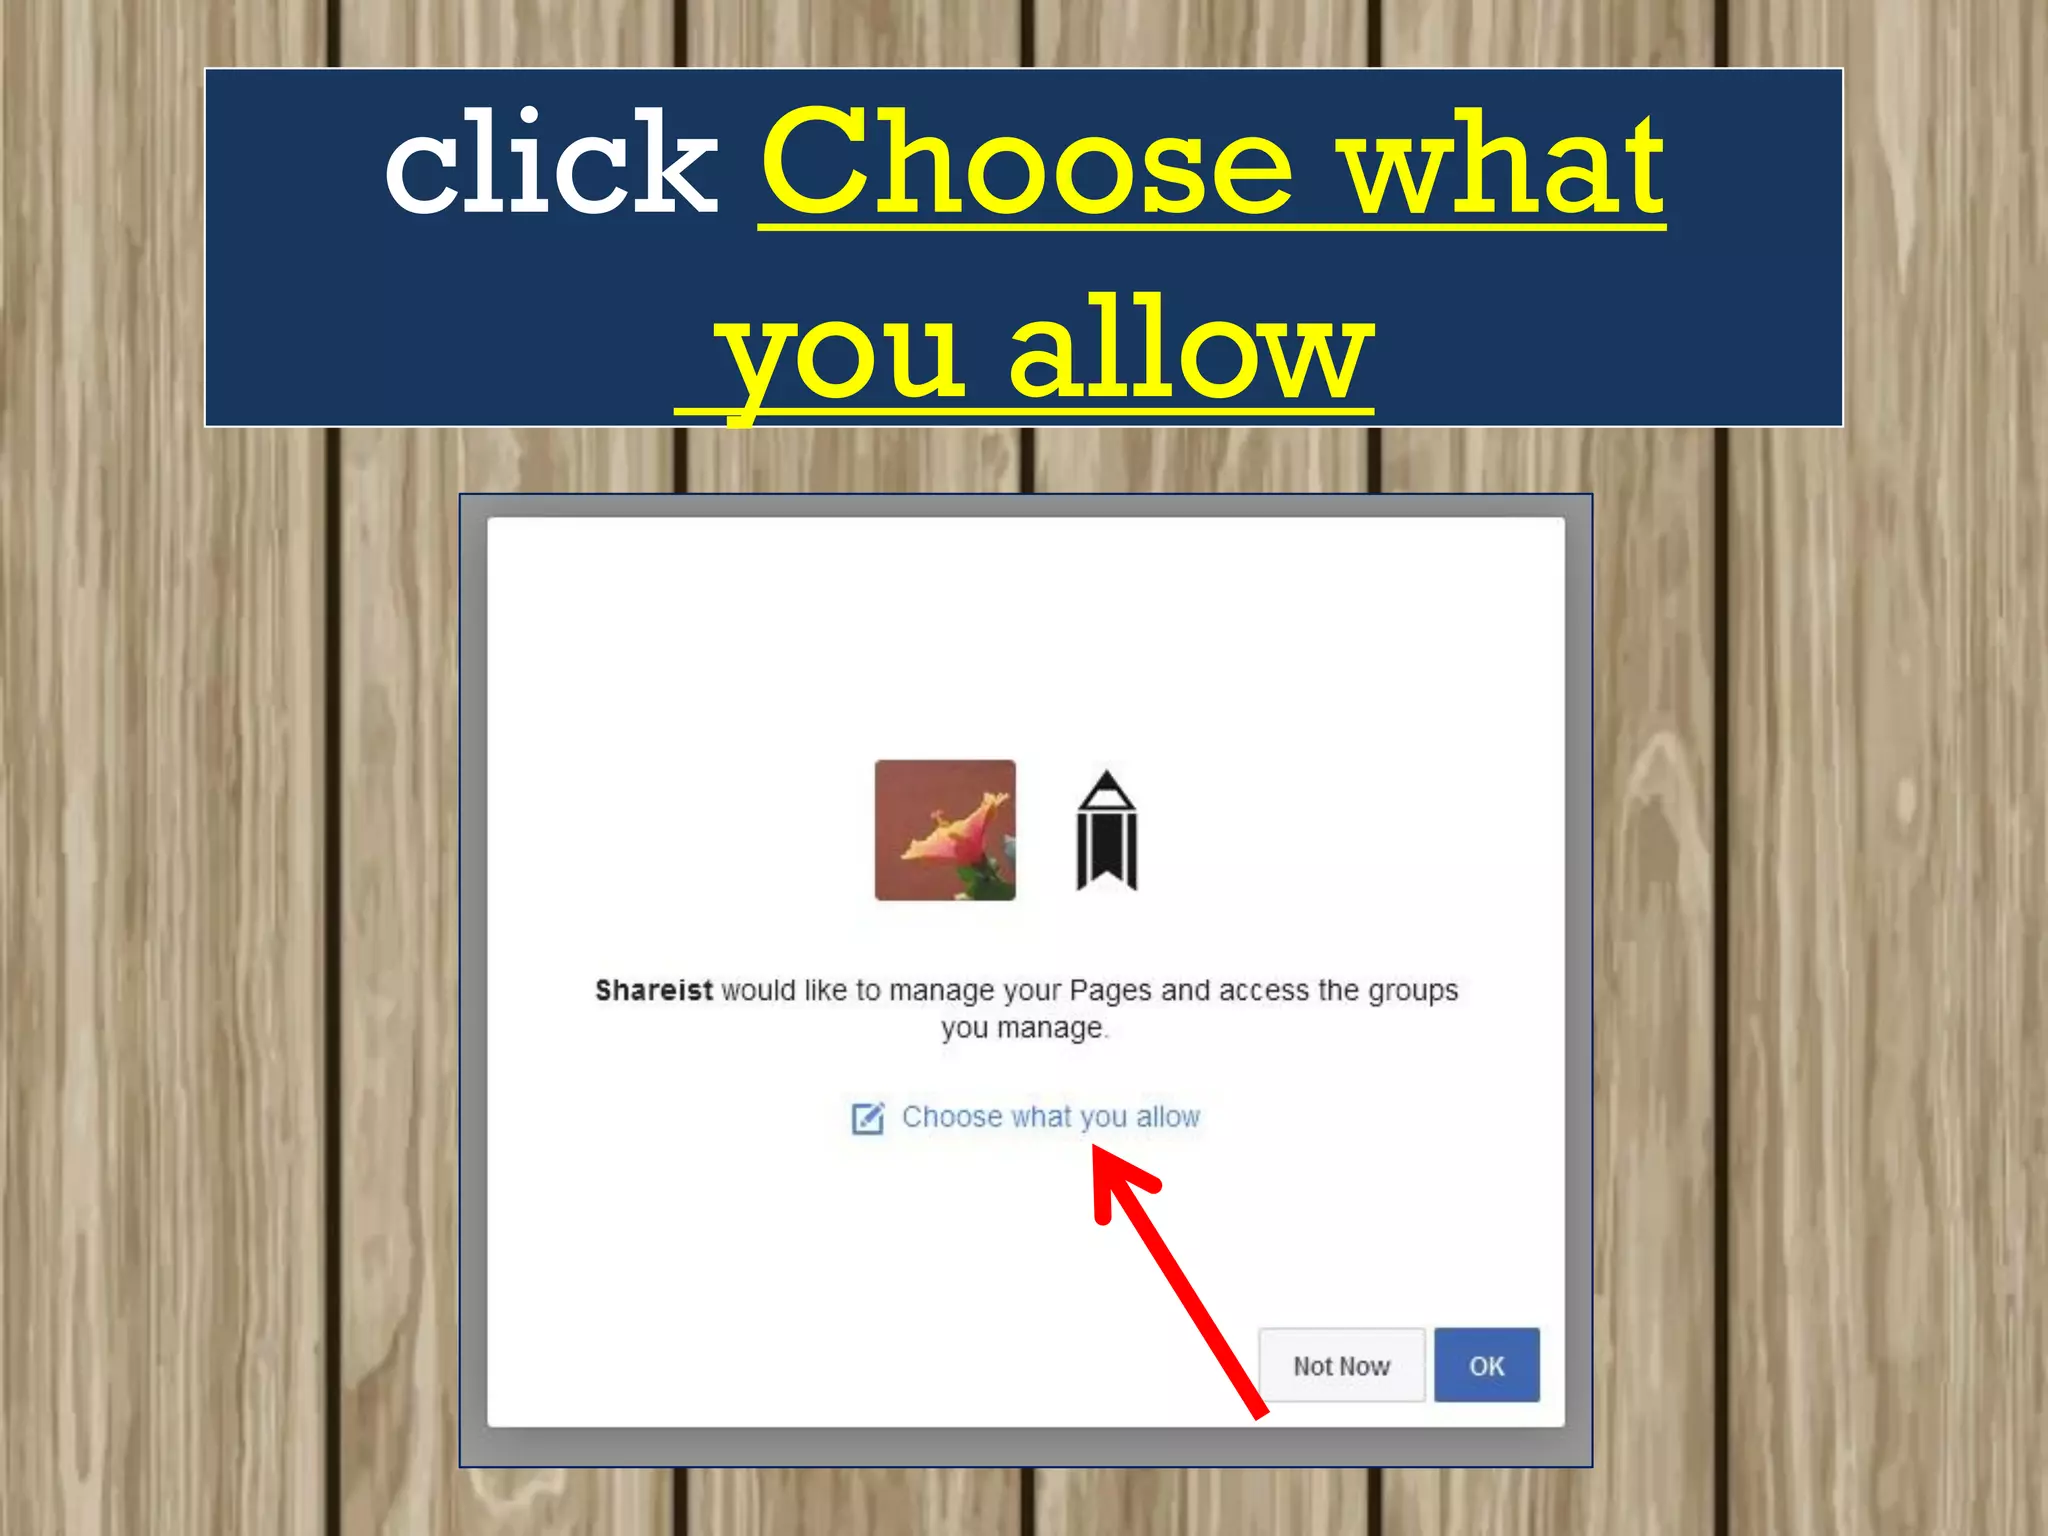
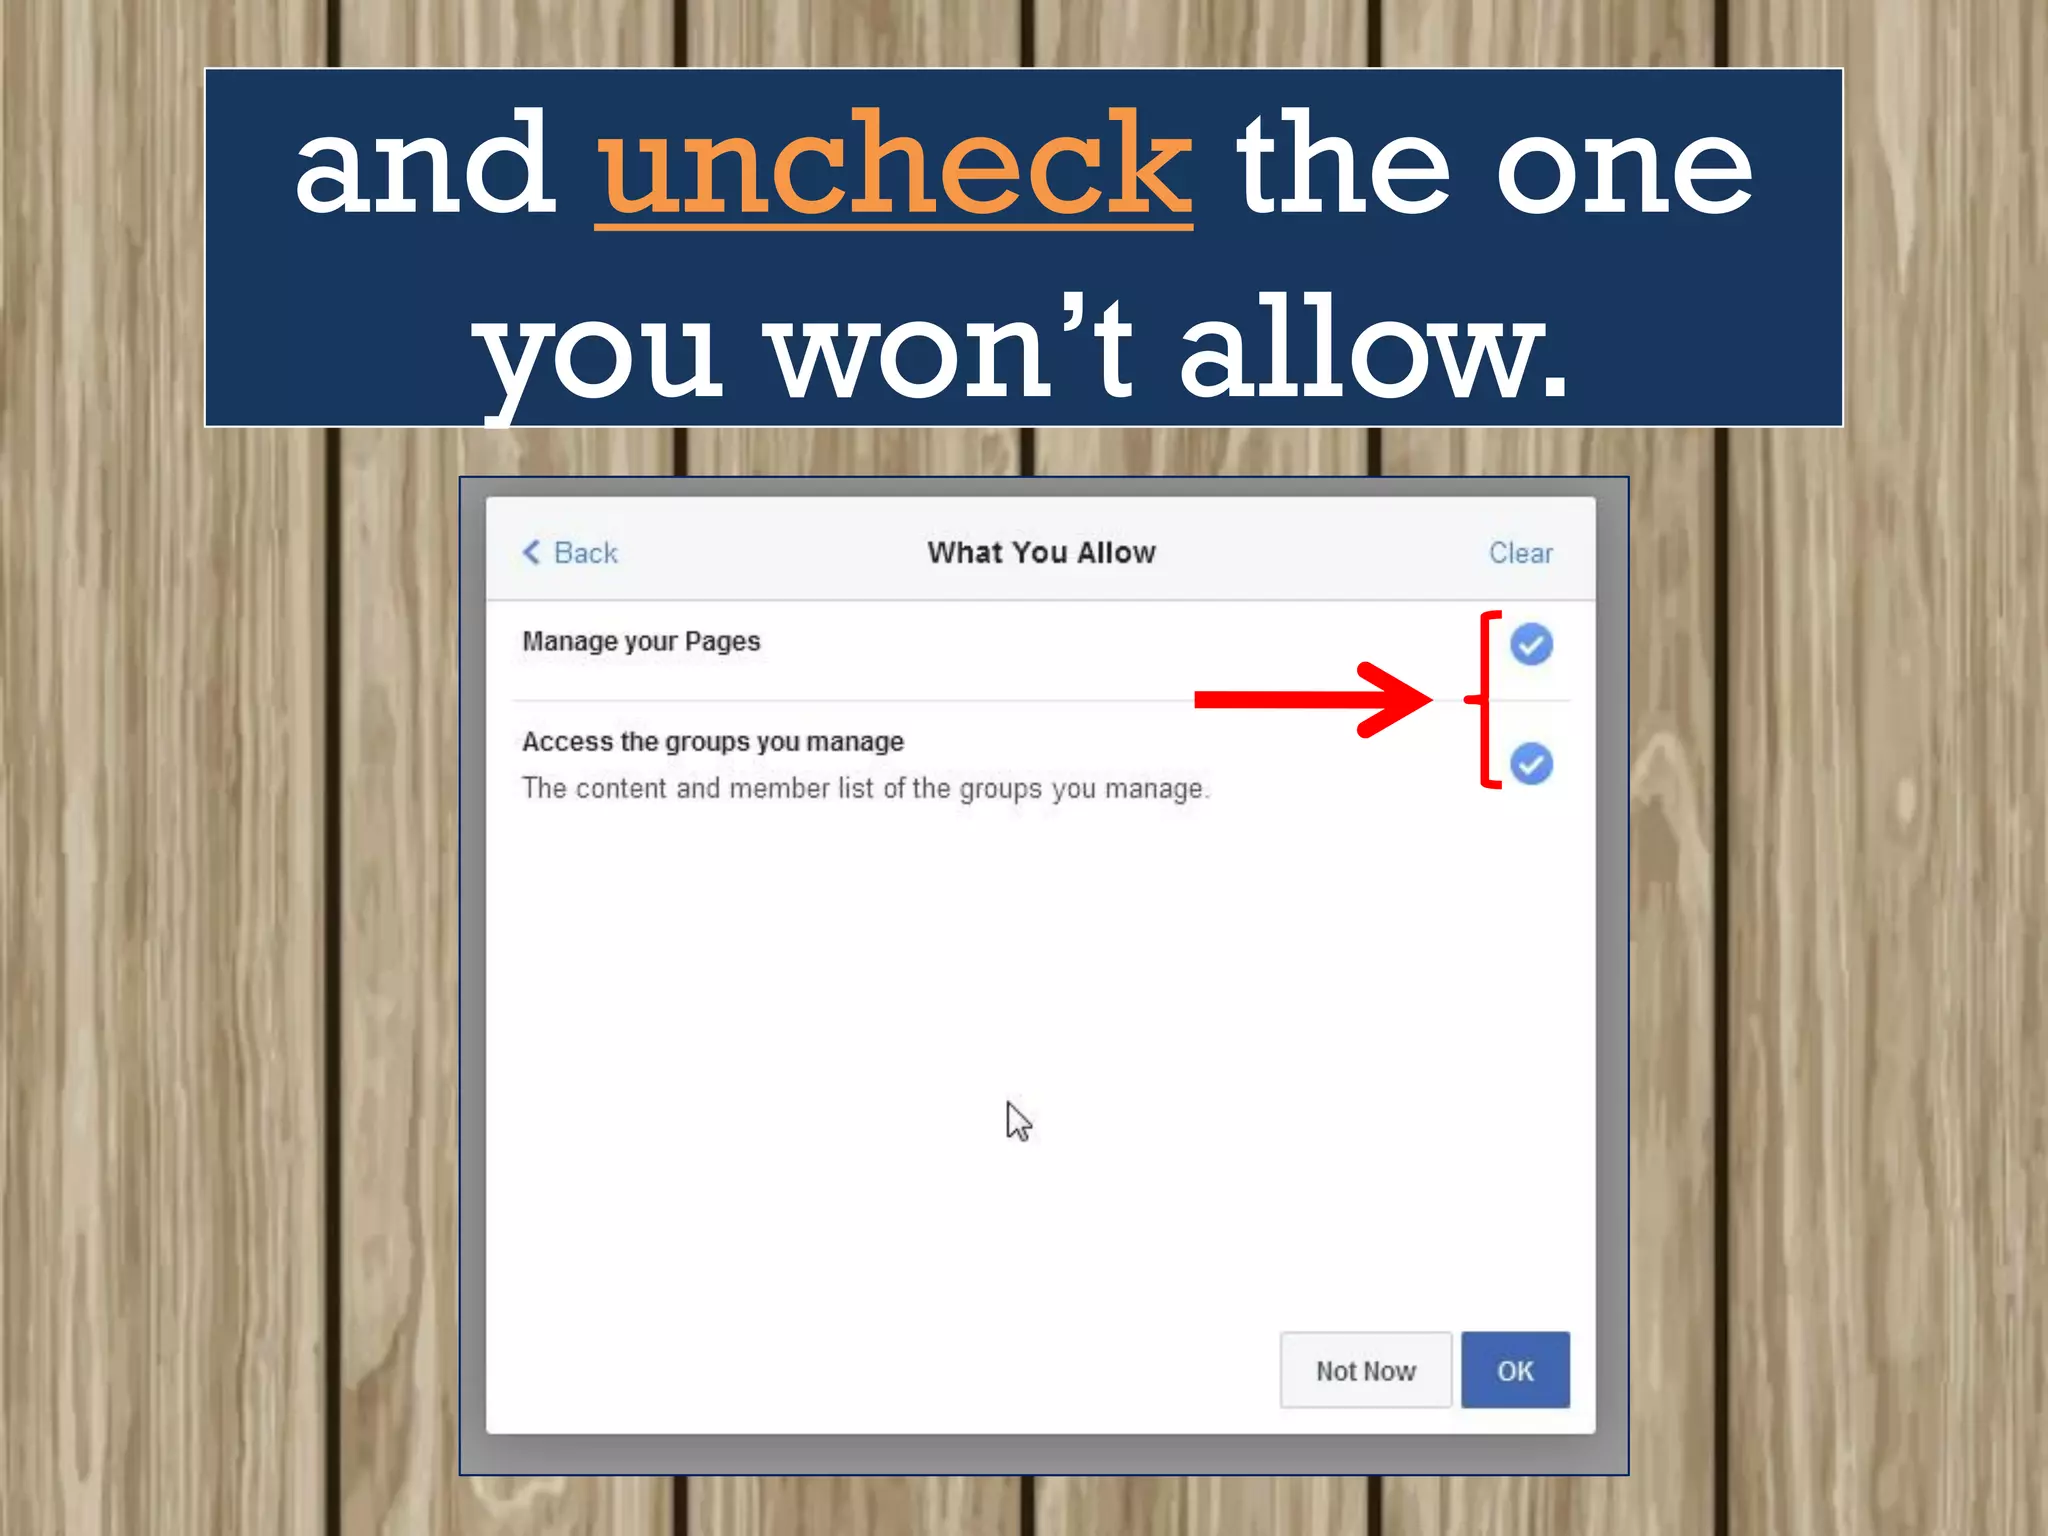
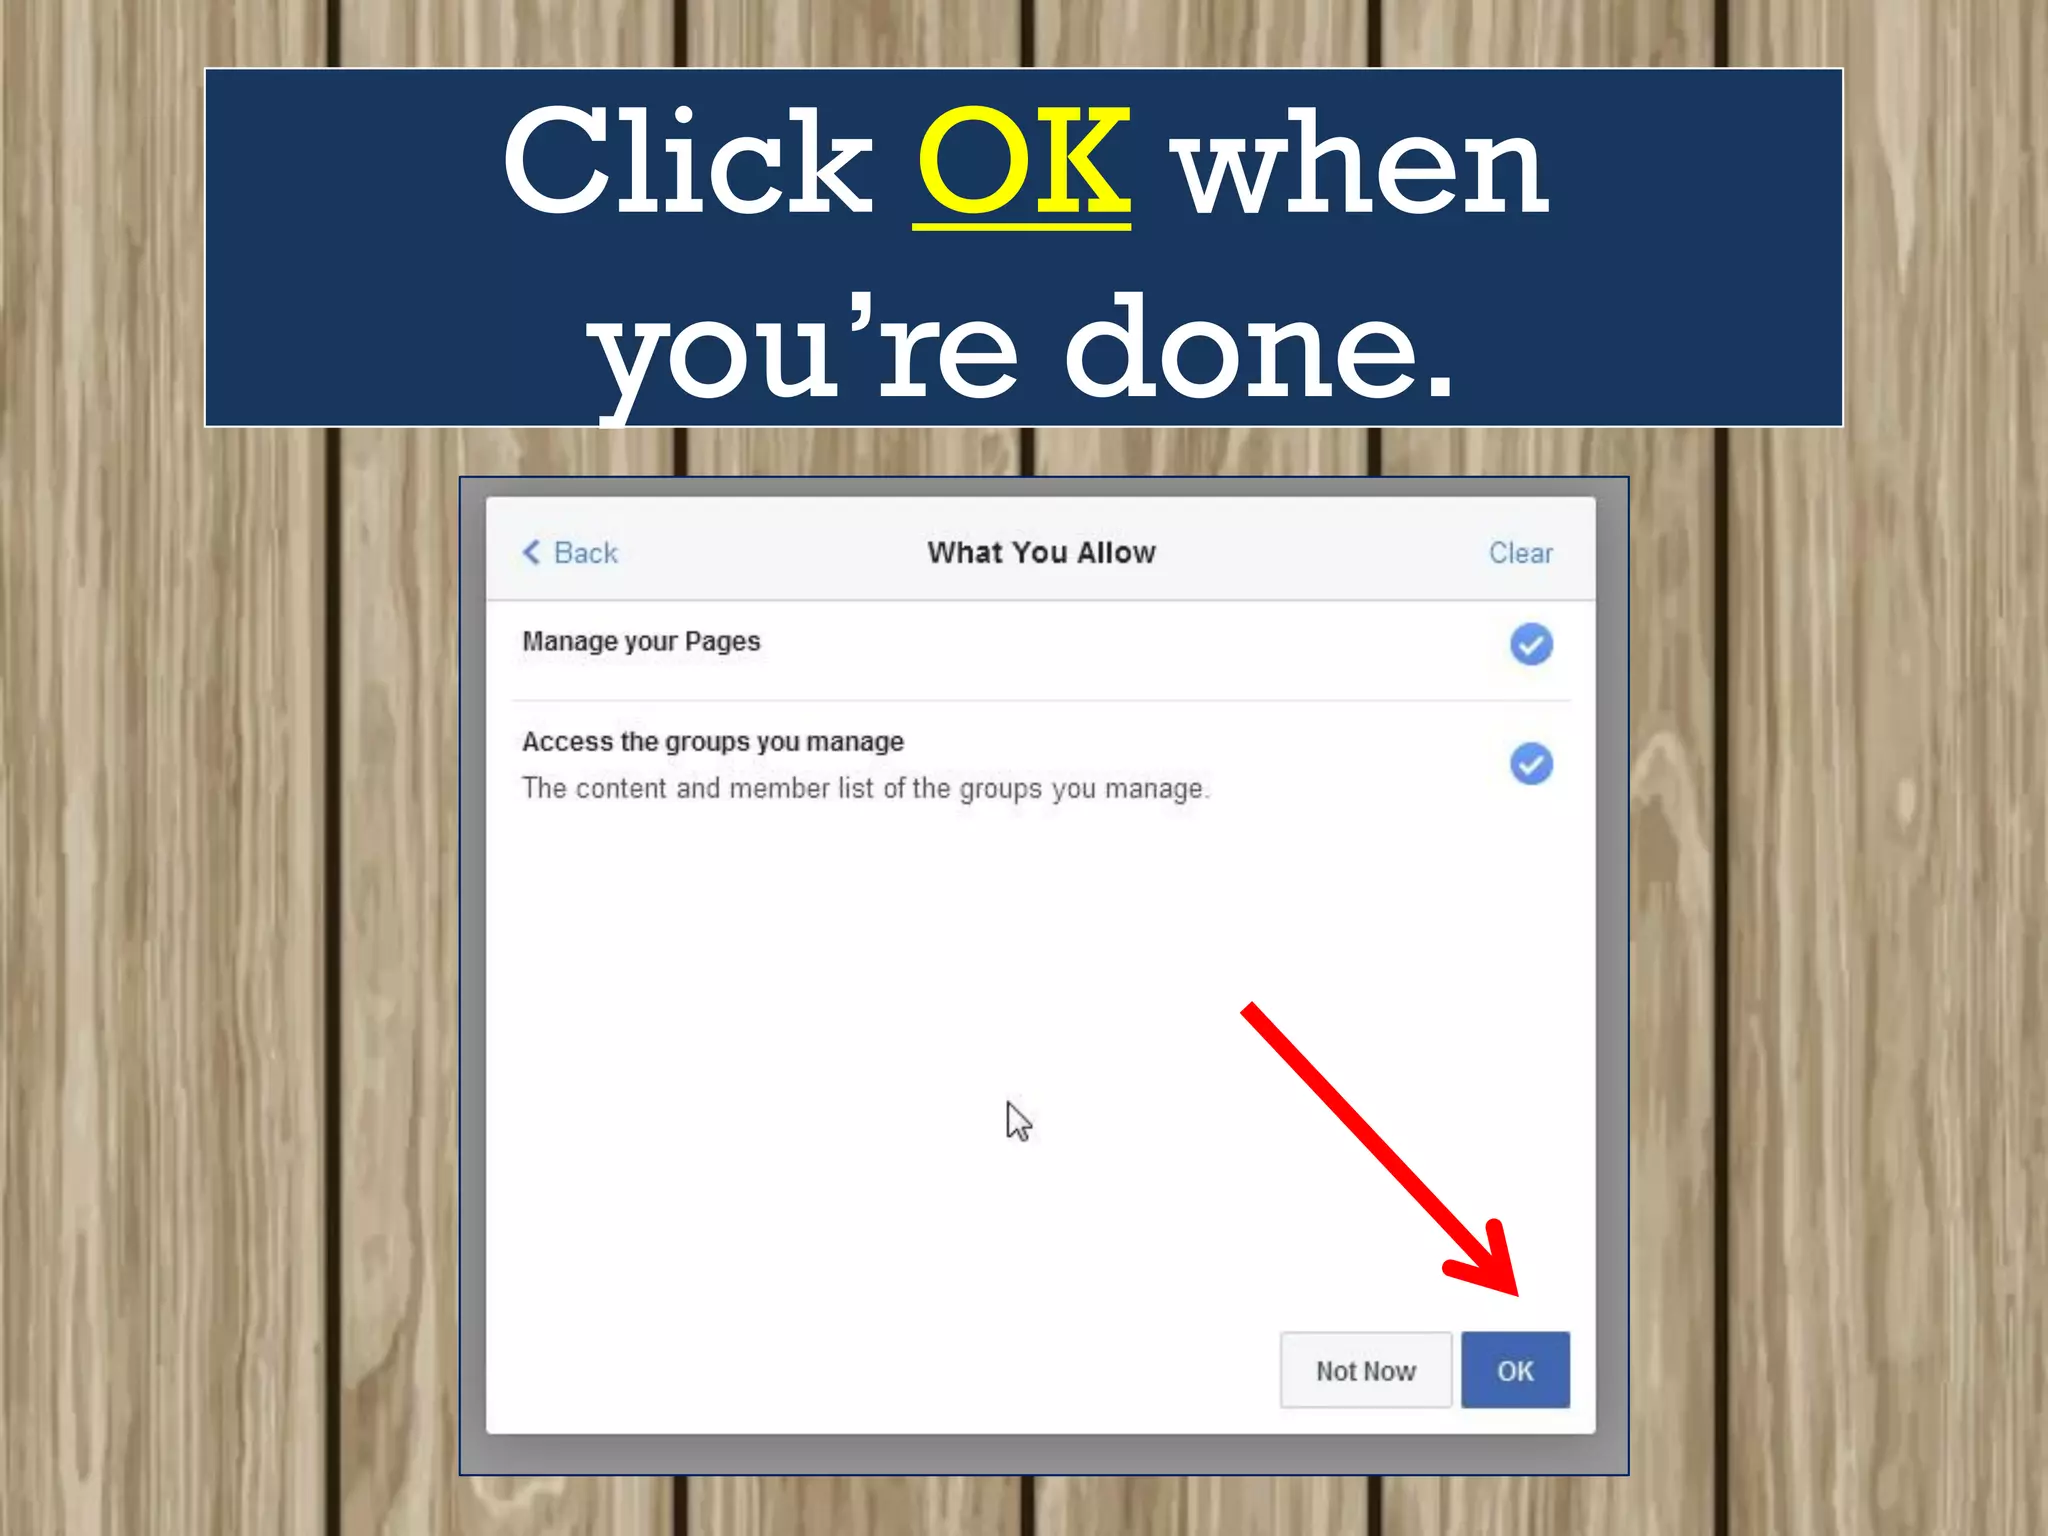


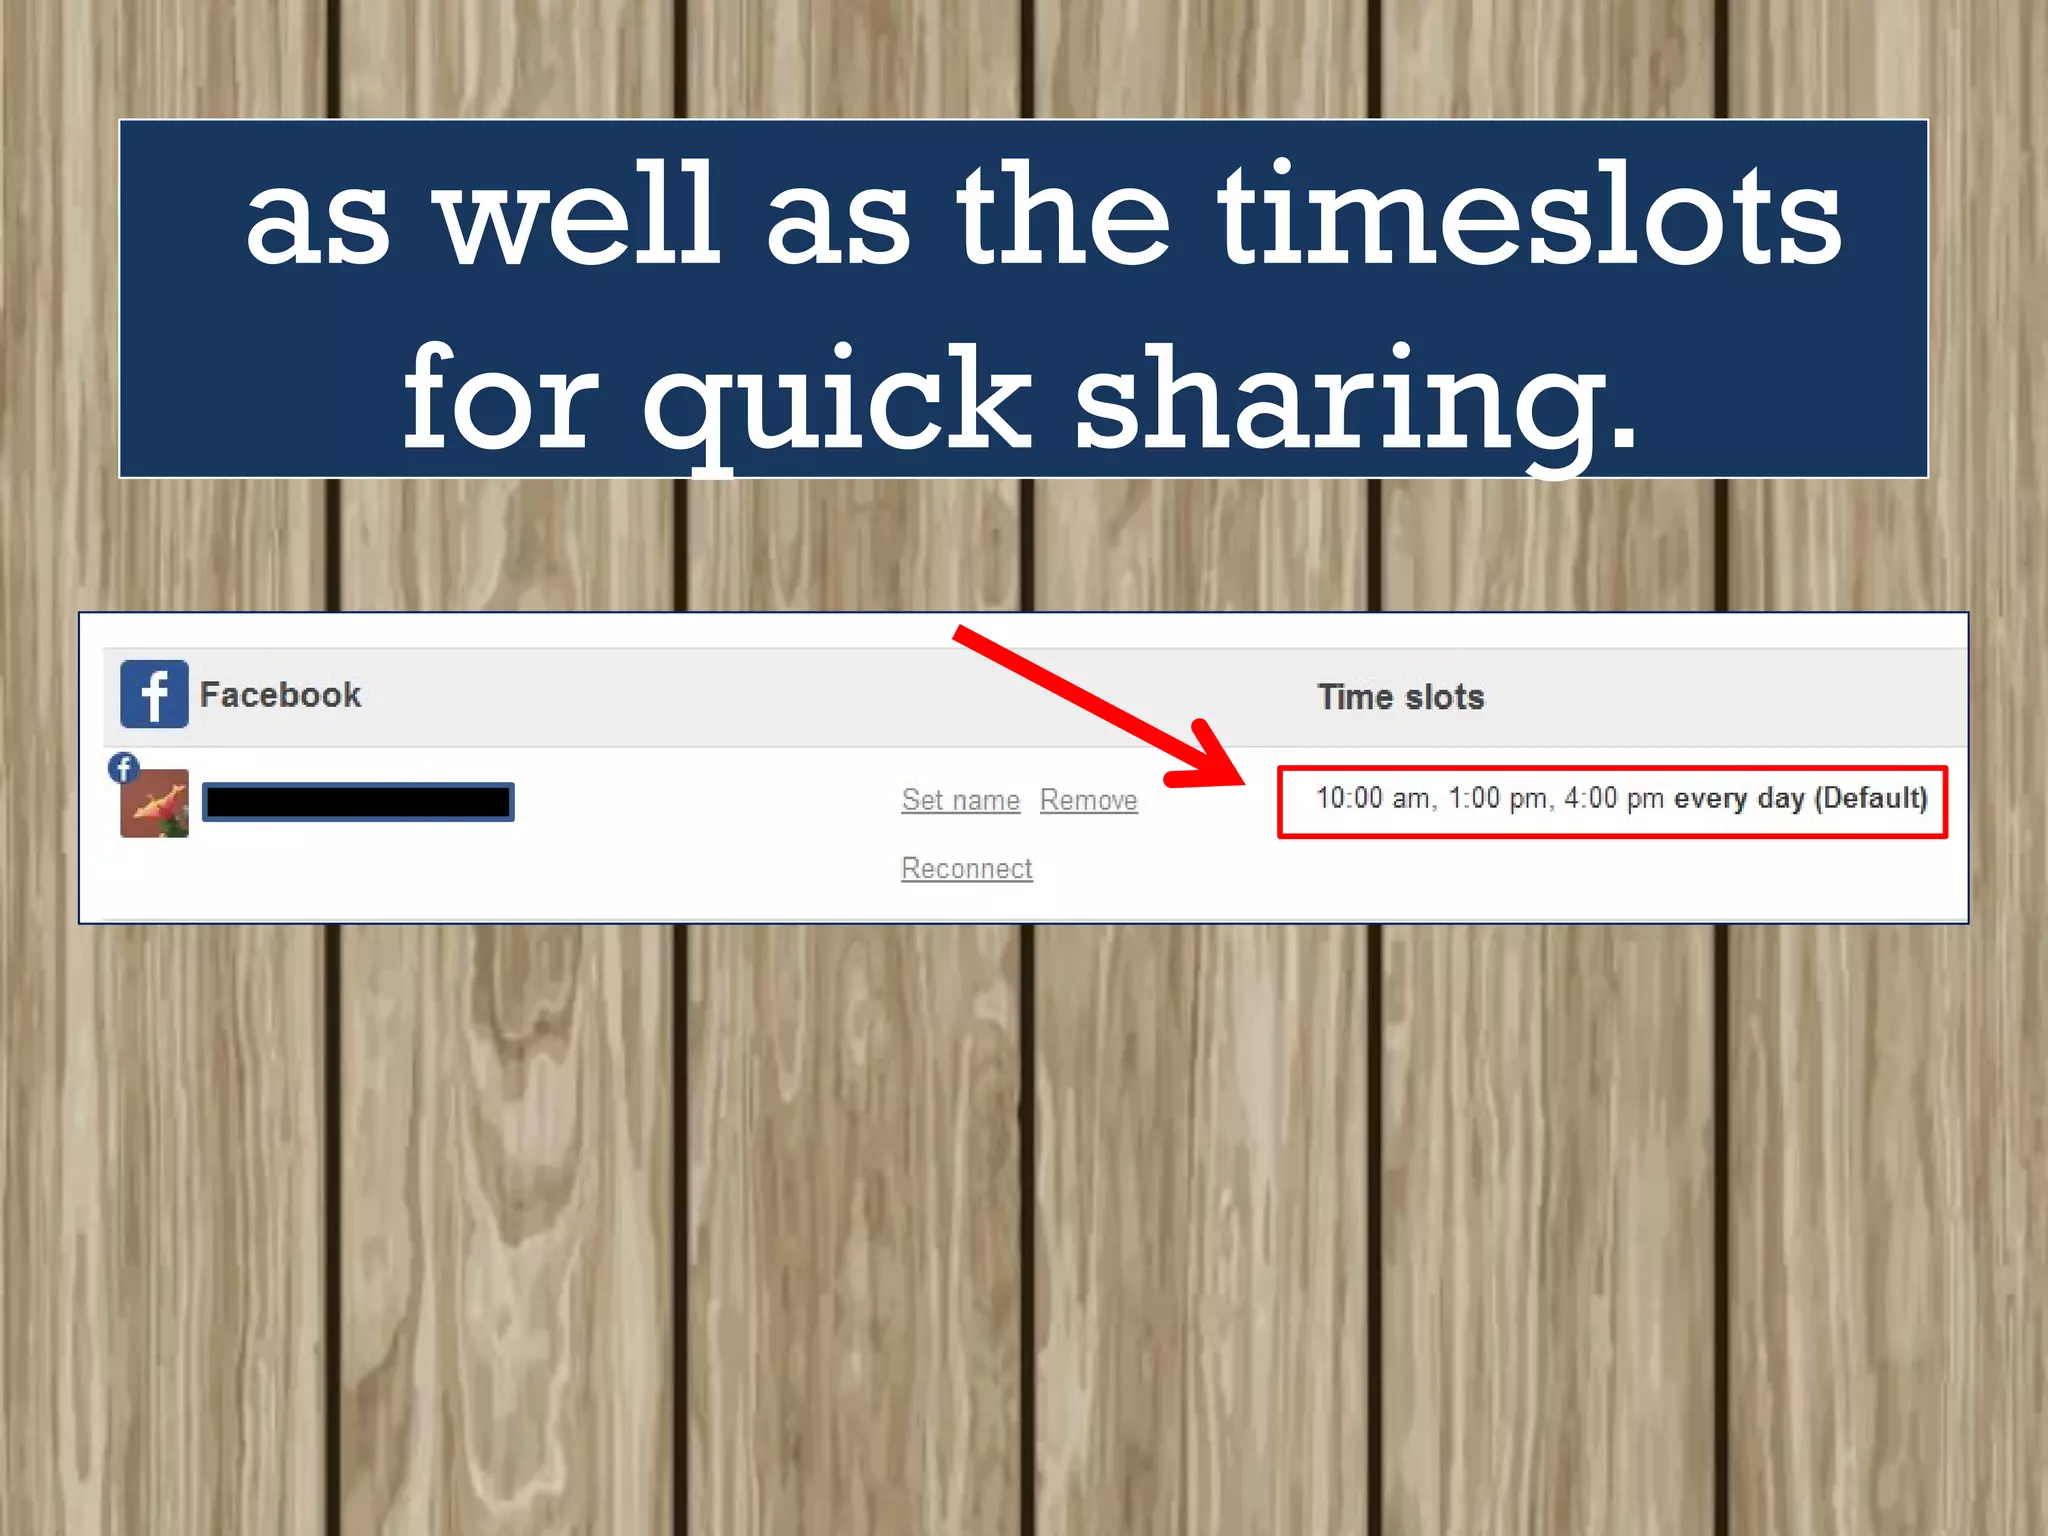


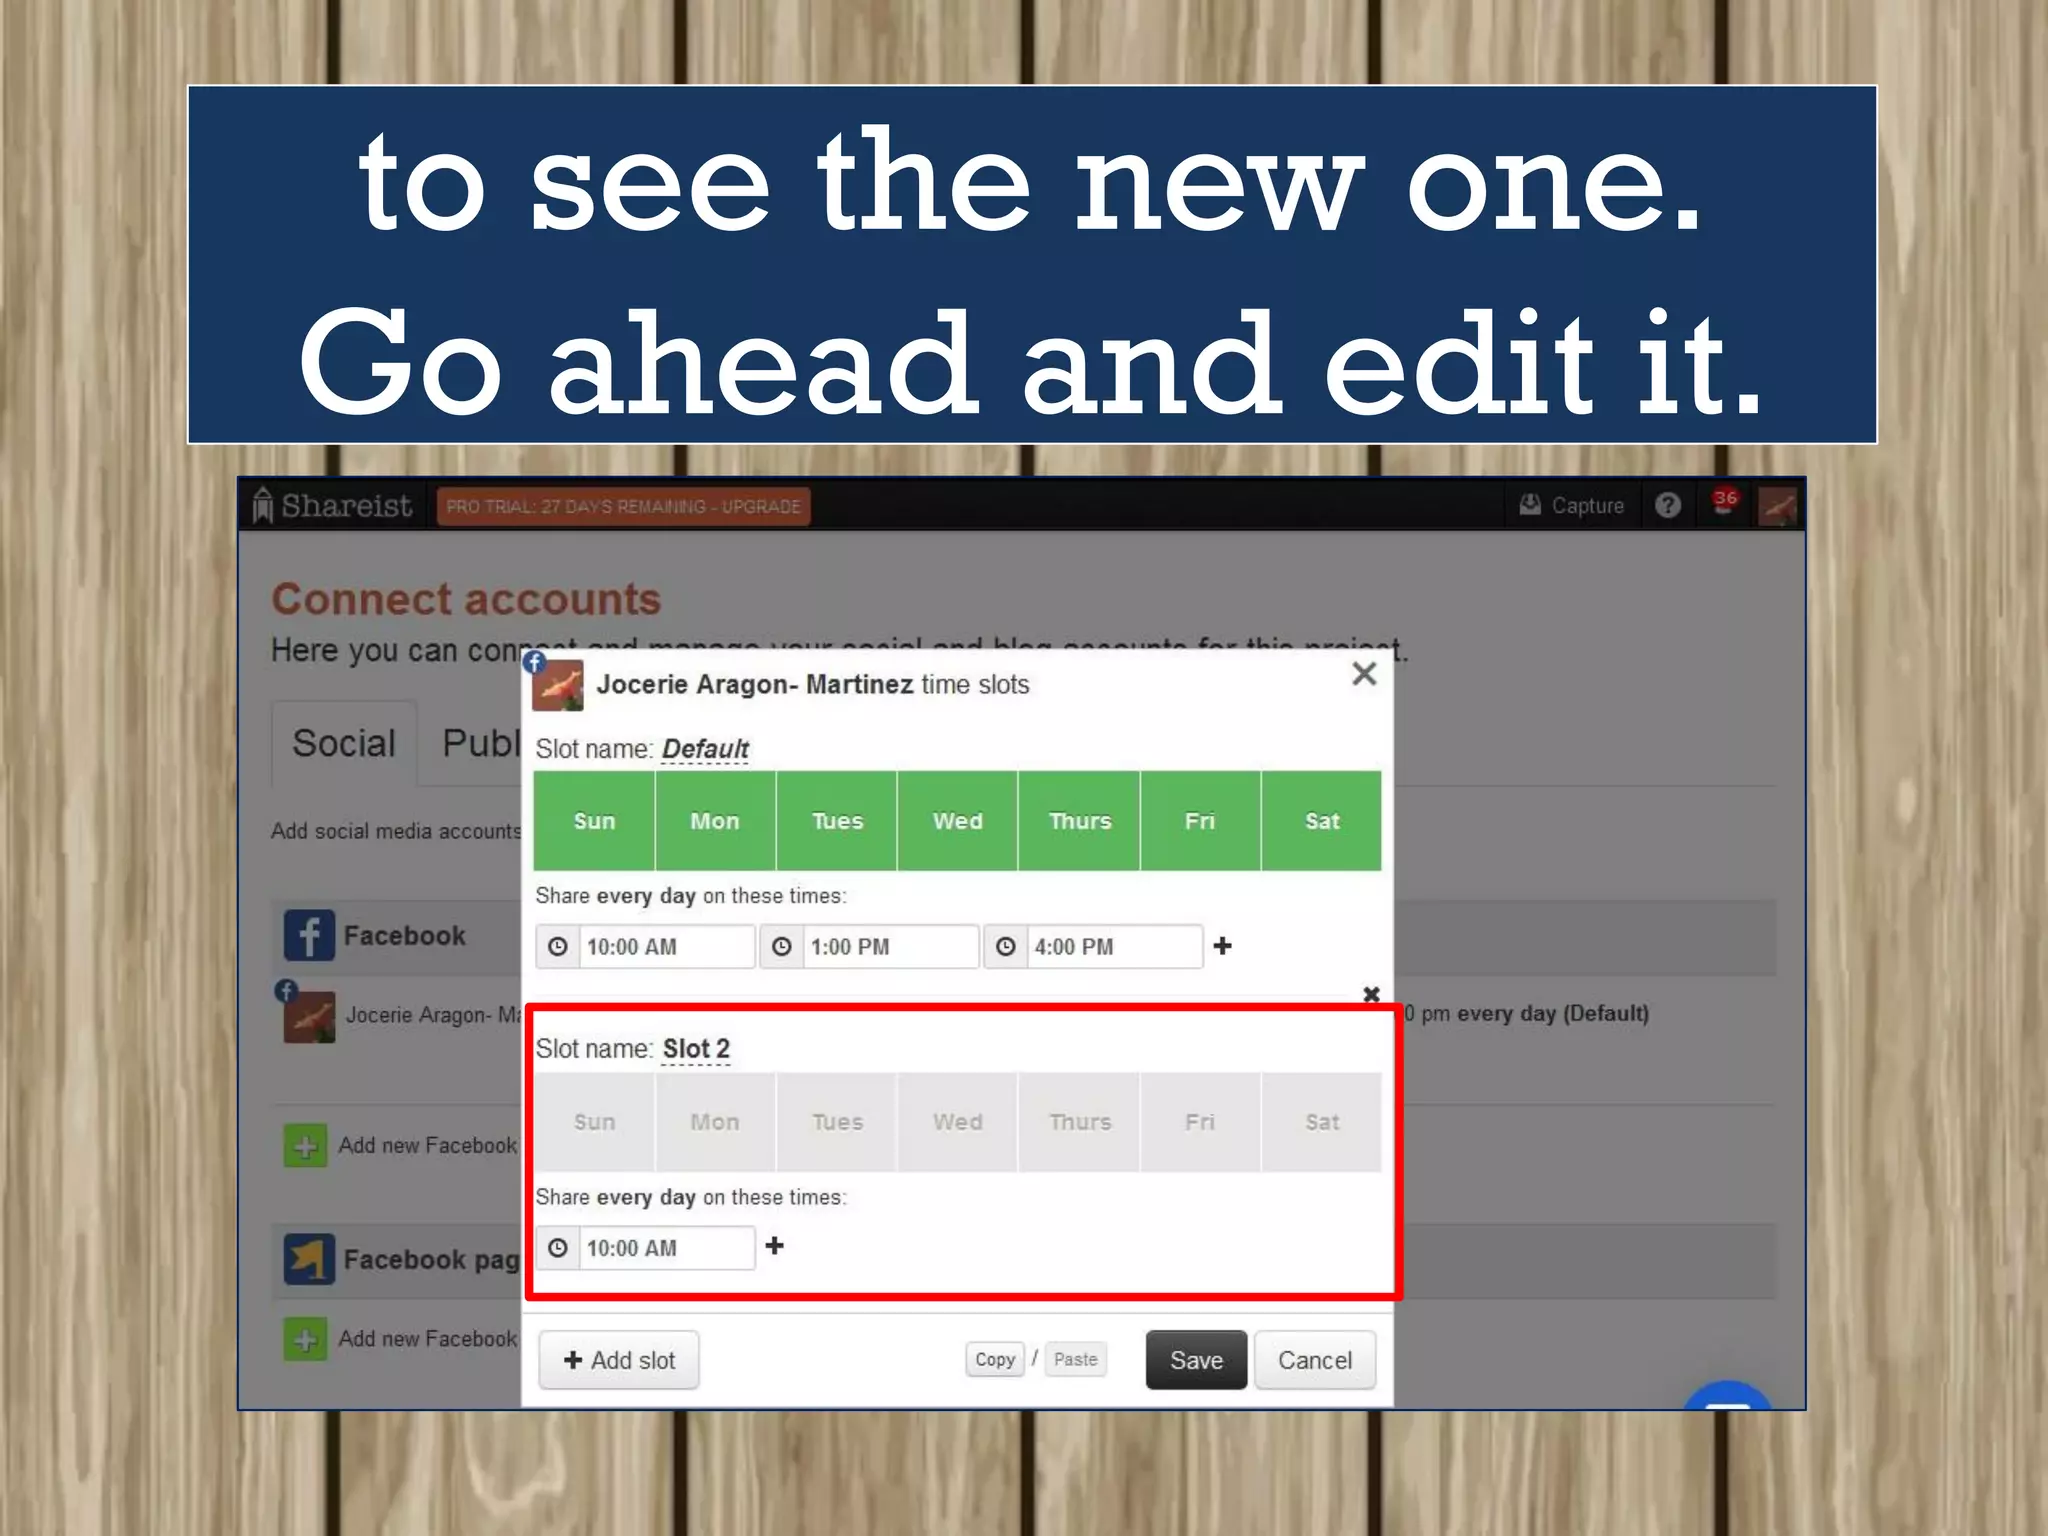
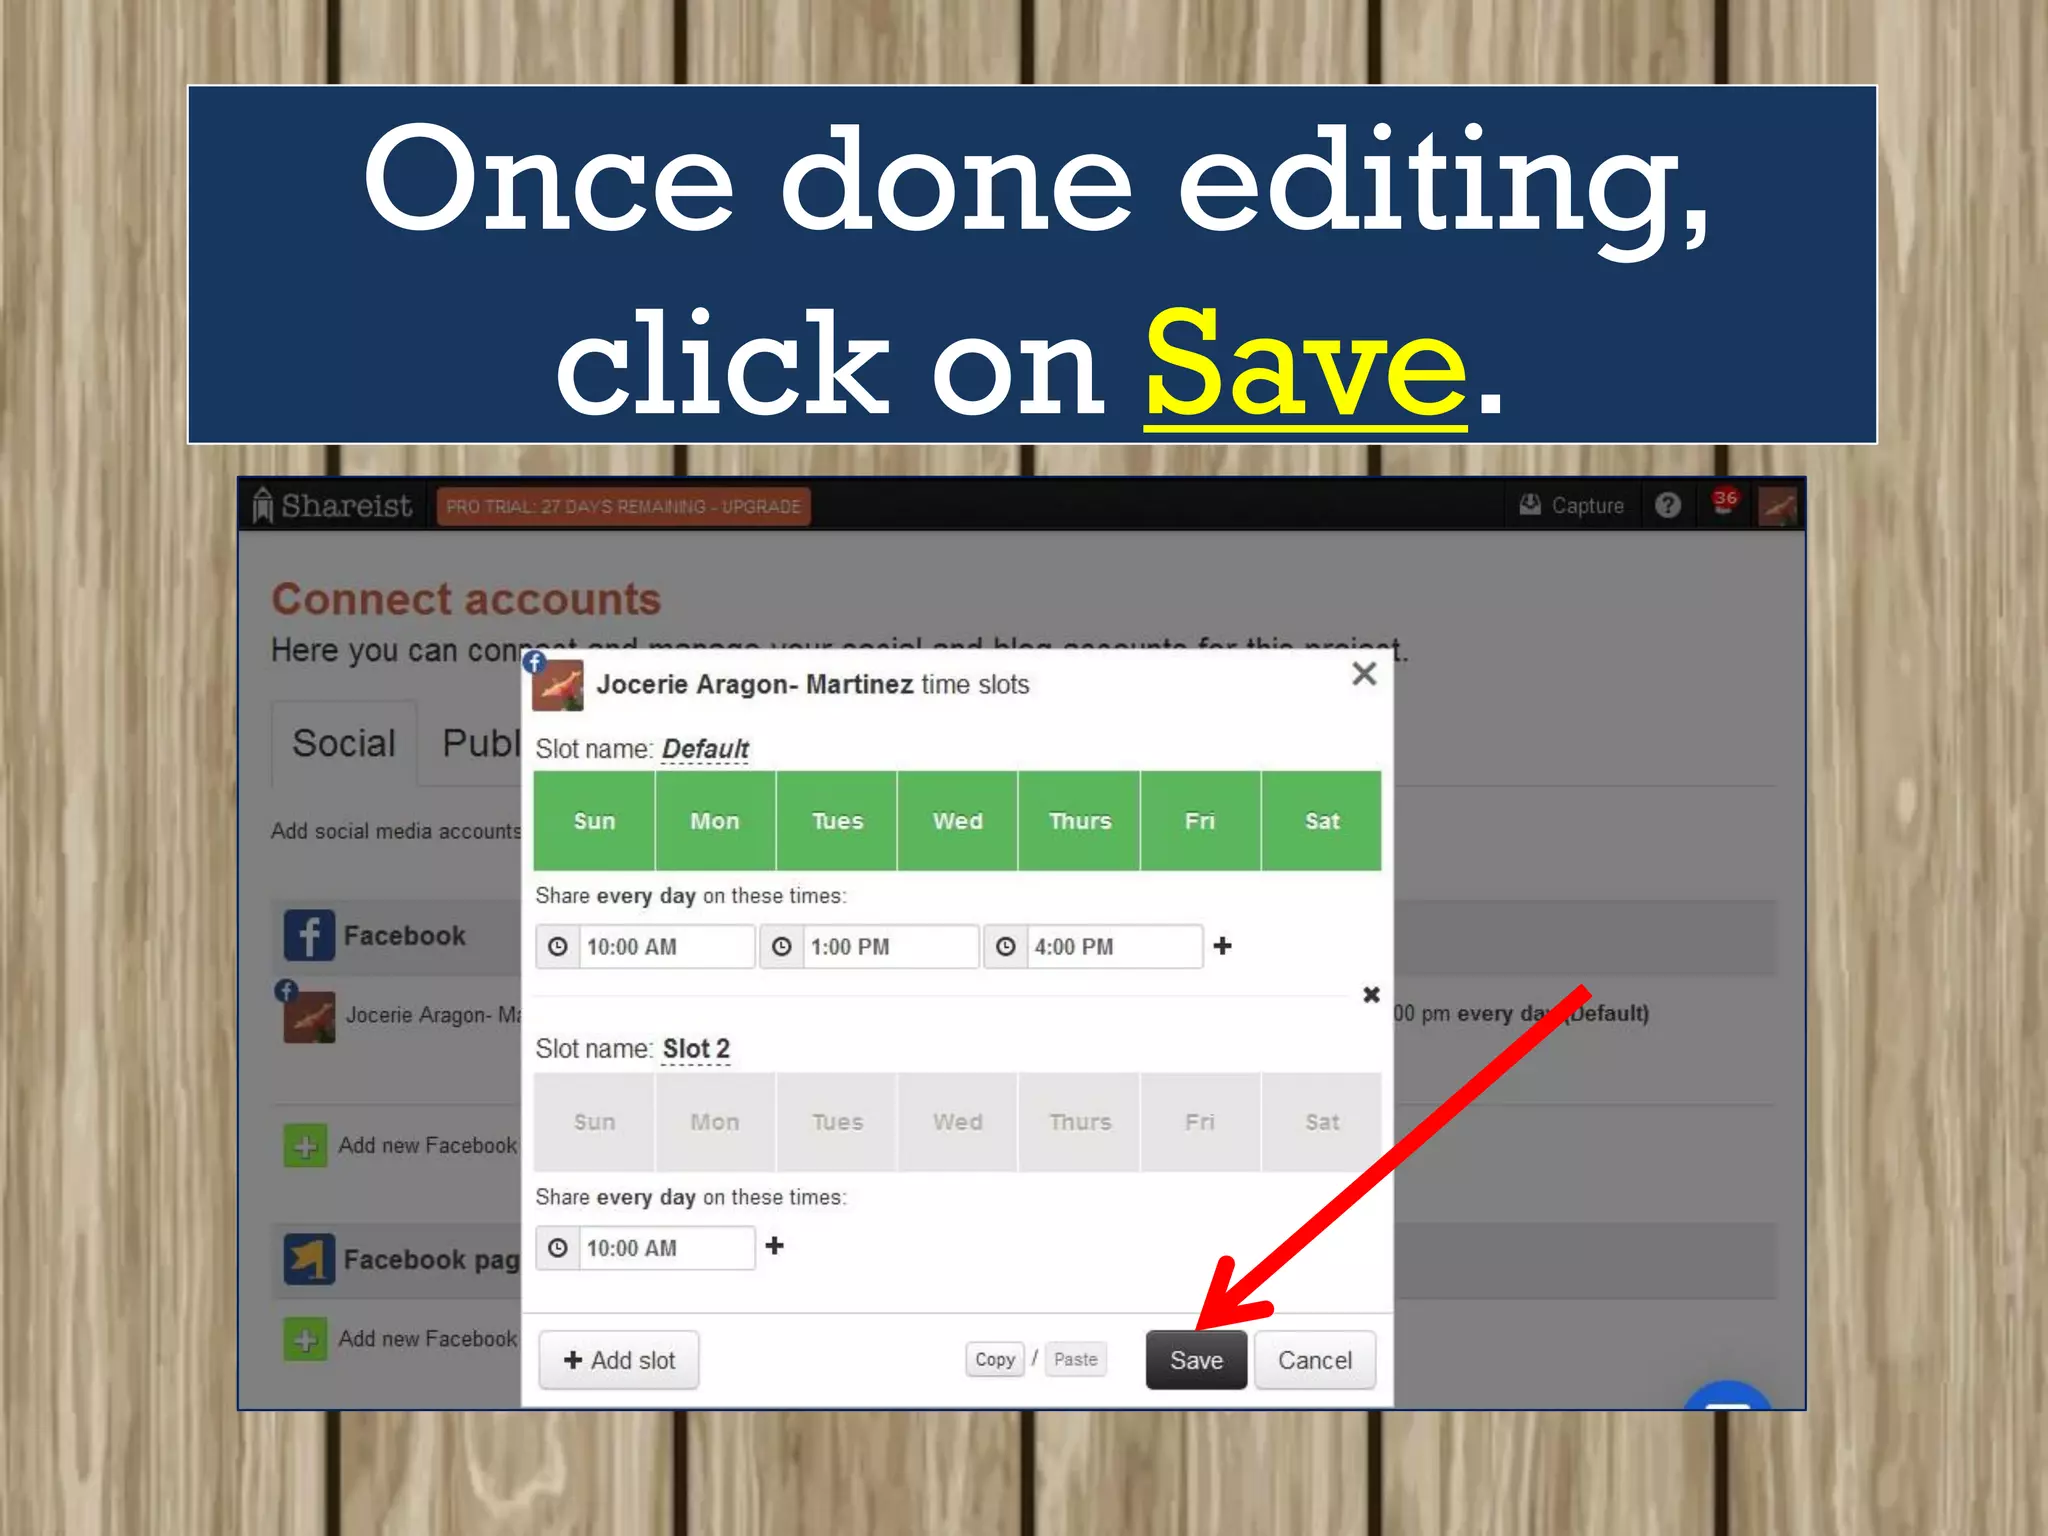


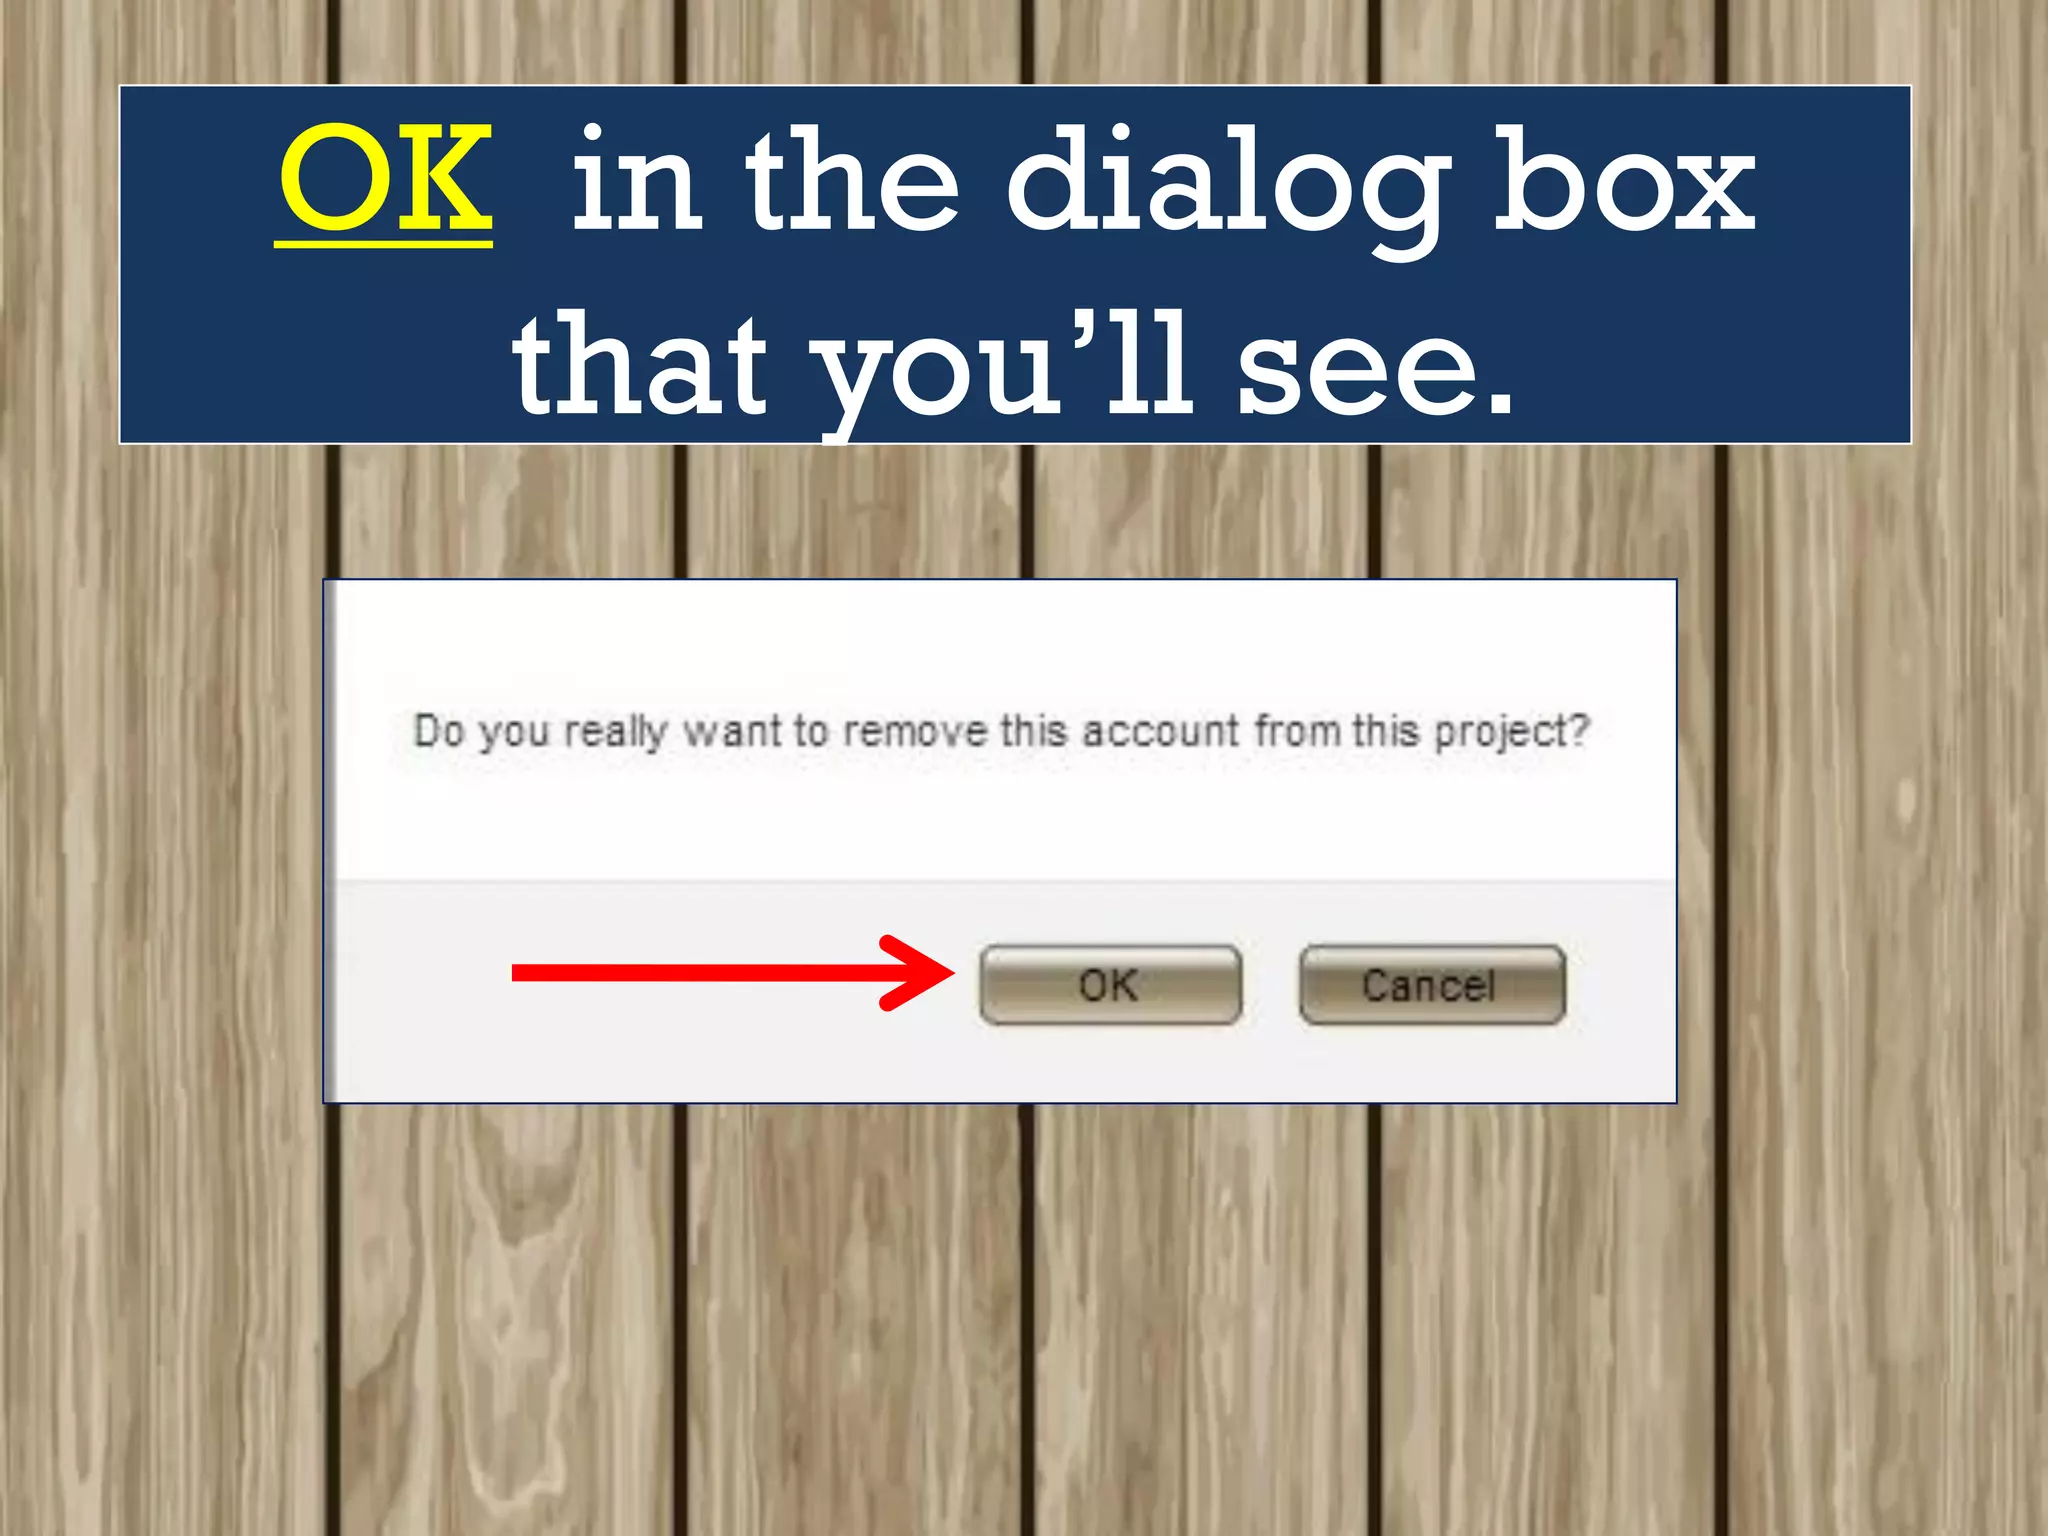
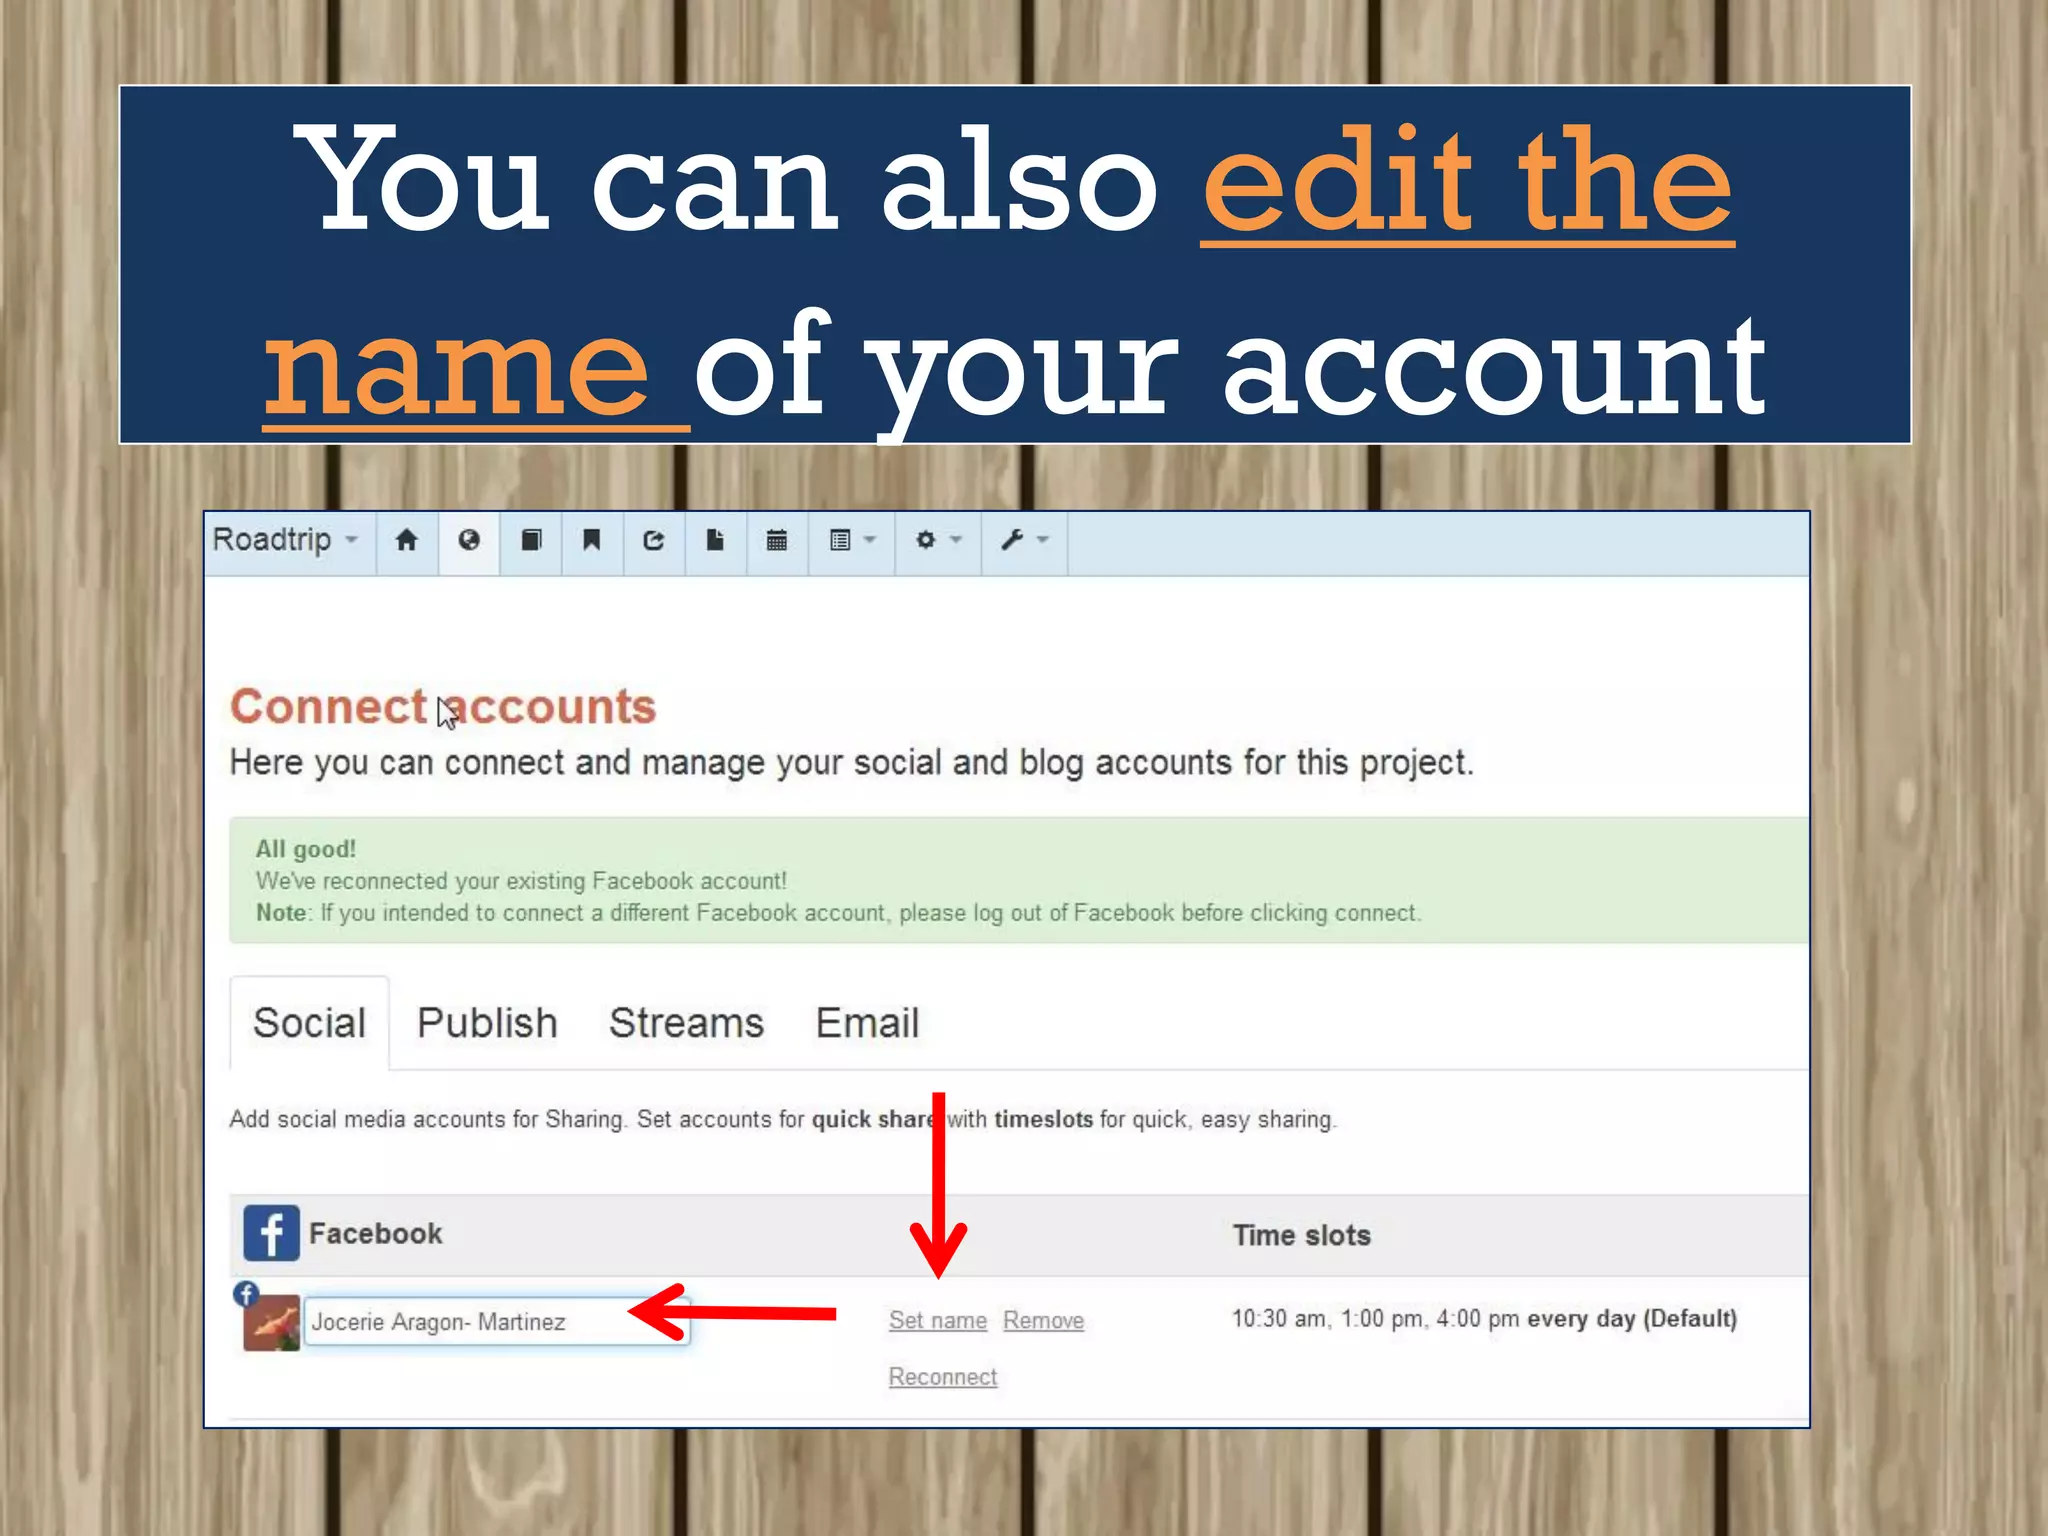
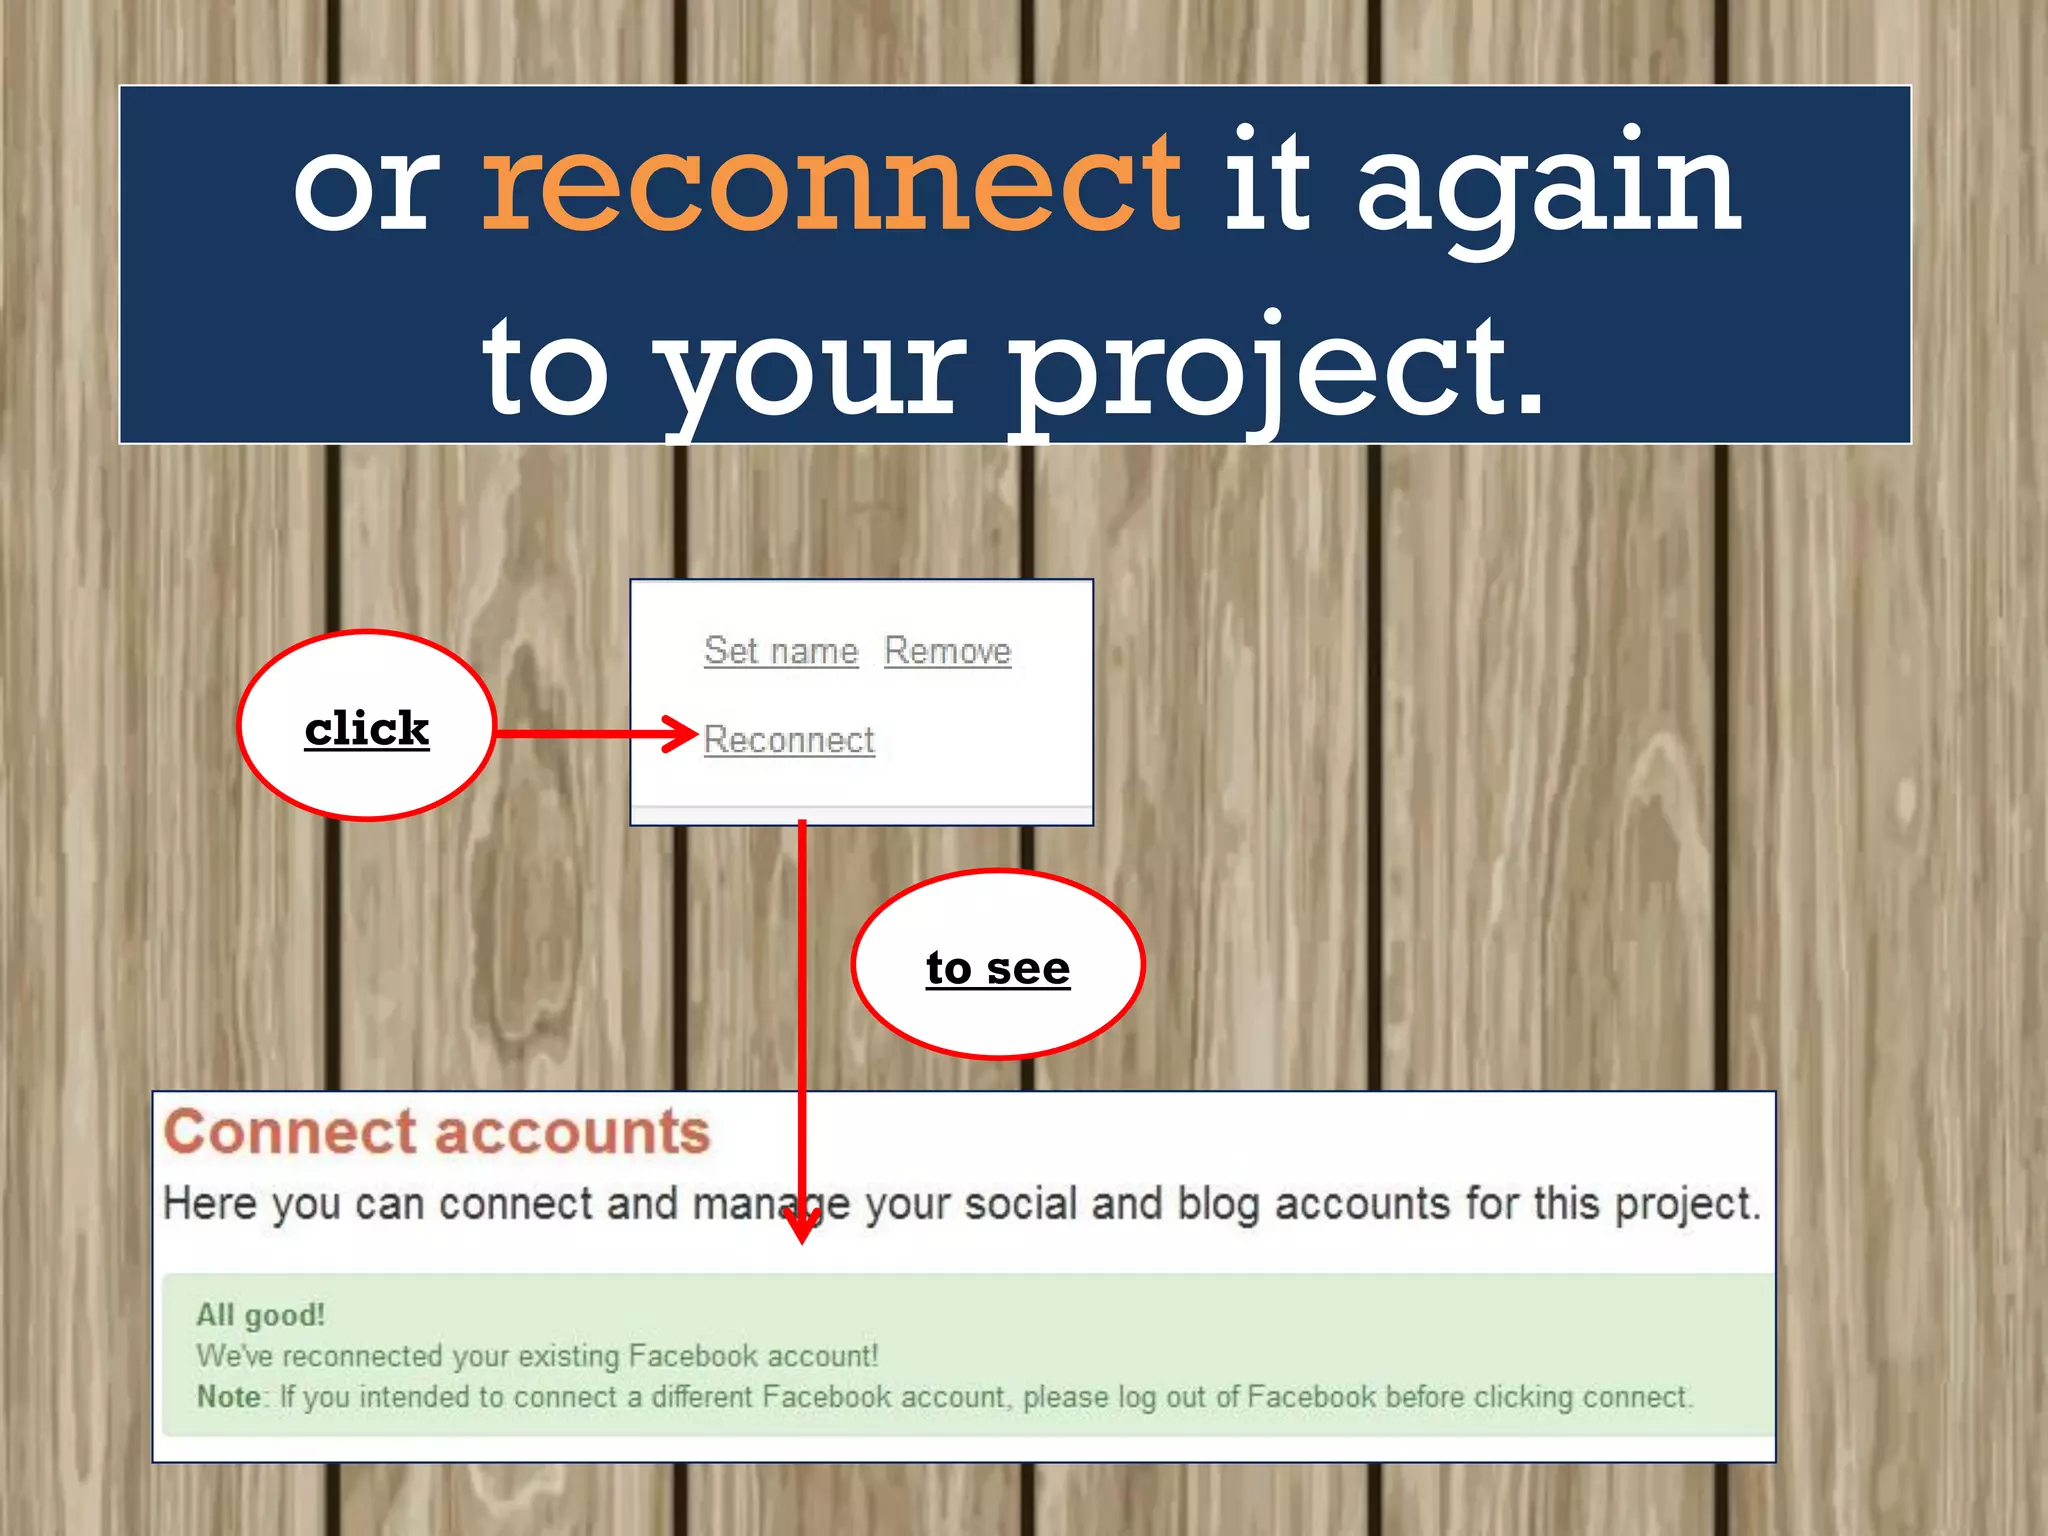


This document serves as a beginner's guide to using Shareist, a content management tool developed by Scott Jangro and Damien Arlabosse, which helps users capture ideas, create content, and publish efficiently across social platforms. It covers the initial steps for signing up, creating projects, and utilizing features like the content inbox for managing and editing captured content, as well as connecting various social media accounts. The guide also outlines how to effectively use the research capabilities within Shareist to gather content for projects.