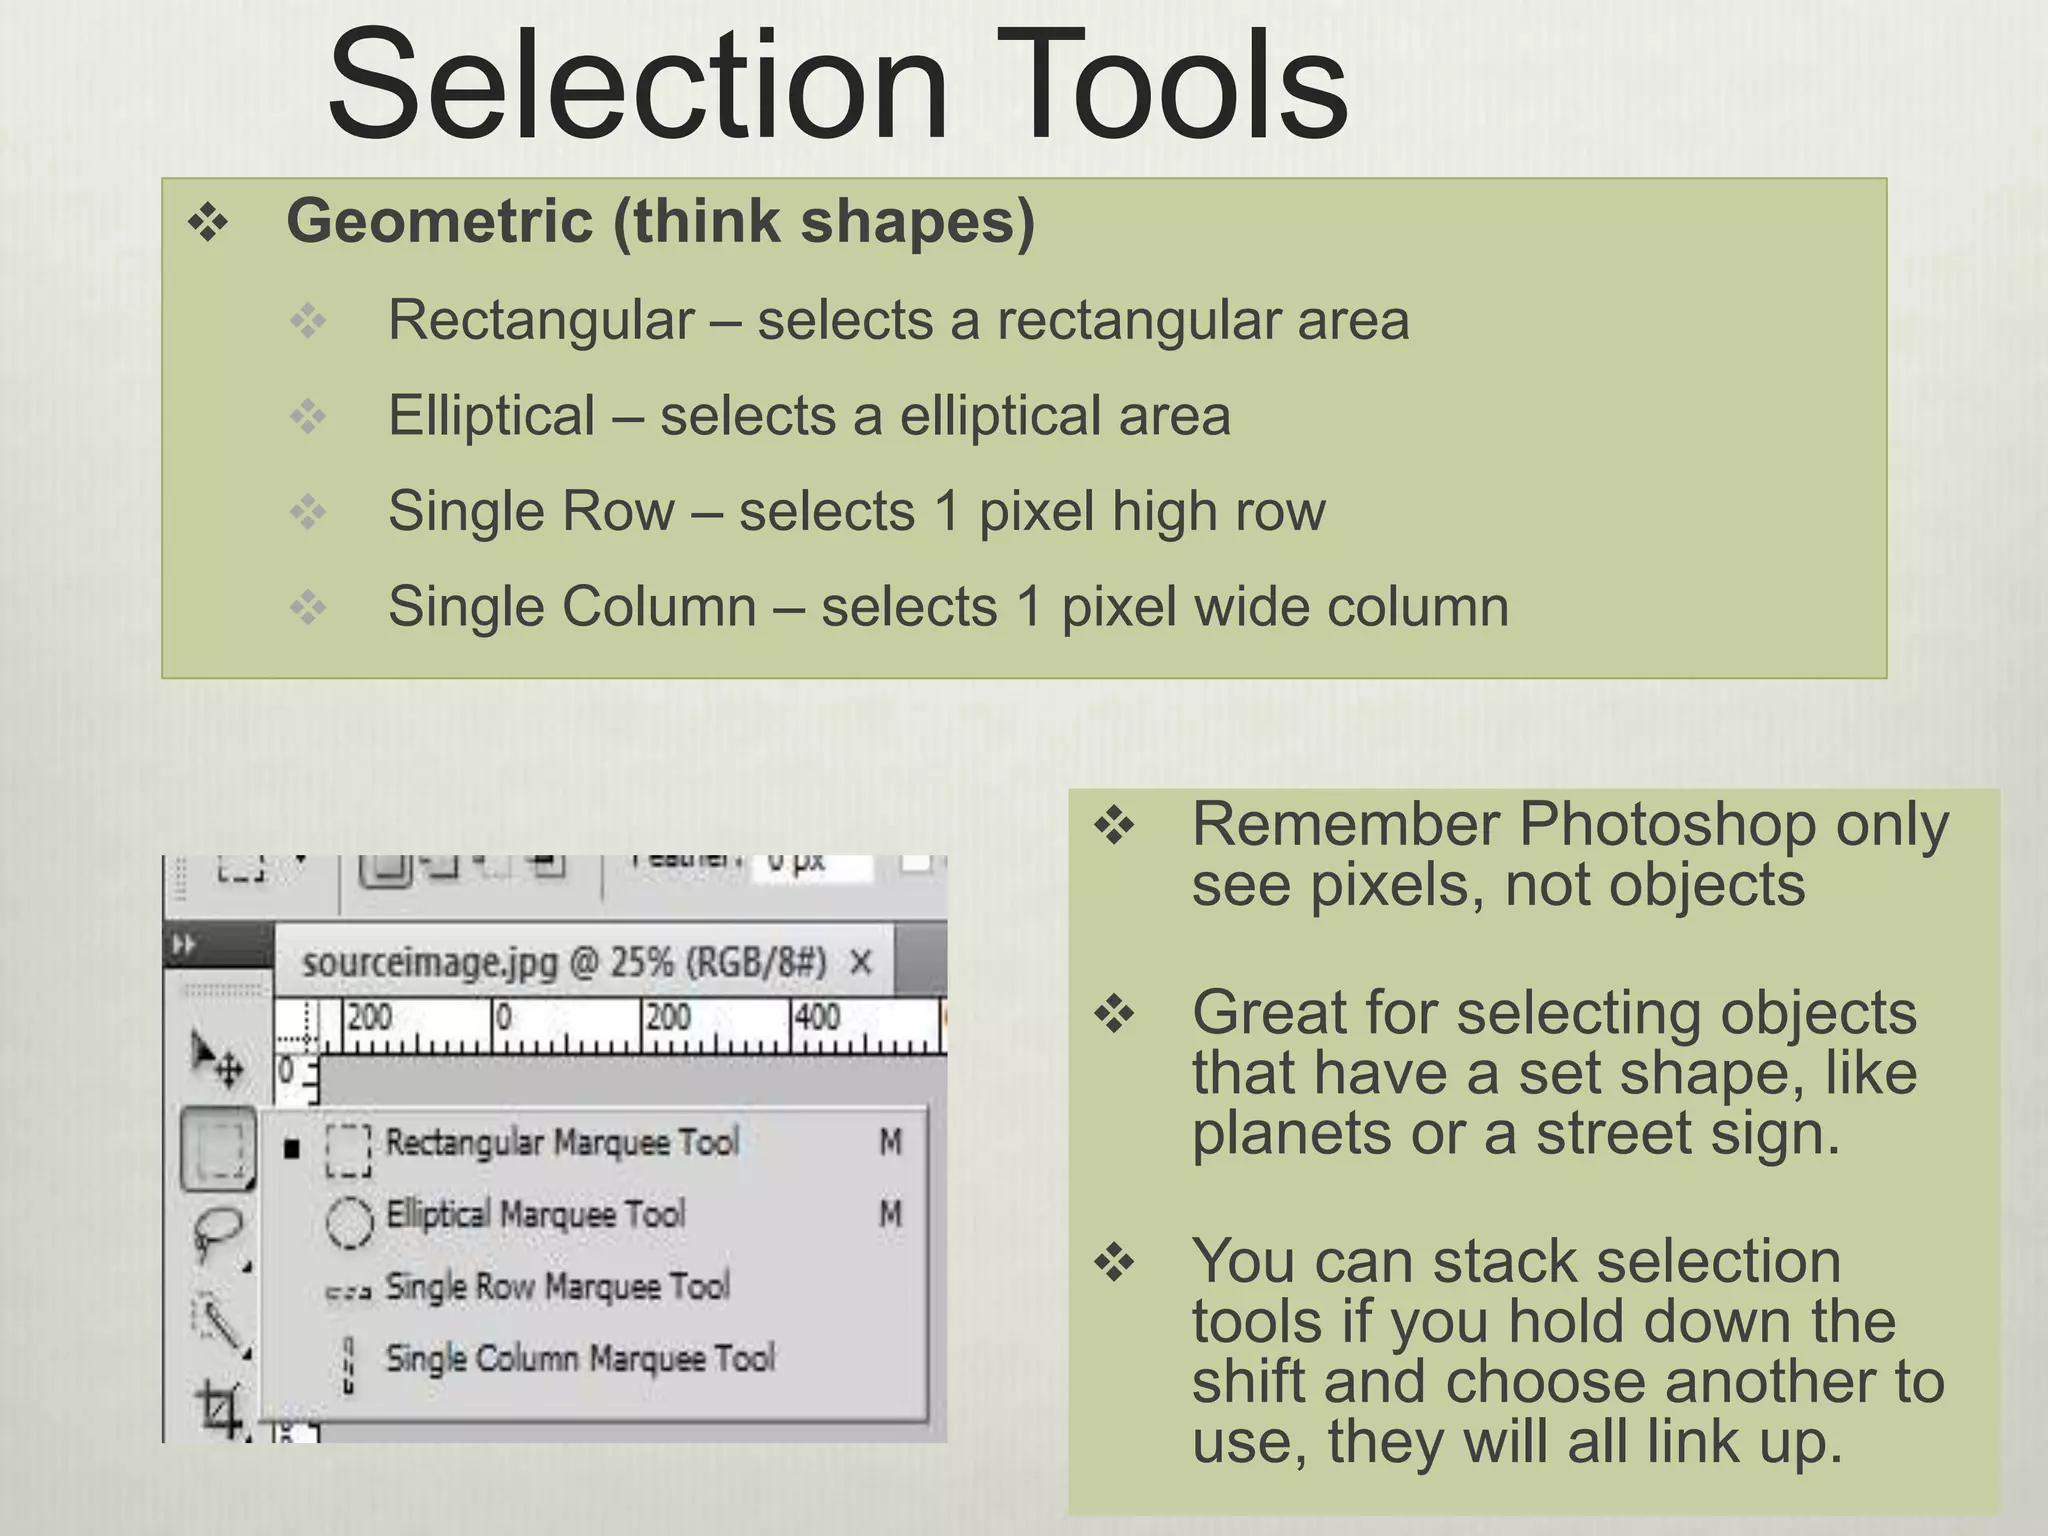
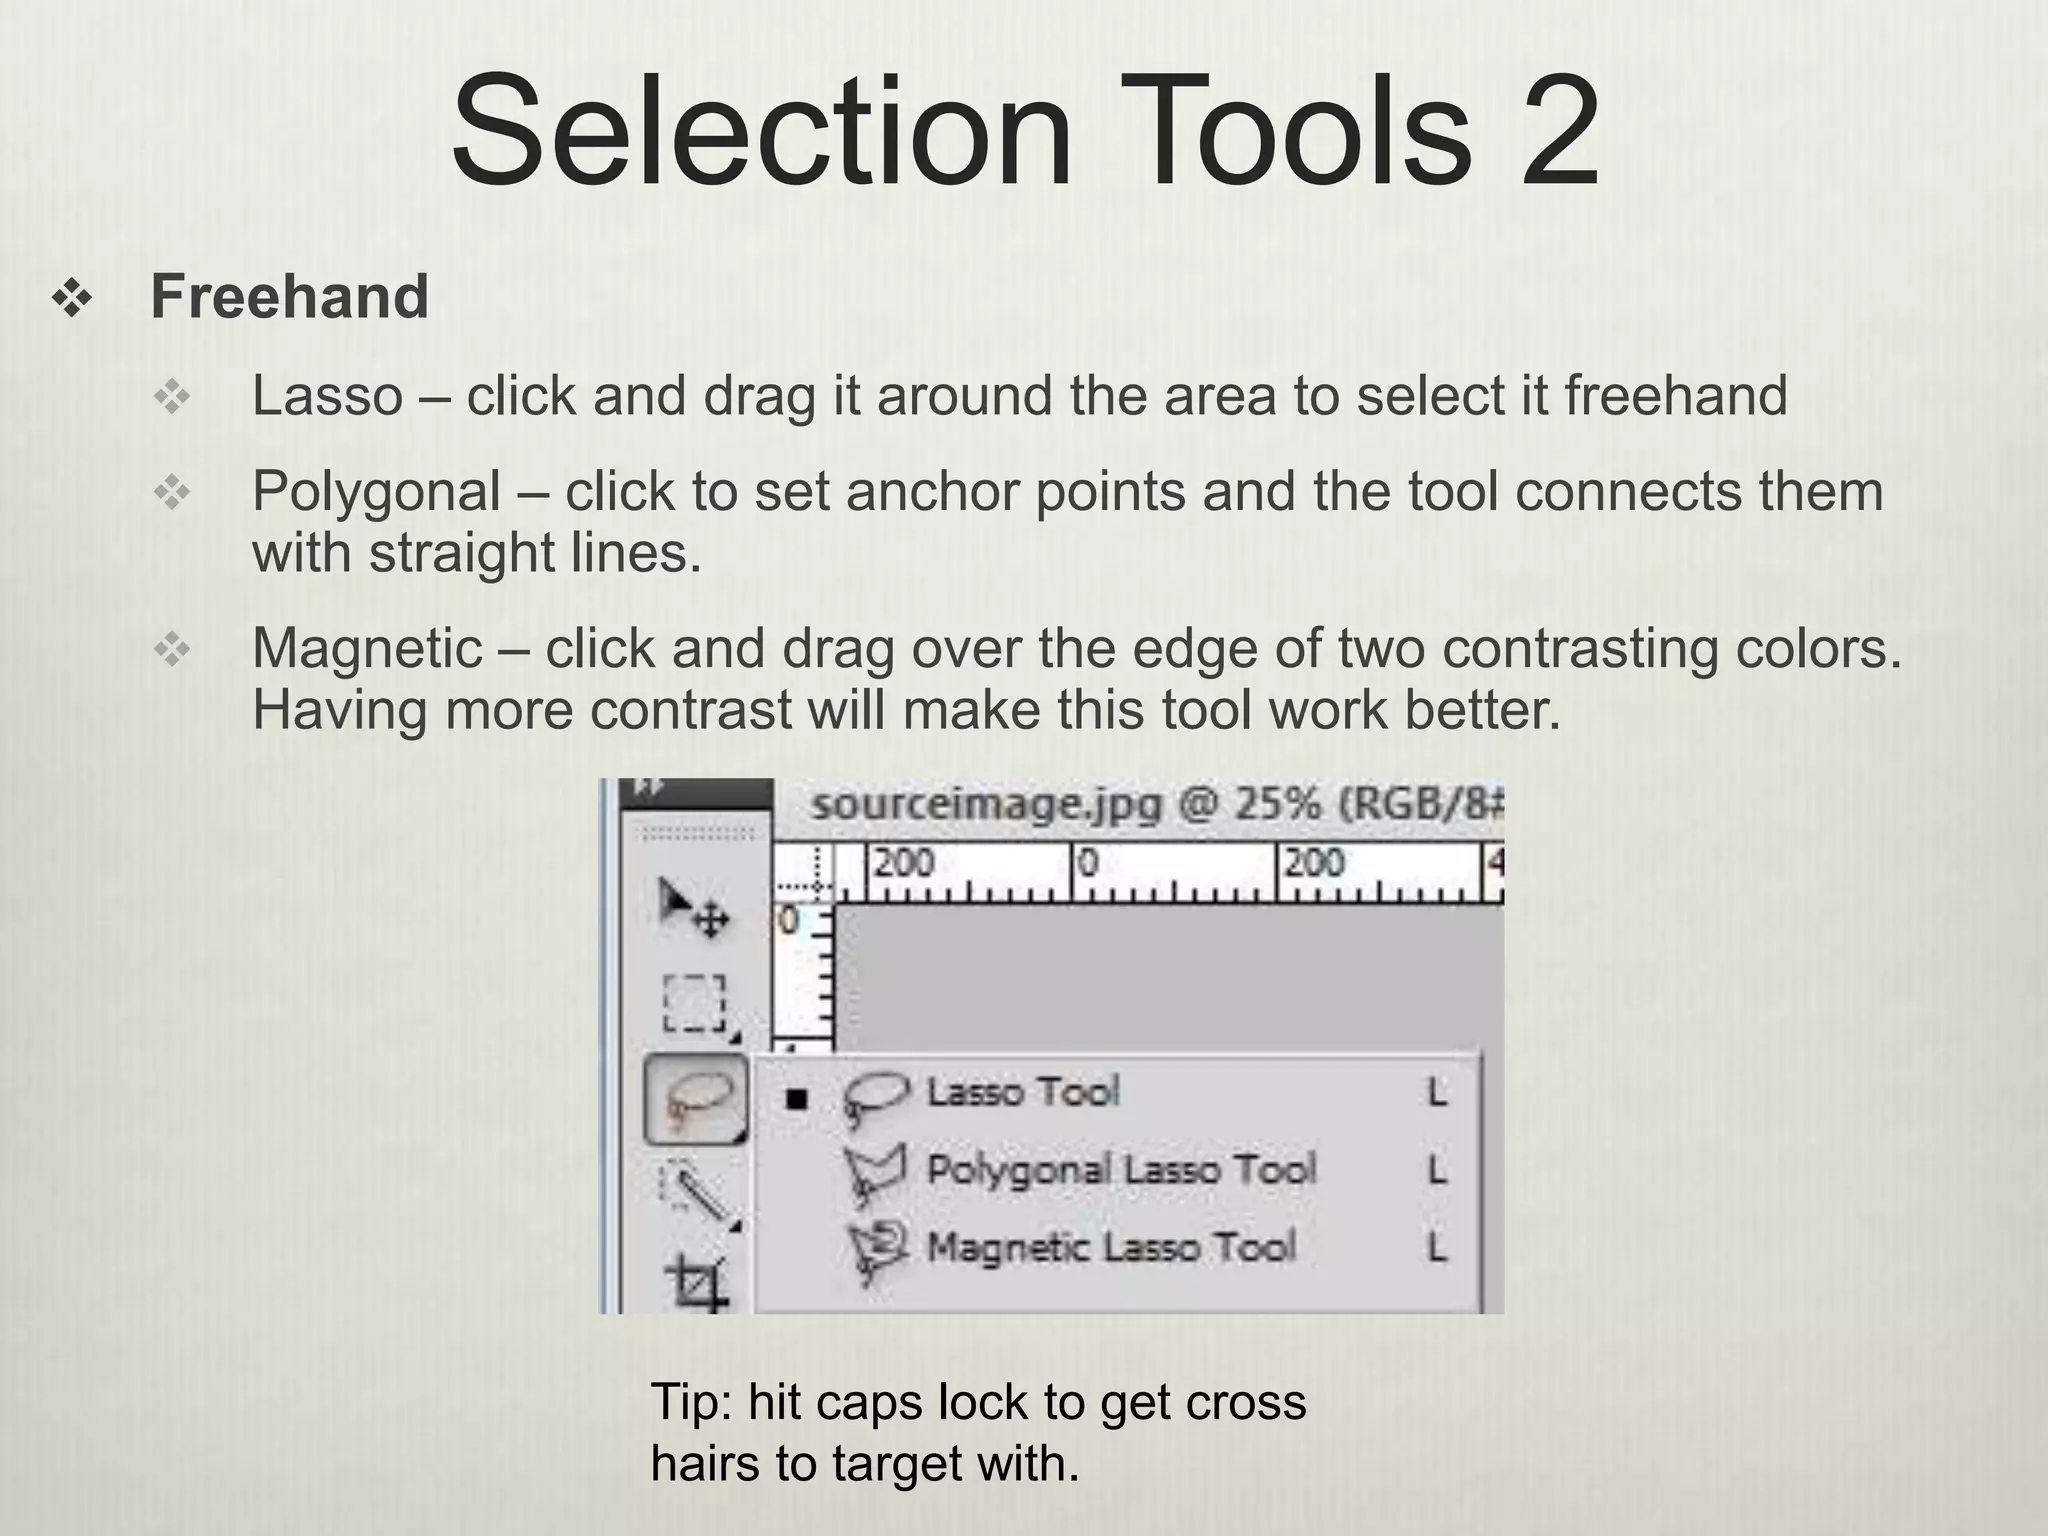
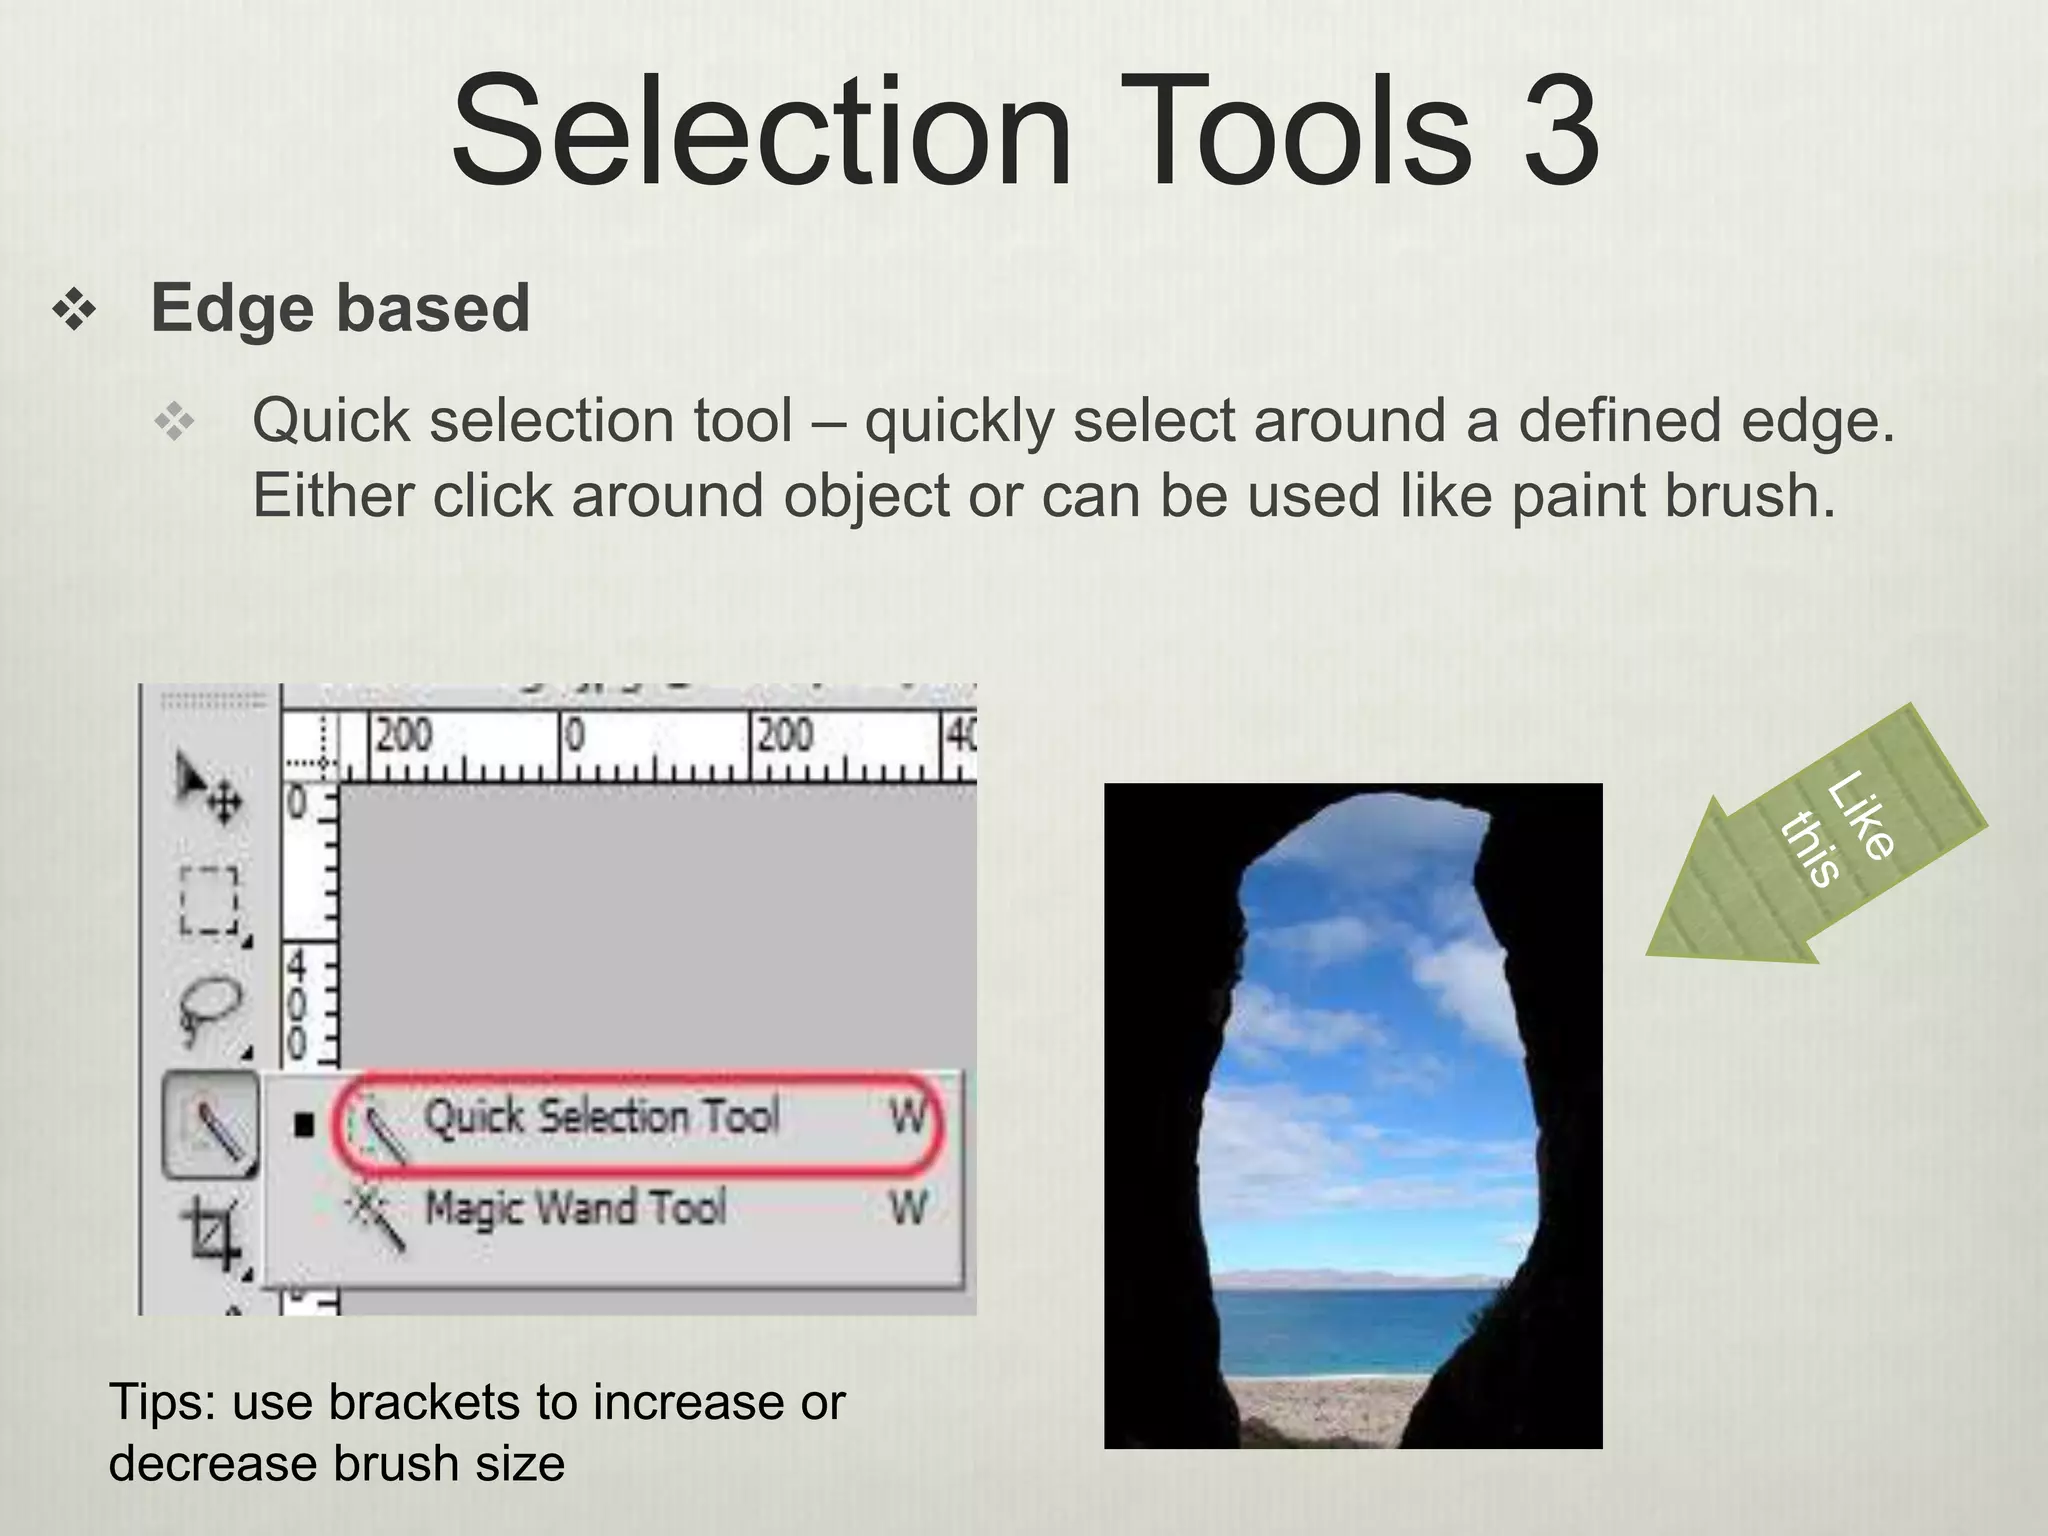
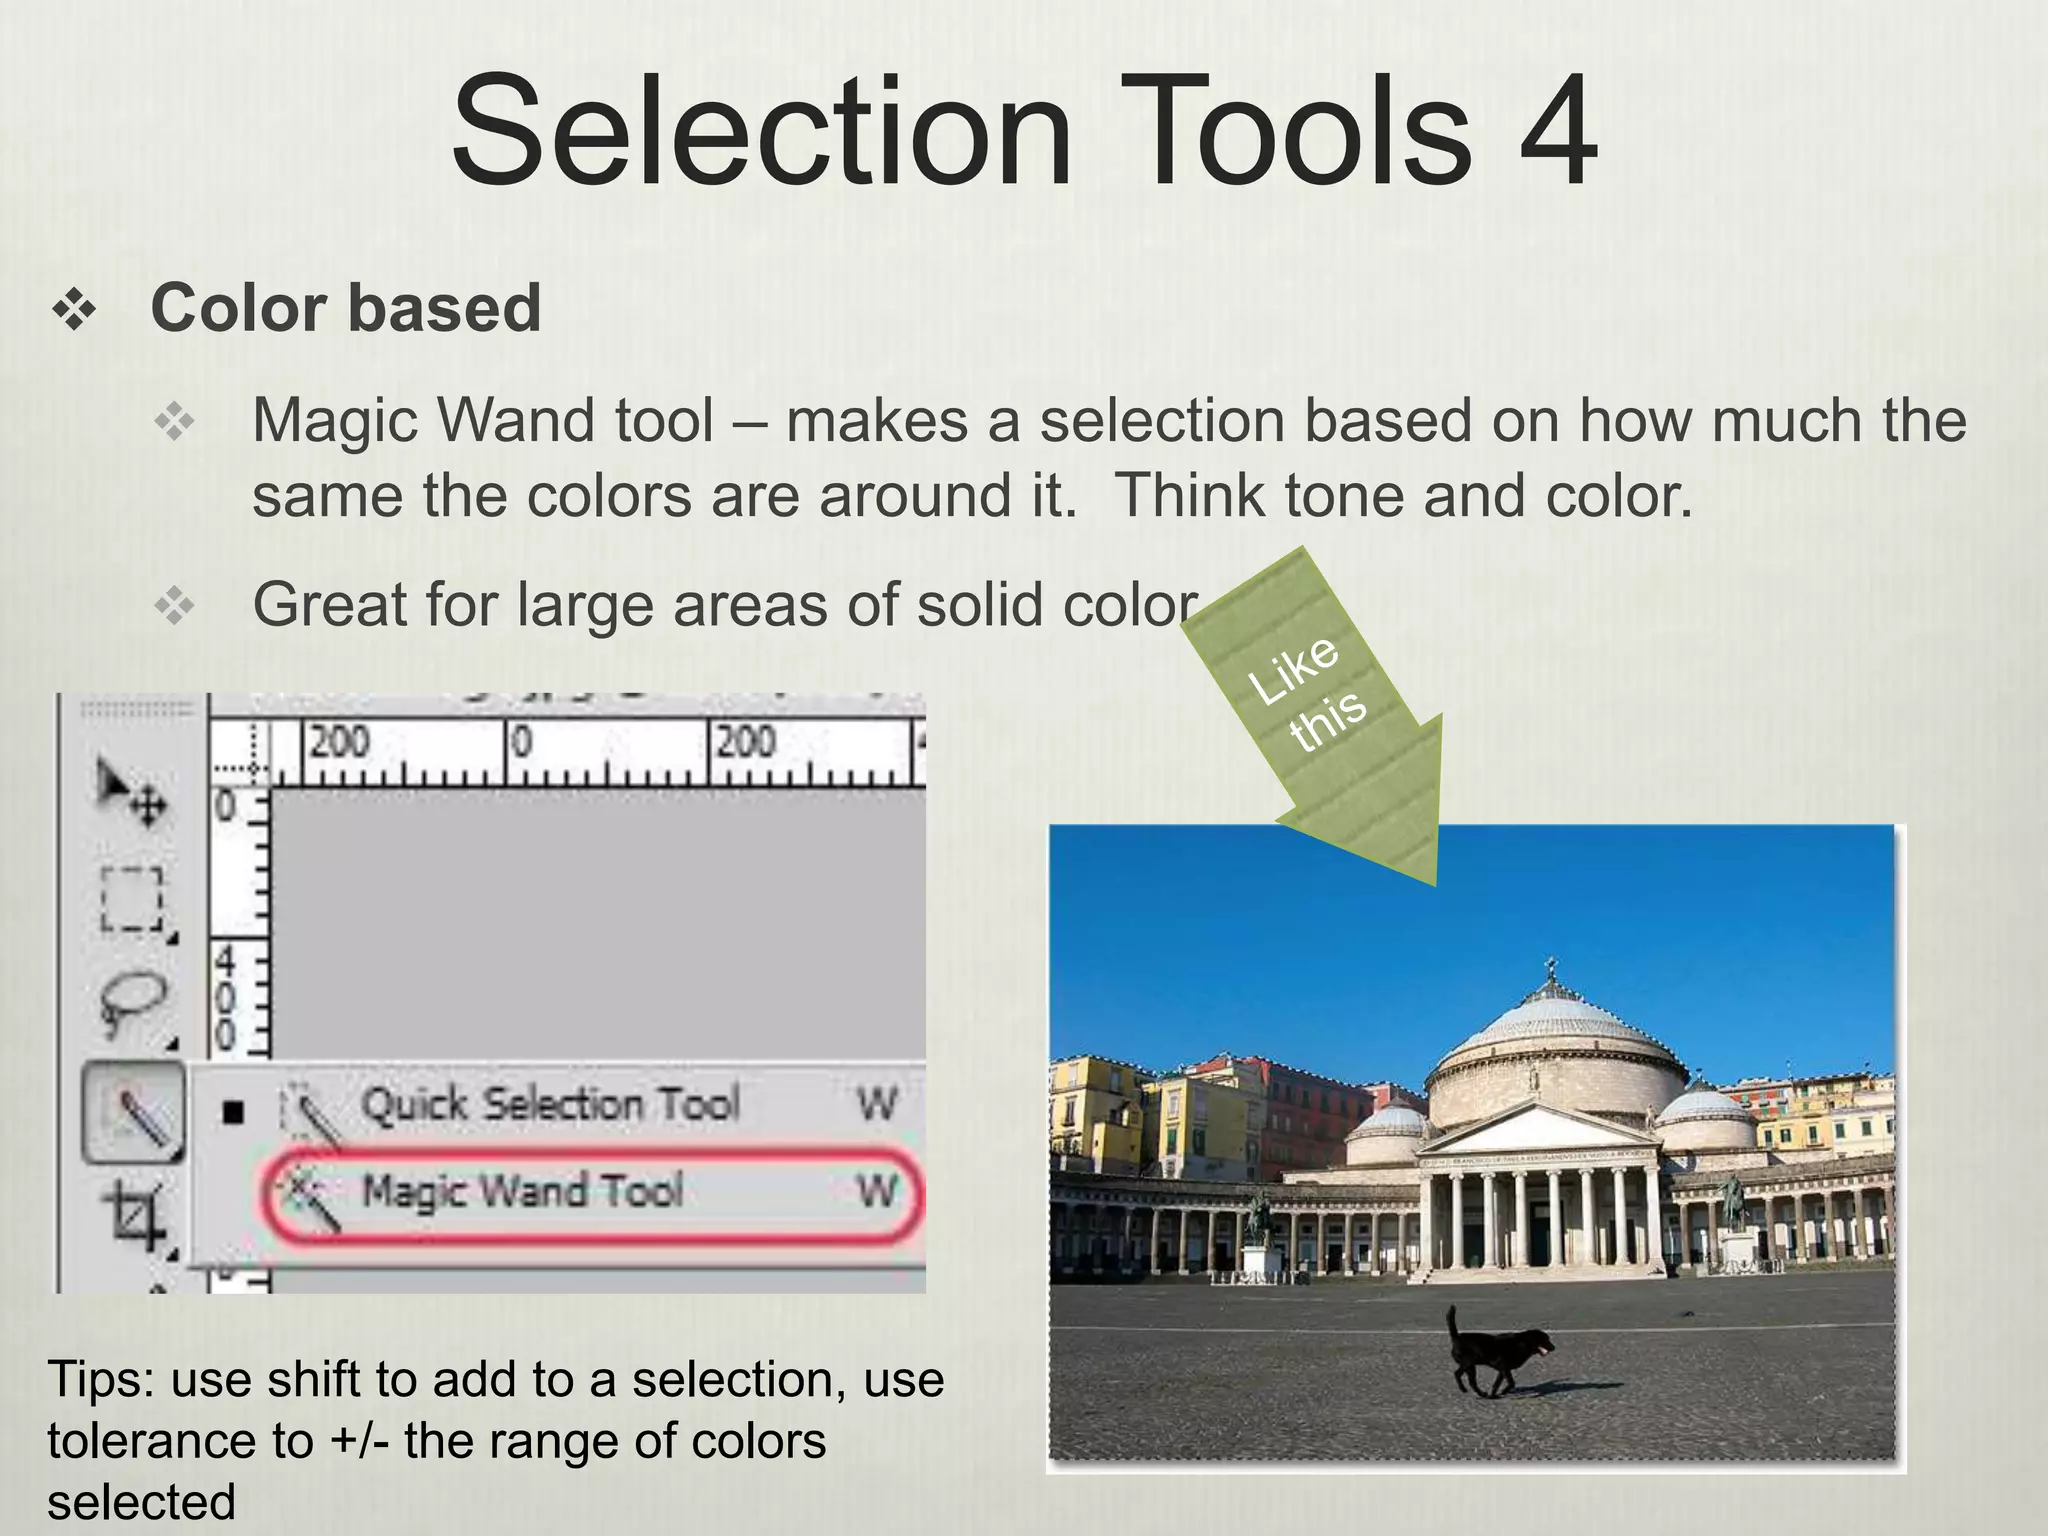
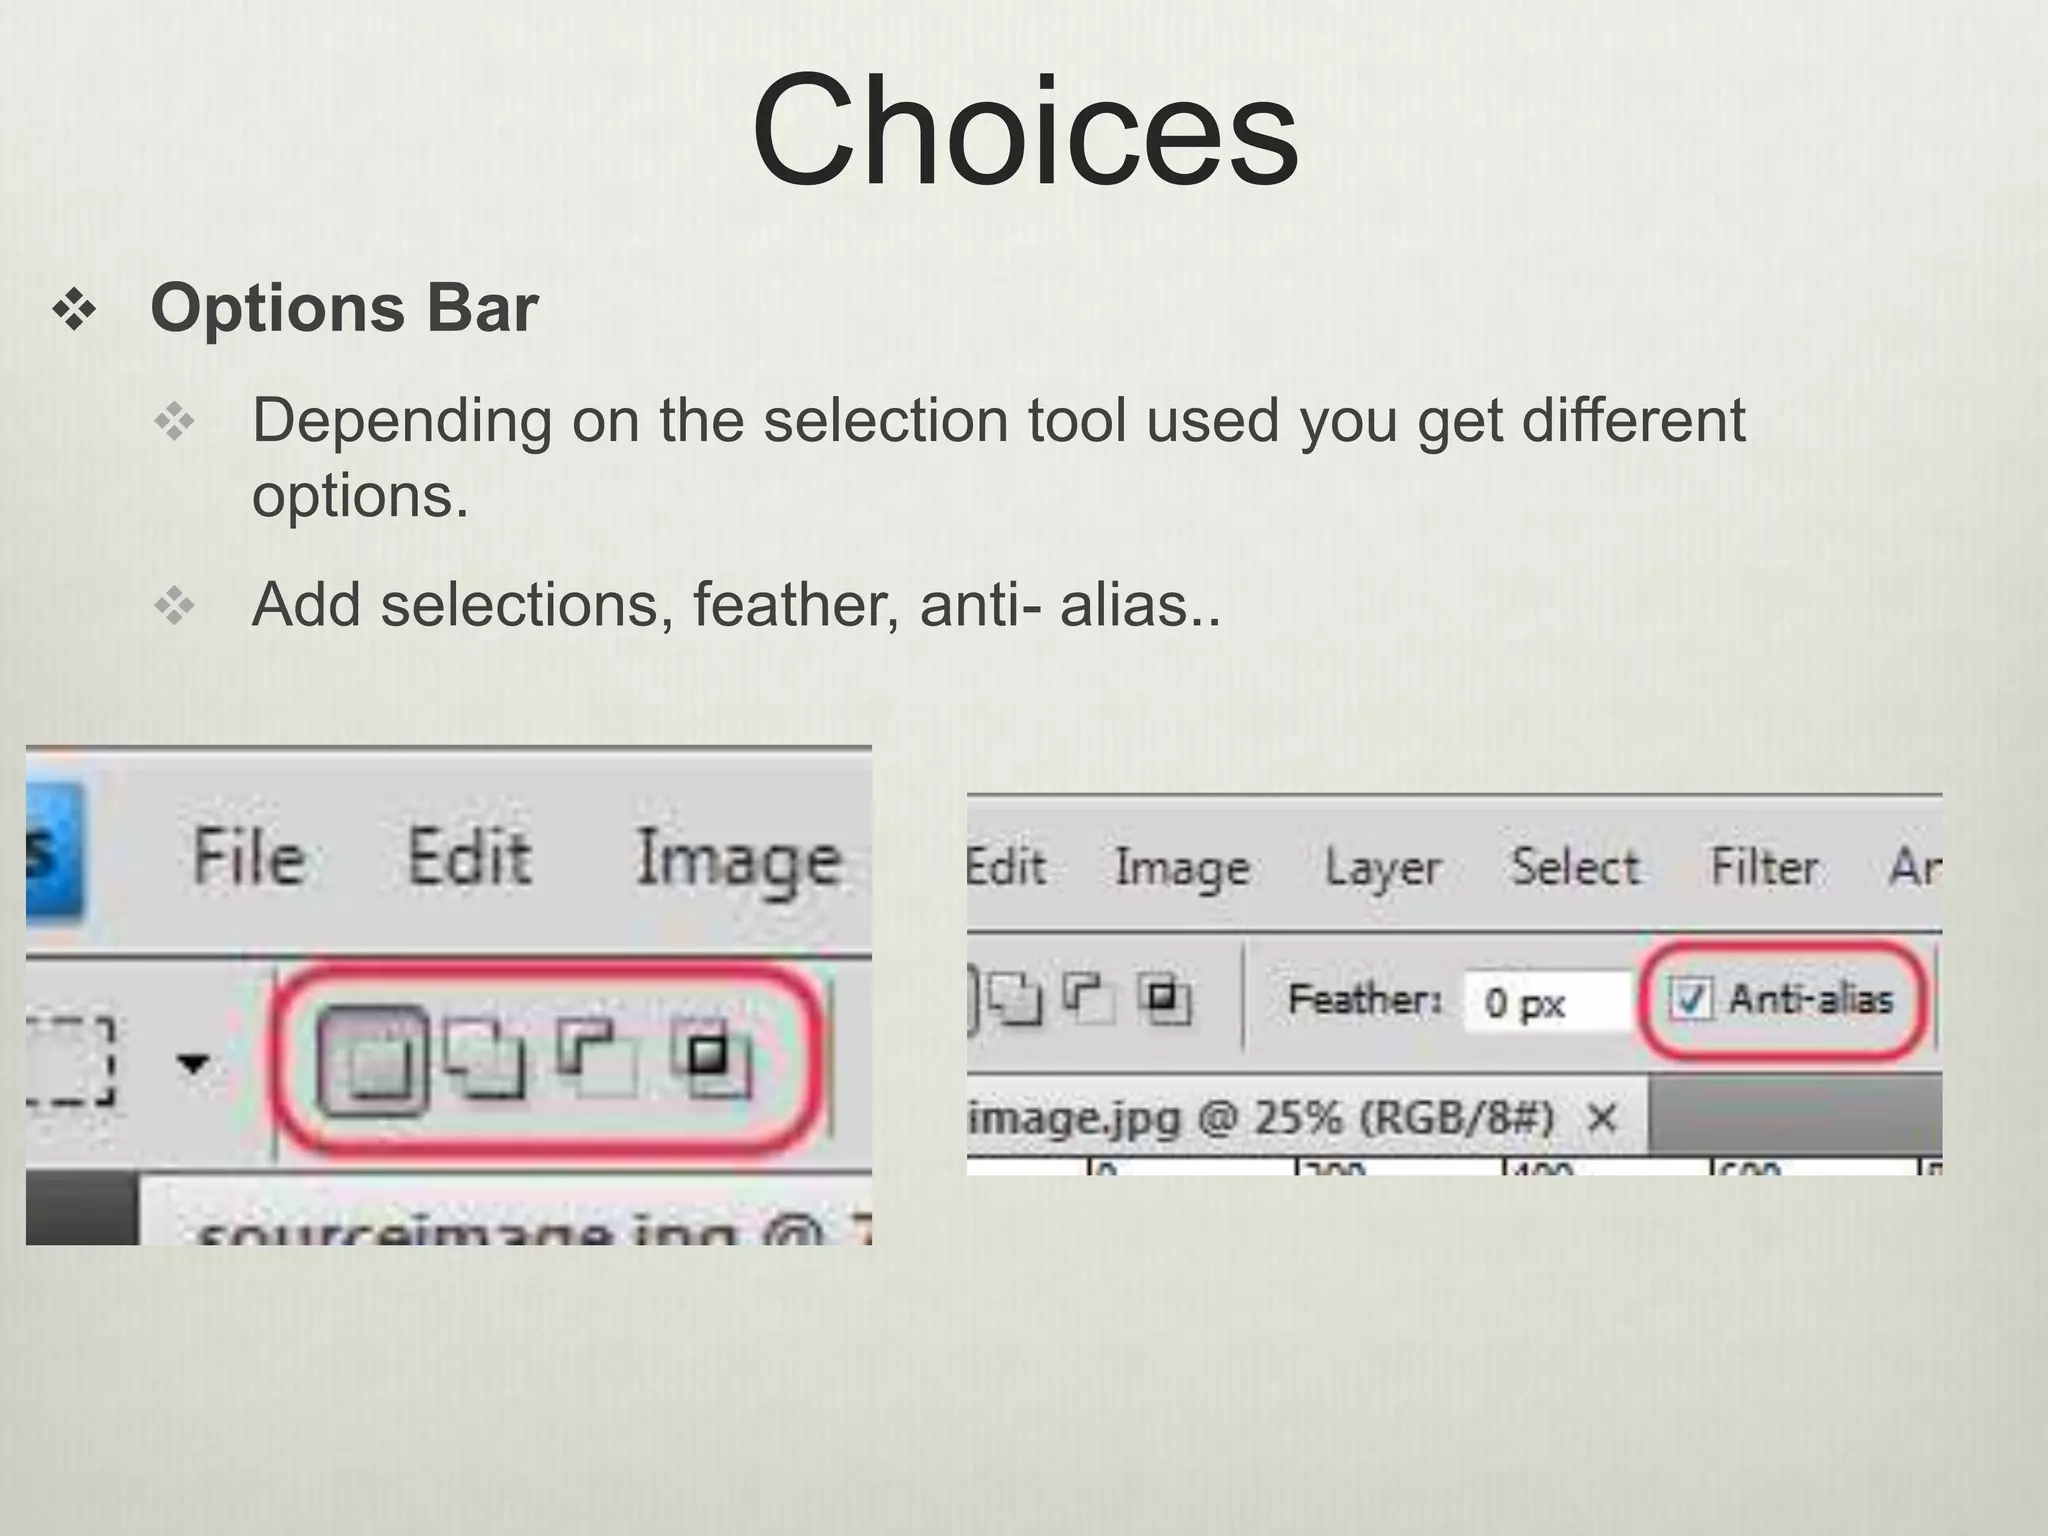
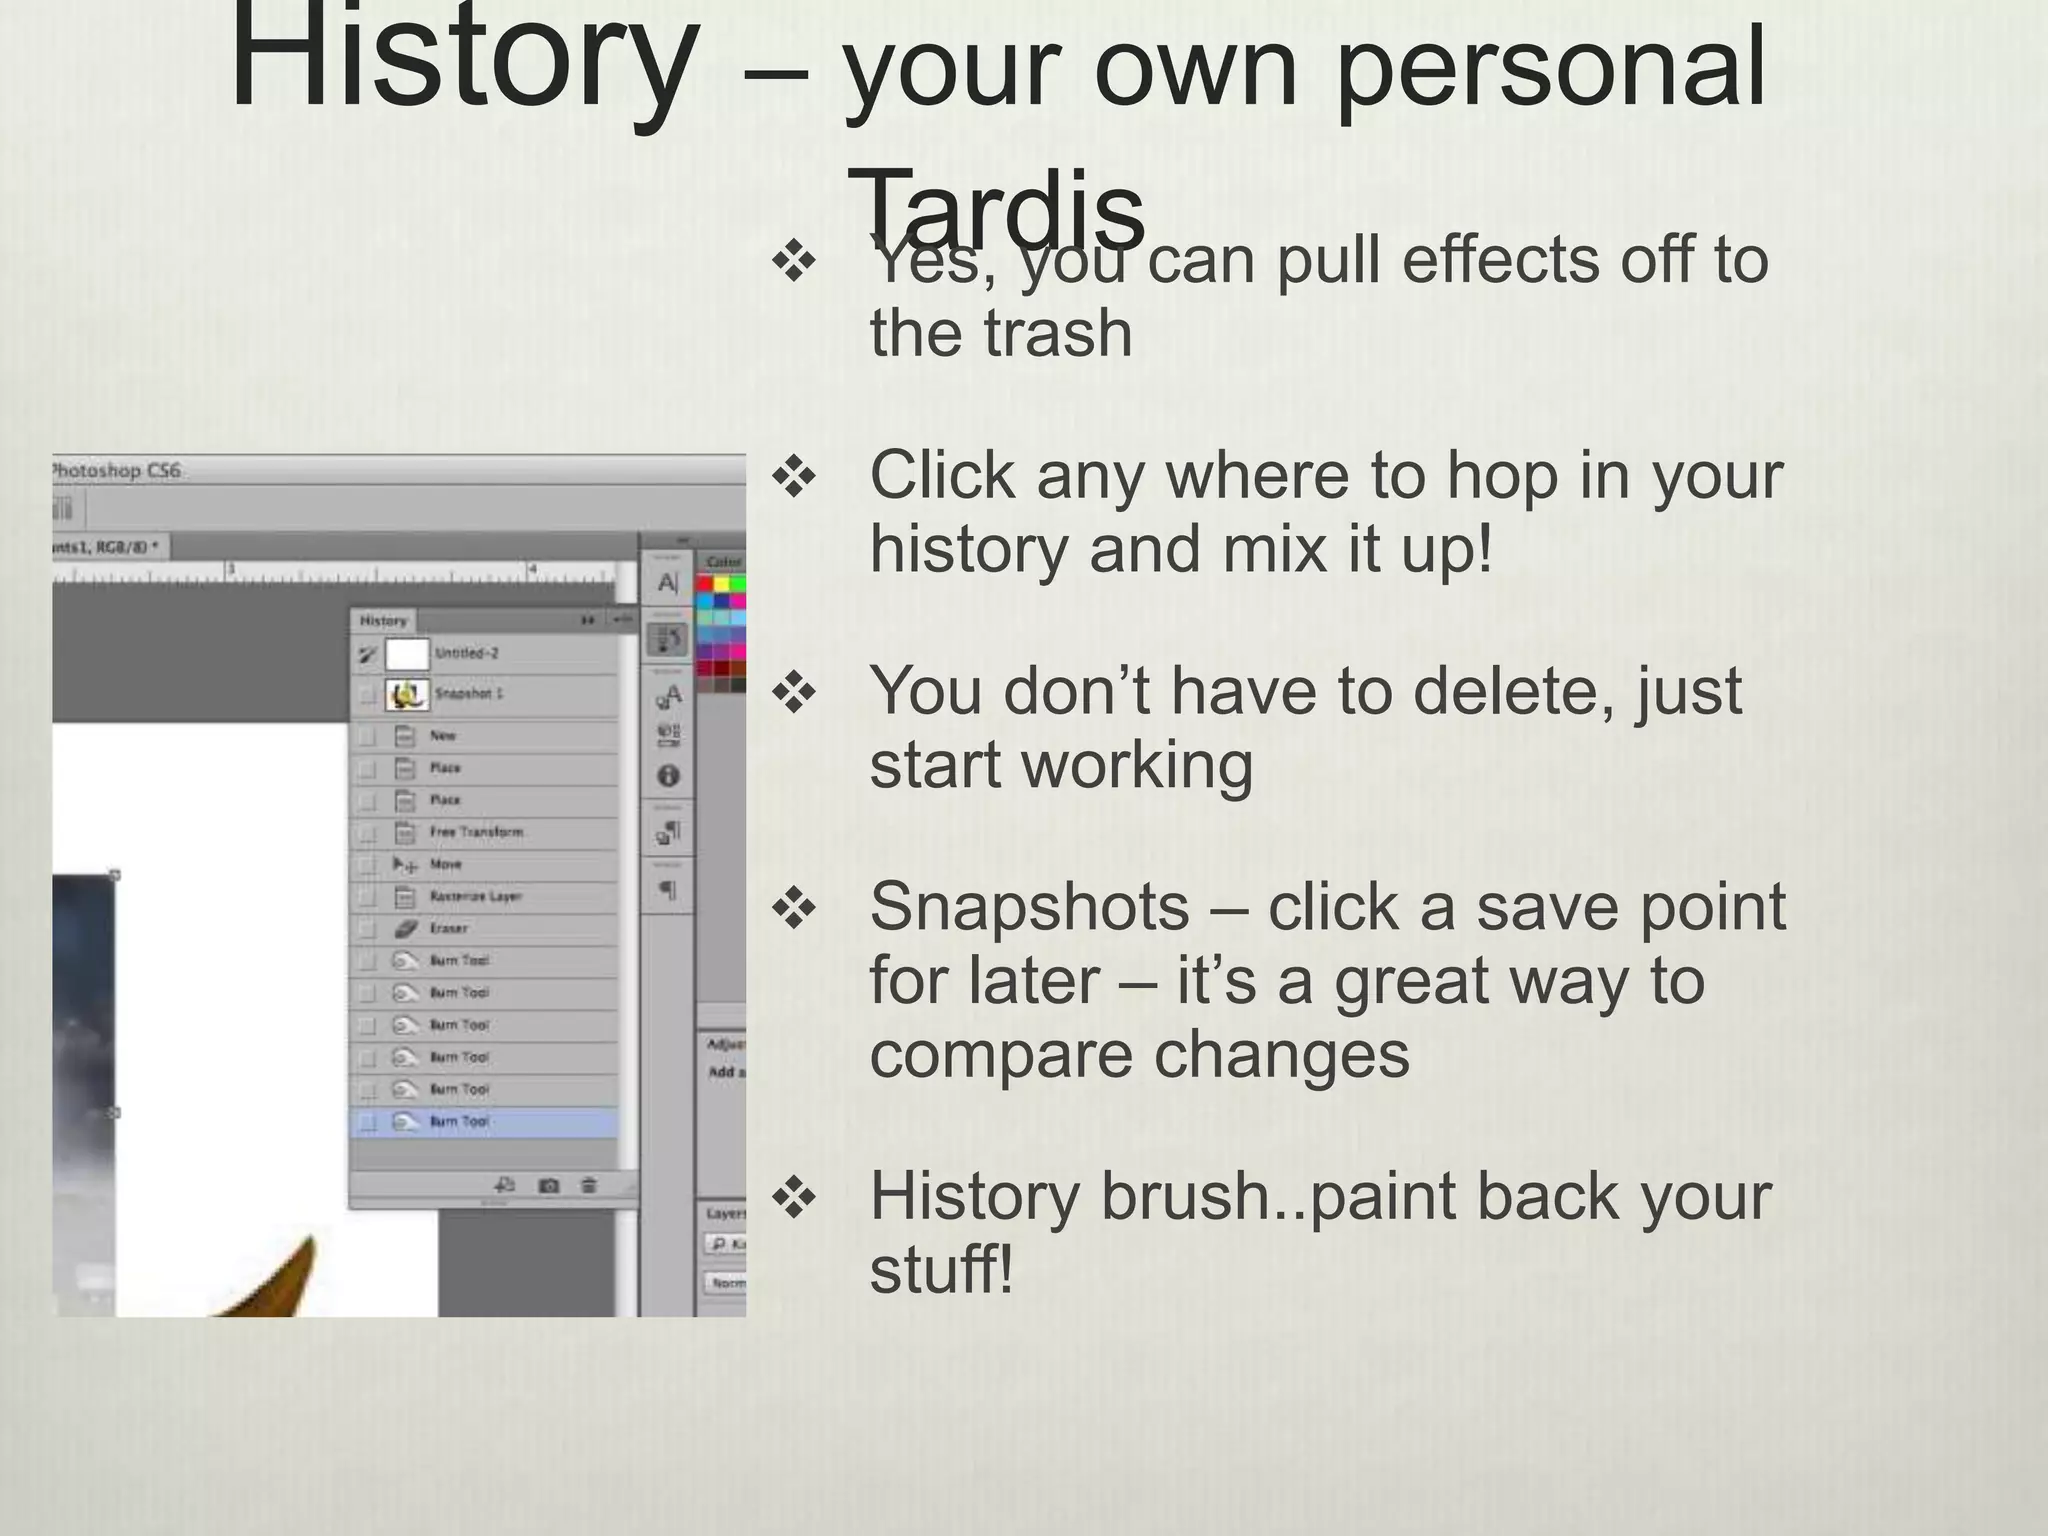
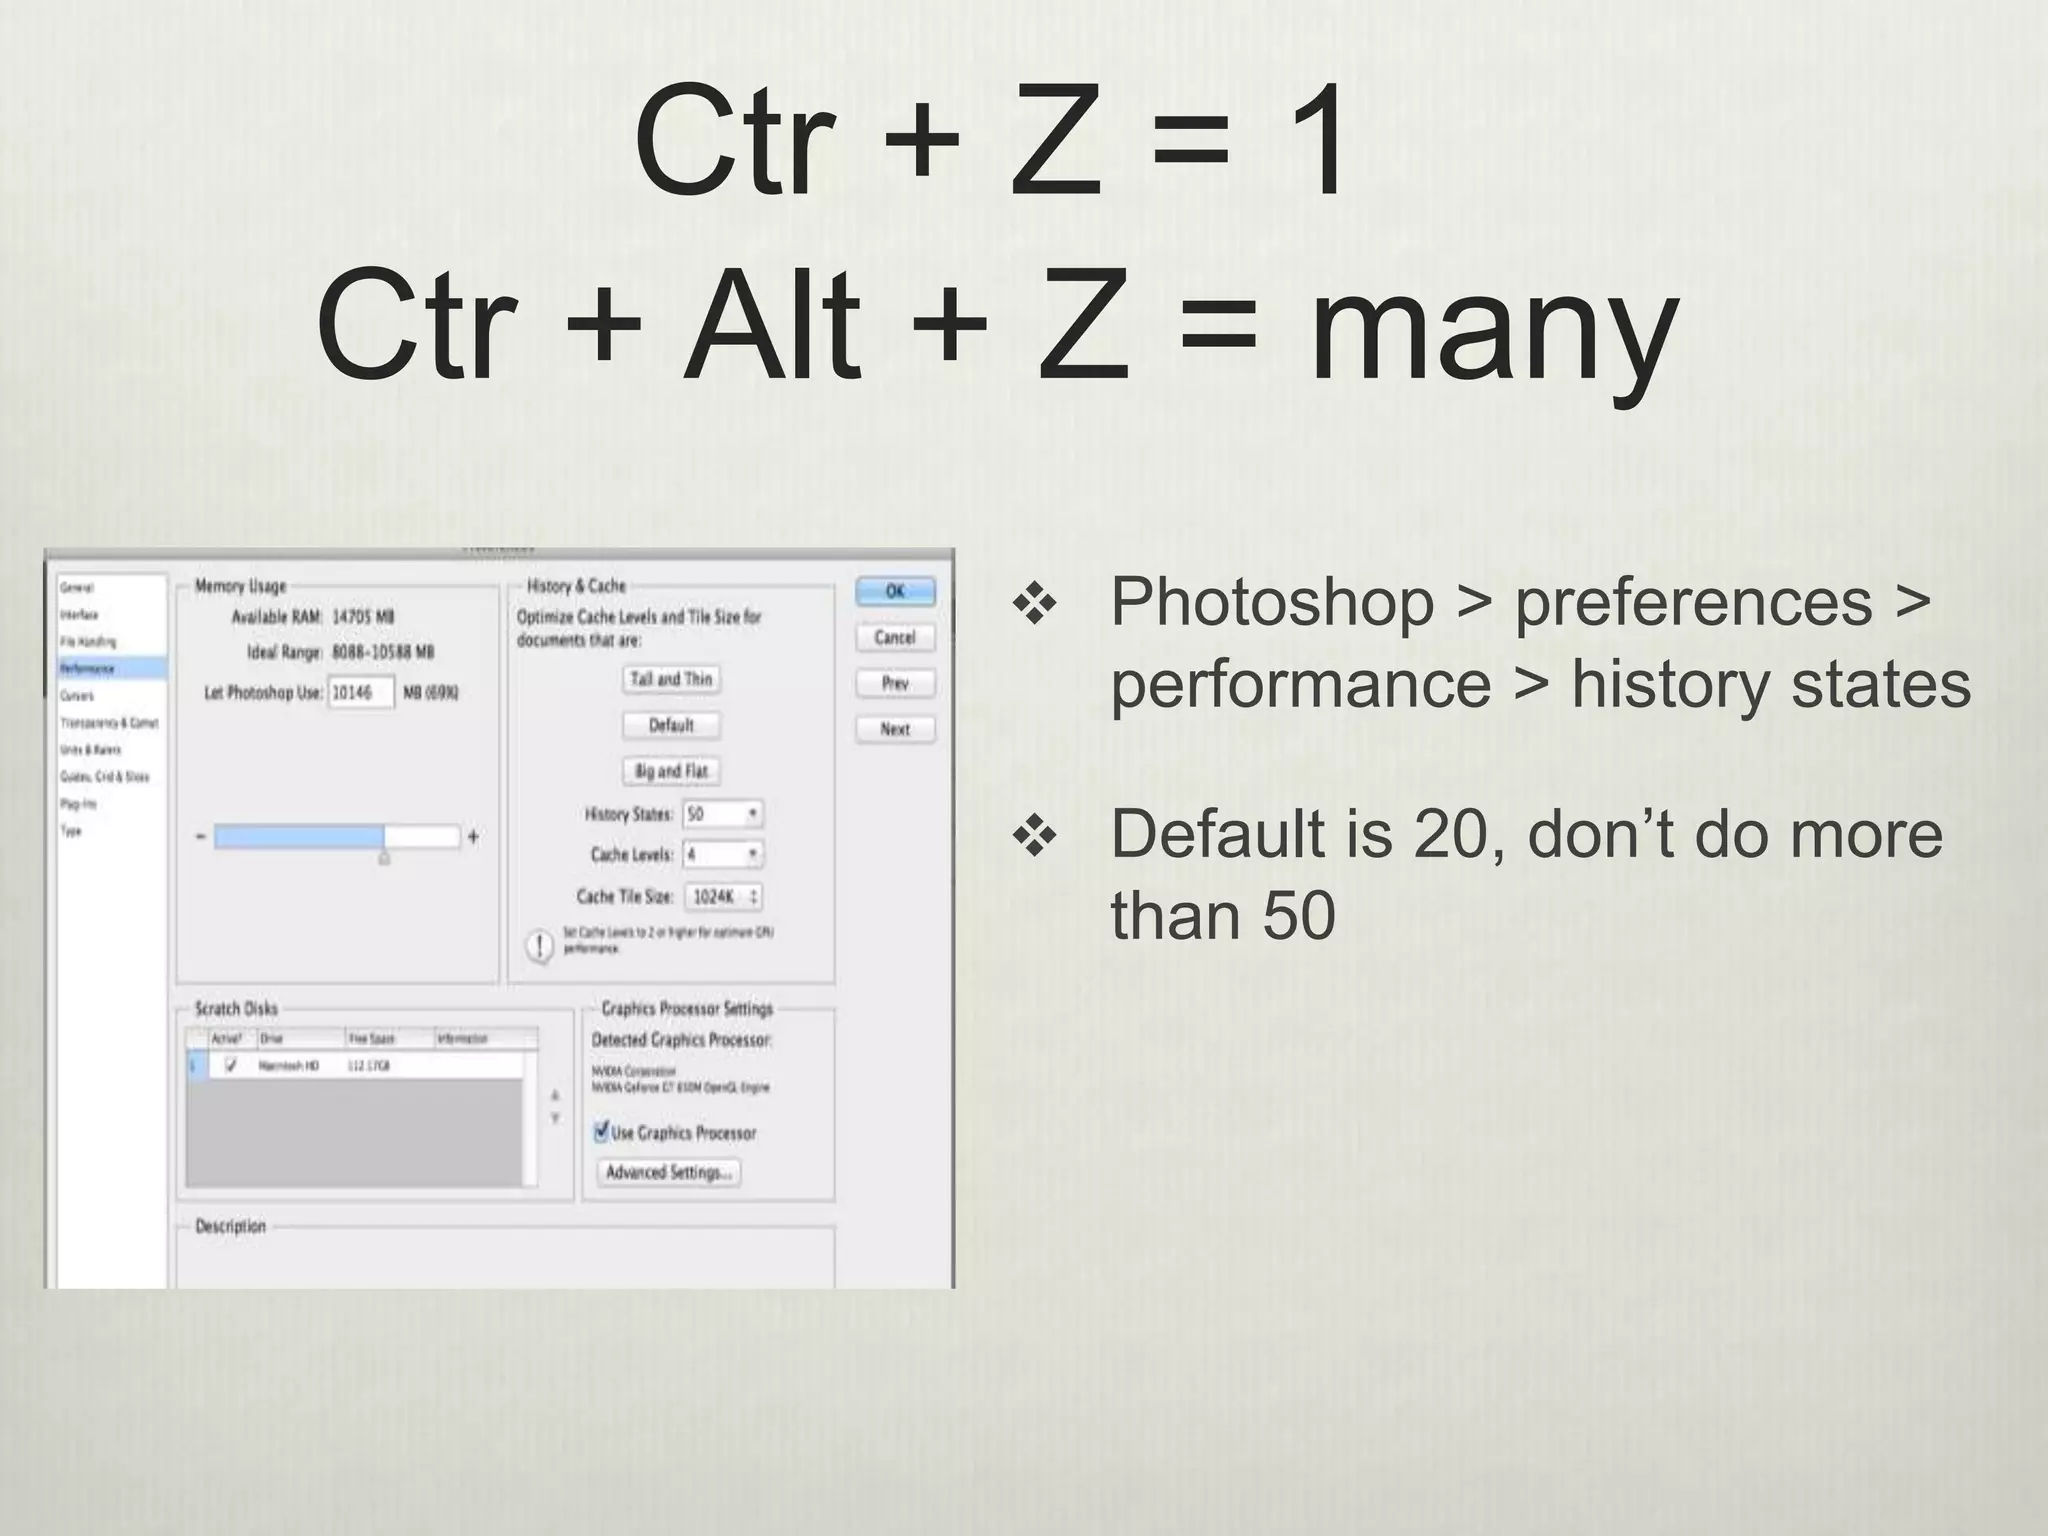
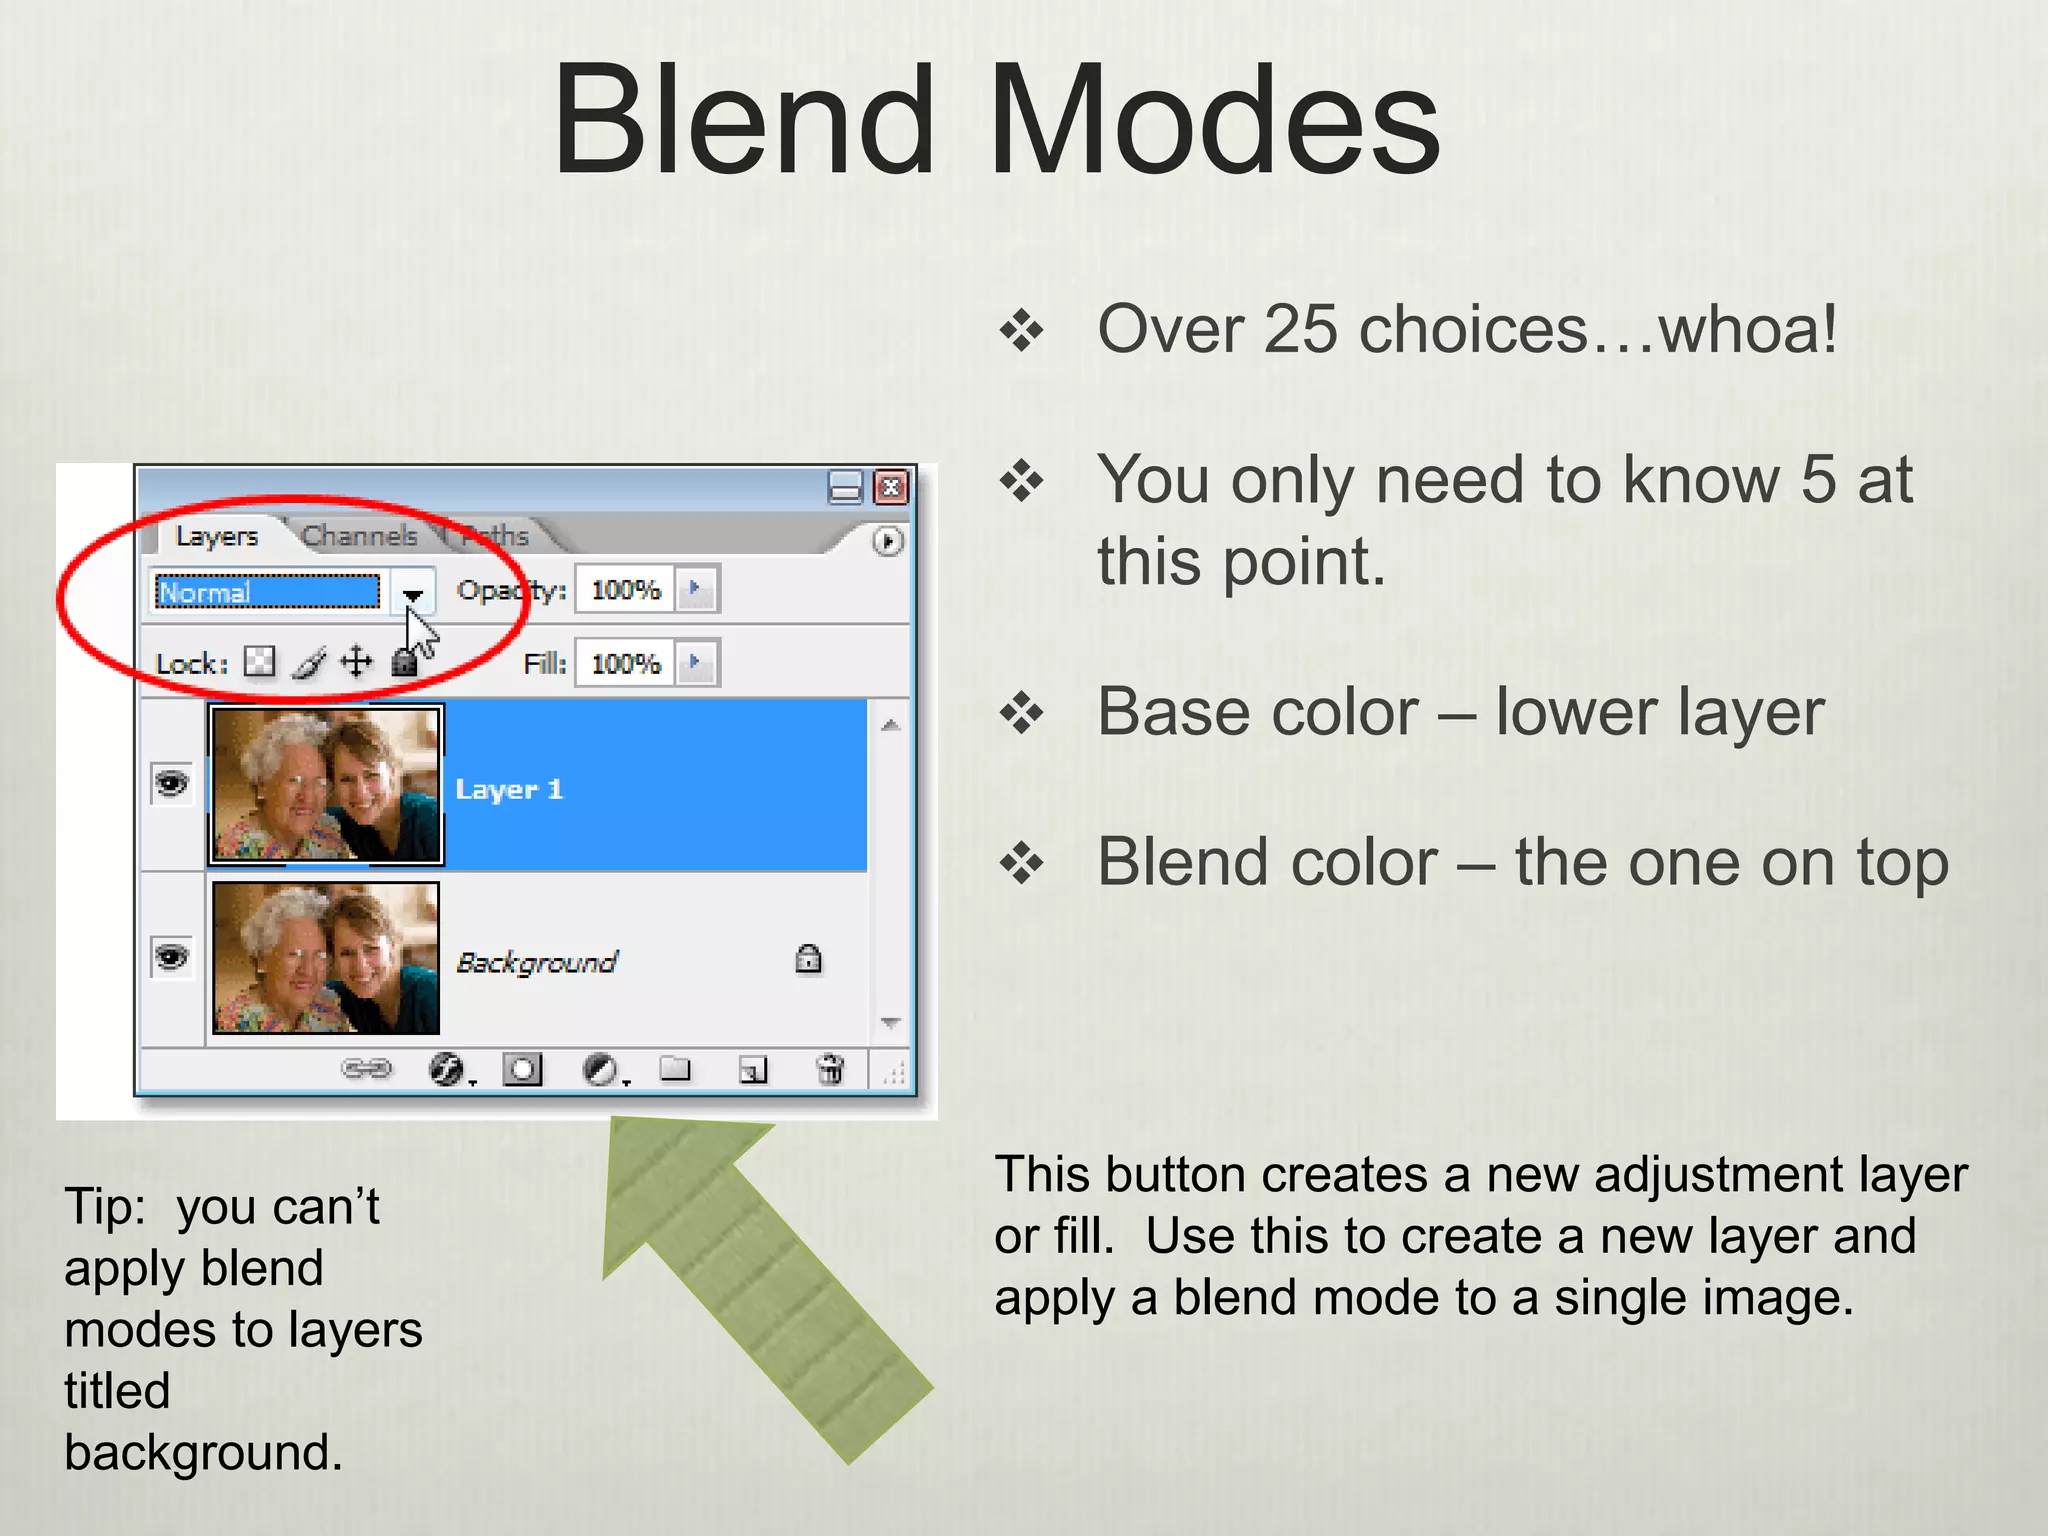
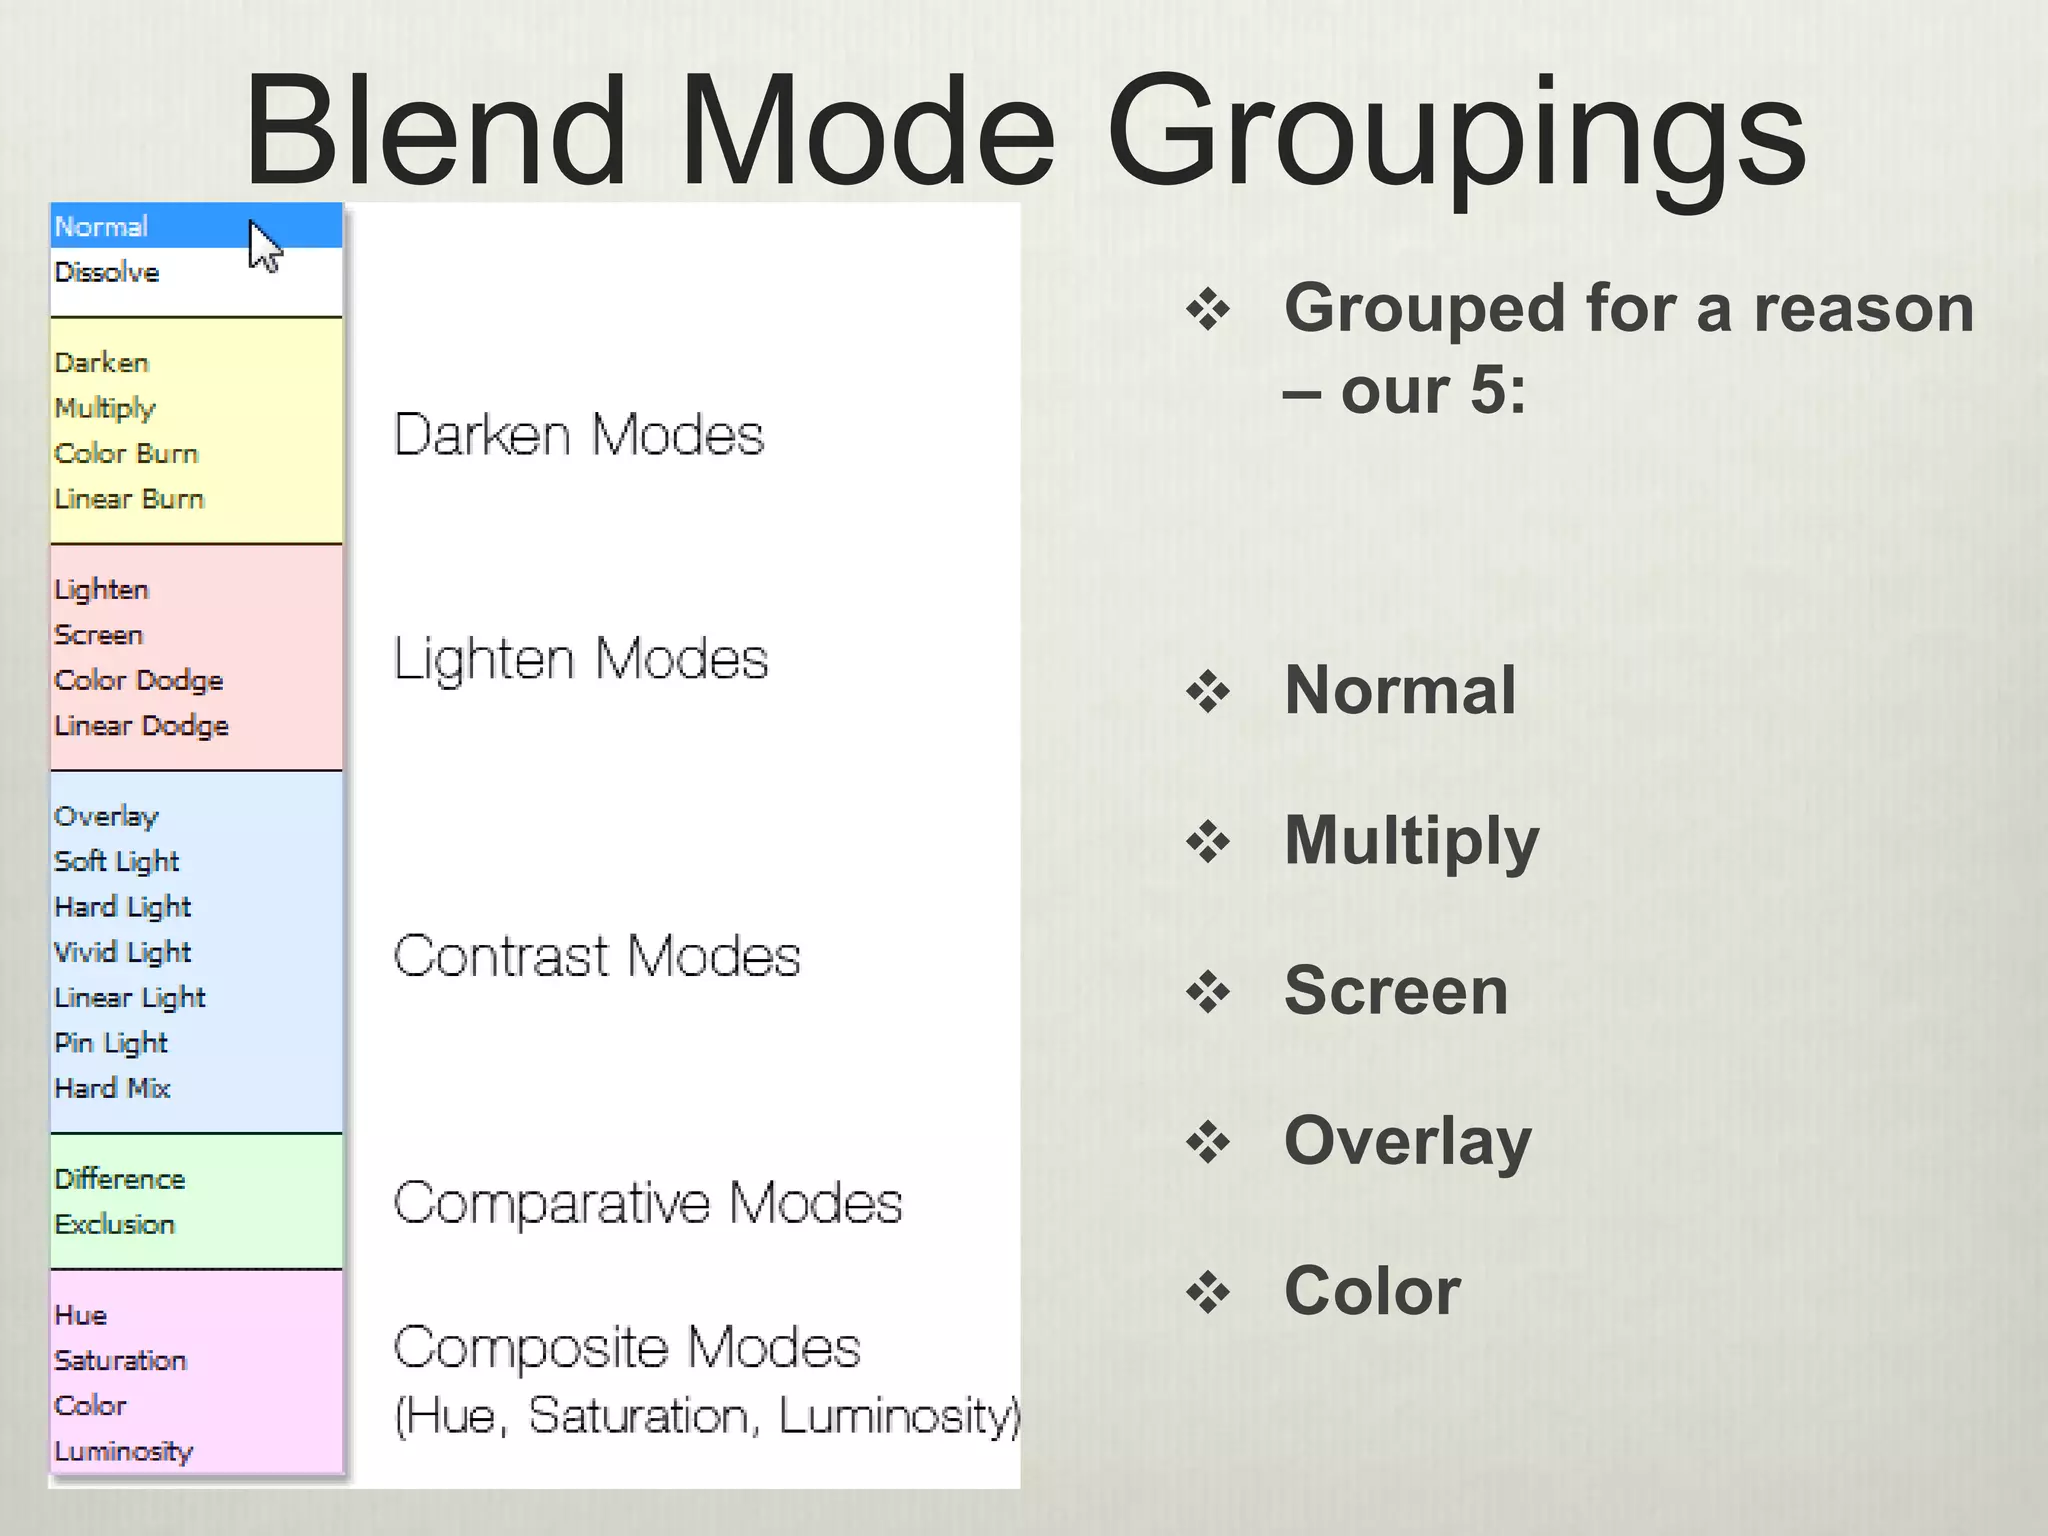
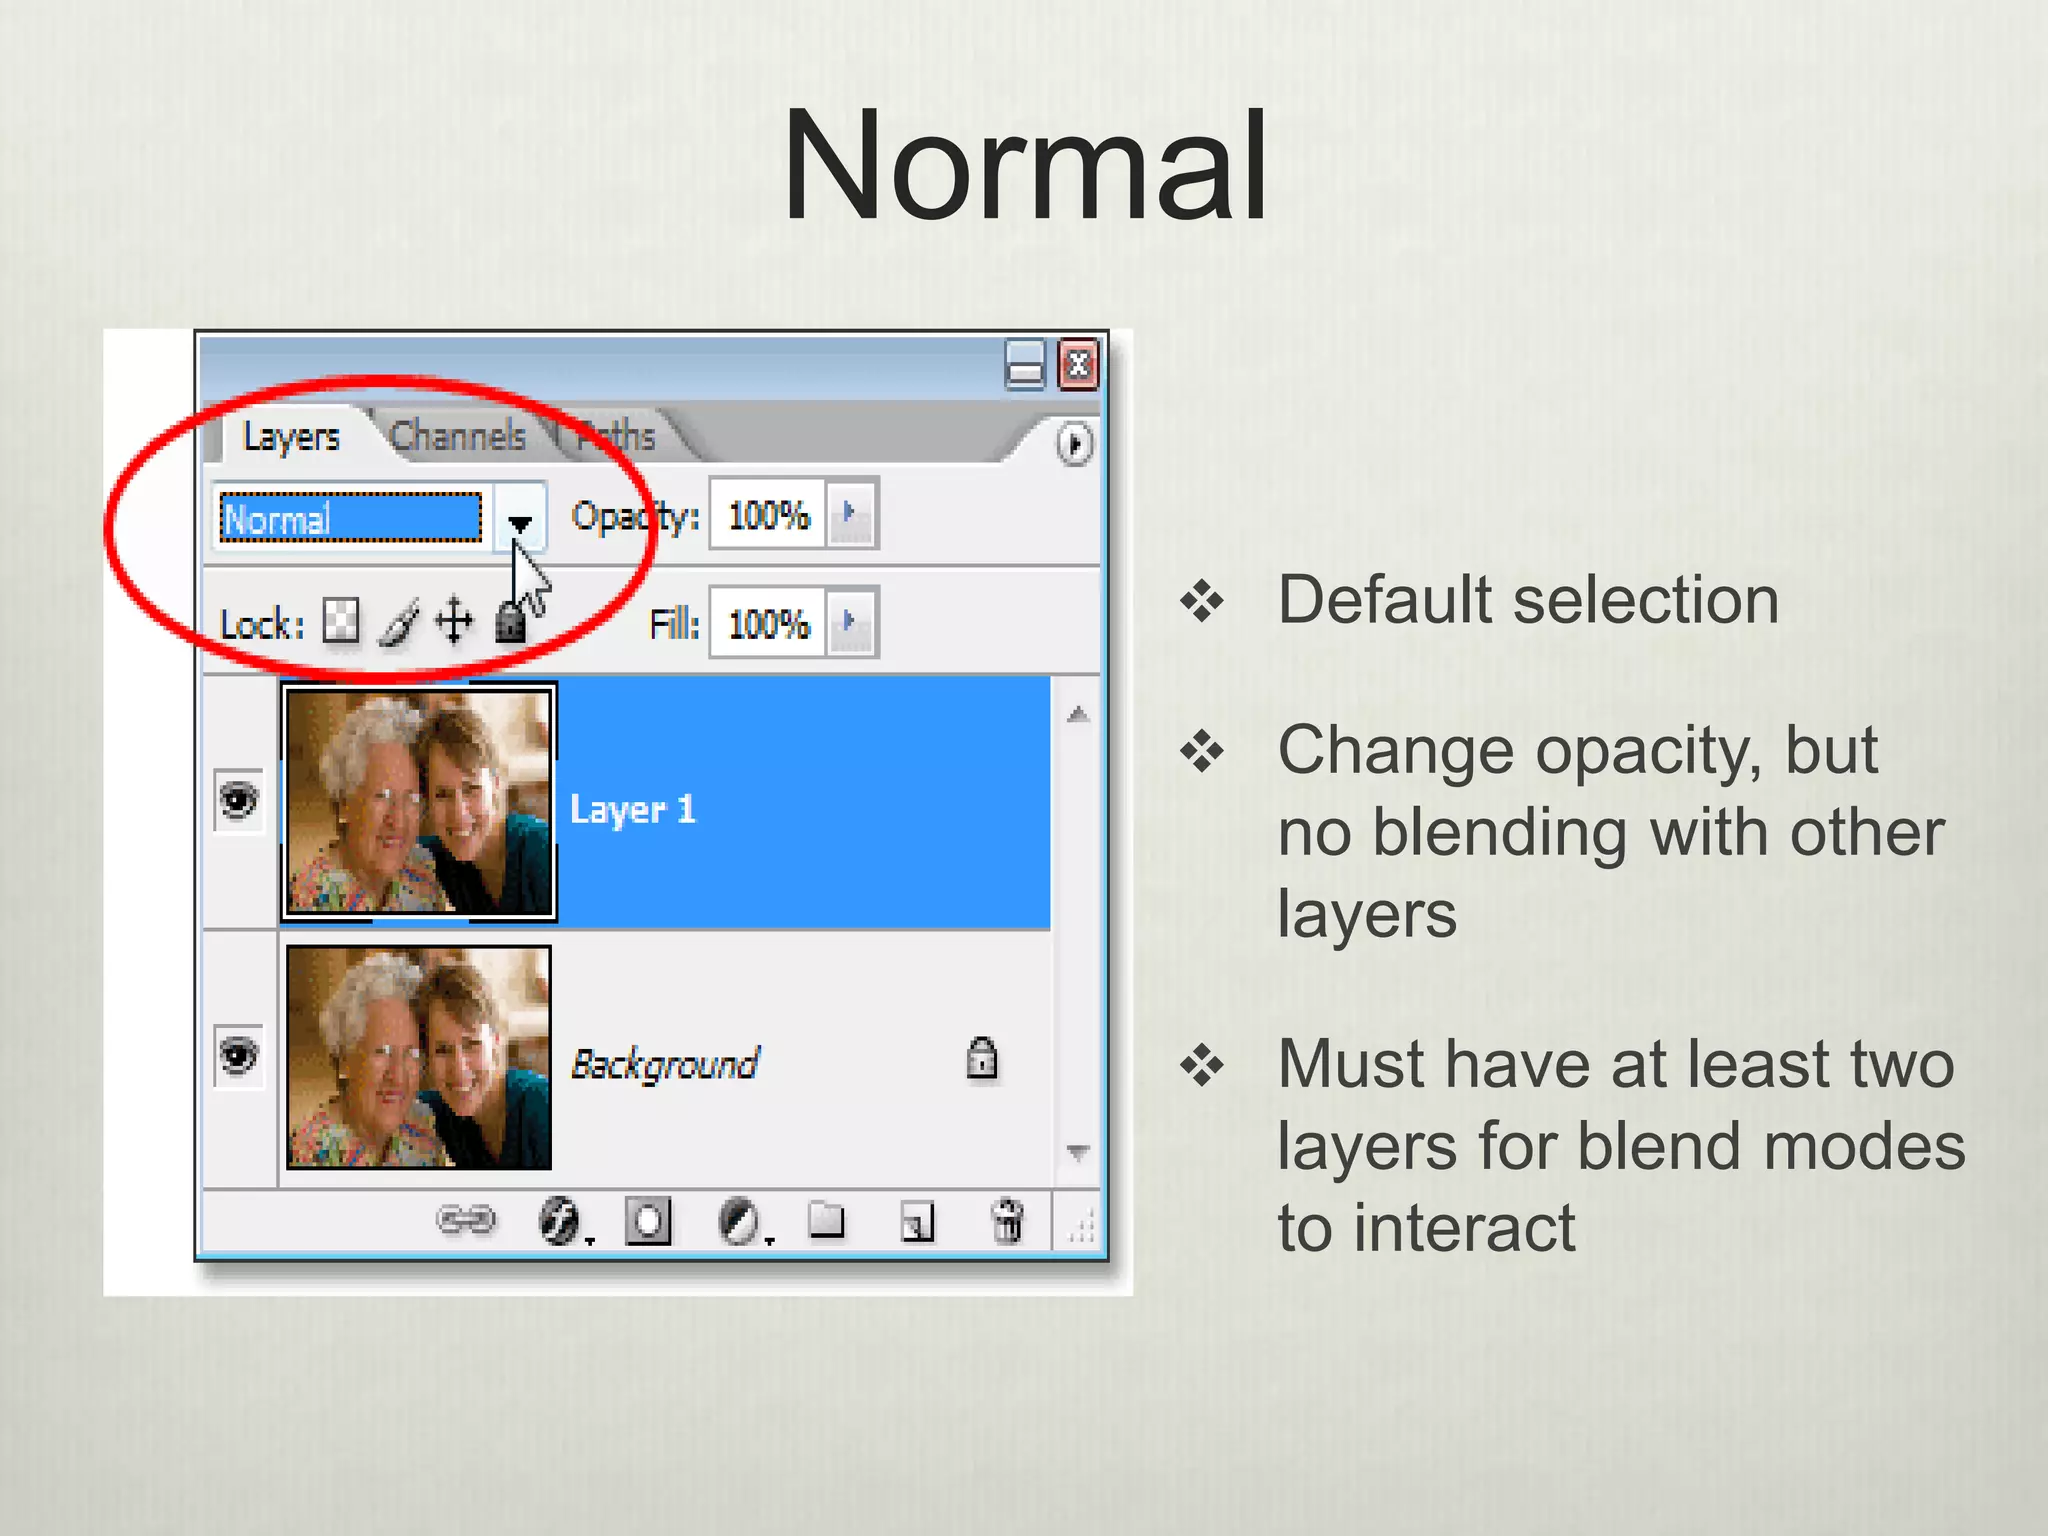
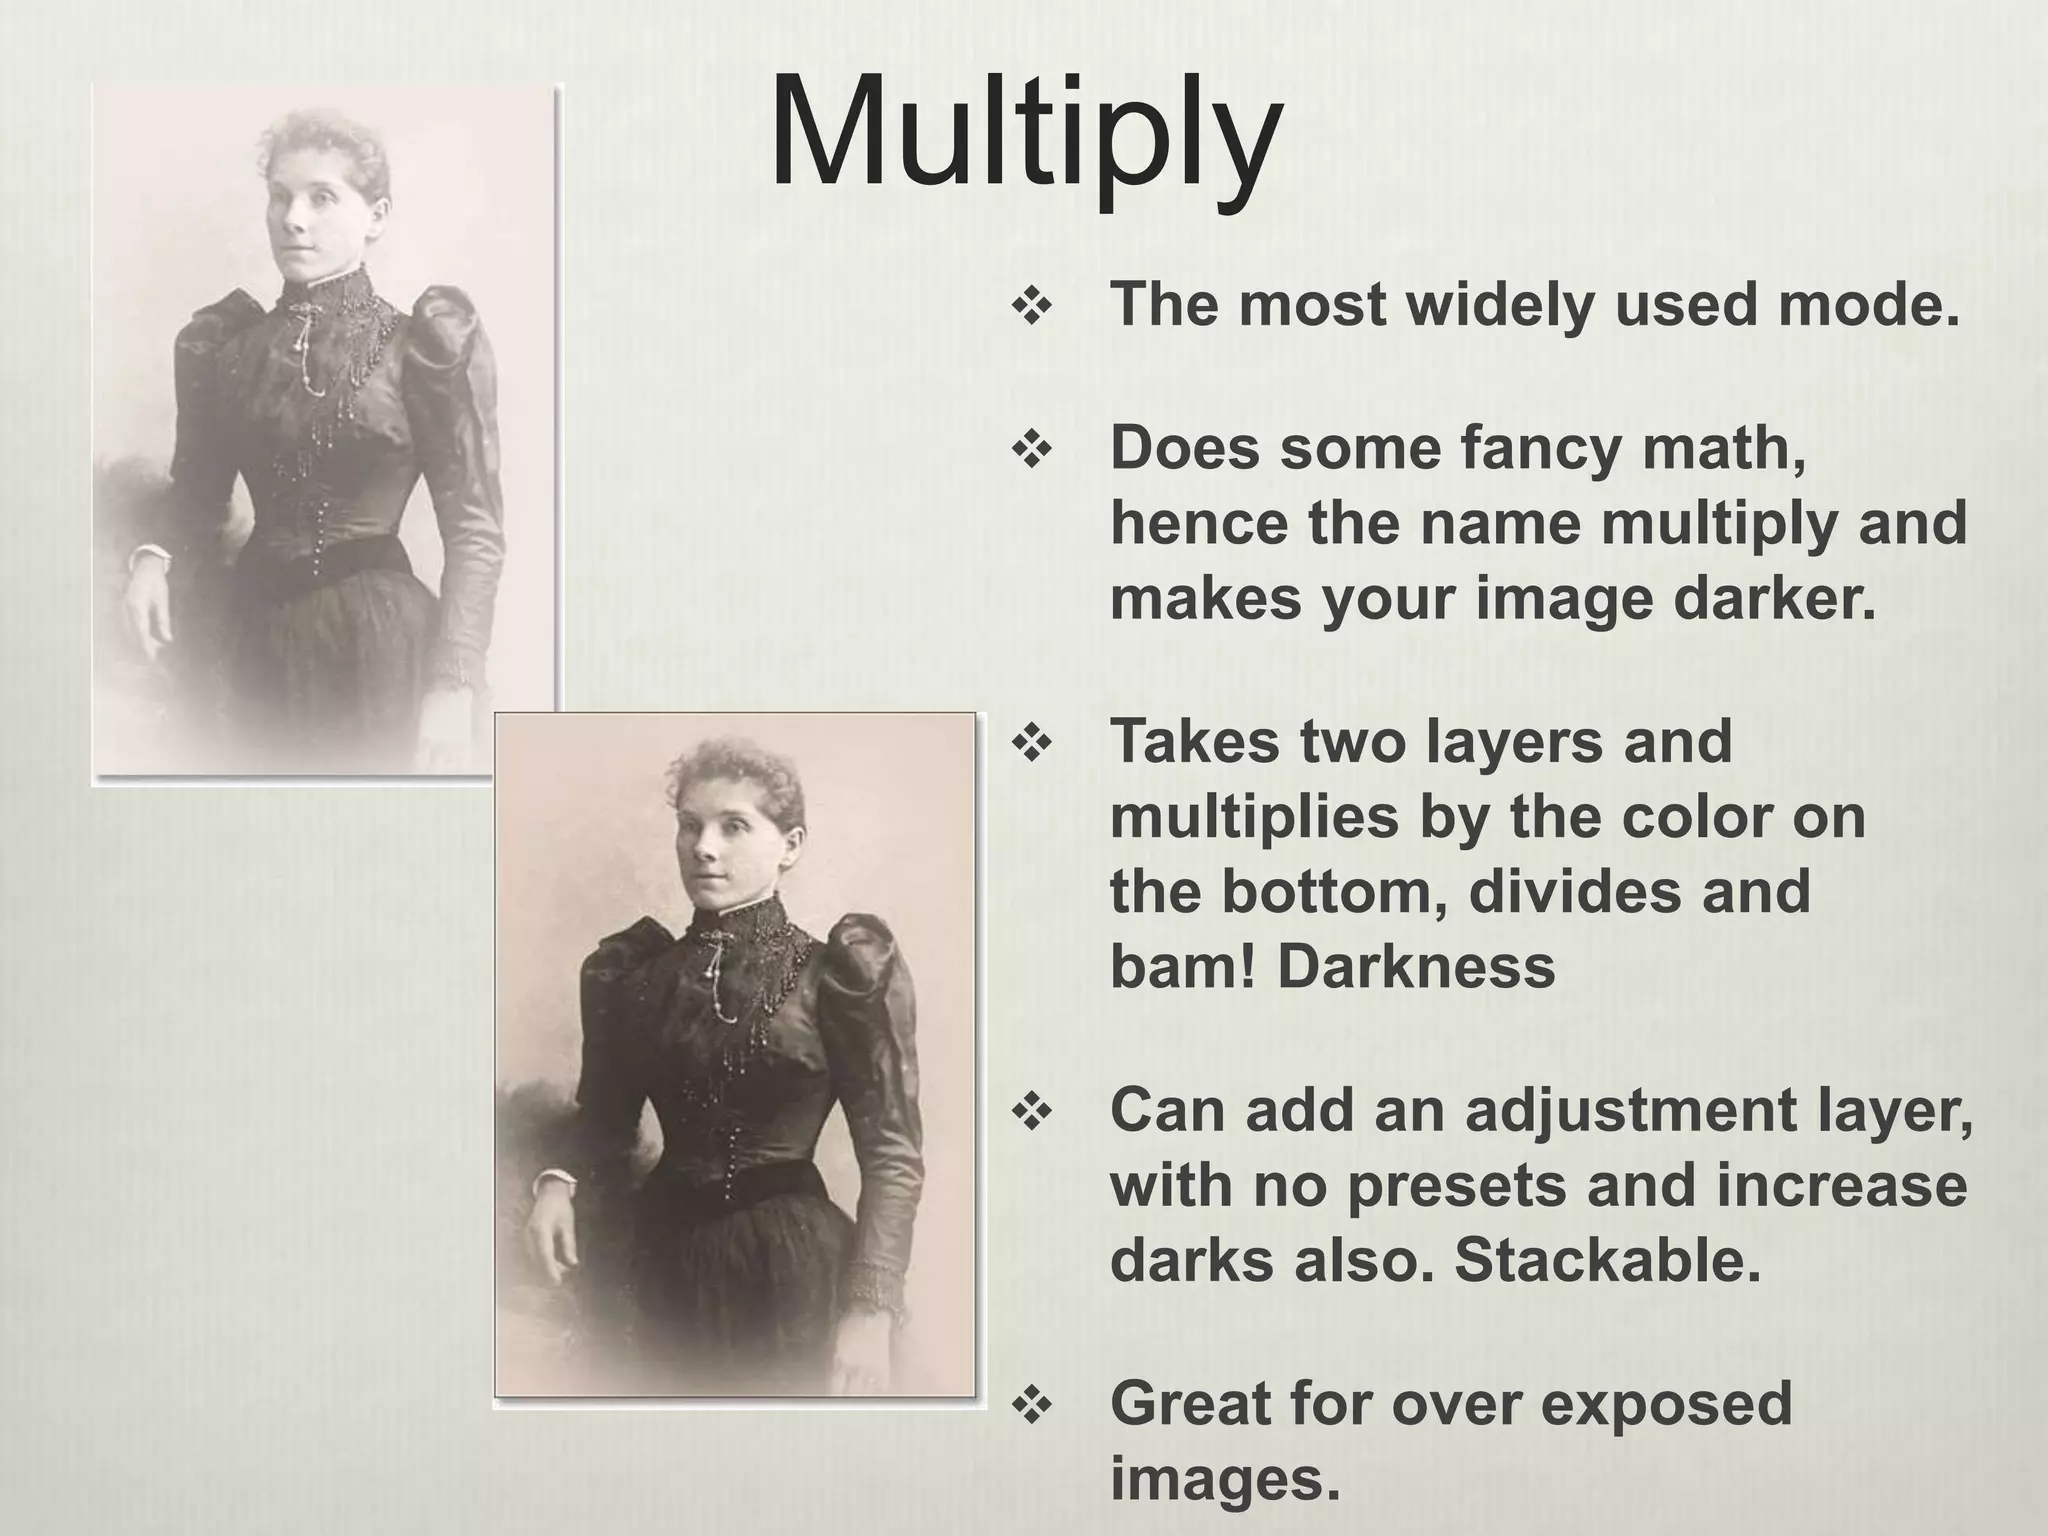
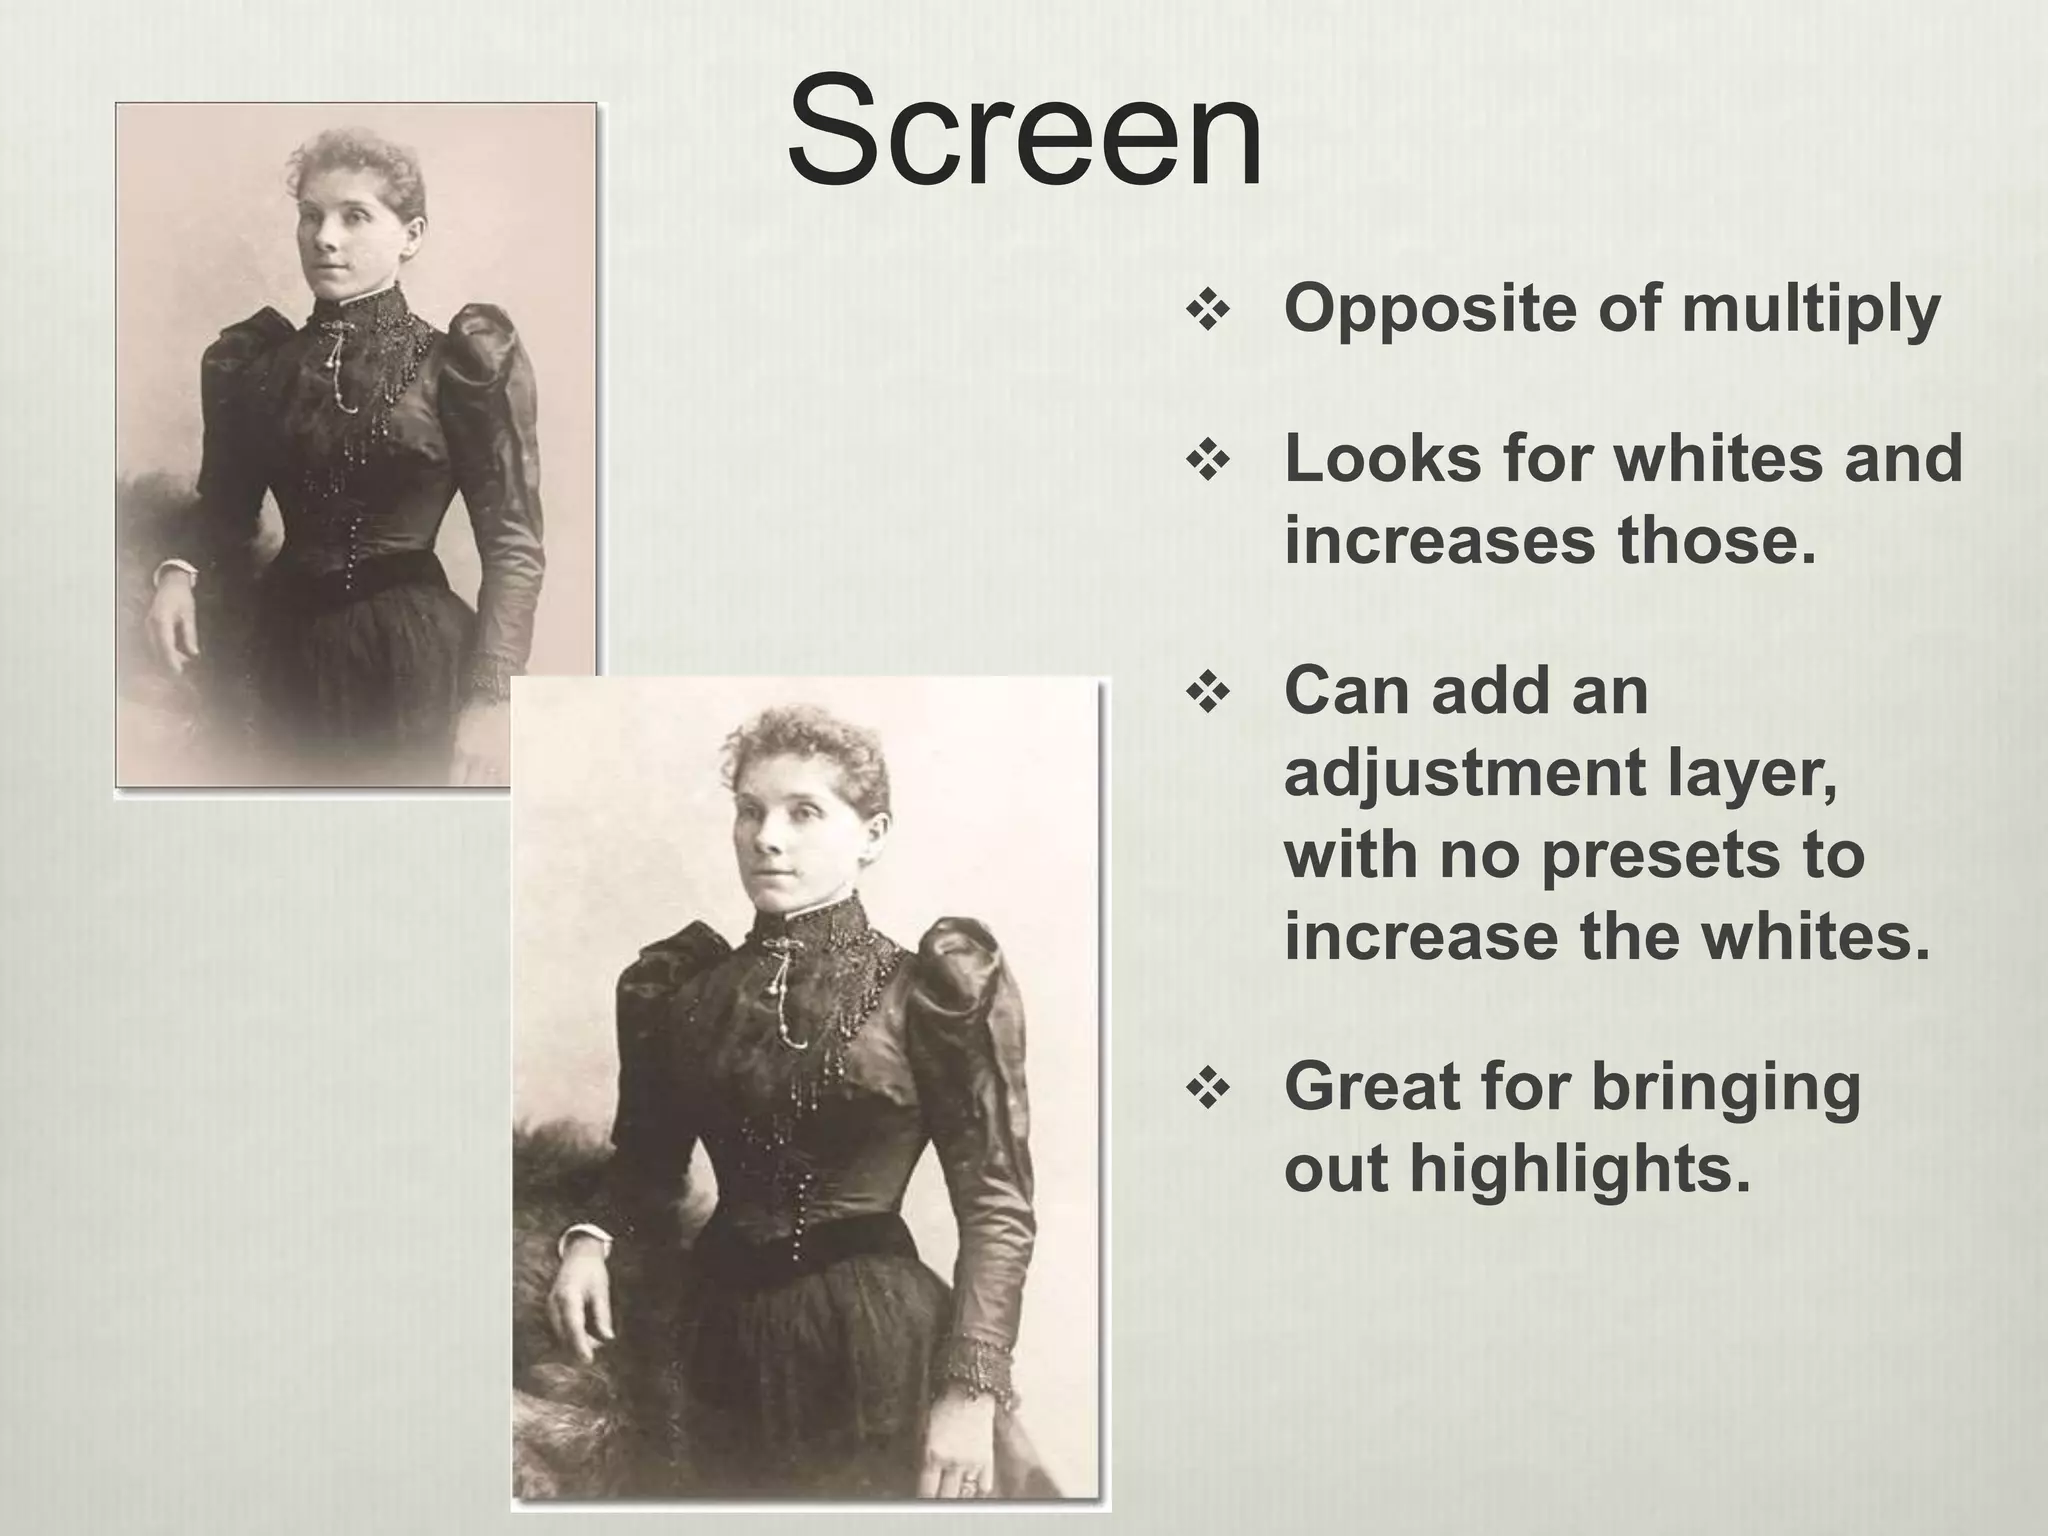
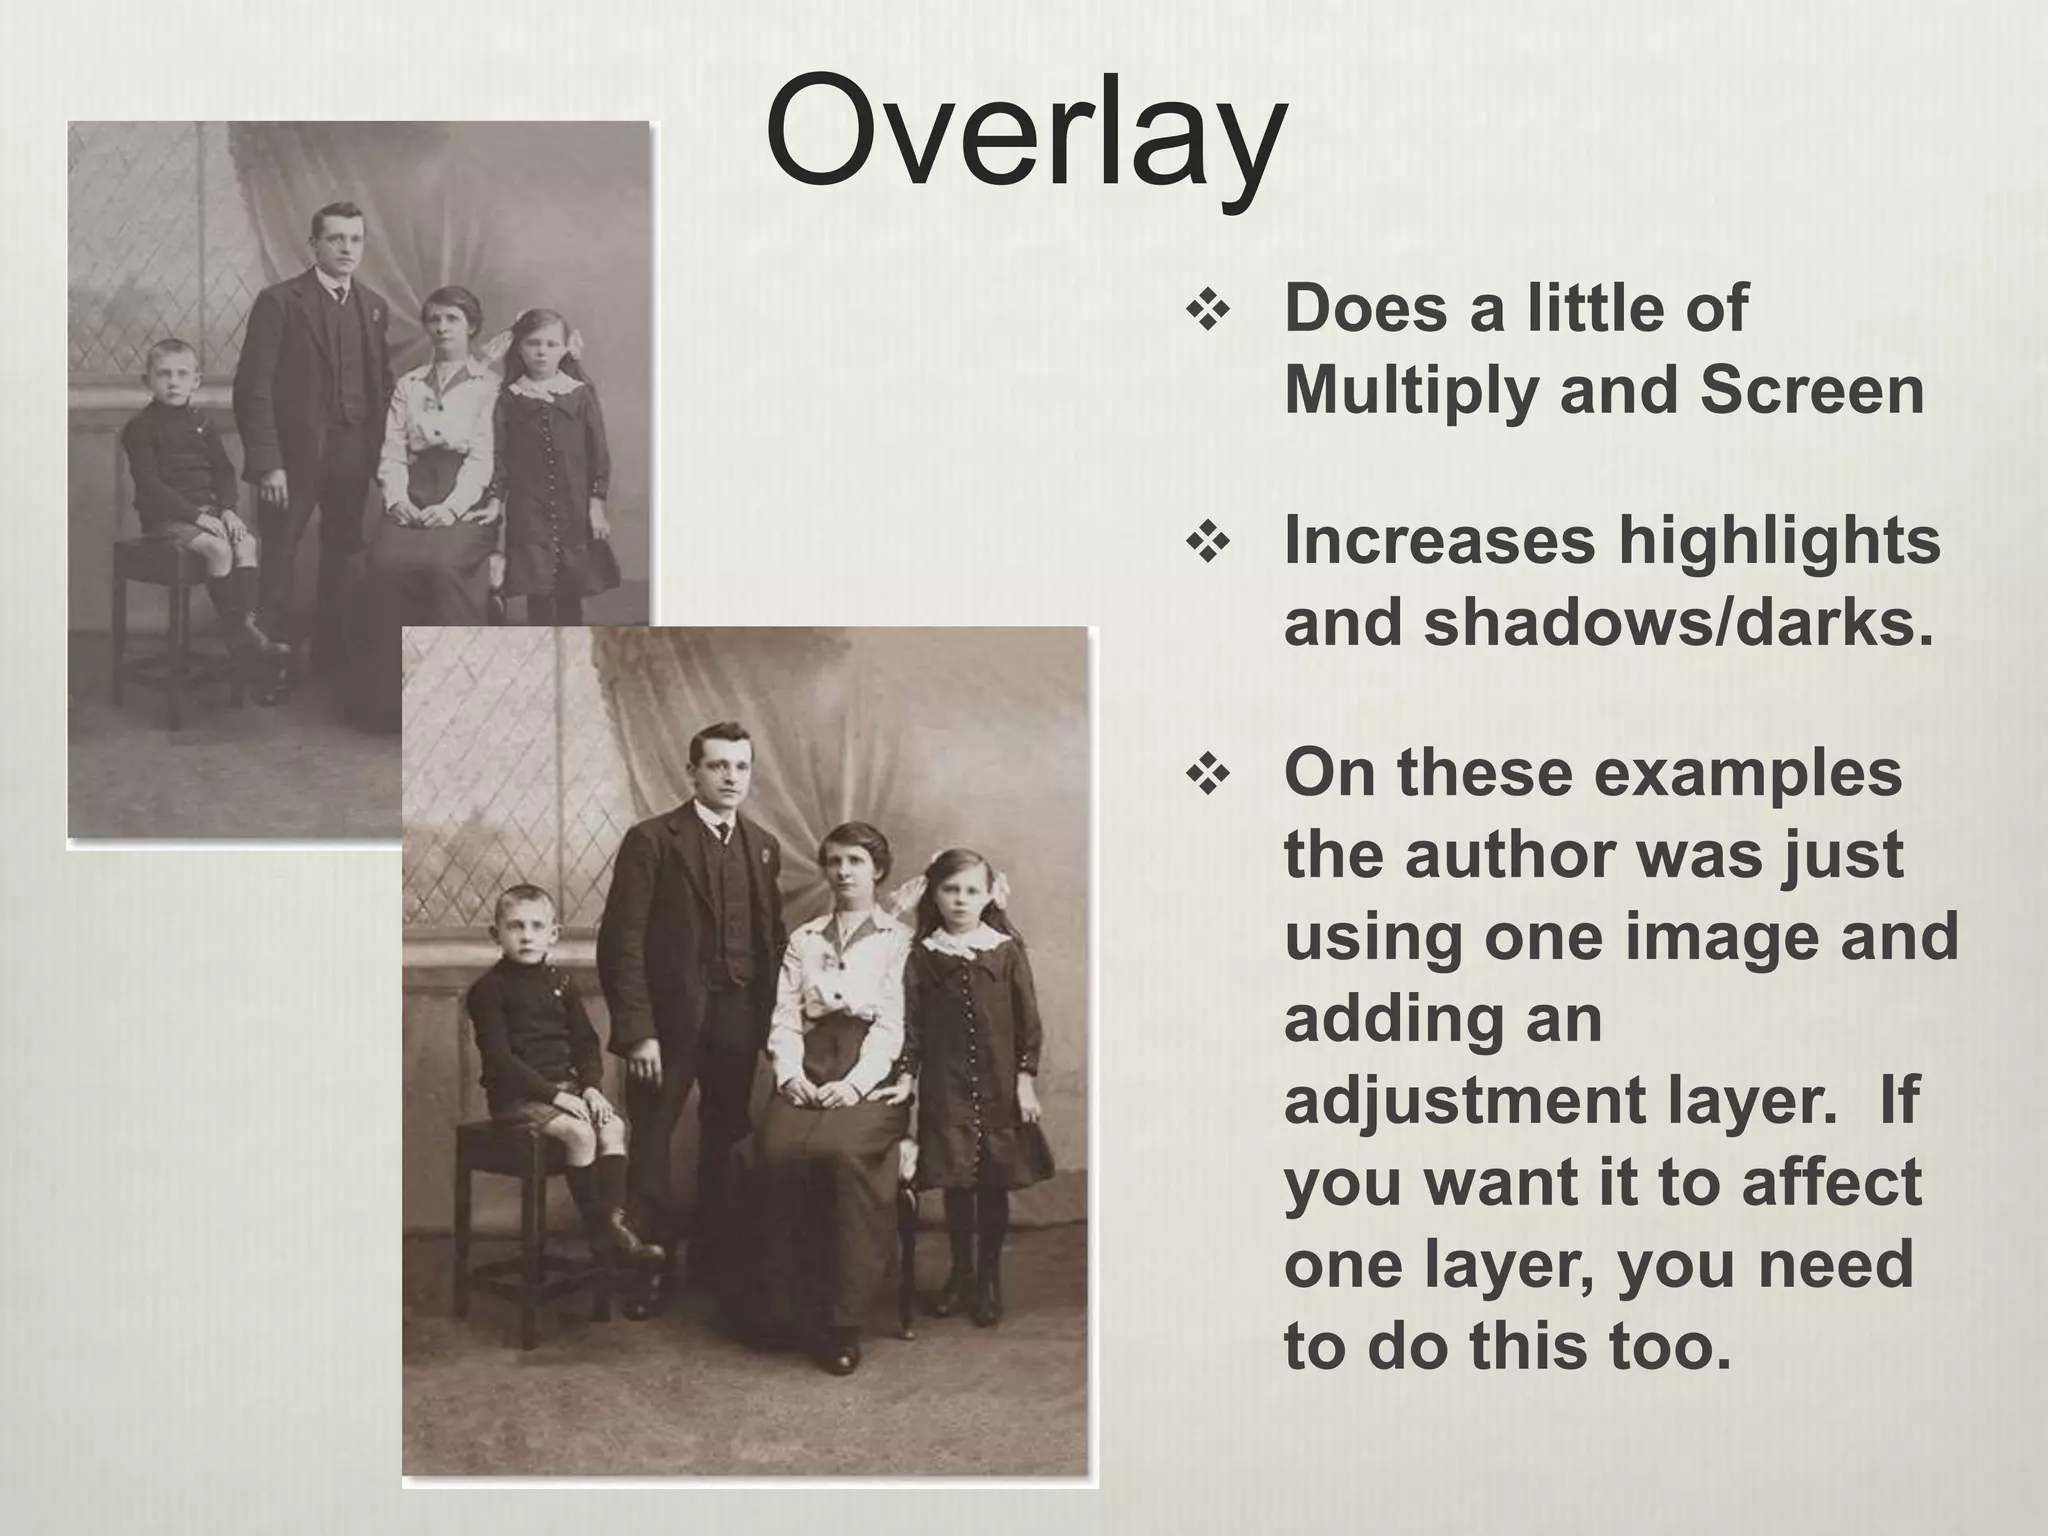
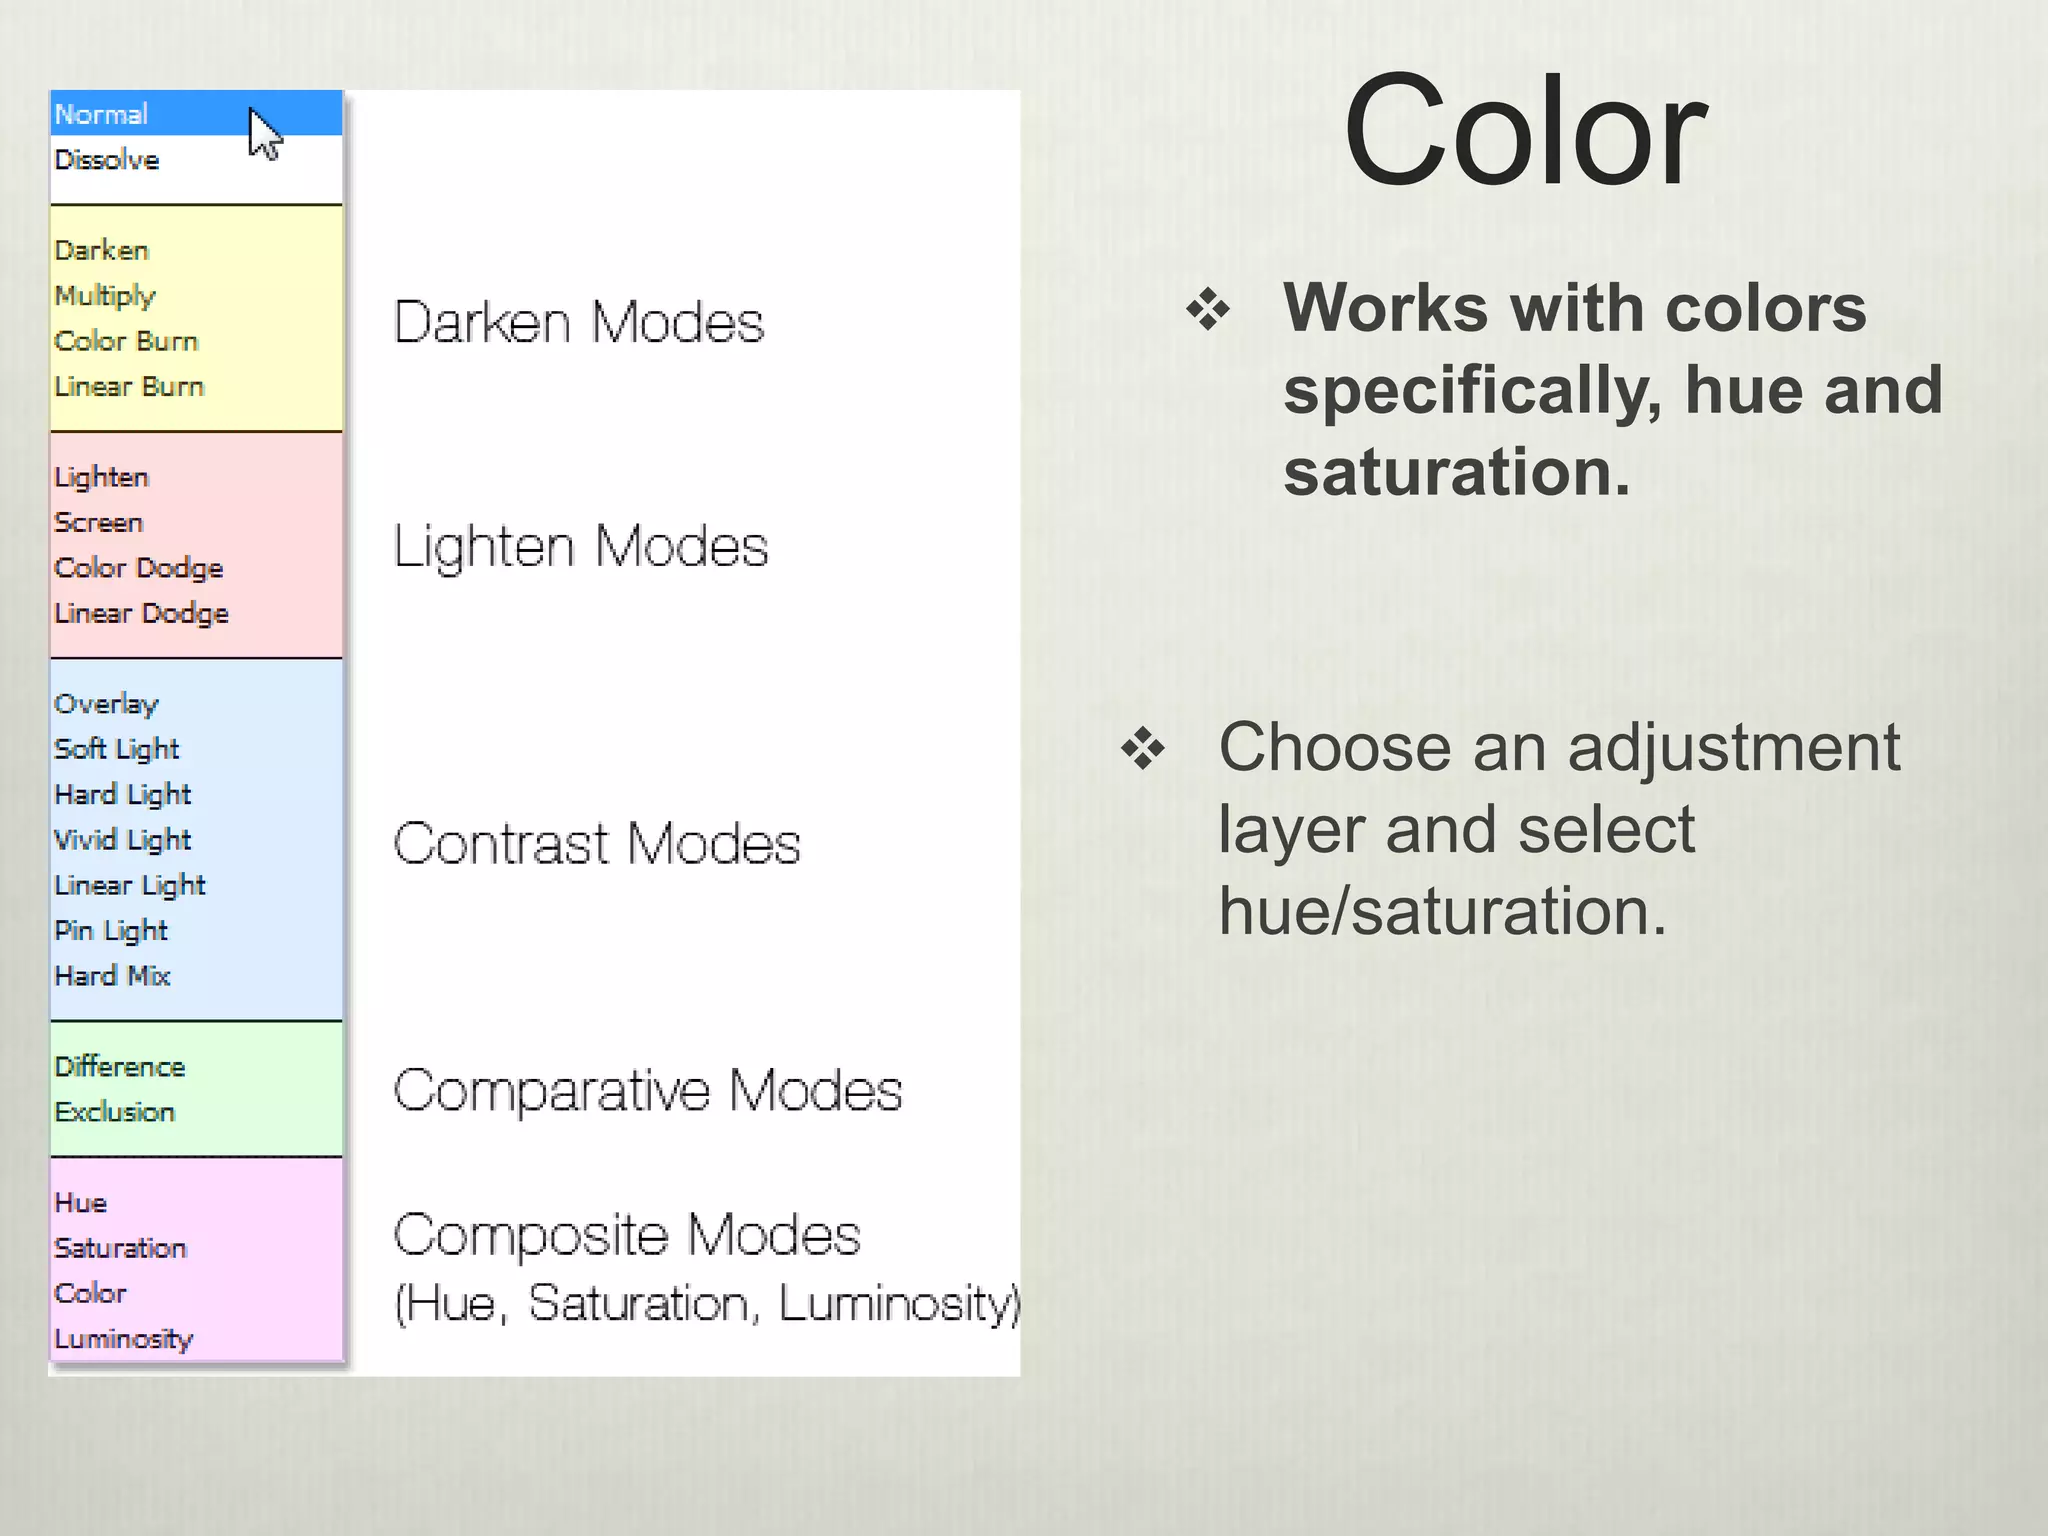
Photoshop Tips
A few basics to keep you rolling along!
Selection Tools
 Geometric (think shapes)
 Rectangular – selects a rectangular area
 Elliptical – selects a elliptical area
 Single Row – selects 1 pixel high row
 Single Column – selects 1 pixel wide column
 Remember Photoshop only
see pixels, not objects
 Great for selecting objects
that have a set shape, like
planets or a street sign.
 You can stack selection
tools if you hold down the
shift and choose another to
use, they will all link up.
Selection Tools 2
 Freehand
 Lasso – click and drag it around the area to select it freehand
 Polygonal – click to set anchor points and the tool connects them
with straight lines.
 Magnetic – click and drag over the edge of two contrasting colors.
Having more contrast will make this tool work better.
Tip: hit caps lock to get cross
hairs to target with.
Selection Tools 3
 Edge based
 Quick selection tool – quickly select around a defined edge.
Either click around object or can be used like paint brush.
Tips: use brackets to increase or
decrease brush size
Selection Tools 4
 Color based
 Magic Wand tool – makes a selection based on how much the
same the colors are around it. Think tone and color.
 Great for large areas of solid color
Tips: use shift to add to a selection, use
tolerance to +/- the range of colors
selected
Choices
 Options Bar
 Depending on the selection tool used you get different
options.
 Add selections, feather, anti- alias..
Photoshop Tips
Part 2
History – your own personal
Tardis Yes, you can pull effects off to
the trash
 Click any where to hop in your
history and mix it up!
 You don’t have to delete, just
start working
 Snapshots – click a save point
for later – it’s a great way to
compare changes
 History brush..paint back your
stuff!
Ctr + Z = 1
Ctr + Alt + Z = many
 Photoshop > preferences >
performance > history states
 Default is 20, don’t do more
than 50
Photoshop Tips
Part 3
Erase or Mask?
 Which should you do?
 It’s usually better to mask and paint with black or white to
reveal/hide images
 Erasing is permanent. No chance of going back.
 Better to create a plain masking layer and paint black (with
paint brush and black as the foreground color)
 Use brush modes to add interest to how your blending
done
Brusheezy!
 If you want some cool brushes head to Brusheezy!
 Click the download button
 Open the file and double click on the ABR file to open.
 Open Photoshop and your brushes should be loaded into
the brush to for you to use
 Ask Maci and Sarah if you need expert help 
Photoshop Tips
Part 4
Blend Modes
 Over 25 choices…whoa!
 You only need to know 5 at
this point.
 Base color – lower layer
 Blend color – the one on top
Tip: you can’t
apply blend
modes to layers
titled
background.
This button creates a new adjustment layer
or fill. Use this to create a new layer and
apply a blend mode to a single image.
Blend Mode Groupings
 Grouped for a reason
– our 5:
 Normal
 Multiply
 Screen
 Overlay
 Color
Normal
 Default selection
 Change opacity, but
no blending with other
layers
 Must have at least two
layers for blend modes
to interact
Multiply
 The most widely used mode.
 Does some fancy math,
hence the name multiply and
makes your image darker.
 Takes two layers and
multiplies by the color on
the bottom, divides and
bam! Darkness
 Can add an adjustment layer,
with no presets and increase
darks also. Stackable.
 Great for over exposed
images.
Screen
 Opposite of multiply
 Looks for whites and
increases those.
 Can add an
adjustment layer,
with no presets to
increase the whites.
 Great for bringing
out highlights.
Overlay
 Does a little of
Multiply and Screen
 Increases highlights
and shadows/darks.
 On these examples
the author was just
using one image and
adding an
adjustment layer. If
you want it to affect
one layer, you need
to do this too.
Photoshop Tips
The finish line!
Color
 Works with colors
specifically, hue and
saturation.
 Choose an adjustment
layer and select
hue/saturation.
Color
 Works with colors
specifically, hue and
saturation.
 Great for adding color to a
black and white image
without changing the
highlights.
 You’re not changing the
image, just add color that
will fill in with the values
that are already there. No
more flat colors!
 Just add a blank layer,
choose brush and begin
painting the color you want.
Photoshop Tips
The finish line!
Adjustment Layers
 Found above layers
panels
 Can be used for
many different fixes
on your work
 Use clipping mask
icon to have effect
only work on one
layer
 Can be used for
many different fixes
on your work
 Trash can to get rid
of an adjustment
layer
 Across the bottom of
the adjustment layer
fly out panel, lots of
choices.
 Brightness
 Use the sliders to
lighten or darken
your image
 Levels
 Adjusts colors and
tonal range on 3
points
 Curves
 Adjusts colors and
tonal range more
than layers can.

Photoshop tips online class version 2015

  • 1.
    Photoshop Tips A fewbasics to keep you rolling along!
  • 2.
    Selection Tools  Geometric(think shapes)  Rectangular – selects a rectangular area  Elliptical – selects a elliptical area  Single Row – selects 1 pixel high row  Single Column – selects 1 pixel wide column  Remember Photoshop only see pixels, not objects  Great for selecting objects that have a set shape, like planets or a street sign.  You can stack selection tools if you hold down the shift and choose another to use, they will all link up.
  • 3.
    Selection Tools 2 Freehand  Lasso – click and drag it around the area to select it freehand  Polygonal – click to set anchor points and the tool connects them with straight lines.  Magnetic – click and drag over the edge of two contrasting colors. Having more contrast will make this tool work better. Tip: hit caps lock to get cross hairs to target with.
  • 4.
    Selection Tools 3 Edge based  Quick selection tool – quickly select around a defined edge. Either click around object or can be used like paint brush. Tips: use brackets to increase or decrease brush size
  • 5.
    Selection Tools 4 Color based  Magic Wand tool – makes a selection based on how much the same the colors are around it. Think tone and color.  Great for large areas of solid color Tips: use shift to add to a selection, use tolerance to +/- the range of colors selected
  • 6.
    Choices  Options Bar Depending on the selection tool used you get different options.  Add selections, feather, anti- alias..
  • 7.
  • 8.
    History – yourown personal Tardis Yes, you can pull effects off to the trash  Click any where to hop in your history and mix it up!  You don’t have to delete, just start working  Snapshots – click a save point for later – it’s a great way to compare changes  History brush..paint back your stuff!
  • 9.
    Ctr + Z= 1 Ctr + Alt + Z = many  Photoshop > preferences > performance > history states  Default is 20, don’t do more than 50
  • 10.
  • 11.
    Erase or Mask? Which should you do?  It’s usually better to mask and paint with black or white to reveal/hide images  Erasing is permanent. No chance of going back.  Better to create a plain masking layer and paint black (with paint brush and black as the foreground color)  Use brush modes to add interest to how your blending done
  • 12.
    Brusheezy!  If youwant some cool brushes head to Brusheezy!  Click the download button  Open the file and double click on the ABR file to open.  Open Photoshop and your brushes should be loaded into the brush to for you to use  Ask Maci and Sarah if you need expert help 
  • 13.
  • 14.
    Blend Modes  Over25 choices…whoa!  You only need to know 5 at this point.  Base color – lower layer  Blend color – the one on top Tip: you can’t apply blend modes to layers titled background. This button creates a new adjustment layer or fill. Use this to create a new layer and apply a blend mode to a single image.
  • 15.
    Blend Mode Groupings Grouped for a reason – our 5:  Normal  Multiply  Screen  Overlay  Color
  • 16.
    Normal  Default selection Change opacity, but no blending with other layers  Must have at least two layers for blend modes to interact
  • 17.
    Multiply  The mostwidely used mode.  Does some fancy math, hence the name multiply and makes your image darker.  Takes two layers and multiplies by the color on the bottom, divides and bam! Darkness  Can add an adjustment layer, with no presets and increase darks also. Stackable.  Great for over exposed images.
  • 18.
    Screen  Opposite ofmultiply  Looks for whites and increases those.  Can add an adjustment layer, with no presets to increase the whites.  Great for bringing out highlights.
  • 19.
    Overlay  Does alittle of Multiply and Screen  Increases highlights and shadows/darks.  On these examples the author was just using one image and adding an adjustment layer. If you want it to affect one layer, you need to do this too.
  • 20.
  • 21.
    Color  Works withcolors specifically, hue and saturation.  Choose an adjustment layer and select hue/saturation.
  • 22.
    Color  Works withcolors specifically, hue and saturation.  Great for adding color to a black and white image without changing the highlights.  You’re not changing the image, just add color that will fill in with the values that are already there. No more flat colors!  Just add a blank layer, choose brush and begin painting the color you want.
  • 23.
  • 24.
    Adjustment Layers  Foundabove layers panels
  • 25.
     Can beused for many different fixes on your work  Use clipping mask icon to have effect only work on one layer
  • 26.
     Can beused for many different fixes on your work  Trash can to get rid of an adjustment layer  Across the bottom of the adjustment layer fly out panel, lots of choices.
  • 27.
     Brightness  Usethe sliders to lighten or darken your image
  • 28.
     Levels  Adjustscolors and tonal range on 3 points
  • 29.
     Curves  Adjustscolors and tonal range more than layers can.

Editor's Notes

  • #3 http://www.igdesigns.eu/blog/2011/02/16/selection-tools-in-photoshop-part-1/
  • #4 http://www.igdesigns.eu/blog/2011/02/16/selection-tools-in-photoshop-part-1/
  • #5 http://www.igdesigns.eu/blog/2011/02/16/selection-tools-in-photoshop-part-1/ http://www.photoshopessentials.com/basics/selections/quick-selection-tool/
  • #6 http://www.igdesigns.eu/blog/2011/02/16/selection-tools-in-photoshop-part-1/ http://www.photoshopessentials.com/basics/selections/magic-wand-tool/
  • #7 http://www.igdesigns.eu/blog/2011/02/16/selection-tools-in-photoshop-part-1/ http://www.photoshopessentials.com/basics/selections/magic-wand-tool/
  • #15 Get frog example ready, show adjustment layer button at bottom of screen, half black, half white round button. Choose levels, or something else that doesn’t immediately effect the image.
  • #16 Darken, makes darker, Lighten, lightens pixels, contrast effects both light and dark http://www.photoshopessentials.com/photo-editing/layer-blend-modes/intro/
  • #17 Open eyeball example to show layers and how they don’t change the values, it’s not just like spray painting over an area 
  • #18 http://www.photoshopessentials.com/photo-editing/layer-blend-modes/multiply/
  • #19 http://www.photoshopessentials.com/photo-editing/layer-blend-modes/multiply/
  • #20 http://www.photoshopessentials.com/photo-editing/layer-blend-modes/multiply/
  • #22 http://www.photoshopessentials.com/photo-editing/layer-blend-modes/multiply/
  • #23 Open eyeball example to show layers and how they don’t change the values, it’s not just like spray painting over an area 
  • #25 Open eyeball example to show layers and how they don’t change the values, it’s not just like spray painting over an area 
  • #26 Open eyeball example to show layers and how they don’t change the values, it’s not just like spray painting over an area 
  • #27 Open eyeball example to show layers and how they don’t change the values, it’s not just like spray painting over an area 
  • #28 Open eyeball example to show layers and how they don’t change the values, it’s not just like spray painting over an area 
  • #29 Open eyeball example to show layers and how they don’t change the values, it’s not just like spray painting over an area 
  • #30 Open eyeball example to show layers and how they don’t change the values, it’s not just like spray painting over an area 