Downloaded 570 times


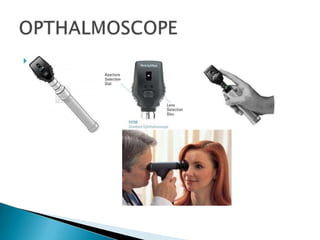


This document provides instructions for examining a patient's fundus using an ophthalmoscope. It describes how to position the patient and ophthalmoscope, how to focus on different parts of the fundus including the optic disc, blood vessels, periphery, and macula, and what features to assess for each area such as shape and clarity of the optic disc or signs of hypertensive retinopathy. The goal is to be able to properly examine the fundus and recognize common abnormalities.