Downloaded 3,593 times
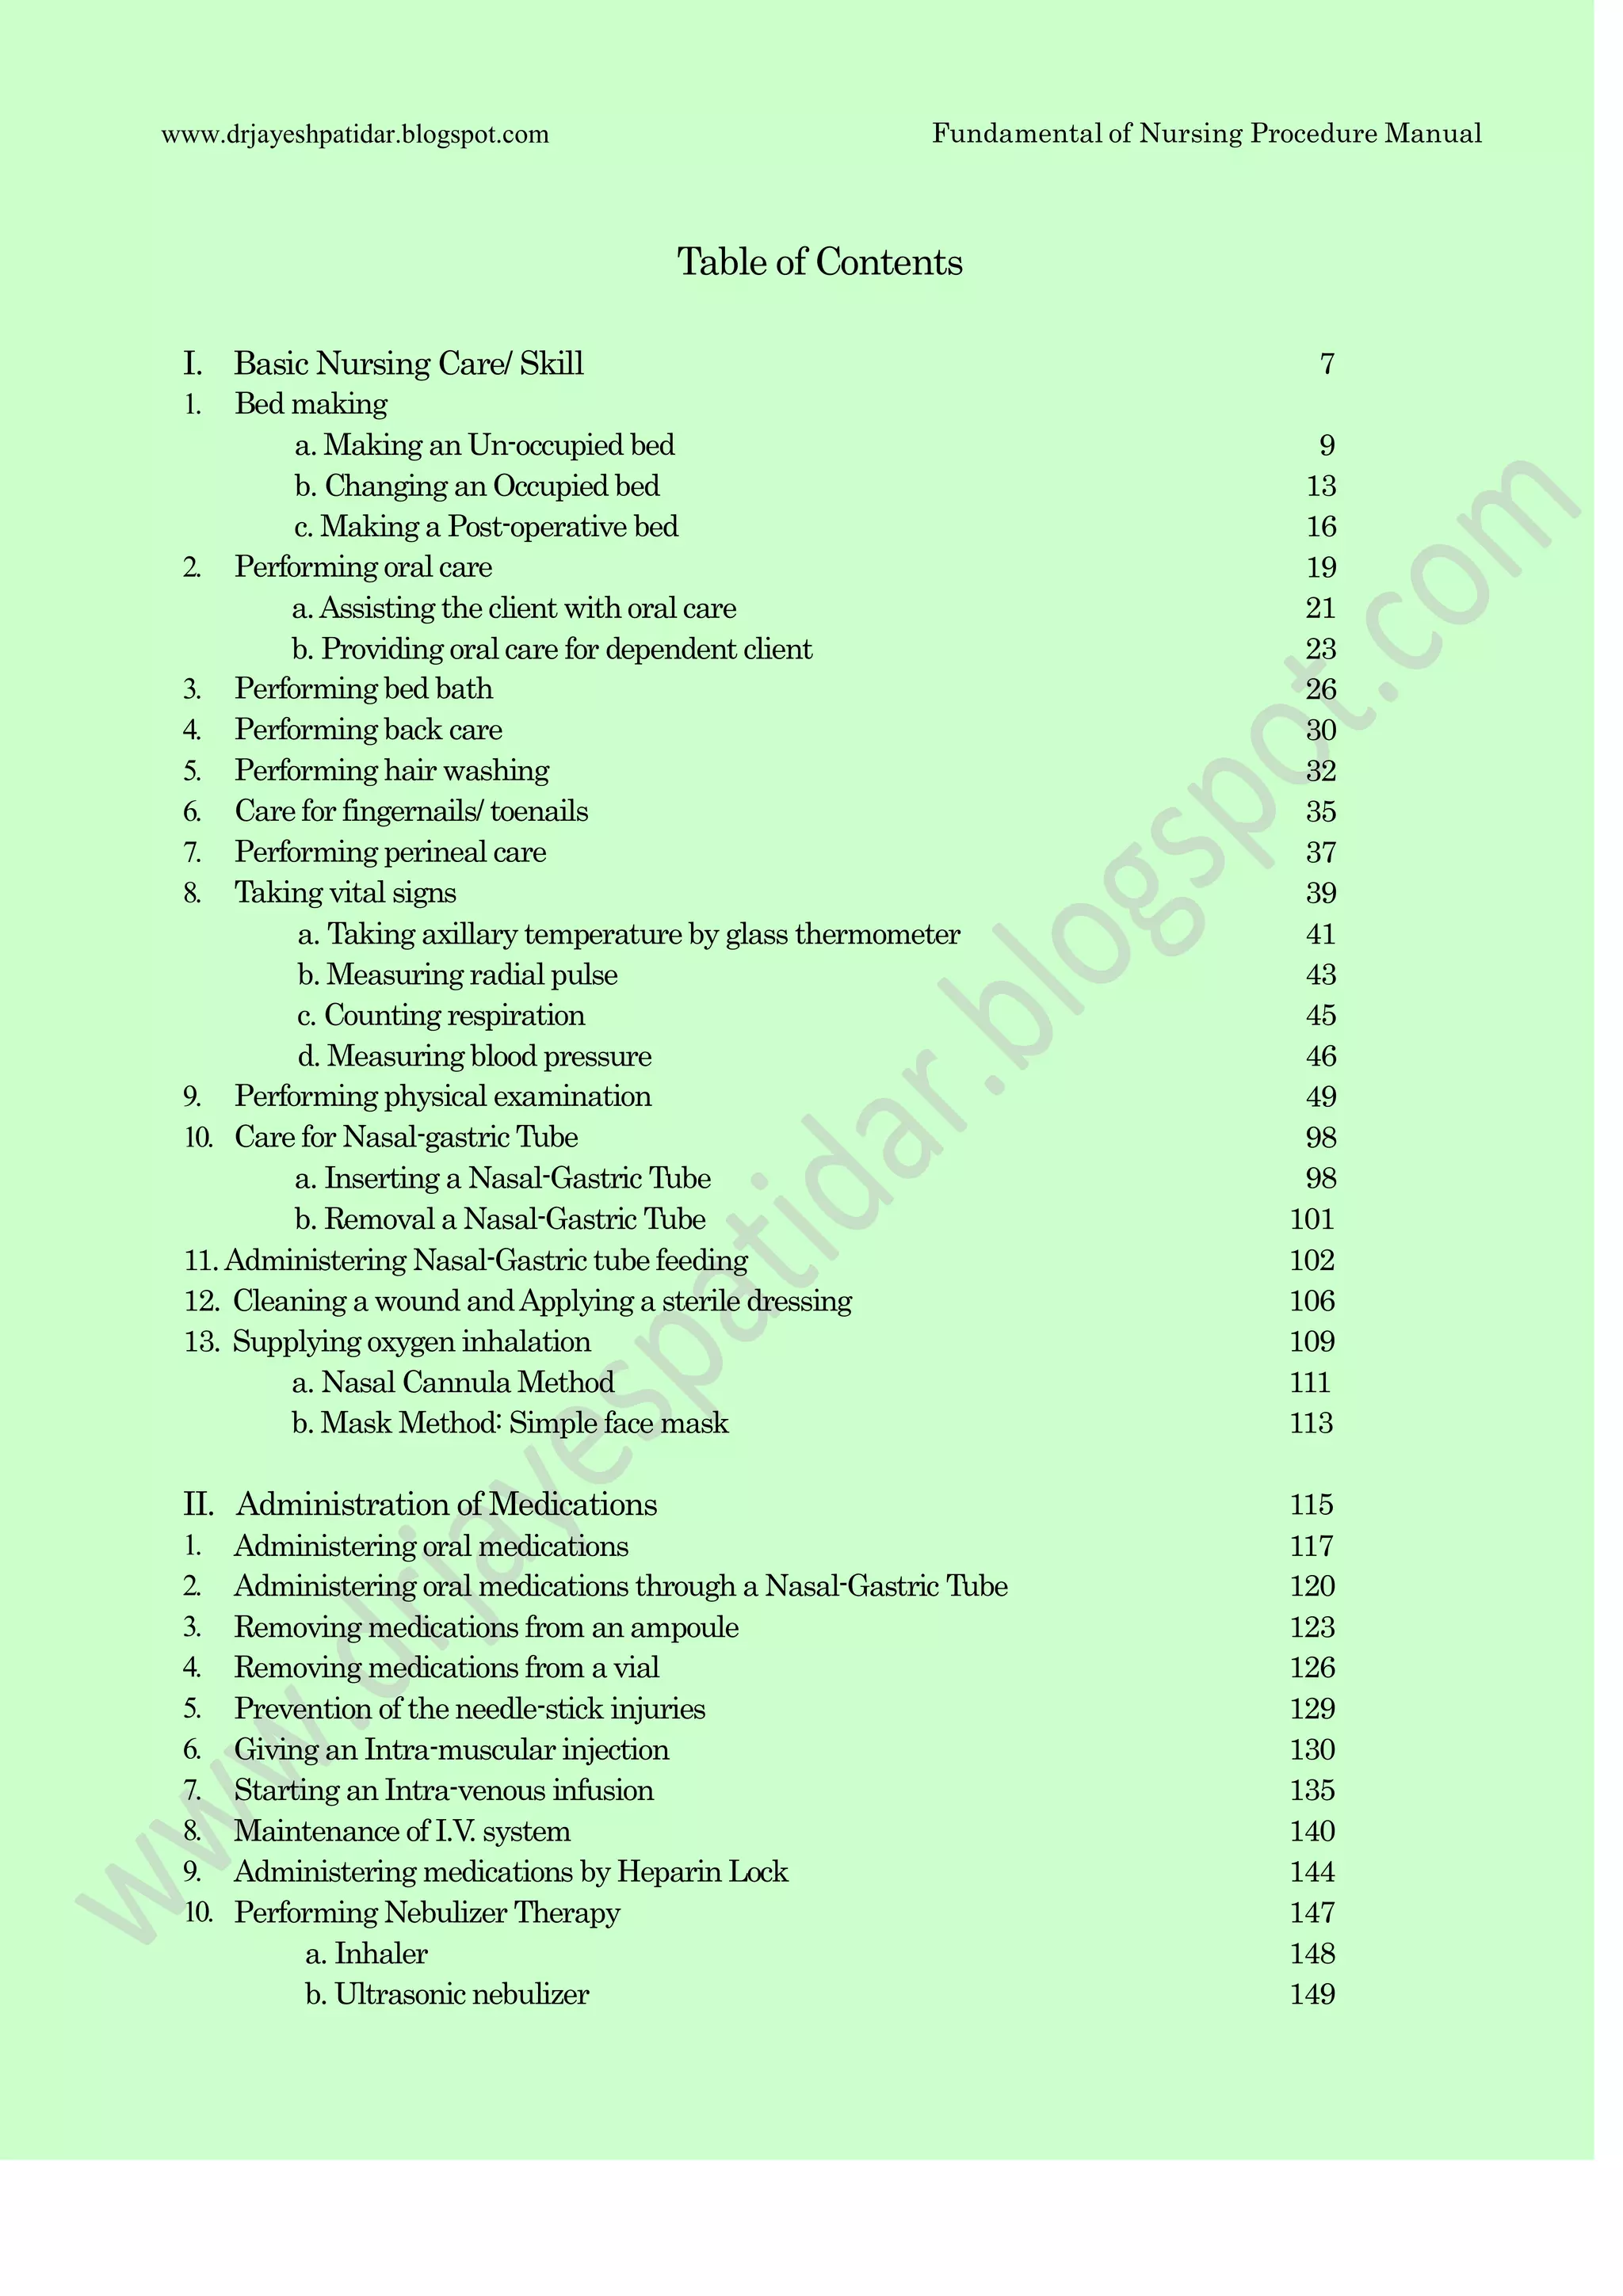

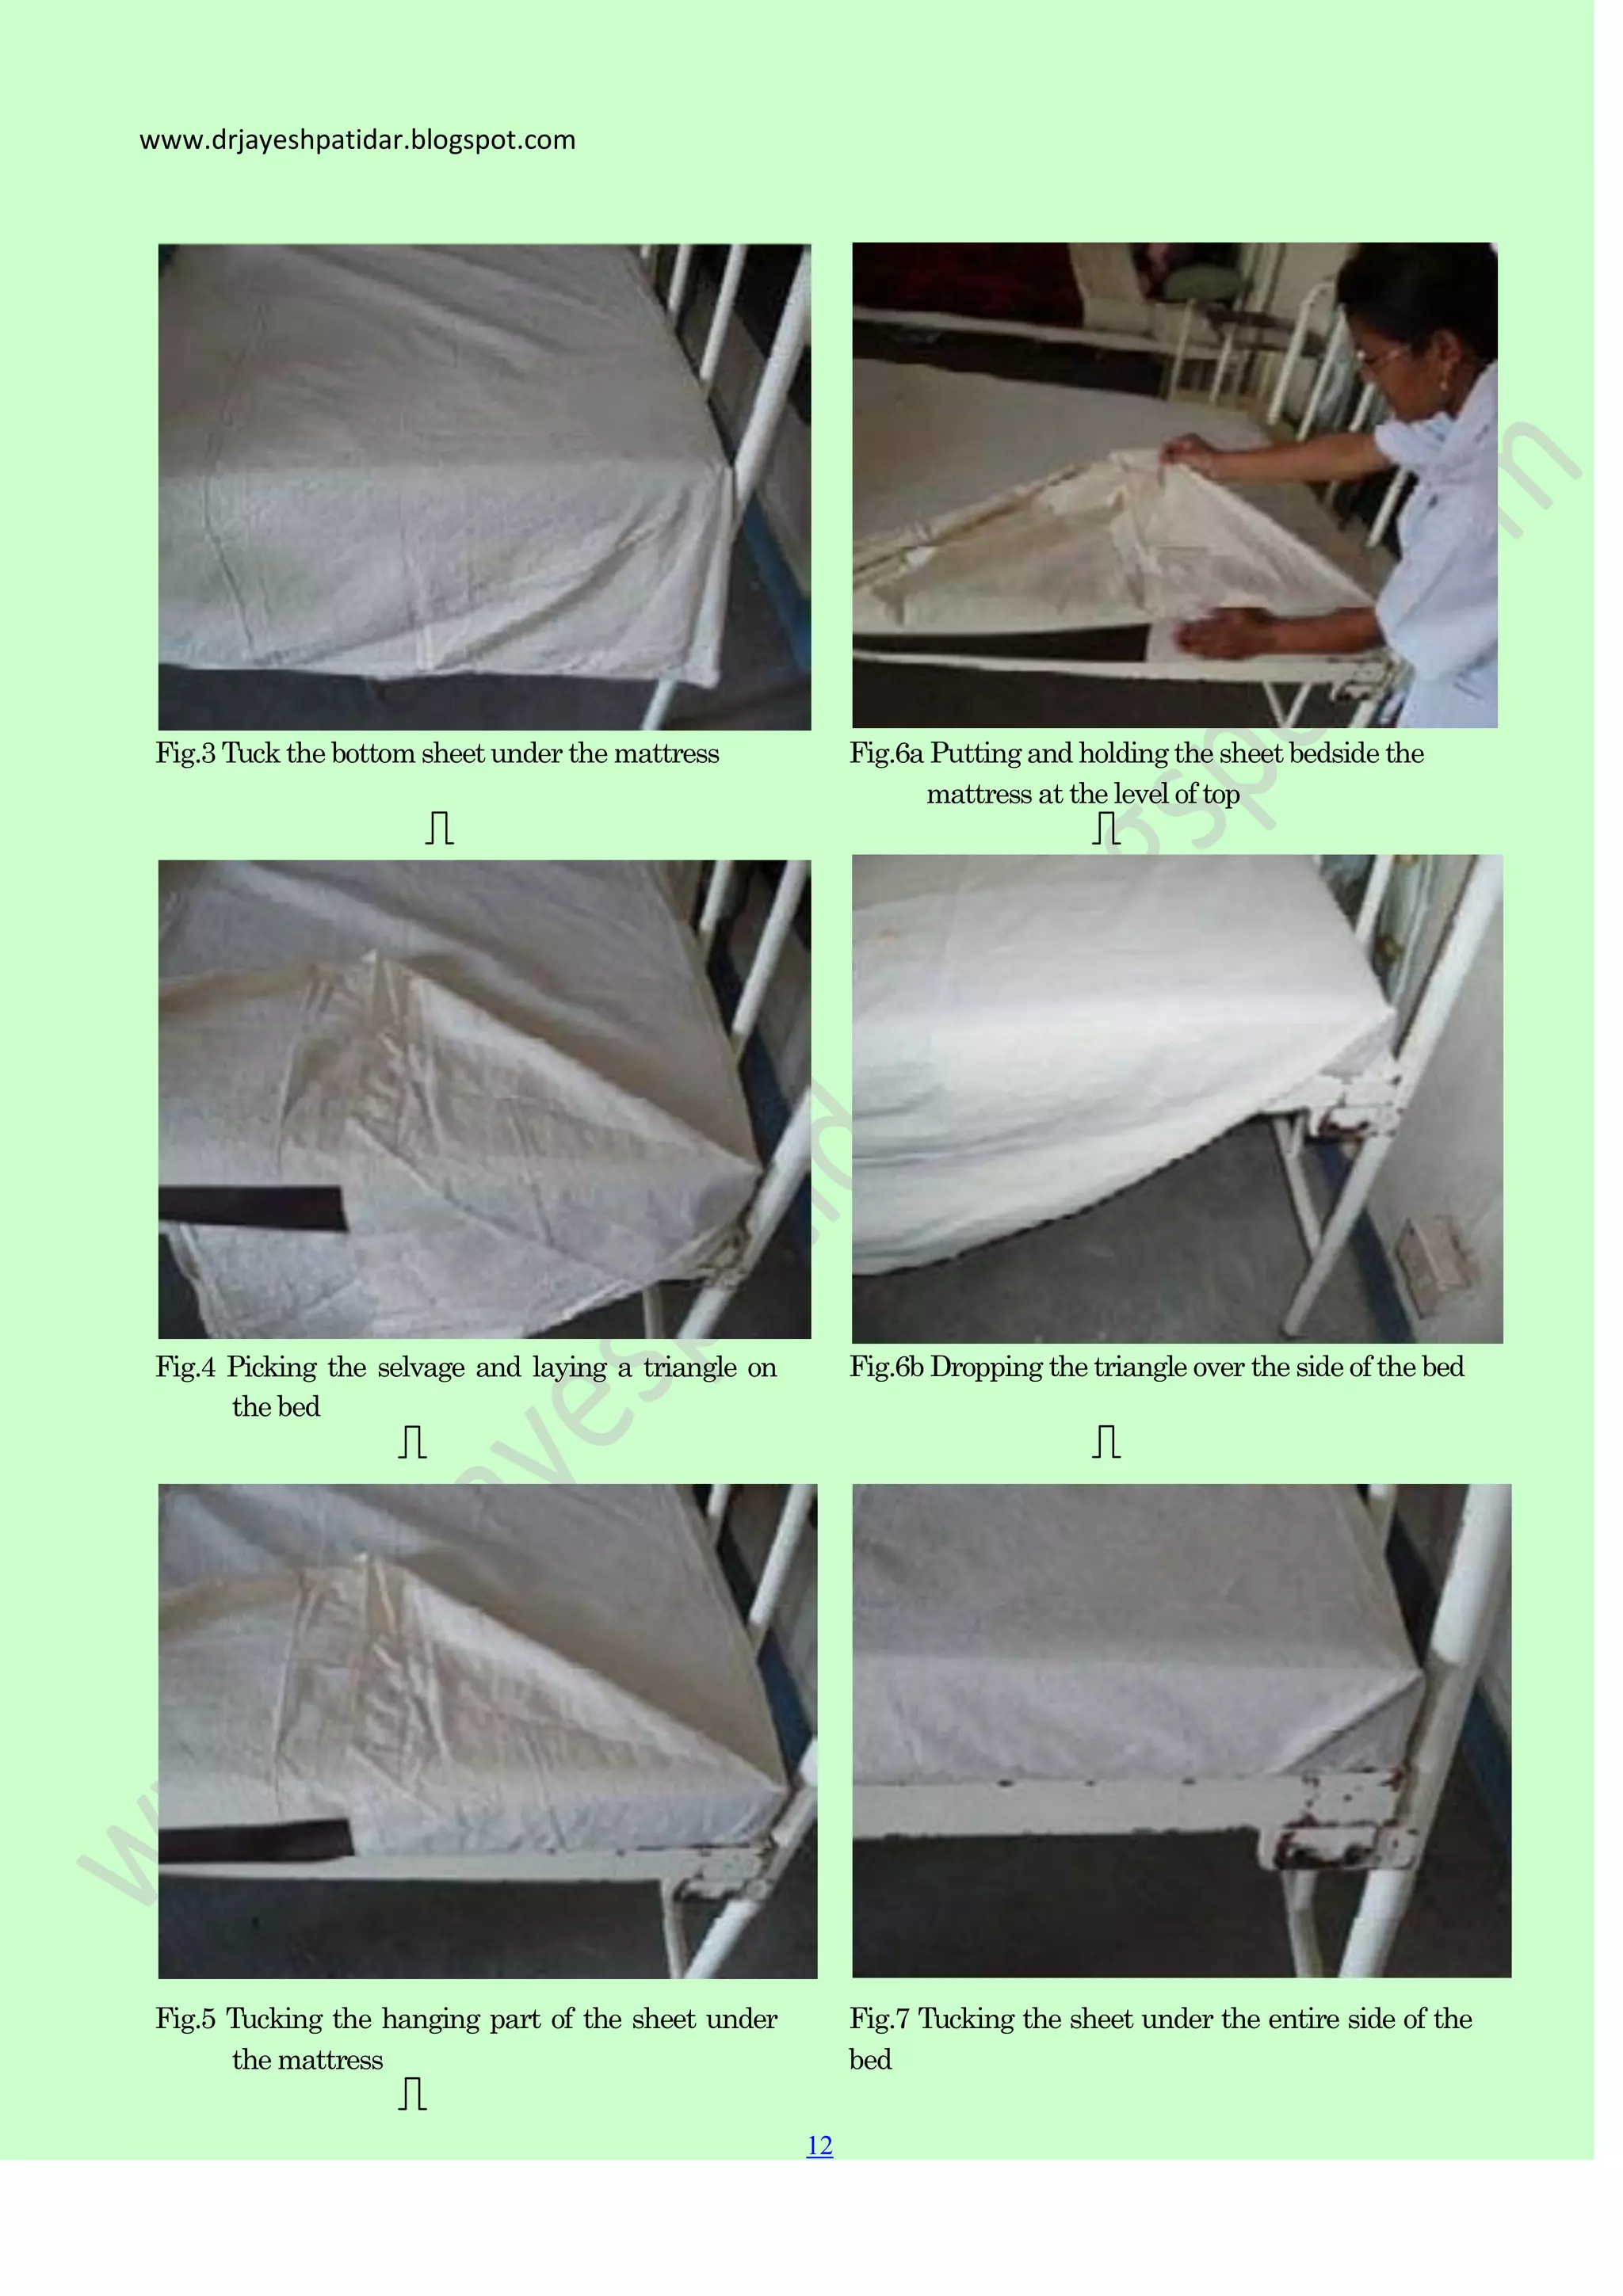


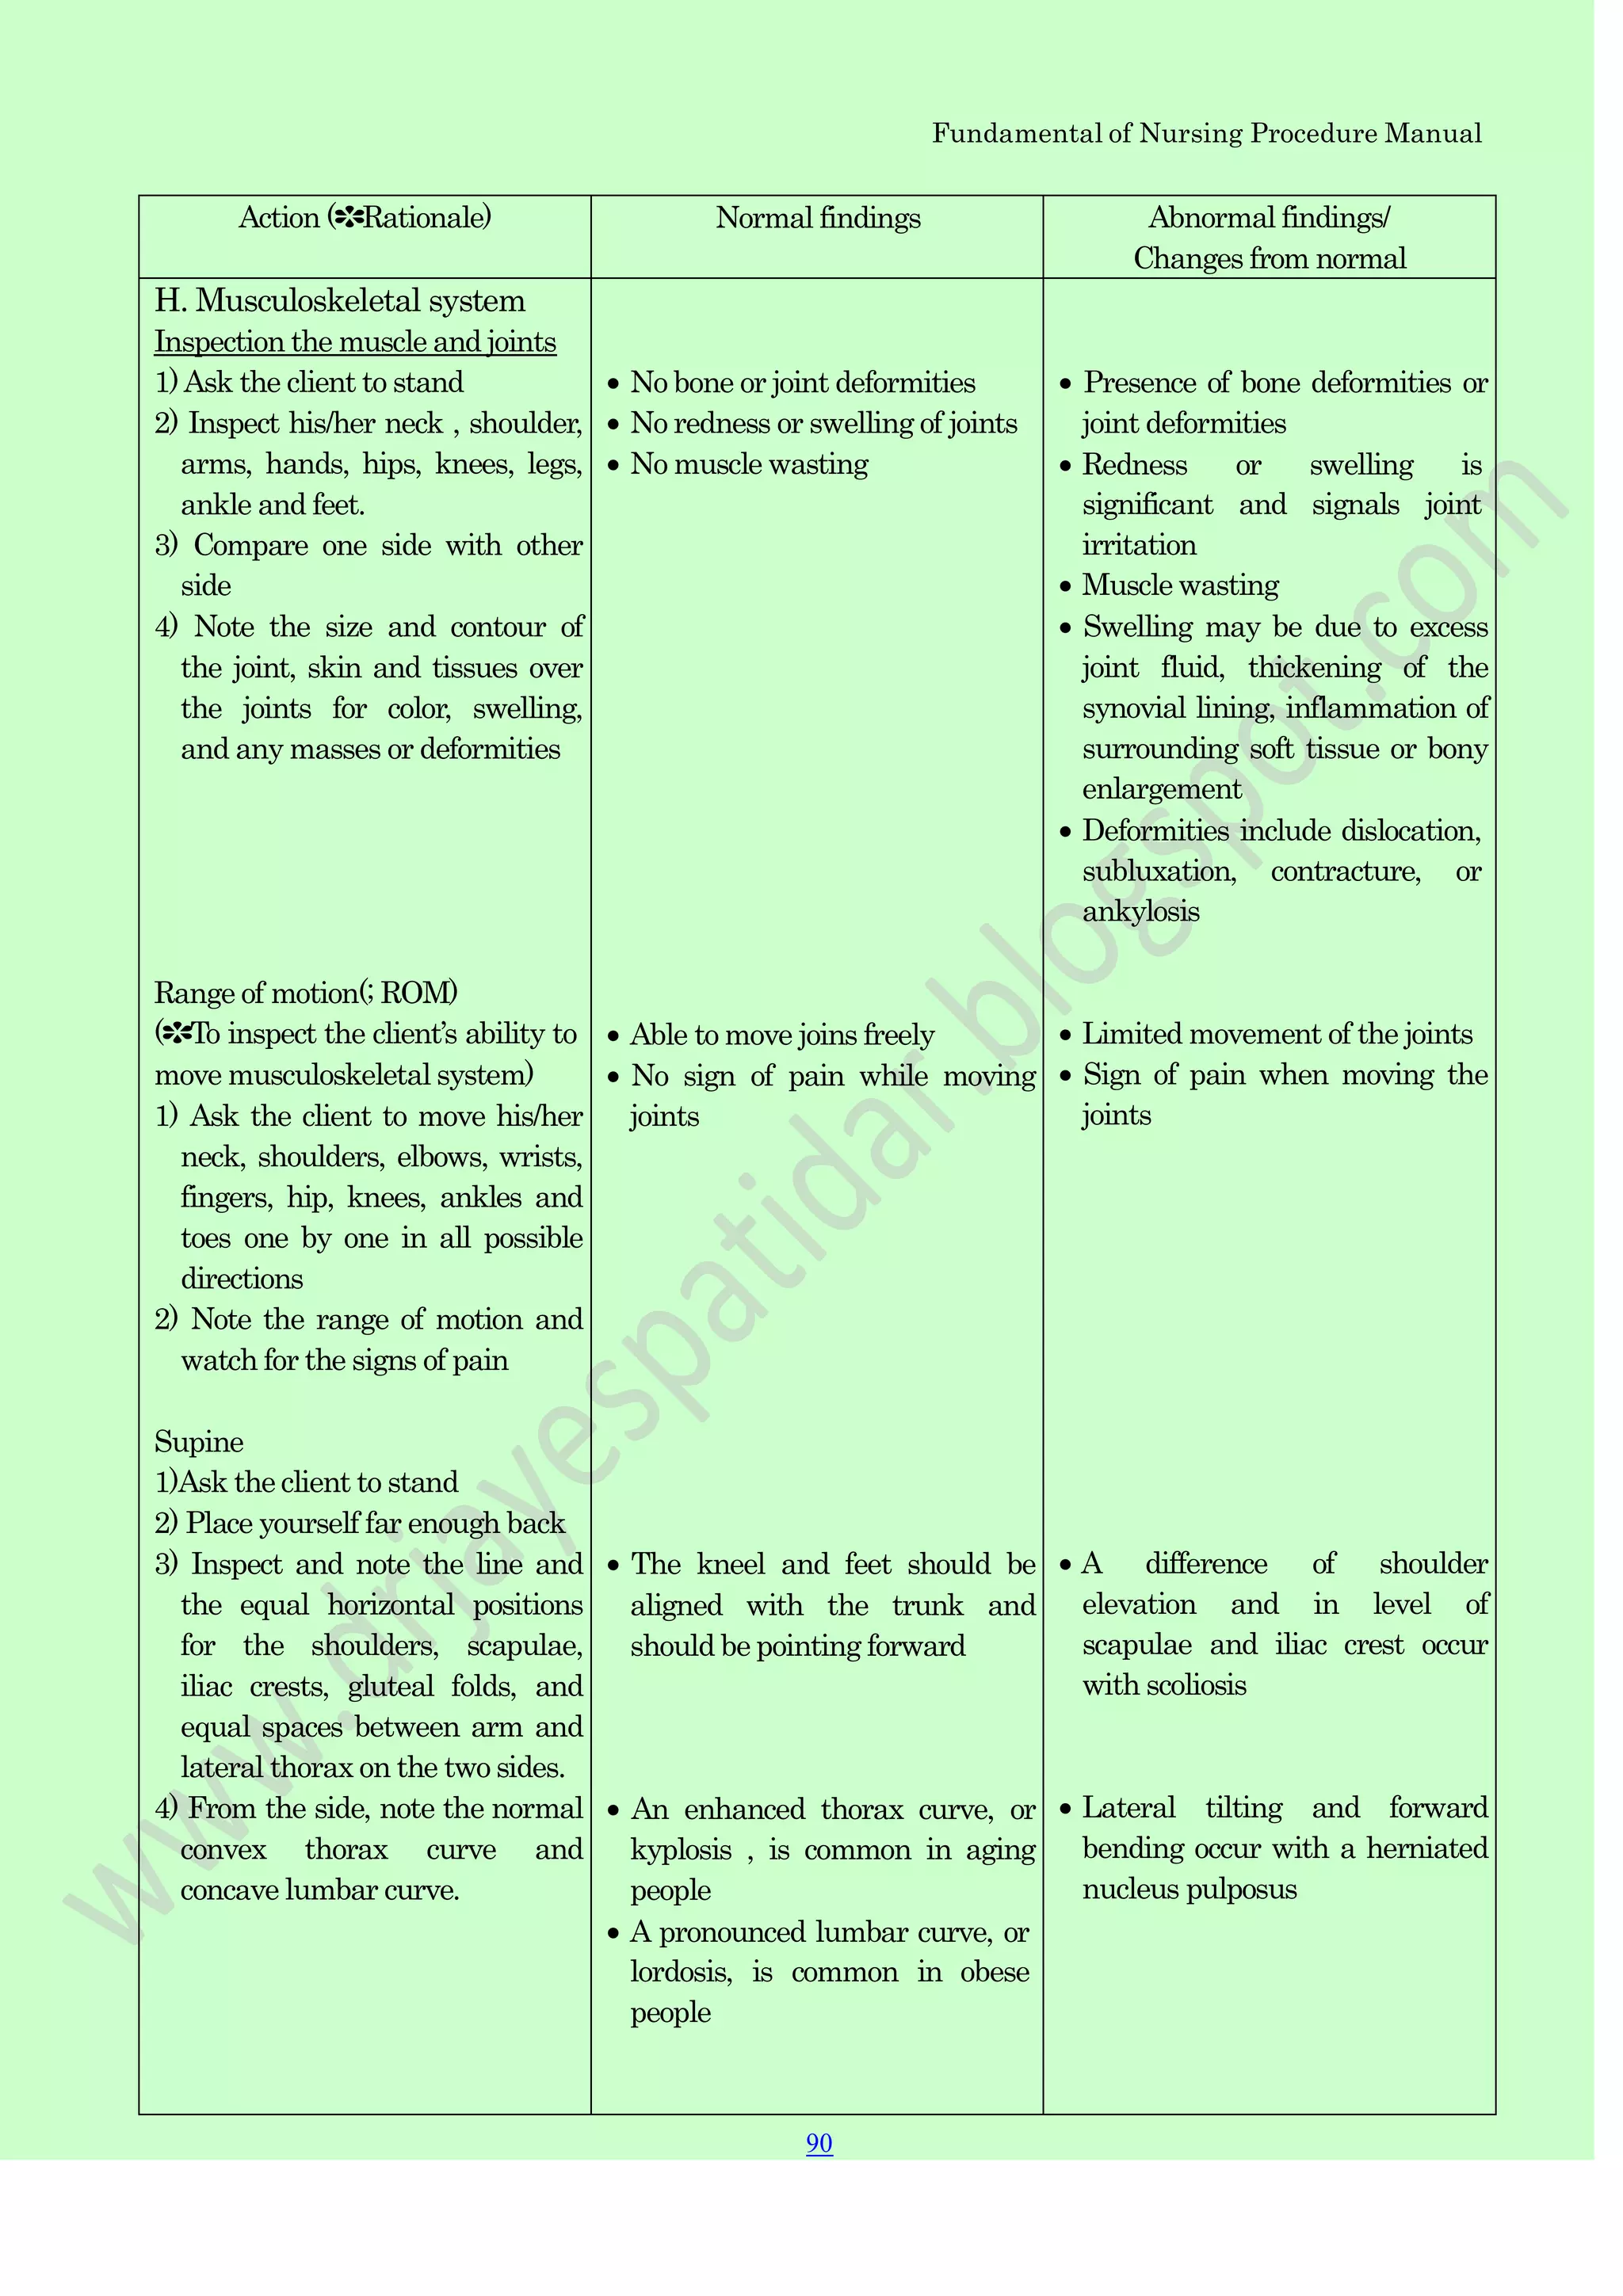
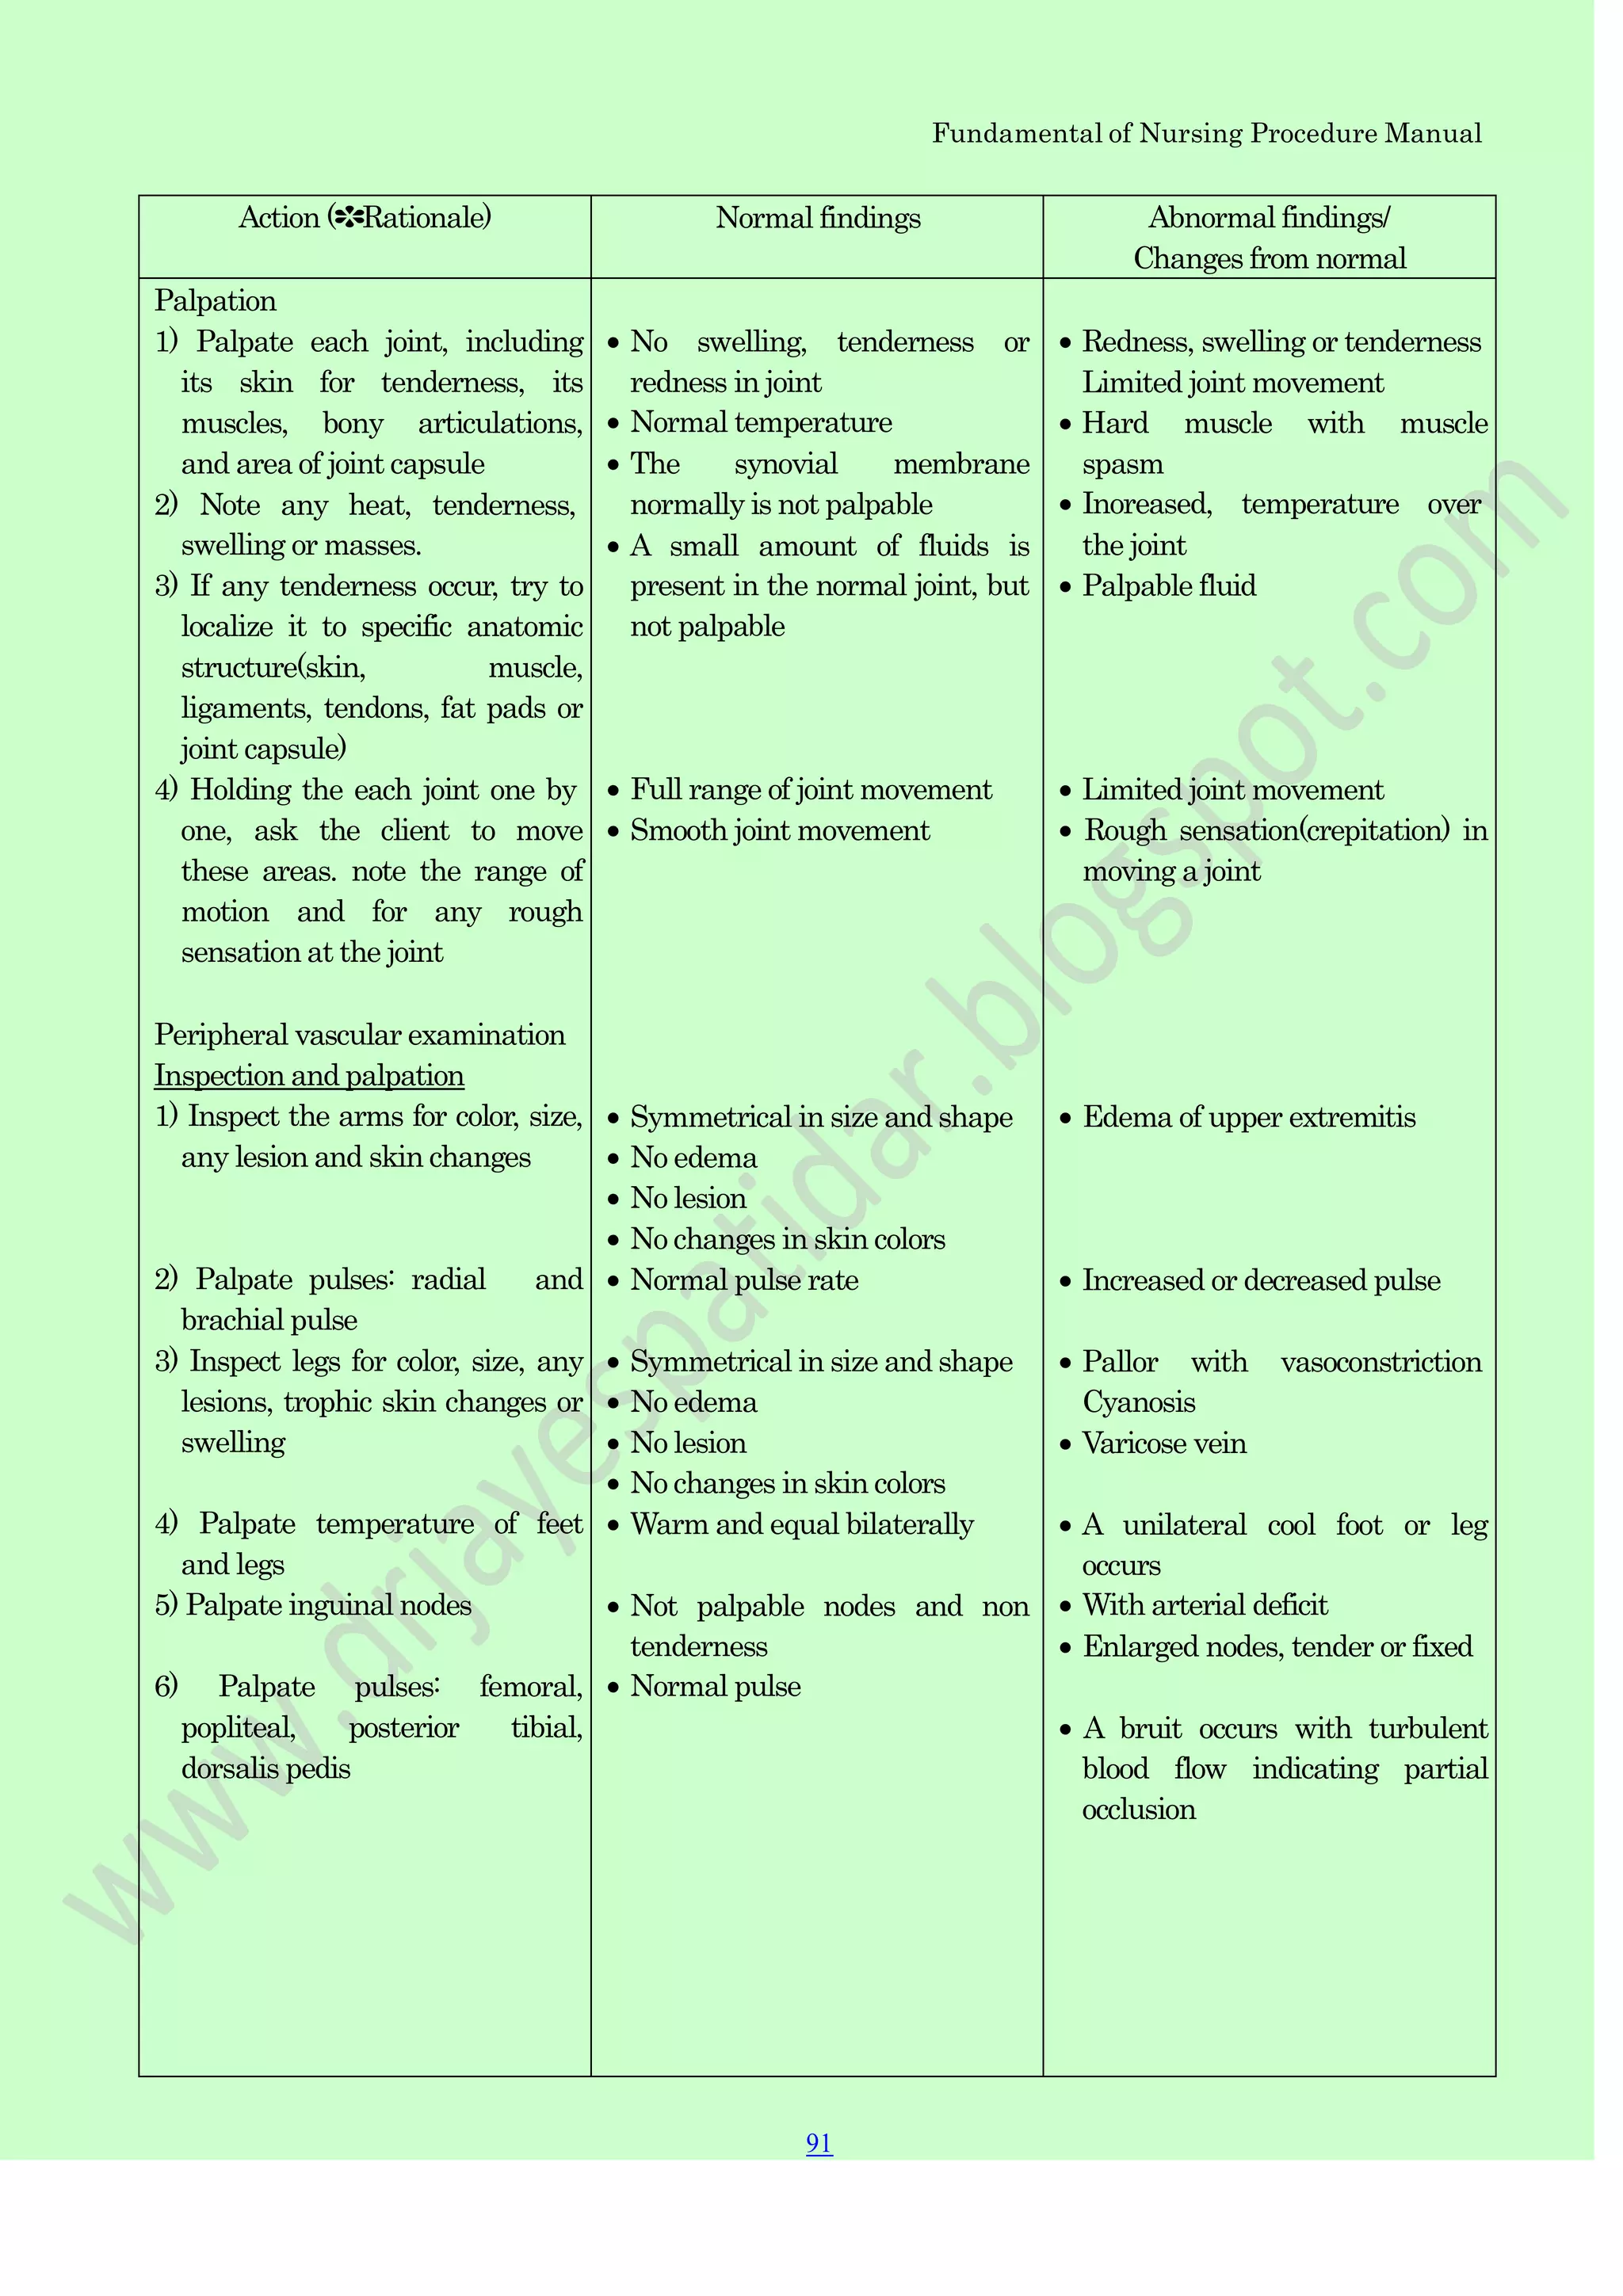
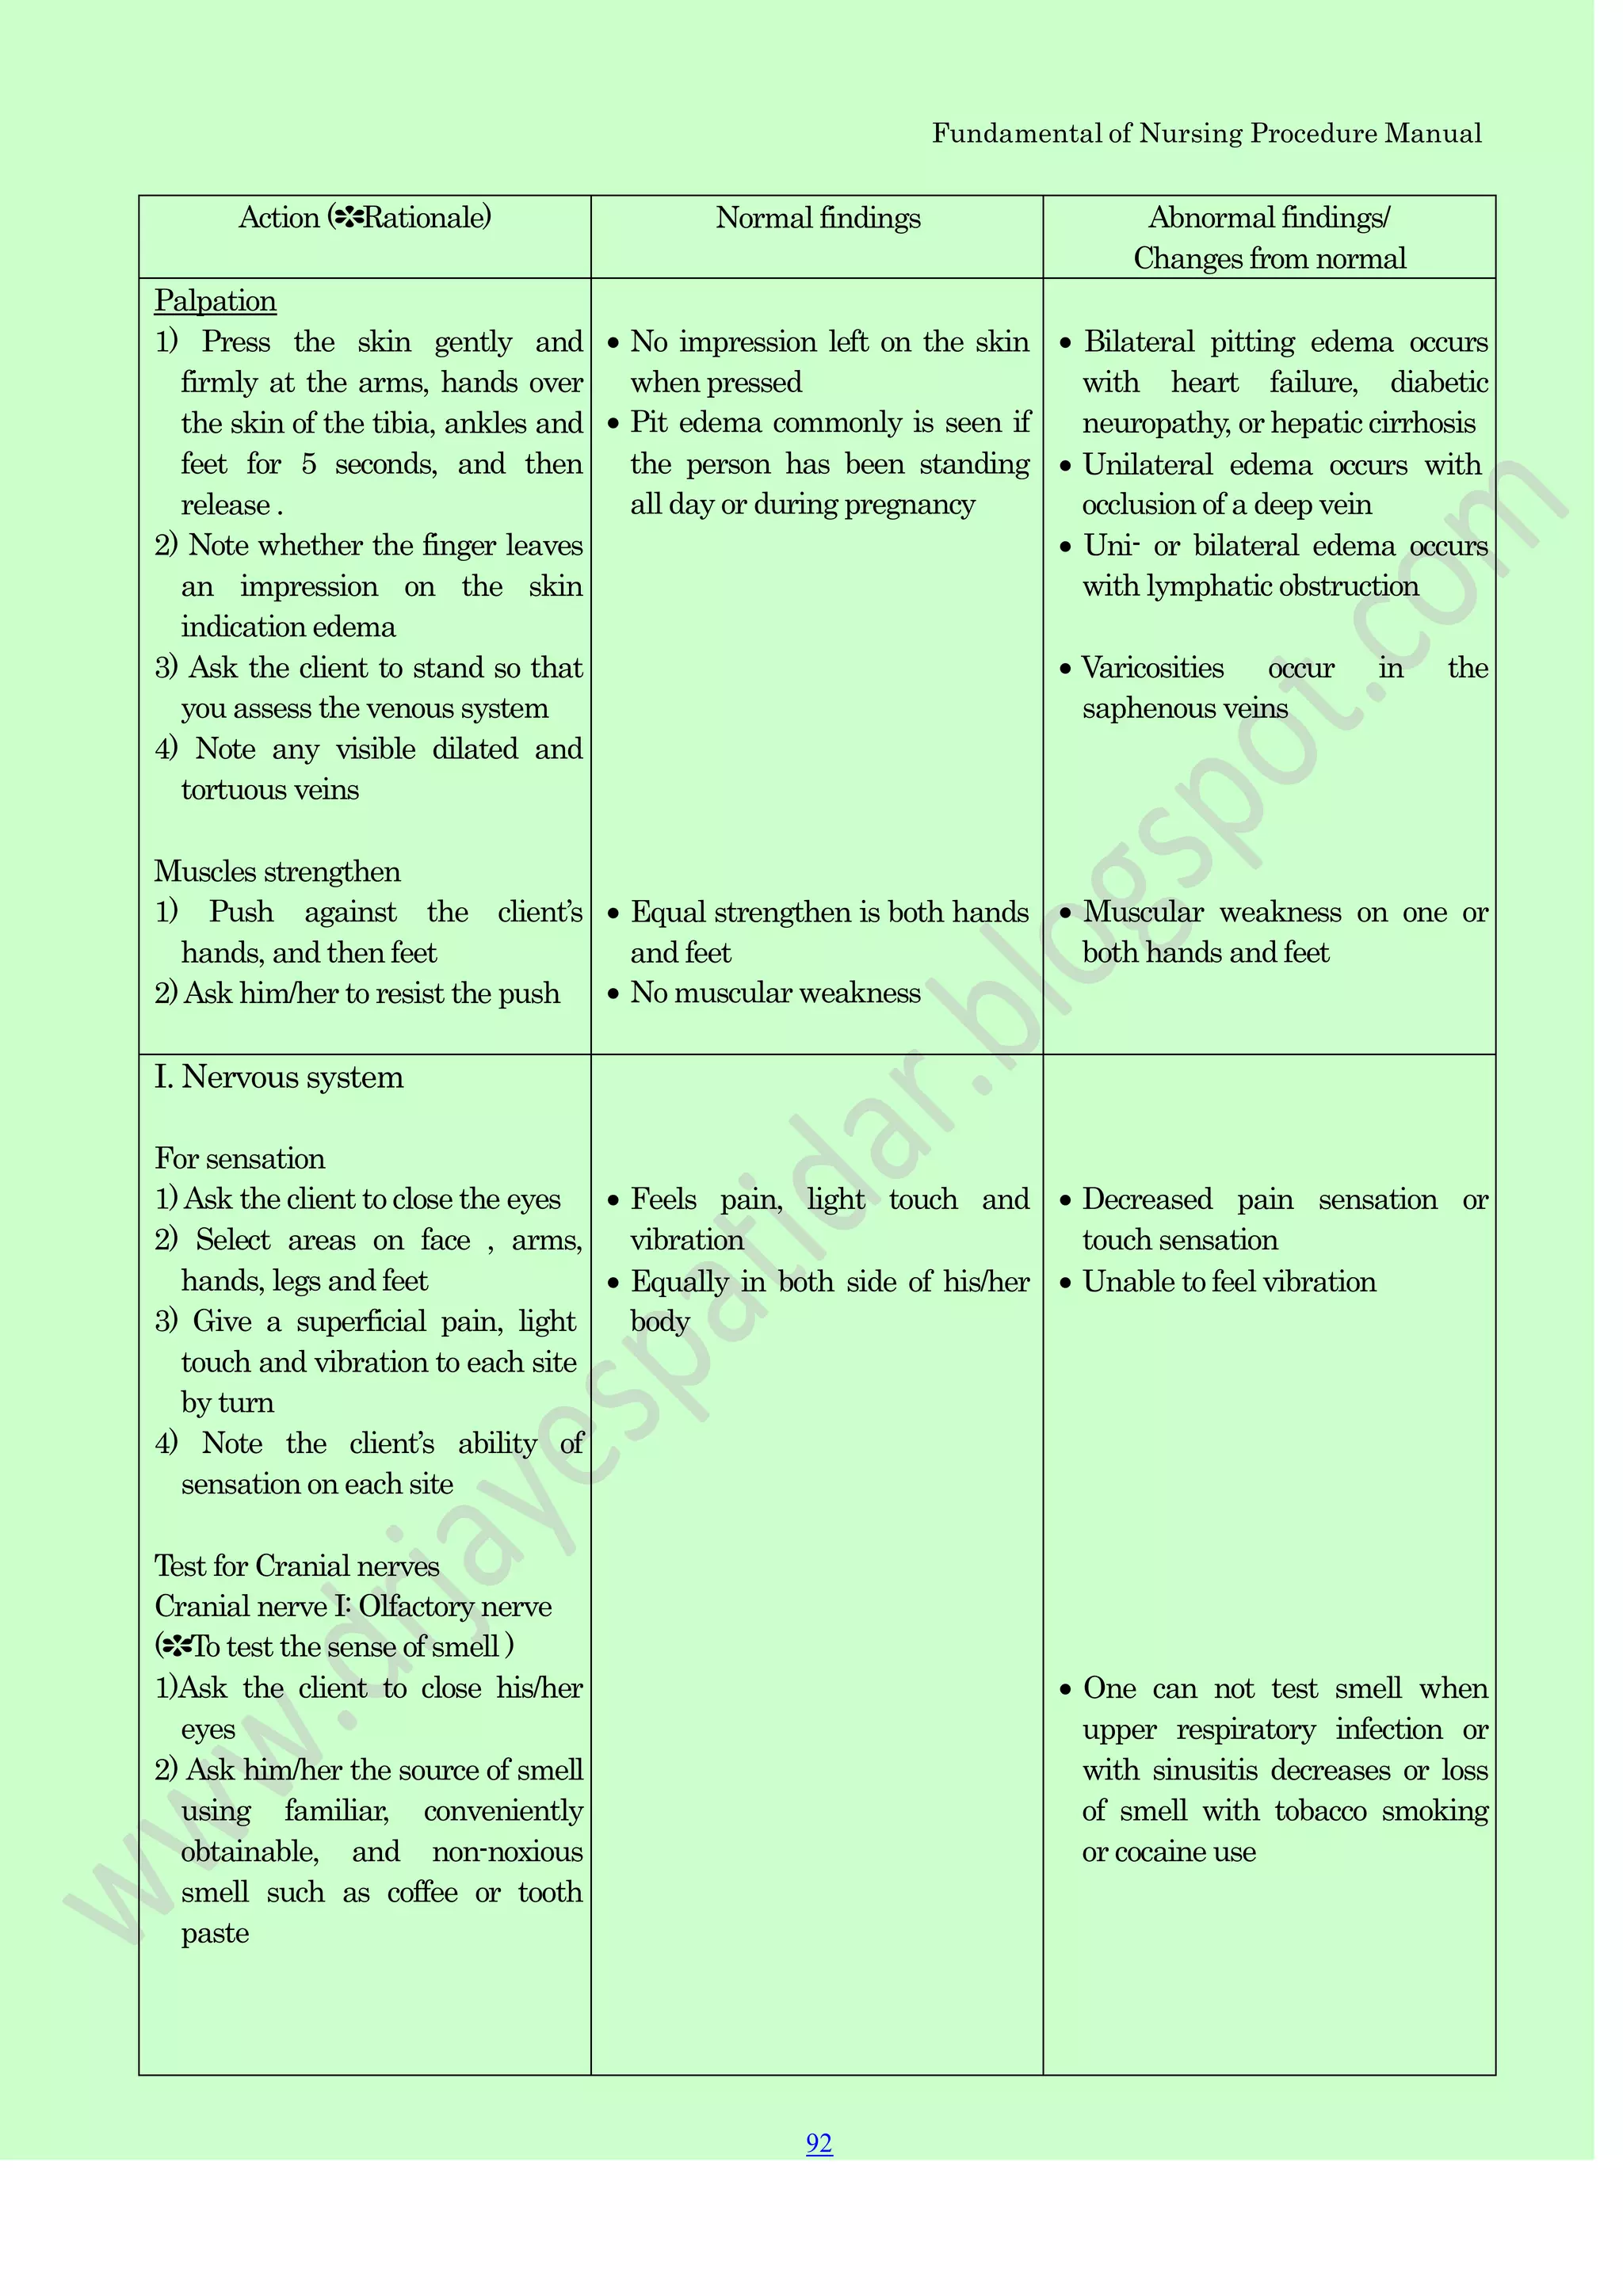
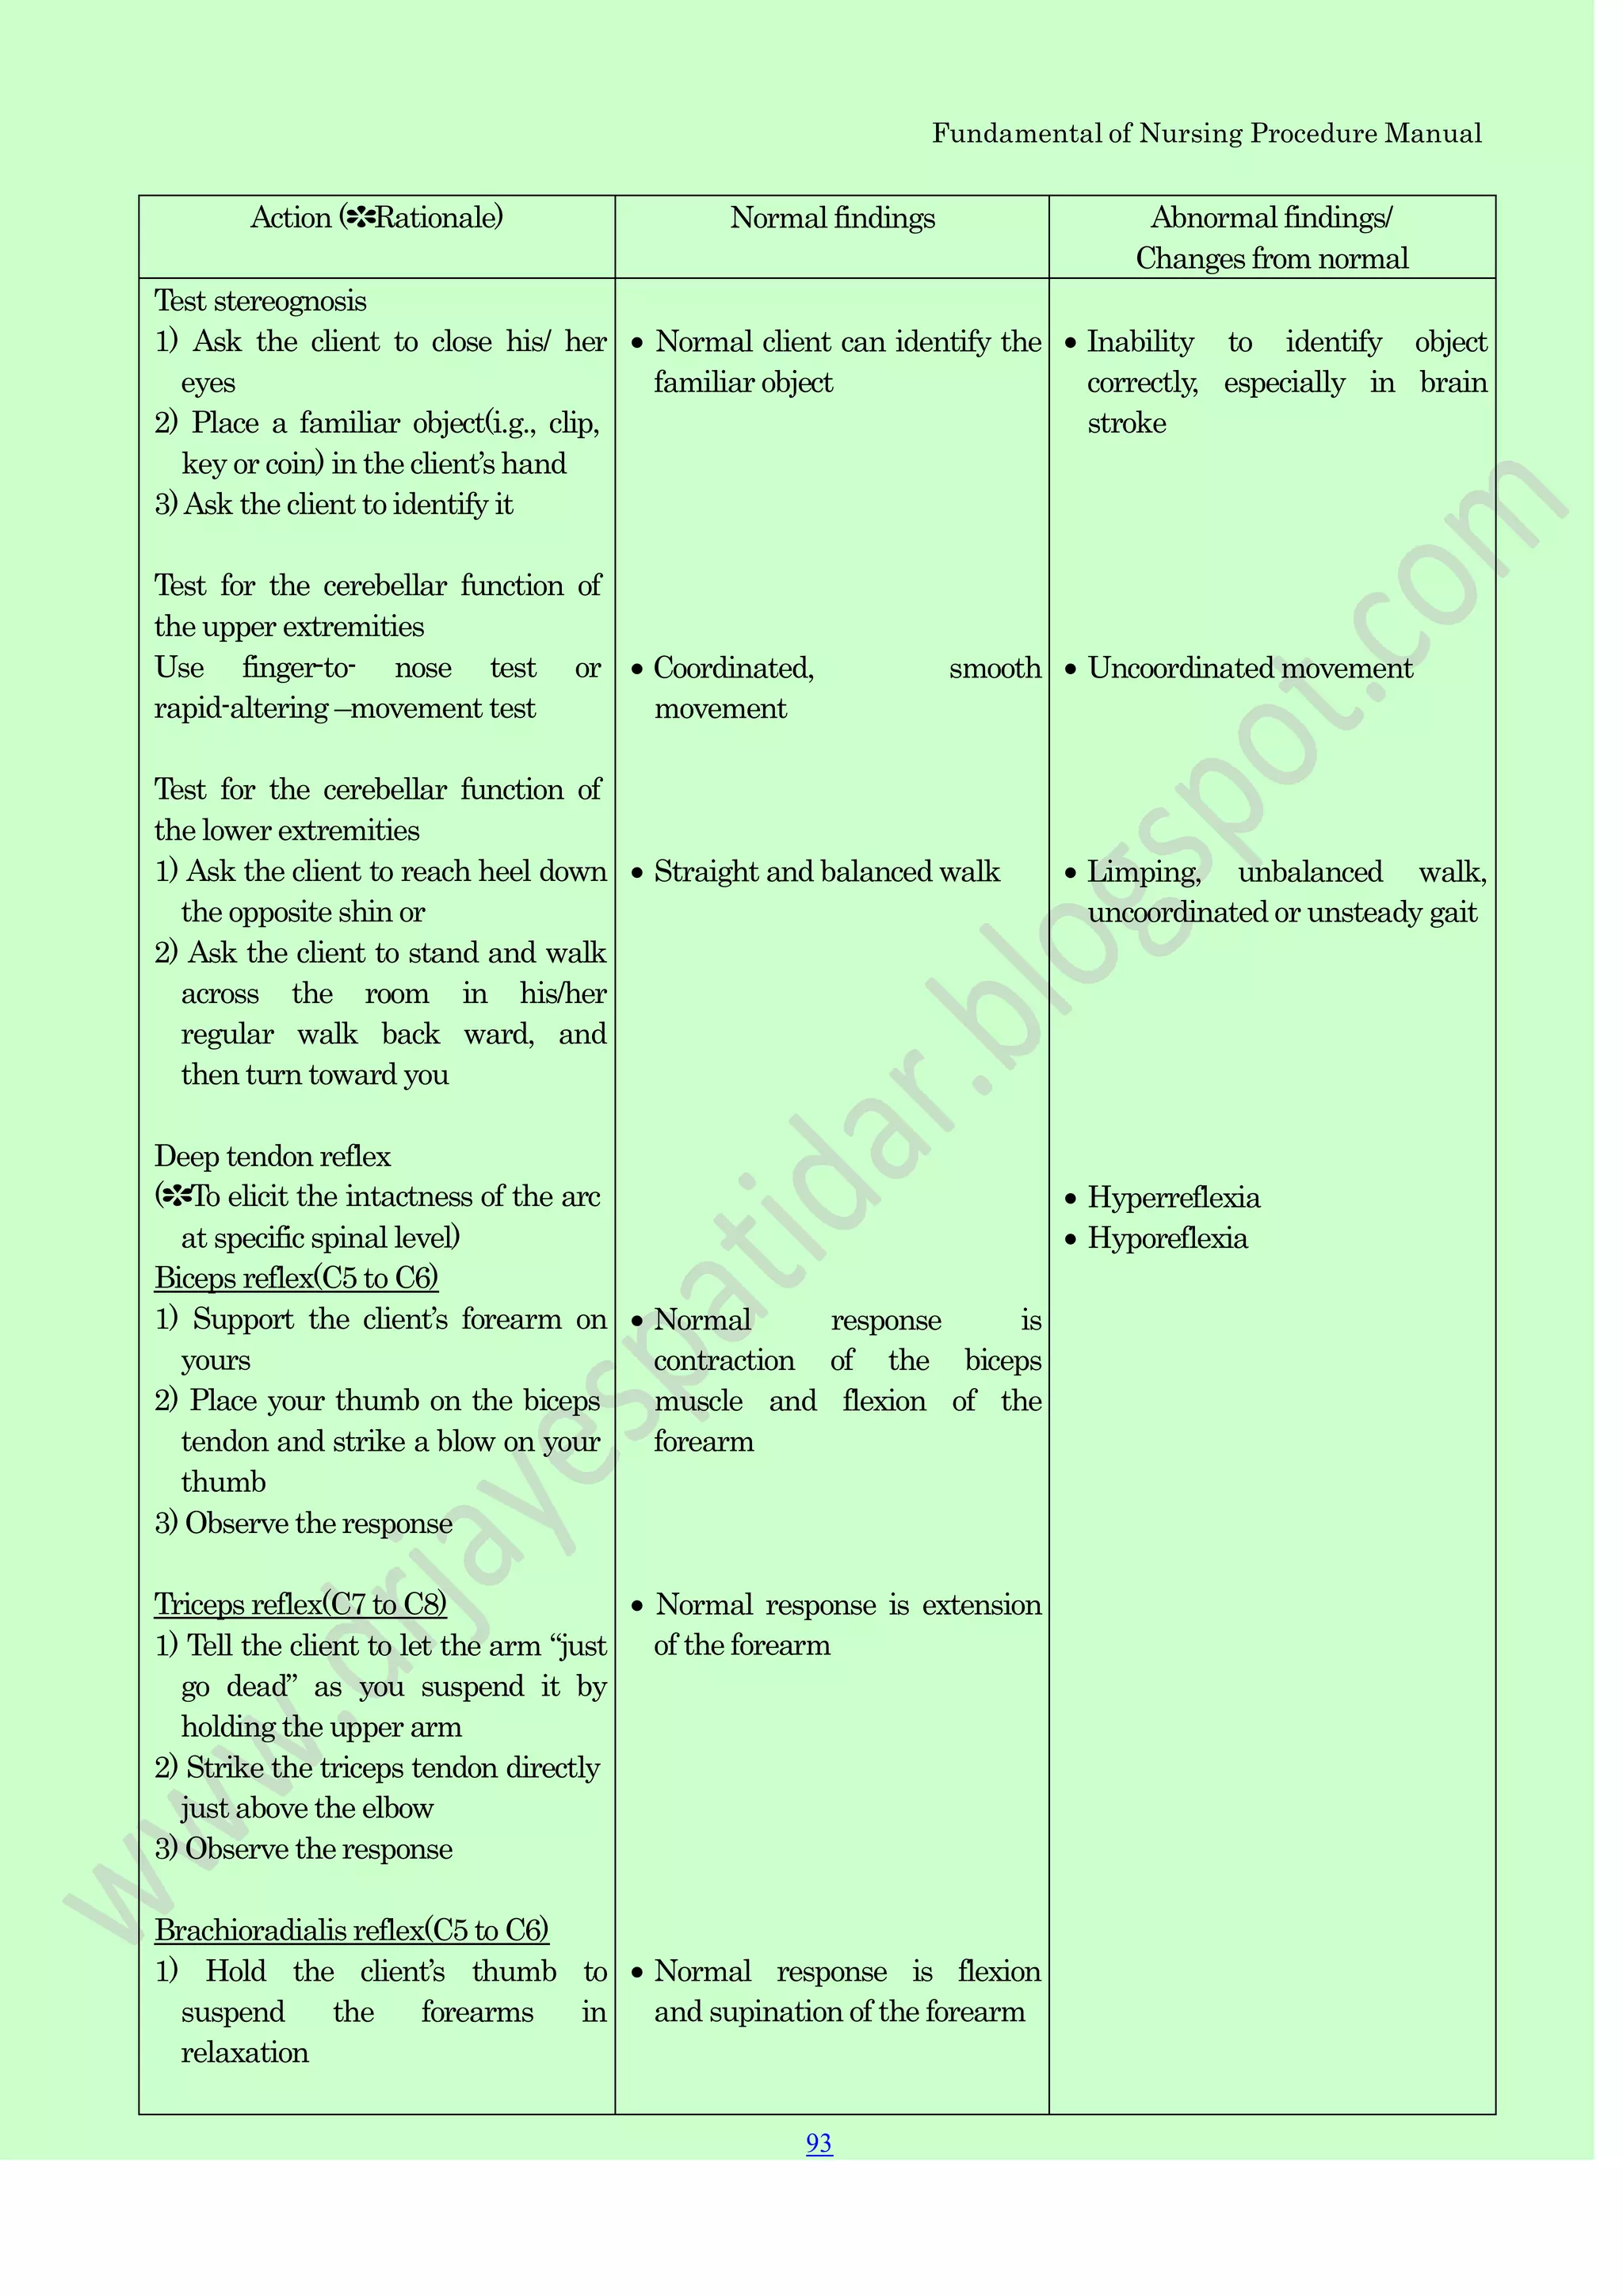


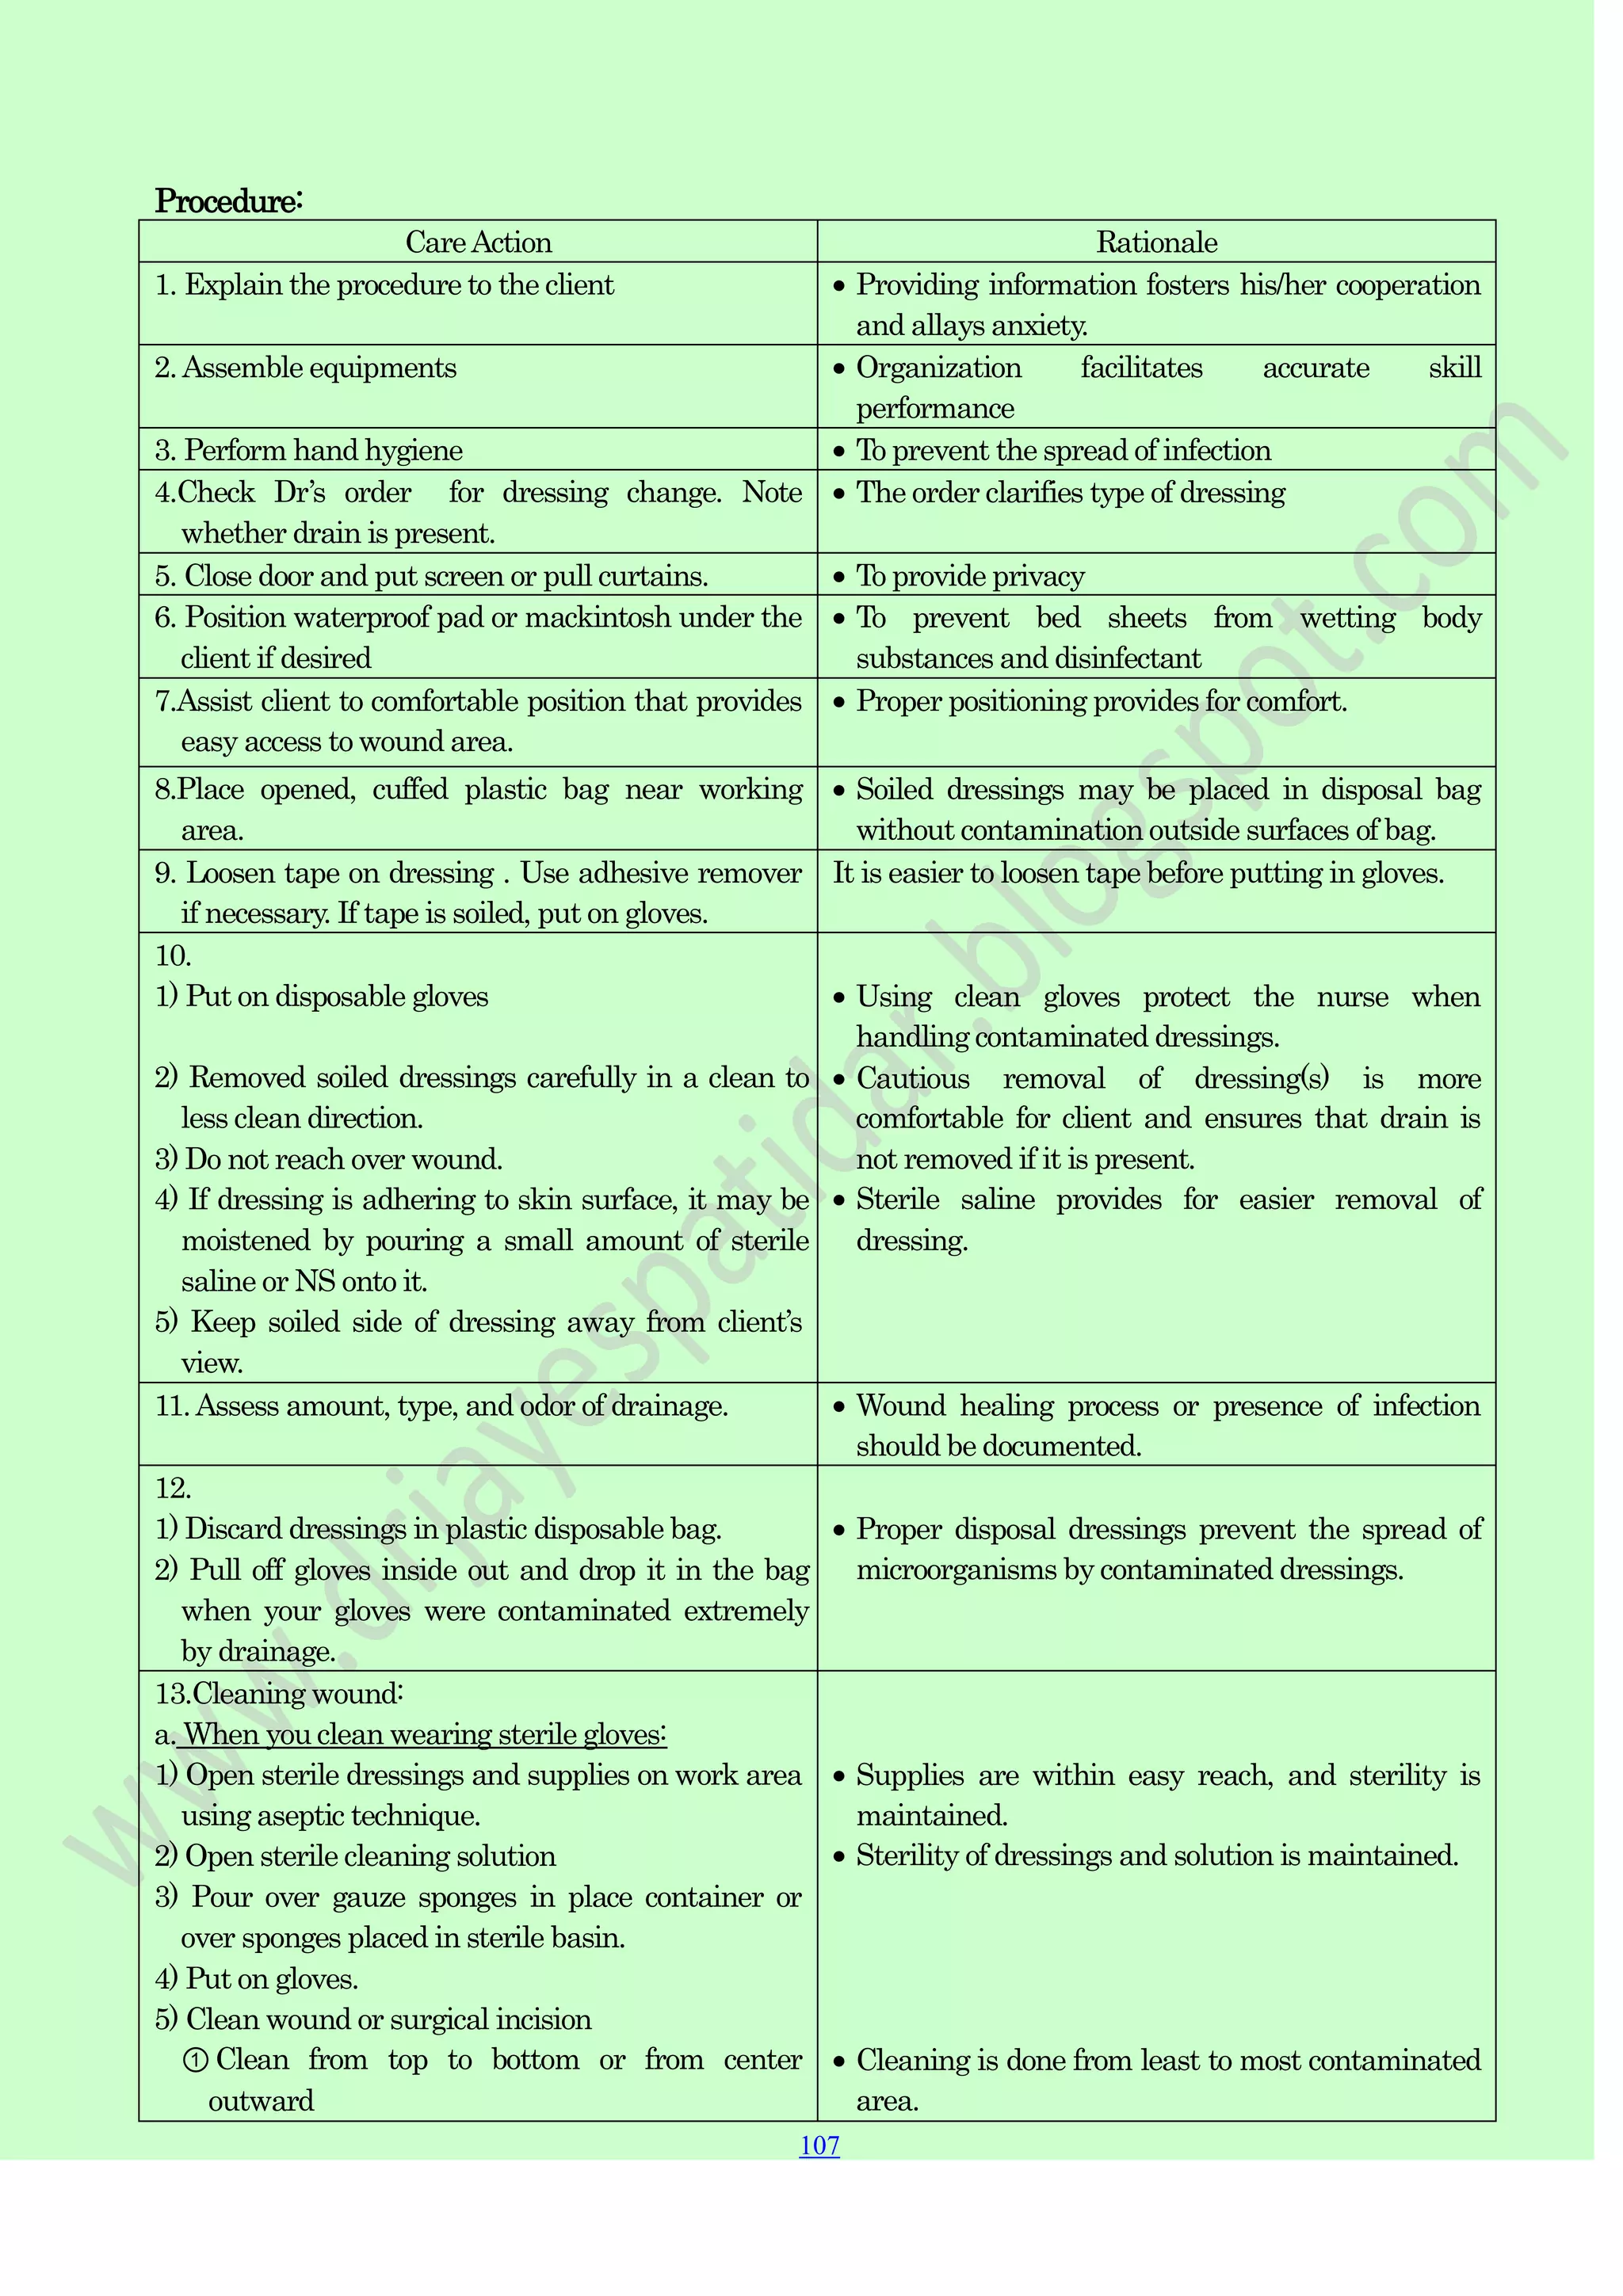
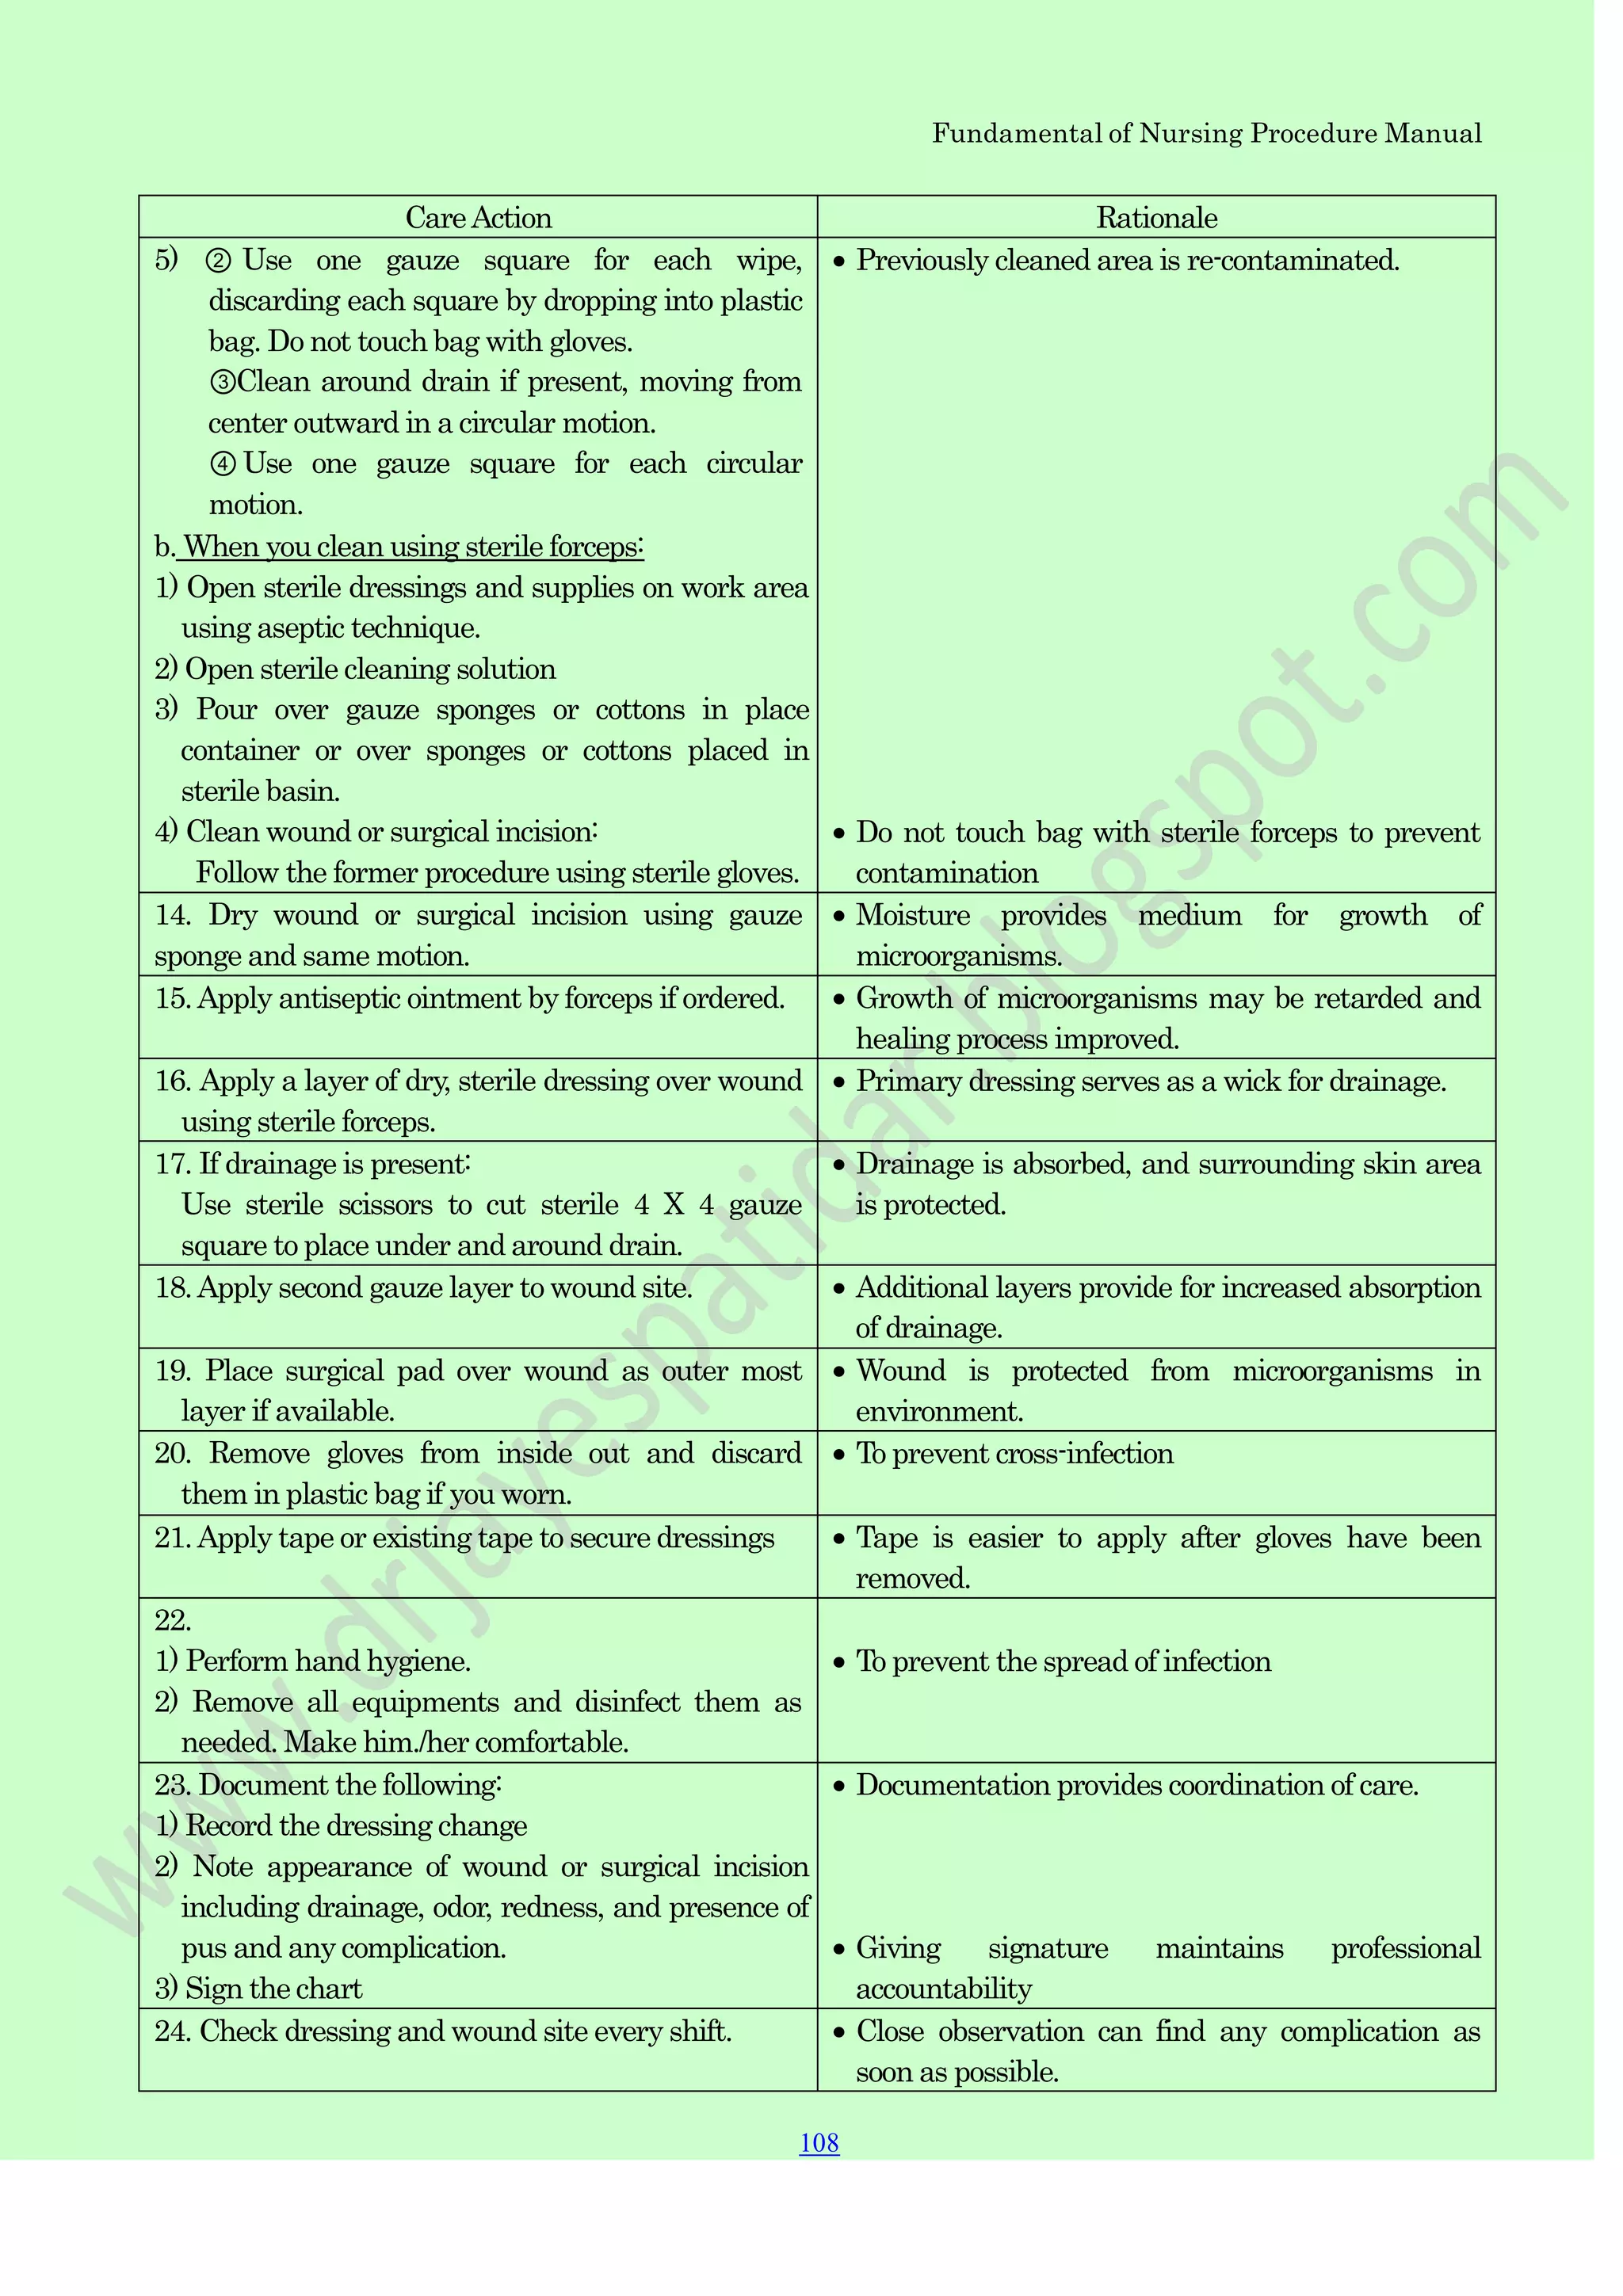

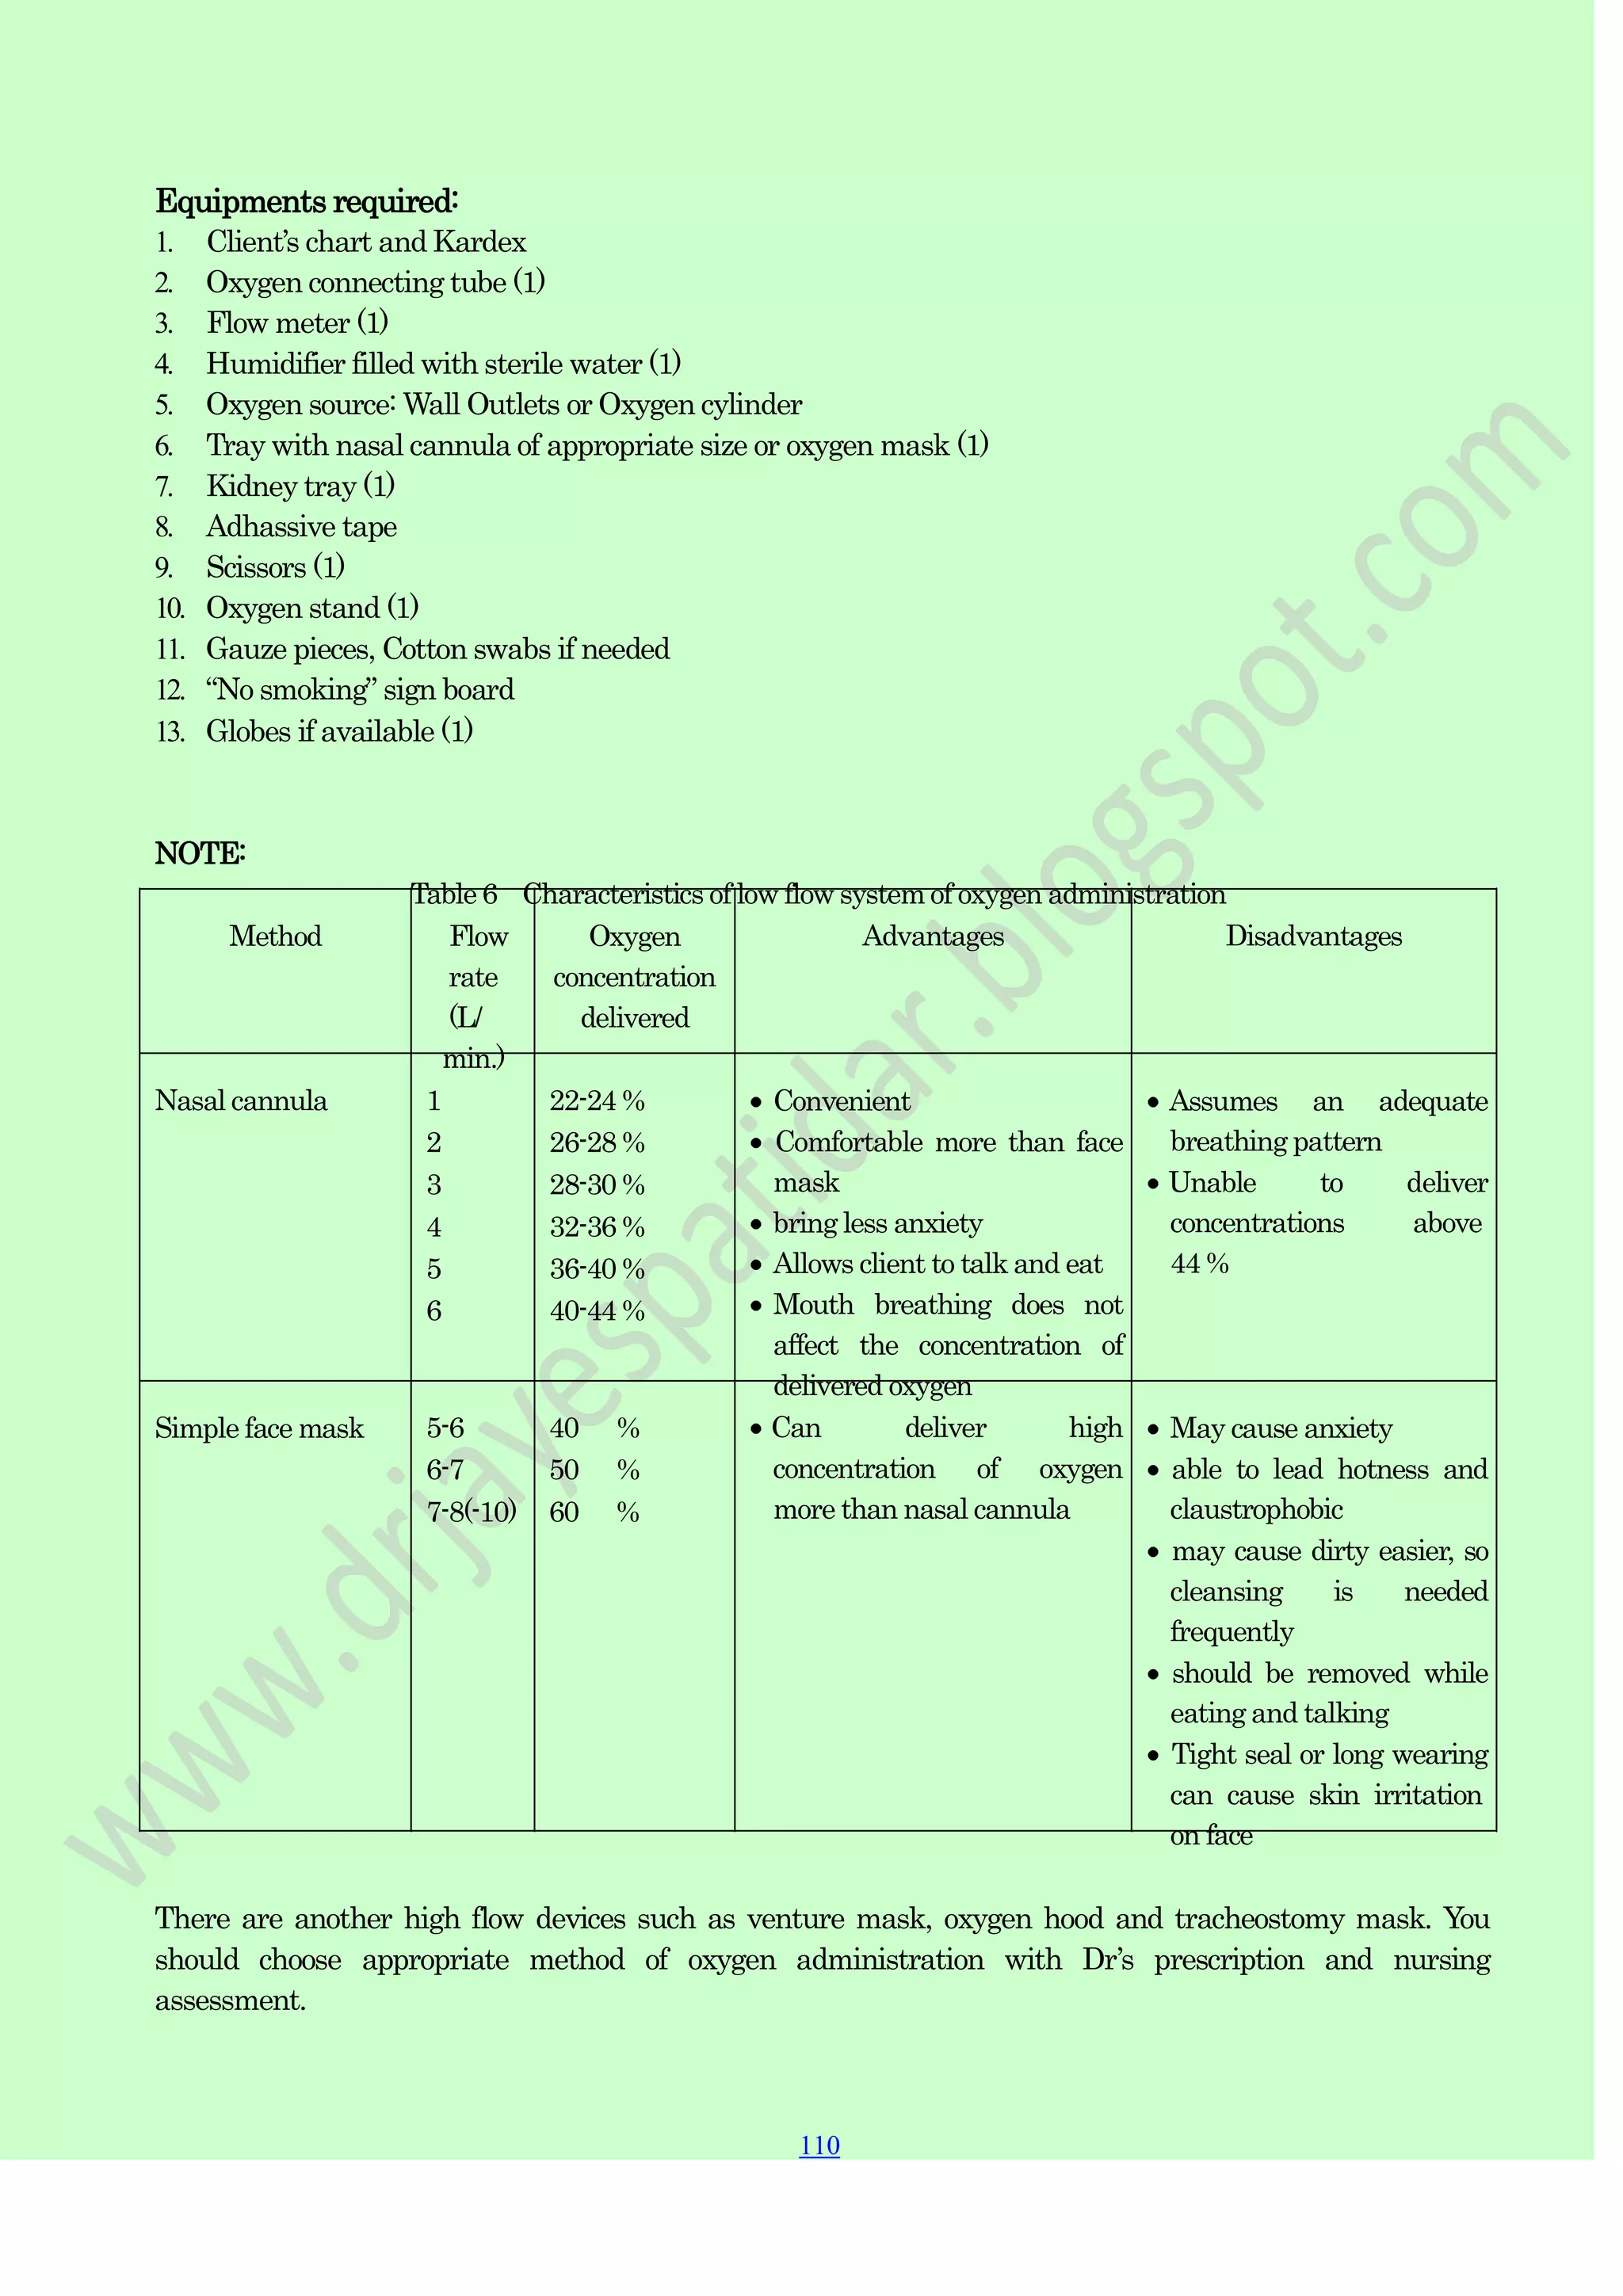
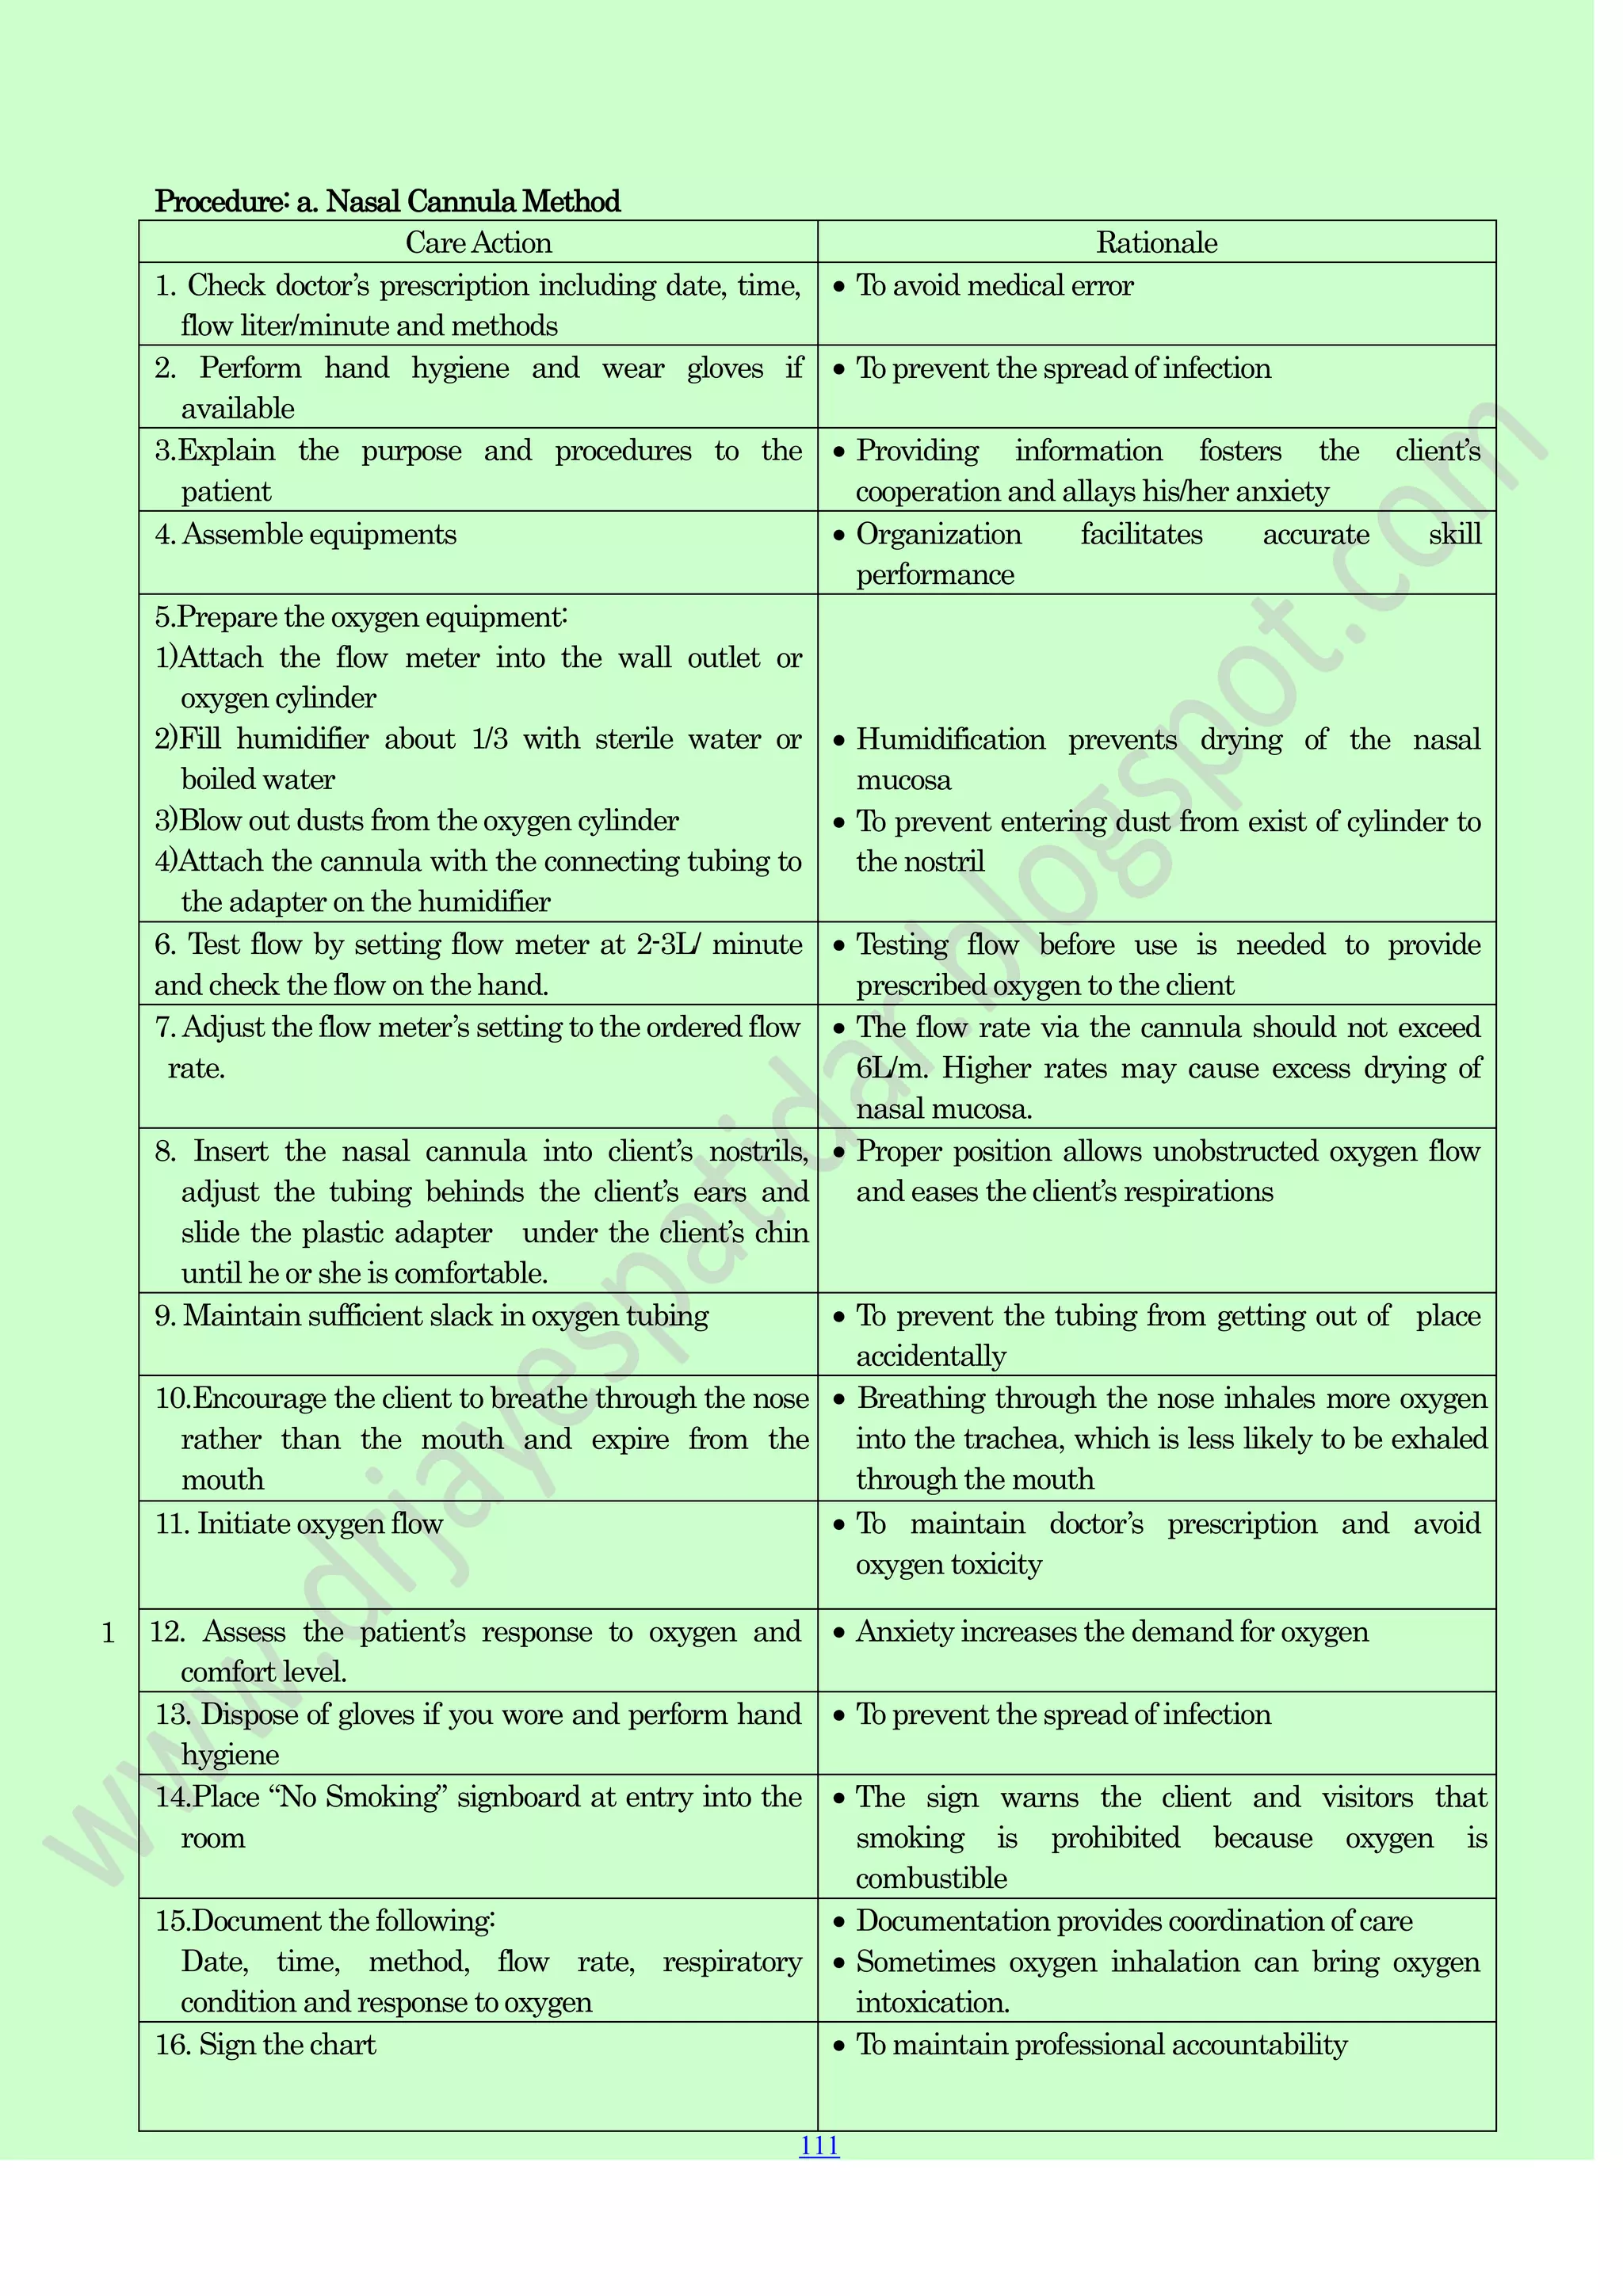


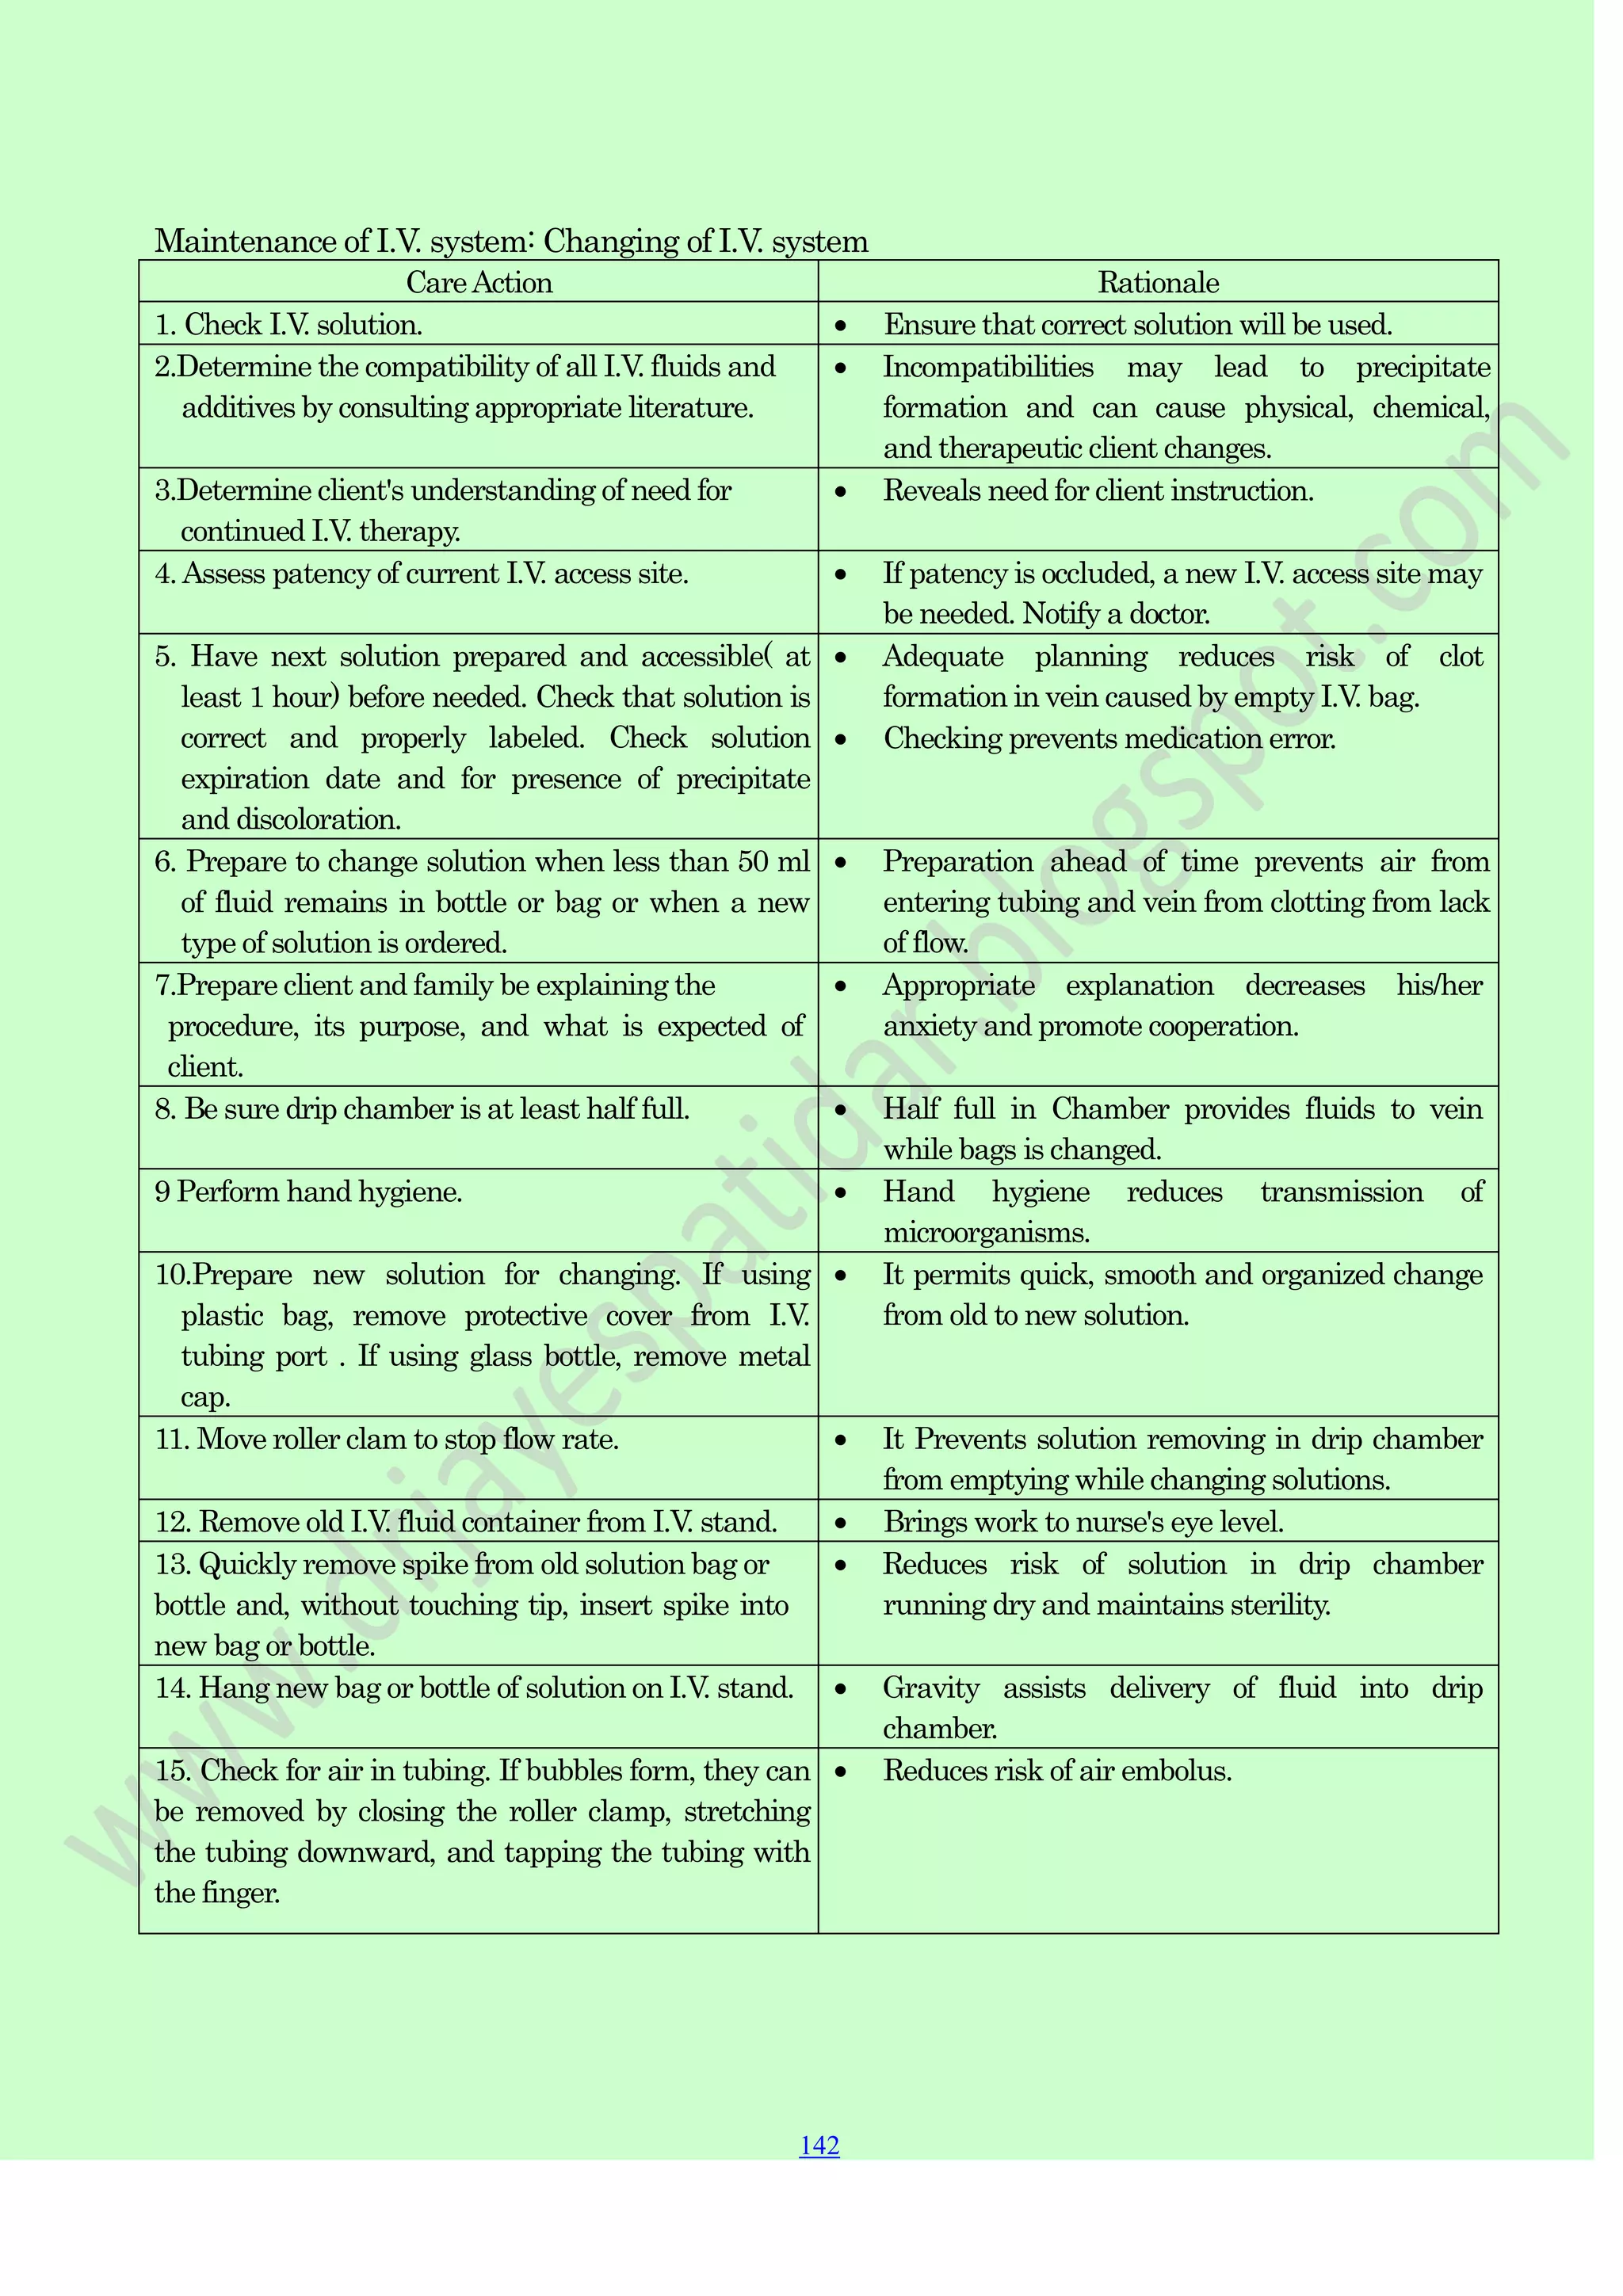
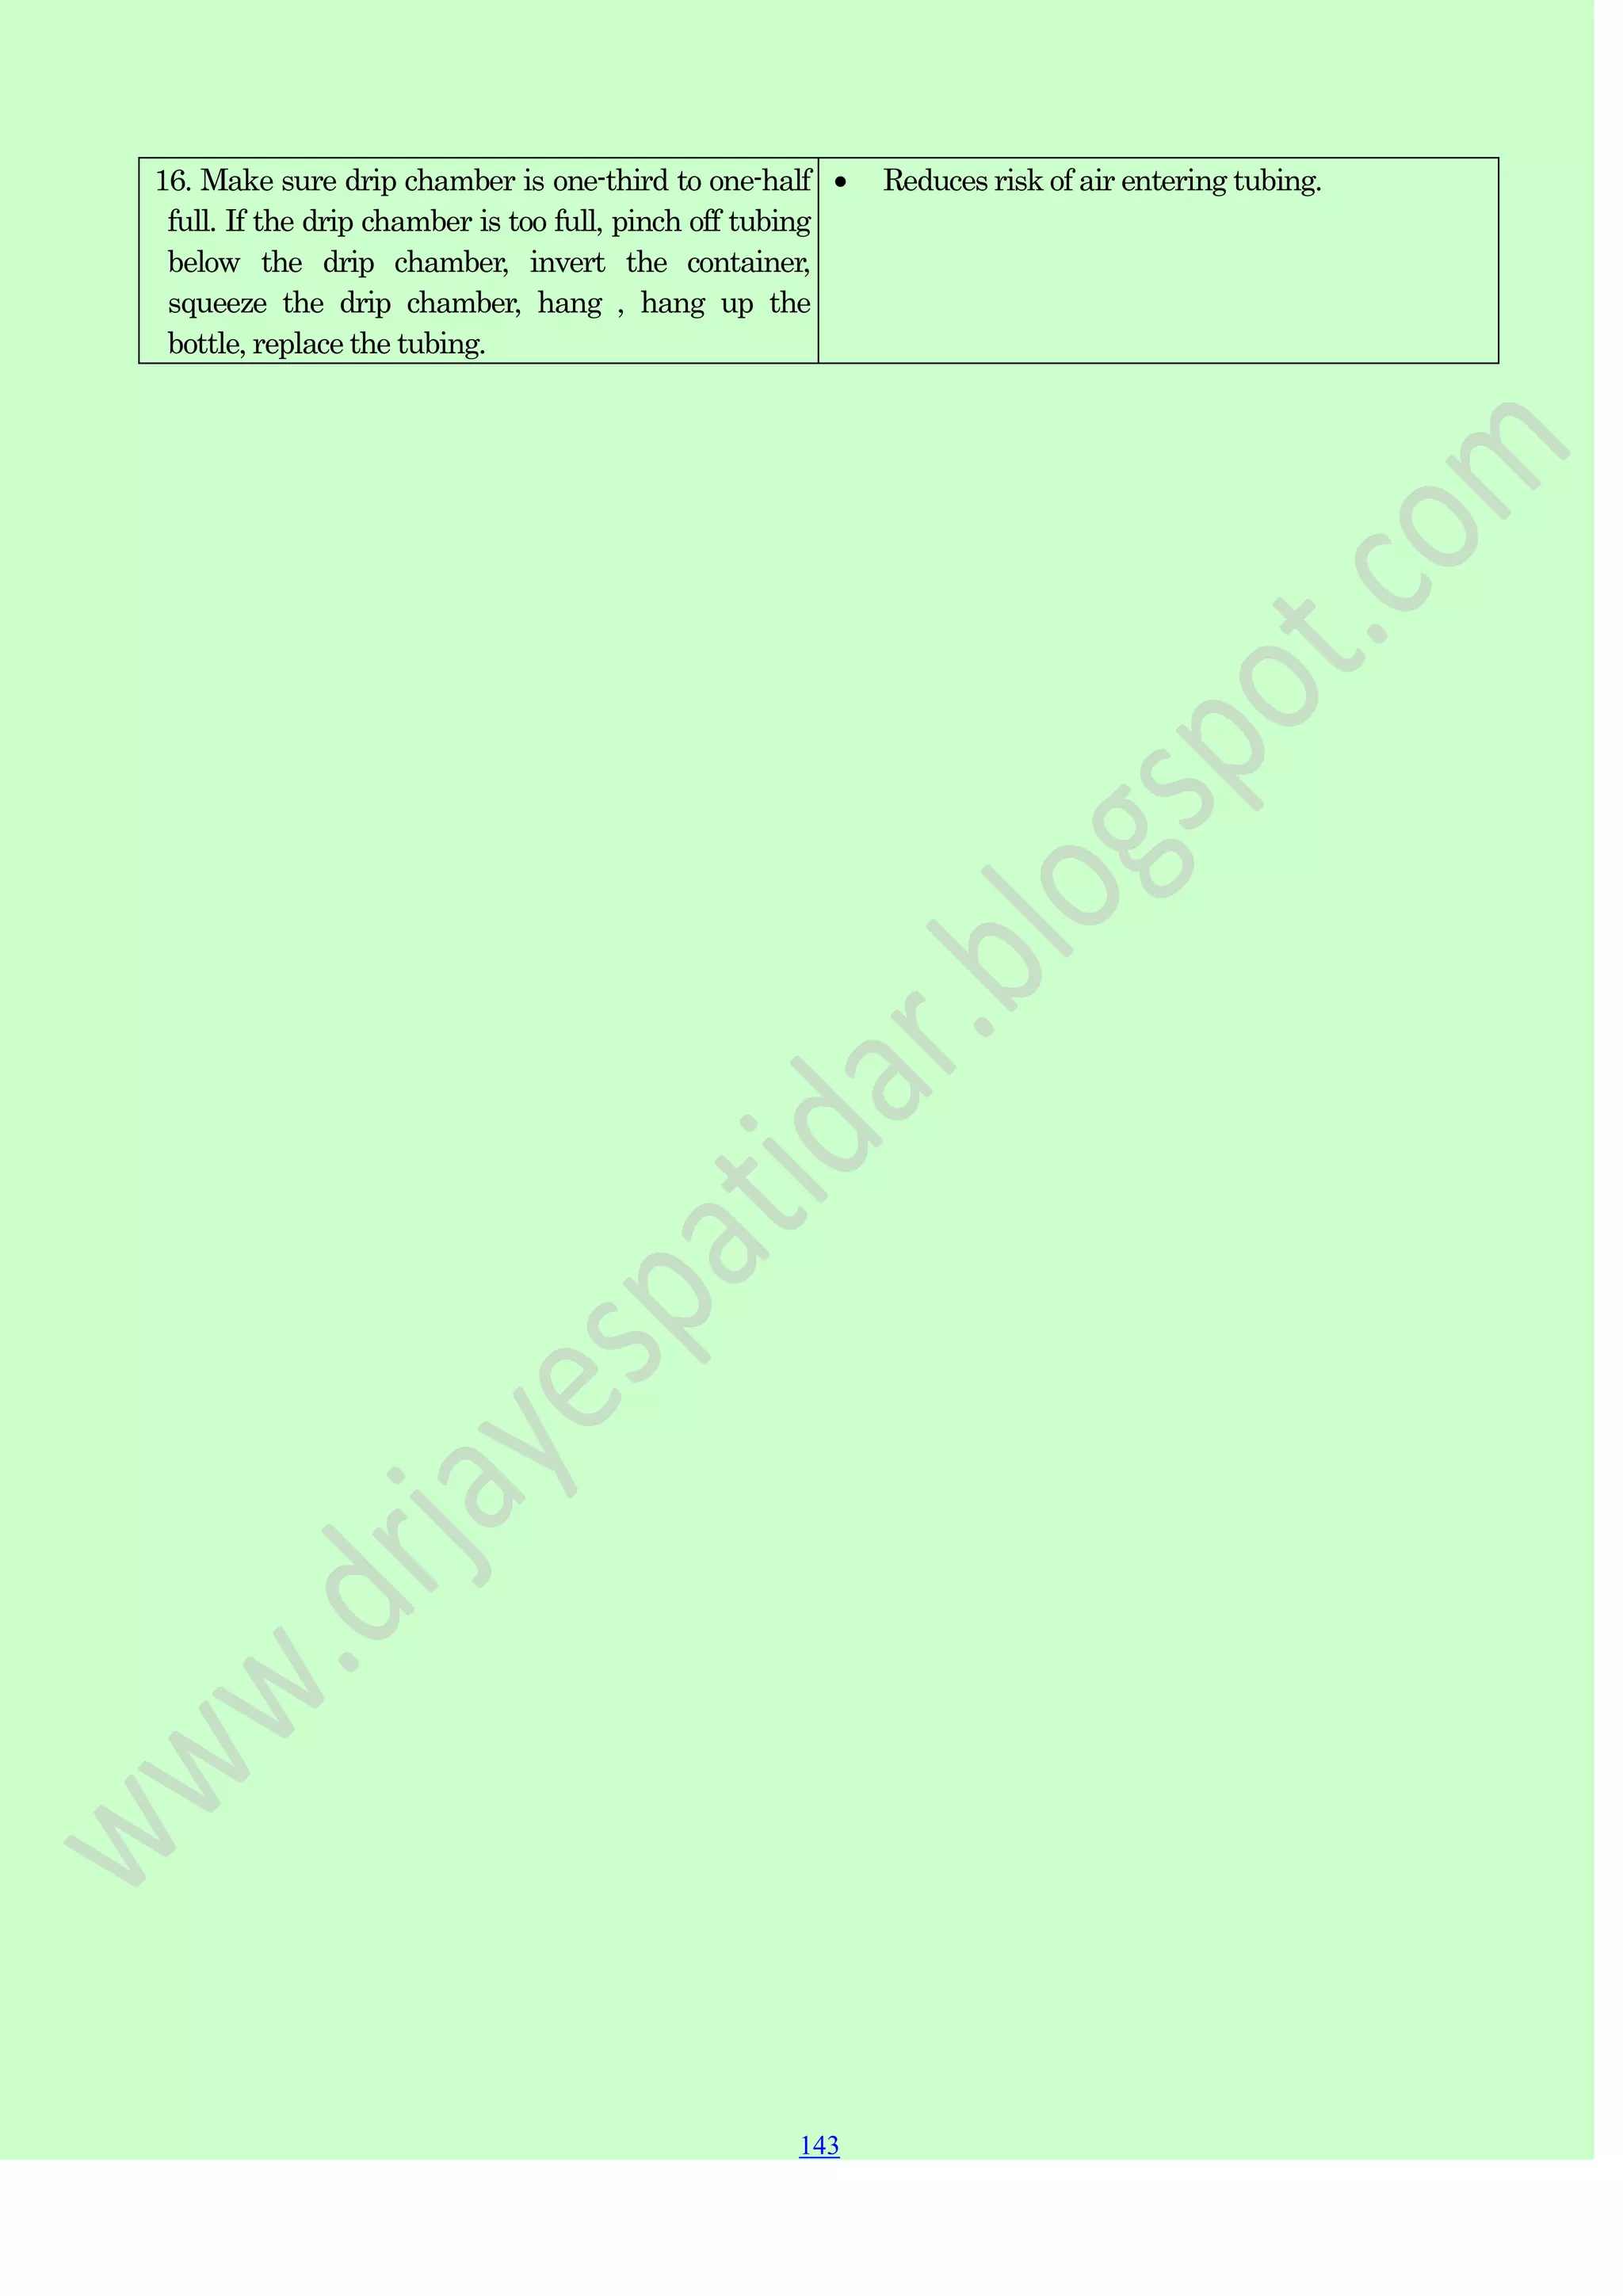
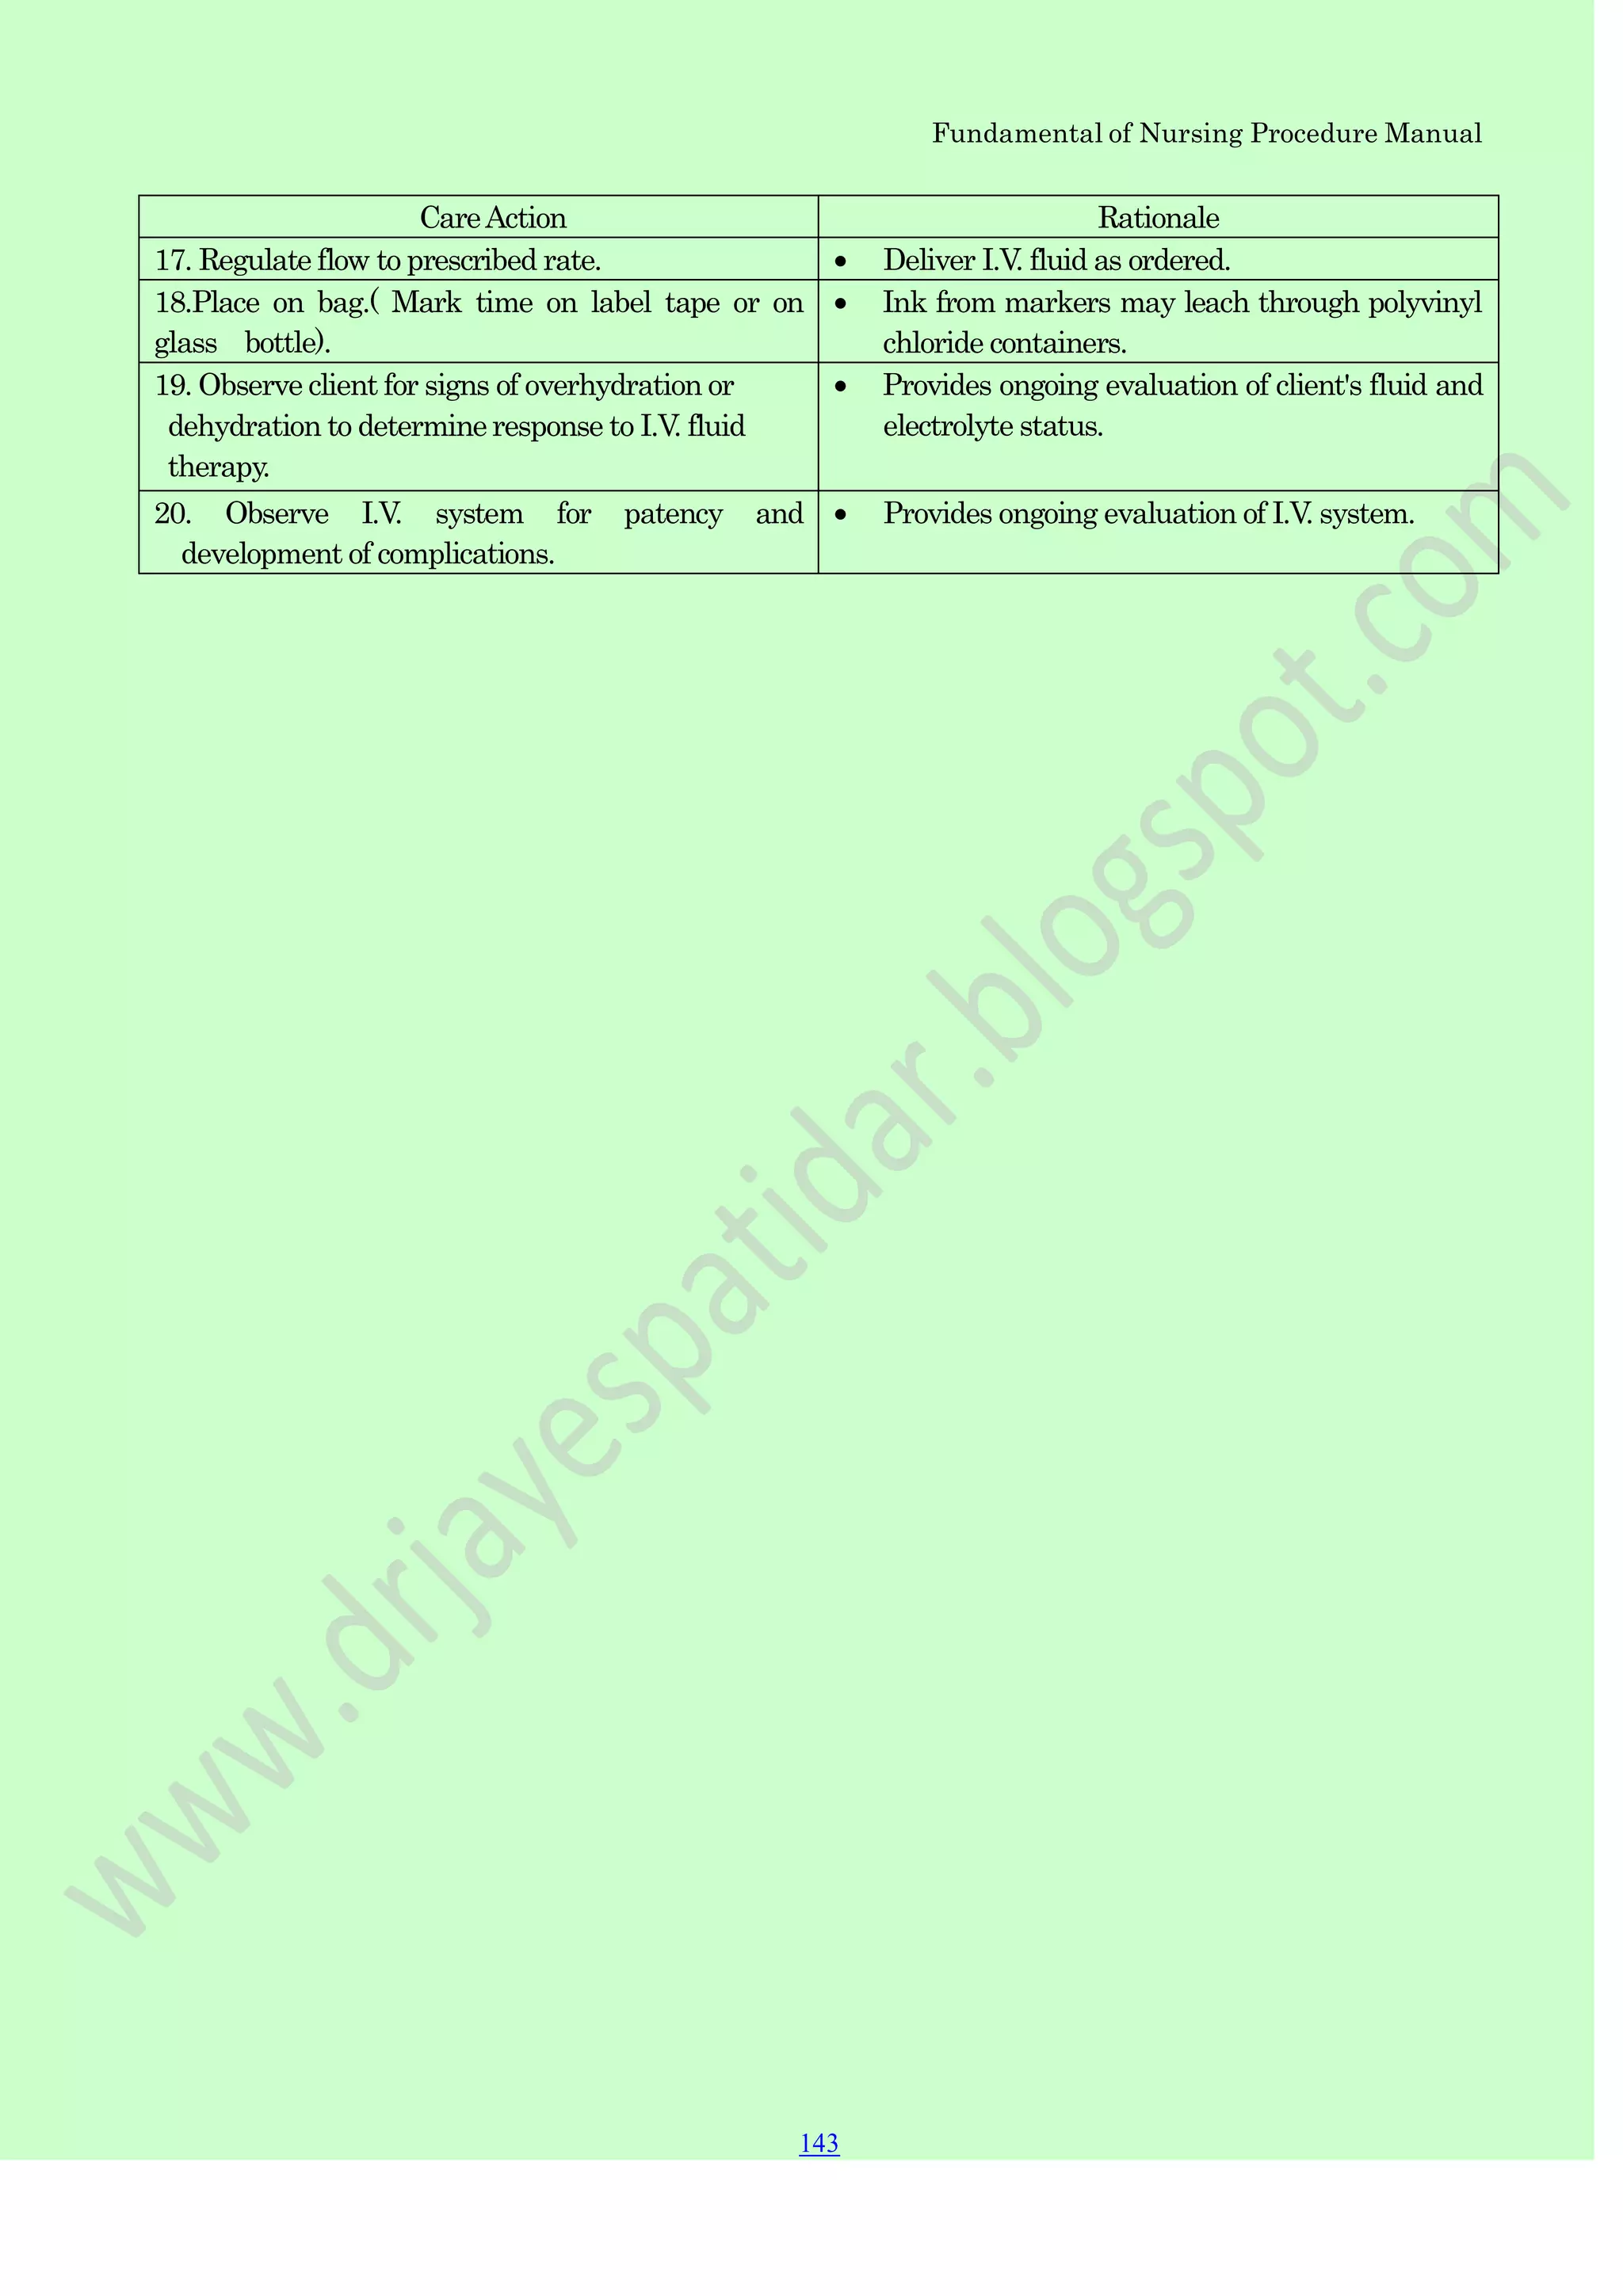
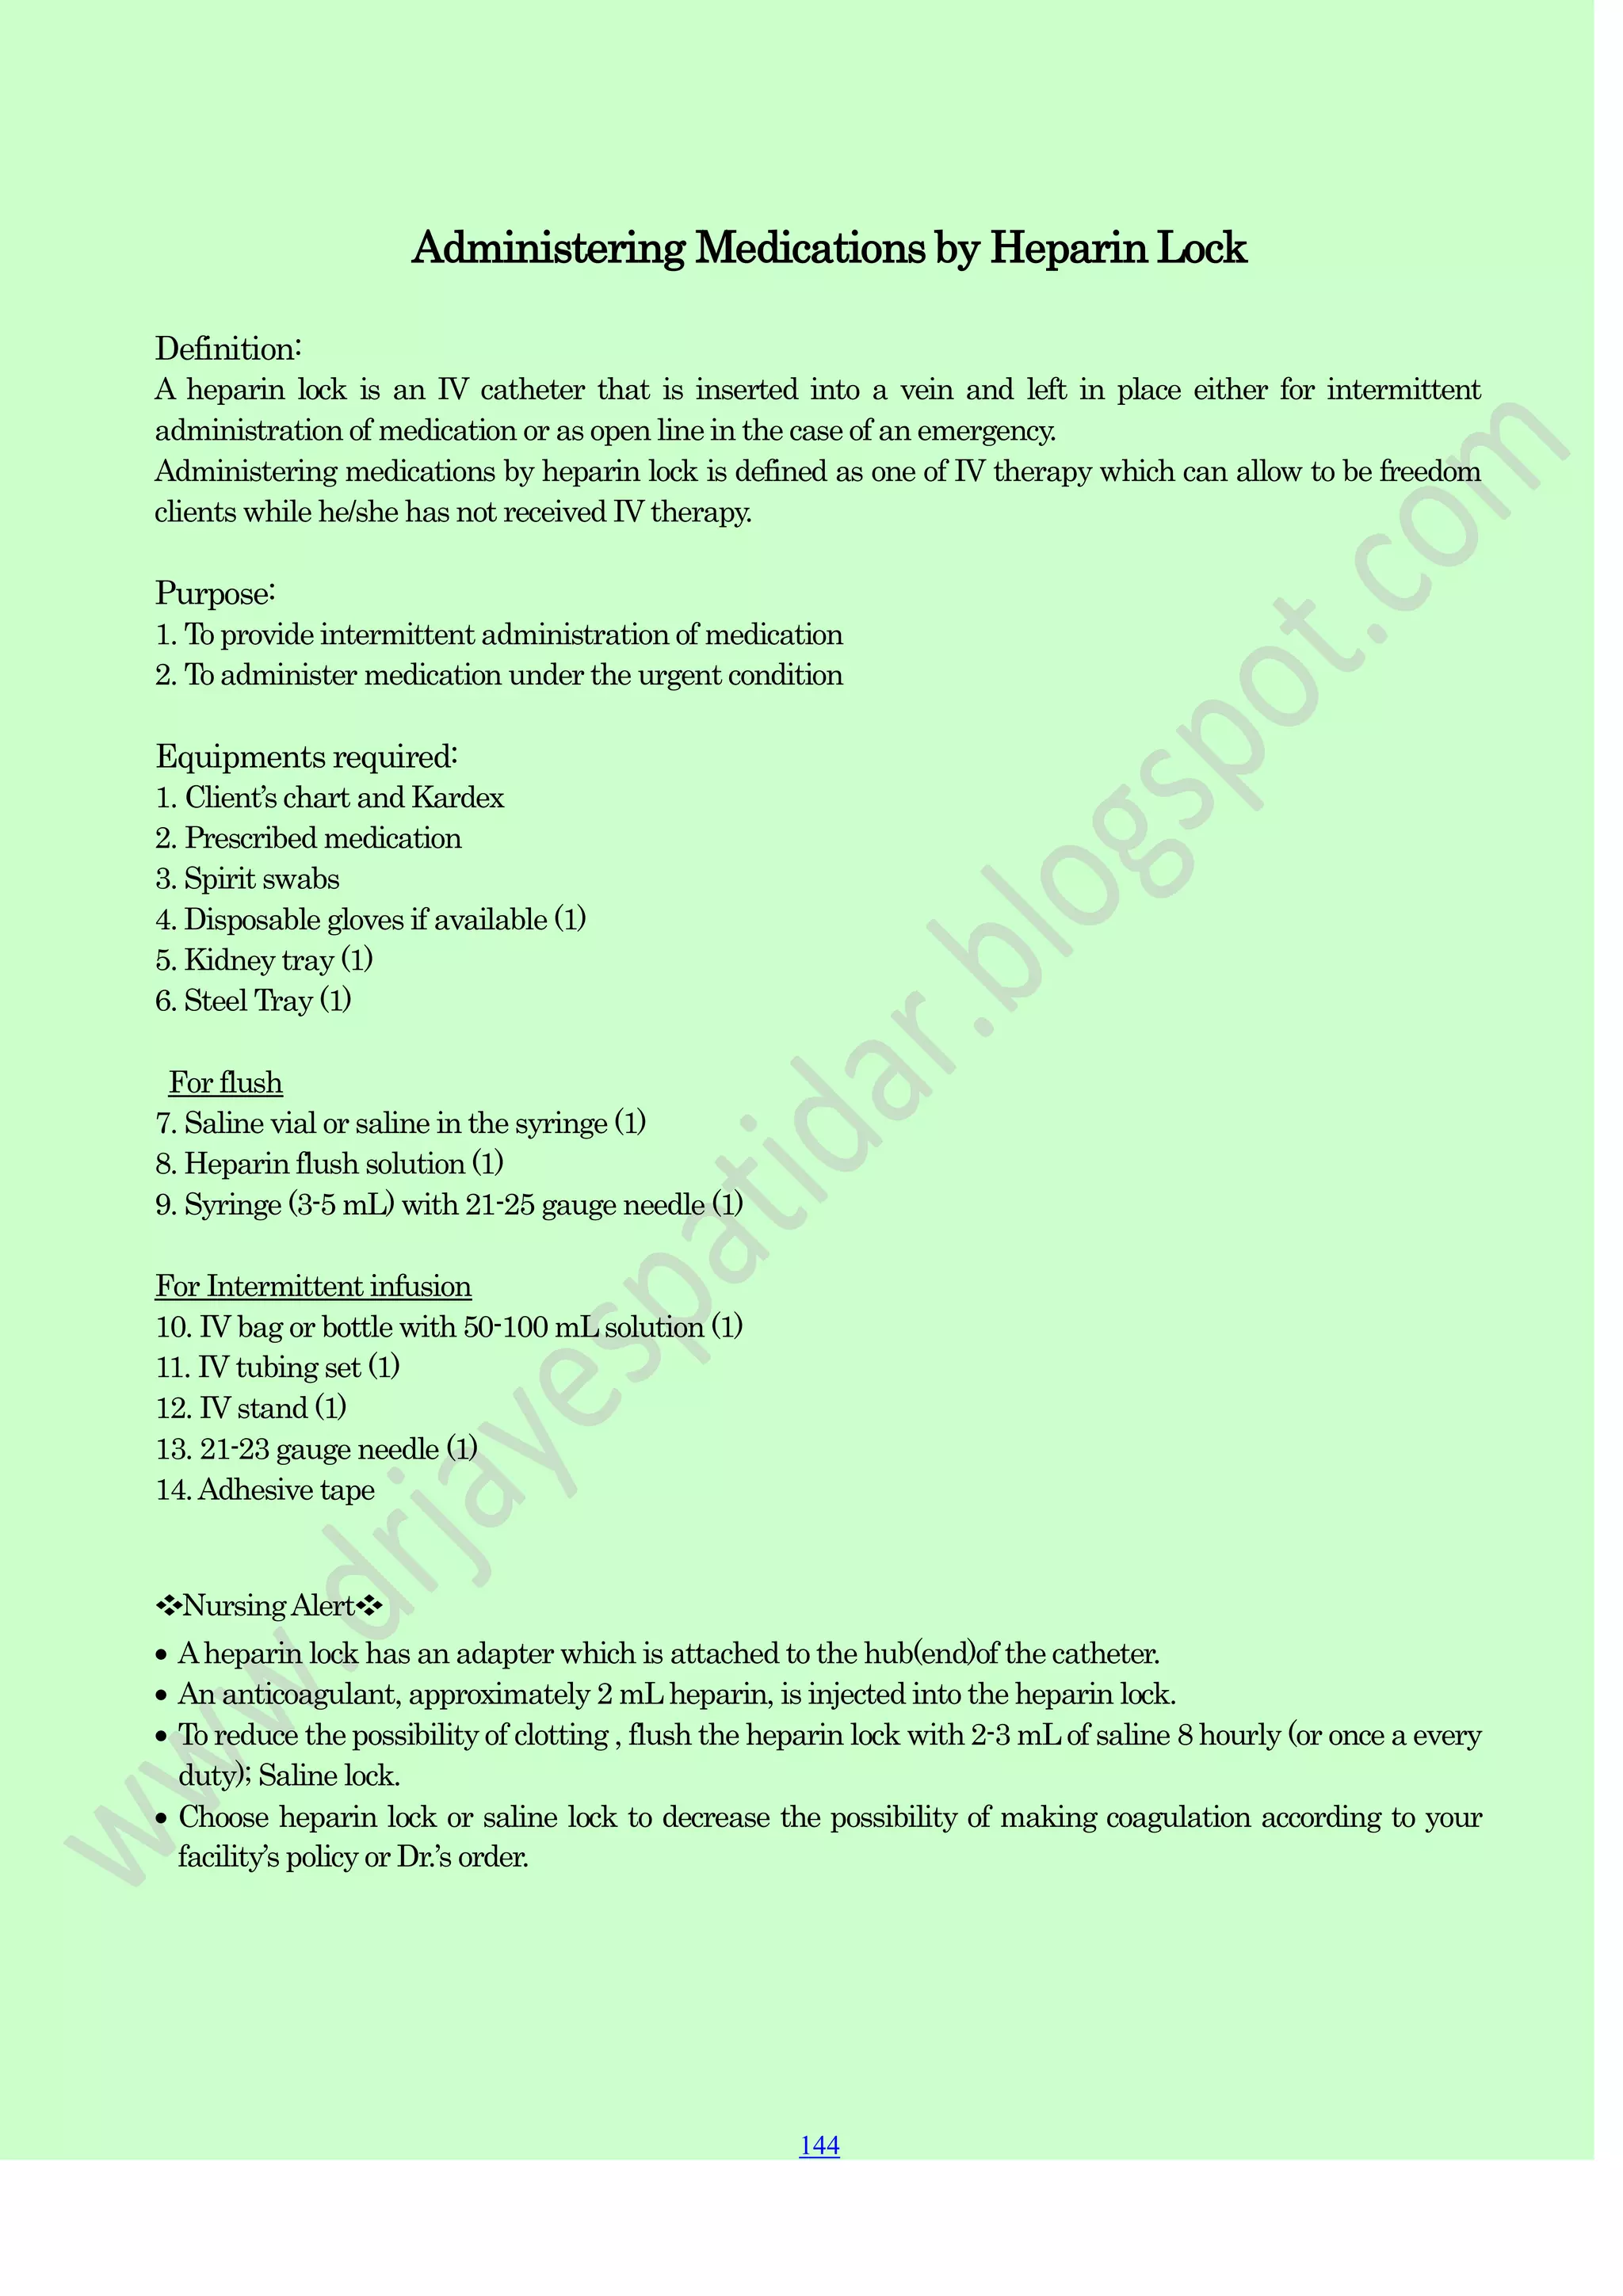
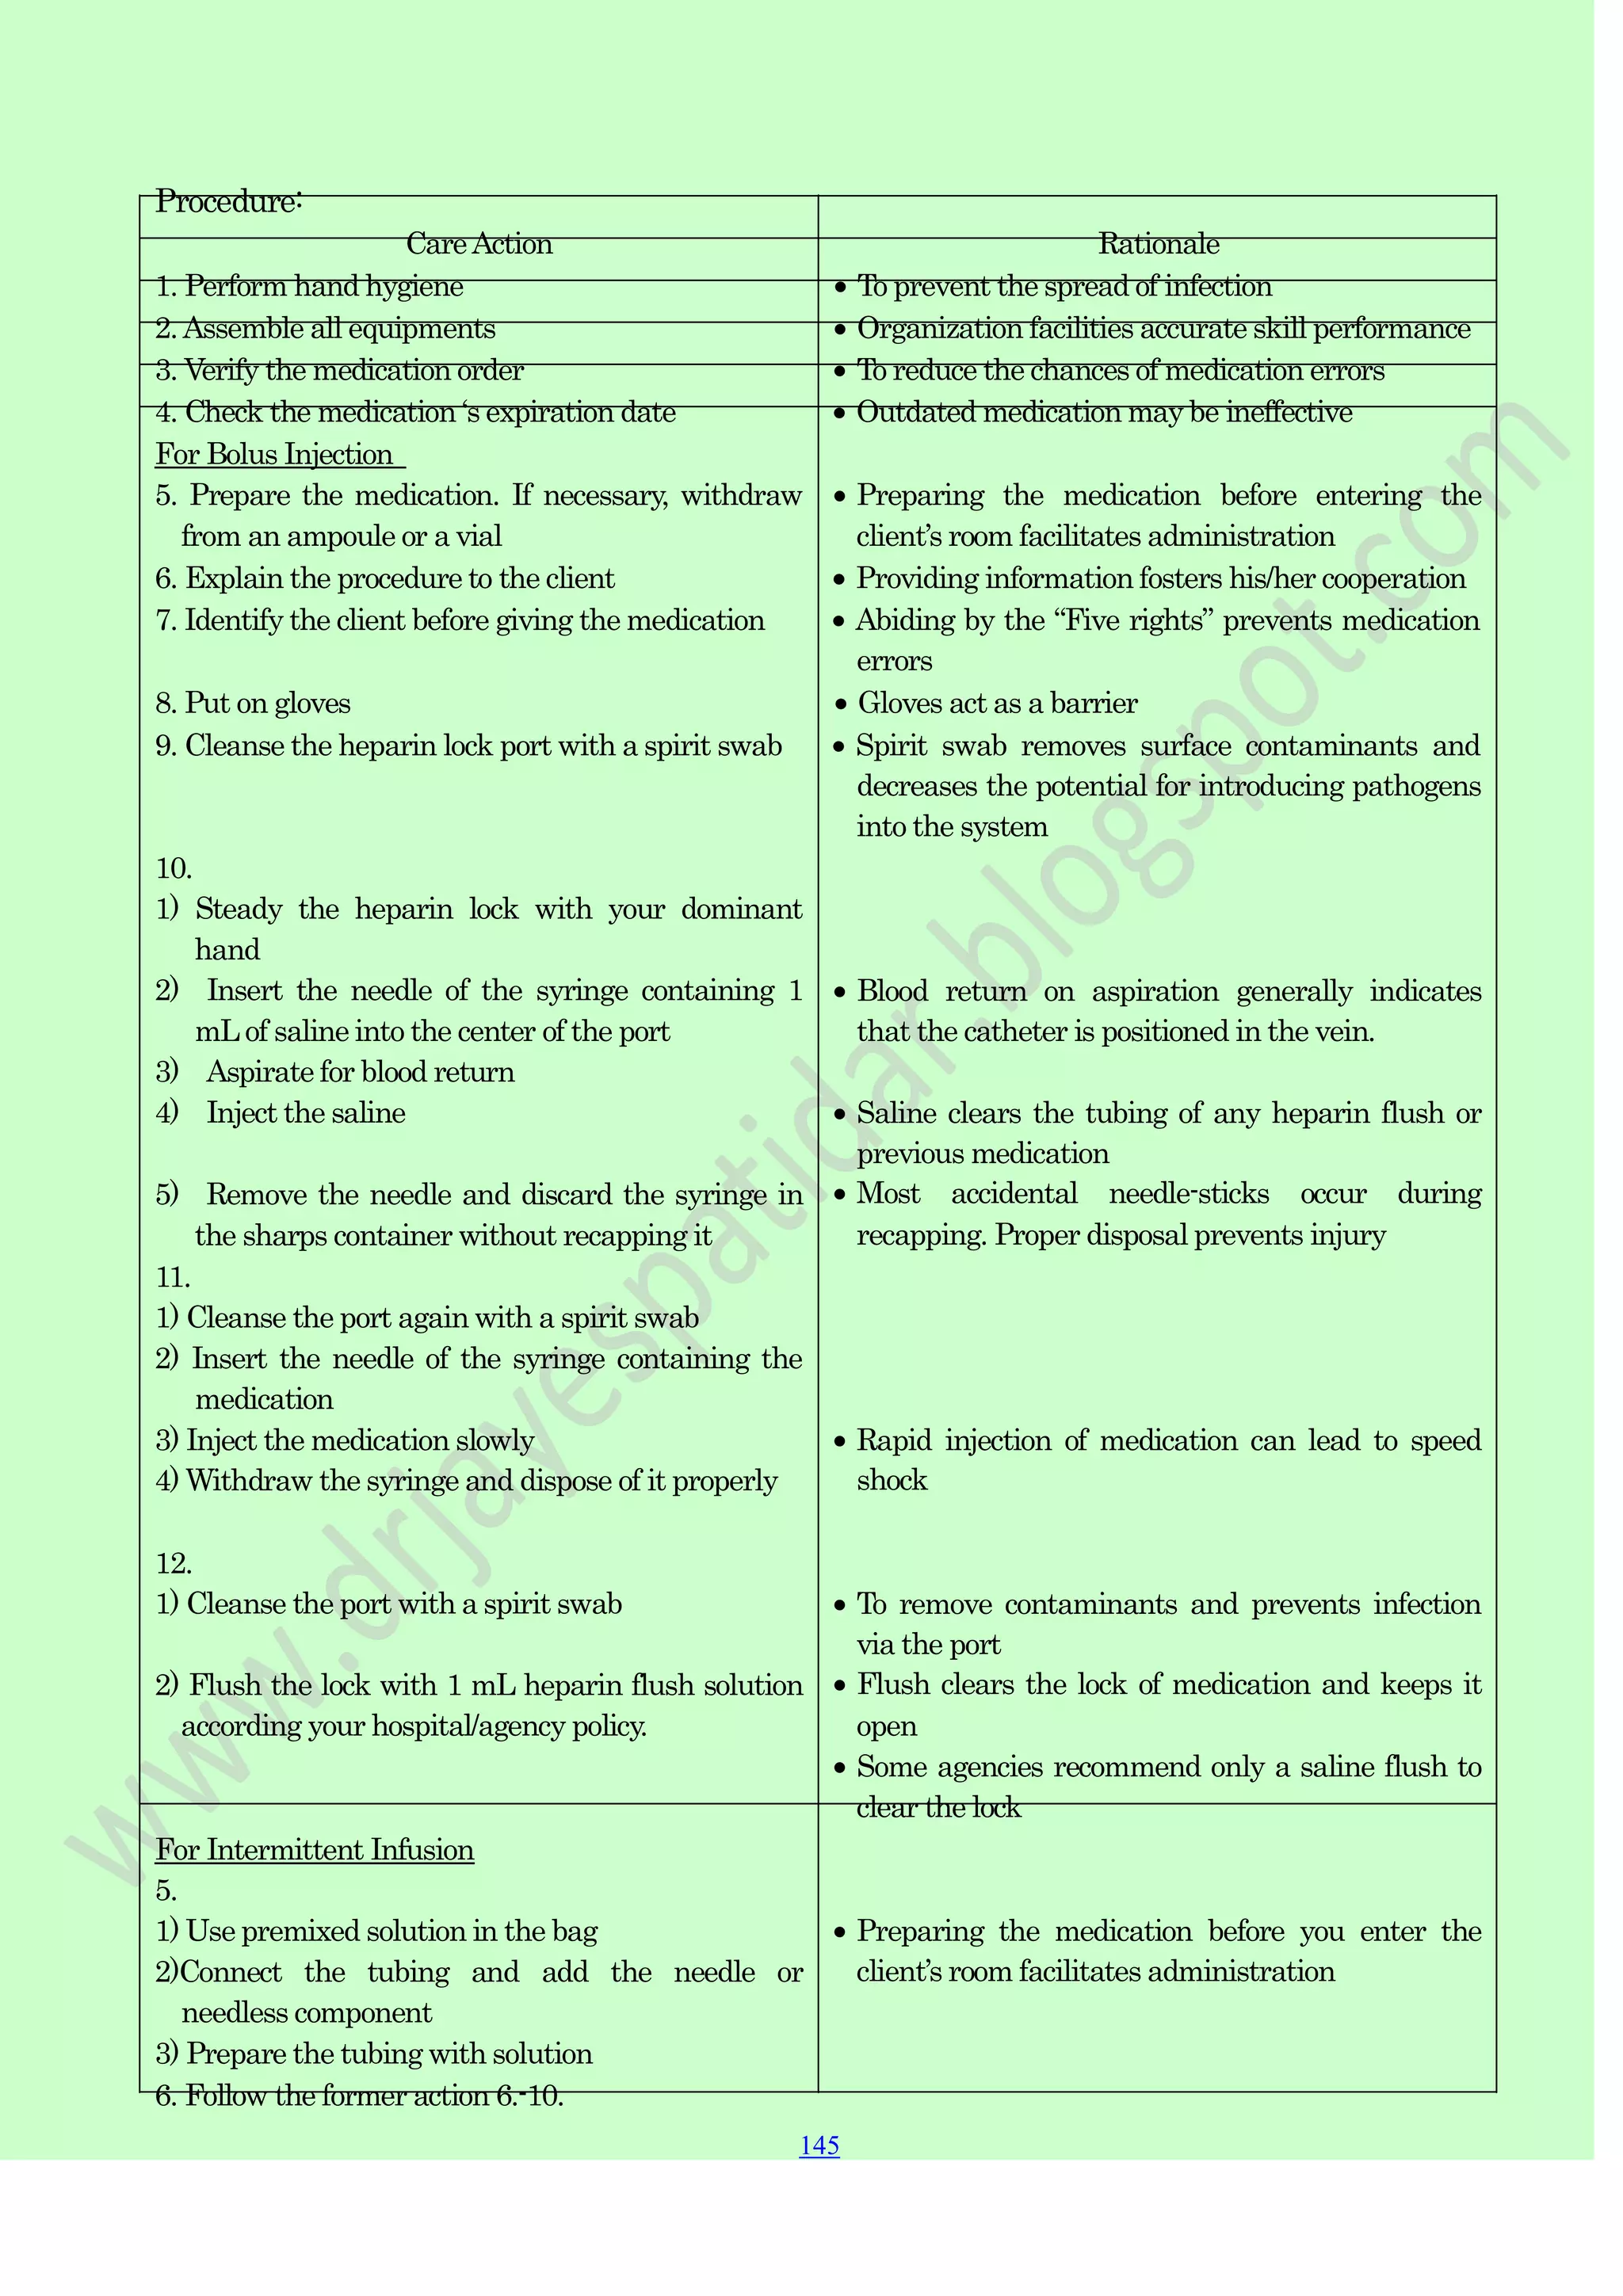
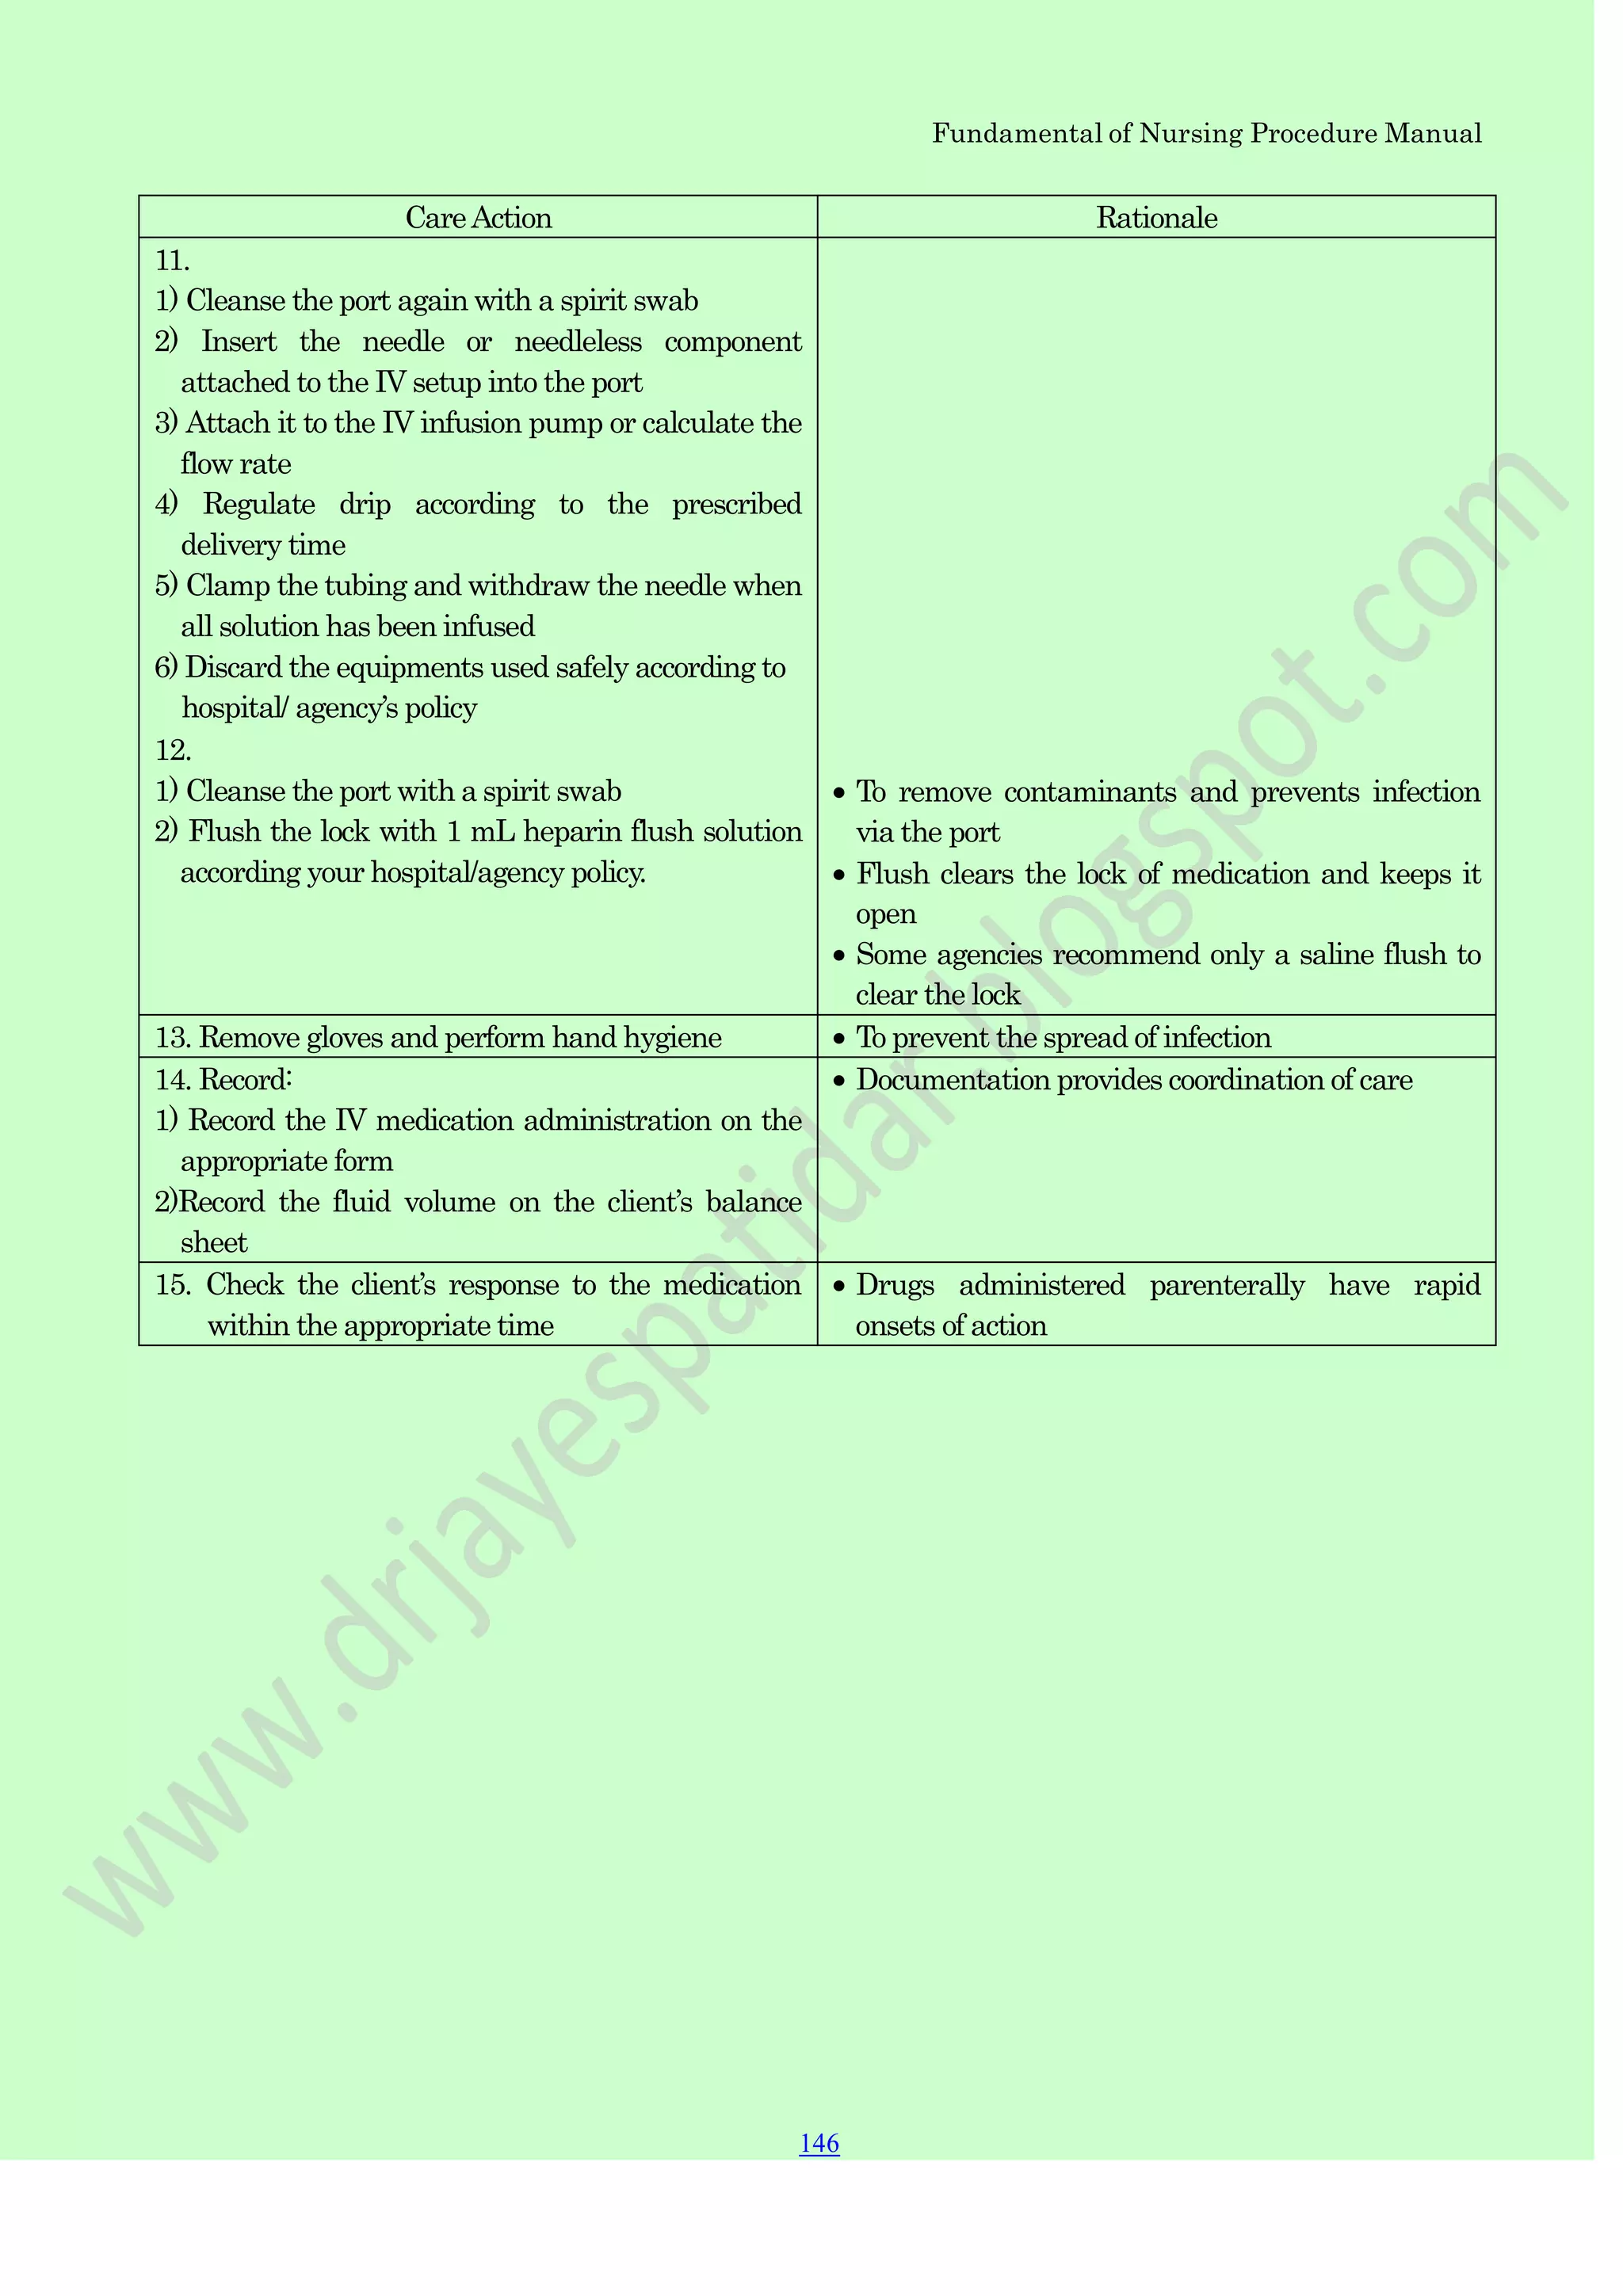
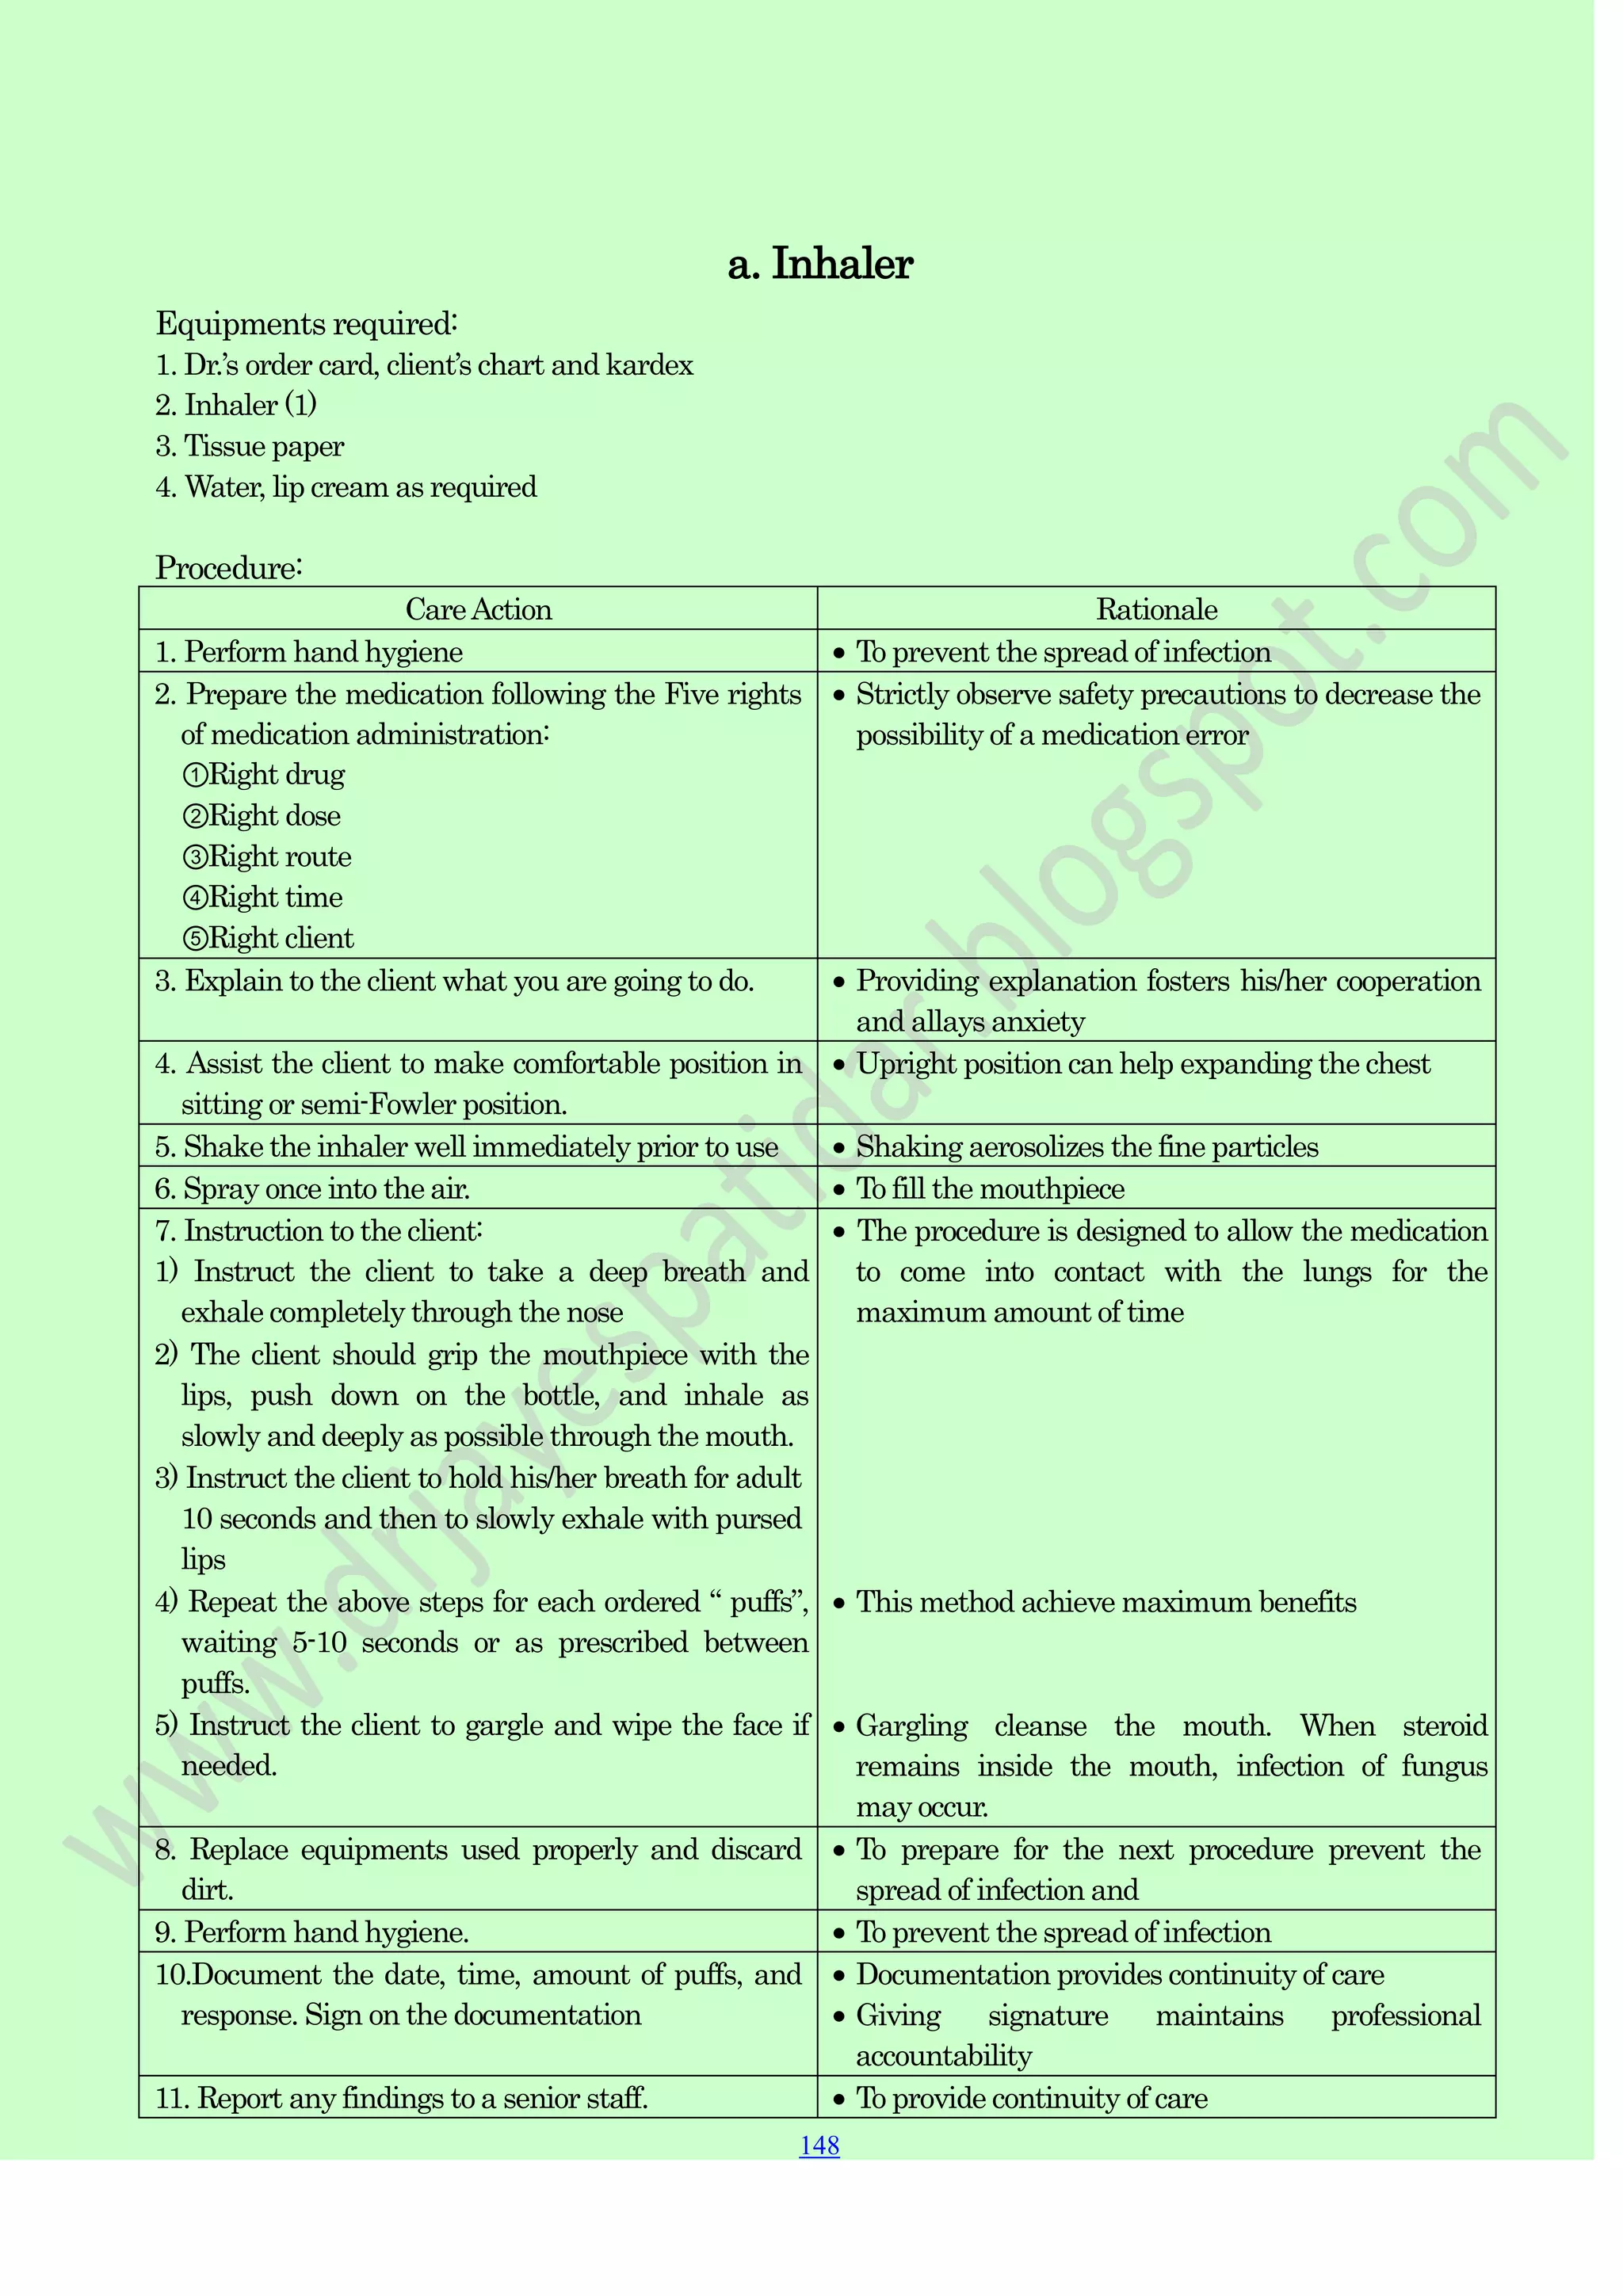


This document provides instructions for various nursing procedures including bed making, vital signs, wound care, tube feedings, and medication administration. It includes detailed steps for making different types of beds, such as unoccupied beds, occupied beds, and postoperative beds. Other sections cover procedures like taking temperatures, blood pressures, oral care and bathing. The document aims to be a comprehensive manual of fundamental nursing skills and their proper techniques.