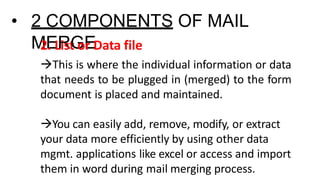
LESSON 3:
Advanced Word
Processing Skills
• Mail merge and label generation
• Integrating images and external materials
What is Microsoft Word?
Microsoft Word or MS Word is a
Graphical word processing program that
users can type with.
Its purpose is to allow users to type and
save document. Similar to other word
processors, it has helpful tools to make
documents.
Microsoft Word Versions
• Word 95
• Word 97
• Word 98
• Word 2000
• Word 2001
• Word 2002/ XP
• Word 2003
• Word 2004
• Word 2007
• Word 2008
• Word 2010
• Word 2011
• Word 2013
• Word 2016
MS WORD Basic Parts
Tab Menu
Tab Menu
Parts of
MS Word 2016
1. Quick Access Toolbar
2. Ribbon
3. File Tab
4. Tabs
5. Group Name
6. Dialog
Box
Launcher
7. Insertion
Point
8. Word
Document
Window
9. Status Bar
10. Print Layout
Button
11. View
Options
12. Zoom Slider
13. Vertical
Scroll Bar
14. Scroll Box
15. Program-Level
Control Buttons
16. Title Bar
MAIL
MERGE
• MAIL MERGE
 One of the most powerful and commonly
used features of Microsoft Word
 It allows you to create documents and
combine or merge them with another
document or data file
 Commonly used when sending out
advertising materials to various recipients
September24, 2020
NAME
COMPANY
ADDRESS LINE 1
ADDRESS LINE 2
ADDRESS LINE
Dear TITLE,
We would like to announce and invite you to avail our 3’rd
quarter promo, for which you are qualified! Being one of our
loyal customers, we would like to thank you for trusting and
buying our products.
Included in this promo kit are the mechanics of our promo
and the catalog from where you can see and choose from
our exciting new products.
Please do not hesitate to contact us if you have further
Inquiries regarding the details of the promo or about any of
the new products in our catalog. We look forward to doing
more business with you.
Again, thank you very much and more power.
Your partner in merchandising,
Red Dragon, Inc.
Figure 1 :
Sample form document
September24, 2020
<<Name>>
<<Company>>
<<AddressLine 1>>
<<AddressLine 2>>
<<AddressLine 3>>
Dear <<Title>>,
We would like to announce and invite you to avail our 3’rd
quarter promo, for which you are qualified! Being one of our
loyal customers, we would like to thank you for trusting and
buying our products.
Included in this promo kit are the mechanics of our promo
and the catalog from where you can see and choose from
our exciting new products.
Please do not hesitate to contact us if you have further
Inquiries regarding the details of the promo or about any of
the new products in our catalog. We look forward to doing
more business with you.
Again, thank you very much and more power.
Your partner in merchandising,
Red Dragon, Inc.
Figure 1 :
Sample form document
• 2 COMPONENTS OF MAIL
M
1
E
. RFoGrmEDocument
The document that contains the main body
of the message we want to convey or send
The main body of the message is the part of
the form or document that remains the same
no matter whom you send it to from among
your list.
• 2 COMPONENTS OF MAIL
M
1
E
. RFoGrmEDocument
also included in the form document is what
we call place holders also referred to as data
fields or merge fields.
 It marks the position on your form
document where individual data or
information will be inserted.
• 2 COMPONENTS OF MAIL
M
1
E
. RFoGrmEDocument
The placeholders are denoted or marked by
the text with double-headed arrows (<< >>) on
each side with a gray background.
 On a printed standard form, this will be the
underlined spaces that you will see and use as
a guide to where you need to write the
information that you need to fill out.
• 2 COMPONENTS OF MAIL
M
2E
. LR
ist
G
oE
r Data file
This is where the individual information or data
that needs to be plugged in (merged) to the form
document is placed and maintained.
You can easily add, remove, modify, or extract
your data more efficiently by using other data
mgmt. applications like excel or access and import
them in word during mail merging process.
2 Choose “Select Recipients” button on the mailings ribbon
1 Type the letter
4 Enter the entities on the address list dialog box
3 Select “type new list” on select recipient’s button
10 Save your file and exit MS word
5 Type your data on the address list dialog box
7 Insert Merge fields
6 Save the data entities
8 Click “finish and merge” button then choose edit individual documents
9 Click “Select recipients” and choose “use existing list then look for your saved
entities”
BASIC STEPS IN CREATING A MAIL
MERGE
Steps in creating a simple mail merge :
1. Open MS Word and start a new blank document
2. On the Mailings tab, go to Start Mail Merge  Letters
2.1 Type the letter
below. You will be typing
in only the common
parts of the letter. The
text that does not
change for each copy
you print.
3. Save your letter and name it “Sample letter”
4. Insert the fields you
need in the letter (Name,
Company, AL 1, AL 2, AL 3
and Title). You can make
special markings on these
fields.
5. Save the main document once more. (Ctrl+S)
6. On the Mailings tab in the Start Mail Merge group,
choose Select Recipients  Type a New List
7. Click the Customize
Columns button on the
dialog box for the New
Address List.
*This will allow you to modify the
fields in the address list that MS Word
has pre-determined*
8. Select a field that you do not need then click the Delete
button. A confirmation dialog box appears.
9. Click Yes on the confirmation dialog box. The dialog box
closes, and unnecessary field disappears.
10. Repeat steps 8-9 for each field you do not need. After
removing the excess fields, the next step is to add the
fields you need.
11. To add a field that you need in your document, click
the Add button
12. Type the field name on the prompt inside a small
Add field dialog box and click the Ok button
13. Repeat steps 11 and 12 for each new field you need in
your main document.
14. Click the Ok button on the Customize Address List
dialog box to confirm your changes
15. The New Address List dialog box will appear again
ready for you to type in your data
16. Type the individual data from your list corresponding
to Name, Company, Address Line 1, Address Line 2,
Address Line 3, and Title.
17. Press the Tab key each time to enter the next field.
18.To add a new record, press the Tab key after inputting
the last field. When you press the Tab key on the last field
in a record, a new record is automatically created and
added on the next line
19.Repeat steps 16 through 18 until you enter all the
records you want. Once you are done typing your data,
click the Ok button on the Add New List dialog box to save
your data. A special Save Address List dialog box pops up
allowing you to save the recipient list.
20. Type a name for the address list. Name it “Client list”
21. Click the Save button. You should be back on your
main document soon after.
22. Select a field placeholder (ALL CAPS) in the main
document.
23. Click the Insert Merge Field command button
24. Choose the proper field to insert into your text. For
example, if you are replacing the text name in your
document with a name field, choose the Name field from
the Insert Merge Field menu. The field is inserted into
your document and replaces the ALL CAPS text.
25. Continue adding fields until the document is complete.
Repeat steps 22 through 22-24 necessary to stick all fields
into your document.
26. Save the main document.
27. Choose Finish & Merge to edit, print or send your
merged documents through email.
28. Or you may want to choose Preview Results to check
your work before you send it.
29. You should get a merged document close to this one
If you decide to print the document,
the Merge to Printer dialog box
appears, from which you can choose
records to print. Choose All to print
your entire document. Alternatively,
you can specify which record to print.
Click OK. The traditional Print dialog
box appears. Click the OK button again
to print your documents.
30. Save and close your document
INTEGRATING IMAGES AND
EXTERNAL MATERIALS
Kinds of Materials
1. Pictures
 Generally, these are electronic or digital pictures or
photographs you have saved in any local storage device.
3 common types of picture files :
.JPG (Joint Photographic Experts Group)
.GIF (Graphics Interchange Format)
.PNG (Portable Network Graphic)
2.Clip Art. This is generally a .GIF type; line art drawings or images
used as generic representation for ideas and objects that you might
want to integrate in your document.
3.Shapes. These are printable objects or materials that you can
integrate in your document to enhance its appearance or to allow
you to have some tools to use for composing and representing
ideas or messages.
4.Smart Art. Generally, these are predefined sets of different
shapes grouped together to form ideas that are organizational or
structural in nature.
5.Chart. Another type of material that you can integrate in your
Word document that allows you to represent data characteristics
and trends.
6.Screenshot. Sometimes, creating reports or manuals for training
or procedure will require the integration of a more realistic image of
what you are discussing on your report or manual.
IMAGE PLACEMENT
1. In line with text. This is the default setting for images that are
inserted or integrated in your document. It treats your image like a
text font with the bottom side totally aligned with the text line.
IMAGE PLACEMENT
2. Square. This setting allows the image you inserted to be placed
anywhere within the paragraph with text going around the image in a
square pattern like a frame.
IMAGE PLACEMENT
3. Tight. This is most the same as the square setting, but here the
text “Hugs” or conforms to the general shape of the image. This
allows you to get a more creative effect on your document.
IMAGE PLACEMENT
4. Through. This setting allows the text on your document to follow
even tighter, taking the contours and shape of the image.
IMAGE PLACEMENT
5. Top and bottom. This setting pushes the texts away vertically to
the top and or the bottom of the image so that the image occupies a
whole text on its own as in example.
IMAGE PLACEMENT
6. Behind text. This allows image to be dragged and placed anywhere
on your image look like a background.
IMAGE PLACEMENT
7. In front of text. As it suggest, this setting allows your image to be
placed right on top of the text as if your image was dropped right on
it.
Advanced word Processing Skills.pptx

Advanced word Processing Skills.pptx

  • 1.
    LESSON 3: Advanced Word ProcessingSkills • Mail merge and label generation • Integrating images and external materials
  • 2.
    What is MicrosoftWord? Microsoft Word or MS Word is a Graphical word processing program that users can type with. Its purpose is to allow users to type and save document. Similar to other word processors, it has helpful tools to make documents.
  • 3.
    Microsoft Word Versions •Word 95 • Word 97 • Word 98 • Word 2000 • Word 2001 • Word 2002/ XP • Word 2003 • Word 2004 • Word 2007 • Word 2008 • Word 2010 • Word 2011 • Word 2013 • Word 2016
  • 6.
    MS WORD BasicParts Tab Menu
  • 7.
  • 9.
  • 11.
  • 12.
  • 13.
  • 14.
  • 15.
  • 16.
  • 17.
  • 18.
  • 19.
  • 20.
  • 21.
  • 22.
  • 23.
  • 24.
  • 25.
  • 26.
  • 27.
  • 28.
    • MAIL MERGE One of the most powerful and commonly used features of Microsoft Word  It allows you to create documents and combine or merge them with another document or data file  Commonly used when sending out advertising materials to various recipients
  • 30.
    September24, 2020 NAME COMPANY ADDRESS LINE1 ADDRESS LINE 2 ADDRESS LINE Dear TITLE, We would like to announce and invite you to avail our 3’rd quarter promo, for which you are qualified! Being one of our loyal customers, we would like to thank you for trusting and buying our products. Included in this promo kit are the mechanics of our promo and the catalog from where you can see and choose from our exciting new products. Please do not hesitate to contact us if you have further Inquiries regarding the details of the promo or about any of the new products in our catalog. We look forward to doing more business with you. Again, thank you very much and more power. Your partner in merchandising, Red Dragon, Inc. Figure 1 : Sample form document
  • 31.
    September24, 2020 <<Name>> <<Company>> <<AddressLine 1>> <<AddressLine2>> <<AddressLine 3>> Dear <<Title>>, We would like to announce and invite you to avail our 3’rd quarter promo, for which you are qualified! Being one of our loyal customers, we would like to thank you for trusting and buying our products. Included in this promo kit are the mechanics of our promo and the catalog from where you can see and choose from our exciting new products. Please do not hesitate to contact us if you have further Inquiries regarding the details of the promo or about any of the new products in our catalog. We look forward to doing more business with you. Again, thank you very much and more power. Your partner in merchandising, Red Dragon, Inc. Figure 1 : Sample form document
  • 32.
    • 2 COMPONENTSOF MAIL M 1 E . RFoGrmEDocument The document that contains the main body of the message we want to convey or send The main body of the message is the part of the form or document that remains the same no matter whom you send it to from among your list.
  • 33.
    • 2 COMPONENTSOF MAIL M 1 E . RFoGrmEDocument also included in the form document is what we call place holders also referred to as data fields or merge fields.  It marks the position on your form document where individual data or information will be inserted.
  • 34.
    • 2 COMPONENTSOF MAIL M 1 E . RFoGrmEDocument The placeholders are denoted or marked by the text with double-headed arrows (<< >>) on each side with a gray background.  On a printed standard form, this will be the underlined spaces that you will see and use as a guide to where you need to write the information that you need to fill out.
  • 35.
    • 2 COMPONENTSOF MAIL M 2E . LR ist G oE r Data file This is where the individual information or data that needs to be plugged in (merged) to the form document is placed and maintained. You can easily add, remove, modify, or extract your data more efficiently by using other data mgmt. applications like excel or access and import them in word during mail merging process.
  • 36.
    2 Choose “SelectRecipients” button on the mailings ribbon 1 Type the letter 4 Enter the entities on the address list dialog box 3 Select “type new list” on select recipient’s button 10 Save your file and exit MS word 5 Type your data on the address list dialog box 7 Insert Merge fields 6 Save the data entities 8 Click “finish and merge” button then choose edit individual documents 9 Click “Select recipients” and choose “use existing list then look for your saved entities” BASIC STEPS IN CREATING A MAIL MERGE
  • 38.
    Steps in creatinga simple mail merge : 1. Open MS Word and start a new blank document 2. On the Mailings tab, go to Start Mail Merge  Letters
  • 39.
    2.1 Type theletter below. You will be typing in only the common parts of the letter. The text that does not change for each copy you print.
  • 40.
    3. Save yourletter and name it “Sample letter” 4. Insert the fields you need in the letter (Name, Company, AL 1, AL 2, AL 3 and Title). You can make special markings on these fields.
  • 41.
    5. Save themain document once more. (Ctrl+S) 6. On the Mailings tab in the Start Mail Merge group, choose Select Recipients  Type a New List 7. Click the Customize Columns button on the dialog box for the New Address List. *This will allow you to modify the fields in the address list that MS Word has pre-determined*
  • 42.
    8. Select afield that you do not need then click the Delete button. A confirmation dialog box appears. 9. Click Yes on the confirmation dialog box. The dialog box closes, and unnecessary field disappears. 10. Repeat steps 8-9 for each field you do not need. After removing the excess fields, the next step is to add the fields you need.
  • 43.
    11. To adda field that you need in your document, click the Add button 12. Type the field name on the prompt inside a small Add field dialog box and click the Ok button 13. Repeat steps 11 and 12 for each new field you need in your main document.
  • 45.
    14. Click theOk button on the Customize Address List dialog box to confirm your changes 15. The New Address List dialog box will appear again ready for you to type in your data 16. Type the individual data from your list corresponding to Name, Company, Address Line 1, Address Line 2, Address Line 3, and Title.
  • 46.
    17. Press theTab key each time to enter the next field. 18.To add a new record, press the Tab key after inputting the last field. When you press the Tab key on the last field in a record, a new record is automatically created and added on the next line 19.Repeat steps 16 through 18 until you enter all the records you want. Once you are done typing your data, click the Ok button on the Add New List dialog box to save your data. A special Save Address List dialog box pops up allowing you to save the recipient list.
  • 48.
    20. Type aname for the address list. Name it “Client list” 21. Click the Save button. You should be back on your main document soon after. 22. Select a field placeholder (ALL CAPS) in the main document. 23. Click the Insert Merge Field command button
  • 50.
    24. Choose theproper field to insert into your text. For example, if you are replacing the text name in your document with a name field, choose the Name field from the Insert Merge Field menu. The field is inserted into your document and replaces the ALL CAPS text. 25. Continue adding fields until the document is complete. Repeat steps 22 through 22-24 necessary to stick all fields into your document. 26. Save the main document.
  • 51.
    27. Choose Finish& Merge to edit, print or send your merged documents through email.
  • 52.
    28. Or youmay want to choose Preview Results to check your work before you send it.
  • 53.
    29. You shouldget a merged document close to this one If you decide to print the document, the Merge to Printer dialog box appears, from which you can choose records to print. Choose All to print your entire document. Alternatively, you can specify which record to print. Click OK. The traditional Print dialog box appears. Click the OK button again to print your documents. 30. Save and close your document
  • 55.
    INTEGRATING IMAGES AND EXTERNALMATERIALS Kinds of Materials 1. Pictures  Generally, these are electronic or digital pictures or photographs you have saved in any local storage device. 3 common types of picture files : .JPG (Joint Photographic Experts Group) .GIF (Graphics Interchange Format) .PNG (Portable Network Graphic)
  • 56.
    2.Clip Art. Thisis generally a .GIF type; line art drawings or images used as generic representation for ideas and objects that you might want to integrate in your document. 3.Shapes. These are printable objects or materials that you can integrate in your document to enhance its appearance or to allow you to have some tools to use for composing and representing ideas or messages. 4.Smart Art. Generally, these are predefined sets of different shapes grouped together to form ideas that are organizational or structural in nature.
  • 57.
    5.Chart. Another typeof material that you can integrate in your Word document that allows you to represent data characteristics and trends. 6.Screenshot. Sometimes, creating reports or manuals for training or procedure will require the integration of a more realistic image of what you are discussing on your report or manual.
  • 58.
    IMAGE PLACEMENT 1. Inline with text. This is the default setting for images that are inserted or integrated in your document. It treats your image like a text font with the bottom side totally aligned with the text line.
  • 59.
    IMAGE PLACEMENT 2. Square.This setting allows the image you inserted to be placed anywhere within the paragraph with text going around the image in a square pattern like a frame.
  • 60.
    IMAGE PLACEMENT 3. Tight.This is most the same as the square setting, but here the text “Hugs” or conforms to the general shape of the image. This allows you to get a more creative effect on your document.
  • 61.
    IMAGE PLACEMENT 4. Through.This setting allows the text on your document to follow even tighter, taking the contours and shape of the image.
  • 62.
    IMAGE PLACEMENT 5. Topand bottom. This setting pushes the texts away vertically to the top and or the bottom of the image so that the image occupies a whole text on its own as in example.
  • 63.
    IMAGE PLACEMENT 6. Behindtext. This allows image to be dragged and placed anywhere on your image look like a background.
  • 64.
    IMAGE PLACEMENT 7. Infront of text. As it suggest, this setting allows your image to be placed right on top of the text as if your image was dropped right on it.