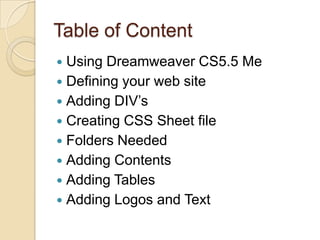
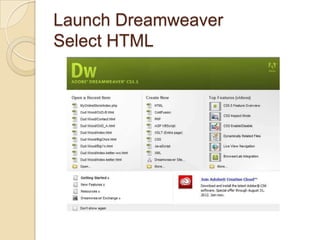
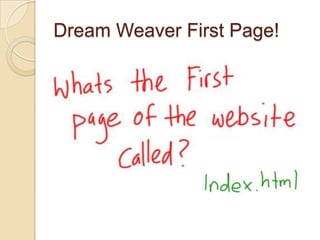
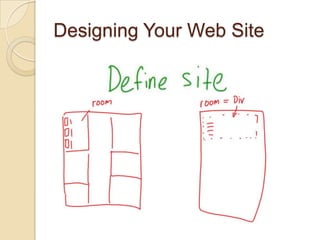
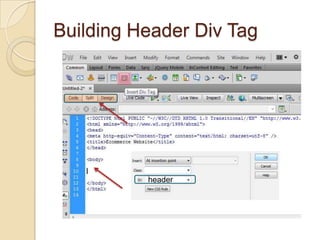
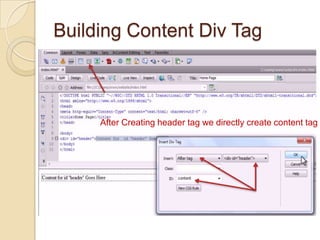
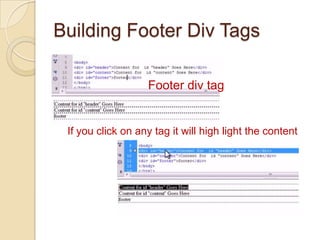
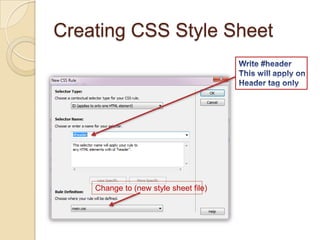
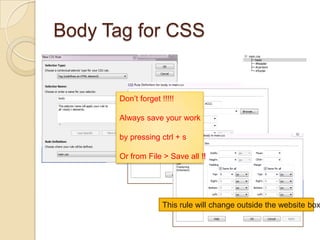
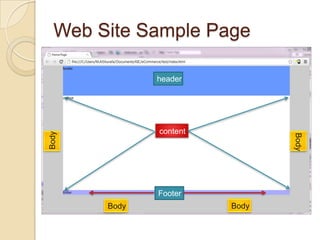
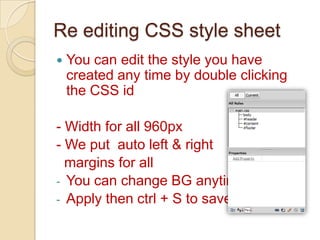
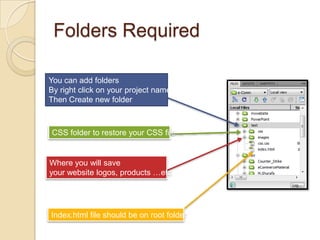
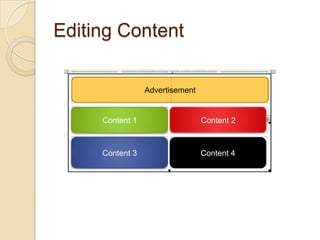
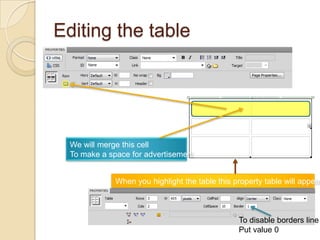
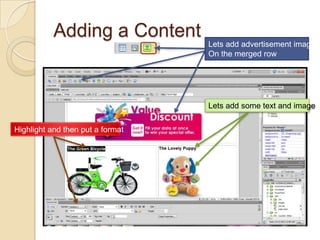
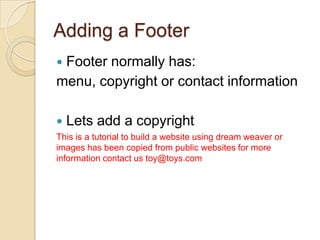
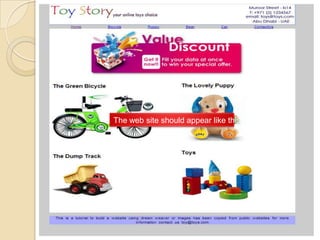
Building a basic website using
  dream weaver CS5.5 for
         eCommerce


       By Mohamed AlShurafa
Table of Content
 Using Dreamweaver CS5.5 Me
 Defining your web site
 Adding DIV’s
 Creating CSS Sheet file
 Folders Needed
 Adding Contents
 Adding Tables
 Adding Logos and Text
Launch Dreamweaver
Select HTML
Dream Weaver Common Toolbar
Dream Weaver First Page!
Designing Your Web Site
Building Header Div Tag


          header
Building Content Div Tag


     After Creating header tag we directly create content tag
Building Footer Div Tags

                   Footer div tag


 If you click on any tag it will high light the content
Creating CSS Style Sheet


    Change to (new style sheet file)
Saving CSS File
             Save as main.css

             Locate folder then click Save
Creating Header rules
               Width x Height
                                        Un tick This setting will make
                                                the webpage auto
                                                maximized and
                                                minimized
                                                   Change to auto


                                                    Background color

                                                    Or header picture

This rule will apply on the header upper of the webpage
Creating Content rules


 This rule will apply on the content in middle of the website
Creating Footer rule


   This rule will apply on the footer bottom of page
Body Tag for CSS


      Don’t forget !!!!!

      Always save your work

      by pressing ctrl + s

      Or from File > Save all !!


                    This rule will change outside the website box
Web Site Sample Page

              header


              content
Body


                               Body
              Footer
       Body             Body
Re editing CSS style sheet
   You can edit the style you have
    created any time by double clicking
    the CSS id

- Width for all 960px
- We put auto left & right
  margins for all
- You can change BG anytime
- Apply then ctrl + S to save
Folders Required

You can add folders
By right click on your project name
Then Create new folder


CSS folder to restore your CSS file


Where you will save
your website logos, products …etc


Index.html file should be on root folder
Lets add some more

-   Create your own website logo with
    width 960px and height 100px as we
    put in header

-   Using photoshop open a new project
    then use your imagination to design

-   You can google it just write “header
    banner”
Header Samples
Product Samples
These images should be saved in
Image folder
Adding Header
     Lets add a header with size 100x960
      px


First we will
Edit #header
By double click
                                                           Browse
                                                           For your
                                                           logo


          After this step a picture should appear in the
          header
Adding a menu for a website


Lets add some menu items:
 Home | Bicycle | Doggy | Bear | Car | ContactUs


Lets add some links to the menu


  Highlight the word                       Put hash “#” in the link field
Adding properties for the
menu
   We will add a new CSS rule for menu
Your Web Page first look
Adding Content
   The content of your index.html should
    has some general information about
    your services or products

   You may put any general information,
    advertisement, thumbnails of your
    products.
Adding a Table
      Lets divide content tab to 4 rows or more table
The icon @ right behind
the div icon allows you
to create table


You can customize your table size
by stretching the corners
Editing Content

                 Advertisement


     Content 1                   Content 2


     Content 3                   Content 4
Editing the table


  We will merge this cell
  To make a space for advertisement


              When you highlight the table this property table will appear


                                                 To disable borders line
                                                 Put value 0
Adding a Content
                                  Lets add advertisement image
                                  On the merged row


                                  Lets add some text and image

Highlight and then put a format
Adding a Footer
Footer normally has:
menu, copyright or contact information

   Lets add a copyright
This is a tutorial to build a website using dream weaver or
images has been copied from public websites for more
information contact us toy@toys.com
The web site should appear like this
Adding extra pages
 Usually the product’s page has more
  details about the product/service
 It contains specification, pictures and
  price
 Before saving make sure the home
  link is working properly
 Save as the index.html to your product
  name
 Edit the content table to add some
  more extra information about your
  product/service
Congratulations !!
 You have made your index page using
  Dreamweaver CS5.5 ME with CSS
  style sheet
 For the rest pages just save as the
  index.html to another name thin link
  them using the Link tool
          Check this out !!
          www.oud-wood.com

E commerce-website

  • 1.
    Building a basicwebsite using dream weaver CS5.5 for eCommerce By Mohamed AlShurafa
  • 2.
    Table of Content Using Dreamweaver CS5.5 Me  Defining your web site  Adding DIV’s  Creating CSS Sheet file  Folders Needed  Adding Contents  Adding Tables  Adding Logos and Text
  • 3.
  • 4.
  • 5.
  • 6.
  • 7.
  • 8.
    Building Content DivTag After Creating header tag we directly create content tag
  • 9.
    Building Footer DivTags Footer div tag If you click on any tag it will high light the content
  • 10.
    Creating CSS StyleSheet Change to (new style sheet file)
  • 11.
    Saving CSS File Save as main.css Locate folder then click Save
  • 12.
    Creating Header rules Width x Height Un tick This setting will make the webpage auto maximized and minimized Change to auto Background color Or header picture This rule will apply on the header upper of the webpage
  • 13.
    Creating Content rules This rule will apply on the content in middle of the website
  • 14.
    Creating Footer rule This rule will apply on the footer bottom of page
  • 15.
    Body Tag forCSS Don’t forget !!!!! Always save your work by pressing ctrl + s Or from File > Save all !! This rule will change outside the website box
  • 16.
    Web Site SamplePage header content Body Body Footer Body Body
  • 17.
    Re editing CSSstyle sheet  You can edit the style you have created any time by double clicking the CSS id - Width for all 960px - We put auto left & right margins for all - You can change BG anytime - Apply then ctrl + S to save
  • 18.
    Folders Required You canadd folders By right click on your project name Then Create new folder CSS folder to restore your CSS file Where you will save your website logos, products …etc Index.html file should be on root folder
  • 19.
    Lets add somemore - Create your own website logo with width 960px and height 100px as we put in header - Using photoshop open a new project then use your imagination to design - You can google it just write “header banner”
  • 20.
  • 21.
  • 22.
    These images shouldbe saved in Image folder
  • 23.
    Adding Header  Lets add a header with size 100x960 px First we will Edit #header By double click Browse For your logo After this step a picture should appear in the header
  • 24.
    Adding a menufor a website Lets add some menu items: Home | Bicycle | Doggy | Bear | Car | ContactUs Lets add some links to the menu Highlight the word Put hash “#” in the link field
  • 25.
    Adding properties forthe menu  We will add a new CSS rule for menu
  • 26.
    Your Web Pagefirst look
  • 27.
    Adding Content  The content of your index.html should has some general information about your services or products  You may put any general information, advertisement, thumbnails of your products.
  • 28.
    Adding a Table  Lets divide content tab to 4 rows or more table The icon @ right behind the div icon allows you to create table You can customize your table size by stretching the corners
  • 29.
    Editing Content Advertisement Content 1 Content 2 Content 3 Content 4
  • 30.
    Editing the table We will merge this cell To make a space for advertisement When you highlight the table this property table will appear To disable borders line Put value 0
  • 31.
    Adding a Content Lets add advertisement image On the merged row Lets add some text and image Highlight and then put a format
  • 32.
    Adding a Footer Footernormally has: menu, copyright or contact information  Lets add a copyright This is a tutorial to build a website using dream weaver or images has been copied from public websites for more information contact us toy@toys.com
  • 33.
    The web siteshould appear like this
  • 34.
    Adding extra pages Usually the product’s page has more details about the product/service  It contains specification, pictures and price  Before saving make sure the home link is working properly  Save as the index.html to your product name  Edit the content table to add some more extra information about your product/service
  • 35.
    Congratulations !!  Youhave made your index page using Dreamweaver CS5.5 ME with CSS style sheet  For the rest pages just save as the index.html to another name thin link them using the Link tool Check this out !! www.oud-wood.com