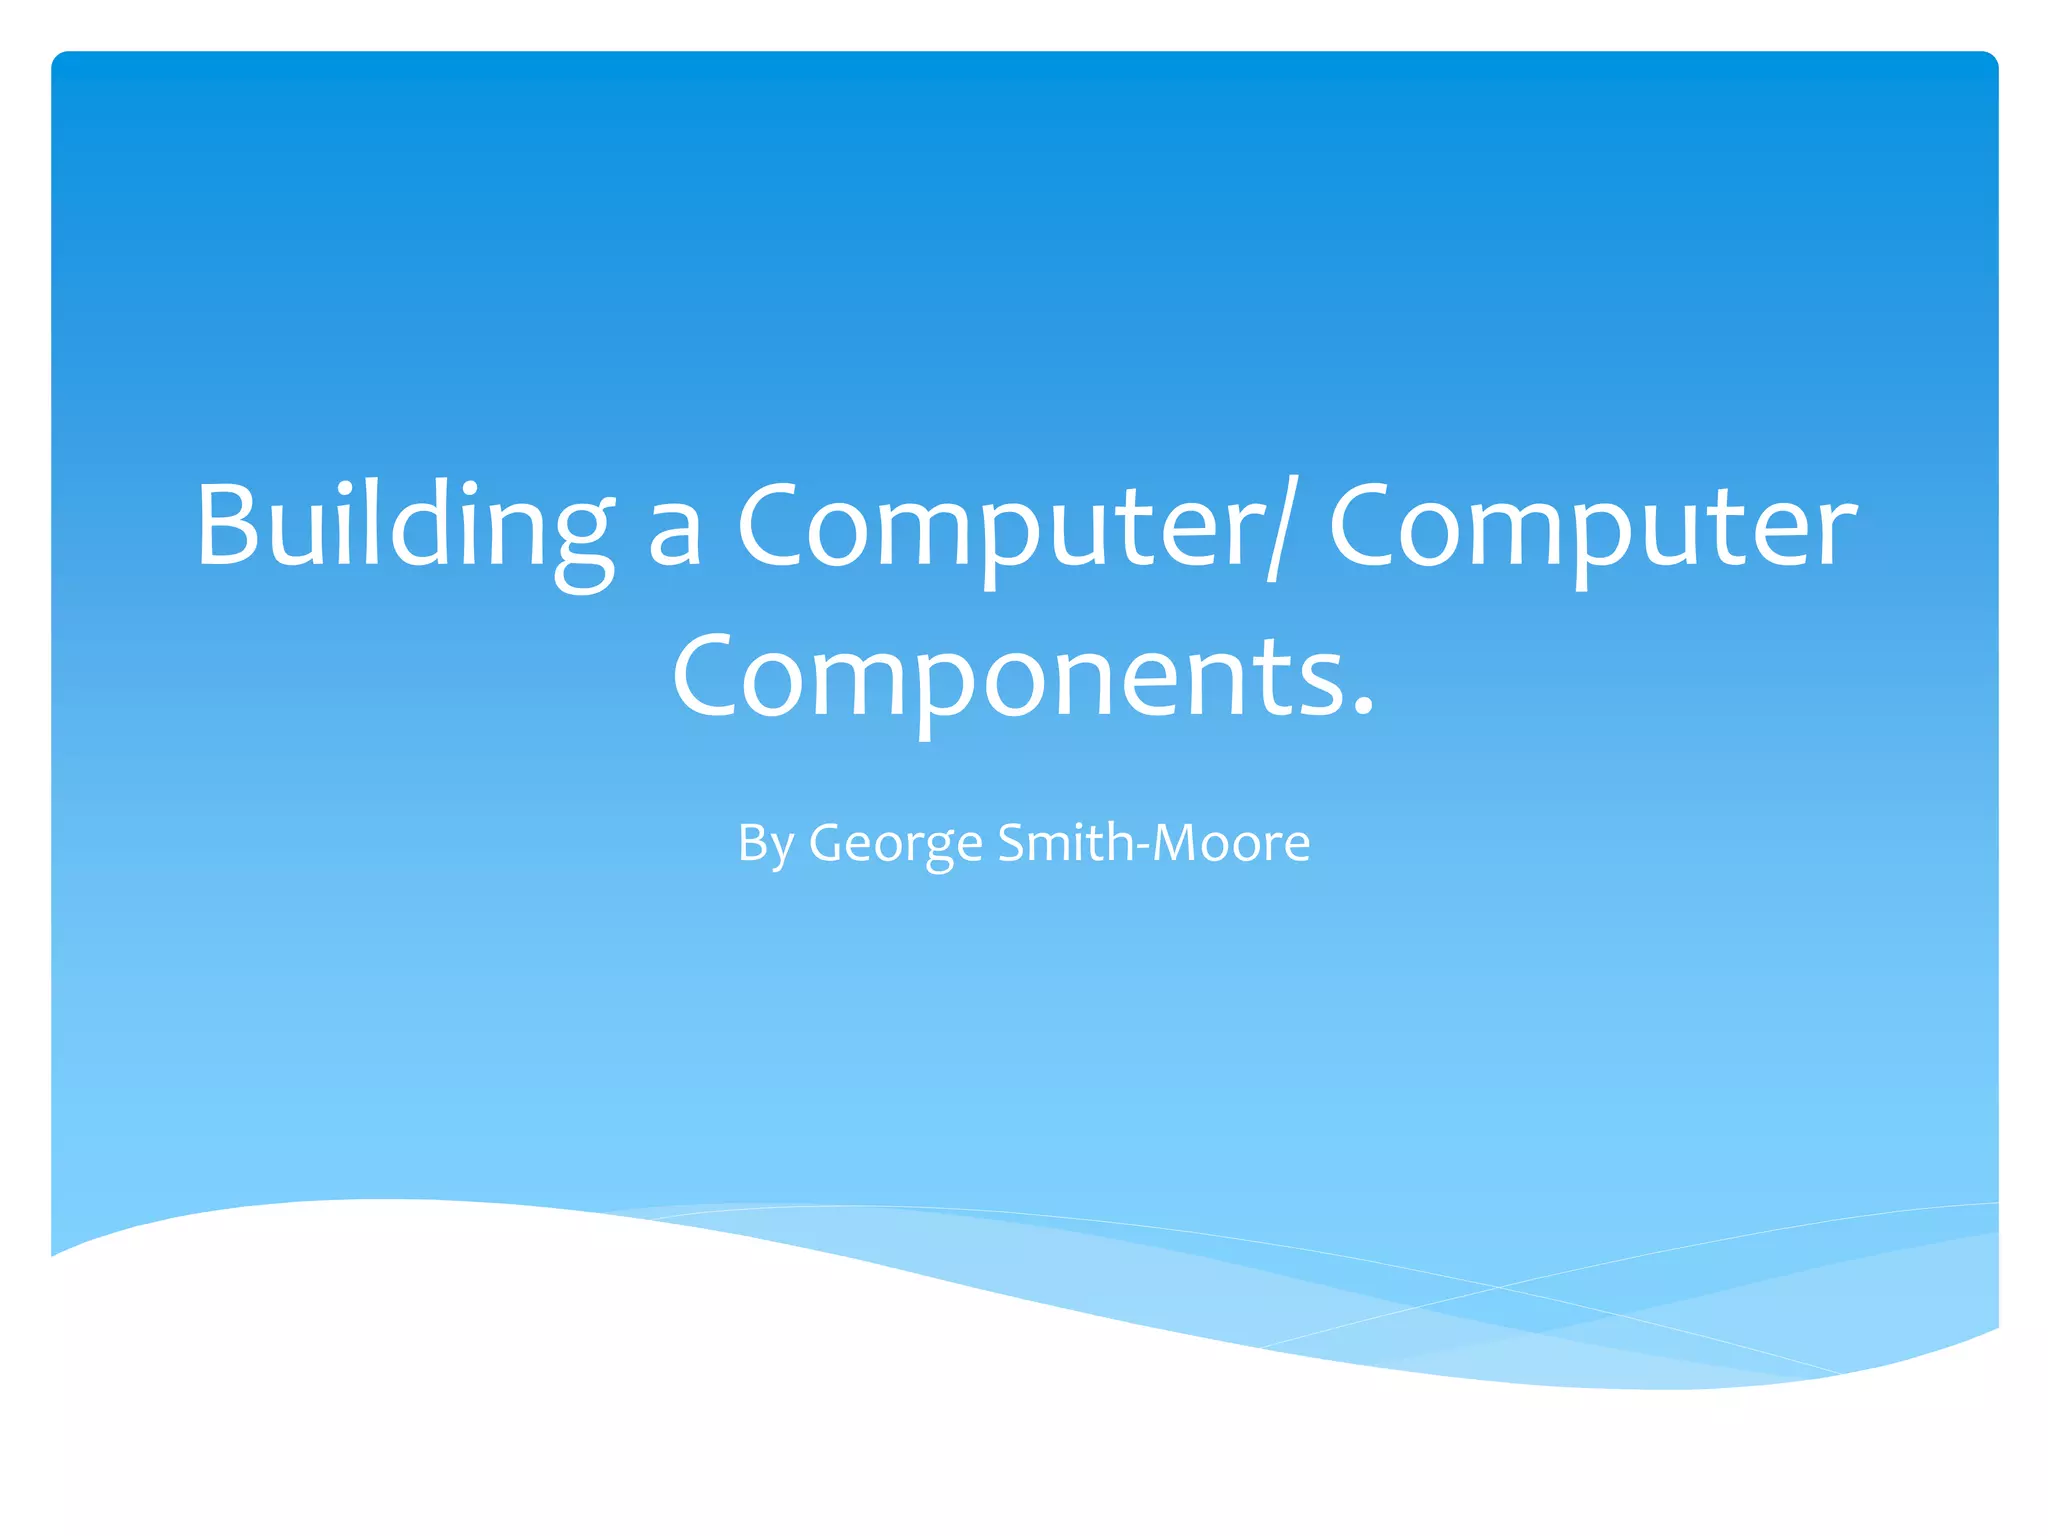
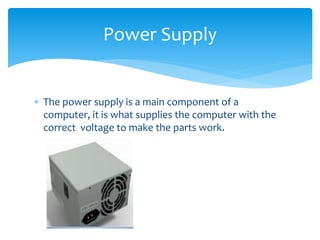
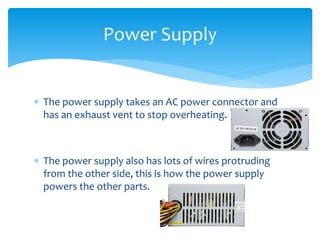
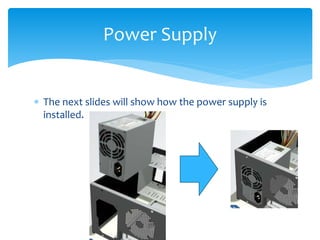
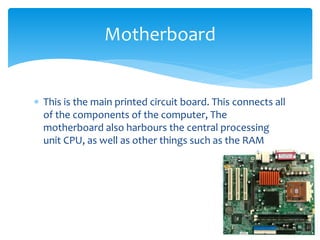
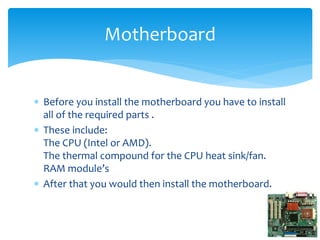
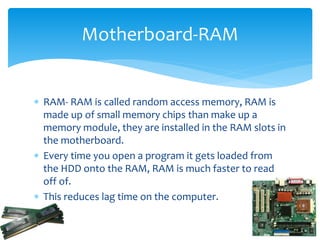
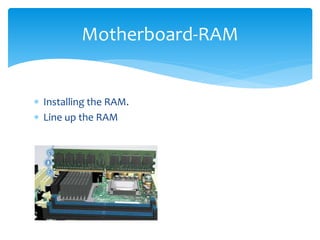
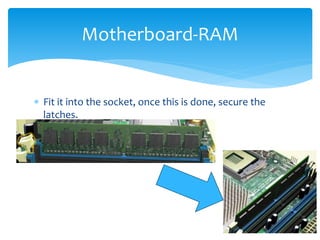
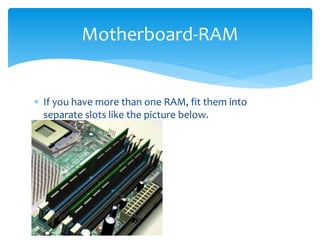
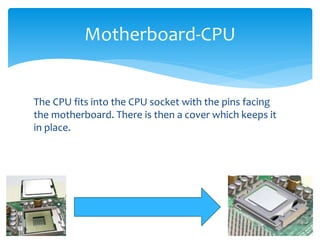
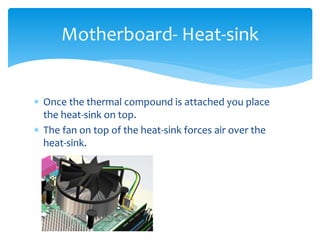
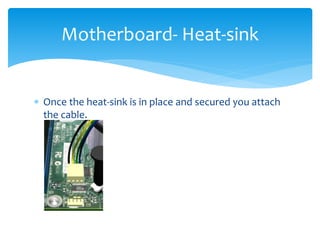
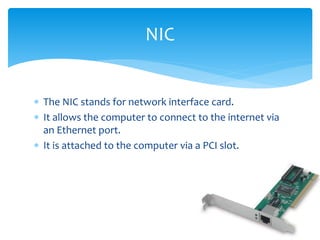
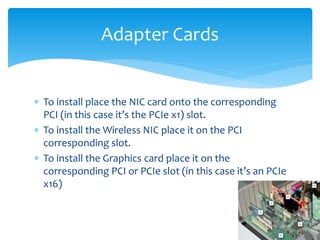
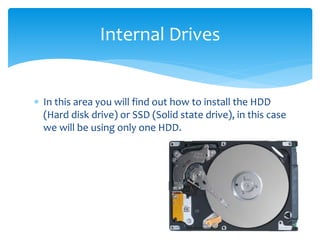
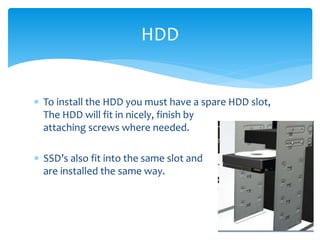
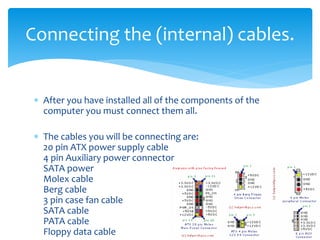
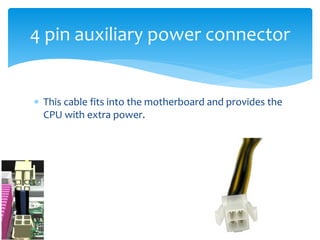
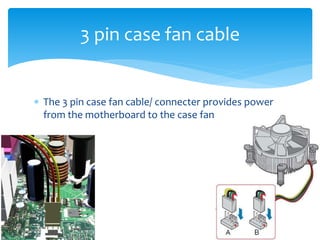
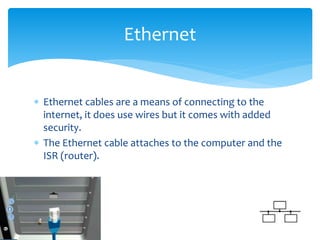
Building a Computer/ Computer
Components.
By George Smith-Moore
 In this document I will go through the different stages
to building a computer.
 I will go through installing the power supply,
motherboard, adapter cards, internal drives, drives in
external bays, internal cables, and external cables.
 Each part will be explained with a labelled diagram
which the picture was taken from
http://vendorlib.leighacademy.org.uk/curr/ITEVP/VDE/
Index.html virtual desktop.
What will be included?
 For your safety but more importantly the computer
parts safety, you will need to use either an antistatic
mat or an anti-static wrist strap.
Safety
 The power supply is a main component of a
computer, it is what supplies the computer with the
correct voltage to make the parts work.
Power Supply
 The power supply takes an AC power connector and
has an exhaust vent to stop overheating.
 The power supply also has lots of wires protruding
from the other side, this is how the power supply
powers the other parts.
Power Supply
 The next slides will show how the power supply is
installed.
Power Supply
 After you have placed the power supply in correctly
you use some screws that fit the power supply in
place.
 The screws keep the
power supply from
moving about.
 See the difference?
Power Supply
 This is the main printed circuit board. This connects all
of the components of the computer, The
motherboard also harbours the central processing
unit CPU, as well as other things such as the RAM
Motherboard
 Before you install the motherboard you have to install
all of the required parts .
 These include:
The CPU (Intel or AMD).
The thermal compound for the CPU heat sink/fan.
RAM module’s
 After that you would then install the motherboard.
Motherboard
 RAM- RAM is called random access memory, RAM is
made up of small memory chips than make up a
memory module, they are installed in the RAM slots in
the motherboard.
 Every time you open a program it gets loaded from
the HDD onto the RAM, RAM is much faster to read
off of.
 This reduces lag time on the computer.
Motherboard-RAM
 Installing the RAM.
 Line up the RAM
Motherboard-RAM
 Fit it into the socket, once this is done, secure the
latches.
Motherboard-RAM
 If you have more than one RAM, fit them into
separate slots like the picture below.
Motherboard-RAM
 The CPU stands for the central processing unit.
 The main CPU brands are Intel and AMD; when a
motherboard is bought it can only take a certain type
of CPU’s, different CPU’s have different socket types.
 The CPU reads computer code and executes the
commands.
Motherboard-CPU
The CPU fits into the CPU socket with the pins facing
the motherboard. There is then a cover which keeps it
in place.
Motherboard-CPU
 The heat-sink is used to disperse the heat from a CPU,
the heat-sink is attached by applying thermal
compound to the CPU
Motherboard- Heat-sink
 Once the thermal compound is attached you place
the heat-sink on top.
 The fan on top of the heat-sink forces air over the
heat-sink.
Motherboard- Heat-sink
 Once the heat-sink is in place and secured you attach
the cable.
Motherboard- Heat-sink
 Once all of the steps above are complete, you must
install the motherboard, you attach the motherboard
with the motherboard screws attached.
Motherboard
 The next slides will show you the NIC, the Wireless
NIC, and the Graphics Card.
Adapter Cards
 The NIC stands for network interface card.
 It allows the computer to connect to the internet via
an Ethernet port.
 It is attached to the computer via a PCI slot.
NIC
 The Wireless NIC stands for wireless network
interface card.
 It allows the computer to connect to the internet
Wi-Fi
 It is attached to the computer via a PCI slot.
Wireless NIC
 The graphics card takes stress off of the CPU to
render games, movie, etc.
 The graphics card will also have more power to
render the games and movies than your CPU, so
better quality images.
Graphics Card
 To install place the NIC card onto the corresponding
PCI (in this case it’s the PCIe x1) slot.
 To install the Wireless NIC place it on the PCI
corresponding slot.
 To install the Graphics card place it on the
corresponding PCI or PCIe slot (in this case it’s an PCIe
x16)
Adapter Cards
 In this area you will find out how to install the HDD
(Hard disk drive) or SSD (Solid state drive), in this case
we will be using only one HDD.
Internal Drives
 To install the HDD you must have a spare HDD slot,
The HDD will fit in nicely, finish by
attaching screws where needed.
 SSD’s also fit into the same slot and
are installed the same way.
HDD
 Under this section there will be the Floppy disk drive
and the Optical disk drive (CD’s and DVD’s).
External Drives
 The floppy disk drive, fits into it’s slot nicely but it
needs screws to hold it in place.
Floppy disk drive
 The Optical disk drive is installed in the same way as
the Floppy disk drive above, but the Optical drive
comes in several options, you can buy one’s that re-
write CD’s and DVD’s.
Optical disk drive
 After you have installed all of the components of the
computer you must connect them all.
 The cables you will be connecting are:
20 pin ATX power supply cable
4 pin Auxiliary power connector
SATA power
Molex cable
Berg cable
3 pin case fan cable
SATA cable
PATA cable
Floppy data cable
Connecting the (internal) cables.
 (Could also be the newer specification 24pin ATX 2)
 This comes from the Power Supply and fits into this
slot, it provides the motherboard with power.
20 pin ATX power supply cable
 This cable fits into the motherboard and provides the
CPU with extra power.
4 pin auxiliary power connector
 The SATA power connecter provides the HDD or the
SSD with power from the power supply.
SATA power
 The Molex cable is a dying breed, it is slowly being
replaced with the SATA cable.
 The Molex cable/connector is held in place by friction
and it used to provide power to large devices like the
HDD (now used SATA) and the CD/DVD drive.
Molex cable
 The Berg cable/connecter is
used to provide power to
the floppy disk, and
sometimes other
peripherals.
 (floppy disk no longer used)
Berg cable
 The 3 pin case fan cable/ connecter provides power
from the motherboard to the case fan
3 pin case fan cable
 The SATA cable provides an interface between the
motherboard and the HDD/SSD.
 Now being used instead of a Molex
cable.
SATA cable.
 The PATA cable connects drives (CD/DVD) to the
motherboard.
 It serves as an interface between CD drives (and
others) and the motherboard.
PATA cable
 The floppy cable connects the floppy drive to the
motherboard.
 It serves as an interface between the floppy drive and
the motherboard.
Floppy Cable
 In this section I will show you how to place your case
panels back in once you are finished:
-how to connect the monitor HDMI or monitor cable.
-Keyboard and mouse (USB and Ps2)
-Ethernet, and wireless antenna.
-USB cables and power.
External cables.
 When you took the case panels off of the computer
to fit in the different components, you have to just fit
them in the same way you took them off.
 The case panels are there to protect the computer, it
also blocks dust entering from the side.
Case panels
 The HDMI and monitor cables are connected at the
corresponding slots at the back of the computer.
 The monitor cables has screws built in which you
tighten to stop the cable coming loose.
 HDMI is digital, VGA is analogue, VGA only carries
video not sound.
HDMI and monitor cables.
 The keyboard and mouse used to be connected via a
Ps2 connection, it is now done via USB.
 To connect you place in the corresponding Ps2 slot
(colour coded)
Keyboard and mouse
 Ethernet cables are a means of connecting to the
internet, it does use wires but it comes with added
security.
 The Ethernet cable attaches to the computer and the
ISR (router).
Ethernet
 The wireless antenna allows you to connect to the
internet without the hassle of wires.
 Using wireless has its downsides though, it is easier
for others to see what you have been viewing.
 Signal is not as great either.
Installing the Wireless antenna
 Now the computer has been installed, you will need
to install any software, to do this you need power!
 Use the power cable and attach it to a wall socket and
a power supply.
Power

Building a computer virtual desktop computer components

  • 1.
    Building a Computer/Computer Components. By George Smith-Moore
  • 2.
     In thisdocument I will go through the different stages to building a computer.  I will go through installing the power supply, motherboard, adapter cards, internal drives, drives in external bays, internal cables, and external cables.  Each part will be explained with a labelled diagram which the picture was taken from http://vendorlib.leighacademy.org.uk/curr/ITEVP/VDE/ Index.html virtual desktop. What will be included?
  • 3.
     For yoursafety but more importantly the computer parts safety, you will need to use either an antistatic mat or an anti-static wrist strap. Safety
  • 4.
     The powersupply is a main component of a computer, it is what supplies the computer with the correct voltage to make the parts work. Power Supply
  • 5.
     The powersupply takes an AC power connector and has an exhaust vent to stop overheating.  The power supply also has lots of wires protruding from the other side, this is how the power supply powers the other parts. Power Supply
  • 6.
     The nextslides will show how the power supply is installed. Power Supply
  • 7.
     After youhave placed the power supply in correctly you use some screws that fit the power supply in place.  The screws keep the power supply from moving about.  See the difference? Power Supply
  • 8.
     This isthe main printed circuit board. This connects all of the components of the computer, The motherboard also harbours the central processing unit CPU, as well as other things such as the RAM Motherboard
  • 9.
     Before youinstall the motherboard you have to install all of the required parts .  These include: The CPU (Intel or AMD). The thermal compound for the CPU heat sink/fan. RAM module’s  After that you would then install the motherboard. Motherboard
  • 10.
     RAM- RAMis called random access memory, RAM is made up of small memory chips than make up a memory module, they are installed in the RAM slots in the motherboard.  Every time you open a program it gets loaded from the HDD onto the RAM, RAM is much faster to read off of.  This reduces lag time on the computer. Motherboard-RAM
  • 11.
     Installing theRAM.  Line up the RAM Motherboard-RAM
  • 12.
     Fit itinto the socket, once this is done, secure the latches. Motherboard-RAM
  • 13.
     If youhave more than one RAM, fit them into separate slots like the picture below. Motherboard-RAM
  • 14.
     The CPUstands for the central processing unit.  The main CPU brands are Intel and AMD; when a motherboard is bought it can only take a certain type of CPU’s, different CPU’s have different socket types.  The CPU reads computer code and executes the commands. Motherboard-CPU
  • 15.
    The CPU fitsinto the CPU socket with the pins facing the motherboard. There is then a cover which keeps it in place. Motherboard-CPU
  • 16.
     The heat-sinkis used to disperse the heat from a CPU, the heat-sink is attached by applying thermal compound to the CPU Motherboard- Heat-sink
  • 17.
     Once thethermal compound is attached you place the heat-sink on top.  The fan on top of the heat-sink forces air over the heat-sink. Motherboard- Heat-sink
  • 18.
     Once theheat-sink is in place and secured you attach the cable. Motherboard- Heat-sink
  • 19.
     Once allof the steps above are complete, you must install the motherboard, you attach the motherboard with the motherboard screws attached. Motherboard
  • 20.
     The nextslides will show you the NIC, the Wireless NIC, and the Graphics Card. Adapter Cards
  • 21.
     The NICstands for network interface card.  It allows the computer to connect to the internet via an Ethernet port.  It is attached to the computer via a PCI slot. NIC
  • 22.
     The WirelessNIC stands for wireless network interface card.  It allows the computer to connect to the internet Wi-Fi  It is attached to the computer via a PCI slot. Wireless NIC
  • 23.
     The graphicscard takes stress off of the CPU to render games, movie, etc.  The graphics card will also have more power to render the games and movies than your CPU, so better quality images. Graphics Card
  • 24.
     To installplace the NIC card onto the corresponding PCI (in this case it’s the PCIe x1) slot.  To install the Wireless NIC place it on the PCI corresponding slot.  To install the Graphics card place it on the corresponding PCI or PCIe slot (in this case it’s an PCIe x16) Adapter Cards
  • 25.
     In thisarea you will find out how to install the HDD (Hard disk drive) or SSD (Solid state drive), in this case we will be using only one HDD. Internal Drives
  • 26.
     To installthe HDD you must have a spare HDD slot, The HDD will fit in nicely, finish by attaching screws where needed.  SSD’s also fit into the same slot and are installed the same way. HDD
  • 27.
     Under thissection there will be the Floppy disk drive and the Optical disk drive (CD’s and DVD’s). External Drives
  • 28.
     The floppydisk drive, fits into it’s slot nicely but it needs screws to hold it in place. Floppy disk drive
  • 29.
     The Opticaldisk drive is installed in the same way as the Floppy disk drive above, but the Optical drive comes in several options, you can buy one’s that re- write CD’s and DVD’s. Optical disk drive
  • 30.
     After youhave installed all of the components of the computer you must connect them all.  The cables you will be connecting are: 20 pin ATX power supply cable 4 pin Auxiliary power connector SATA power Molex cable Berg cable 3 pin case fan cable SATA cable PATA cable Floppy data cable Connecting the (internal) cables.
  • 31.
     (Could alsobe the newer specification 24pin ATX 2)  This comes from the Power Supply and fits into this slot, it provides the motherboard with power. 20 pin ATX power supply cable
  • 32.
     This cablefits into the motherboard and provides the CPU with extra power. 4 pin auxiliary power connector
  • 33.
     The SATApower connecter provides the HDD or the SSD with power from the power supply. SATA power
  • 34.
     The Molexcable is a dying breed, it is slowly being replaced with the SATA cable.  The Molex cable/connector is held in place by friction and it used to provide power to large devices like the HDD (now used SATA) and the CD/DVD drive. Molex cable
  • 35.
     The Bergcable/connecter is used to provide power to the floppy disk, and sometimes other peripherals.  (floppy disk no longer used) Berg cable
  • 36.
     The 3pin case fan cable/ connecter provides power from the motherboard to the case fan 3 pin case fan cable
  • 37.
     The SATAcable provides an interface between the motherboard and the HDD/SSD.  Now being used instead of a Molex cable. SATA cable.
  • 38.
     The PATAcable connects drives (CD/DVD) to the motherboard.  It serves as an interface between CD drives (and others) and the motherboard. PATA cable
  • 39.
     The floppycable connects the floppy drive to the motherboard.  It serves as an interface between the floppy drive and the motherboard. Floppy Cable
  • 40.
     In thissection I will show you how to place your case panels back in once you are finished: -how to connect the monitor HDMI or monitor cable. -Keyboard and mouse (USB and Ps2) -Ethernet, and wireless antenna. -USB cables and power. External cables.
  • 41.
     When youtook the case panels off of the computer to fit in the different components, you have to just fit them in the same way you took them off.  The case panels are there to protect the computer, it also blocks dust entering from the side. Case panels
  • 42.
     The HDMIand monitor cables are connected at the corresponding slots at the back of the computer.  The monitor cables has screws built in which you tighten to stop the cable coming loose.  HDMI is digital, VGA is analogue, VGA only carries video not sound. HDMI and monitor cables.
  • 43.
     The keyboardand mouse used to be connected via a Ps2 connection, it is now done via USB.  To connect you place in the corresponding Ps2 slot (colour coded) Keyboard and mouse
  • 44.
     Ethernet cablesare a means of connecting to the internet, it does use wires but it comes with added security.  The Ethernet cable attaches to the computer and the ISR (router). Ethernet
  • 45.
     The wirelessantenna allows you to connect to the internet without the hassle of wires.  Using wireless has its downsides though, it is easier for others to see what you have been viewing.  Signal is not as great either. Installing the Wireless antenna
  • 46.
     Now thecomputer has been installed, you will need to install any software, to do this you need power!  Use the power cable and attach it to a wall socket and a power supply. Power