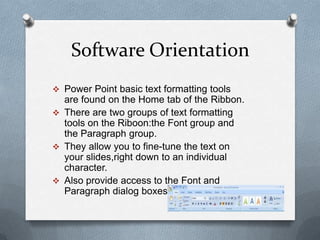
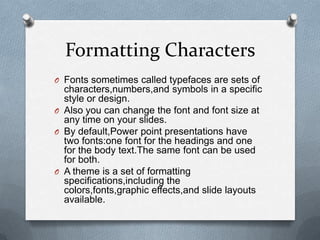
2. Software Orientation
Power Point basic text formatting tools
are found on the Home tab of the Ribbon.
There are two groups of text formatting
tools on the Riboon:the Font group and
the Paragraph group.
They allow you to fine-tune the text on
your slides,right down to an individual
character.
Also provide access to the Font and
Paragraph dialog boxes .
3. Formatting Characters
O Fonts sometimes called typefaces are sets of
characters,numbers,and symbols in a specific
style or design.
O Also you can change the font and font size at
any time on your slides.
O By default,Power point presentations have
two fonts:one font for the headings and one
for the body text.The same font can be used
for both.
O A theme is a set of formatting
specifications,including the
colors,fonts,graphic effects,and slide layouts
available.
4. Change AutoFit Behavior
AutoFit is enabled by default because it is
a useful feature that the most users
appreciate in most situations.
Rathere than the text to fit in the allotted
space,you can rely on AutoFit to figure
that out for you.
5. Applying Font Styles and
Effects
O Use font styles and effects to emphasize
text on a slide.
O Power Point provides a variety of special
effects such as strikethrough and small
caps.
O Also you can adjust characters spacing
and case to give your text a special look.
O To Accese more font effects,click the Font
groups dialog box launcher to open the
Font dialog box.
6. Changing Font Color
O Use the Font color button in the Font group to
access a palette of colors you can apply to
selected text.
O Power Point provides an almost limitless selection
of colors that can be applied to fonts.
O Each Power Point theme includes a set of
coordinating colors,which appear in the color
palettte when you click theFont Color button.
O In the color dialog box, you can choose from
dozens of standard colors or create a custom
color.
O The difference between a theme color and a
standard color is apparent when you switch to a
different theme or color scheme.
7. Copying Character Formats
with the Format Painter
O If you want to copy a format only
once,simply click the button.
O To copy a format multiple times, double-
click the button, and the feature will stay
on until you turn it off.
O Also can copy not only character formats
but paragraphs formats suchas
alignments and line spacing.
8. Set Indentation
O Indentation determines how far from the
text boxs left a
O and right margins the text appears.
O There are two indentation settings.
O The first one , Before Text, applies to lines
in the paragraph .
O The second one is a speciality setting that
varies according to the paragraph.
9. Create Numbered Lists
O When you create a numbered list on a slide, you
can continue it automatically after the last item by
pressing Enter.
O To turn off numbering , press Entere twice or click
the numbering button on the Home tab.
O You can , however,change the numbering format to
numerals followed by parentheses,
O Also to change the numbering format ,click the
numbering button´s drop-down arrow and select a
new format from the gallery.
O For more control over the numbering format ,click
bullets and Yo can use this dialogo box to choose
what number to start.
10. Inseting a Wordart Graphic
O You can change the style from the
WordArt gallery,you can apply a nuber of
interesting special effects.
O You can also modify the text of the graphic
at any time.
11. Apply a Solid Fill Color to
WordArt
O One way to fine–tune the graphic you
have inserted is to change the fill color of
the WordArt object.
O Also you can choose form the Standard
Colors palette or select another color from
the Colors dialogo box.
12. Apply a Texure Fill to WordArt
O Just as wich a WordArt object´s fill
color, you can fine-tune the outline color of
the object.
O You have the same color options as for
changing a fill color.
O The Text Outline Colors palette also
allows you to remove the outline,change
its weight , or apply a dash to the outline.
13. Change the WordArt Outline
Color
O You can apply special effects to your
WordArt objects,such as
shadows, reflections,glows
transformations, and more.
O Also can be applied to the other object
types,such as drawn and shapes.
14. Apply Special Effects to
WordArt
O You can apply WordArt styles to any text
in a slide.
O Also to regulatr text in a presentation is an
additional way to format the text to
customize the presentation.
15. Add a Text Box to a Slide
O If you simply click the sli8de withe the text
box pointer,you create a text box in which
text will not wrap.
O Also when you enter the text box expands
horizontally to accommodate the text.
O If you want to create a text box that will
contain the text in a specif area,with text
wrapping from line to line,you draw a
desierd width with the text box pointer.
16. Resize A Text Box
O The height you draw the text box does not
matter because the height automatically
fits the content.
O Also it expands as you type more lines.
O The text box has eight resizing
handels:one in each corner and one in the
middle of each side.
17. Apply Fill and Border
Formatting the Text Box
O You can change the style of a text box´s
outline form solid to dashed or dotted by
selecting the Dashes option from the
Shape Outline drop-down menu.
18. Apply Picture and Gradient
Fills to a Text Box
O You can choose from several prest color
combinations in the Format Shape dialogo
box can be adjusted to create multipoint
gradienteffects in which you choose
exactly which colors appear and in what
proportions.
19. Apply texture and pattern Fills
to a text box
O Youb can apply the same special effects
to text boxes as you can to WordArt
,drawn shapes,and other objects.
O Also you can modify the shape of a text
box,
O Using any of dozens of preset shapes the
PowerPoint offers.
20. Change Text Box Shape and
Apply Effects
O If you are going to create lots of text
boxes in a presentation, there are ways
you can save time in formatting them.
O One way is to redfine the deafault for new
text boxes to match your desired settings.
21. Change the Default
Formatting for New Text Boxes
O You can change the text direction in a text
runs from bottom to top or stacks one
letter atop the other.
O Aslo you can change orientation by
roating the text box itself.
22. Orient Text in a Text Box
O Instead of drawings the text box
horizontally on the slide,draw it so it is
taller than wide and then choose one of
the Text Directions button options to
change text orientation.
O You can also rotate a text box or any
placeholder for a special effects.