The document discusses various ribbon components in Microsoft Word for saving documents, closing documents, and formatting text and paragraphs. It can be summarized as follows:
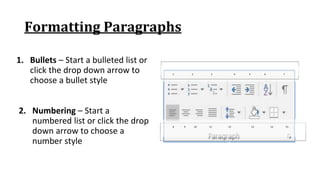
The document discusses how to save documents in Word using features like Save, Save As, and setting default save locations. It also covers how to close documents and options that appear if changes need to be saved. Formatting tools covered include formatting text fonts, size, style, and color. Paragraph formatting options discussed include indentation, alignment, line spacing, borders, and lists.