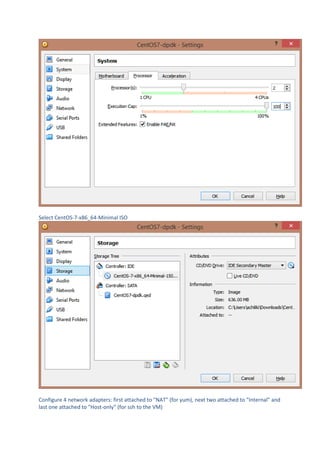
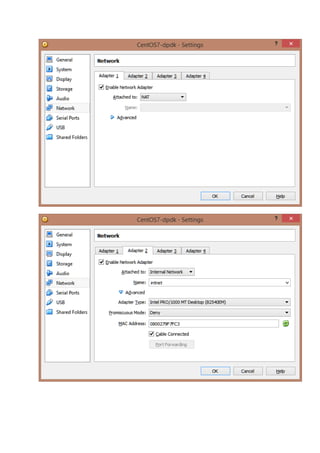
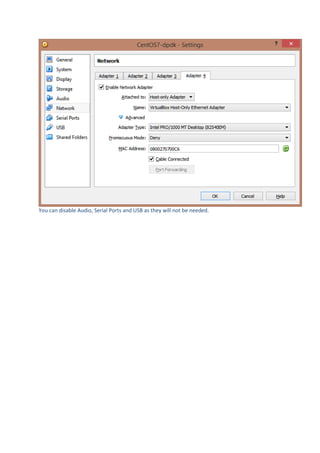
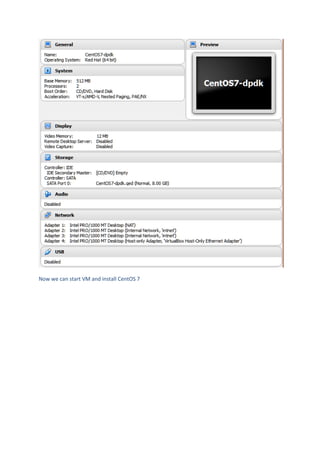
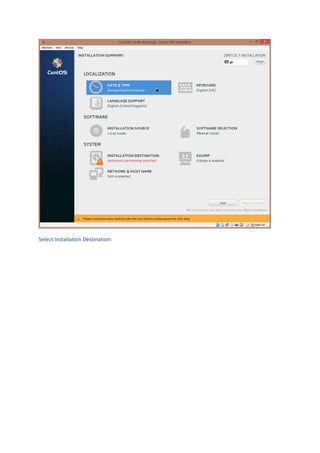
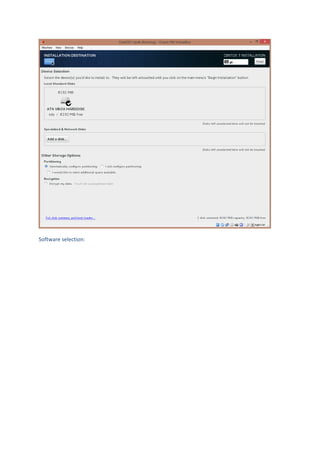
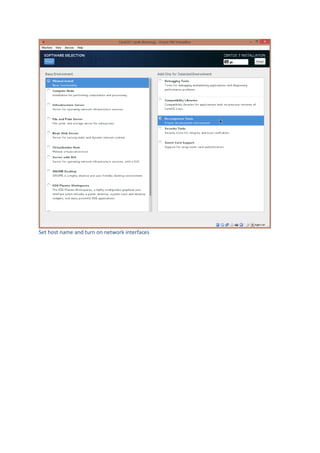
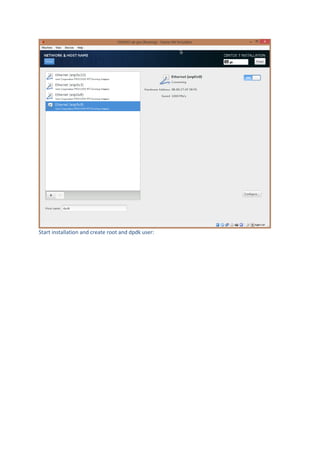
This document provides instructions for setting up a CentOS 7 VM using VirtualBox for DPDK training. It describes installing CentOS 7 Minimal, configuring the VM with 4 network interfaces, installing DPDK and related tools, compiling sample applications like l3fwd and pktgen, and manually starting the applications on the VM to test basic packet forwarding functionality.
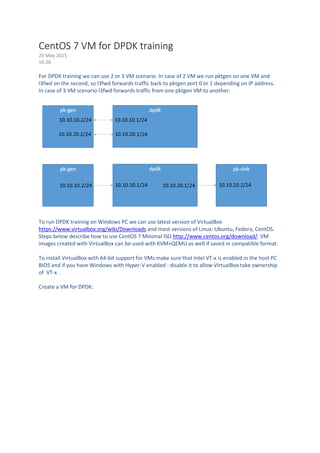
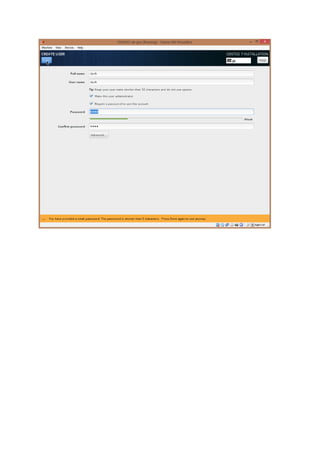
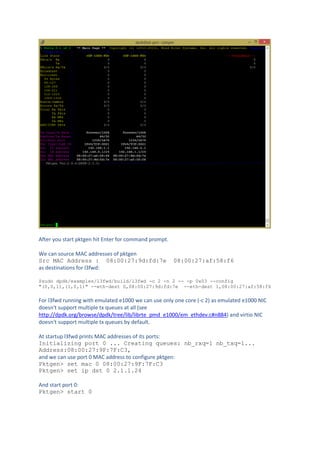
![We will need these addresses for MAC address discovery.
You can use "nmcli d" command to check networks:
[dpdk@dpdk ~]$ nmcli d
DEVICE TYPE STATE CONNECTION
enp0s10 ethernet connected Host-only (enp0s10)
enp0s3 ethernet connected NAT (enp0s3)
enp0s8 ethernet connected DPDK port 0 (enp0s8)](https://image.slidesharecdn.com/9creatingcentos7magesfordpdktraining-150616084330-lva1-app6892/85/9-creating-cent_os-7_mages_for_dpdk_training-16-320.jpg)
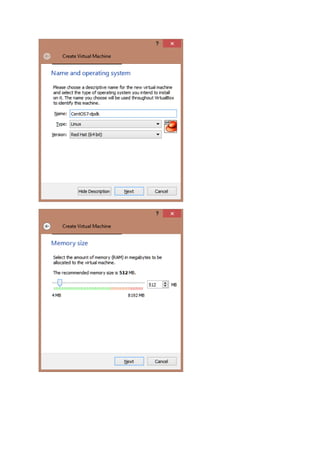
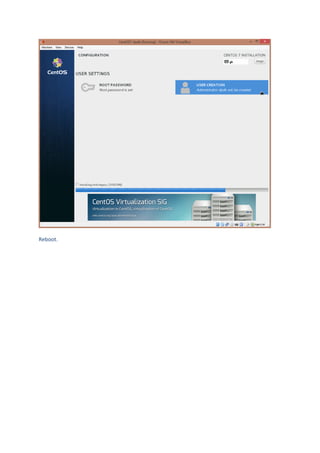
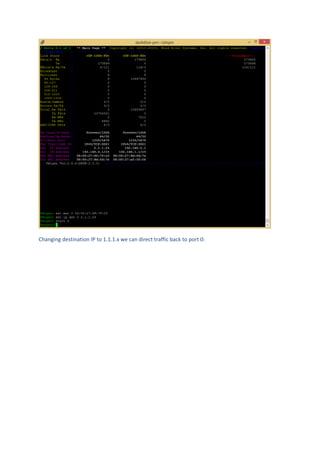
![export RTE_TARGET=x86_64-native-linuxapp-gcc
You also can add export http_proxy here if you need Internet access
Add to ~/.bashrc
# User specific aliases and functions
if [ -f ~/.bash_aliases ]; then
. ~/.bash_aliases
fi
And create ~/.bash_aliases file with the following lines:
alias dpstat='~/dpdk/tools/dpdk_nic_bind.py --status'
alias dpbind='sudo -E ~/dpdk/tools/dpdk_nic_bind.py --force --
bind=igb_uio'
alias dpunbind='sudo -E ~/dpdk/tools/dpdk_nic_bind.py -u'
Re-login. Now we can list/bind/unbind interfaces to DPDK by dpstat/dpbind/dpunbind commands:
[dpdk@dpdk ~]$ dpstat
Network devices using DPDK-compatible driver
============================================
<none>
Network devices using kernel driver
===================================
0000:00:03.0 '82540EM Gigabit Ethernet Controller' if=enp0s3
drv=e1000 unused=igb_uio *Active*
0000:00:08.0 '82540EM Gigabit Ethernet Controller' if=enp0s8
drv=e1000 unused=igb_uio *Active*
0000:00:09.0 '82540EM Gigabit Ethernet Controller' if=enp0s9
drv=e1000 unused=igb_uio *Active*
0000:00:0a.0 '82540EM Gigabit Ethernet Controller' if=enp0s10
drv=e1000 unused=igb_uio *Active*
Other network devices
=====================
<none>
Compile l3fwd. For DPDK 2.0 we need to patch it, so download patches first from DPDK Patchwork
http://dpdk.org/dev/patchwork/project/dpdk/list/
Patch 4752 [dpdk-dev] examples: add ip version check for l3fwd app
$wget http://dpdk.org/dev/patchwork/patch/4752/raw/ -O
dpdk.org/4752.patch
Patch 4774 [dpdk-dev,v2] l3fwd: make destination mac address configurable
$wget http://dpdk.org/dev/patchwork/patch/4774/raw/ -O
dpdk.org/4774.patch
Apply downloaded patches:
[dpdk@dpdk ~]$ cd dpdk
[dpdk@dpdk dpdk]$ patch -p 1 -i ../dpdk.org/4752.patch
patching file examples/l3fwd/main.c
[dpdk@dpdk dpdk]$ patch -p 1 -i ../dpdk.org/4774.patch
patching file examples/l3fwd/main.c](https://image.slidesharecdn.com/9creatingcentos7magesfordpdktraining-150616084330-lva1-app6892/85/9-creating-cent_os-7_mages_for_dpdk_training-18-320.jpg)
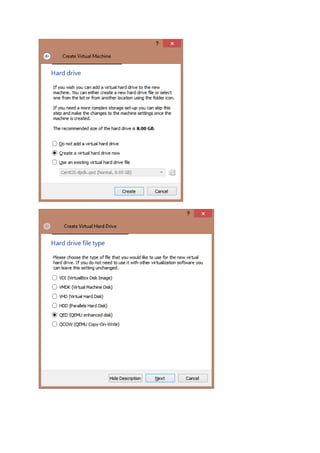
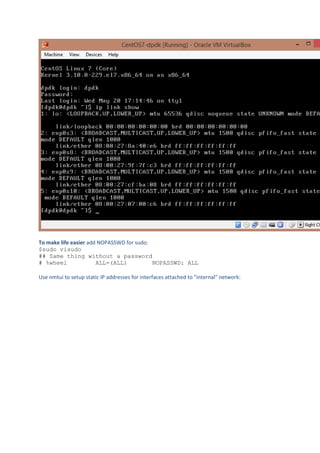
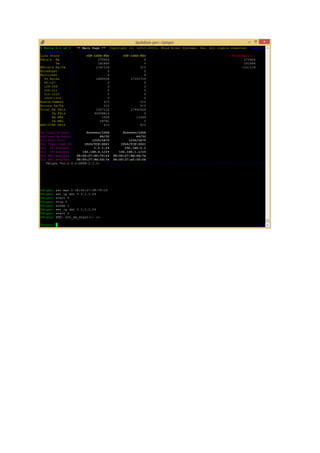
![Edit examples/l3fwd/main.c and set to 1:
#define DO_IP_VERSION_CHECK 1
To enable SW classification of IP packets for emulated devices.
Make l3fwd:
$cd examples/l3fwd
$make
Now we need a VM with pktgen to generate some traffic…
Instead of re-doing all steps above clone VM image we just created and after boot use nmtui to
change static IP addresses and host name to pk-gen.
Download pktgen from dpdk.org:
$wget -P dpdk.org http://dpdk.org/browse/apps/pktgen-
dpdk/snapshot/pktgen-2.9.0.tar.gz
$tar xzvf pktgen-2.9.0.tar.gz
$ln –s pktgen-2.9.0 pktgen
$cd pktgen
$make
Starting pktgen and l3fwd manually
First we need to bind our interfaces to igb_uio. (We already mounted hugepages and inserted
igb_uio above using dpdk/tools/setup.sh)
$sudo -E ~/dpdk/tools/dpdk_nic_bind.py --force --bind=igb_uio
00:08.0 00:09.0
Or, using dpdk/tools/setup.sh select option
[18] Bind Ethernet device to IGB UIO module
Or, with dpbind alias:
$dpbind 00:08.0 00:09.0
$ sudo ./app/app/$RTE_TARGET/pktgen -c 3 -n 2 -m 128 -- -T -p 0x03 -
m "[1:1].0, [1:1].1"](https://image.slidesharecdn.com/9creatingcentos7magesfordpdktraining-150616084330-lva1-app6892/85/9-creating-cent_os-7_mages_for_dpdk_training-19-320.jpg)


![5G Explained! A High Level Overview [Introduction]](https://cdn.slidesharecdn.com/ss_thumbnails/5gexplainedahighleveloverview-260119165306-cc137a3e-thumbnail.jpg?width=640&height=640&fit=bounds)


