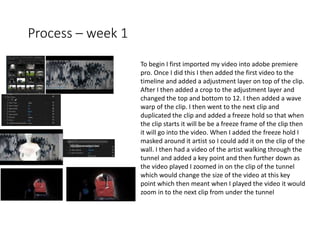
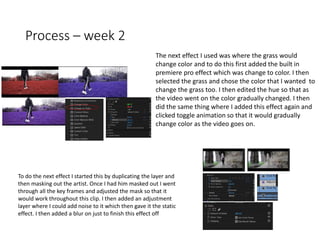
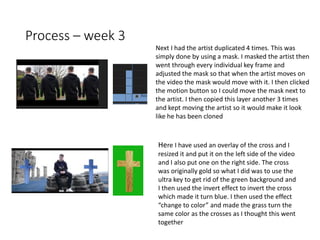
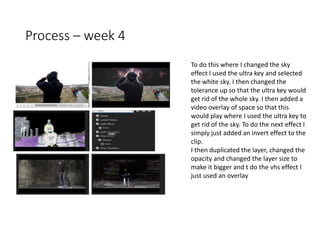
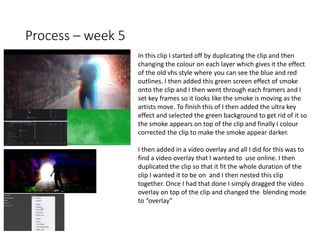
Stage 5
Production Reflections
Your Name
Production reflections
• This proforma is to record how you worked on your production
• You should complete this each week during production
• Consider all relevant areas that you covered that week
• Think about what worked/what didn’t work/how you can improve
and actions for the following sessions/weeks
Process – week 1
To begin I first imported my video into adobe premiere
pro. Once I did this I then added the first video to the
timeline and added a adjustment layer on top of the clip.
After I then added a crop to the adjustment layer and
changed the top and bottom to 12. I then added a wave
warp of the clip. I then went to the next clip and
duplicated the clip and added a freeze hold so that when
the clip starts it will be be a freeze frame of the clip then
it will go into the video. When I added the freeze hold I
masked around it artist so I could add it on the clip of the
wall. I then had a video of the artist walking through the
tunnel and added a key point and then further down as
the video played I zoomed in on the clip of the tunnel
which would change the size of the video at this key
point which then meant when I played the video it would
zoom in to the next clip from under the tunnel
Process – week 2
The next effect I used was where the grass would
change color and to do this first added the built in
premiere pro effect which was change to color. I then
selected the grass and chose the color that I wanted to
change the grass too. I then edited the hue so that as
the video went on the color gradually changed. I then
did the same thing where I added this effect again and
clicked toggle animation so that it would gradually
change color as the video goes on.
To do the next effect I started this by duplicating the layer and
then masking out the artist. Once I had him masked out I went
through all the key frames and adjusted the mask so that it
would work throughout this clip. I then added an adjustment
layer where I could add noise to it which then gave it the static
effect. I then added a blur on just to finish this effect off
Process – week 3
Next I had the artist duplicated 4 times. This was
simply done by using a mask. I masked the artist then
went through every individual key frame and
adjusted the mask so that when the artist moves on
the video the mask would move with it. I then clicked
the motion button so I could move the mask next to
the artist. I then copied this layer another 3 times
and kept moving the artist so it would make it look
like he has been cloned
Here I have used an overlay of the cross and I
resized it and put it on the left side of the video
and I also put one on the right side. The cross
was originally gold so what I did was to use the
ultra key to get rid of the green background and
I then used the invert effect to invert the cross
which made it turn blue. I then used the effect
“change to color” and made the grass turn the
same color as the crosses as I thought this went
together
Process – week 4
To do this where I changed the sky
effect I used the ultra key and selected
the white sky. I then changed the
tolerance up so that the ultra key would
get rid of the whole sky. I then added a
video overlay of space so that this
would play where I used the ultra key to
get rid of the sky. To do the next effect I
simply just added an invert effect to the
clip.
I then duplicated the layer, changed the
opacity and changed the layer size to
make it bigger and t do the vhs effect I
just used an overlay
Process – week 5
In this clip I started off by duplicating the clip and then
changing the colour on each layer which gives it the effect
of the old vhs style where you can see the blue and red
outlines. I then added this green screen effect of smoke
onto the clip and I then went through each framers and I
set key frames so it looks like the smoke is moving as the
artists move. To finish this of I then added the ultra key
effect and selected the green background to get rid of it so
the smoke appears on top of the clip and finally I colour
corrected the clip to make the smoke appear darker.
I then added in a video overlay and all I did for this was to
find a video overlay that I wanted to use online. I then
duplicated the clip so that it fit the whole duration of the
clip I wanted it to be on and I then nested this clip
together. Once I had that done I simply dragged the video
overlay on top of the clip and changed the blending mode
to “overlay”

5. production reflection mv 2018

  • 1.
  • 2.
    Production reflections • Thisproforma is to record how you worked on your production • You should complete this each week during production • Consider all relevant areas that you covered that week • Think about what worked/what didn’t work/how you can improve and actions for the following sessions/weeks
  • 3.
    Process – week1 To begin I first imported my video into adobe premiere pro. Once I did this I then added the first video to the timeline and added a adjustment layer on top of the clip. After I then added a crop to the adjustment layer and changed the top and bottom to 12. I then added a wave warp of the clip. I then went to the next clip and duplicated the clip and added a freeze hold so that when the clip starts it will be be a freeze frame of the clip then it will go into the video. When I added the freeze hold I masked around it artist so I could add it on the clip of the wall. I then had a video of the artist walking through the tunnel and added a key point and then further down as the video played I zoomed in on the clip of the tunnel which would change the size of the video at this key point which then meant when I played the video it would zoom in to the next clip from under the tunnel
  • 4.
    Process – week2 The next effect I used was where the grass would change color and to do this first added the built in premiere pro effect which was change to color. I then selected the grass and chose the color that I wanted to change the grass too. I then edited the hue so that as the video went on the color gradually changed. I then did the same thing where I added this effect again and clicked toggle animation so that it would gradually change color as the video goes on. To do the next effect I started this by duplicating the layer and then masking out the artist. Once I had him masked out I went through all the key frames and adjusted the mask so that it would work throughout this clip. I then added an adjustment layer where I could add noise to it which then gave it the static effect. I then added a blur on just to finish this effect off
  • 5.
    Process – week3 Next I had the artist duplicated 4 times. This was simply done by using a mask. I masked the artist then went through every individual key frame and adjusted the mask so that when the artist moves on the video the mask would move with it. I then clicked the motion button so I could move the mask next to the artist. I then copied this layer another 3 times and kept moving the artist so it would make it look like he has been cloned Here I have used an overlay of the cross and I resized it and put it on the left side of the video and I also put one on the right side. The cross was originally gold so what I did was to use the ultra key to get rid of the green background and I then used the invert effect to invert the cross which made it turn blue. I then used the effect “change to color” and made the grass turn the same color as the crosses as I thought this went together
  • 6.
    Process – week4 To do this where I changed the sky effect I used the ultra key and selected the white sky. I then changed the tolerance up so that the ultra key would get rid of the whole sky. I then added a video overlay of space so that this would play where I used the ultra key to get rid of the sky. To do the next effect I simply just added an invert effect to the clip. I then duplicated the layer, changed the opacity and changed the layer size to make it bigger and t do the vhs effect I just used an overlay
  • 7.
    Process – week5 In this clip I started off by duplicating the clip and then changing the colour on each layer which gives it the effect of the old vhs style where you can see the blue and red outlines. I then added this green screen effect of smoke onto the clip and I then went through each framers and I set key frames so it looks like the smoke is moving as the artists move. To finish this of I then added the ultra key effect and selected the green background to get rid of it so the smoke appears on top of the clip and finally I colour corrected the clip to make the smoke appear darker. I then added in a video overlay and all I did for this was to find a video overlay that I wanted to use online. I then duplicated the clip so that it fit the whole duration of the clip I wanted it to be on and I then nested this clip together. Once I had that done I simply dragged the video overlay on top of the clip and changed the blending mode to “overlay”

Editor's Notes

  • #4 Discuss the tools and processes used in your production. Log your thoughts and feelings about your work.
  • #5 Discuss the tools and processes used in your production. Log your thoughts and feelings about your work.
  • #6 Discuss the tools and processes used in your production. Log your thoughts and feelings about your work.
  • #7 Discuss the tools and processes used in your production. Log your thoughts and feelings about your work.
  • #8 Discuss the tools and processes used in your production. Log your thoughts and feelings about your work.