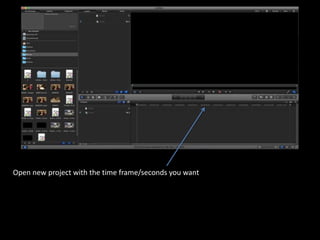
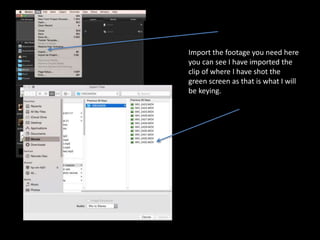
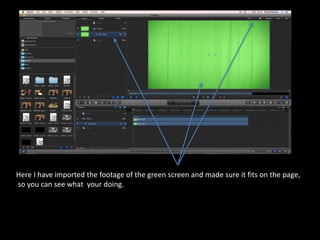
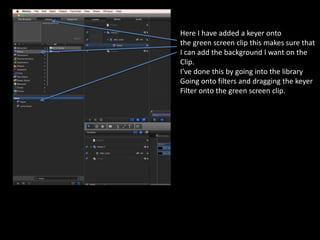
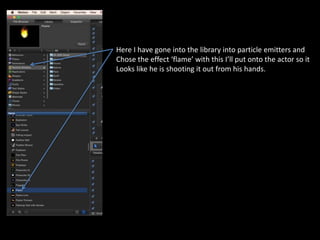
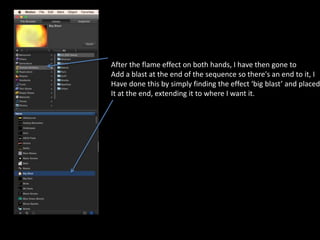
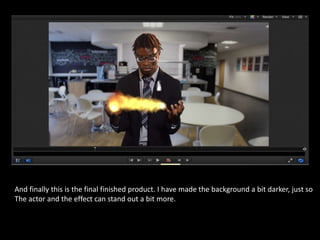
Green screen tutorial
Open new project with the time frame/seconds you want
Import the footage you need here
you can see I have imported the
clip of where I have shot the
green screen as that is what I will
be keying.
Here I have imported the footage of the green screen and made sure it fits on the page,
so you can see what your doing.
Here I have added a keyer onto
the green screen clip this makes sure that
I can add the background I want on the
Clip.
I’ve done this by going into the library
Going onto filters and dragging the keyer
Filter onto the green screen clip.
I have added the image that I want as the background of my clip by importing it from my area
That I had saved it on.
Here I have gone into the library into particle emitters and
Chose the effect ‘flame’ with this I’ll put onto the actor so it
Looks like he is shooting it out from his hands.
Here I have added the effect onto the actors hand. I have done this by dragging the effect to
Where I want it to come from and tracked it by recording the movement so it moves as the
Actors hand moves. I have done this twice on both of the actors hands, as you can see on the
Second screenshot.
After the flame effect on both hands, I have then gone to
Add a blast at the end of the sequence so there's an end to it, I
Have done this by simply finding the effect ‘big blast’ and placed
It at the end, extending it to where I want it.
This is the effect of the big blast effect. I have used this as an ending to the clip.
And finally this is the final finished product. I have made the background a bit darker, just so
The actor and the effect can stand out a bit more.

Green screen tutorial

  • 1.
  • 2.
    Open new projectwith the time frame/seconds you want
  • 3.
    Import the footageyou need here you can see I have imported the clip of where I have shot the green screen as that is what I will be keying.
  • 4.
    Here I haveimported the footage of the green screen and made sure it fits on the page, so you can see what your doing.
  • 5.
    Here I haveadded a keyer onto the green screen clip this makes sure that I can add the background I want on the Clip. I’ve done this by going into the library Going onto filters and dragging the keyer Filter onto the green screen clip.
  • 6.
    I have addedthe image that I want as the background of my clip by importing it from my area That I had saved it on.
  • 7.
    Here I havegone into the library into particle emitters and Chose the effect ‘flame’ with this I’ll put onto the actor so it Looks like he is shooting it out from his hands.
  • 8.
    Here I haveadded the effect onto the actors hand. I have done this by dragging the effect to Where I want it to come from and tracked it by recording the movement so it moves as the Actors hand moves. I have done this twice on both of the actors hands, as you can see on the Second screenshot.
  • 9.
    After the flameeffect on both hands, I have then gone to Add a blast at the end of the sequence so there's an end to it, I Have done this by simply finding the effect ‘big blast’ and placed It at the end, extending it to where I want it.
  • 10.
    This is theeffect of the big blast effect. I have used this as an ending to the clip.
  • 11.
    And finally thisis the final finished product. I have made the background a bit darker, just so The actor and the effect can stand out a bit more.