
Recommended
More Related Content
What's hot
What's hot (19)
Viewers also liked
Viewers also liked (16)
Similar to Adding a feathered border
Similar to Adding a feathered border (20)
Recently uploaded
Recently uploaded (20)
Adding a feathered border
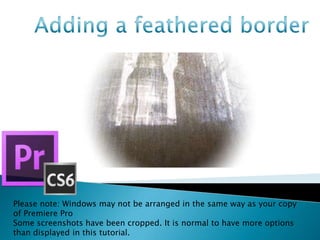
- 1. Please note: Windows may not be arranged in the same way as your copy of Premiere Pro Some screenshots have been cropped. It is normal to have more options than displayed in this tutorial.
- 2. Firstly, locate the clip or video in which you want the border to apply to and select it from the timeline. Make sure that the playback marker is on and over the selected clip. This will allow you to monitor the effect taking place in real time.
- 3. Double clicking the video clip should open the clip in the source window. (This window is often to the left of the playback window) This means that the video clip is now set as active.
- 4. You will now need to locate and select a window marked ‘Effects Controls’. Above the title of the windows, there is a small scroll bar. Use it to locate the correct window. If you cannot locate this window, press Shift+5 Or locate the ‘Window’ tab and selecting ‘Effect Controls’ from the menu
- 5. In the Effects Controls, we can control all and any effects applied to a clip in Premiere. Some effects enabled from After Effects may be controlled here as well. Now, locate the Effects window. It may look like this depending on the version of Premiere you are using. If you cannot find this. You can locate it in the ‘Windows’ tab or by pressing Shift+7 In this window, we are able to apply different transitions and or effects to our selected video clip.
- 6. Navigate to the ‘circle’ effect. This is done by Video Effects/Generate/Circle You can either double click this effect, or select and drag it over the selected clip in the timeline or select and drag it into the ‘Effect Controls’ window You may notice that a white circle appears in the playback window. This is normal. Controls will appear for the circle in the ‘Effects Control’ window
- 7. Each line in the circle effect will control one aspect of the effect. For instance. The first line will control the circle’s positing in the playback By changing the numbers, you will effect it’s Y and X coordinates. By default it will be placed in the centre of the frame. Once applied. The playback window may appear similar to our own.
- 8. To be able to get a good gauge on the size of the circle, change the blend to ‘Normal’ Do this by located the line marked ‘Blending Mode’ and selecting ‘Normal’ in the menu. This will enable to video and the circle to be visible at the same time. You may want to choose other blending options
- 9. Use the circle to mark what you want visible in the video. Use the radius to change the size of the circle.
- 10. Now, you can invert the circle. This would mean that the area under the circle will be visible and the are around will be not be visible Do this by checking the ‘Invert Circle’ box
- 11. Locate the ‘Feather’ section and expand it This feature allow you to control how much the edge of the circle is feathered. Increasing the value will increase the feathering effect This step is optional. In this demonstration we wanted a moderate effect
- 12. With circle effect Without circle effect
- 13. You may want to change the colour of the circle around the feathered circle. To do this, locate the line marked ‘Colour’ and either use the eye drop tool or open the colour pallet.
- 14. When happy with the colour selection. The colour of the circle will change accordingly.
- 15. You may want to apply this effect to other clips. To do this. Select effect and press Ctrl+C Next locate the clip you want to apply this effect to and open its ‘Effect Controls’ Press Ctrl+V The effect should copy over. You may want to adjust its settings