
Recommended
More Related Content
What's hot
What's hot (20)
Similar to How to Create Agendas, Invitations, and More in MS Office
Similar to How to Create Agendas, Invitations, and More in MS Office (20)
More from RajaKrishnan M
More from RajaKrishnan M (20)
Recently uploaded
Recently uploaded (20)
How to Create Agendas, Invitations, and More in MS Office
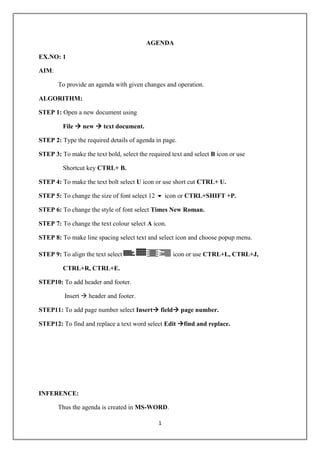
- 1. 1 AGENDA EX.NO: 1 AIM: To provide an agenda with given changes and operation. ALGORITHM: STEP 1: Open a new document using File new text document. STEP 2: Type the required details of agenda in page. STEP 3: To make the text bold, select the required text and select B icon or use Shortcut key CTRL+ B. STEP 4: To make the text bolt select U icon or use short cut CTRL+ U. STEP 5: To change the size of font select 12 icon or CTRL+SHIFT +P. STEP 6: To change the style of font select Times New Roman. STEP 7: To change the text colour select A icon. STEP 8: To make line spacing select text and select icon and choose popup menu. STEP 9: To align the text select icon or use CTRL+L, CTRL+J, CTRL+R, CTRL+E. STEP10: To add header and footer. Insert header and footer. STEP11: To add page number select Insert field page number. STEP12: To find and replace a text word select Edit find and replace. INFERENCE: Thus the agenda is created in MS-WORD.
- 2. 2 INVITATION EX.NO: 2 AIM: The aim is to prepare an invitation by using MS WORD. ALGORITHM: STEP 1: To select MS WORD select Start All programs Ms Word. STEP 2: The text book is create by using Insert Text box. STEP 3: Type the text and use font style to change format. STEP 4: The picture are also inserted by using clip arts for the invitation. INFERENCE: College invitation is thus prepared using MS –Word.
- 3. 3 INVOICE EX.NO: 3 AIM: To format an invoice using MS-Word. ALGORITHM: STEP 1: To start MS Word select start all program-MS Word. STEP 2: Select table draw table that is available in toolbar menu. STEP 3: Draw a box using toolbar menu. STEP 4: Type S.No, Particulars, Amount, Name and Authorised signature. INFERENCE: Thus, a simple invoice is created using MS-Word.
- 4. 4 TIME TABLE EX.NO: 4 AIM: To prepare a class timetable using inserting option. ALGORITHM: STEP 1: open a new text document using file newtext document. STEP 2: Insert a new table using tableinsert table. STEP 3: Select required rows and columns & click ok. STEP 4: Enter the data in the table. STEP 5: Make required change and save the document. STEP 6: Then select borders and shading. INFERENCE Thus, a time table is created using MS word.
- 5. 5 MAIL MERGE EX.NO: 5 AIM: To prepare annual general meeting letters for mail merge operation. ALGORITHM: STEP 1: Open a document using file new text document. STEP 2: Type the required data in the document. STEP 3: Open the mail merge using tableletter mailing mail merge. STEP 4: Select letters option in popup menu. STEP 5: Then in final step edit individual letter. STEP 6: The required letters are prepared. INFERENCE: Thus, from above procedure the receipt is obtained.
- 6. 6 RESUME WIZARD EX.NO: 6 AIM: To prepare the data by using wizard and templates ALGORITHM: STEP 1: Open a new document using file new text document. STEP 2: Select templates as on my computer and then select resume wizard under Topic. STEP 3: A popup wizard appears make a required field and finish the wizard. STEP 4: The fields are entered in the documents. STEP 5: After entering save the document. INFERENCE: Thus from above procedure the output is obtained.
- 7. 7 PRODUCT ADVERTISEMENT EX.NO: 7 AIM: To develop an advertisement using wizard in the slides. ALGORITHM: STEP 1: To start MS- power point select Start all programs MS-power point. STEP 2: Choose a wizard and type the title as “advertisement”. STEP 3: Choose the product and type the information about the product. STEP 4: Insert clipart for that product. STEP 5: Thus the advertisement wizard is formulated. INFERENCE: Thus an advertisement for the product is created by using MS – PowerPoint.
- 8. 8 ORGANISATION CHART EX.NO: 8 AIM: To design for organisation of chart of a company. ALGORITHAM: STEP 1: To start MS-power point select StartAll programMS-power point. STEP 2: Select the new slide and title. STEP 3: Using the subordinate different size of slides are installed. STEP 4: In the subordinate respective category of the placement are co-written in the text is Entered in the subordinate. STEP 5: F12 is used to see the developed organisation charts as slide show. INFERENCE: Thus the organisation chart is created by using MS – PowerPoint.
- 9. 9 NEWS HEADLINES EX.NO: 9 AIM: To develop a picture slide using pictures with custom option in MS – Power point. ALGORITHM: STEP 1: To start MS- power point select Start all programs MS-power point. STEP 2: Use ctrl + N to select a new slide. STEP 3: Enter the news headlines with bullet points given and select any custom animation. STEP 4: Use F5 to view the slide show. STEP 5: Save the file and stop the execution process. INFERENCE: Thus the presentation of the slide is created by using MS – PowerPoint.
- 10. 10 COMPANY ADVERTISEMENT EX.NO: 10 AIM: To design the slide about an Organization using clipart. ALGORITHM: STEP 1: To start MS-Power point select Start all programs MS-Power point. STEP 2: Select the suitable side to present about an organisation. STEP 3: The side designed using picture by the option clipart. STEP 4: Click on insert clipart option to select a picture. STEP 5: Use F5 key to view the slide view and select the execution process. INFERENCE: Thus the presentation is created by using MS – PowerPoint.
- 11. 11 SEMINAR PRESENTATION EX.NO: 11 AIM: To design a presentation slide (or) seminar (or) lecture presentation. ALGORITHM: STEP 1: To start MS-power point select Startall programsMS-power point. STEP 2: Select the suitable slide & enter the topic as seminar presentation. STEP 3: Enter the necessary details in different slides. STEP 4: Change the background colour by selecting Right clickslide design. STEP 5: Use F5 to view slide show then save the slide and stop the execution processing. INFERENCE: Thus the presentation slide for seminar is created by using MS – Power Point.
- 12. 12 QUERIES EX.NO: 12 AIM : To prepare a query for the employee Database. ALGORITHM: STEP 1: To start Ms-Access. Select Start All program Ms-Access. STEP 2: Employee table is prepared using the Option table and details for the Employee table and double click. STEP 3: Save the table and select create queries in wizard using view option and create the necessary table DA: [BP]*10/100, HRA:[BP]*2/100 GP: [BP]+[DA]+[HRA], Deduction:[GP]*3/100 NP: [GP]-[Deduction]. STEP 4: Save the table and when you open the table, queries created are activated. INFERENCE: Thus employee table is prepared using queries table in MS Access.
- 13. 13 MAILING TABLES EX.NO: 13 AIM : To create three student databases and perform merge option. ALGORITHM: STEP 1: To start Ms-Access. Select Start All program Ms-Access. STEP 2: Create the table by clicking the option “table” with fields “Roll no, Name”. STEP 3: Enter the value of the table we have created. STEP 4: Each table should have at least two fields. STEP 4: Save the table. INFERENCE: Thus the creation of the student database is created by using MS Access.
- 14. 14 FORM DESIGNS EX.NO: 14 AIM: To create an invoice in the form using design view. ALGORITHM STEP 1: To start MS-access select Start All programs MS access. STEP 2: Create a program [produce] table, with the field of Id, produce name, unit, Price quantity and total. STEP 3: Select the “create form in design view” option and design the form for your further product table. STEP 4: Save the form and stop the execution process. INFERENCE: Thus an invoice form using design view is created in MS- Access.
- 15. 15 E-MAIL ETIQUTTE EX.NO: 15 AIM: To write a polite E- mail by following rules of E- mail etiquette. ALGORITHM: STEP 1: To open a browser select Startall programsGoogle Chrome. STEP 2: Open a new tab use google search engine to open Gmail. STEP 3: Log in to Gmail account and click compose mail option. STEP 4: Type the receiver’s address in the address field. STEP 5: Type subject line, greeting, body, closing and signature. STEP 6: Click the option send. INFERENCE: Thus, the polite E- mail by following rules of E- mail etiquette is prepared.
- 16. 16 DATA COLLECTION EX.NO: 16 AIM: To visit Wikipedia and National Digital Library of India to collect required information. ALGORITHM: STEP 1: To open a browser select Startall programsGoogle Chrome. STEP 2: Open a new tab use google search engine to open Wikipedia. STEP 3: Visit the Wikipedia to collect necessary information by using search option. STEP 4: Visit the National Digital Library of India and crate your account using Sign-up option. STEP 5: Log into your account and create your profile. STEP 6: Search for necessary information by using search option. INFERENCE: Thus, information is collected from Wikipedia and National Digital Library of India Successfully.