Cavity walls were introduced in the 1920s to improve insulation and prevent moisture penetration compared to solid walls. They consist of an inner and outer leaf separated by a cavity. Current regulations require cavities to be filled with insulation to achieve high thermal resistance. Proper installation of wall ties and damp-proof courses is necessary to join the leaves while allowing moisture to drain. Below ground, the cavity may be filled with concrete or use solid foundation blocks to resist lateral pressure from soil.
3. Purpose and history
Cavity walling was first introduced to
domestic buildings in the 1920s
replacing traditional solid walls. This
type of wall is designed and
constructed as a means of preventing
heat loss and also moisture
penetrating to the internal face of the
wall, as was common in solid walls,
causing dampness on the inside of
the building.
The walls are often referred to as the
inner leaf and the outer leaf.
50mm minimum
Outer leaf Inner leaf
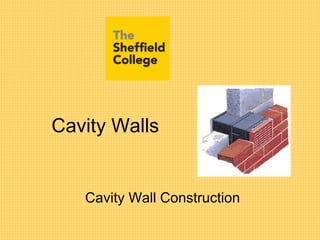
Cavity wall construction
4. Purpose and history
In the early days of cavity
walling it was considered good
practice to ventilate the cavity
as the flow of air around the
cavity kept it dry.
The 1960s saw a change in design of cavity walls
due to the increase in fuel prices and the need to
conserve energy in buildings.
This greater emphasis on retaining heat in buildings
led to cavities being sealed because still air is a far
better insulator of heat than air subject to convection
currents.
5. Current Building Regulations require much
higher resistance to the passage of heat
offered by the materials in a structure.
To achieve this reduction in heat loss, the
cavities are now either partially or totally
filled with an insulation material.
Full fill cavity insulation Partial fill cavity insulation
6. The two wall leaves need to be held together
so that they become one solid structure.
This needs to be done without allowing any
water to penetrate from the outer leaf to the
inner leaf.
Wall ties must be used and designed so as to
allow water to drip from them rather than
pass across into the internal wall and they
need to be strong enough to hold the two
leaves as one.
7. Cavity Wall Ties
The walls are supported and tied into one
another by means of specially designed
metal ties called ‘wall ties’.
Ties can be made from stainless steel, Plastic
or Galvanised Steel.
Wall ties are covered in greater depth in the
wall tie unit.
8. Cavity Wall Ties
Outer leaf
brickwork
Inner leaf
blockwork
Wall tie
Moisture drips off wall tie
Cavity
9. Building Regulations requirements
for insulated cavity walls
Approved Document L – Conservation of Fuel and
Power – of the current Building Regulations requires
external cavity walls to give a U-value of 0.35W/m² k.
A U-value is a measurement of the rate of heat loss
through a wall, roof or floor.
The lower the U-value, the better the insulation value
of the wall. So a wall with a U-value of 0.35W/m² k
performs better than a wall with a U-value of
0.45W/m² k.
10. A typical wall design, to meet current regulations,
may consist of:
• 100mm external wall.
• 75mm full fill fibreglass insulation quilt.
• 100mm lightweight thermal block.
• Dry-lined plasterboard on ‘dabs’ on the
inner leaf wall.
This construction provides a U-value of
0.33W/m² k
11. The following points are a general
guide to good construction.
• Wall leafs should be tied together with wall ties.
• Wall ties should be level or slope slightly downwards towards
the outer leaf of the wall with the drip positioned in the centre of
the cavity and pointing downwards.
• Only wall ties specified in the contract documents should be
used as they may be designed for use with insulating materials.
• The cavities should be clear of mortar droppings if insulation
materials are to be used.
• The ends or cross joints of the facework should be filled solidly
with mortar to prevent water penetration.
• Suitable DPC membranes should be positioned correctly, and
cavity trays should be placed over lintels, and stopped ends
built in to prevent water running off the ends of the trays into the
cavity insulation.
• Weep holes should be formed to drain off water from cavity
trays.
12. Typical components needed for
bridging cavities at openings.
Tray DPC
DPC stop end
Vertical DPC
Weep hole
13. Wall construction below ground
level
Cavity walling below ground level can be
constructed in the following ways:
• Cavity wall formed with two walls of common
bricks.
• Cavity wall formed with walls of foundation
blocks.
• Wall formed with solid foundation blocks
that are the full width of the cavity wall above.
14. Cavity wall formed with two walls of common
bricks
The diagram shows the construction of a
cavity wall formed with two walls of common
bricks.
Constructional features
1. Facework is set out at least one course
below ground level to allow for uneven
ground.
2. Horizontal DPC minimum of 150mm
above ground level.
3. Cavity below ground level filled with
weak mix concrete to resist lateral (side)
pressure crushing the cavity, and to
prevent the cavity filling with water.
4. Weep holes formed at 900mm centres
above the weak mix concrete fill, to allow
escape of any water.
5. Minimum depth of 600mm below ground
level to protect from frost heave.
15. Cavity wall formed with two walls of common
bricks with services running through
Constructional features
1. Face work is set out at least one course below
ground level to allow for uneven ground.
2. Horizontal DPC minimum of 150mm above
ground level.
3. Cavity below ground level is filled with a weak
mix of concrete to resist lateral (side) pressure
crushing the cavity, and to prevent the cavity
filling with water.
4. Weep holes formed at 900mm centres above
the weak mix concrete fill, to allow escape of
any water.
5. Openings for service ducts below ground level
typically spanned with pre stressed concrete
lintel.
6. Minimum depth of 600mm below ground level
to protect from frost heave.
This form of cavity wall construction would be used when service pipes etc run
through the wall just above the foundation. The services must be protected, so
a pre stressed lintel is inserted to form an opening.
16. Cavity wall formed with walls of foundation blocks
Constructional features
1. Cavity walls below ground are formed with blocks
that are designed for substructure work and have
a minimum strength of 3.5N/mm² if protected from
frost or, if they are to be exposed to the elements,
7N/mm².
2. Facework is set out at least one course below
ground level to allow for uneven ground that may
expose the first courses. Blockwork below ground
level must be terminated at a level to allow this.
3. Horizontal DPC minimum of 150mm above ground
level.
4. Cavity below ground level is filled with a weak mix
of concrete to resist lateral pressure crushing the
cavity.
5. Weep holes are formed at 900mm centres above
a weak concrete mix placed in the cavity. This is to
allow water to escape.
An alternative form of cavity wall construction makes use of solid foundation blocks.
These blocks are designed to be used for substructure work. They are strong and
dense and are capable of supporting the upper brick or blockwork. This type of block
has a minimum strength of 3.5N/mm² if protected from frost or, if they are to be
exposed to the elements, 7N/mm².
17. Wall formed with solid foundation
blocks that are the full width of the
cavity wall above
This type of cavity wall construction also makes
use of solid foundation blocks.
Constructional features
1. Cavity wall construction below ground formed
with solid foundation blocks. These may be a
dense or lightweight block depending upon the
design of the foundation.
2. Facework is set out at least one course
below ground level to allow for uneven ground
that may expose the first courses. Blockwork
below ground level must be terminated at a
level to allow this.
3. The cavity begins below ground level but no
infill of weak concrete mix is needed.