Downloaded 668 times

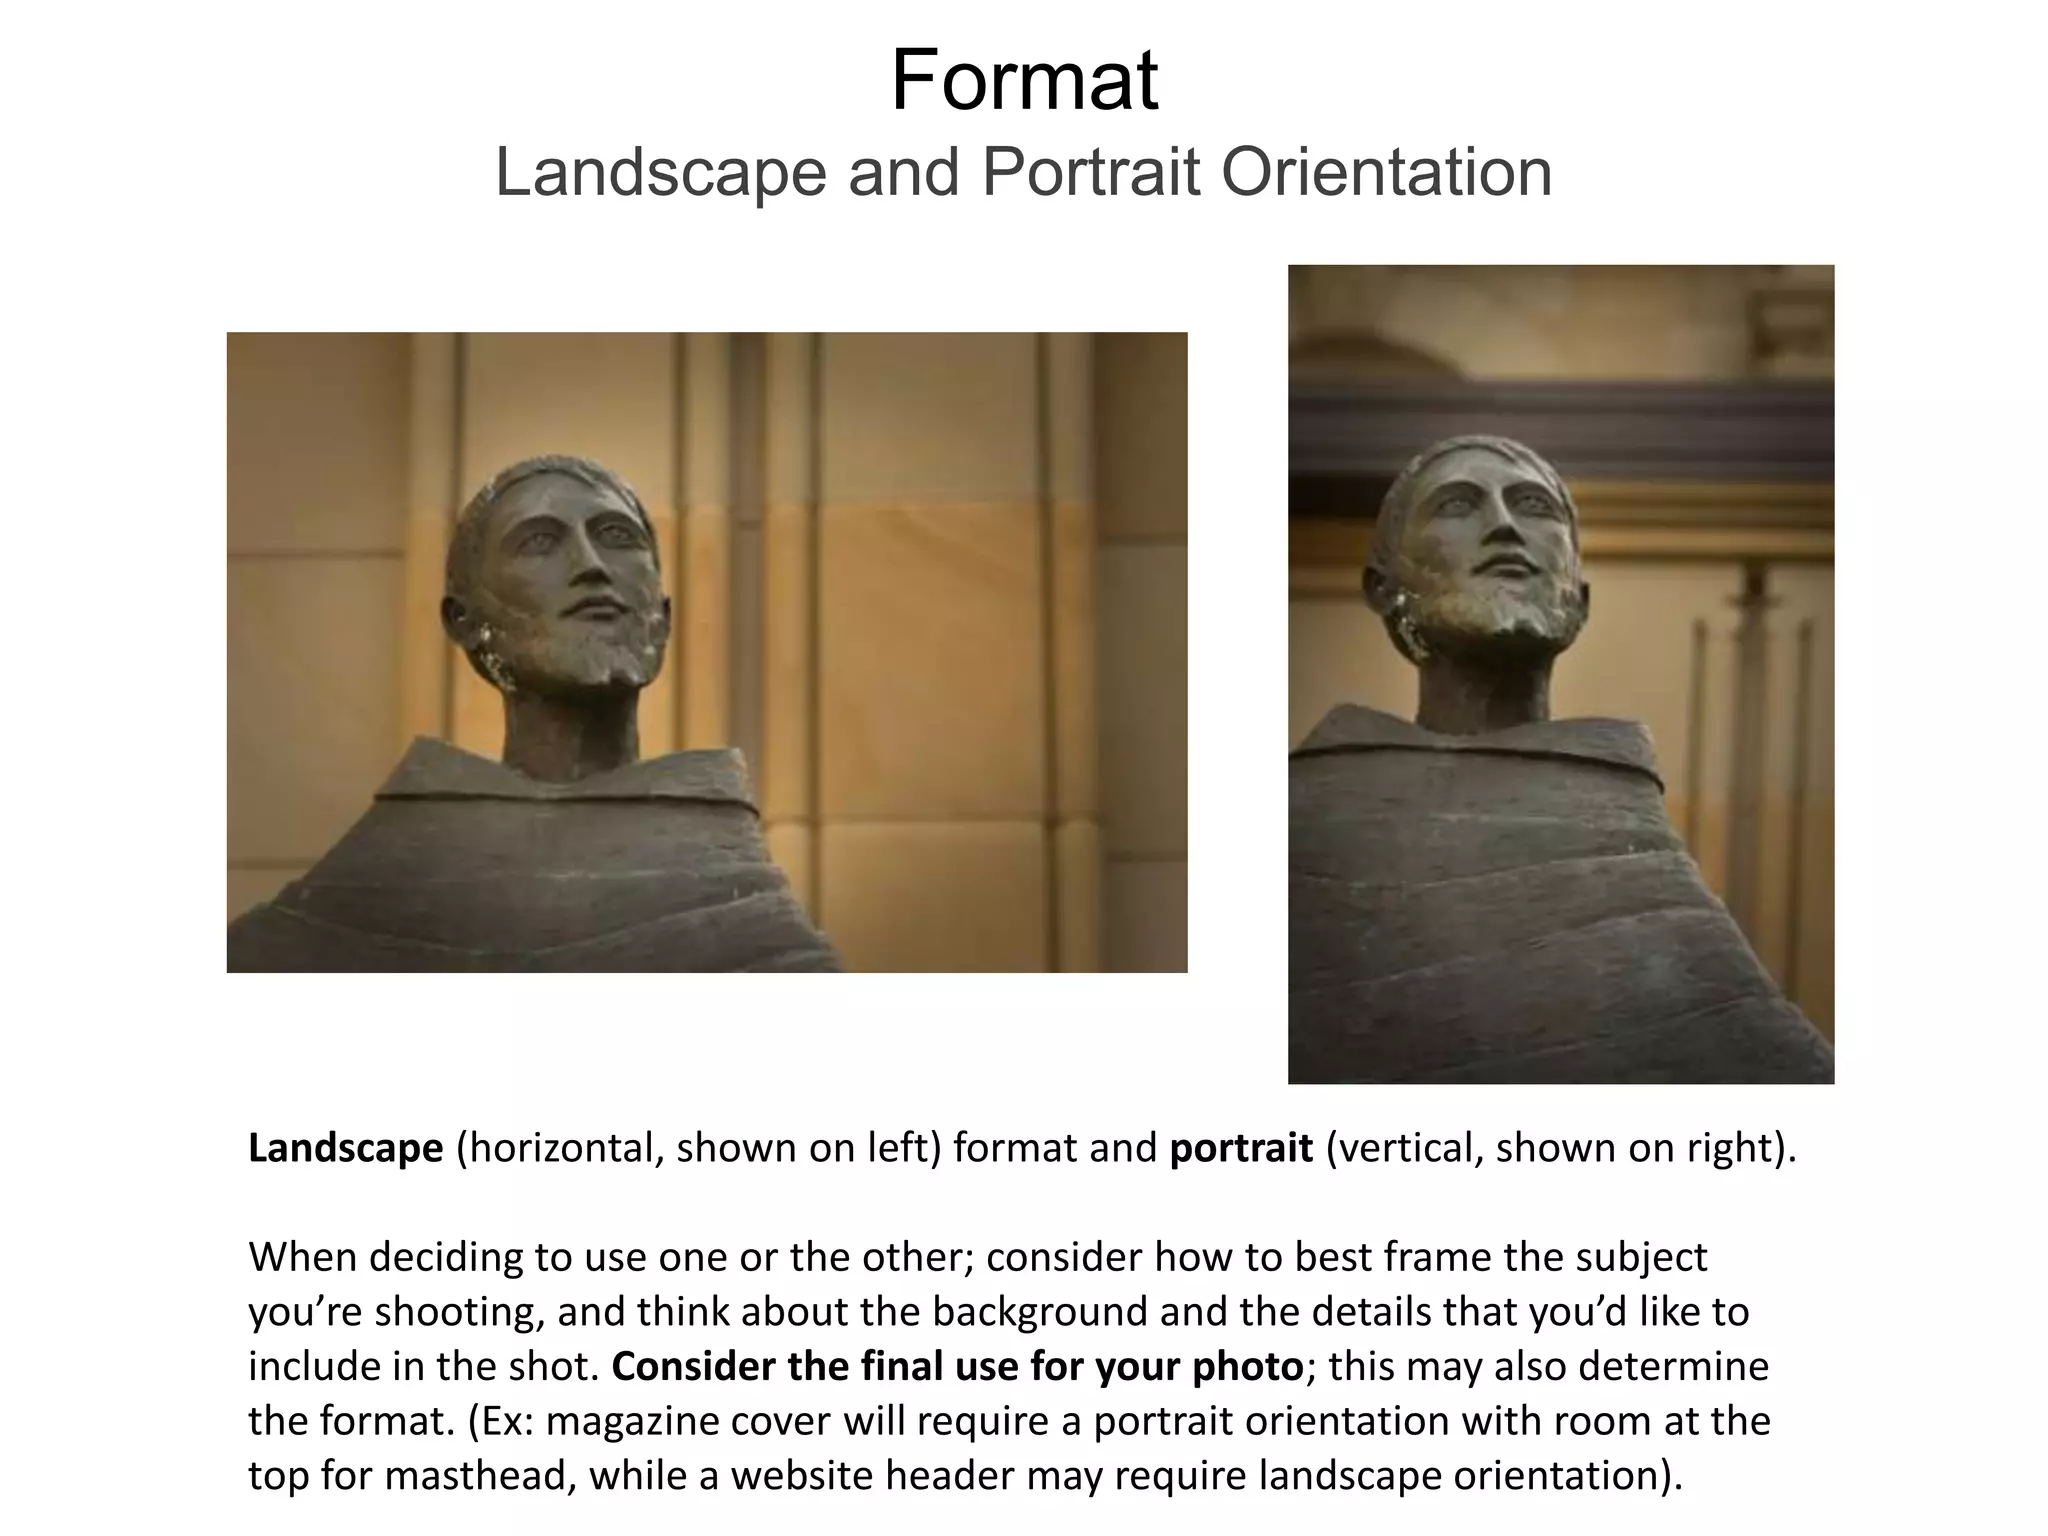
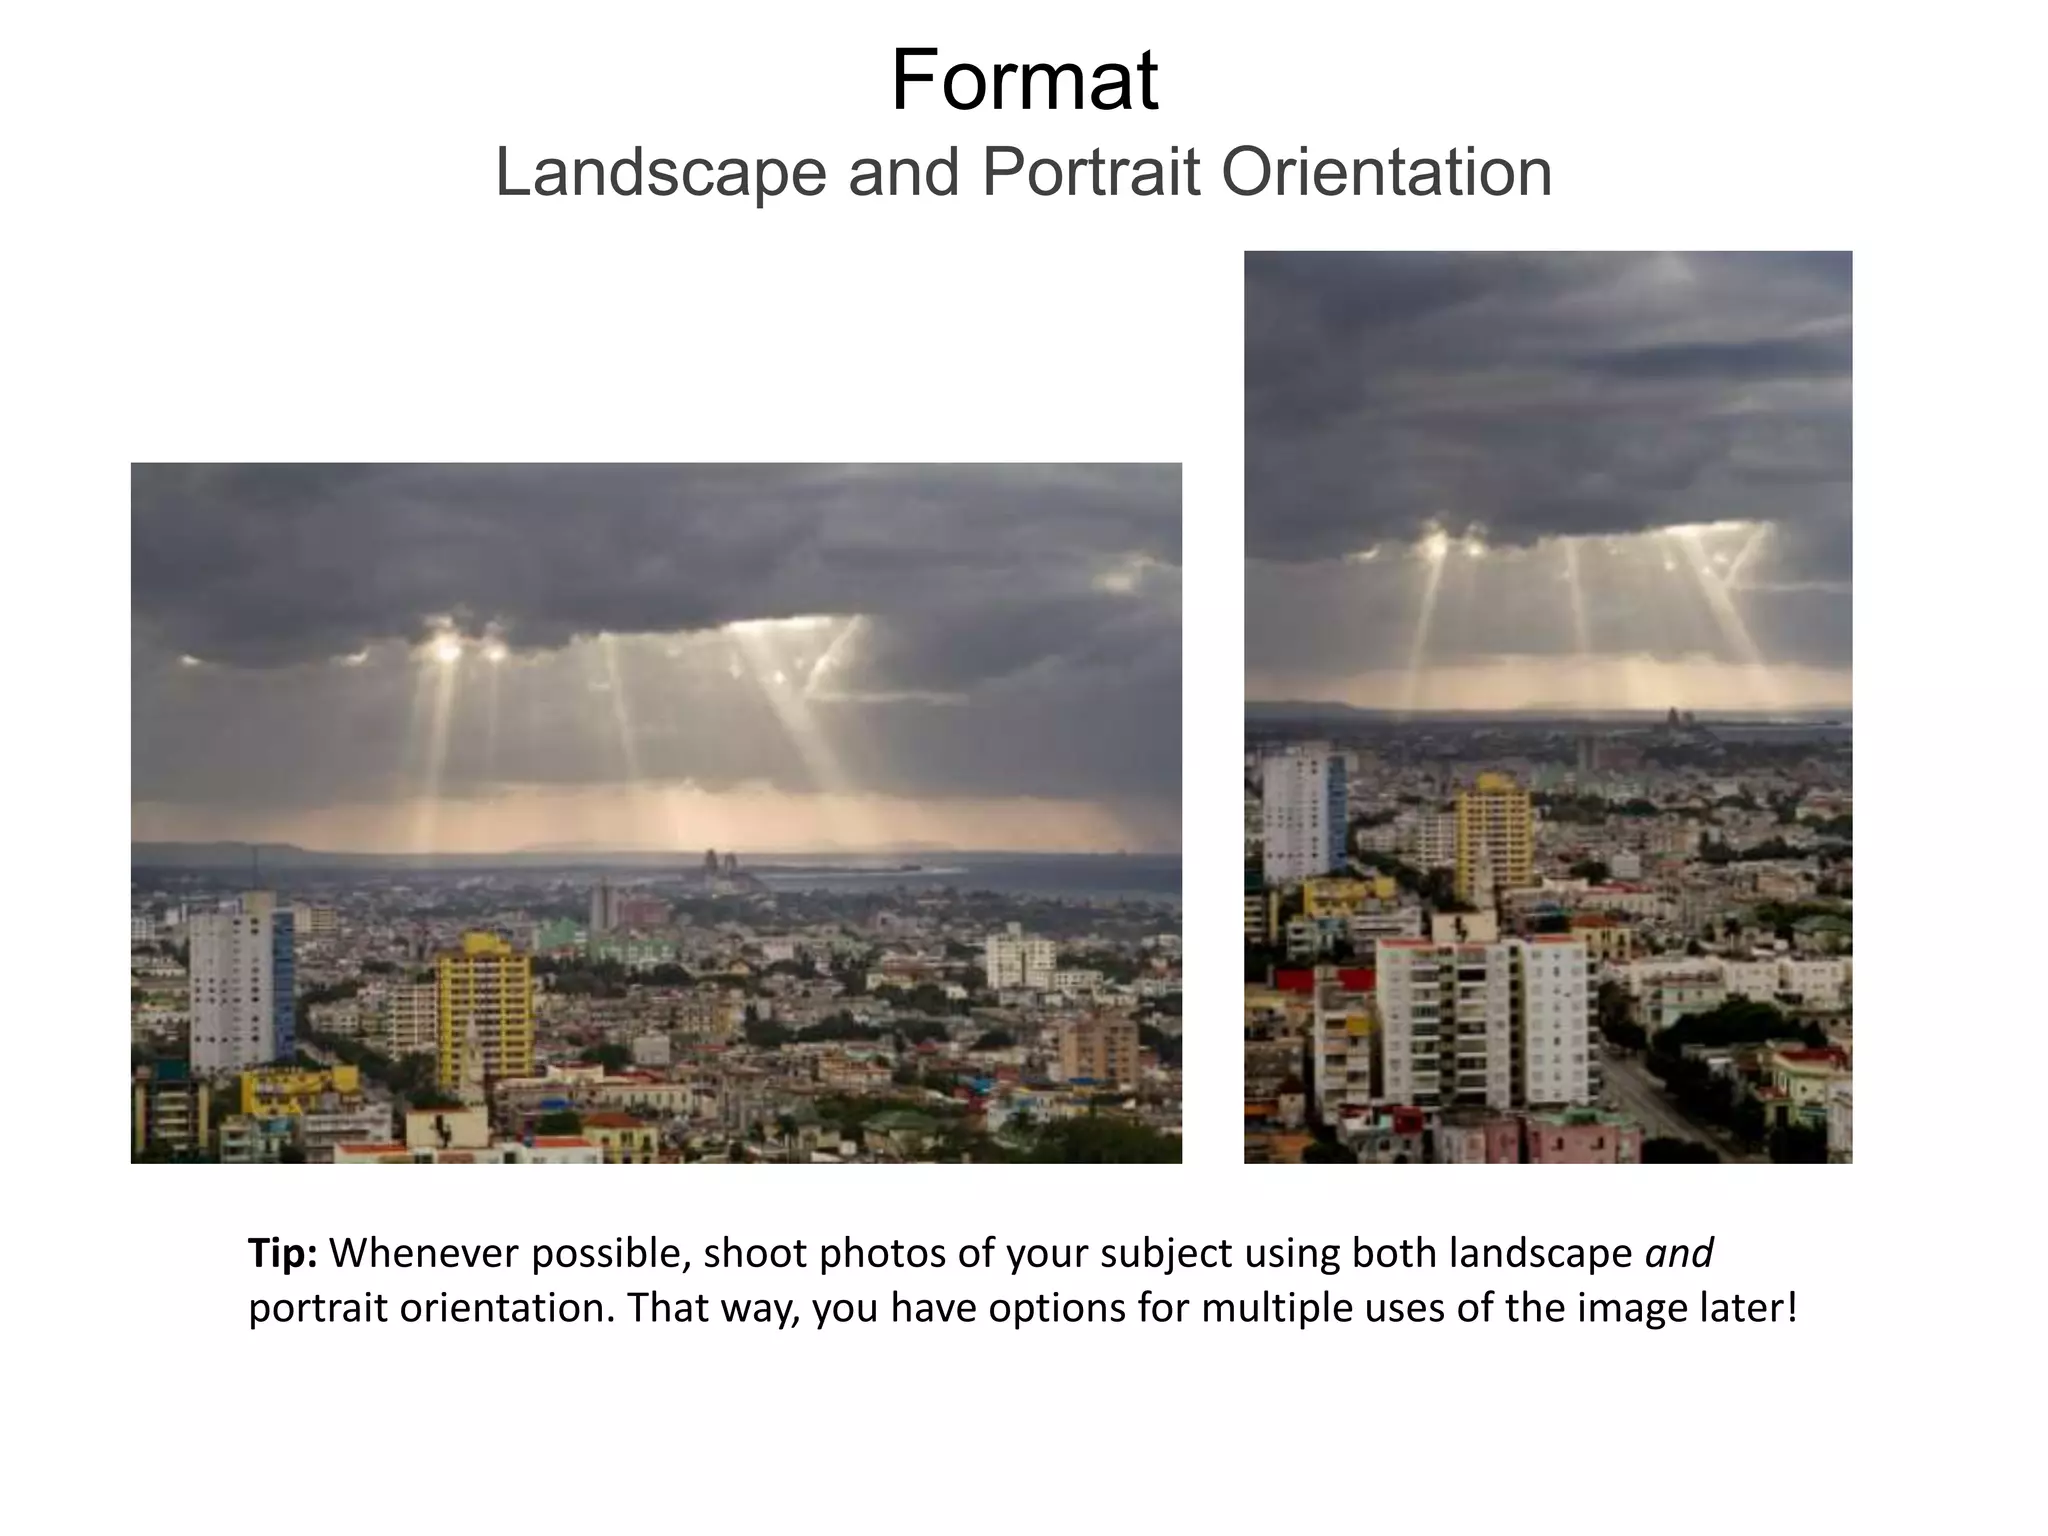
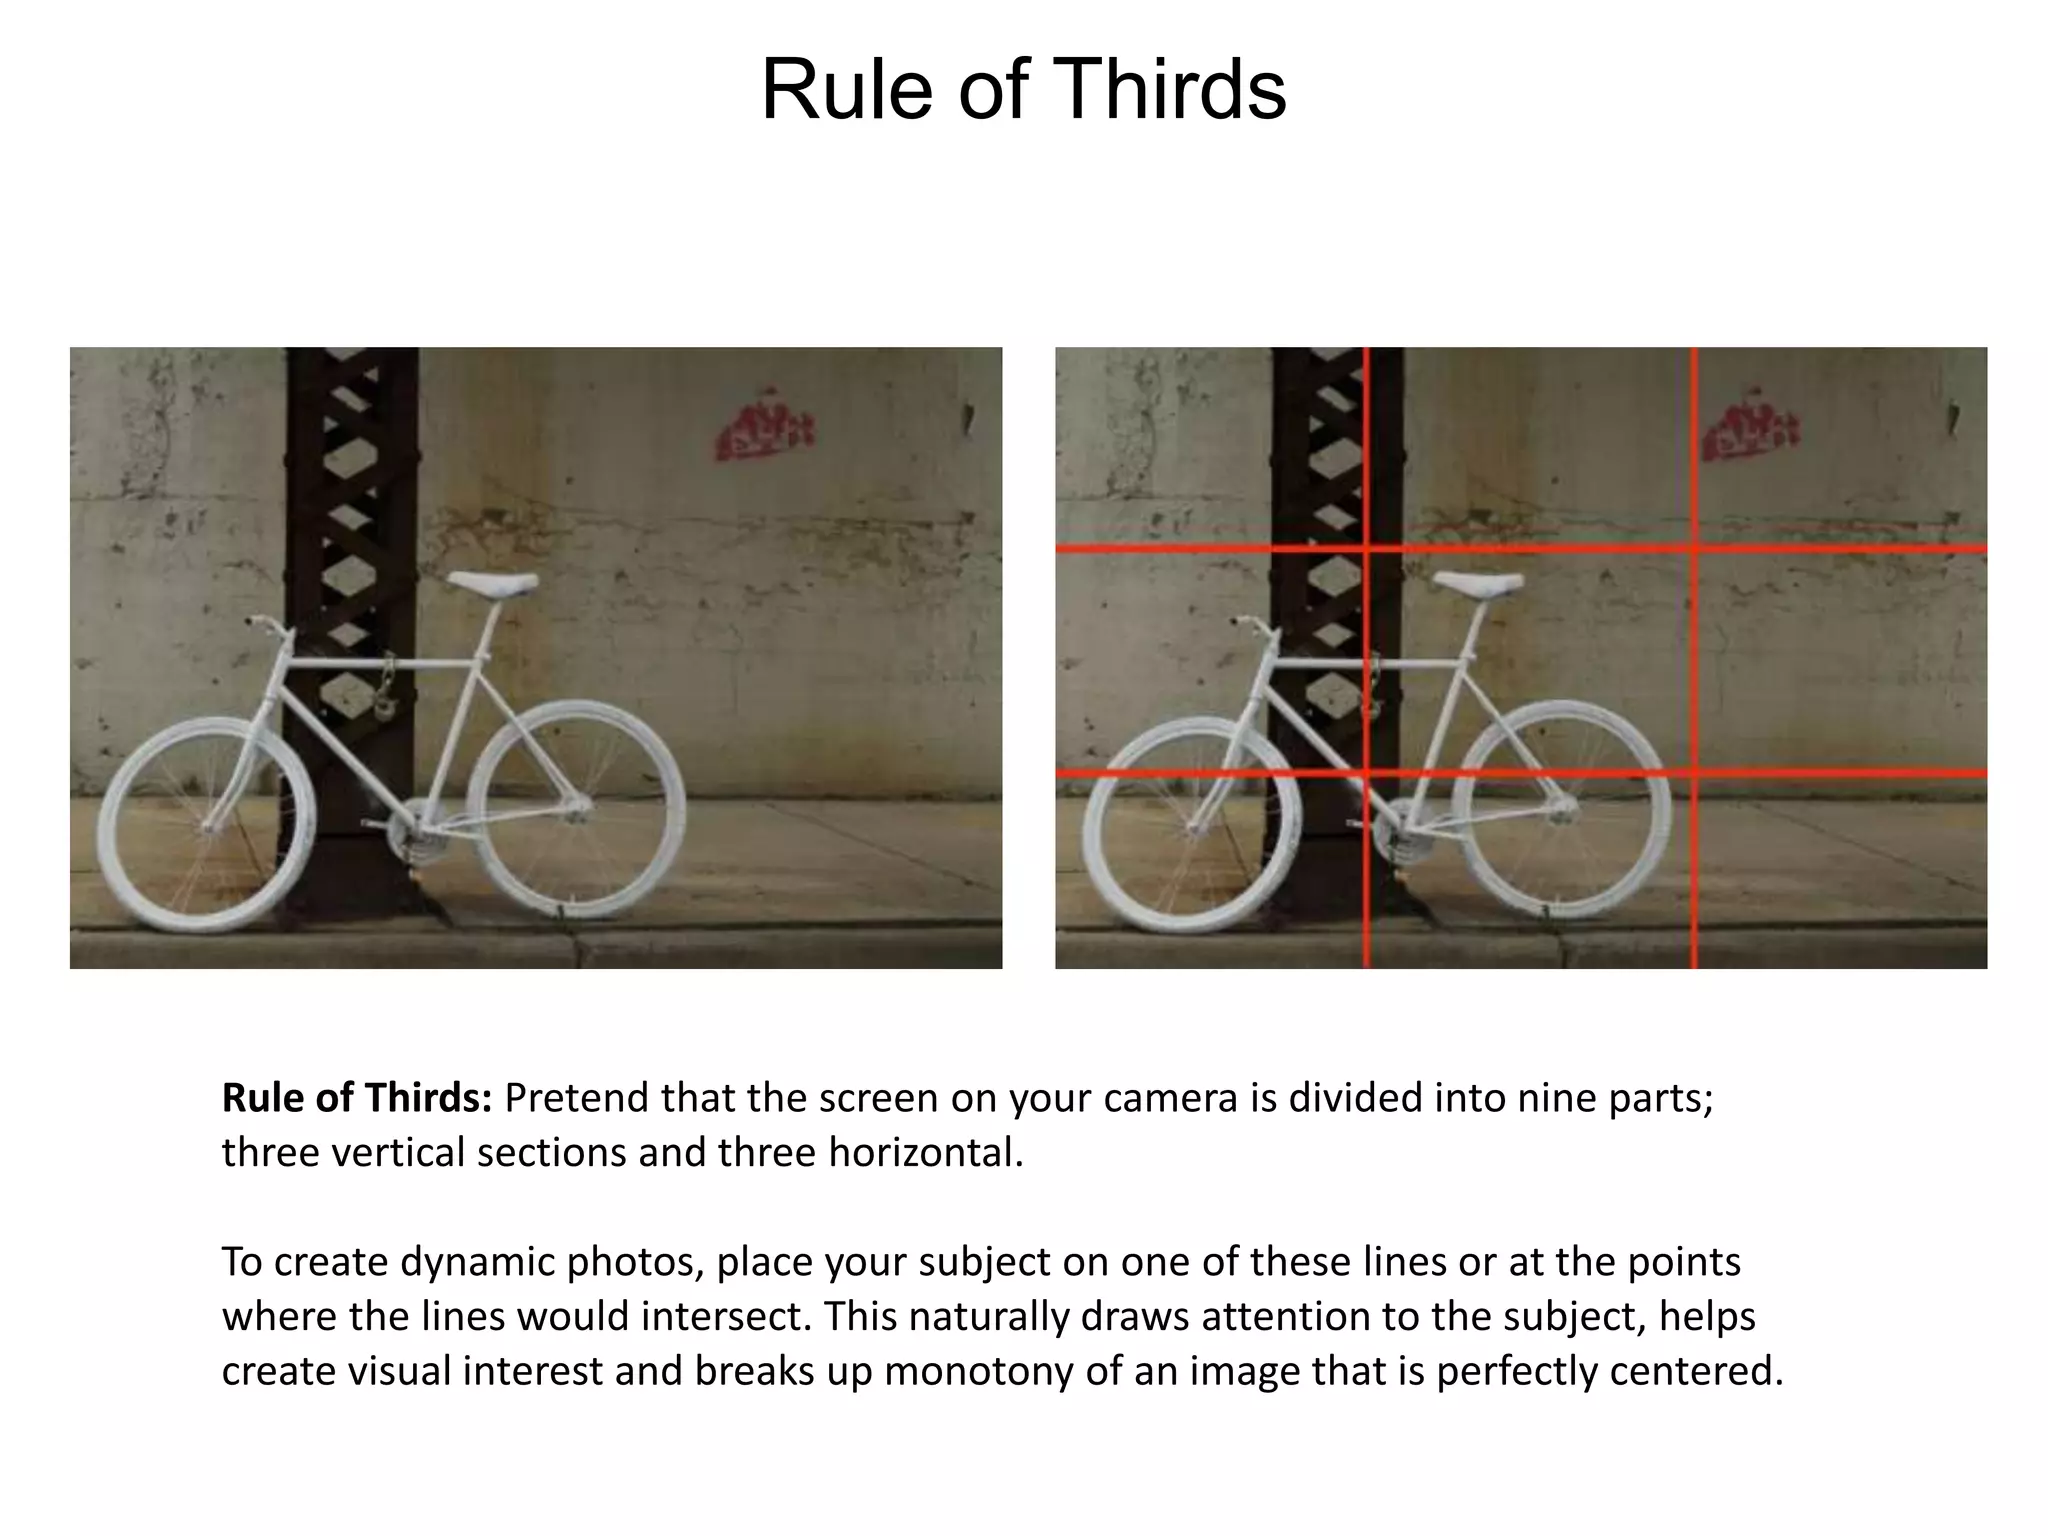
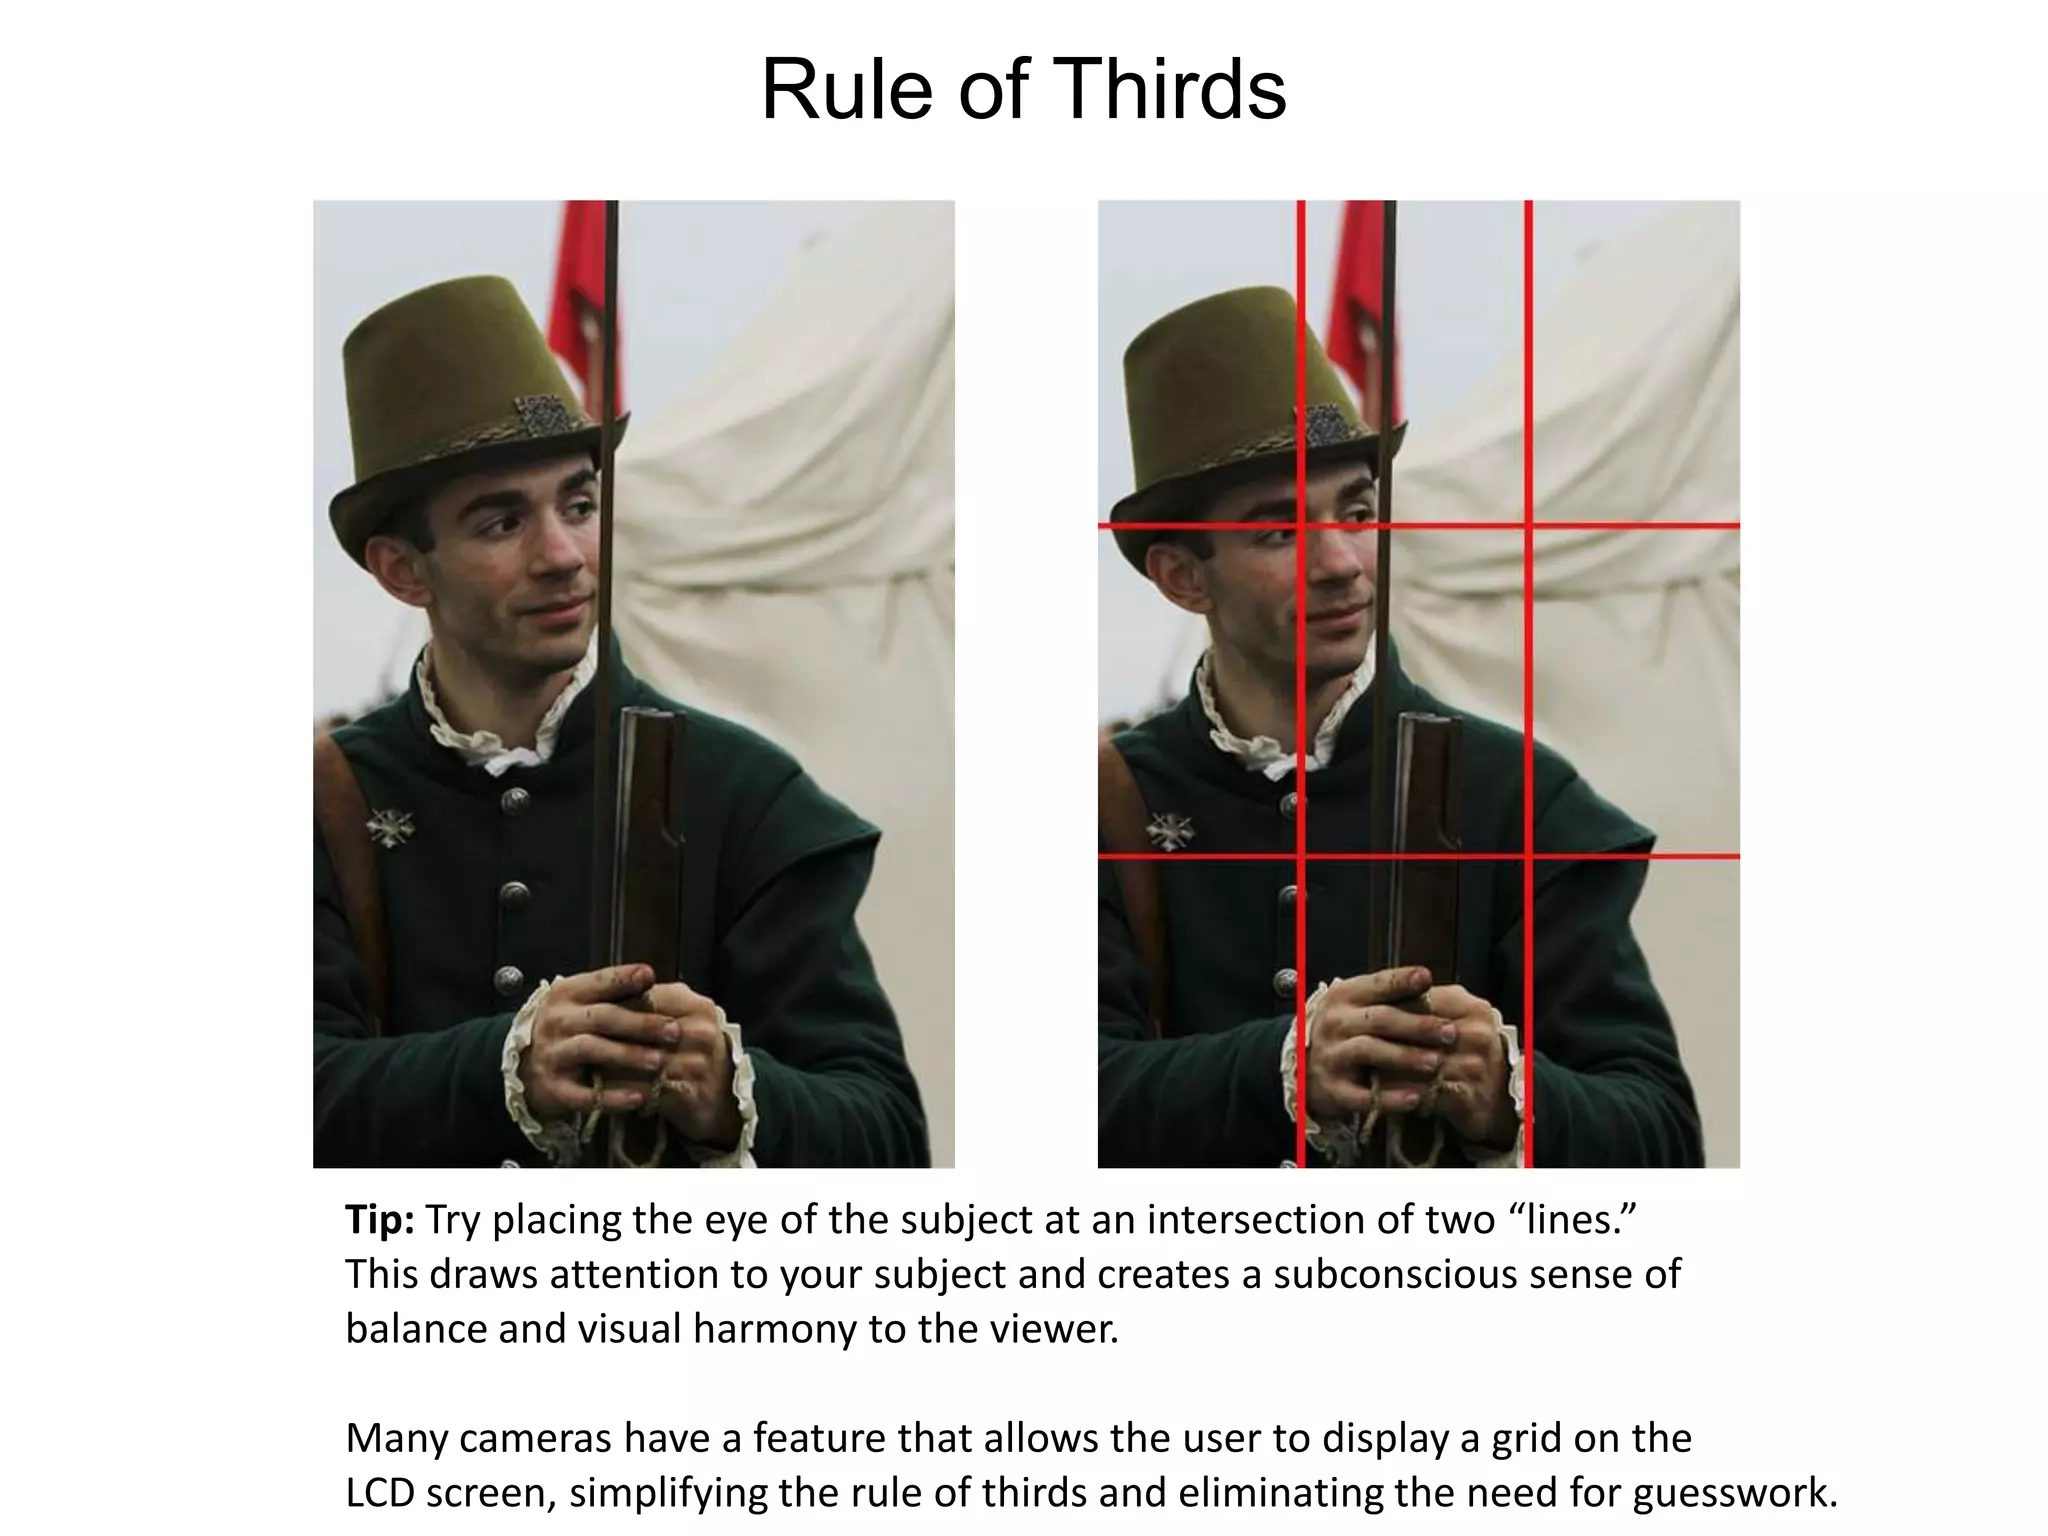

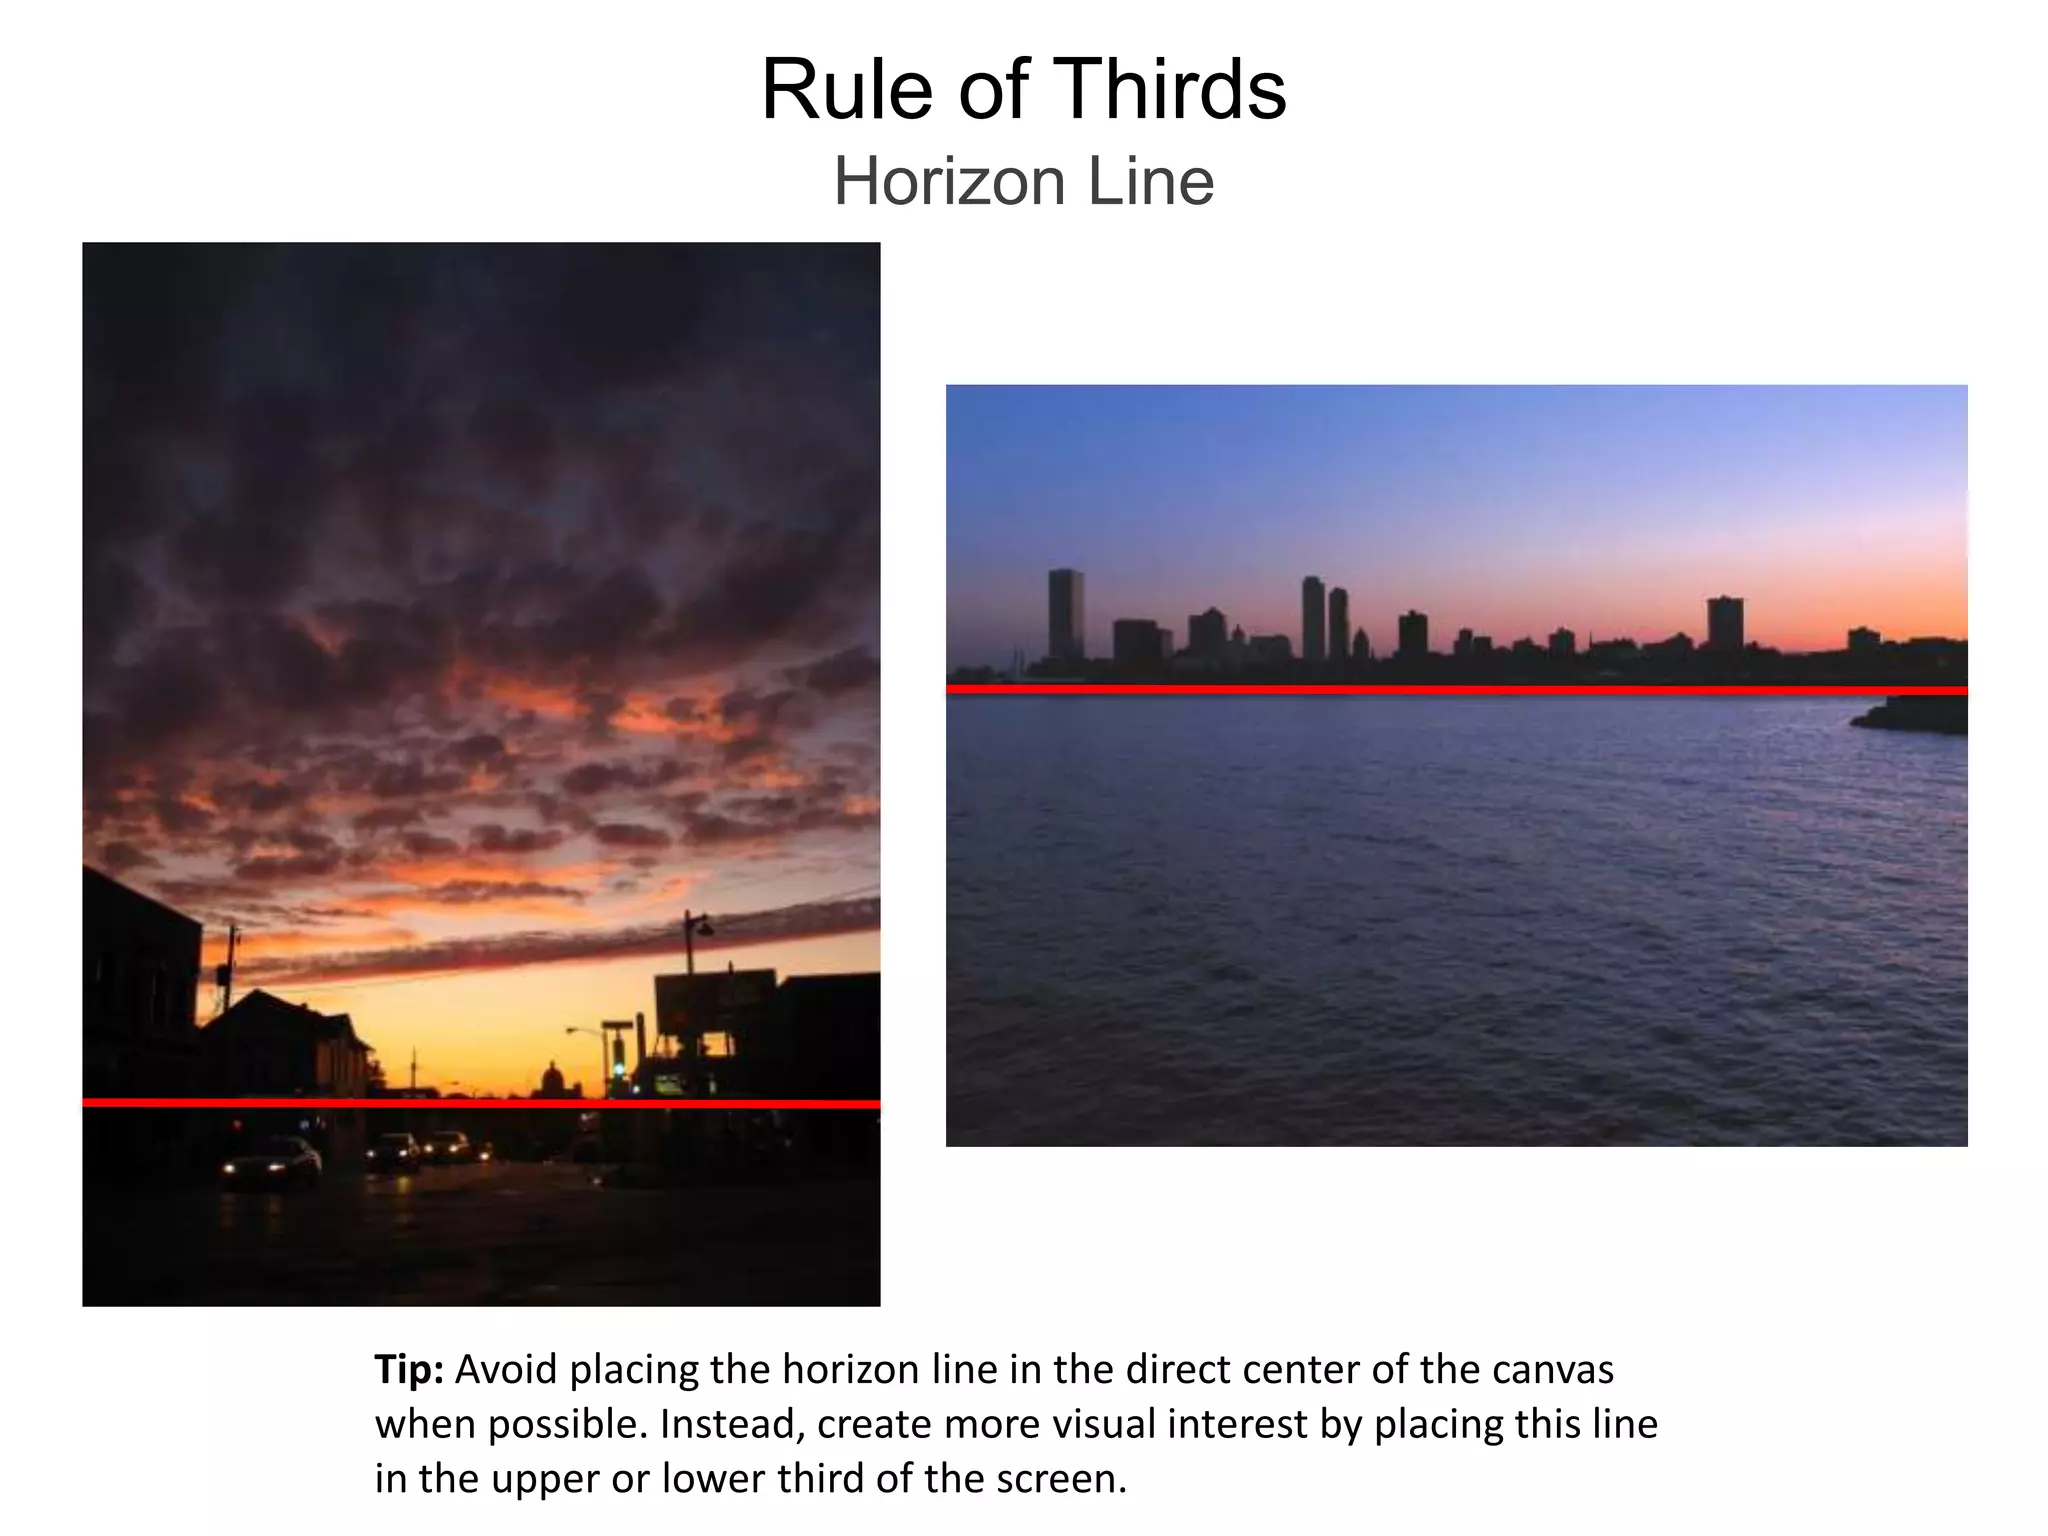
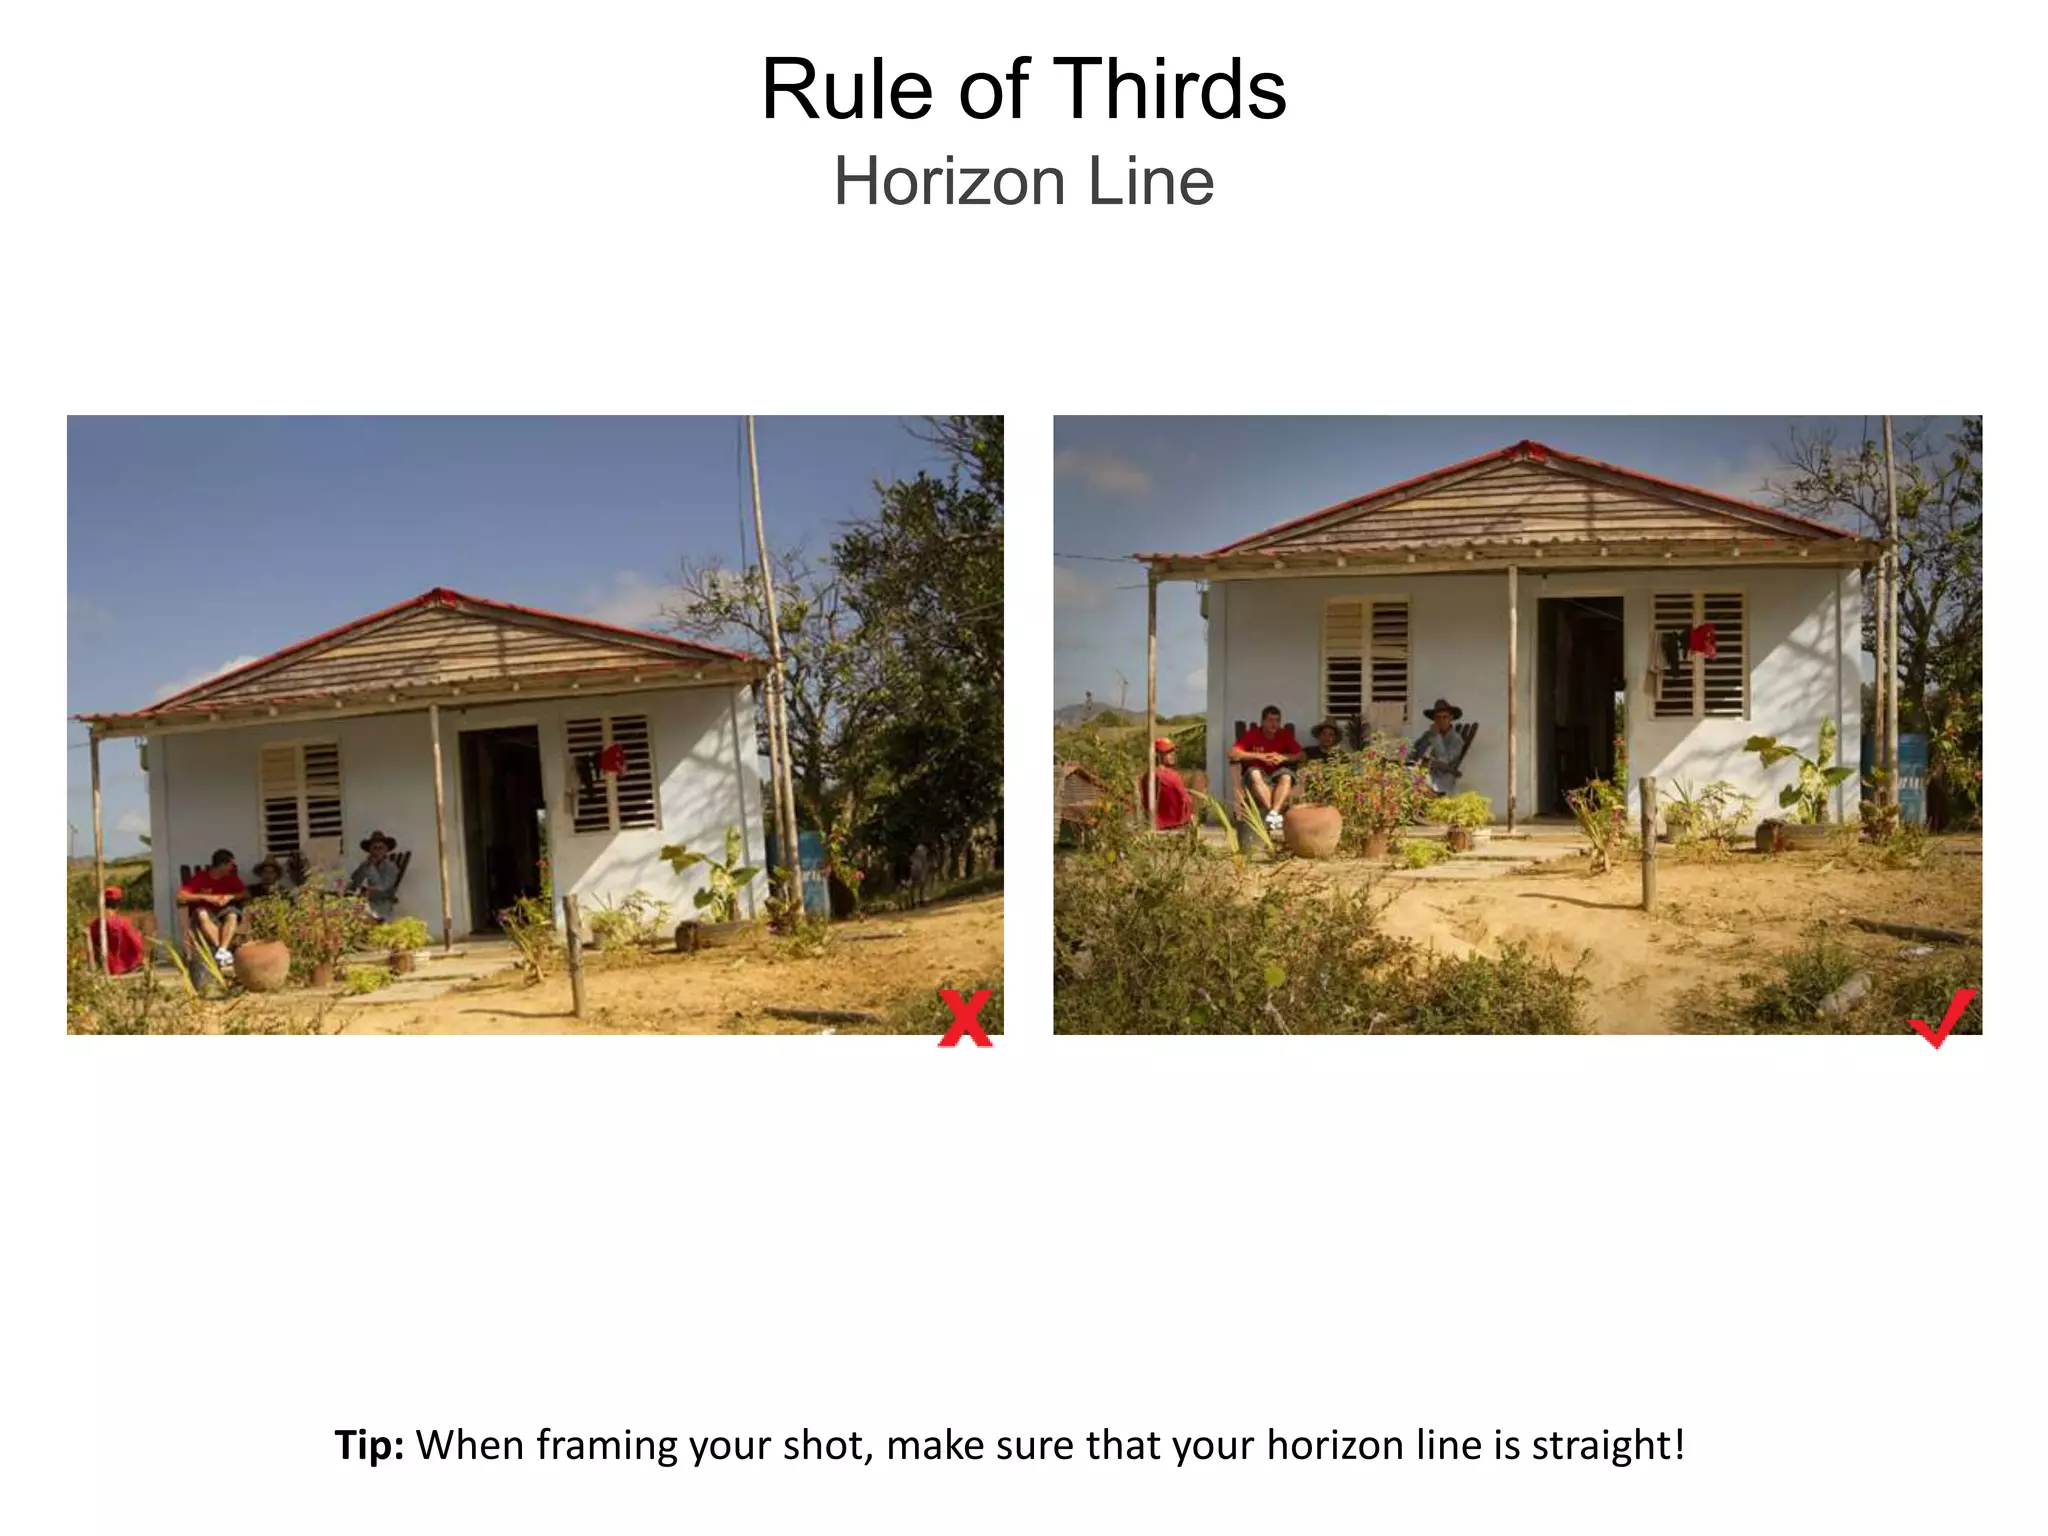
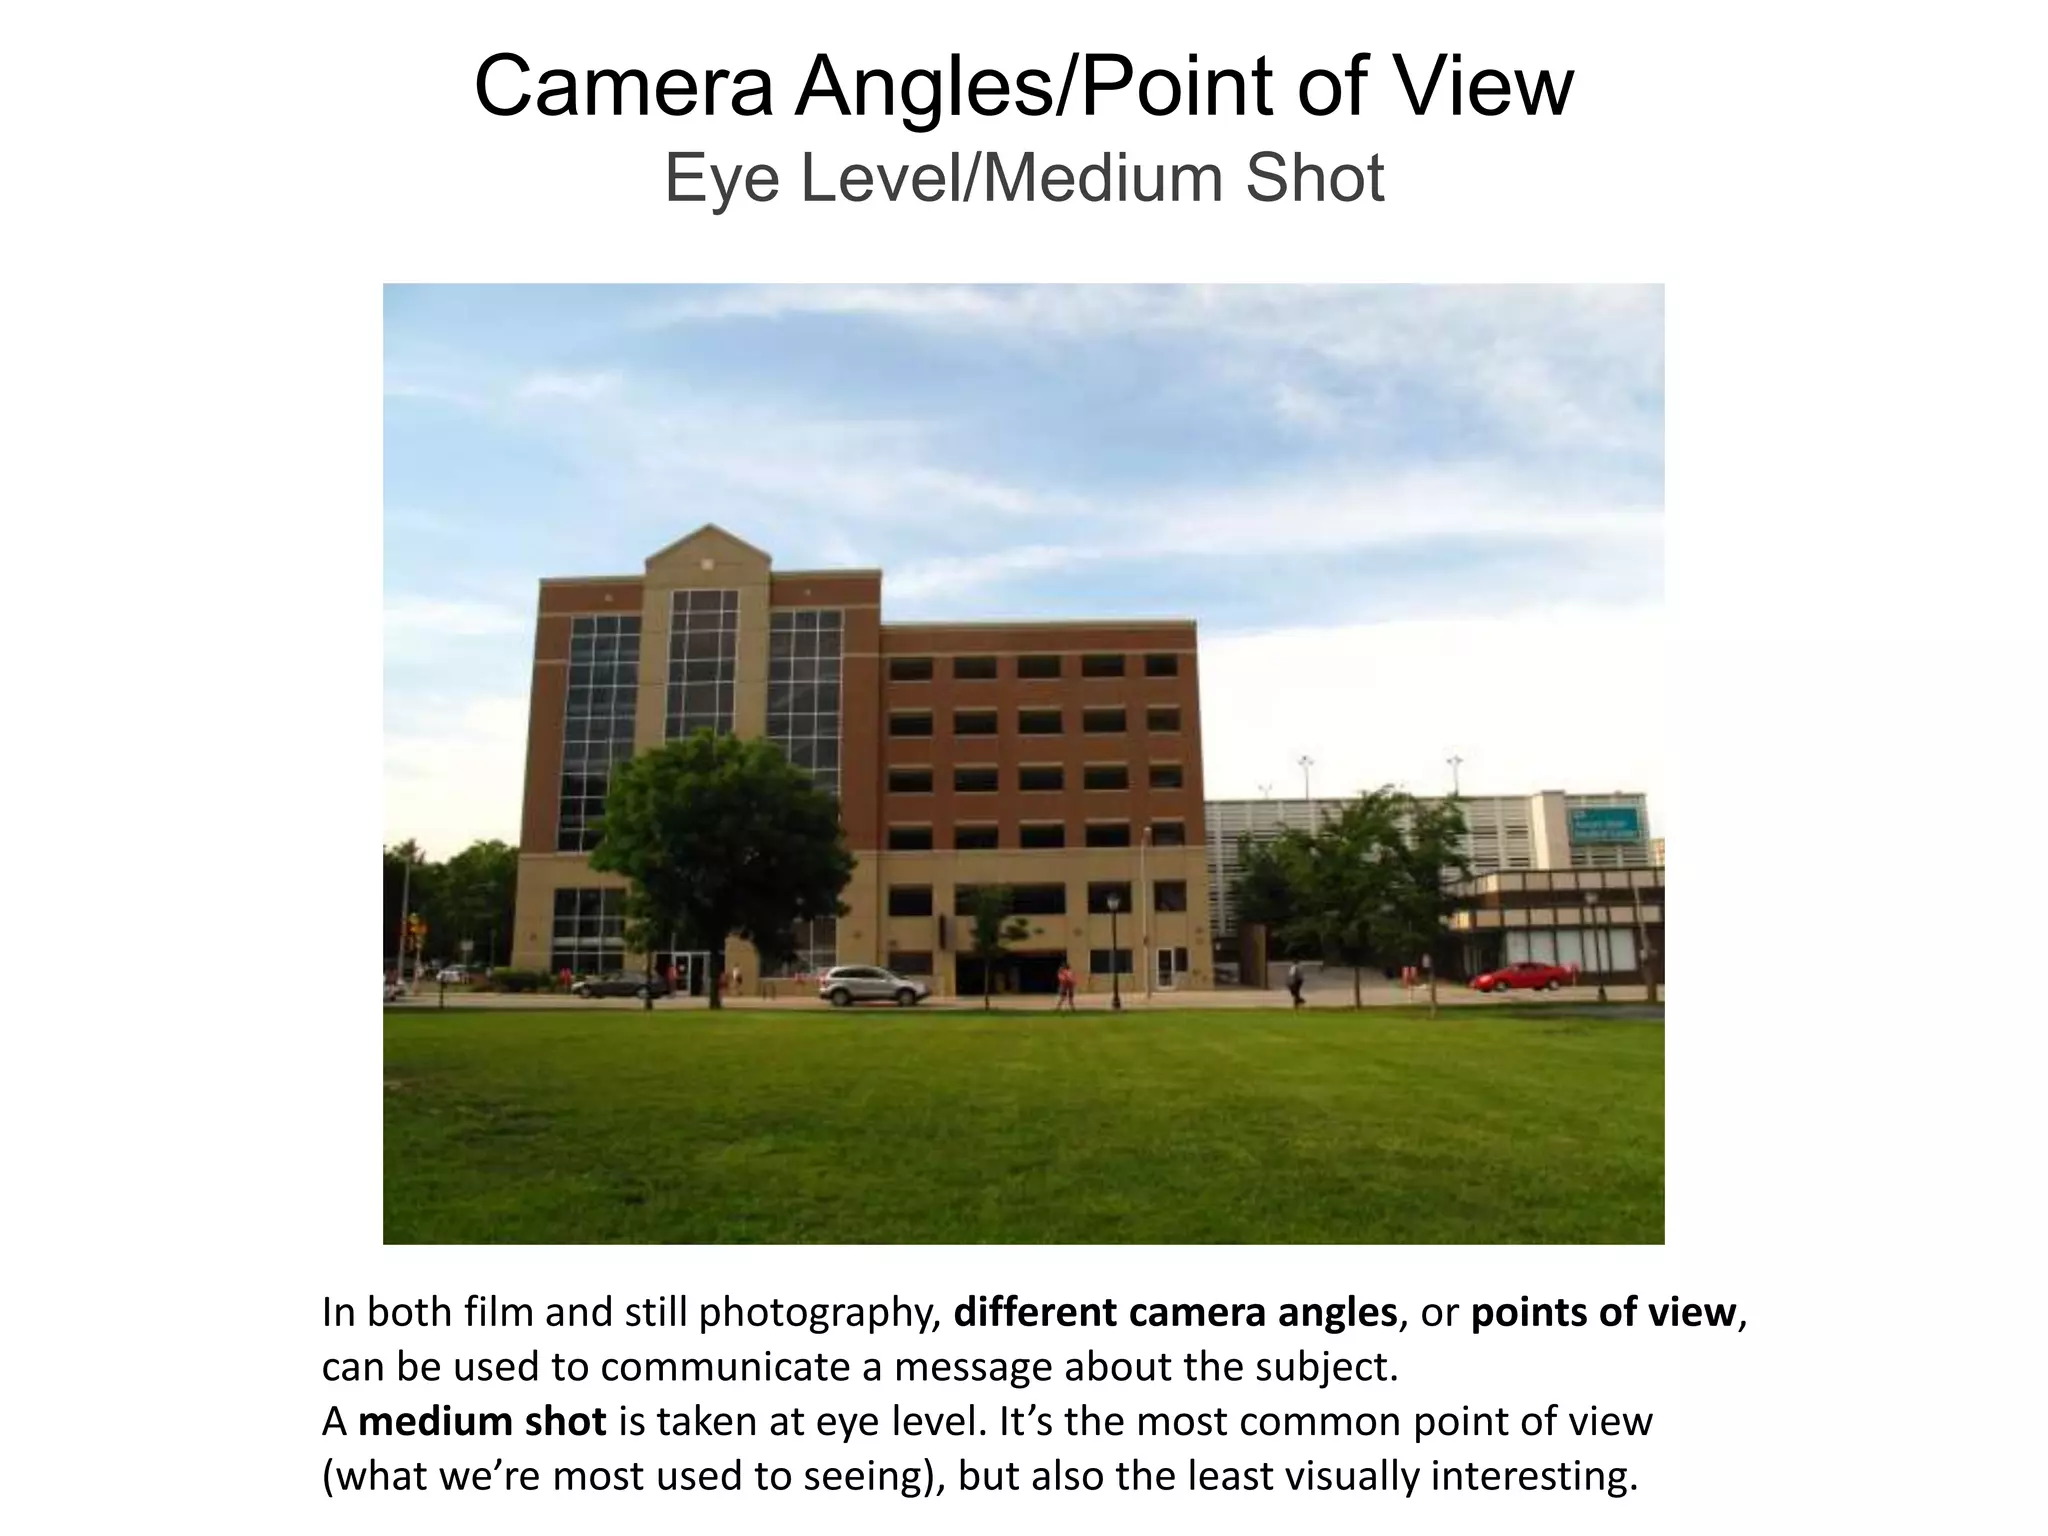

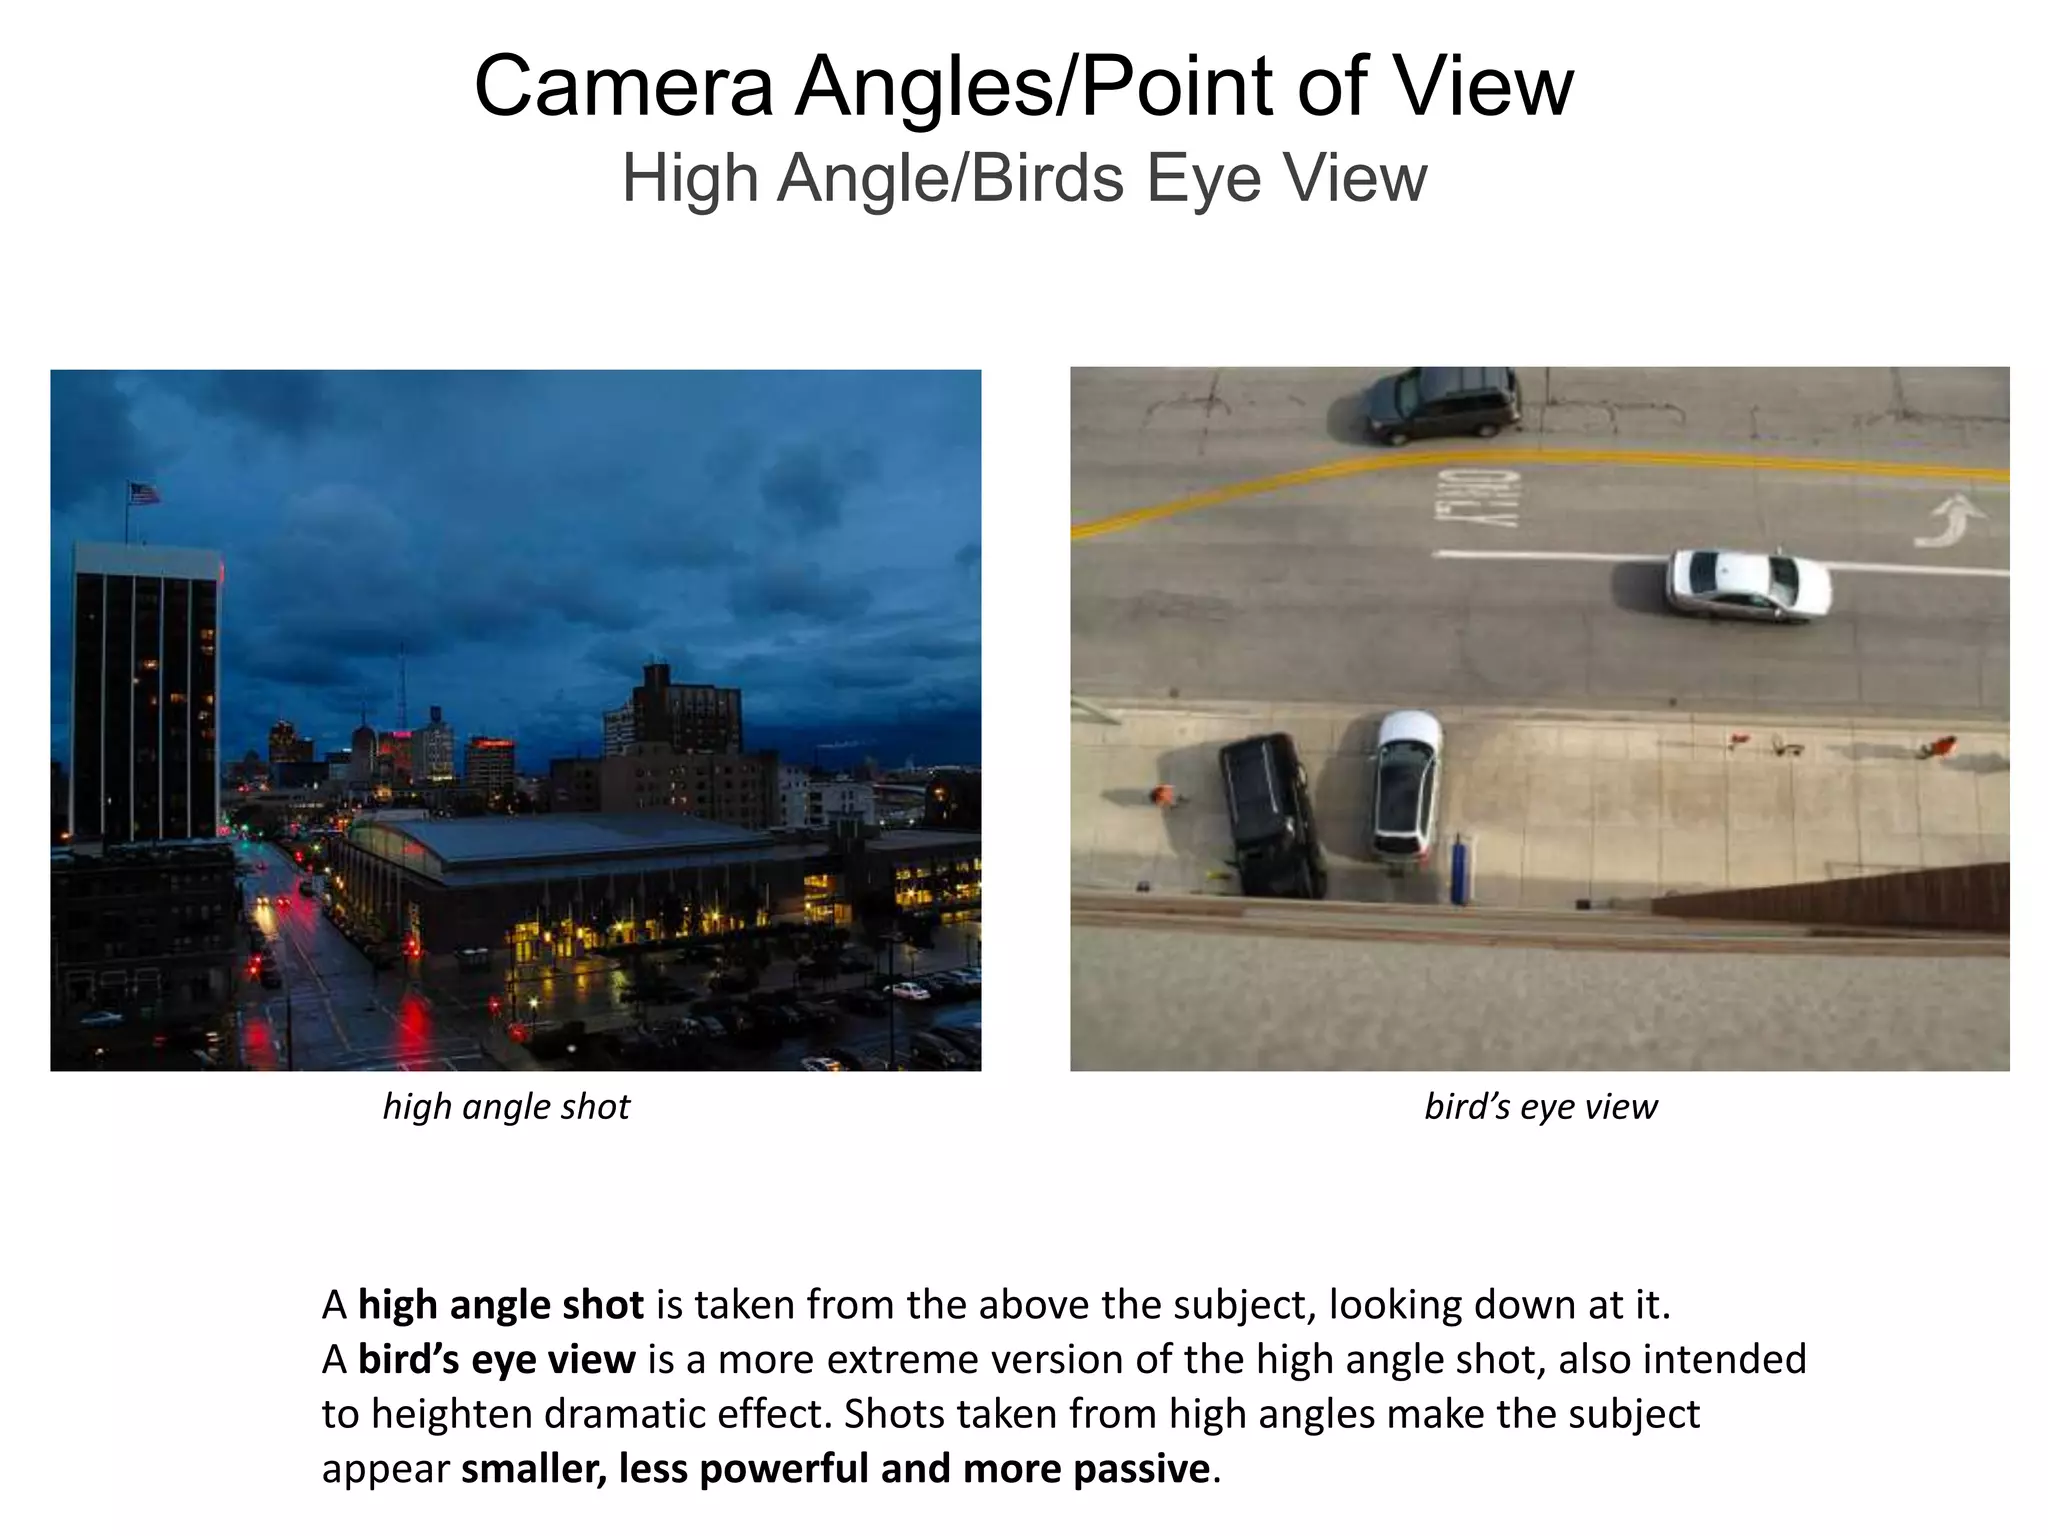


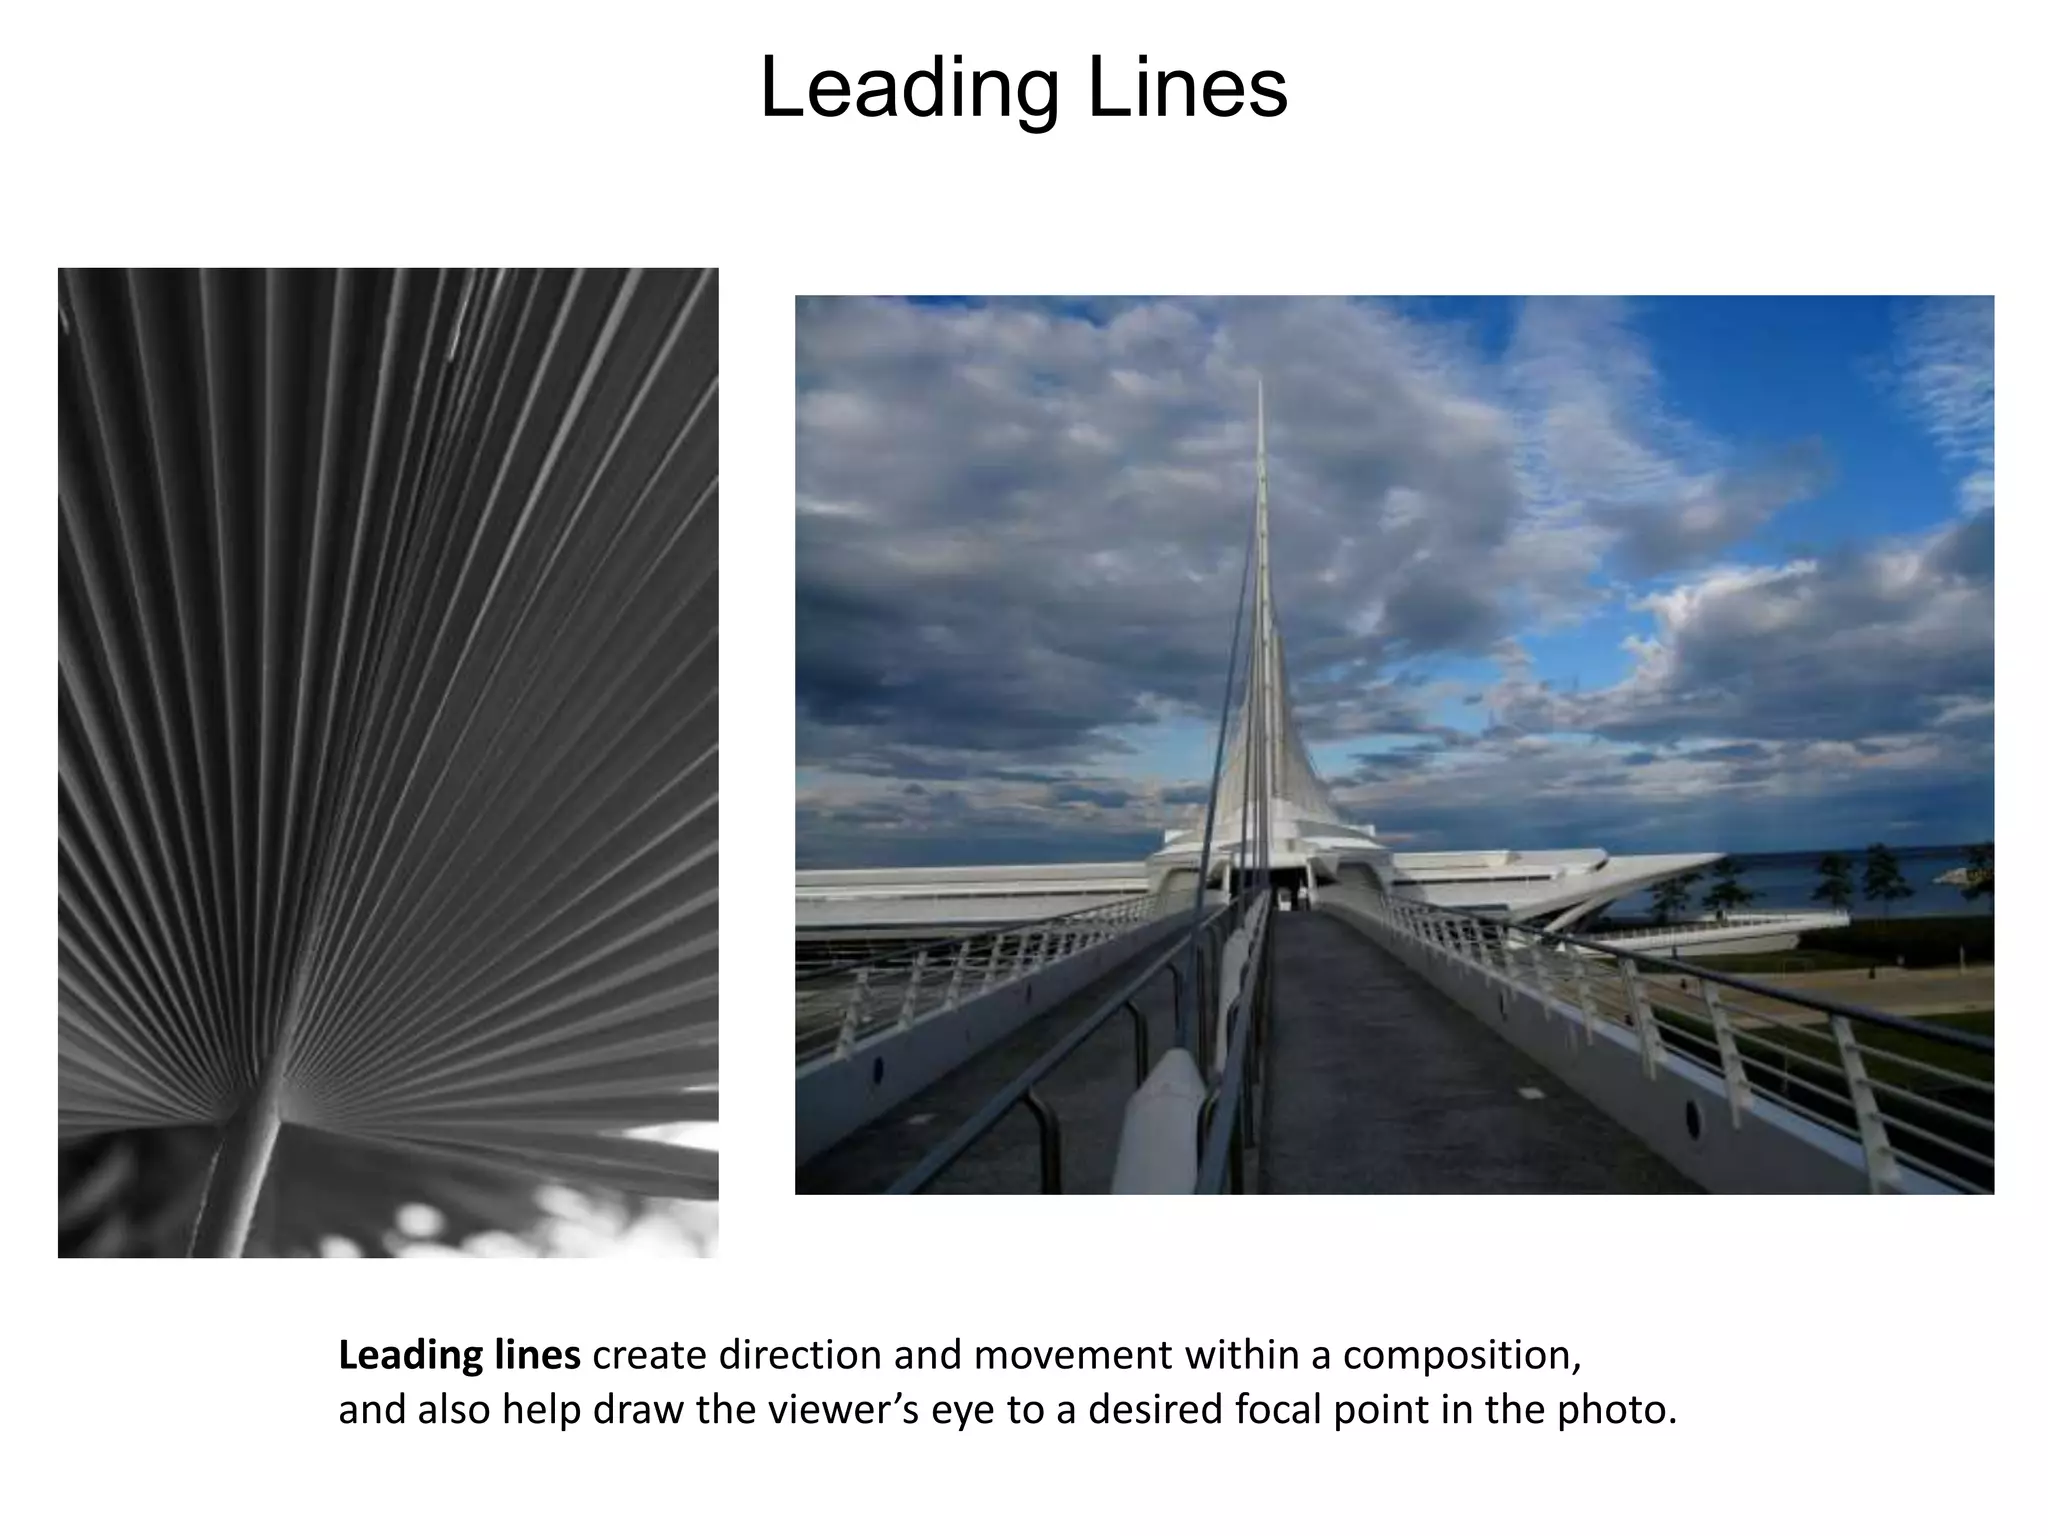
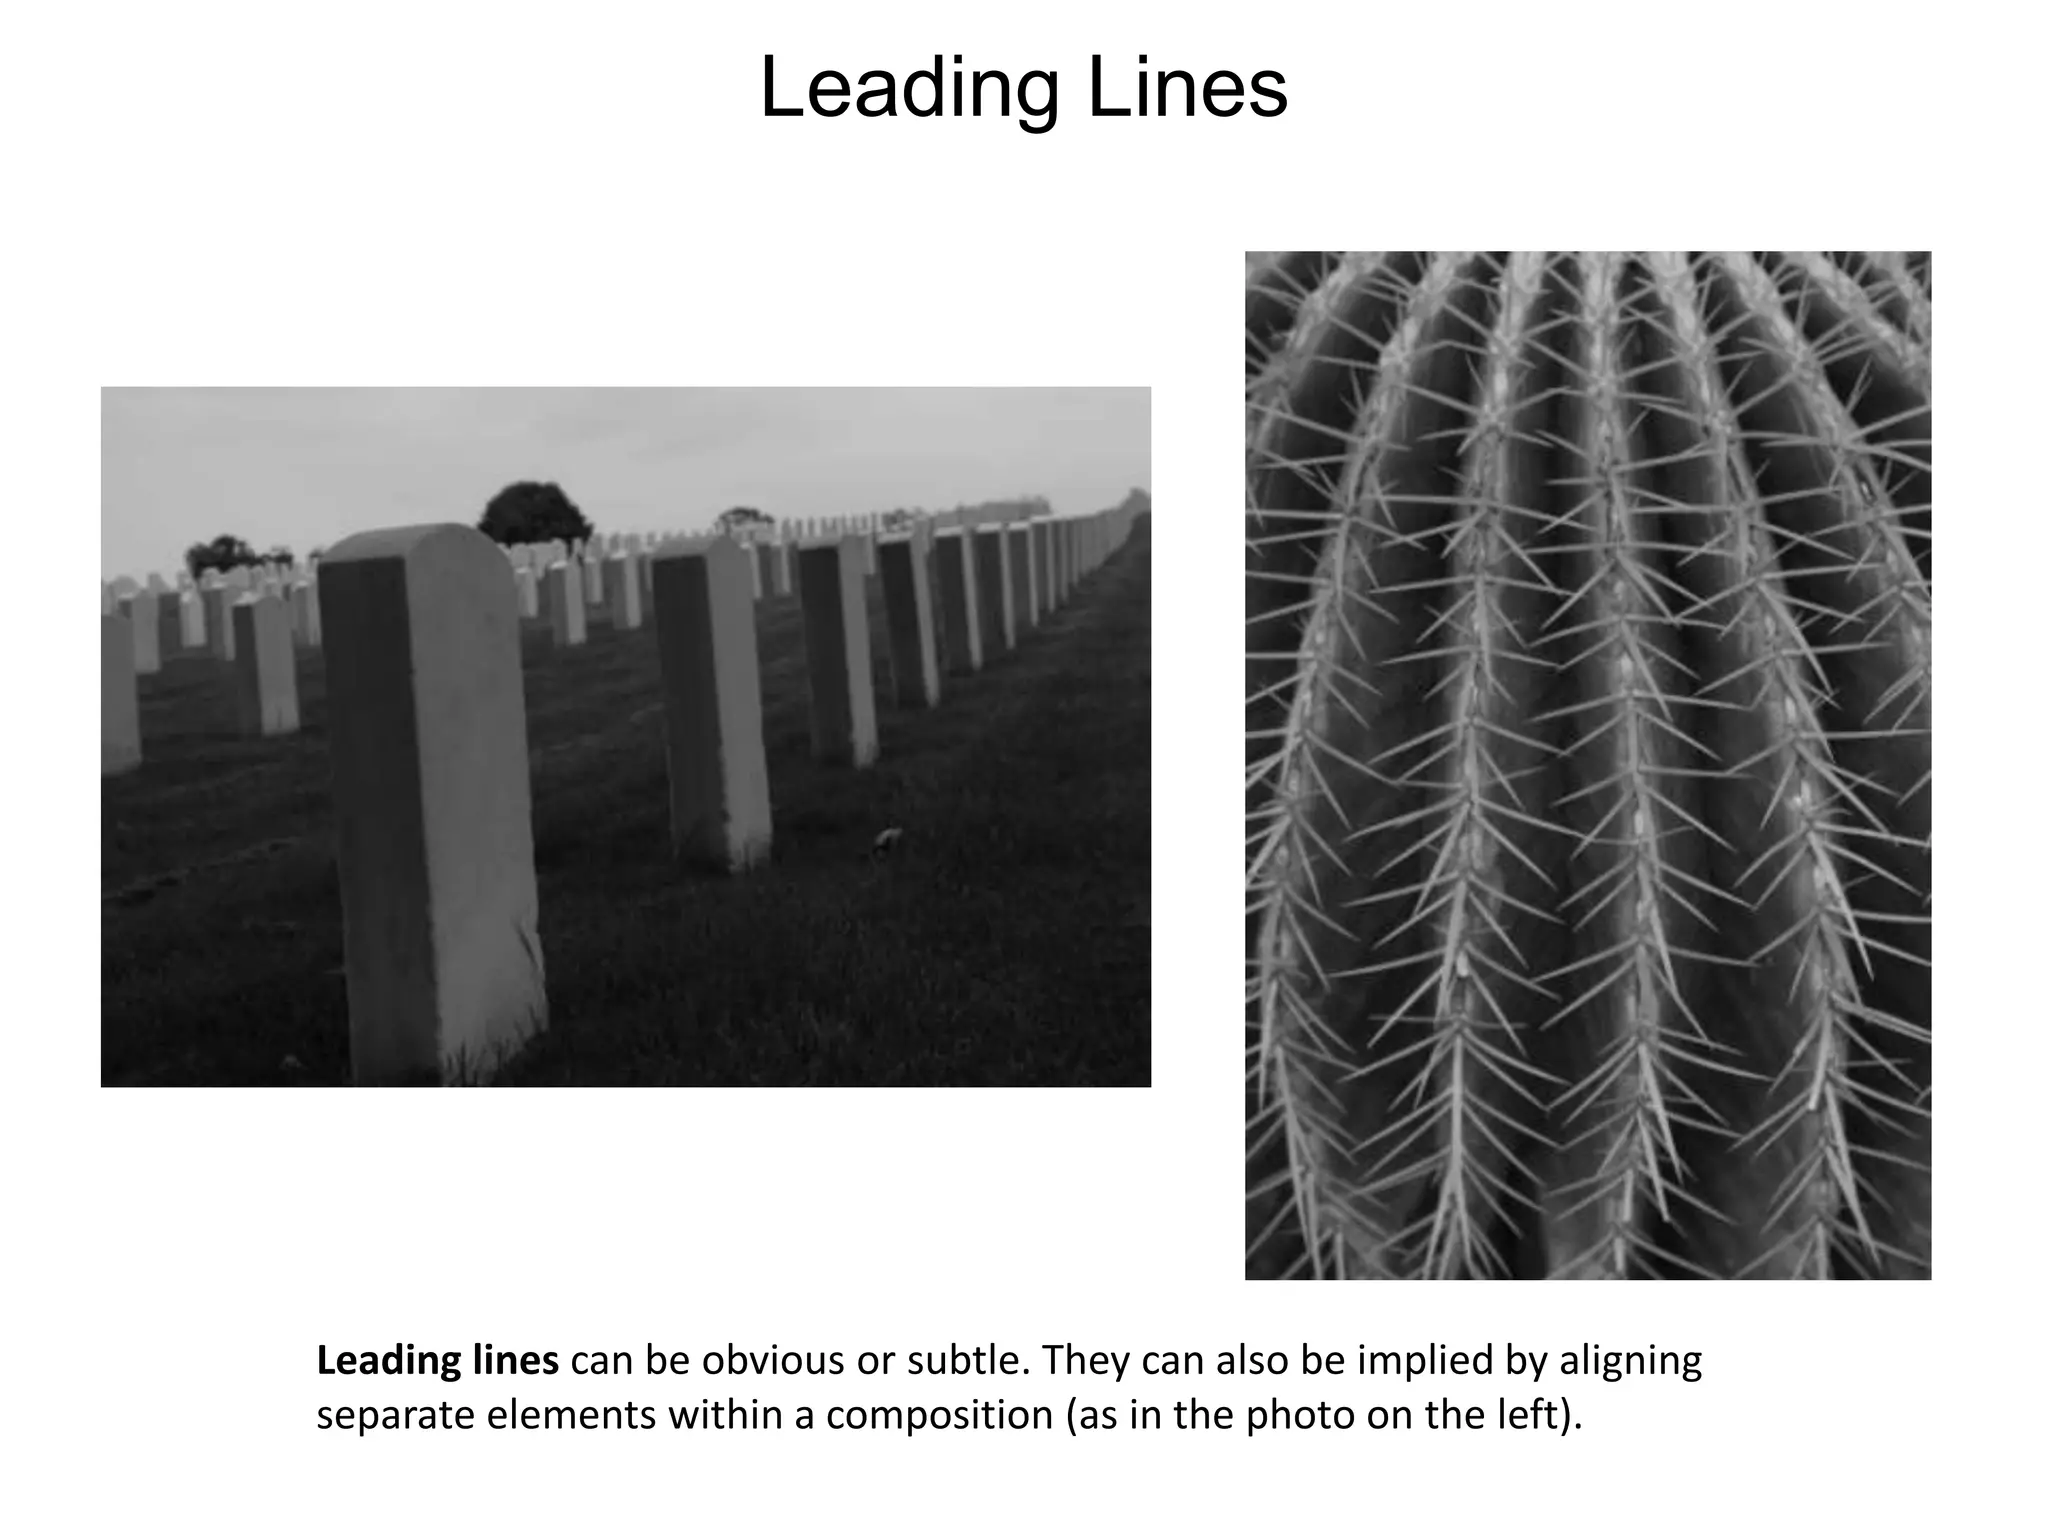
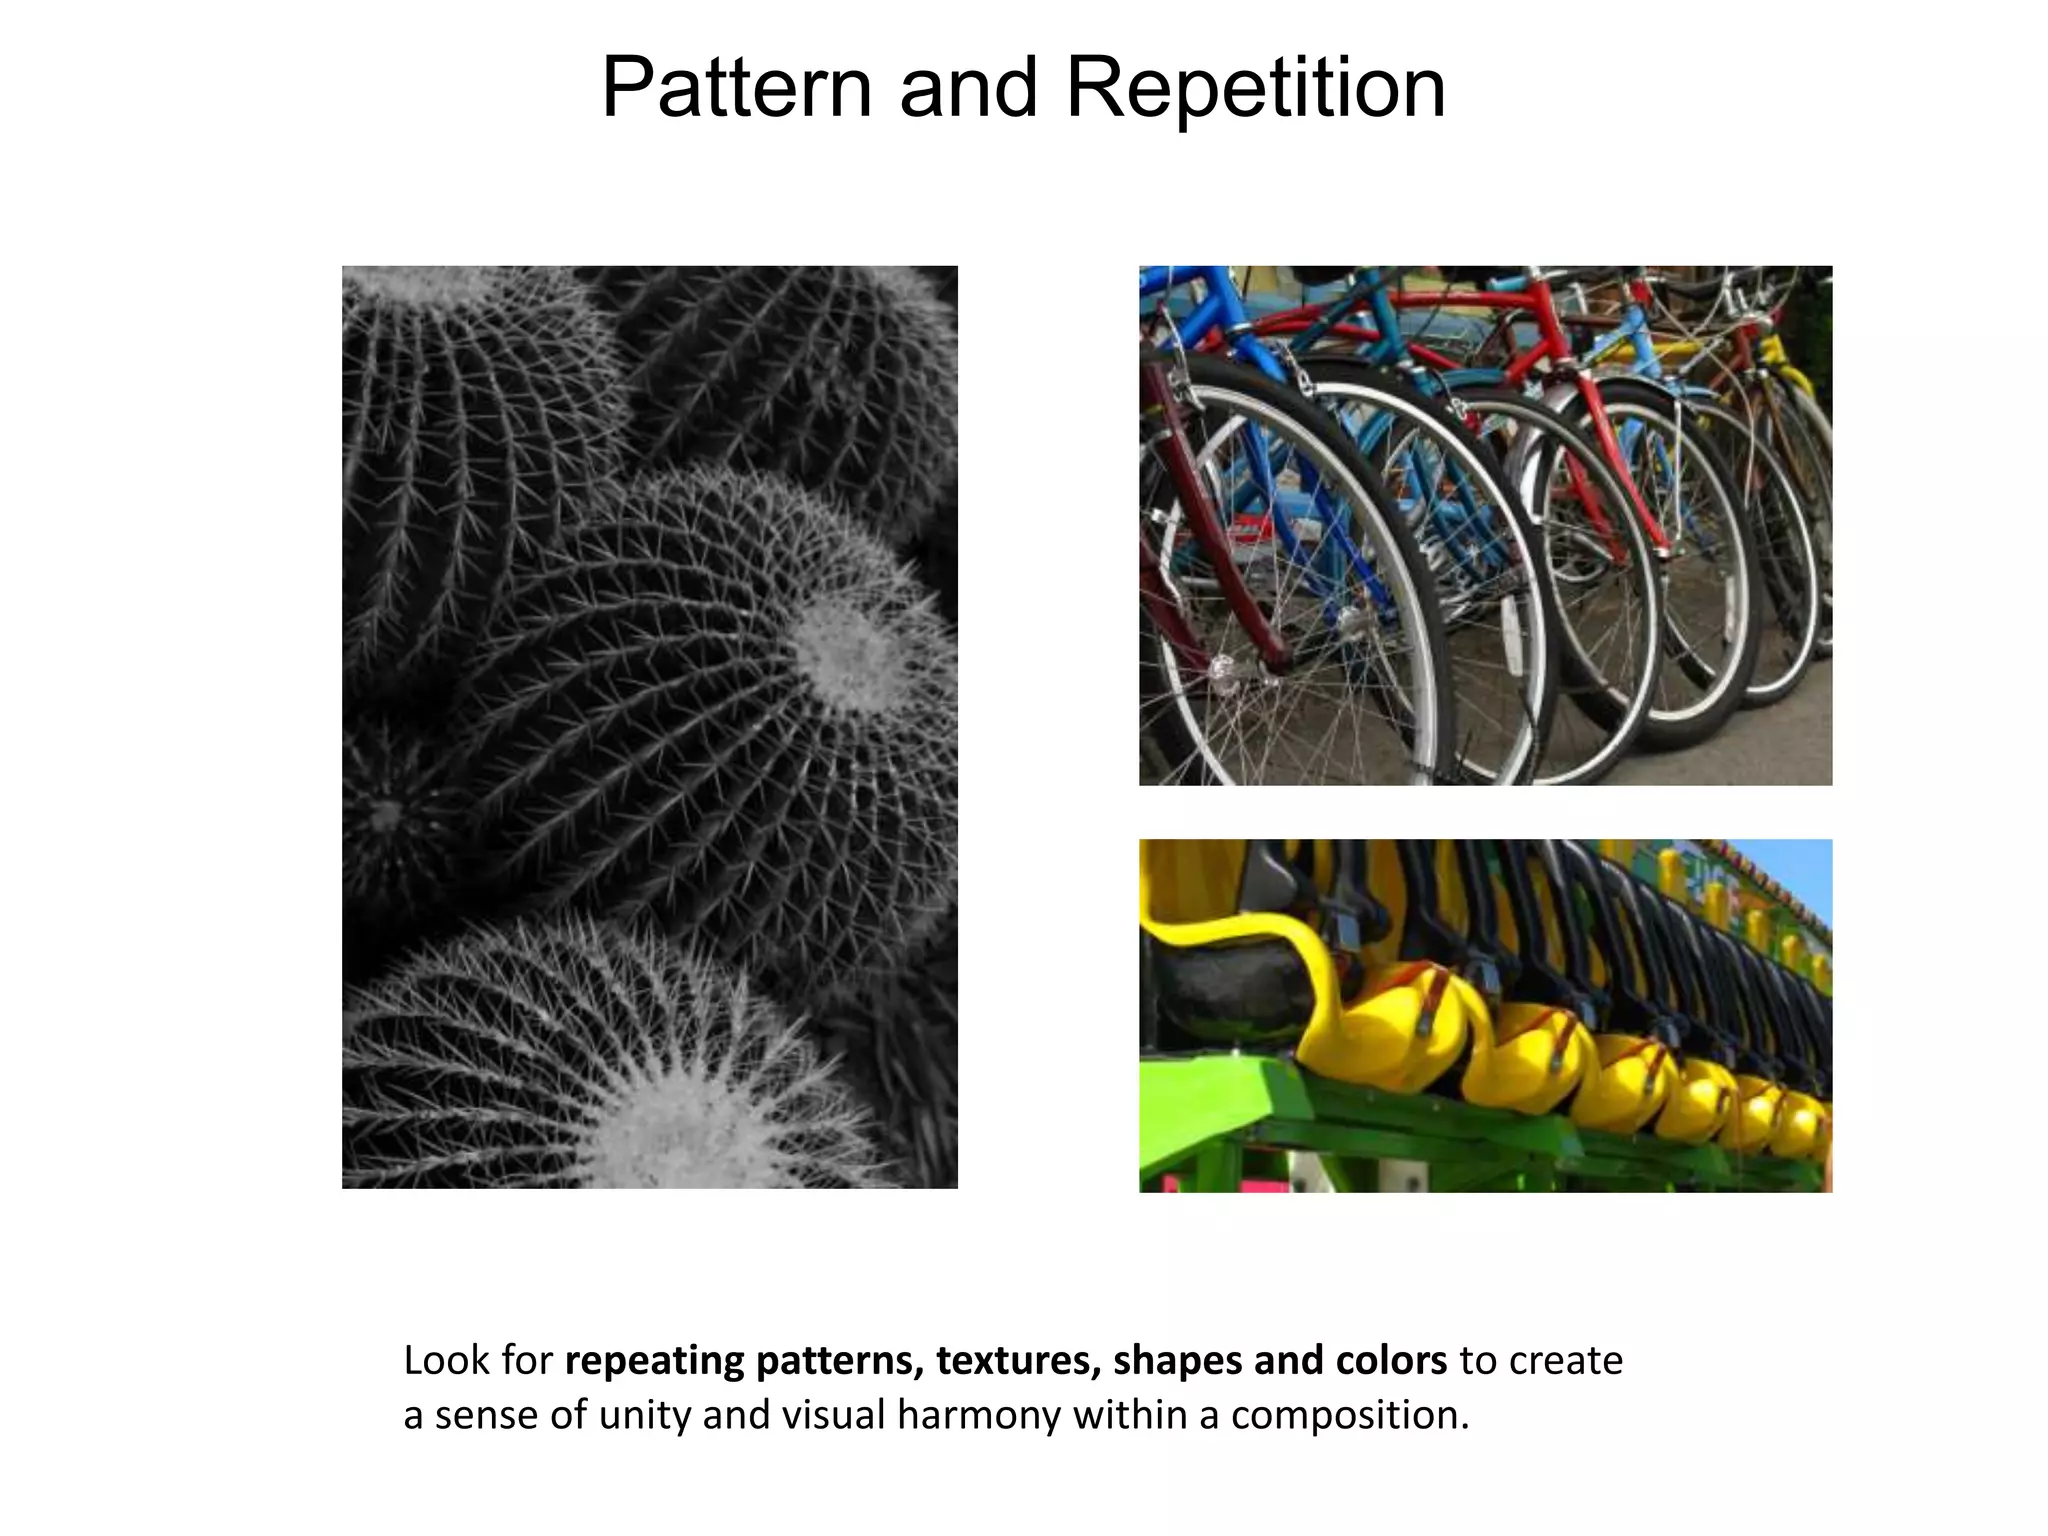
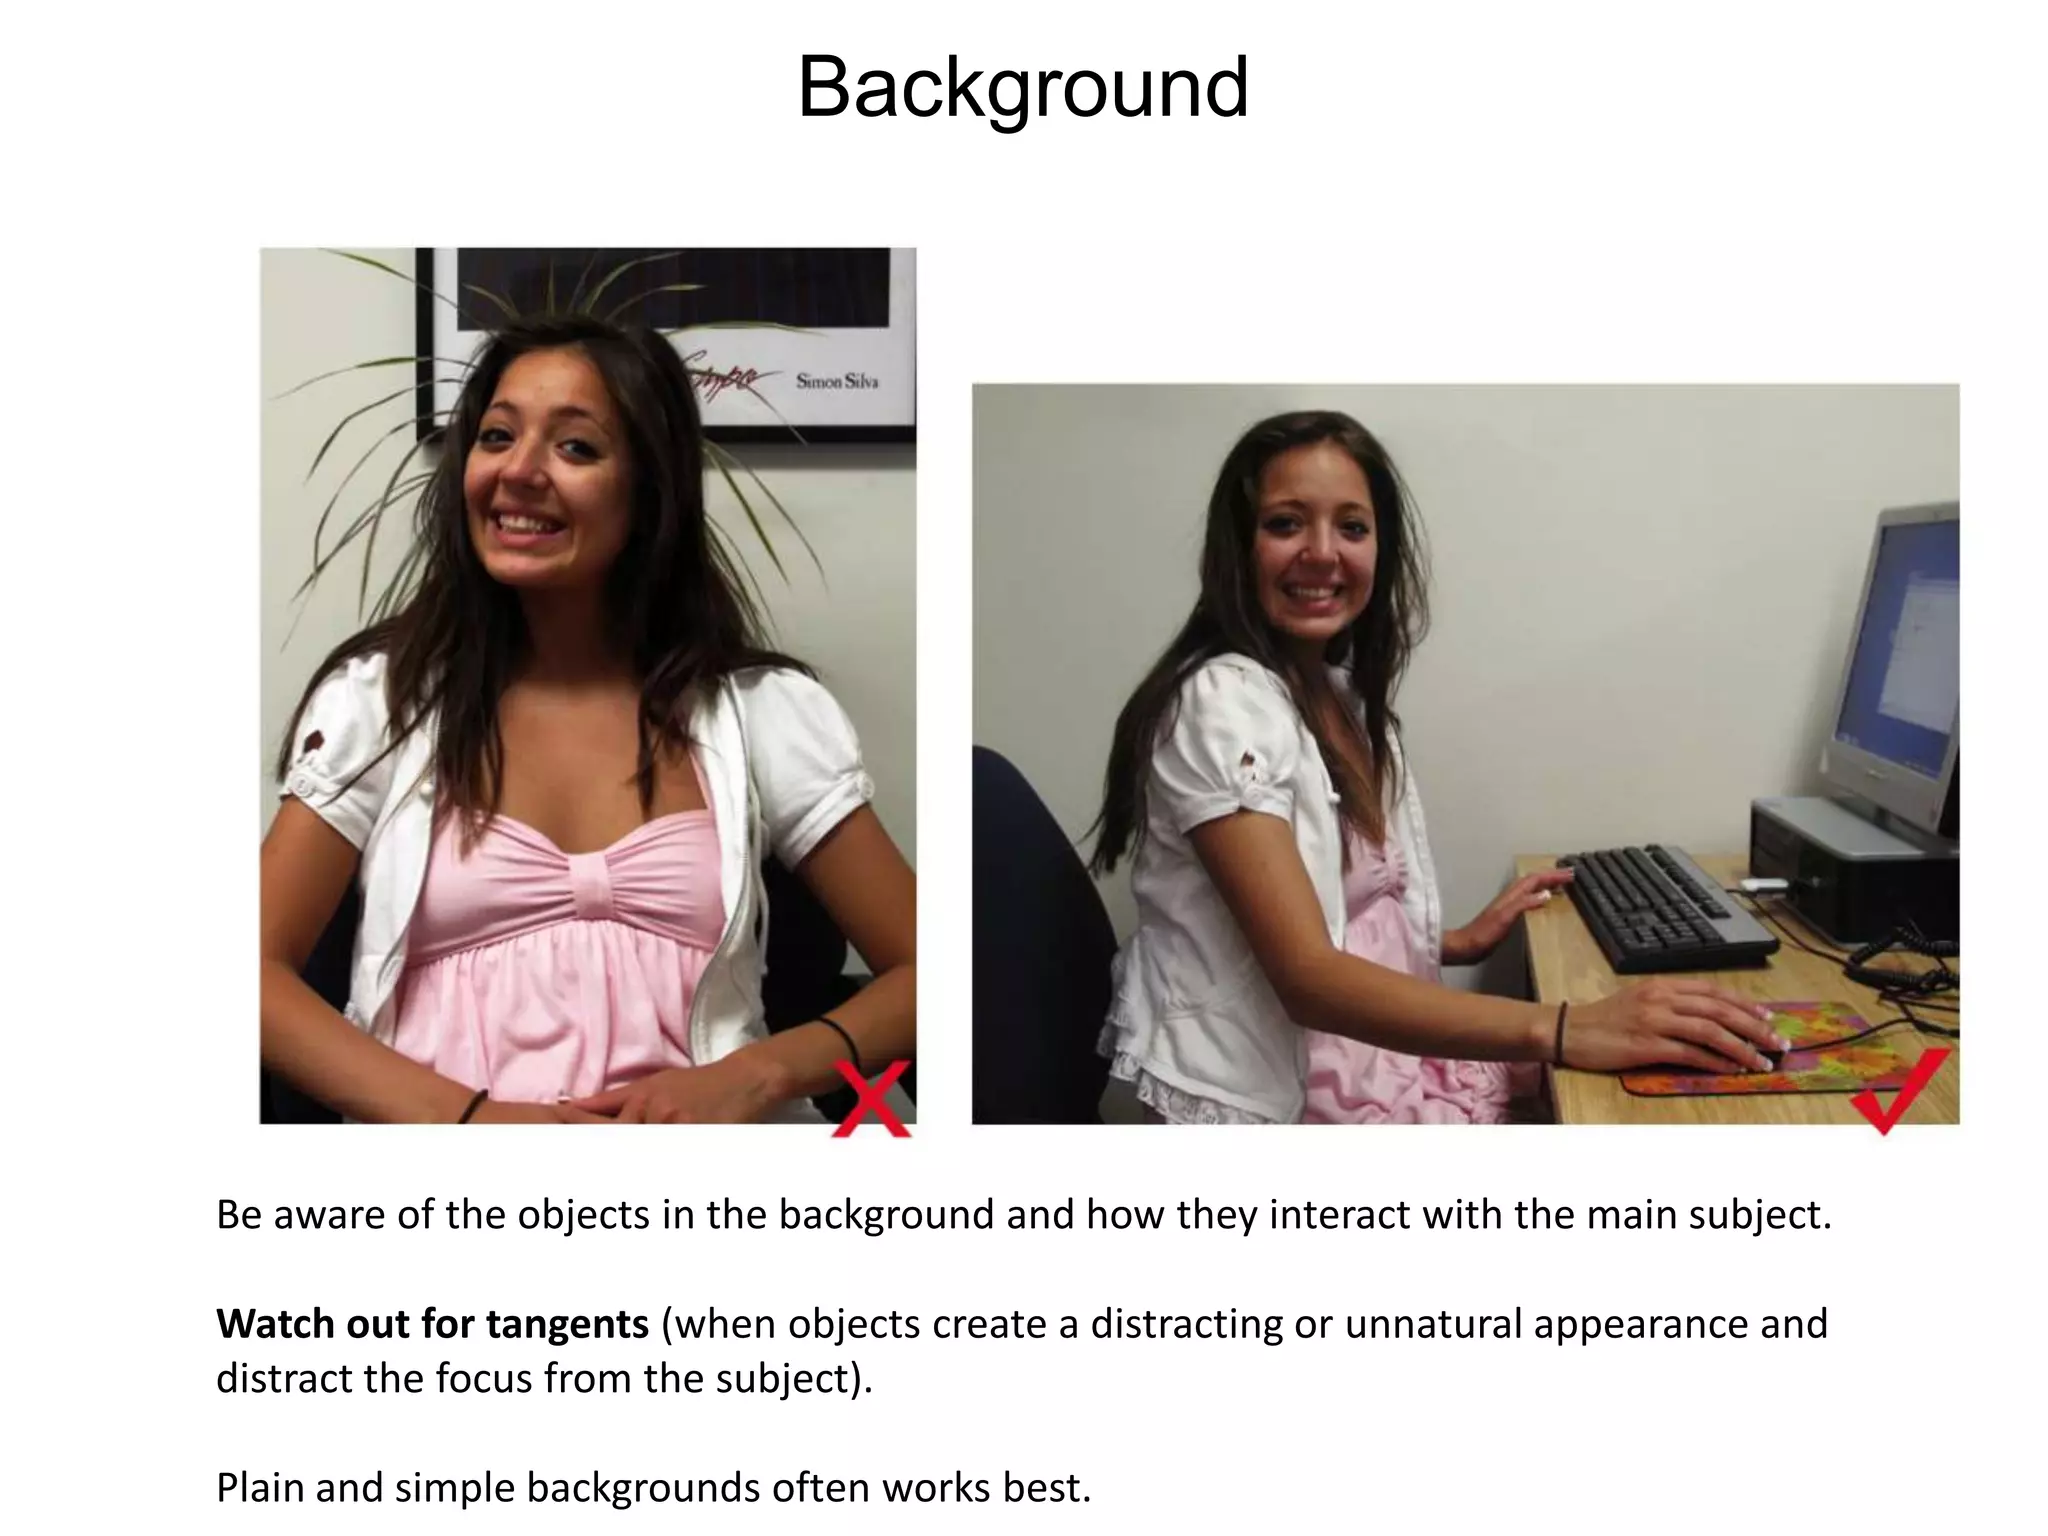
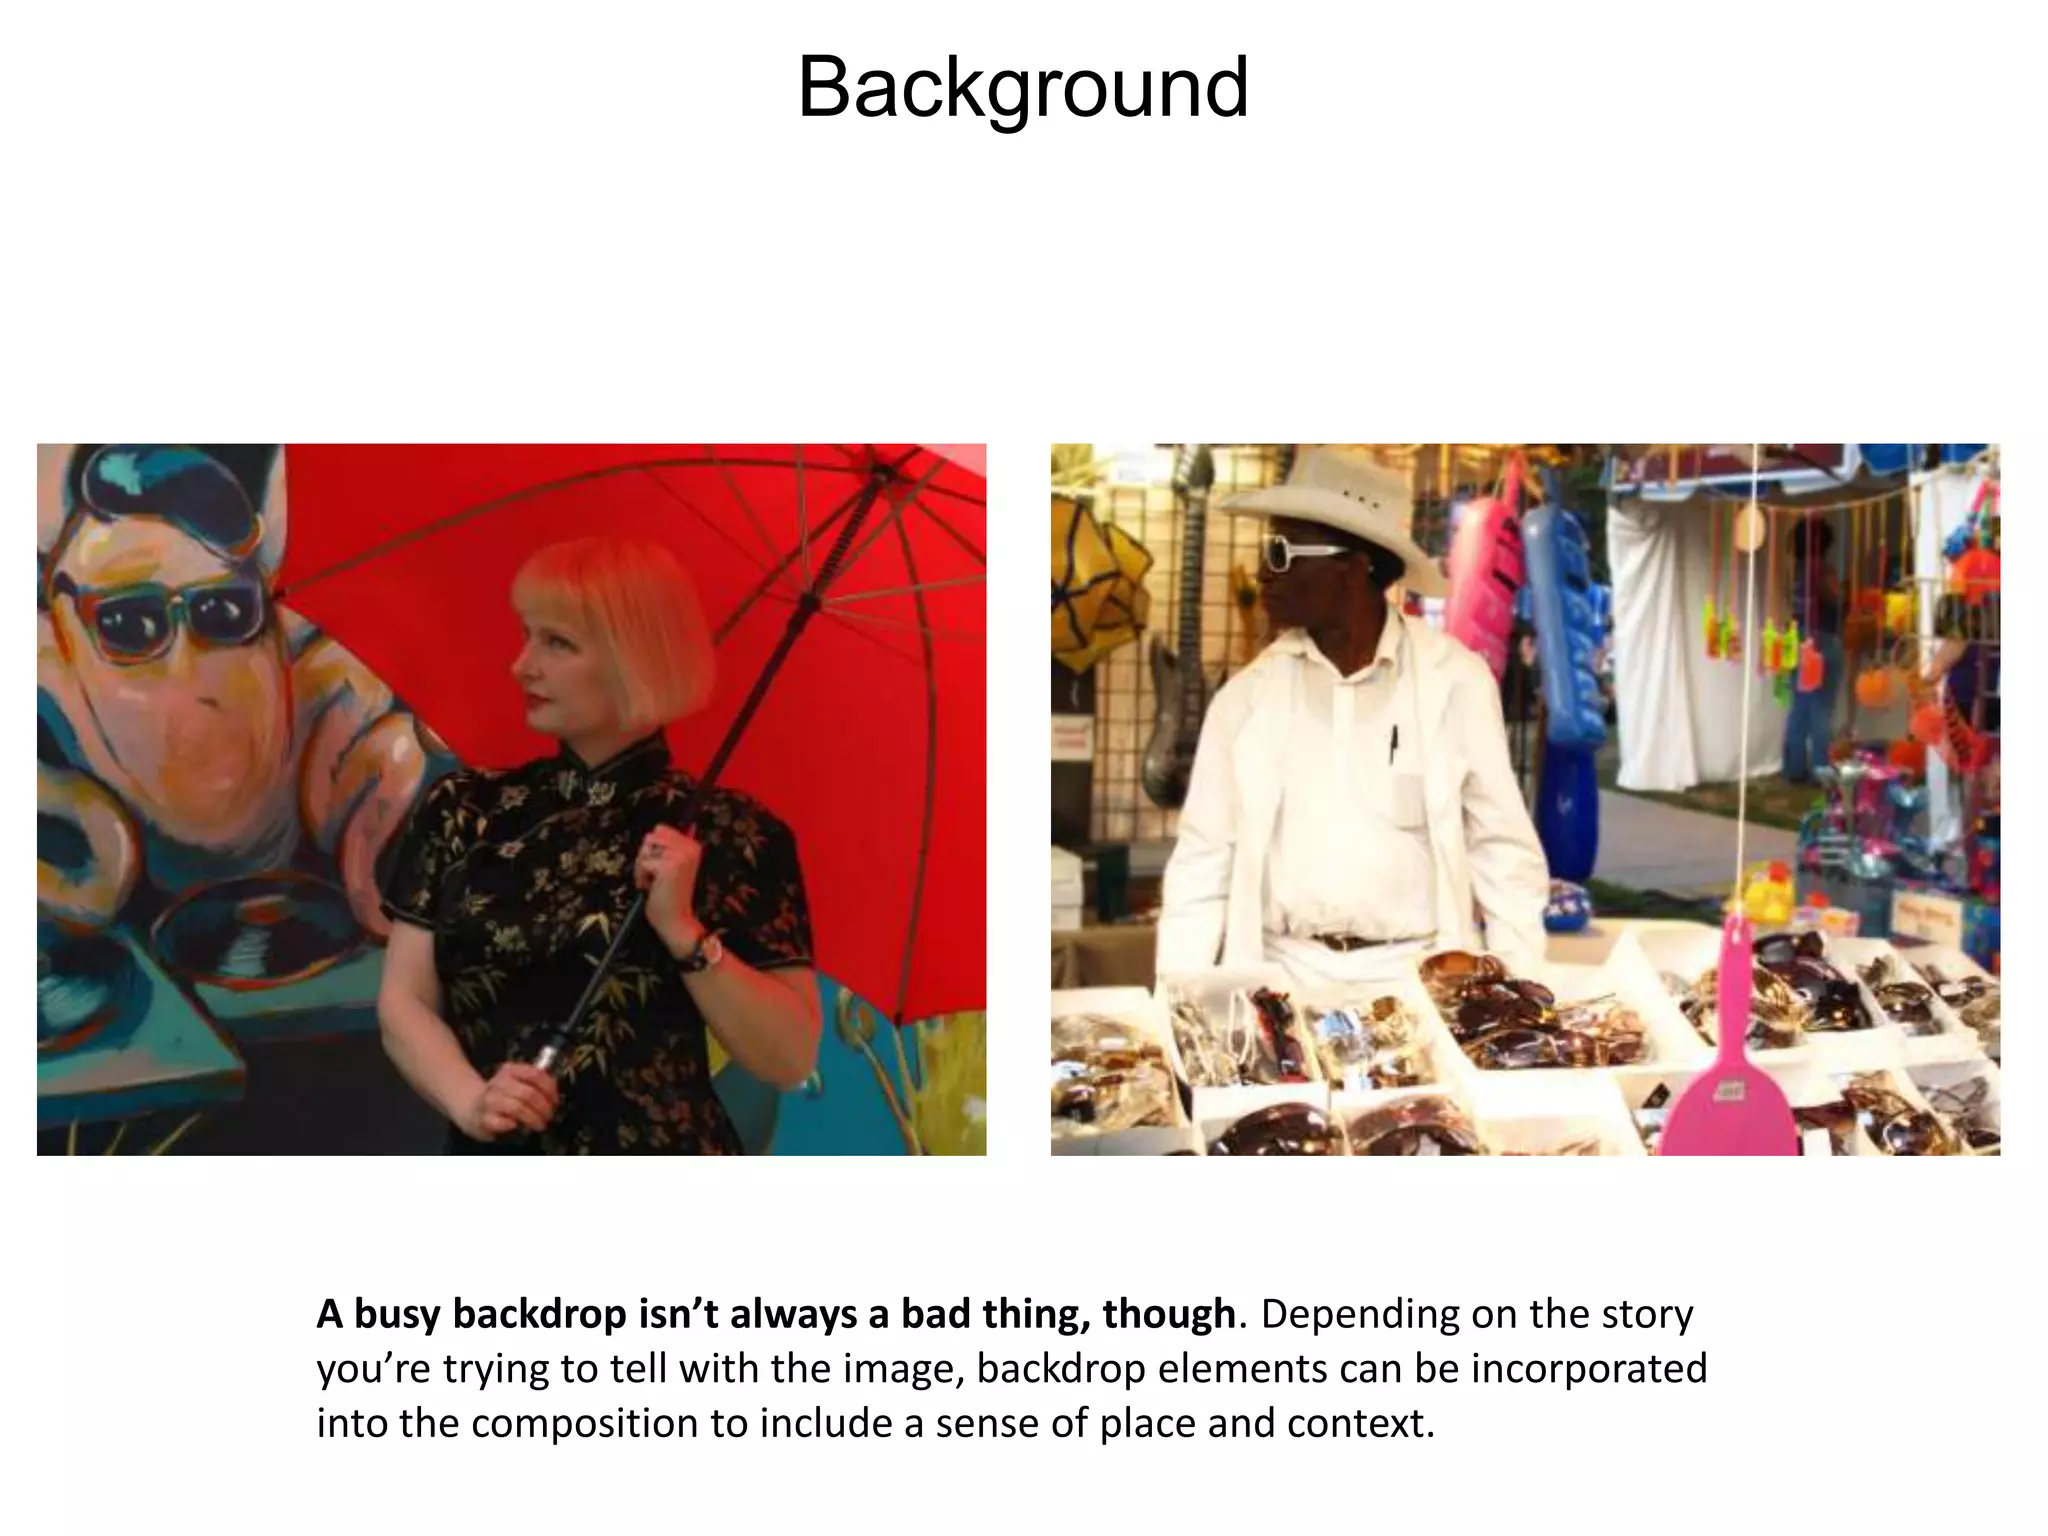
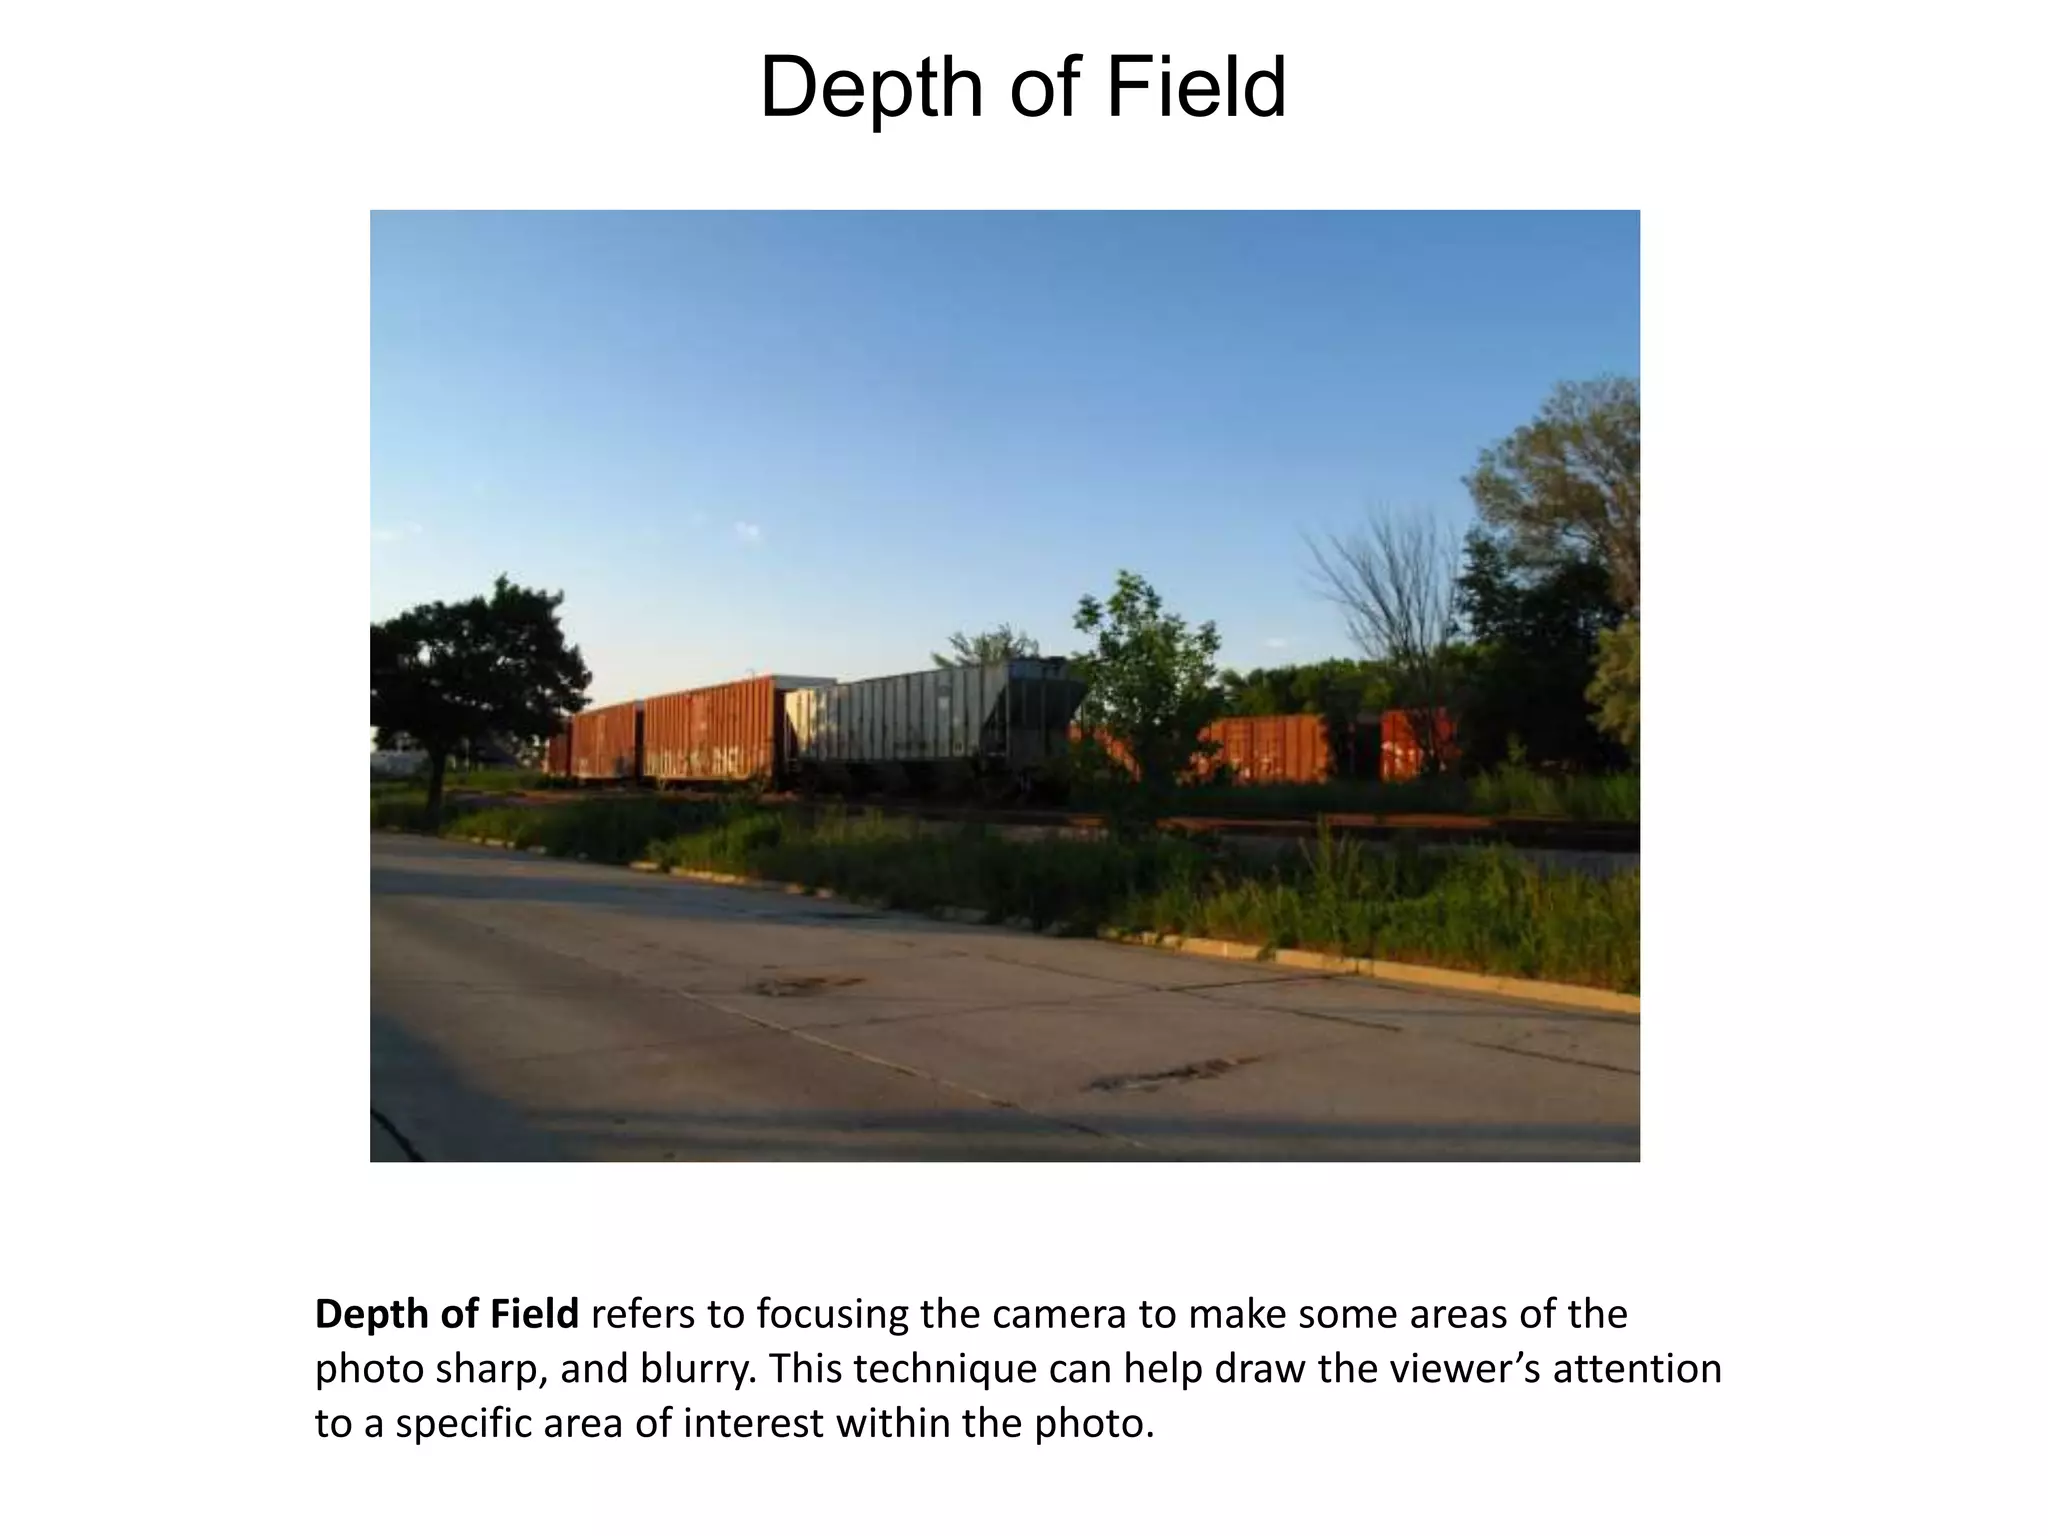
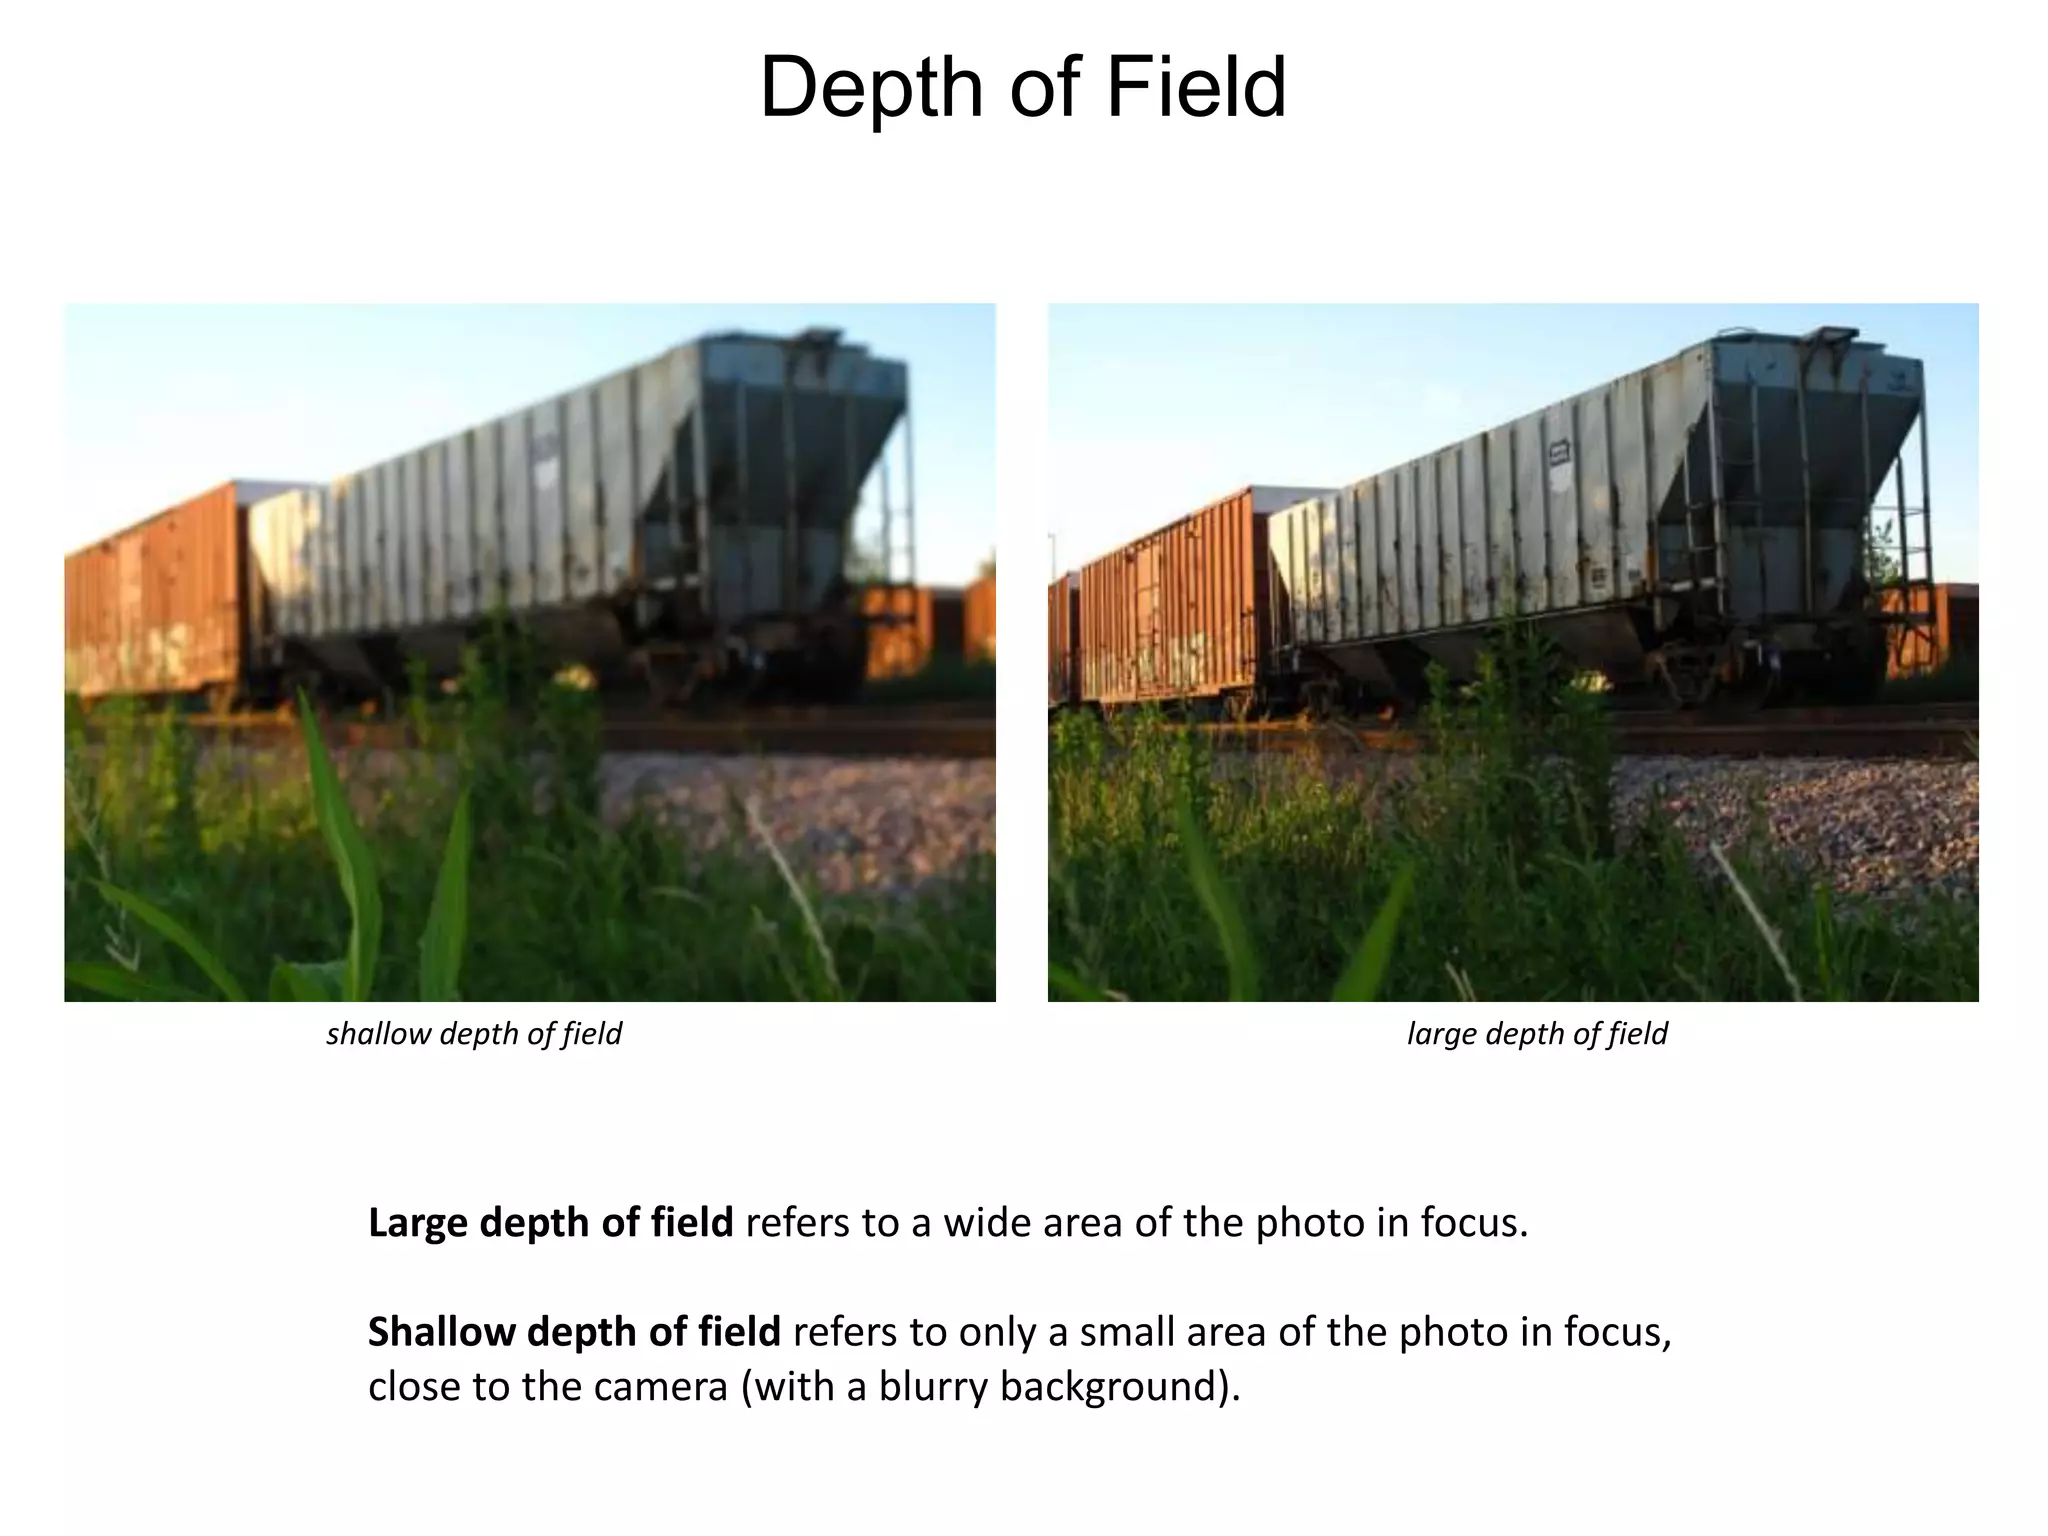
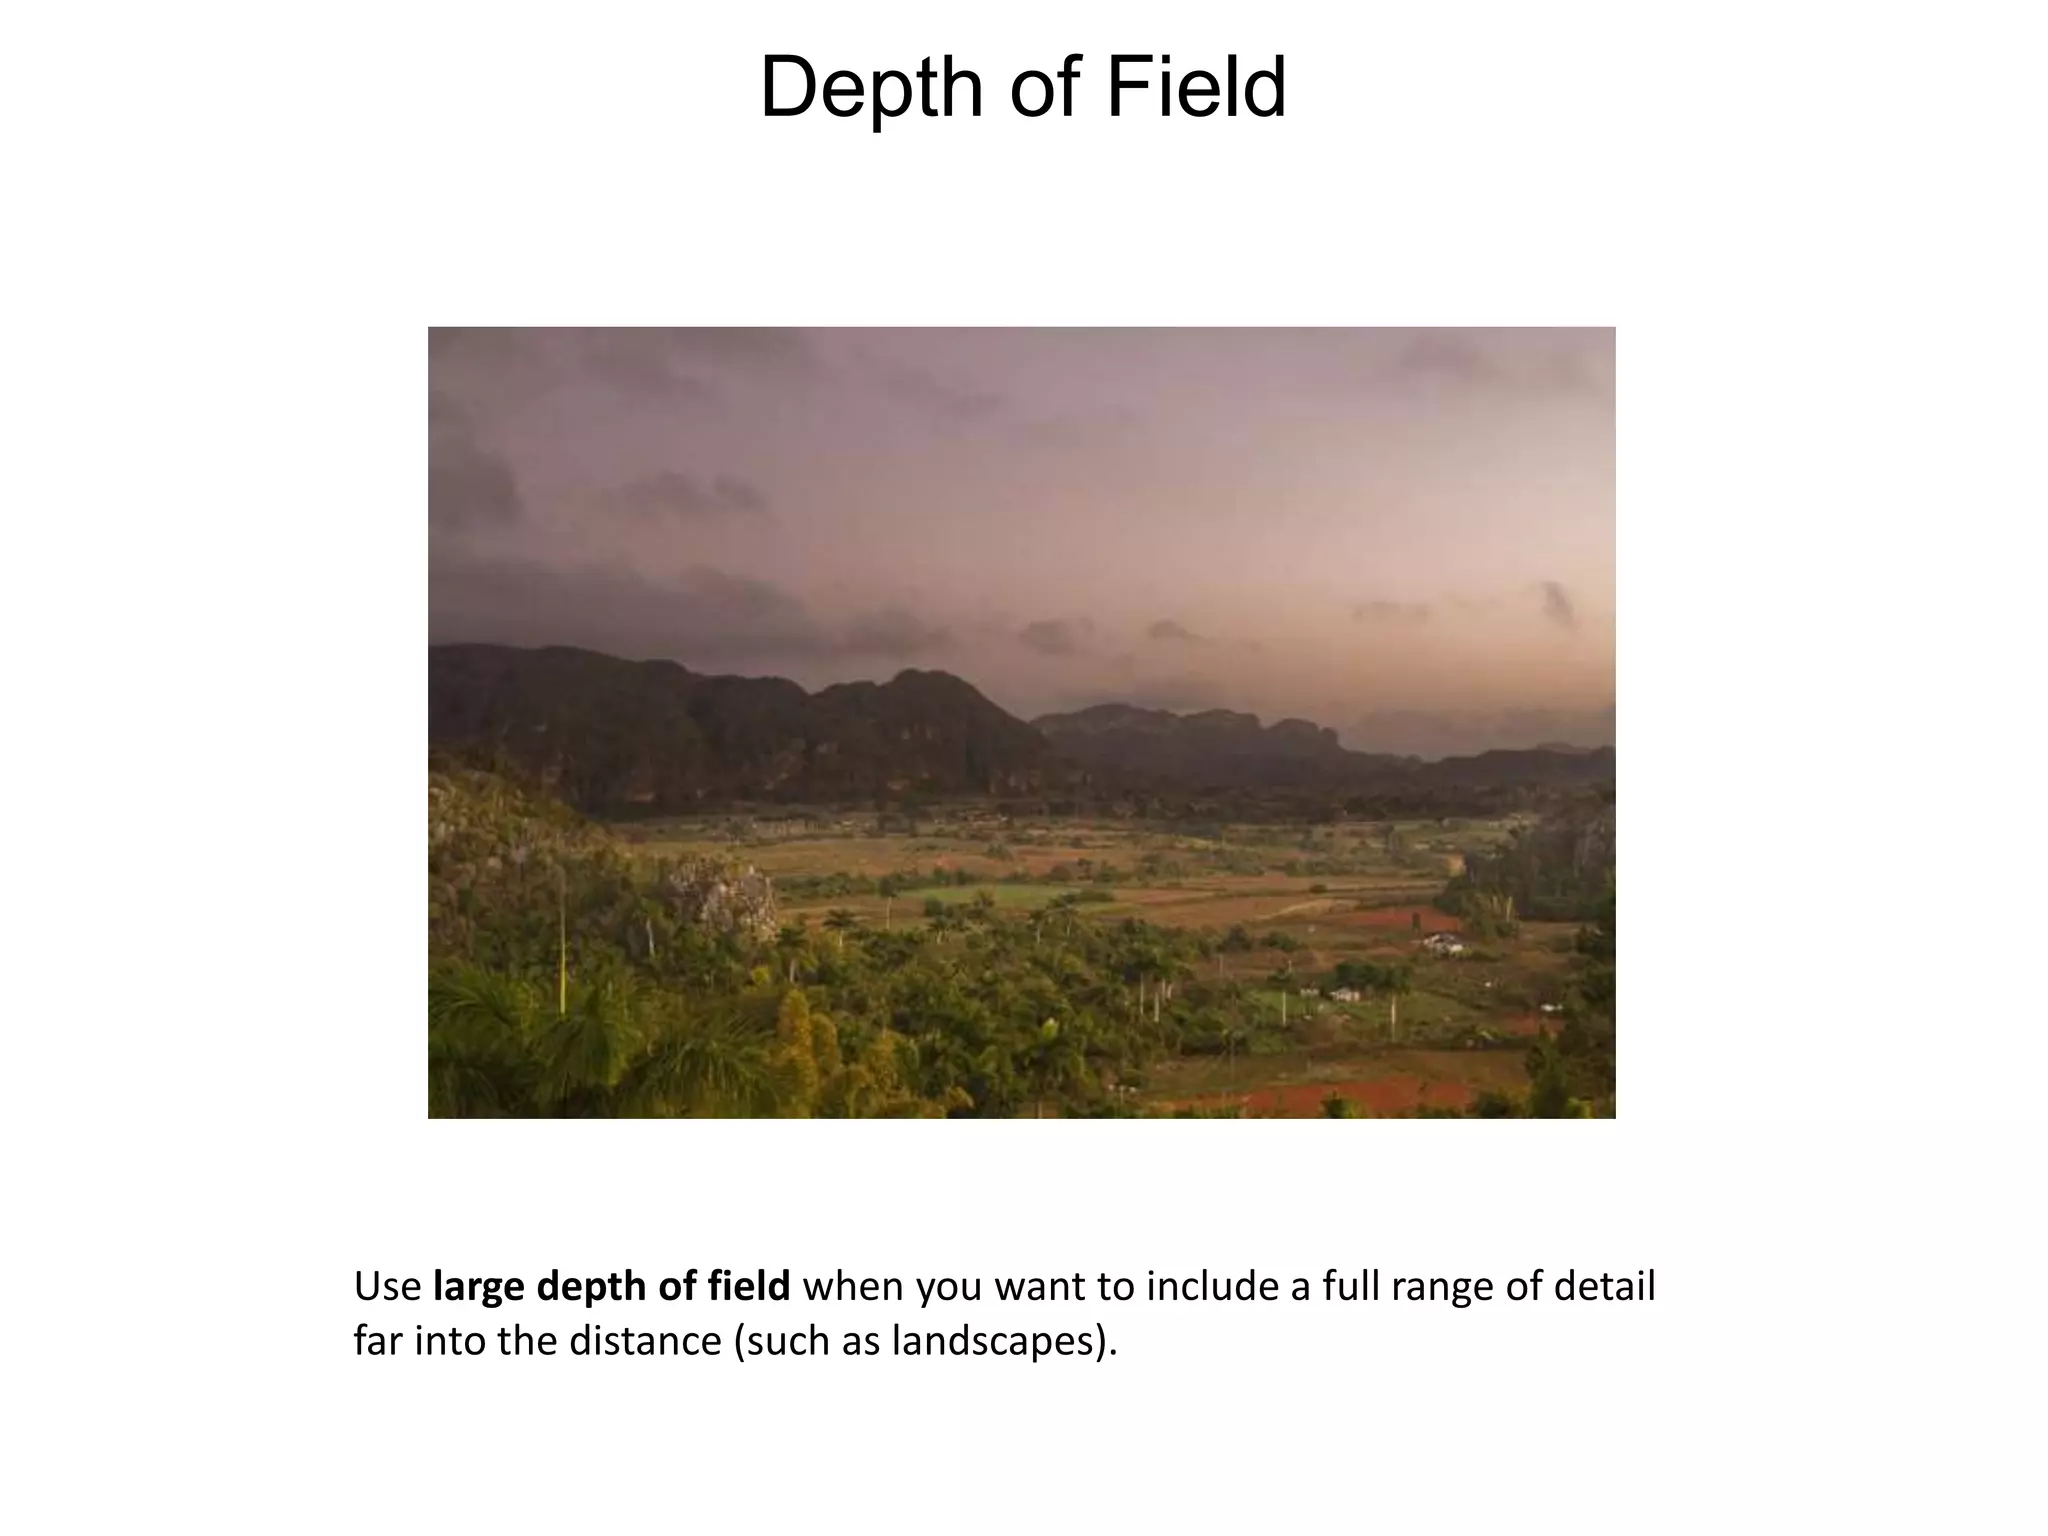
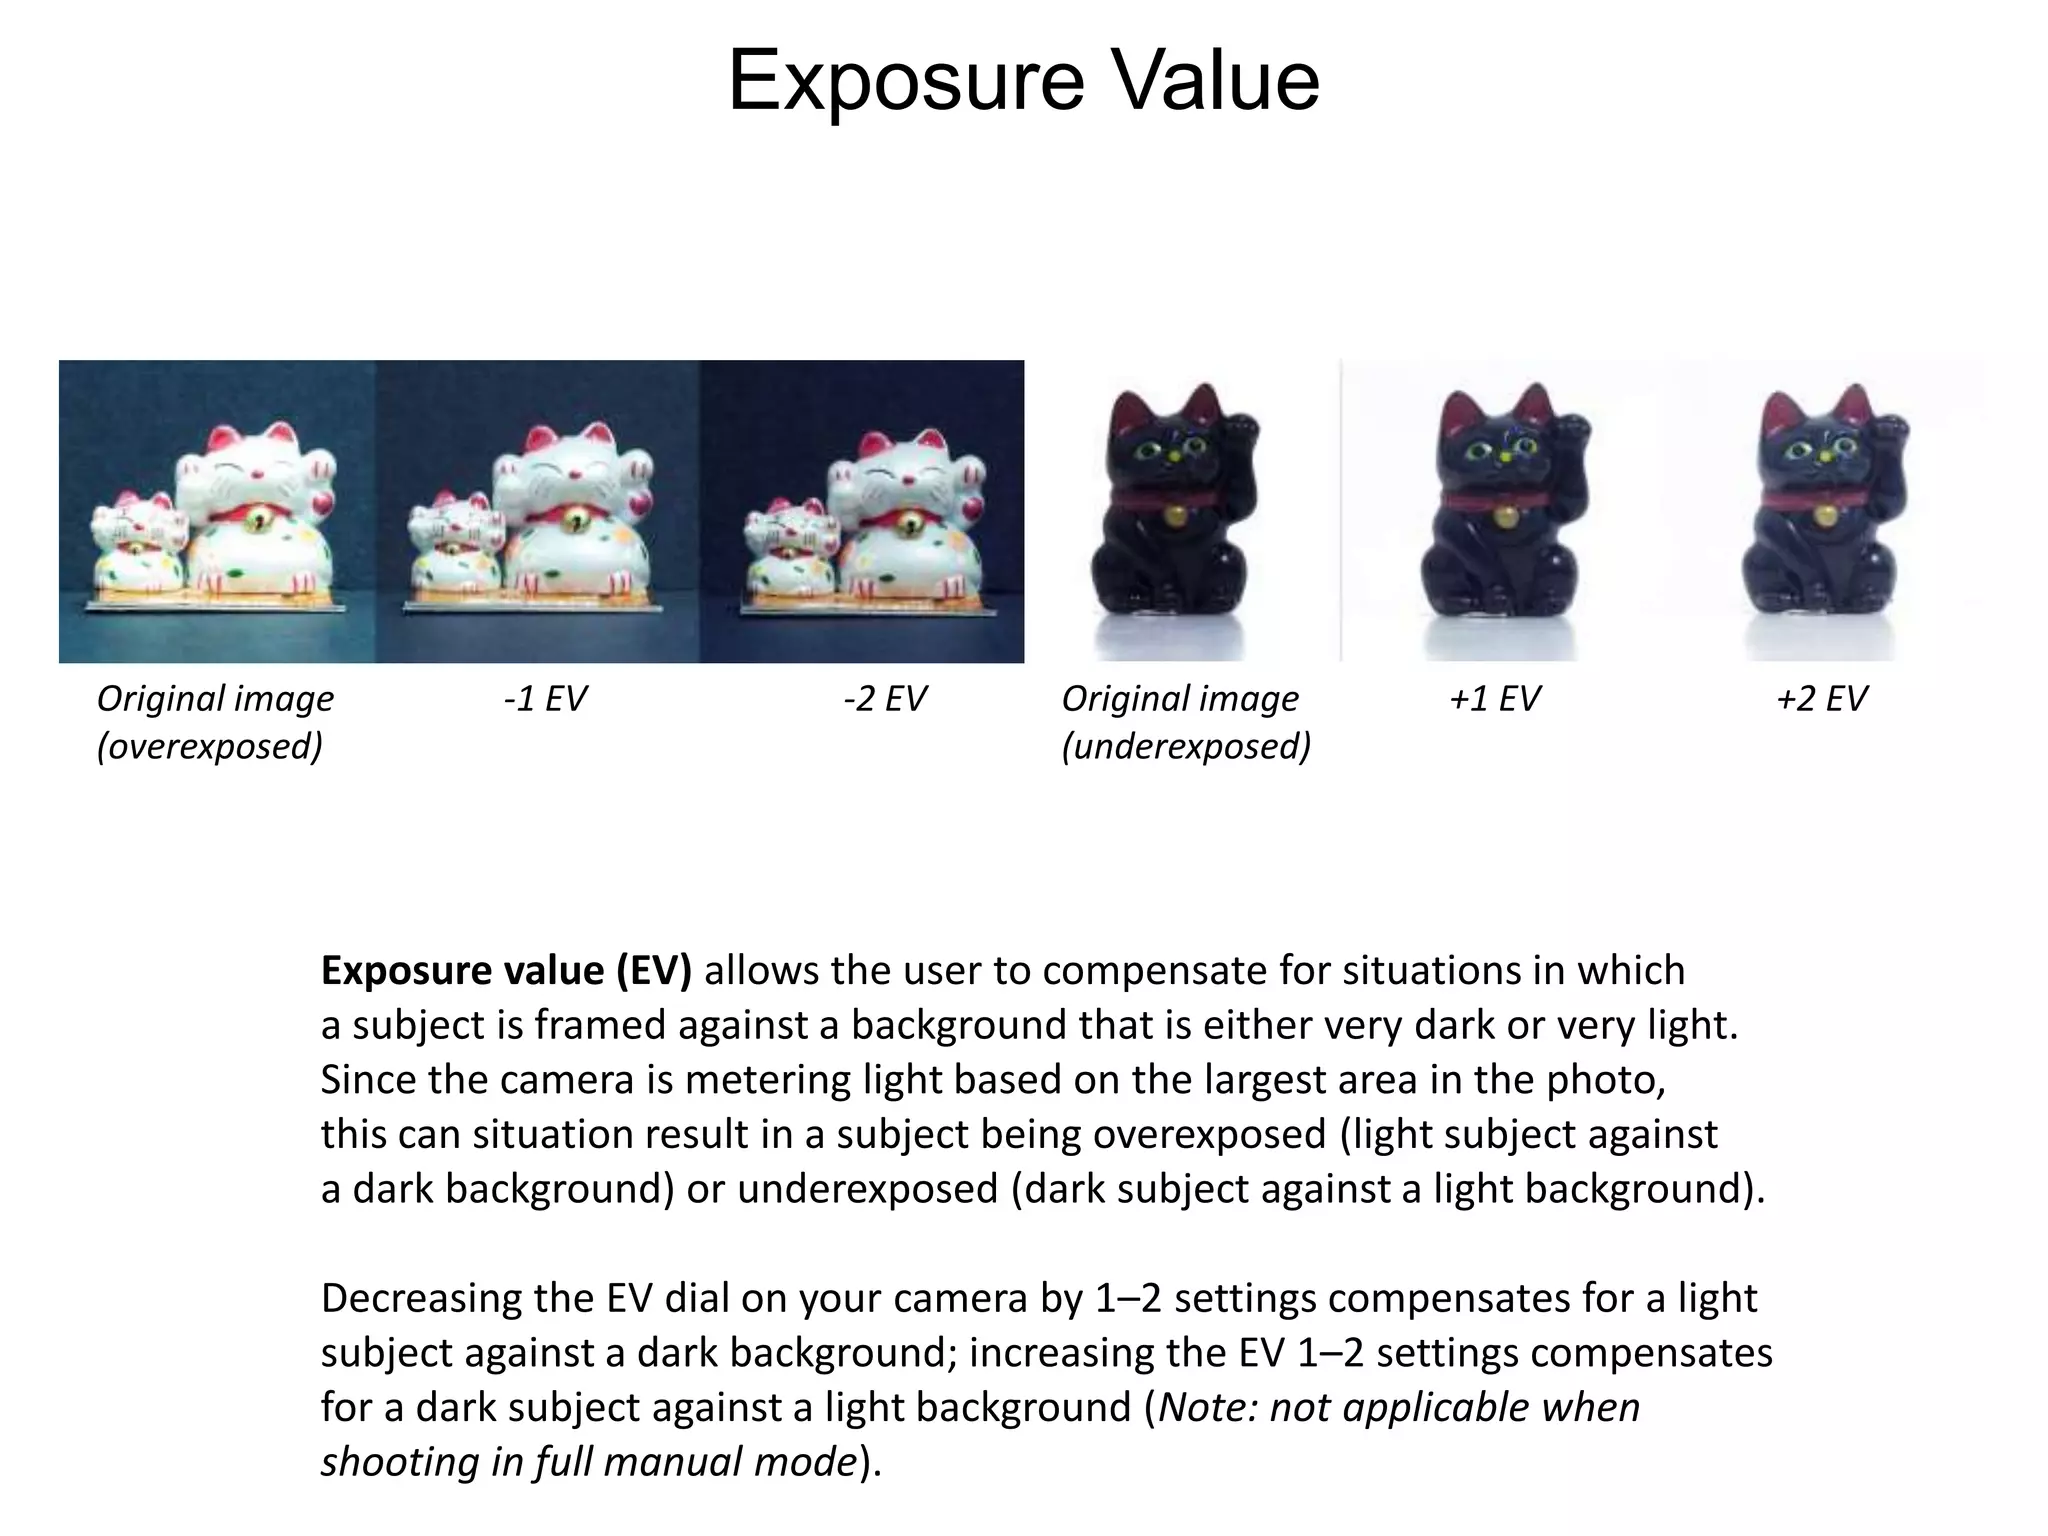
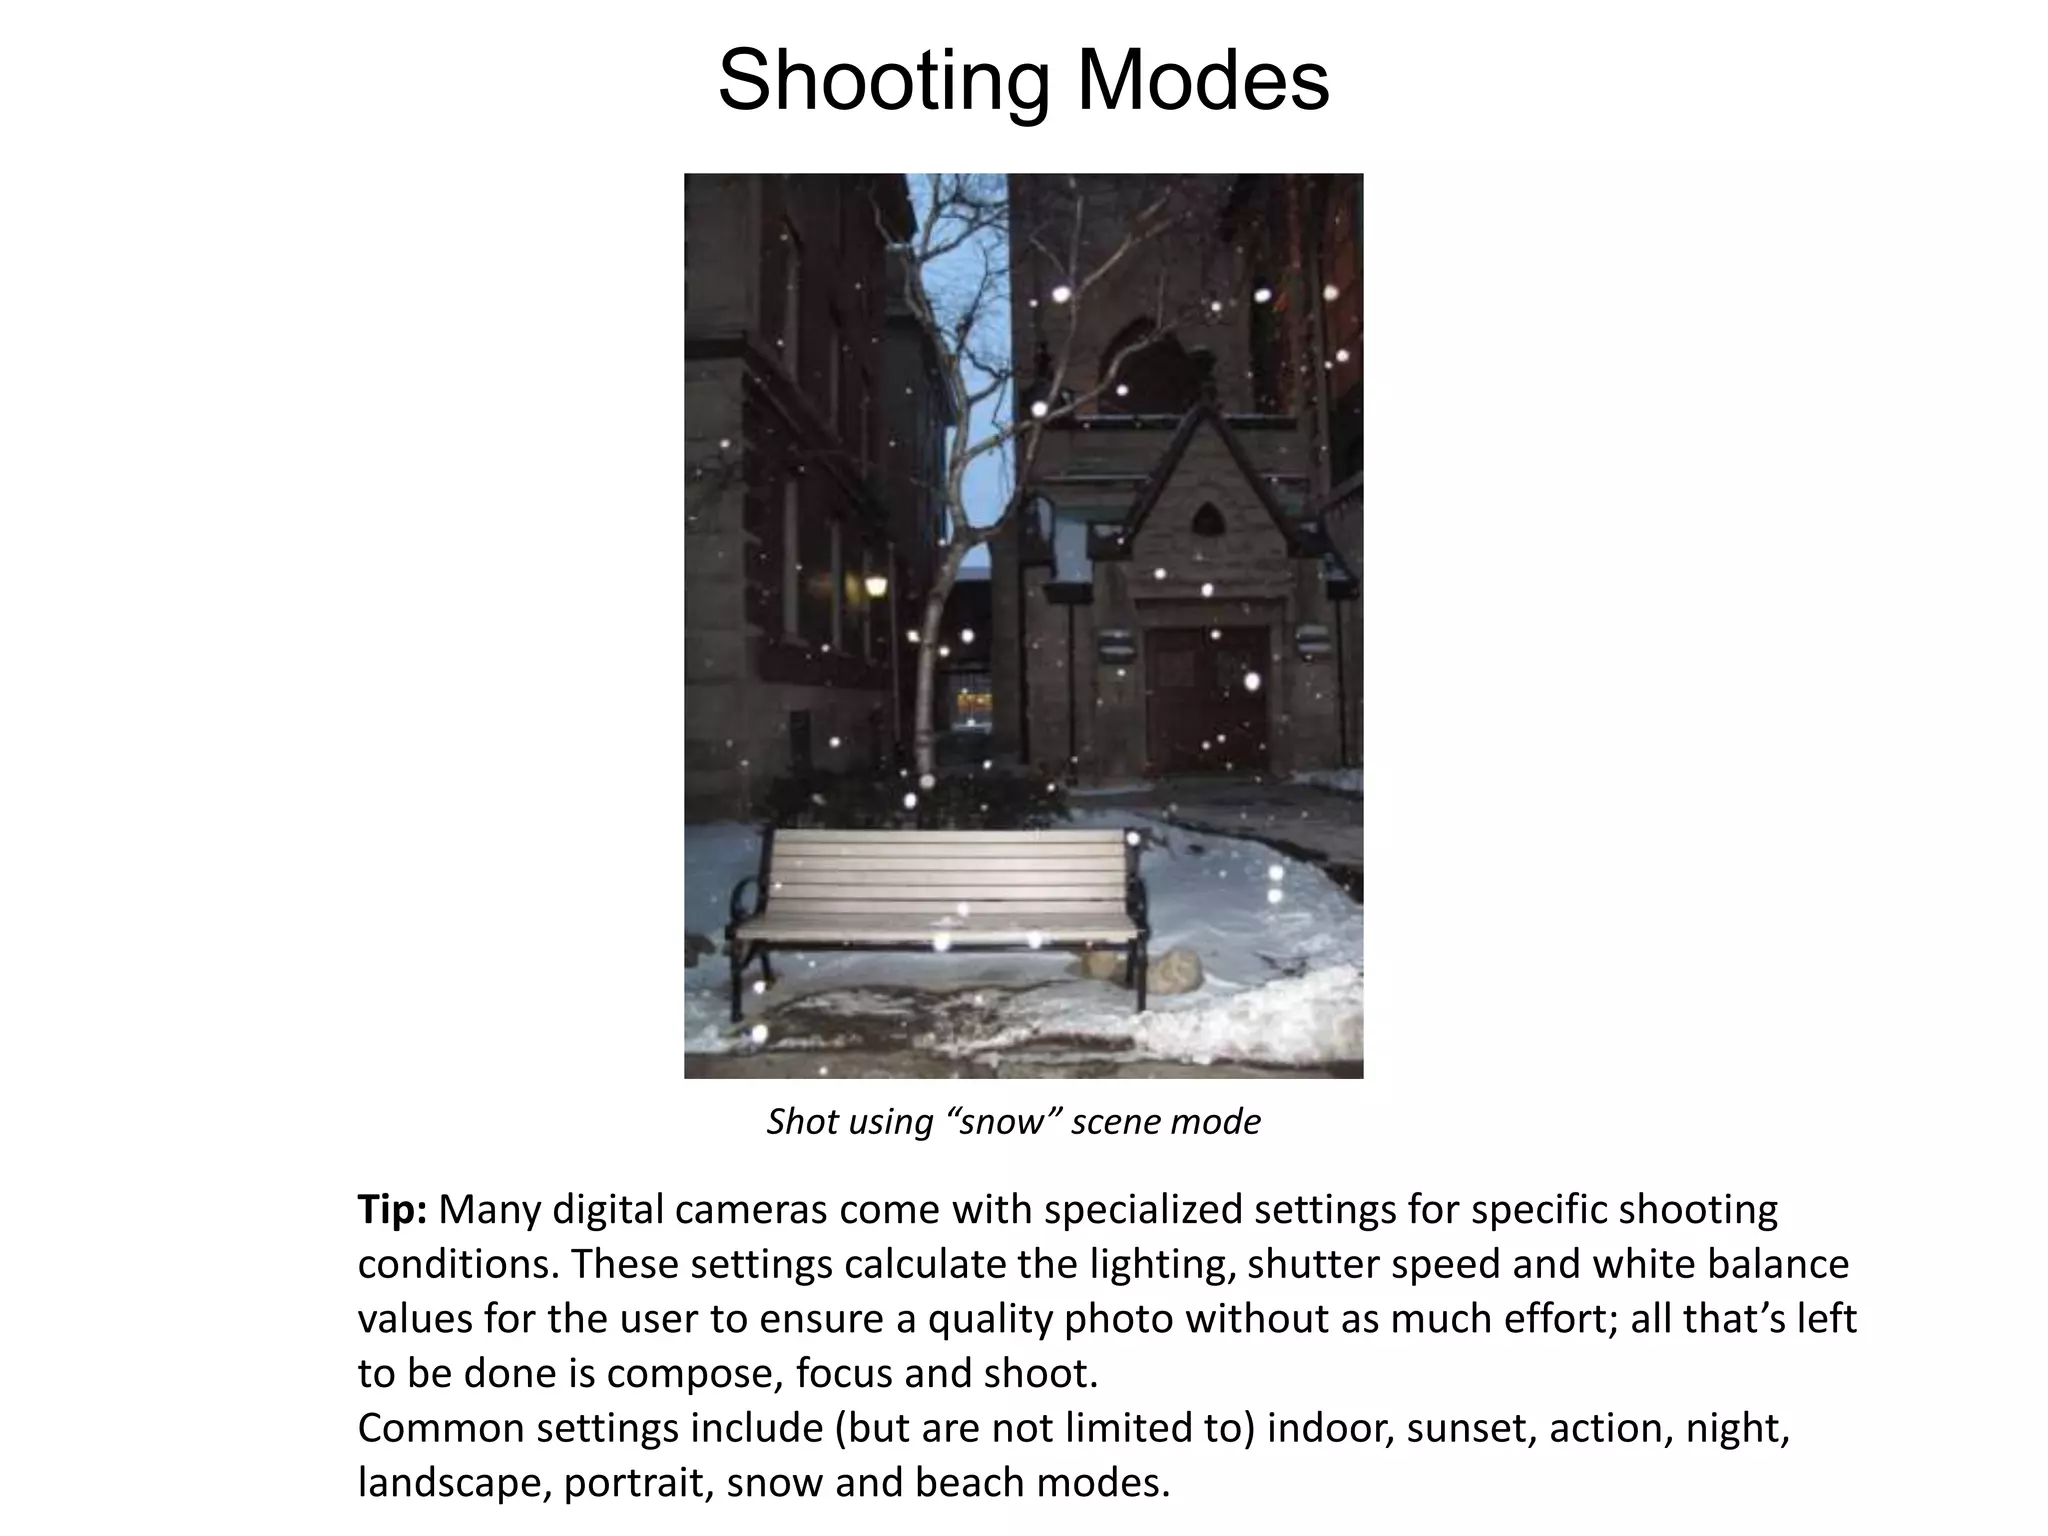
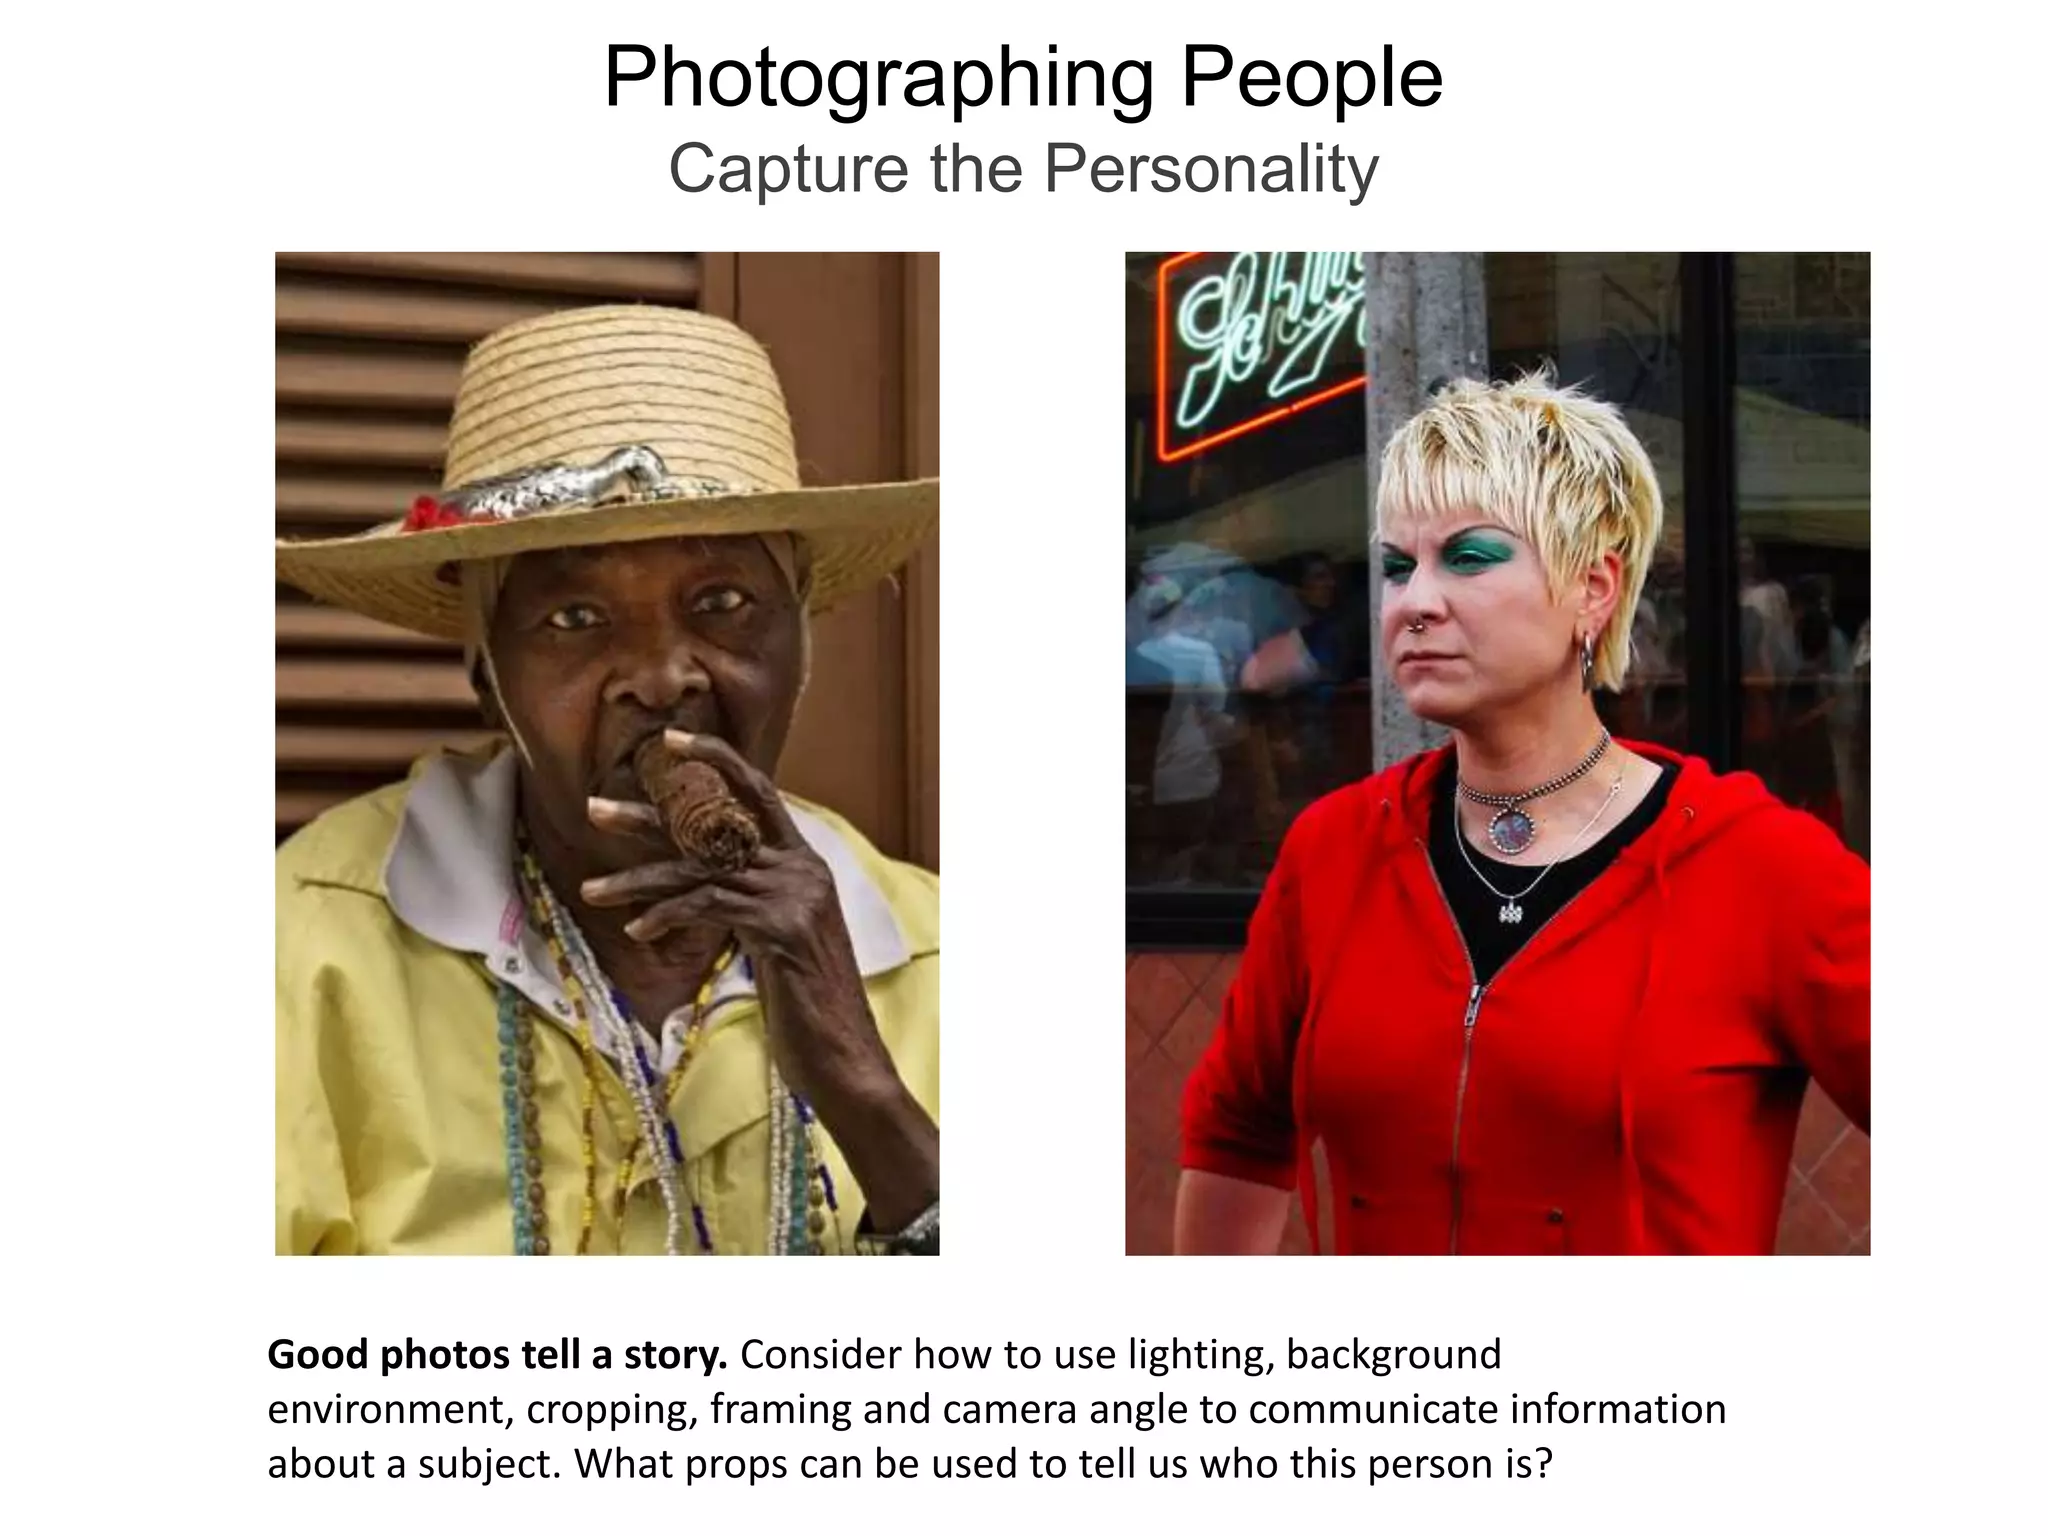
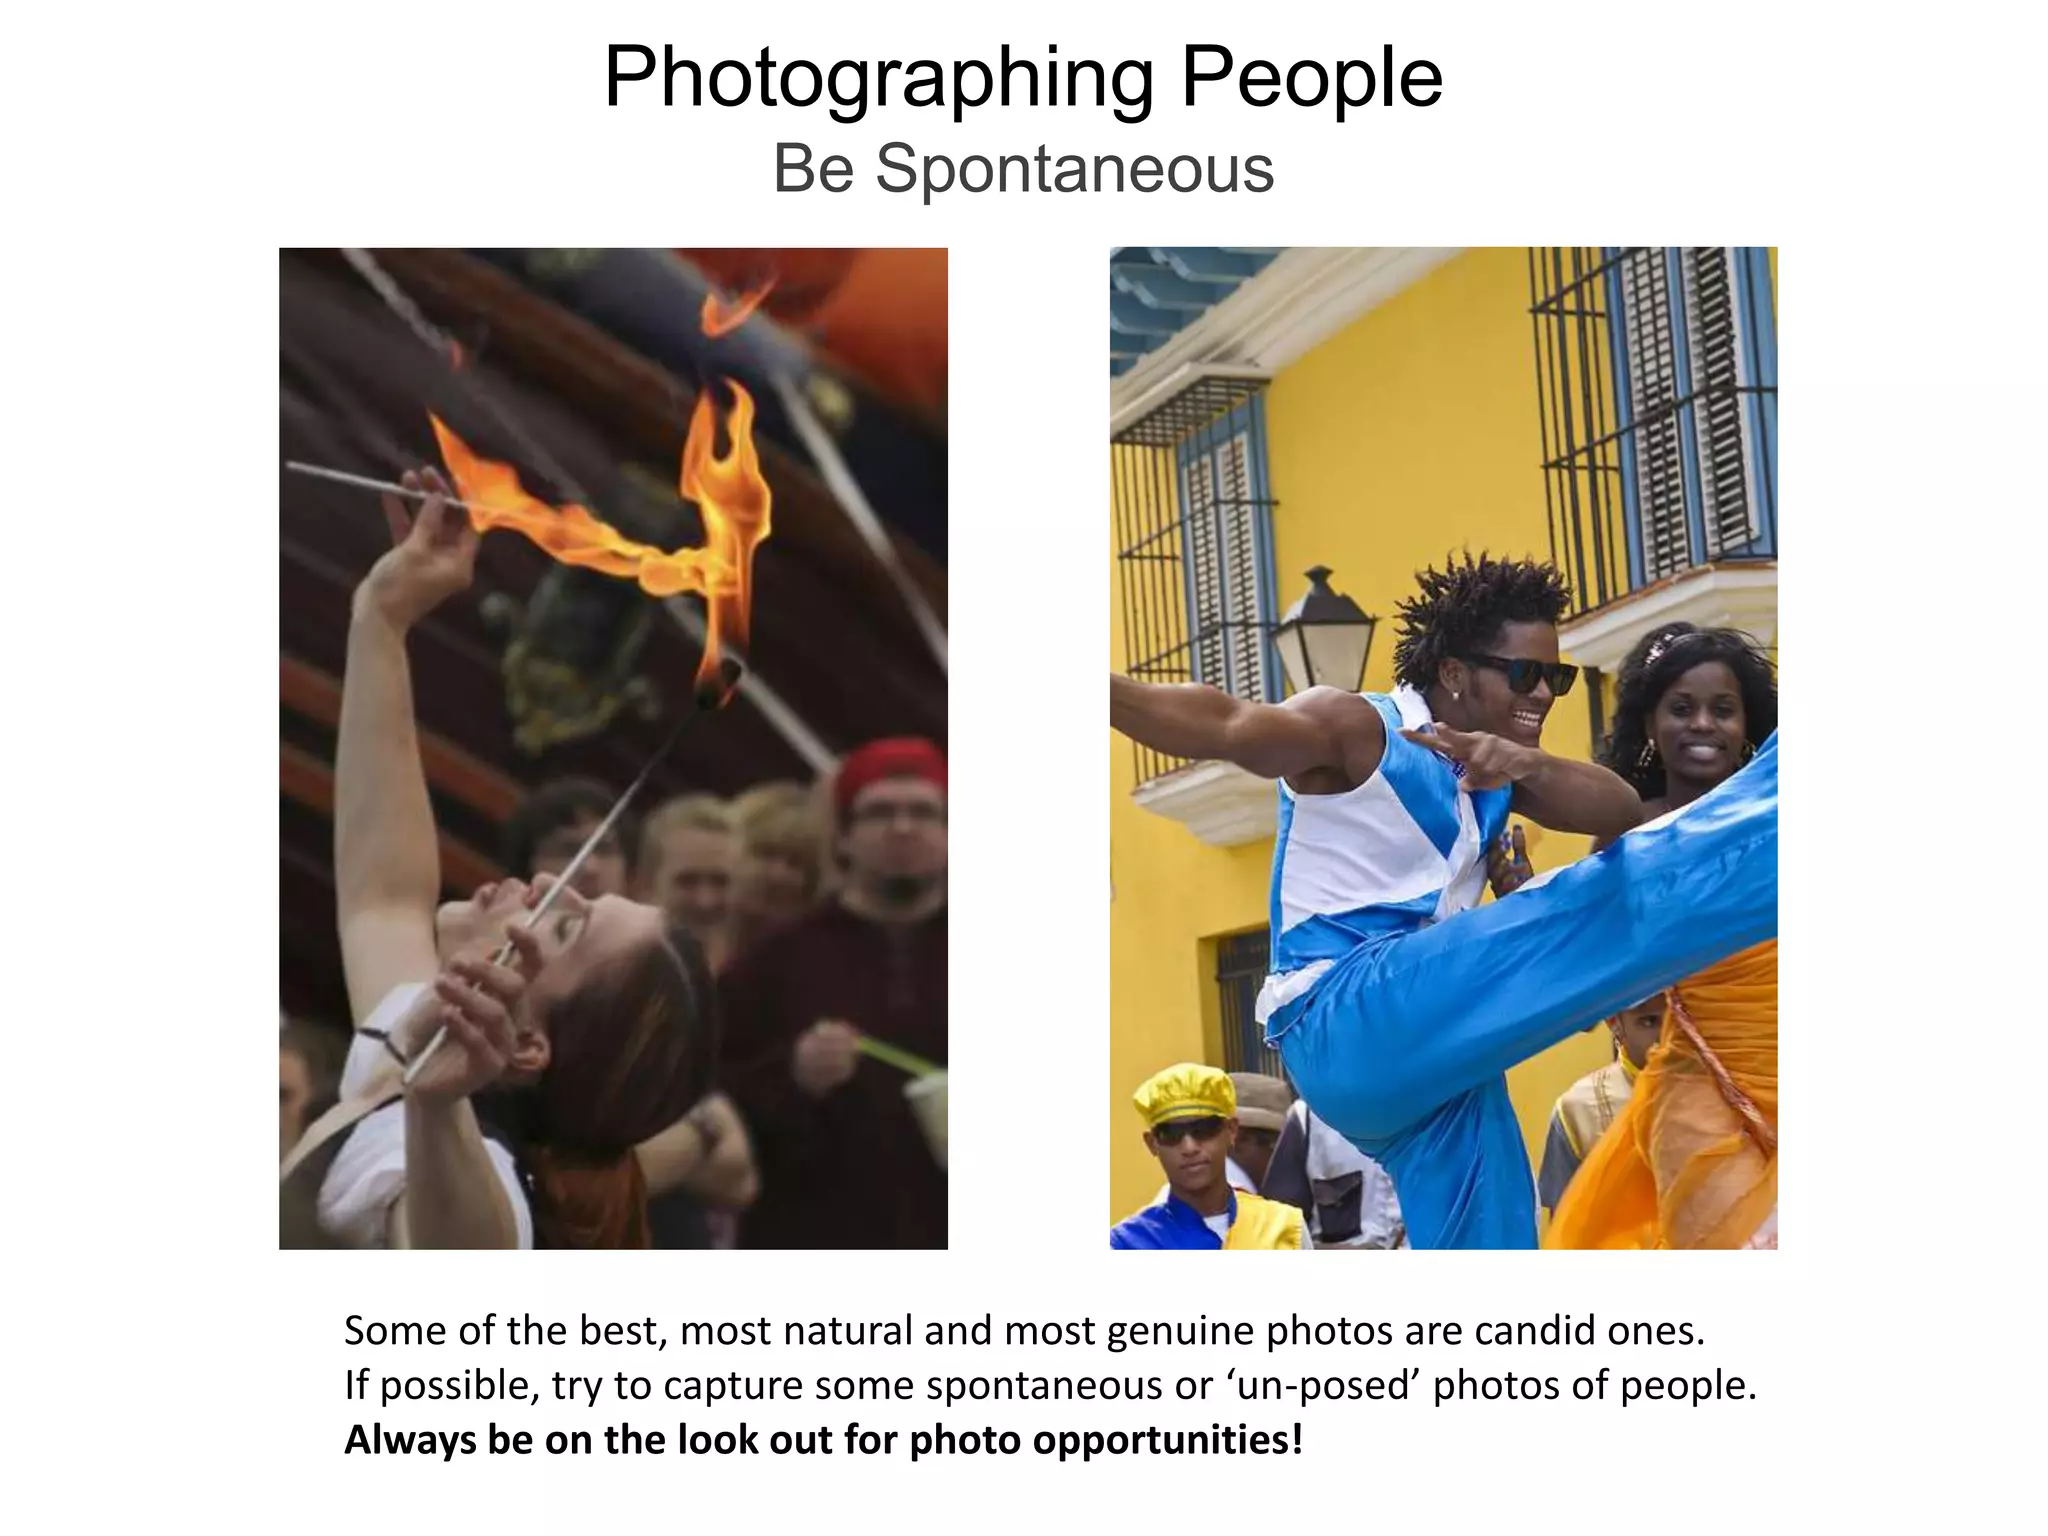
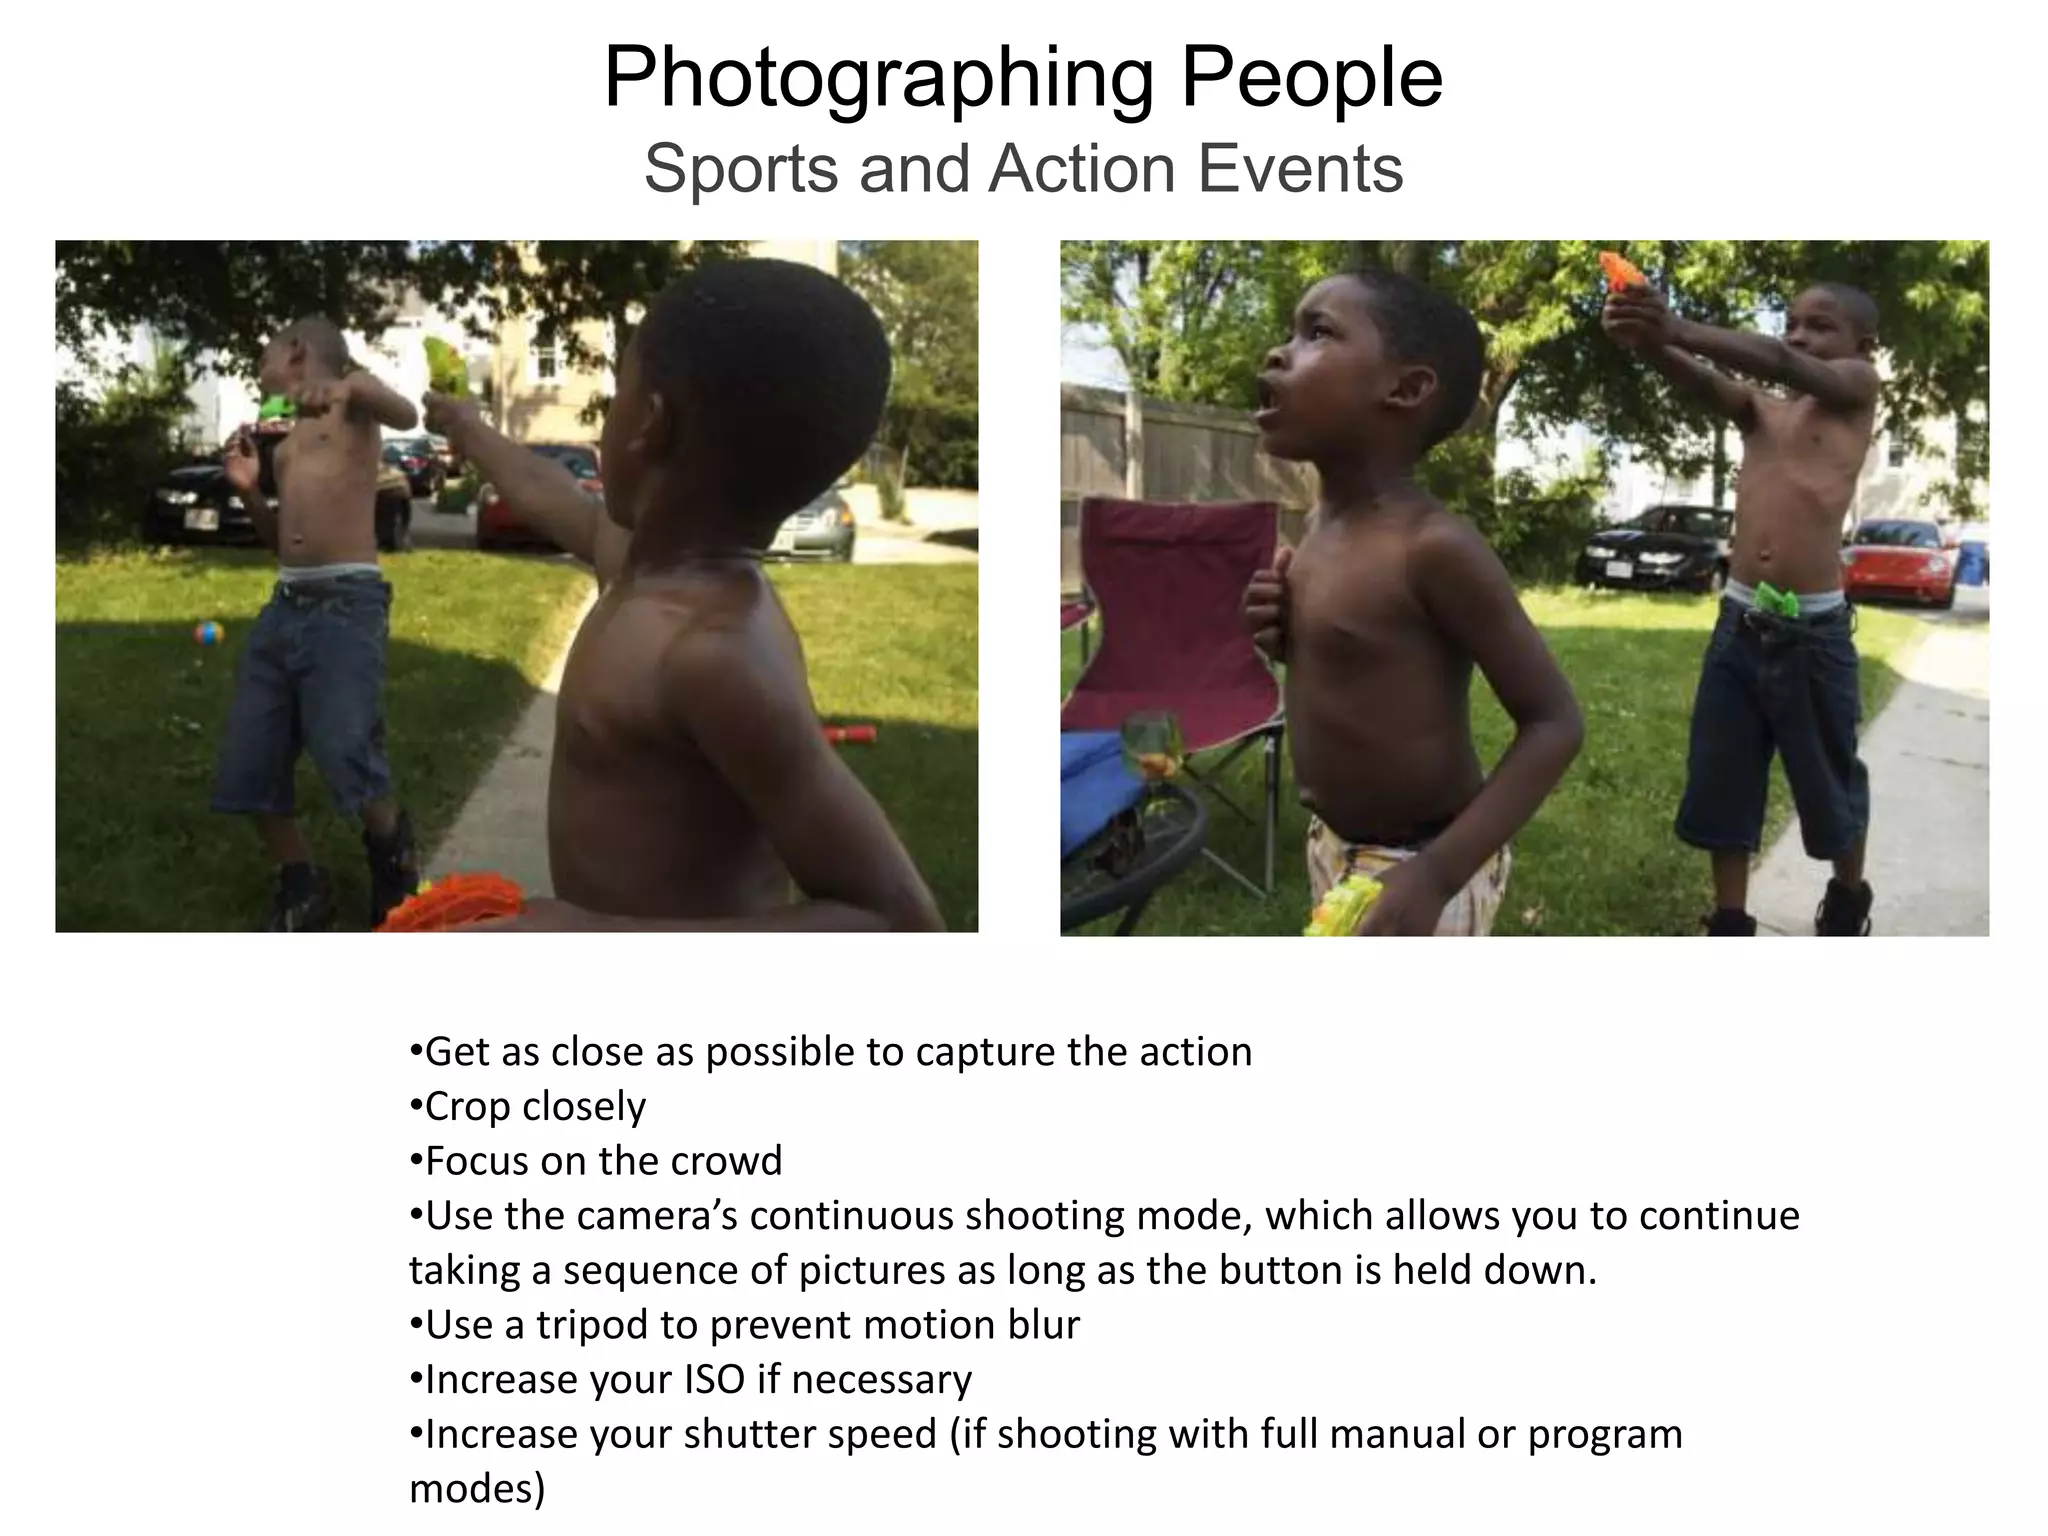


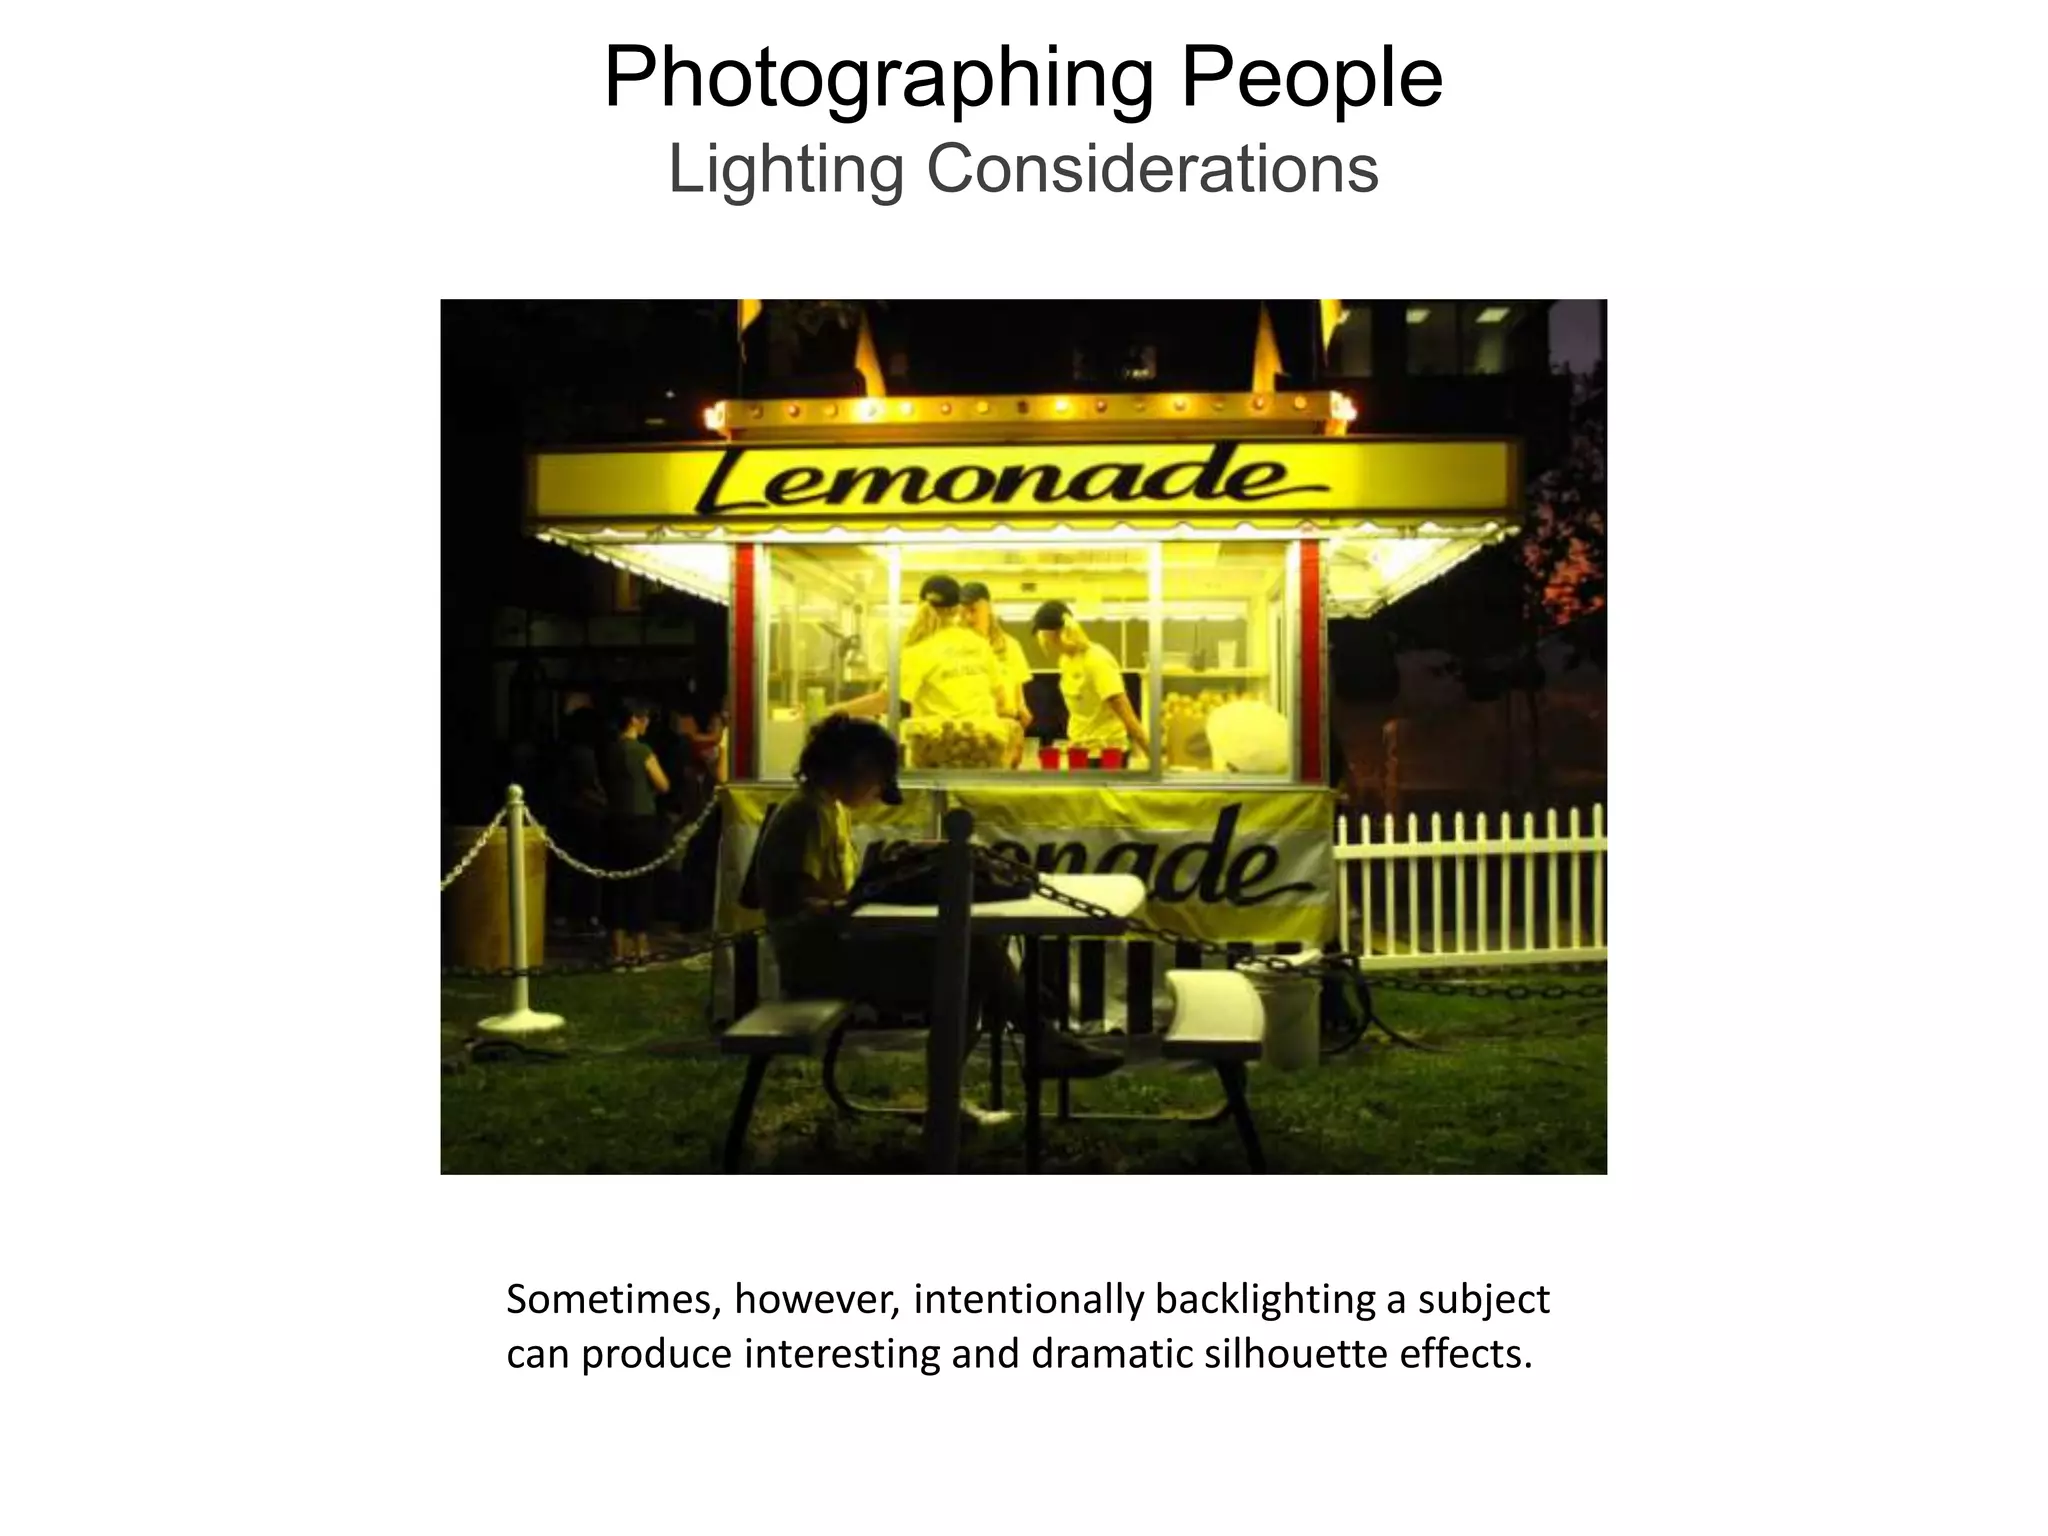
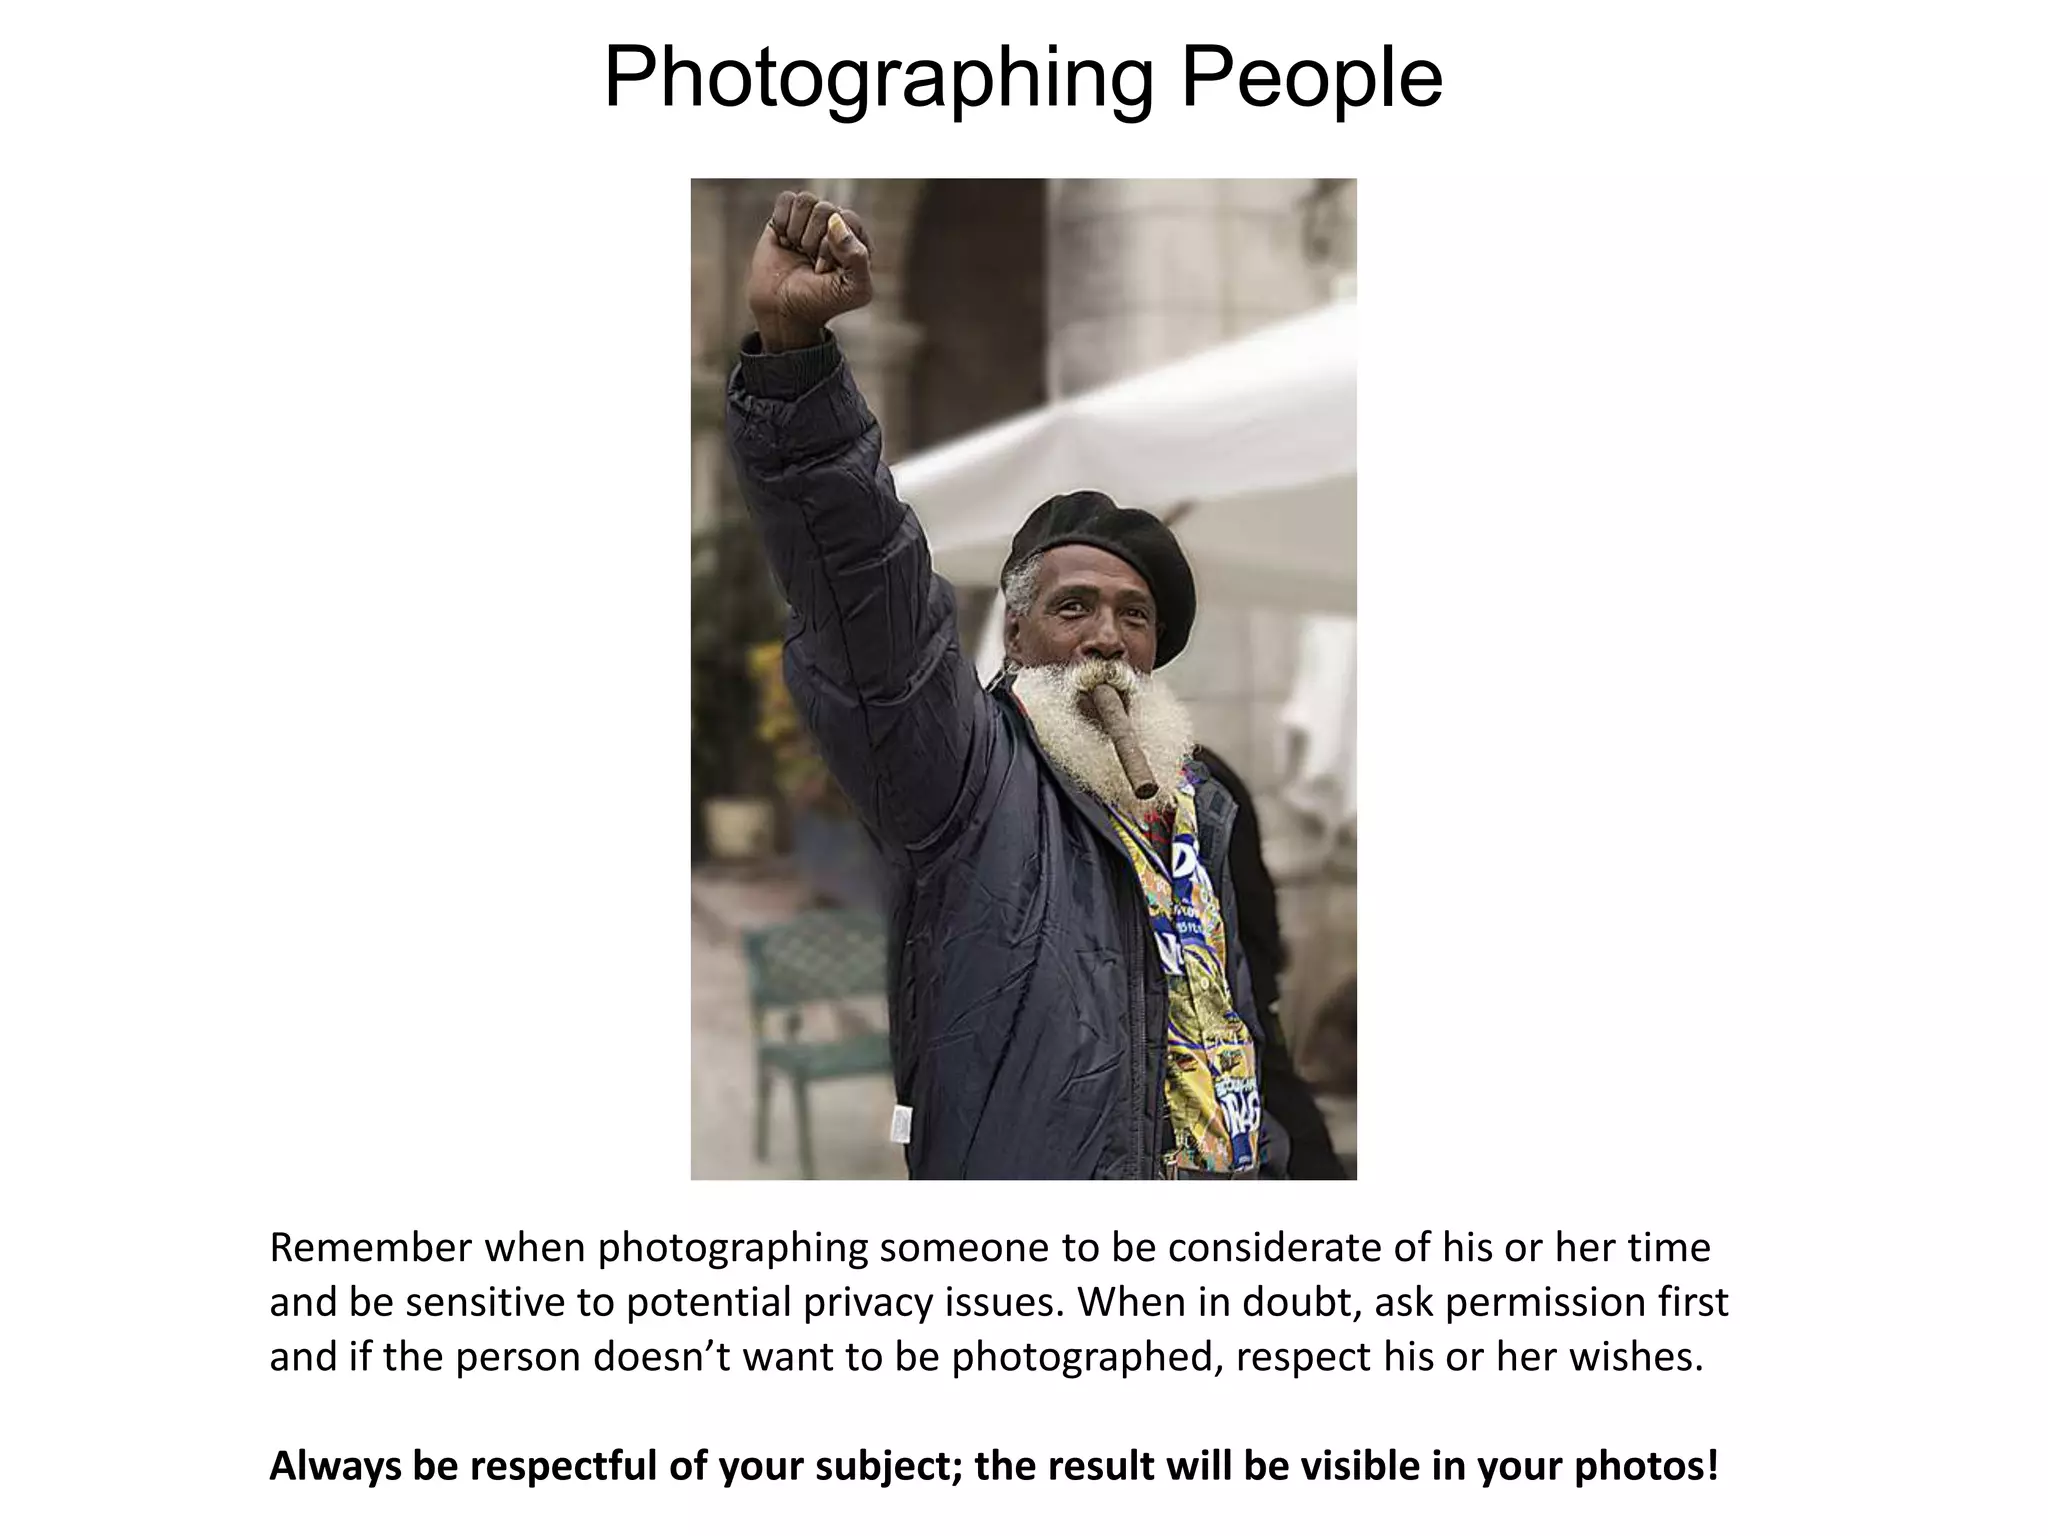

This document provides tips and guidelines for digital photography basics, including landscape vs portrait orientation, the rule of thirds, camera angles, depth of field, lighting, and photographing people. Key points covered include using landscape format for website headers and portrait for magazine covers, placing subjects along grid lines or intersections for visual interest, and changing camera angles to tell different stories about the subject. Tips are also given for lighting, backgrounds, leading lines, and capturing natural expressions when photographing people.


