Basic Fundamental Electronics by D-Sarda PART IV
•Download as PPTX, PDF•
1 like•80 views

Fundamental Electronics

Recommended
More Related Content
What's hot
Similar to Basic Fundamental Electronics by D-Sarda PART IV
Similar to Basic Fundamental Electronics by D-Sarda PART IV (20)
More from Dinesh Sarda
More from Dinesh Sarda (15)
Recently uploaded
Recently uploaded (20)
Basic Fundamental Electronics by D-Sarda PART IV
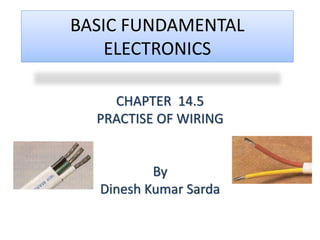
- 1. BASIC FUNDAMENTAL ELECTRONICS CHAPTER 14.5 PRACTISE OF WIRING By Dinesh Kumar Sarda
- 2. Prototyping Techniques and Soldering Schematic Diagrams Assembly Methods Soldering Tutorial
- 3. Schematic Diagrams Schematic diagrams represent an electronic circuit in symbolic form. A schematic need not depict the actual physical arrangement of the components
- 5. Wires and wire connections Current practice: Either A or B is acceptable C is the preferred style D is seldom used E is interpreted as a non-connection
- 6. Power sources (V) and common connections (GND)
- 7. Resistors (R) and Capacitors (C)
- 8. Diodes (D) The arrow points in the allowed direction of conventional (positive charges) current flow. The bar represents the cathode, marked with a band on most parts.
- 9. Transistors (Q) bipolar NPN junction transistor bipolar PNP junction transistor N-channel junction field-effect transistor P-channel junction field-effect transistor N-channel MOS field-effect transistor P-channel MOS field-effect transistor
- 10. Integrated circuits (U) Most complex integrated circuits are represented on schematic diagrams as a rectangular block symbol, with pin numbers and, usually, pin functions indicated; but many logic integrated circuits have special symbols that identify their function.
- 11. Switches (S) and Relays (K) single pole single throw SPST single pole double throw SPDT double pole single throw DPST double pole double throw DPDT rotary switch 1 pole, 5 position single pole double throw relay
- 12. BUILDING A PRTOTYPE Solder less breadboards Per boards or Proto boards Manhattan Construction Dead Bug Construction Etched Circuit Boards
- 13. Solder less Breadboards The term breadboard originated in the early days of radio, when many experimenters actually built circuits on the wooden boards used in their mother’s kitchen for rolling out bread dough. modern solderless breadboards Best thing to come along since sliced bread! A ham radio transmitter circa 1930
- 14. Perfbord or Proto board Components are soldered to the board, with connections made using a combination of short pieces of wire and the copper traces already present on some versions of these boards.
- 15. Manhattan and Dead Bug Construction
- 17. Soldering Tutorial “Soldering” fastening metal objects using molten metal (solder) as the glue. Three requirements 1.Low melting point metal (wire solder) 2.Heat source (soldering iron) 3.Flux (to prevent surfaces from oxidizing)
- 18. Types of Solder Tin- Lead solders • 60% Tin, 40% Lead - solid at 361° F, liquid at 374° F • 63% Tin, 37% Lead - eutectic point is 361° F • no “pasty” range so joint movement less a problem Silver- bearing Solder • 62% Tin, 36% Lead, 2 % Silver - solid at 354 ° F, liquid at 372 F • often used for surface mount components whose contacts contain trace amounts of silver
- 19. Soldering Irons Constant wattage Iron is continuously “ON” and eventually reaches equilibrium temperature 20 to 25 watt iron sufficient for circuit board assembly Constant temperature Tip incorporates a thermostatic element to maintain desired tip temperature 650 – 750 ° F appropriate for circuit board assembly But wait…..even better… Weller® 30 watt iron
- 20. Soldering Irons Temperature Controlled Solder Station Feedback control maintains tip at desired temperature Adjustable, often with analog or digital temperature display Many have grounded tip to help prevent ESD damage Weller® solder station
- 21. Types of Flux Rosin Flux Type R – ordinary rosin – most common Type RMA – mildly activated rosin Type RA – activated rosin – use with care Acid Flux – NEVER, EVER use this for electronics
- 22. Flux-core solder Most solder used for electronics assembly is in wire form, with the flux incorporated inside the solder. Multi-core solder has several (usually five) separate flux channels within the solder. For circuit board assembly use wire solder with a diameter of about 0.025 inch or less
- 23. Soldering a Component Use a lead bending jig, if available, to form the component leads to the correct spacing If a bending jig is not on hand, grasp the leads, not the body, of the component with needle-nosed pliers and bend gently.
- 24. Soldering a Component Insert the component’s leads through the holes in the circuit board. The body should lie flat against the board without having to force it down. Turn the board over and gently bend the component leads outward to hold the component in place
- 25. Soldering a Component Clean the iron tip by wiping on a damp sponge. Tin the tip by applying solder, then wipe again. Apply the iron in contact with both the circuit board pad and the component lead. Apply solder to the joint, not to the iron, and allow the heated joint to melt the solder QT Movie Clip QT Movie Clip
- 26. Soldering a Component Use a pair of flush-cutting wire cutters to cut off the excess lead length as close to the board as possible. Hold the lead so will not fly away when cut, a possible occasion for eye injury. !! WEAR SAFETY GLASSES !! Inspect the soldered and trimmed lead. It should be uniform and shiny, with no cracks, gaps, or graininess. Good soldering Bad soldering QT Movie Clip
- 27. We've all seen it: breadboards covered in a rat's net of wires. There are tons of tips and tricks to breadboard wiring, but let's start simple: what's the best wire to breadboard with?
- 28. Solid Core Wire Probably the most common breadboarding wire is simple solid core wire. This is typically sold in spools of varying lengths and many different colors. The commonly recommended size for wire associated with bread boarding is 22awg or 0.8mm.
- 29. Pre-cut Wires Many bread boards often come with assortments of pre-cut and bent wires, often with tinned leads. These wires come in a few different colors and sizes. Typically, the color of the wire also denotes the length of it. These assortments come from many different vendors, but often are all very similar.
- 30. Male to Male Jumpers Another flavor of breadboard wire that is gaining traction are wires with header pins attached on both ends. These wires benefit from being substantially more durable than other types.