Downloaded 386 times

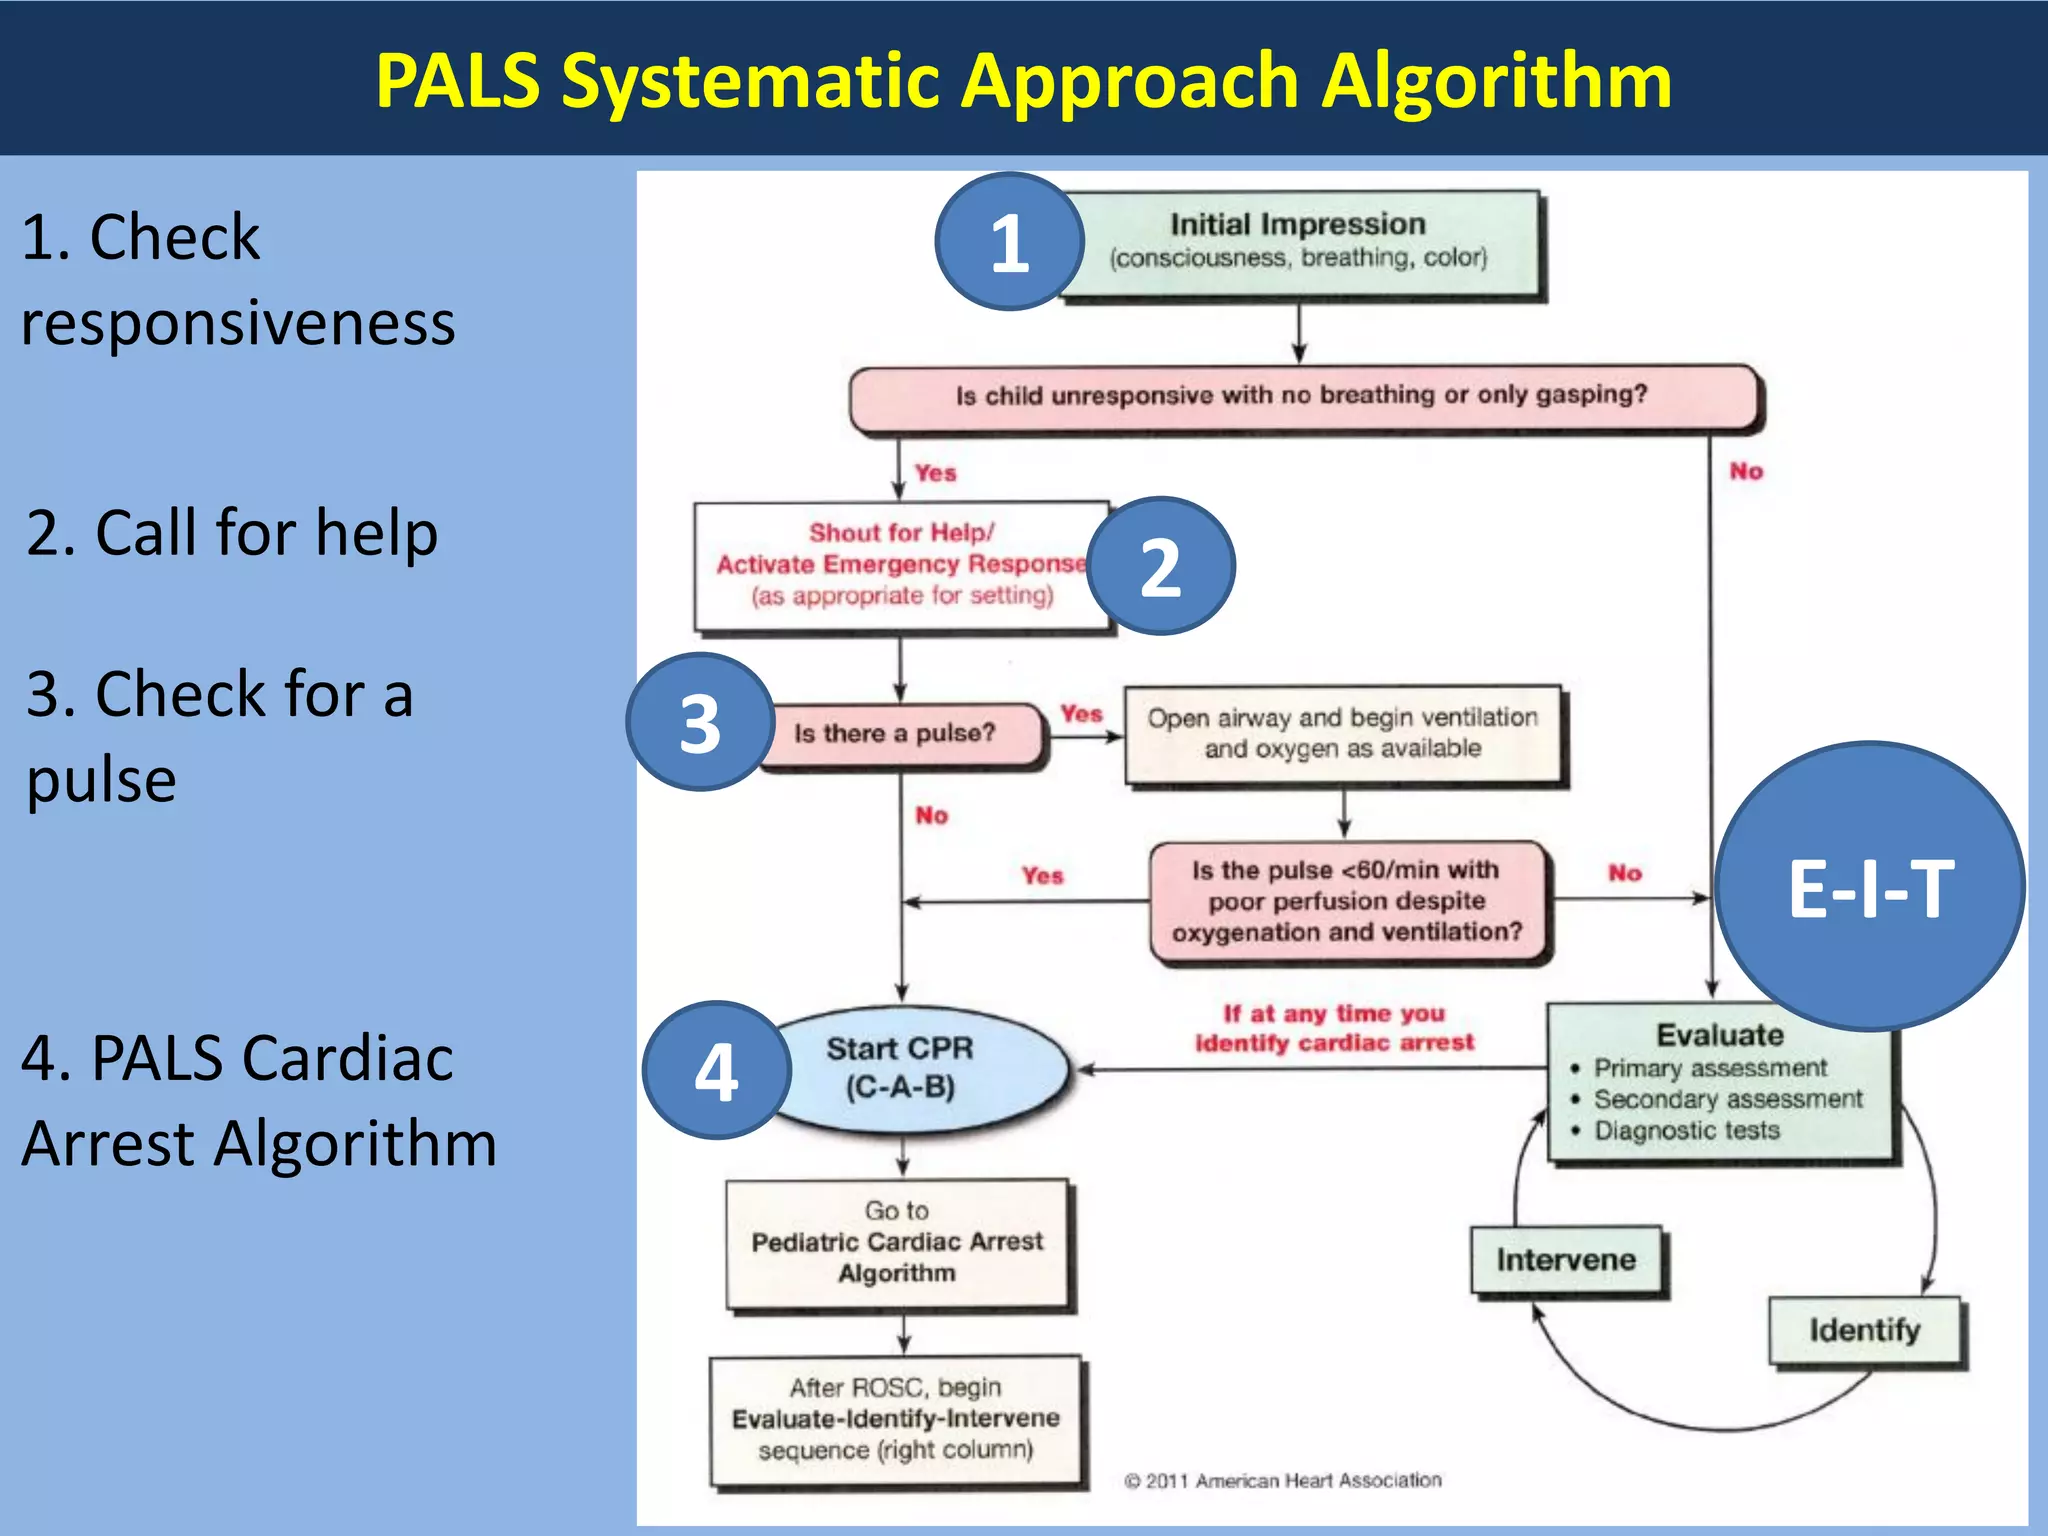

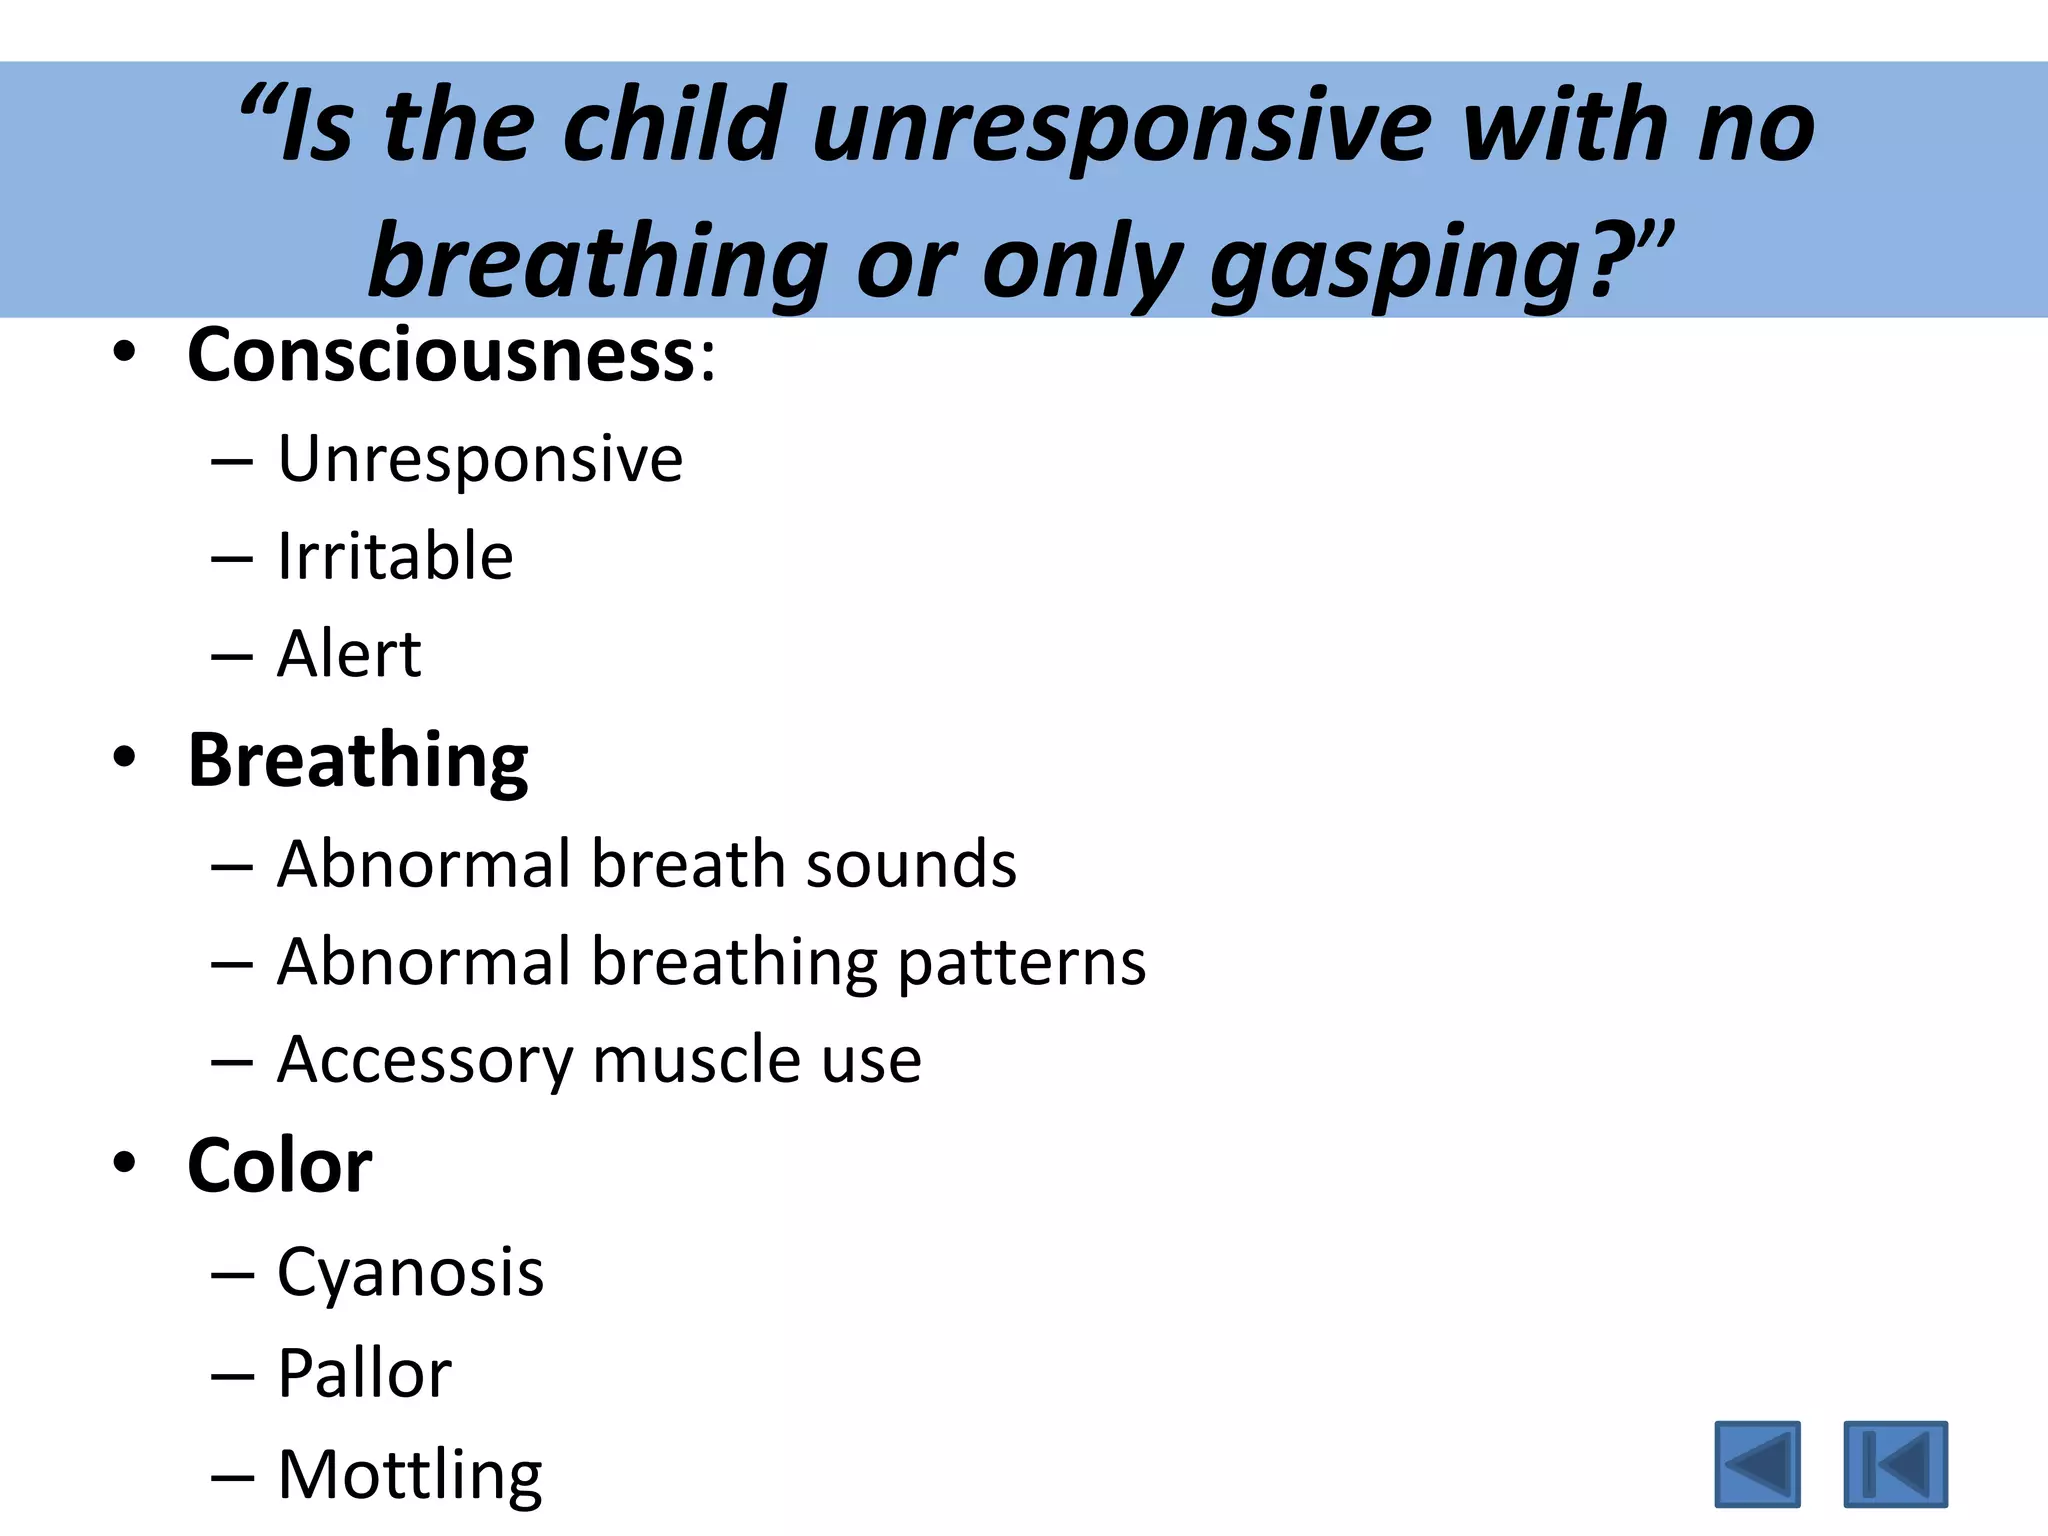


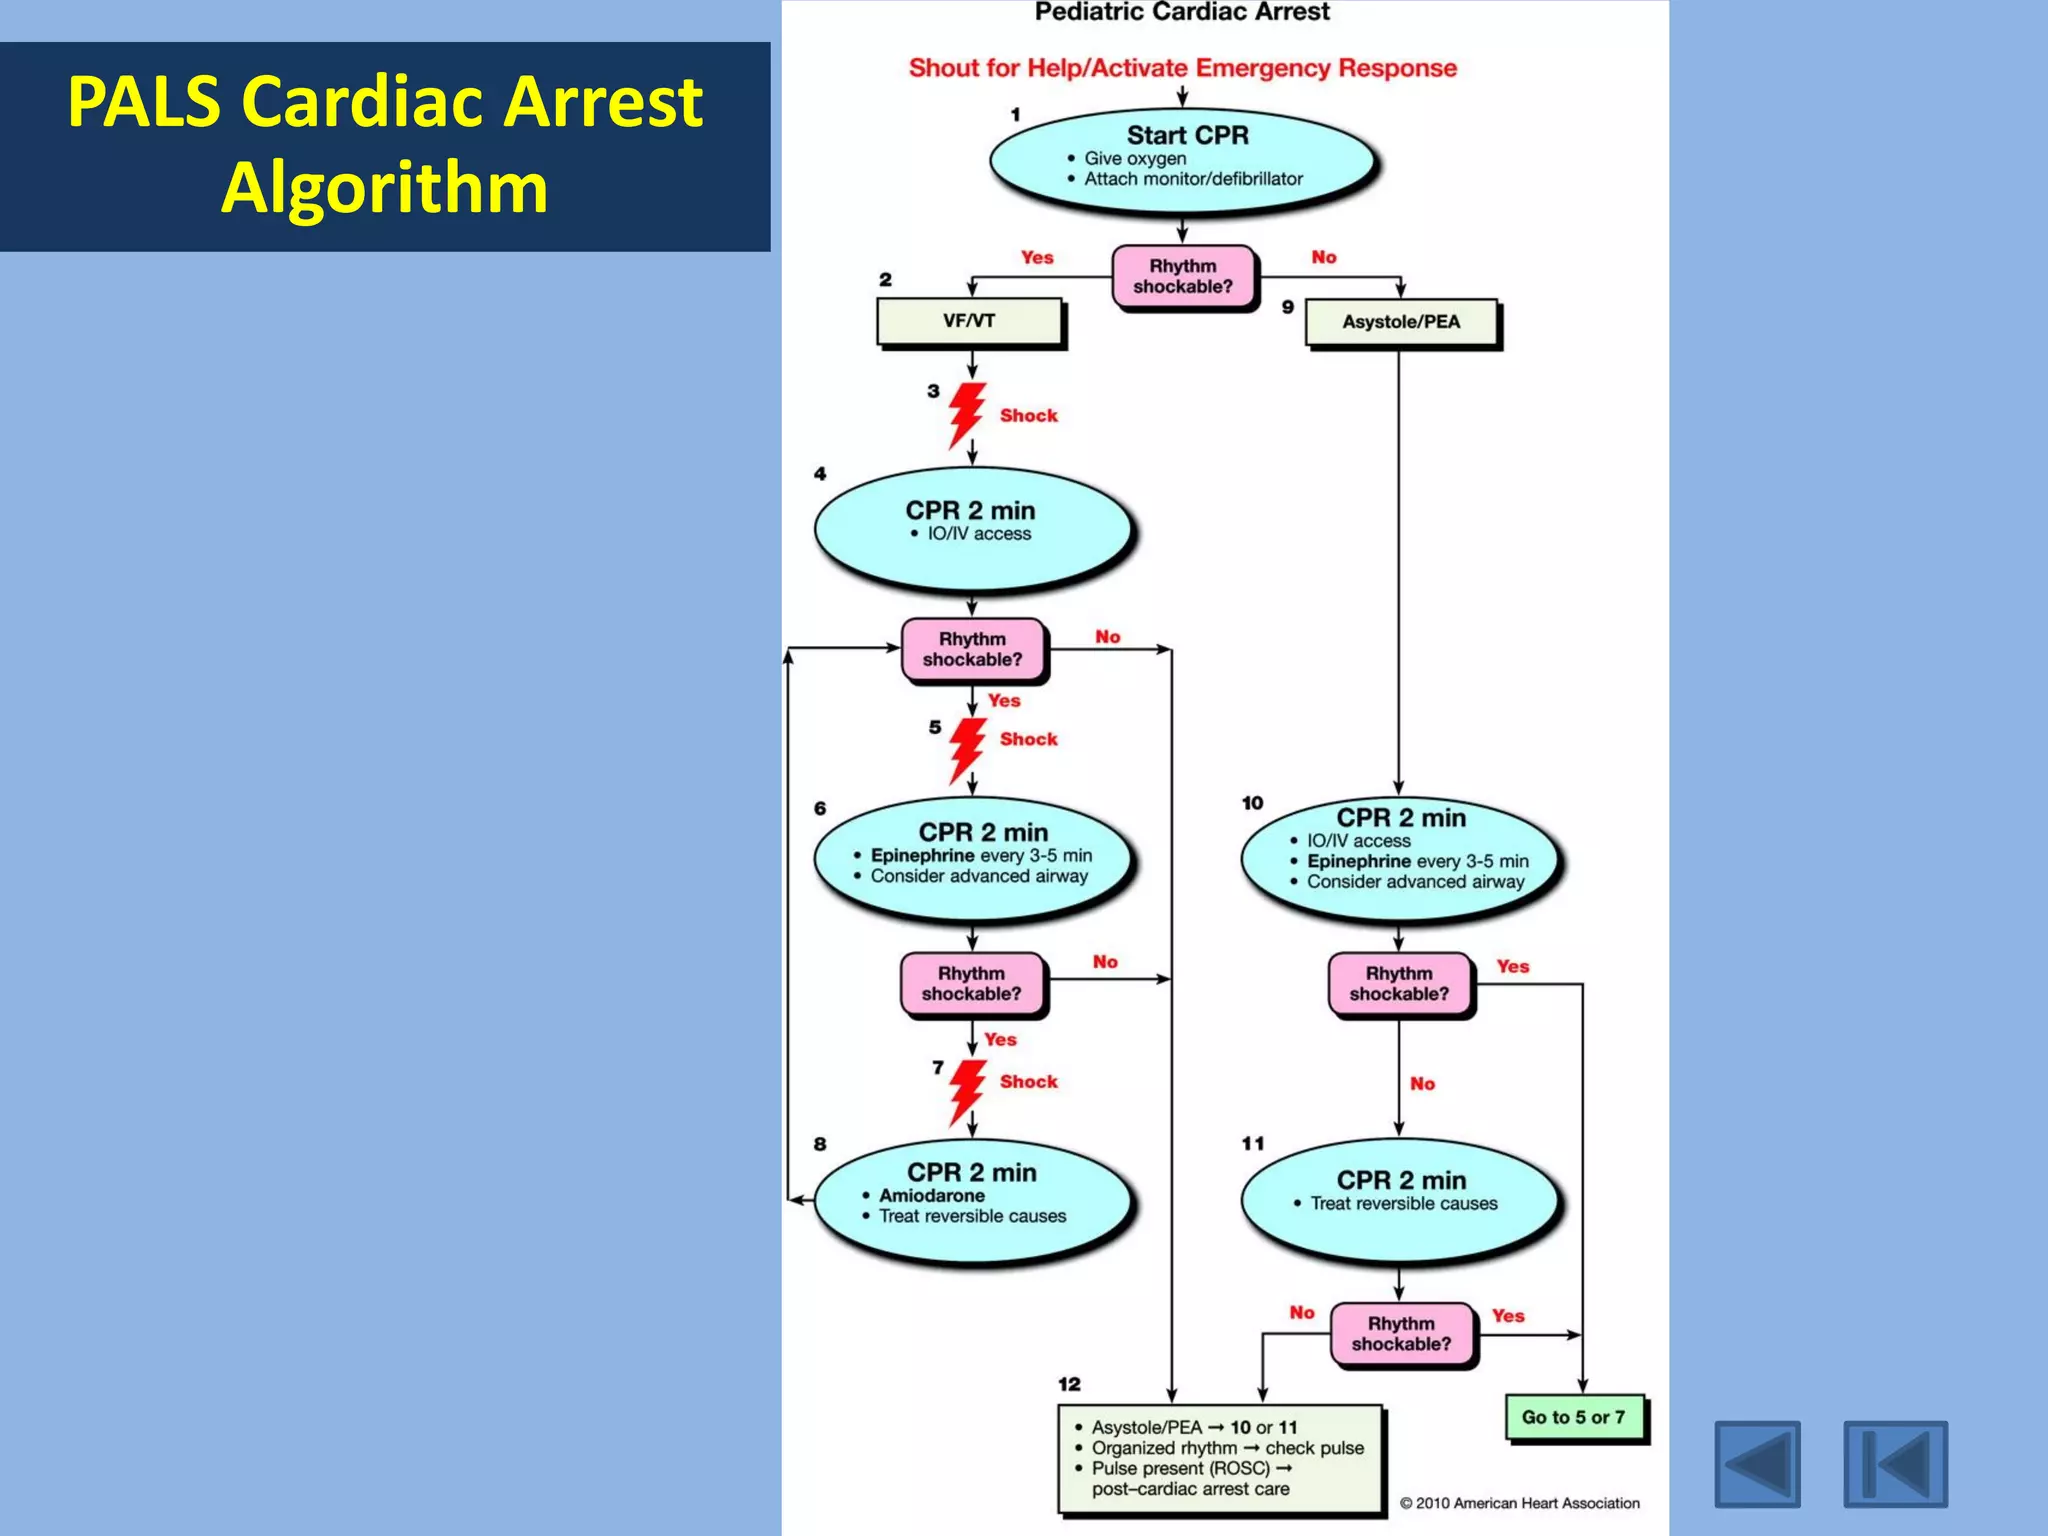


This document provides guidelines for pediatric advanced life support (PALS). It outlines the systematic approach algorithm which begins with checking responsiveness, calling for help, and checking for a pulse. The BLS assessment evaluates consciousness, breathing, and skin color to determine if the child is unresponsive with no breathing. For infants and children under 8, CPR should be provided first before calling for help, while those over 8 receive phone assistance first before CPR. The guidelines describe performing CPR, providing oxygen, inserting airways, monitoring the child, establishing IV/IO access, administering adrenaline, and considering reversible causes and an advanced airway. The primary and secondary assessment evaluates the child's airway, breathing, circulation, and
Introduction to PALS; systematic approach includes assessment of responsiveness, breathing, and color.
Differentiating phone first or CPR first based on age, checking pulse locations for infants and children.
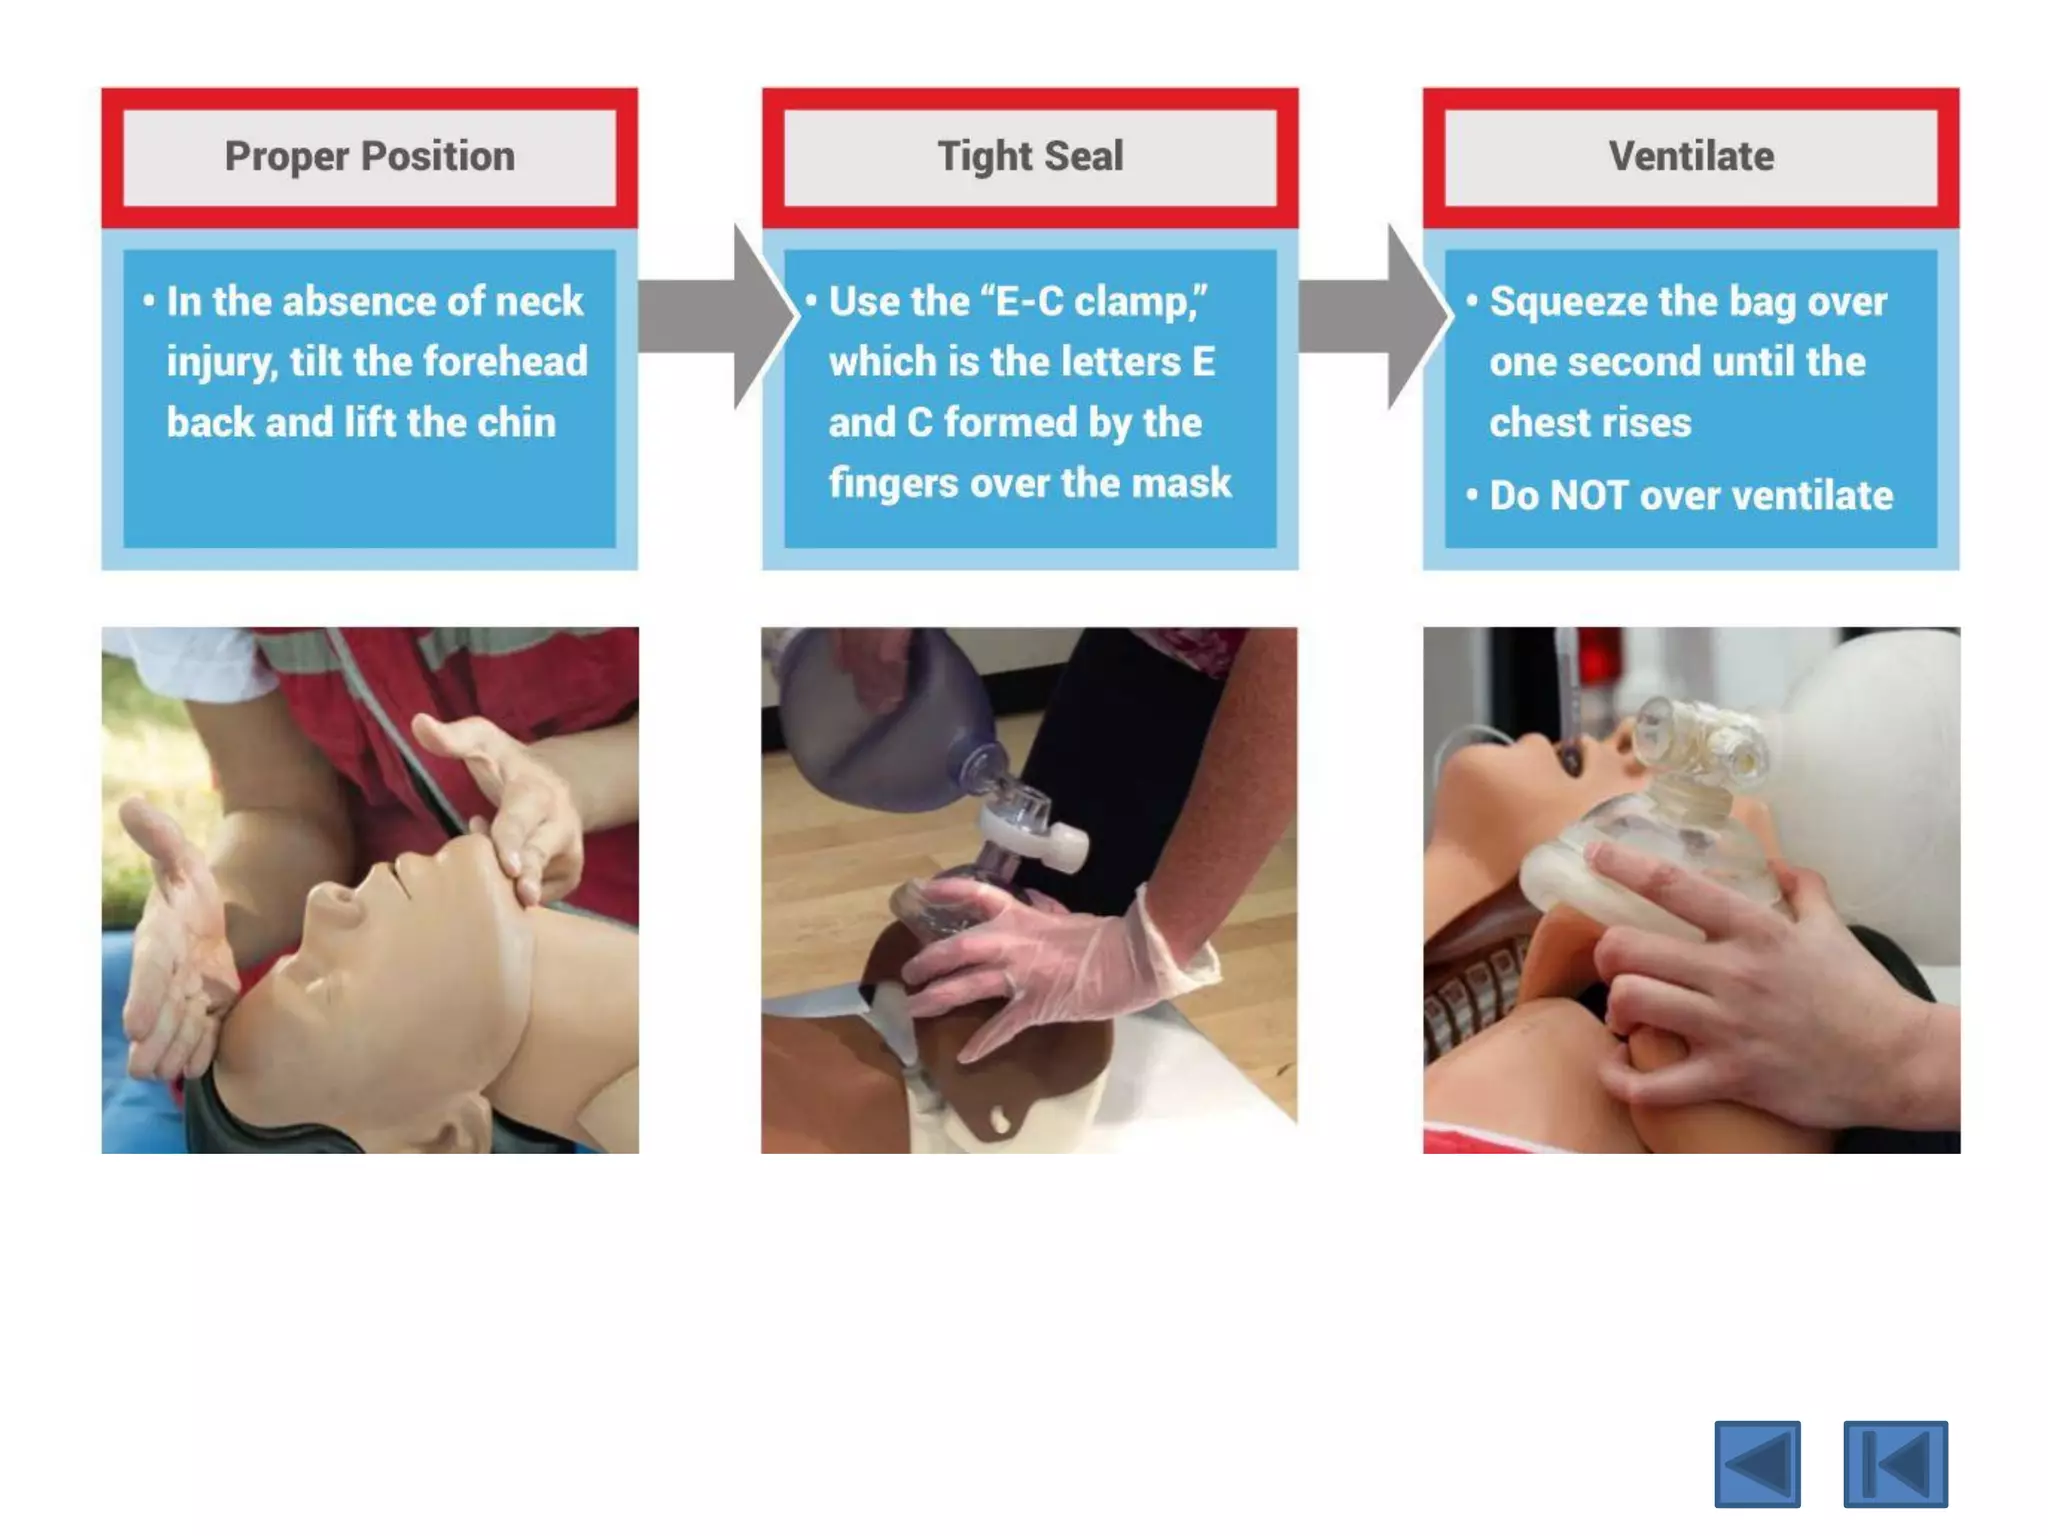
Techniques for opening airways, performing CPR correctly, and providing oxygen and ventilation. PALS cardiac arrest algorithm detailing CPR procedures, adrenaline administration, and advanced airways.
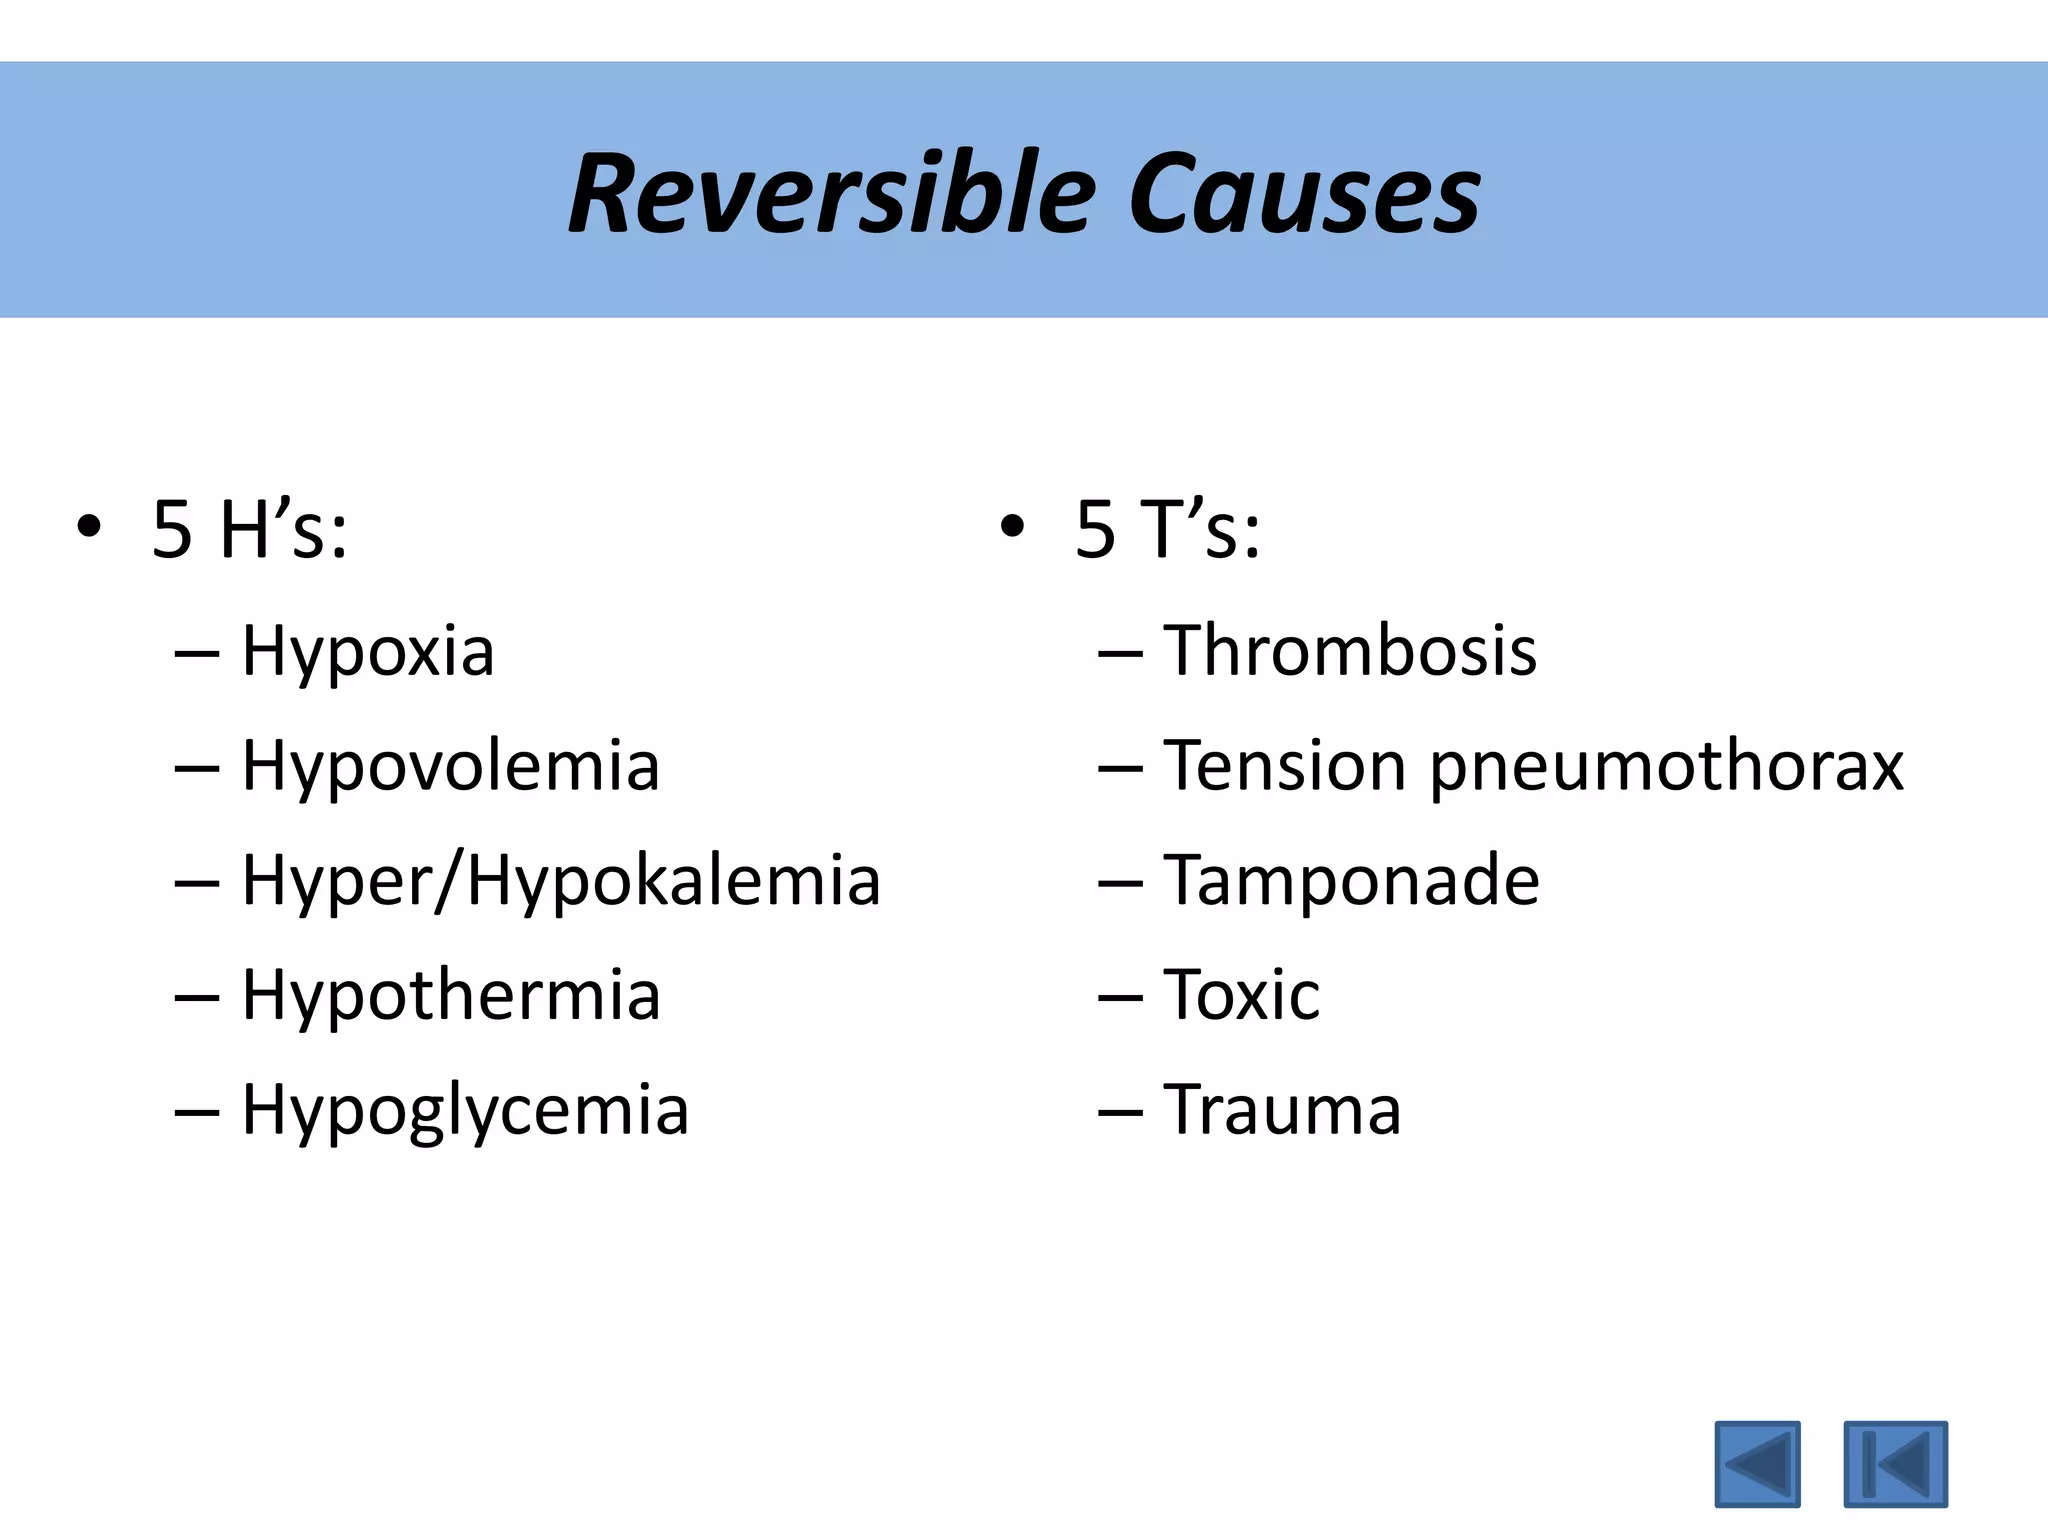
Understanding 5 H's and 5 T's in treatment, evaluating primary and secondary assessments for pediatric patients.
Detailed assessment of Airway, Breathing, and Circulation along with secondary assessment procedures.


![[CPCR] CARDIOPULMONARY CEREBREAL RESUSCITATION PROCEDURES](https://cdn.slidesharecdn.com/ss_thumbnails/cardiopulmonaryresuscitation-250329164131-a99bc90d-thumbnail.jpg?width=640&height=640&fit=bounds)


