Download to read offline


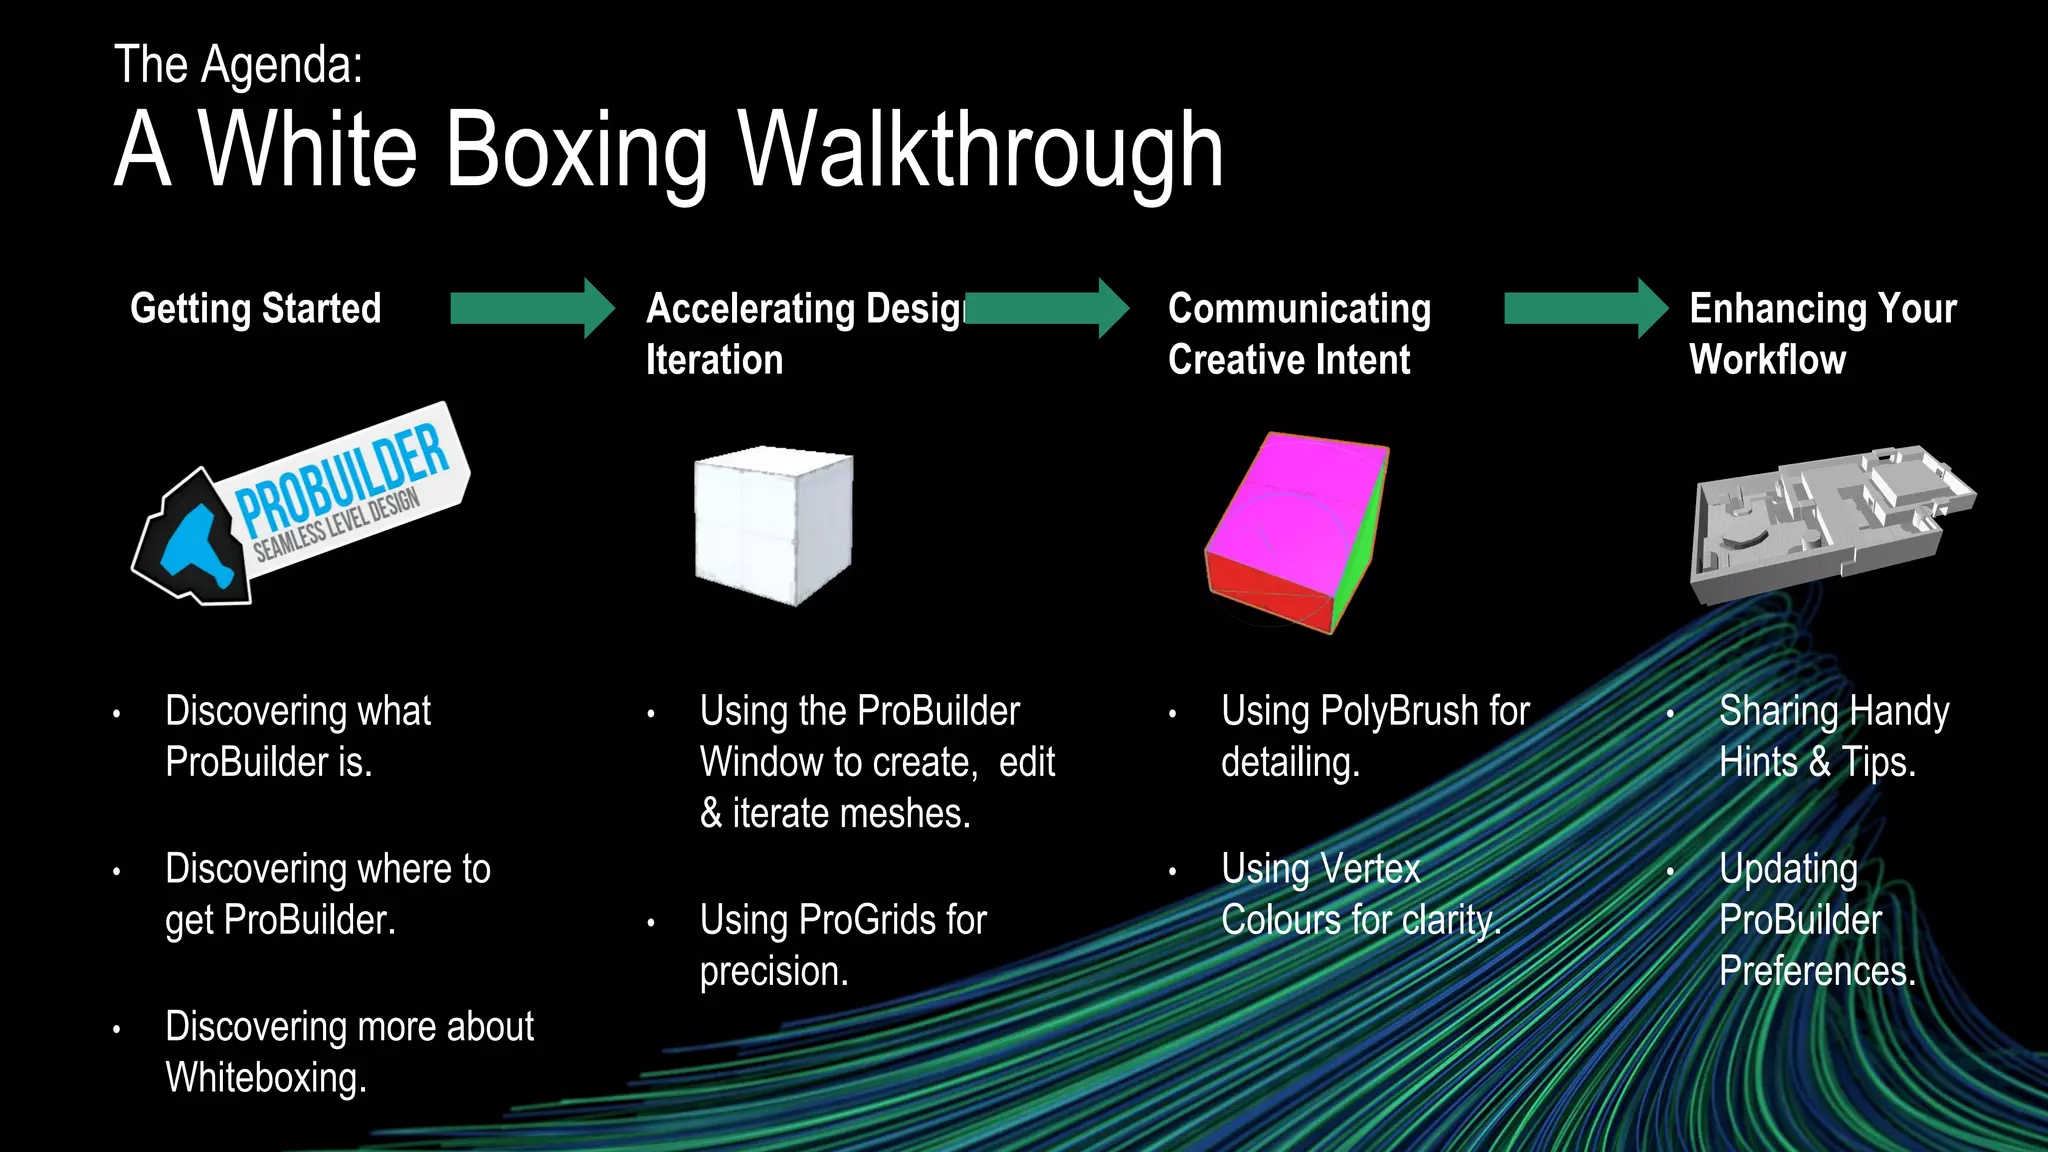

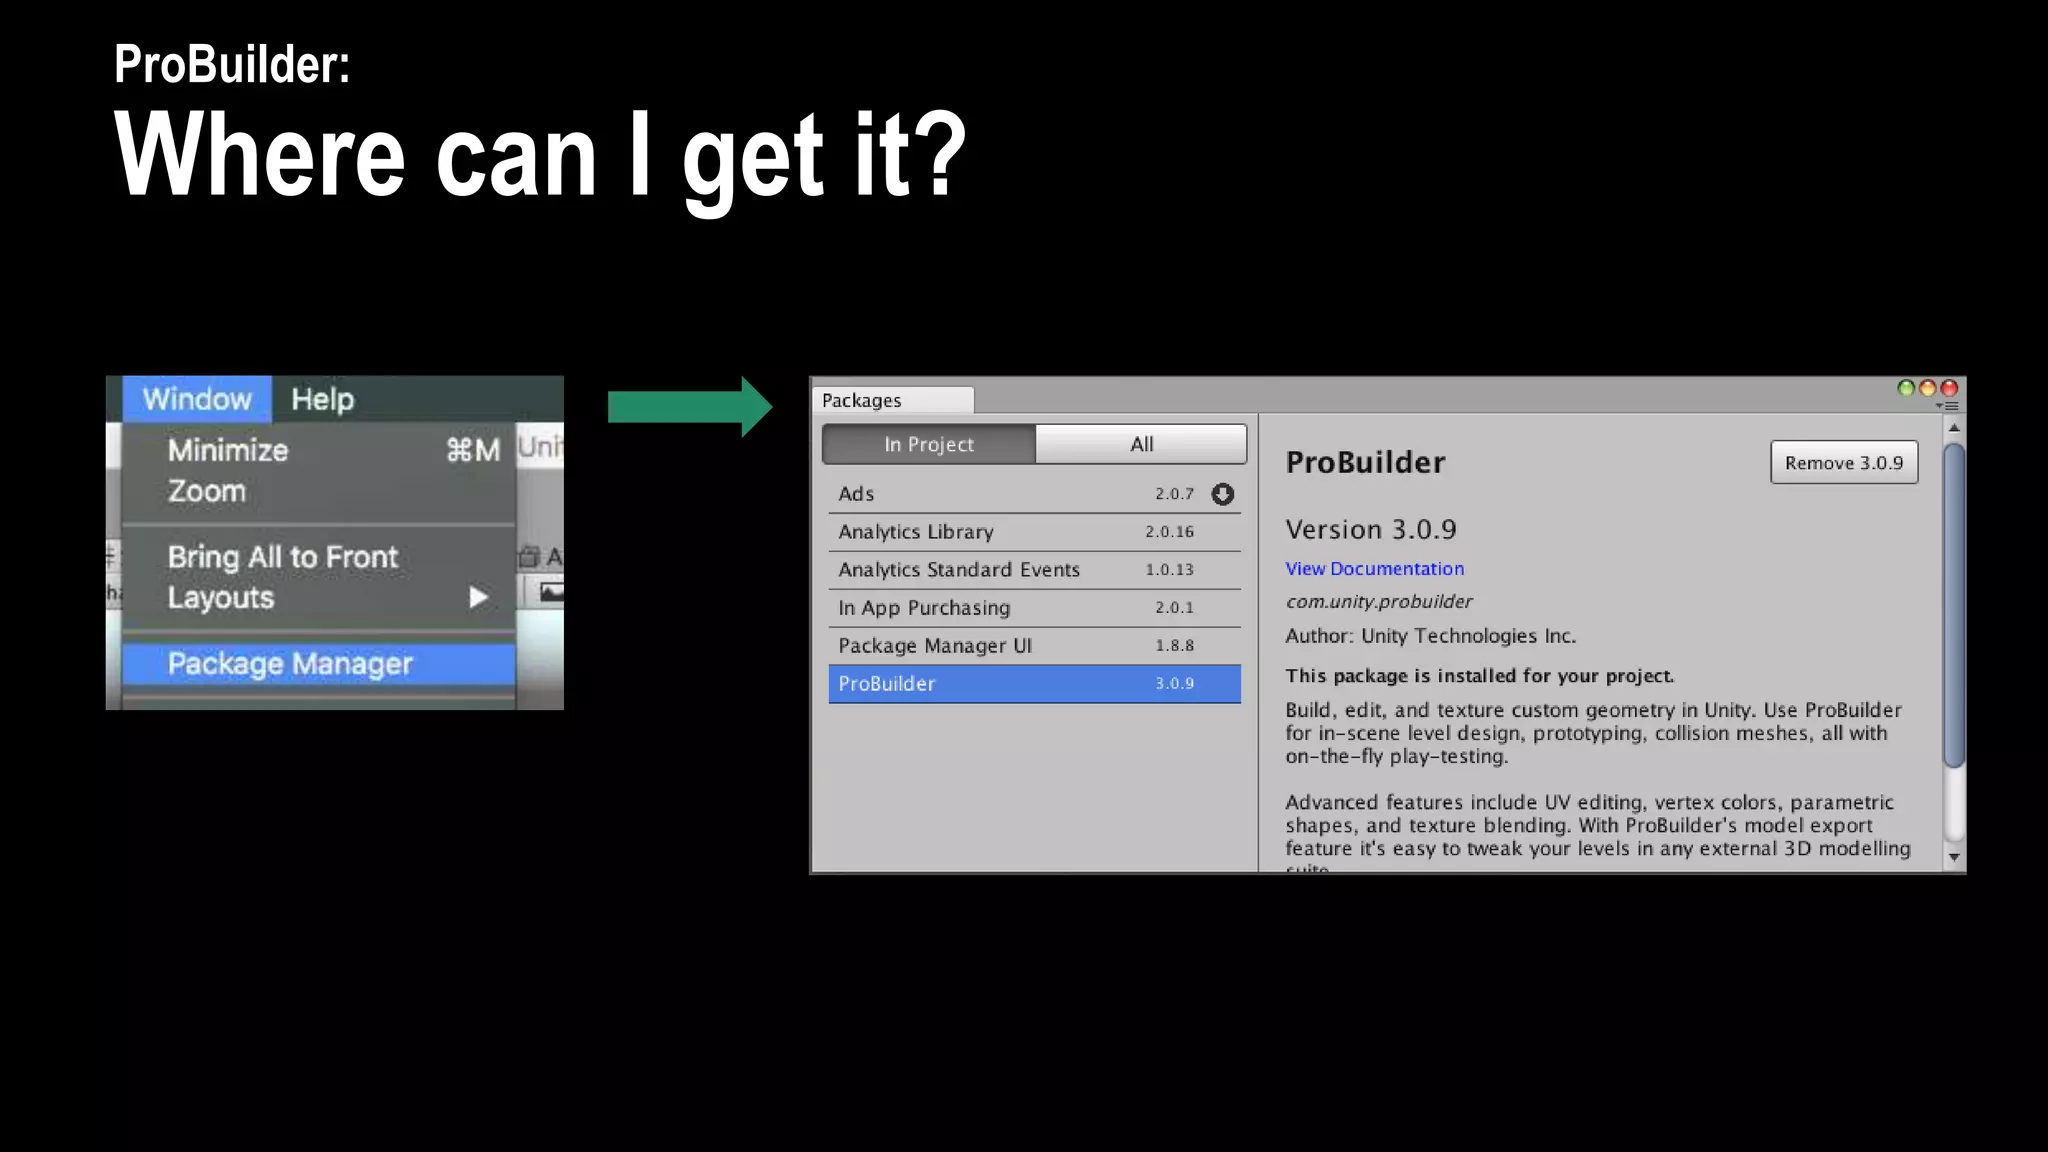


The document provides an overview of ProBuilder, a tool for 3D modeling and mesh editing within the Unity editor, focusing on level design and prototyping through techniques like white boxing. It outlines how to get started with ProBuilder, use its features for design iteration and workflow enhancements, and offers resources for further learning. Overall, it highlights how ProBuilder can streamline the creation and editing of game levels, facilitating early identification of design issues.
![[IGC 2017] 블루홀 최준혁 - '플레이어언노운스 배틀그라운드' DEV 스토리](https://cdn.slidesharecdn.com/ss_thumbnails/igcpubgdevstoryfinalforsharing-170906062941-thumbnail.jpg?width=640&height=640&fit=bounds)
![[NDC 16] 당신은 사랑 받기 위해 태어난 사람: 3년차 게임 디자이너의 자존감 찾기](https://cdn.slidesharecdn.com/ss_thumbnails/ndc16-160426032009-thumbnail.jpg?width=640&height=640&fit=bounds)


![[NDC 2021] 게임 PD가 되어 보니](https://cdn.slidesharecdn.com/ss_thumbnails/2021-210709020918-thumbnail.jpg?width=640&height=640&fit=bounds)