Download as PDF, PPTX


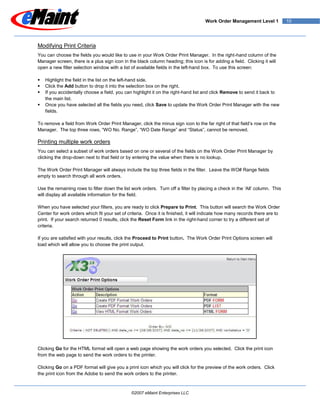


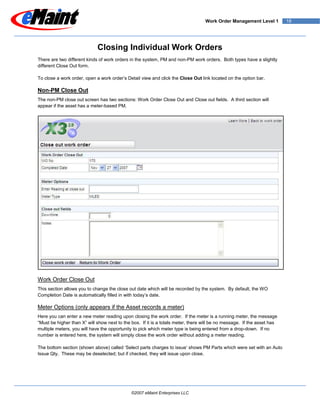
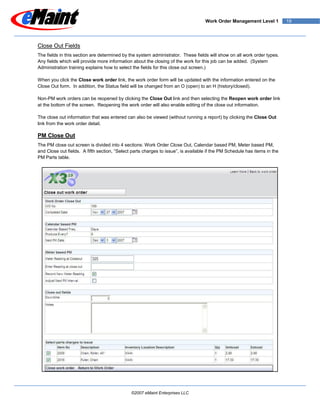

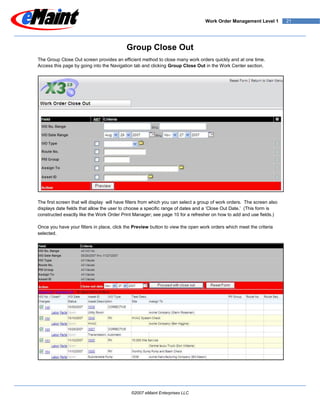

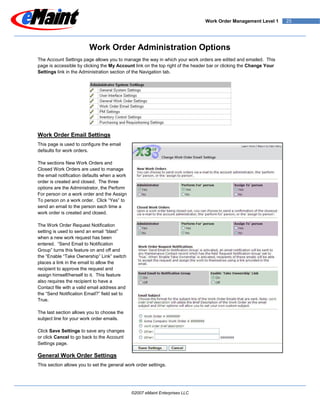


This document provides an overview of the tools available in a work order management system to manage work orders and work requests. It describes how to filter and sort work orders, create work orders, assign personnel, manage work requests, print work orders, track charges against work orders including parts, labor, and other charges, purchase from work orders, close out work orders, and configure administrative settings. The level 1 course provides basic instruction on the core functionality for work order and request management.


![]project-open[ Workflow Developer Tutorial Part 2](https://cdn.slidesharecdn.com/ss_thumbnails/po-workflow-tutorial-2-edi-example-100603-101013103908-phpapp01-thumbnail.jpg?width=640&height=640&fit=bounds)


