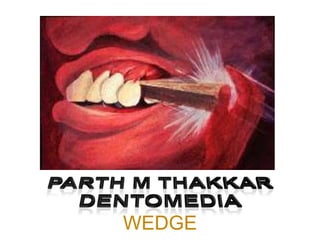
wedges
•
96 likes•49,063 views

Wedges come in various sizes and shapes to adapt dental matrices to tooth preparations. They are typically small triangular pieces of wood or plastic that are inserted between the matrix and tooth. Proper wedge placement is important to prevent excess material at the gingival margin - the wedge should be positioned near the gingival margin without extending past it. Multiple wedges or custom wedges may be used in certain situations to ensure a tight matrix adaptation.

Recommended
More Related Content
What's hot
What's hot (20)
Similar to wedges
Similar to wedges (20)
More from Parth Thakkar
More from Parth Thakkar (20)
Recently uploaded
Recently uploaded (20)
wedges
- 1. WEDGE
- 2. WEDGE Wedges are small, tapering, triangular pieces of wood or clear plastic about 1/2 inch in length.
- 4. SIZE & SHAPE SIZE:- 12 inches (1.2CM) Wedges are available in various sizes, which may be color coded. They are either plain (straight) or anatomically (triangular) shaped.
- 5. Wedges come in many sizes and shapes and can be customized for almost any situation. If the proper size can not be found, they can be modified to fit the interproximal area by cutting the wood away.
- 6. MODE OF INSERTION Break off approximately inch of a round toothpick. Grasp the broken end of the wedge with the no. 110 pliers. The wedge is generally placed on the lingual, away from the side of the tooth on which the retainer is located. The lingual embrasure is also usually the widest of the two embrasures, and therefore is often in greater need of the adaptation of the band by the wedge.
- 7. POSITION & PLACEMENT A wedge should be positioned as near to the gingival cavosurface margin as possible without being occlusal to it. If necessary, the gingival aspect of the wedge may be lightly wetted with lubricant to facilitate its placement. The wedge not only stabilizes the matrix but more importantly it is placed below the gingival cavosurface margin to prevent amalgam from flowing beyond the cavosurface margin in that area. This area is the most inaccessible area for carving instruments, therefore it is critical to place a wedge that will prevent excess amalgam flowing beyond the gingival margin and forming overhangs.
- 8. If the wedge is placed occlusal to the gingival margin, the band will be pressed into the preparation, creating an abnormal concavity in the proximal surface of the restoration. The wedge should not be so far apical to the gingival margin that the band will not be held tightly against the gingival margin. This improper wedge placement will result in gingival excess caused by the band moving slightly away from the margin during condensation of the amalgam. Such an overhang often goes undetected and may result in irritation of the gingival or an area of plaque accumulation. Correct Correct & Incorrect wedge position
- 9. PIGGY BACK WEDGE If the wedge is significantly apical of the gingival margin, a second (usually smaller) wedge may be placed on top of the first to wedge adequately the matrix against the margin. This type of wedging is particularly useful for patients whose interproximal tissue level has receded.
- 10. TIGHTNESS The gingival wedge should be tight enough to prevent any possibility of an overhang of amalgam in at least the middle two third of the gingival margin.
- 11. DOUBLE WEDGING Indication:- Double wedging is permitted (if access allows,) securing the matrix when the proximal box is wide faciolingually.
- 12. Procedure:- Double wedging refers to using two wedges: one from the lingual embrasure and one from facial embrasure. Two wedges help to ensure that the gingival corner of the wide proximal box can be properly condensed,they also help to minimize gingival excess. However double wedging should be used only if the middle two third of the proximal margin can be adequately wedged. Because of the facial and lingual corner are accessible to carving proper wedging is important to prevent gingival excess of amalgam in the middle two third of the proximal box.
- 13. WEDGE WEDGING:- Occasionally concavity may be present on the proximal surface that is apparent in the gingival margin. This may occur on a surface with a fluted root such as the mesial surface of the maxillary 1st premolar.
- 14. A gingival margin located in this area may be concave. To wedge a matrix band tightly against such a margin a second pointed wedge can be inserted between the 1st wedge and the band. This is referred as wedge wedging The wedging action between the teeth should provide enough separation to compensate for the thickness of the matrix band. This will ensure a positive contact relationship after the matrix is removed
- 15. TEST FOR TIGHTNESS OF THE WEDGE Test for tightness of the wedge by pressing the tip of an explorer firmly at the several point along the middle two thirds of the gingival margin (against the matrix band) to verify that it can not be move away from the gingival margin. As an additional test, attempt to remove the wedge (using the explorer with moderate pressure) after first having set the explorer tip into the wood near the broken end. Moderate pulling should not cause dislodgement.
- 16. Use explorer tip (with pressure) to ensure proper adaptation of band to gingival margin. Press and drag the tip of the explorer along the gingival margin in both directions to ensure to removal of any remaining friable enamel.
- 17. TRIANGULAR (ANATOMIC) WEDGE The triangular (i.e., anatomic) wedge is recommended for a preparation with a deep gingival margin. The triangular wedge is usually indicated with the tofflemire MOD matrix band. The triangular wedge is positioned similarly to the round wedge, and the goal is the same.
- 18. When the gingival margin is deep (cervically) the base of the triangular wedge will more readily engage the tooth gingival to the margin without causing excessive soft tissue displacement. The anatomic wedge is preferred for deeply extended gingival margins because its greatest cross- sectional dimension is at its base.
- 19. CUSTOM MADE TONNGUE BLADE WEDGE A suitably trimmed tongue blade can wedge a matrix where the interproximal spacing between teeth is large. Occasionally, however, it is impossible to use a wedge to secure the matrix band . In this case, the band must be sufficiently tight to minimize the gingival excess of amalgam. Because the band is not wedged, special care must be exercised by placing small amounts of amalgam in the gingival floor and condensing the first 1 mm of amalgam lightly, but thoroughly, in a gingival direction.
- 20. SUPPORT WITH HOLLENBACK CARVER BLADE Supporting the matrix material with the blade of a Hollenbeck carver during the insertion of the wedge for the difficult deep gingival restoration may be helpful. The tip of the blade is placed between the matrix and gingival margin and then the “heel” of the blade is leaned against the matrix and adjacent tooth. In this position the blade supports the matrix to help both in positioning the wedge sufficiently gingivally and preventing the wedge from pushing the matrix into the preparation. After the wedge is properly inserted, the blade is gently removed.