SlideShare a Scribd company logo
1 of 70
COMPLEX
AMALGAM
Dr. Swarneet kakpure
(PG I)
Dept of Conservative
dentistry and Endodontics.
CONTENTS
• Definition
• Indications, Contraindications, Advantages, disadvantages
• Pin-Retained Amalgam Restorations
• Slot-Retained Amalgam Restorations
• Amalgam foundations
• Use of Desensitizer or Bonding System
• Matrix Placement
• Inserting the Amalgam.
• Contouring and Finishing the Amalgam
Definition
 Complex amalgam restorations are the one which are
used to replace one or more missing cusps of teeth that
have been fractured or are severely involved with caries
or existing restorative material.
INDICATIONS
when large amounts of tooth structure
are missing
when one or more cusps need
capping
when increased resistance and
retention forms are needed.
teeth that have a questionable pulpal
and/or periodontal prognosis
As definitive (final) restorations.
as interim restorations
CONTRAINDICATIONS
Esthetically important areas
If the tooth cannot be properly
restored with a direct restoration
because of anatomic and/or functional
considerations
ADVANTAGES
 Conserves Tooth Structure
 Appointment Time-The complex
restoration can be completed in one
appointment. The cast restoration
requires at least two appointments.
 Resistance and Retention Forms- it
may be significantly increased by the
use of pins, slots, and bonding.
 Age and Health of the Patient- For some geriatric
and debilitated patients, the complex amalgam
restoration may be the treatment of choice over the
more expensive and time-consuming cast
restoration.
 Economics- Compared to an indirect restoration,
the amalgam restoration is a relatively inexpensive
restorative procedure.
DISADVANTAGES
Dentinal Microfractures- Preparing
pinholes and placing pins may create
craze lines or fractures.
Microleakage- In amalgam
restorations using cavity varnish,
microleakage around all types of pins
has been demonstrated.
Tooth Anatomy- Proper contours and
occlusal contacts, and/or anatomy, are
sometimes difficult to achieve with
large complex restorations.
CLINICAL TECHNIQUE
Pin-Retained Amalgam Restorations
 A pin retained restoration may be defined as ‘‘any restoration
requiring the placement of one or more pins in the dentin to
provide adequate resistance and retention forms’’.
Advantages-
 Amalgam restorations including pins have significantly greater
retention than those using boxes only or those relying solely on
bonding systems.
Disadvantages-
 Penetration and Perforation
 Dentinal Microfractures
Indications
When severe carious destruction or
cusp fracture Has resulted in loss of
4mm or more vertical coronal height.
whenever adequate resistance and
retention forms cannot be established
with slots, locks, or undercuts only.
It is an important adjunct in the
restoration of teeth with extensive
caries or fractures.
Types of Pins
self-
threading
pin
friction-
locked pin
cemented
pins
CEMENTED PINS
 In 1958 by Markley".
 They are cemented into pinholes
prepared 0.025 to 0.05 mm larger than
the diameter of the pin.
 The cementing medium may be any
standard dental luting agent.
How cemented pins are
placed……
FRICTION-LOCKED PIN
 In 1966, by Goldstein
 the diameter of the prepared pinhole
is 0.025 mm smaller than the
diameter of the pin.
 The pins are tapped into place,
retained by the resiliency of the
dentin.
 They are 2 to 3 times more retentive
than cemented pins.
SELF-THREADING PIN
 described by Going in 1966.
 The diameter of the prepared
pinhole is 0.03-0.10 mm smaller
than the diameter of the pin.
 The threads engage the dentin as it
is inserted, retaining the pin.
 The elasticity (resiliency) of the
dentin permits insertion of a
threaded pin into a hole of smaller
diameter.
 The self-threading pin is the most
retentive of the three types of pins,
being three to six times more
retentive than the cemented pin .
Depth of pinhole 1.3-2 mm(depending on
diameter of pin used)
Recommonded pinhole depth 2mm
Thread Mate System (TMS)
Most widely used Because of its:
• versatility
• wide range of pin sizes
• color-coding system
• greater retentiveness
Factors Affecting the Retention of the Pin in
Dentin and Amalgam
Type
Surface characteristics
Orientation, number, and
diameter
Extension into dentin and
amalgam
Type-
 In the order of retentiveness in the dentin
Surface characteristics-
The number and depth of the elevations (serrations or threads)
on the pin influence retention of the pin in the amalgam
restoration
 The shape of the self-threading pin gives it the greatest
retention value.
Cemented pin Friction locked pin Self-threading pin
Orientation, number, and diameter-
 Placing pins in a nonparallel manner increases their retention.
 Bending pins to improve retention in amalgam is not
desirable because bends may interfere with adequate
condensation of amalgam around the pin and thereby
decrease amalgam retention.
Increasing the
number of pins
Increases retention
 But As the number of pins increases:
(1) the crazing of the dentin and the potential for fracture
increase,
(2) the amount of available dentin between the pins decreases;
(3) the strength of the amalgam restoration decreases.
As Diameter of the pin
increases
Retention in dentin and
amalgam increases
number, depth, and
diameter of pins increase
danger of perforating into
the pulp or the external
tooth surface increases
Extension into dentin and amalgam
 Approx 1.5-2 mm to preserve strength of dentin and amalgam
 Extension greater than this is contraindicated.
Pin Placement Factors and Techniques
size Color code
Regular
(0.78mm)
Gold
Minim
(0.61mm)
Silver
Minikin
(0.48mm)
Red
Minuta
(0.38mm)
Pink
 Four sizes of TMS pins are available each with
corresponding color coded drill.
Regular (0.78mm):
 Larger diameter pin have greatest retention.
 Of all 4 pins,regular pin is associated with highest
incidence of dentinal crack communition with
pulp chamber.
Minim (0.64mm)-
Used as a backup incase the pinhole minikin is
overprepared or pin threads strip dentin during
placement resulting in lack of minikin pin
retention in dentin.
Minikin (0.48mm)-
Pin of choice for severely involved
posterior teeth.
Advantages-
1. Reduce risk of dentin crazing
2. Reduce risk of pulpal penetration
3. Reduce risk of root surface
perforation.
Minuta (0.38mm):
 Half as retentive as minikin & 1/3 rd
as retentive as minim pin.
 Too small to provide retention in
posterior teeth.
Number of pins
 Several factors must be considered when deciding how many pins
are required.
 As a rule, one pin per missing axial line angle should be used.
The amount of missing tooth structure
The amount of retention required
The amount of dentin available to receive pins
safely
The size of the pins.
Location
 Several factors aid in determining pinhole locations:
knowledge of normal pulp
anatomy and external tooth
contours
a current radiograph of the
tooth
the patient's age
In the cervical one third of molars and premolars pinholes
should be located near the line angles of the tooth.
The pinhole should be positioned no closer than 0.5 to 1
mm to the DEJ or no closer than 1 to 1.5 mm to the external
surface of the tooth, whichever distance is greater.
Check gingival crevice if any abnormal contours exist that
would predispose the tooth to an external perforation.
As a rule, the pinhole should be parallel to the adjacent
external surface of the tooth.
 Position of pinhole must not result in pin being so close to vertical
wall that condensation of amalgam against pin or wall get
hampered.
minimum 0.5mm clearance around the
circumferance of pin for adequate condensation of
amalgam.
if pin is inappropriately placed, the operator should
provide clearance around the pin to provide
sufficient space for smallest condenser nib.
A no 169L bur may be used for this.
Pinhole should be prepared on flat surface
Whenever three or more pinholes are placed, they
should be located at different vertical levels on
tooth (which reduces stress).
Minimum interpin distance
 Maximal interpin distance results in lower levels of stress in dentin.
 furcal areas should be avoided.Specifically, external perforation
may result from pinhole placement.
Minikin 3mm
Minim 5mm
over the prominent mesial concavity of
the maxillary first premolar
At the midlingual and midfacial
bifurcations of the mandibular first and
second molars
at the midfacial, midmesial, and
middistal furcations of the maxillary
first and second molars.
 Pulpal penetration may result from pin placement at the
mesiofacial corner of the maxillary first molar and the mandibular
first molar.
 When possible, the location of pinholes on the distal surface of
mandibular molars and lingual surface of maxillary molars should
be avoided.
 Obtaining the proper direction for preparing a pinhole in these
locations is difficult because of the abrupt flaring of the roots just
apical to the cemento-enamel junction (CEJ).
 If the pinhole is placed parallel to the external surface of the tooth
crown in these areas, penetration into the pulp is likely. When the
pinhole locations have been determined,
 A No. 1/ 4 bur is first used to
prepare a pilot hole (dimple)
approximately one half the
diameter of the bur at each
location.
 The purpose of this hole is to
permit more accurate
placement of the twist drill
and to prevent the drill from
"crawling" once it has begun
to rotate.
Pinhole preparation
 The Kodex drill (a twist drill)
should be used for preparing
pinholes .
 The aluminum shank of drill,
which acts as a heat absorber, is
color coded so that it can be
easily matched with the
appropriate pin size.
 Because the optimal depth of the
pinhole into the dentin is 2 mm
(only 1.5 mm for the Minikin
pin), a depth-limiting drill should
be used to prepare the hole.
 Only when this type of drill prepares a hole on a flat surface that is
perpendicular to the drill it will prepare the pinhole to the correct
depth.
 When the location for starting a pinhole is neither flat nor
perpendicular to the desired pinhole direction, either flatten the
location area or use the standard twist drill, whose blades are 4 to 5
mm in length, to prepare a pinhole that has an effective depth.
Technique of creating properly aligned pinhole
view the drill from a 90-degree angle to the previous viewing position to acertain that the
drill is also correctly angled in this plane
without changing the angulation obtained from the crevice position, move the handpiece
occlusally and place the drill in the previously prepared pilot hole.
position it until it lies flat against the external surface of the tooth,
place the drill in the gingival crevice beside the location for the pinhole,
Place drill in the latch-type contra-angle handpiece
The drill should never stop rotating (from insertion to removal from the
pinhole) to prevent the drill from breaking while in the pinhole.
a steady stream of air may be applied to the drill to dissipate heat.
Incorrect angulation of the drill may result in pulpal exposure or external
perforation.
Pin design
 For each of the sizes of TMS pins, several designs are available:
standard
self-
shearing
two-in
one
Link
Series
Link Plus
The Link Series pin
 Contained in a color-coded plastic sleeve that fits a latch-type
contra-angle handpiece or the specially designed plastic hand
wrench.
 The pin is somewhat free floating in the plastic sleeve to allow it to
align itself as it is threaded into the pinhole.
 When the pin reaches the bottom of the hole, the top portion of the
pin shears off, leaving a length of pin extending from the dentin.
The plastic sleeve is then discarded.
 The Minuta, Minikin, Minim, and Regular pins are available in the
Link Series. The Link Series pins are recommended because of their
versatility, self-aligning ability, and retentiveness.
The Link Plus pins
 are self-shearing and are available as a single or two-in-one pin
contained in a color-coded plastic sleeve.
 This design has a sharper thread, a shoulder stop at 2 mm, and a
tapered tip to more readily fit the bottom of the pinhole as prepared
by the twist drill.
 It also provides a 2.7-mm length of pin to extend out of the dentin,
which usually needs to be shortened.
Pin insertion
 Instruments for insertion of threaded pins are available:
1. conventional latch-type contra-angle handpiece ,
2. TMS hand wrenches.
 When using the latch-type handpiece, insert a Link Series or a Link
Plus pin into the handpiece and place the pin in the pinhole.
 Activate the handpiece at low speed until the plastic sleeve shears
from the pin.
 Then, remove the sleeve and discard it.
 For low-speed handpieces with a low gear, the low gear should be
used.
 Using low gear increases the torque and increases the tactile sense
of operator.
The latch-type handpiece is recommended for the insertion
of the Link Series and the Link Plus pins
The hand wrench is recommended for the insertion of standard
pins.
 It also reduces the risk of stripping the threads in the dentin once the
pin is in place.
 A standard design pin is placed in the appropriate wrench and
slowly threaded clockwise into the pinhole until a definite resistance
is felt when the pin reaches the bottom of the hole.
 The pin should then be rotated one-quarter to one-half turn
counterclockwise to reduce the dentinal stress created by the end of
the pin pressing the dentin.
 Carefully remove the hand wrench from the pin. If the hand wrench
is used without rubber dam isolation, a gauze throat shield must be
in place, and a strand of dental tape approximately 12 to 15 inches
(30 to 38 cm) in length should be securely tied to the end of the
wrench.
 These precautions will prevent the patient from swallowing or
aspirating the hand wrench should it be dropped accidentally.
 Once the pins are placed, evaluate their length. Any length of pin
greater than 2 mm should be removed.
 2 mm of pin length into amalgam is optimal. Also, whenever
possible, it is desirable to have at least 2 mm thickness of amalgam
occlusal to the end of the pin to prevent unnecessary weakening of
the restoration.
 To remove the excess length of pin, use a sharp No. 1/a, 1/2, or
169L bur at high speed and oriented perpendicular to the pin.
 During removal of excess pin length, the assistant may apply a
steady stream of air to the pin and have the evacuator tip positioned
to remove the pin segment.
 After placement, the pin should be tight, immobile, and not easily
withdrawn.
 Using a mirror, view the preparation from all directions (particularly
from the occlusal) to determine if any pins need to be bent to
position them within the anticipated contour of the final restoration.
 Pins are not to be bent to make them parallel or to increase their
retentiveness. However, occasionally, bending a pin may be
necessary to allow for condensation of amalgam occluso-gingivally.
 When pins require bending, the TMS bending tool must be used.
 The bending tool should be placed on the pin where the pin is to be
bent, and with firm controlled pressure, the bending tool should be
rotated until the desired amount of bend is achieved.
 Use of the bending tool allows placement of the fulcrum at some
point along the length of the exposed pin.
 A hand instrument such as an amalgam condenser or
Black spoon excavator should not be used to bend a pin
because the location of the fulcrum will be at the orifice
of the pinhole.
 These hand instruments may cause crazing or fracture of
the dentin, and the abrupt or sharp bend that usually
results, increases the chance of breaking the pin.
 Also, the operator has less control when pressure is
applied with a hand instrument, and the chance of
slipping is increased.
Possible Problems With Pins
• Failure of pin-retained
restorations
• Broken drills and broken pins
• Loose pins.
• Penetration into the pulp and
perforation of the external
tooth surface
Slot-Retained Amalgam Restorations
Indications-
Definition- a slot is a retention groove in dentin
Slots are particularly indicated in horizontal
areas of short clinical crowns where loss of
vertical height is appox. 2-4 mm.
Slot retention may be used in conjunction
with pin retention, or as an alternative to it.
Tooth Preparation for Slot-Retained Amalgam
 Slot are prepared in the gingival floor of preperation with no 330
bur.
 Slots should be,
 Increasing width and depth doesn’t increase retentive strength
 Shorter slots provide much resistance to horizontal forces as do
longer slots.
• 1mm wide ,1mm deep
• Placed in line angle areas of tooth
• 2-4mm in length
• Positioned 0.5-1mm inside DEJ
• One slot per missing line angle
Amalgam Foundations
 A foundation is an initial
restoration of a severely
involved tooth & serve to
replace lost tooth structure
necessary to provide resistance
& retention forms for final
indirect restoration (eg. crown
or bridge).
 The foundation also should
provide resistance form against
forces that otherwise might
fracture the remaining tooth
structure.
 Unlike a conventional amalgam restoration, an amalgam
foundation may not depend primarily on remaining coronal
tooth structure for support. Instead, it may rely mainly on
secondary preparation retention features (pins, slots, coves, and
proximal retention locks) and somewhat on bonding benefits.
 A temporary or caries control restoration is used to restore a
tooth temporarily and/or to control caries in a tooth.
when definitive treatment is uncertain
when several teeth require immediate attention for control of
caries.
when a tooth's prognosis is questionable.
 foundations are placed in preparation for a full crown, especially
in endodontically treated teeth.
 The restorative materials used for foundations include amalgam,
composite, and reinforced glass ionomer cermets.
 Of the direct filling materials, amalgam is preferred because it is
easy to use and stronger than composite or cermets
RESTORATIVE TECHNIQUES
Use of Desensitizer or
Bonding System
Matrix Placement
Inserting the Amalgam
Contouring and
Finishing the Amalgam.
Use of Desensitizer or Bonding System
 Once the preparation is completed with the necessary resistance
and retention forms incorporated, clean the preparation, if
indicated, with air/water spray and remove visible moisture
without desiccating the tooth.
 Inspect for detection and removal of any debris.
 to reduce dentin permeability and seal the dentin, use a dentin
desensitizer.
Matrix Placement
 One of the most difficult steps in restoring a severely involved posterior
tooth is development of a satisfactory matrix.
Universal Matrix-
 The Tofflemire retainer and band can be used successfully for the majority
of posterior amalgam restorations.
 It requires sufficient tooth structure to retain the band after it is applied.
 Loosen the Tofflemire retainer one-half
turn, and insert the strip of matrix
material next to the opening, between
the matrix band and the tooth.
 Tighten the retainer and complete the
matrix.
 Sometimes, it is helpful to condense a
small amount of softened compound
between the strip and open aspect of
the band retainer to stabilize and
support the strip further.
 When very little tooth structure
remains and deep gingival margins are
present, the Tofflemire matrix may not
function successfully. In the following
sections the Automatrix system
(Dentsply Caulk, Milford, Delaware) is
presented for use when minimal tooth
structure is available.
Automatrix
 The Automatrix is a retainerless
matrix system designed for any tooth
regardless of its circumference and
height. The Automatrix bands are
supplied in three widths:
 The medium band is available in two
thicknesses [0.038 and 0.05 mm].
 The 3/16 and 5/16 inch band widths
are available in the 0.002-inch
thickness only.
3/16 inch
1/4 inch
5/16 inch
Advantages-
convenience
improved visibility because of absence of a retainer
decreased time for application as compared to the
copper band matrix
ability to place the autolock loop on the facial or
lingual surface of the tooth,
Disadvantages-
band is flat and difficult to burnish
development of proper proximal contours and
contacts can be difficult with the Automatrix bands
Inserting the Amalgam.
 A high-copper alloy is strongly recommended for the complex
amalgam restoration because of excellent clinical performance
and high early compressive strengths.
 spherical alloys can be condensed quicker with less pressure to
ensure good adaptation around the pins.
 However, proximal contacts may be easier to achieve with
admixed alloys because of their condensability.
Triturate a mix of amalgam and with the
amalgam carrier, transfer some of the
amalgam to the gingival portion of the
preparation.
Using appropriately sized condensers,
condense each increment of amalgam.
condense the amalgam thoroughly in and
around the retentive features of the
preparation, such as slots, grooves and pins
If amalgam becomes dry or crumbly,
immediately triturate a new mix
Continue condensation until the
preparation is overfilled
Do not spend too much time on
occlusal carving without allowing
adequate time for carving the more
inaccessible gingival margins and
proximal and axial contours.
First, remove the bulk of excess
amalgam on the occlusal surface
and grossly develop the anatomy,
Accurately developed marginal
ridge heights and embrasures
reduce the potential of fracturing
the marginal ridge(s) when the
matrix is removed
 If the matrix is removed prematurely, there is risk of amalgam
fracture causing loss of the restoration.
 Tofflemire-retained matrices are removed first by loosening and
removing the retainer, and then removing the matrix band with
laterally oriented, short-range movements
 Do not attempt to remove any matrix vertically because this will
apply dislodging forces on the recently placed restoration.
 Automatrix bands are removed by using the system's instruments
and once the band is open, by the same technique described for the
Tofflemire-retained matrices.
With the wedges still in place
to maintain passive pressure
on the band from the adjacent
tooth, remove the Tofflemire
retainer from the band
Then, remove each end of the
band by sliding it in an
oblique direction (i.e., move
the band facially or lingually
while simultaneously moving
it in an occlusal direction).
remove the wedges and with
an explorer remove any
interproximal gingival excess.
Develop facial and lingual
contours with a Hollenback
carver, amalgam knife, or an
explorer to complete the
carving
rotary instruments can be
used to complete the occlusal
carving if the amalgam has set
to a hardness
Appropriate round and flame-
shaped burs can be used to
develop occlusal anatomy.
Evaluate the margins with an
explorer and correct any
discrepancy.
Evaluate the adequacy of each
proximal contact by using a
mirror occlusally and lingually to
ensure that no light can be
reflected between the restoration
and the adjacent tooth at the level
of the proximal contact.
The amalgam forming the walls
of this "ideal" preparation must
have sufficient bulk to prevent
future fracture.
Remove the rubber dam and
evaluate the occlusal contacts
Thin, unwaxed dental floss may
be passed through the proximal
contacts one time to help smooth
the amalgam proximal surface
Passing the floss through a
contact more than once may
weaken a contact
 Caution the patient not to apply biting forces to the restoration for
several hours.
 When an amalgam foundation is being placed, if a fast-setting high-
copper amalgam is used, the final crown or onlay preparation can be
initiated within 30 to 45 minutes of insertion of the foundation.
Contouring and Finishing the Amalgam
 Finish and polish the amalgam restoration, if desired.

More Related Content

What's hot

Root canal preparation techniques _ endodontic treatment
Root canal preparation techniques _ endodontic treatment Root canal preparation techniques _ endodontic treatment
Root canal preparation techniques _ endodontic treatment Israa Awadh
 
Jaw relation
Jaw relationJaw relation
Jaw relationIAU Dent
 
Biomechanical preparation in endodontics
Biomechanical preparation in endodonticsBiomechanical preparation in endodontics
Biomechanical preparation in endodonticsKarishma Ashok
 
Access cavity preparation
Access cavity preparationAccess cavity preparation
Access cavity preparationIAU Dent
 
Principle of tooth preparation
Principle of tooth preparationPrinciple of tooth preparation
Principle of tooth preparationApurva Thampi
 
Pin retained amalgam restorations
Pin retained amalgam restorationsPin retained amalgam restorations
Pin retained amalgam restorationsIAU Dent
 
Principles of tooth preparation in Fixed Partial Dentures
Principles of tooth preparation in Fixed Partial DenturesPrinciples of tooth preparation in Fixed Partial Dentures
Principles of tooth preparation in Fixed Partial DenturesVinay Kadavakolanu
 
Stainless steel crowns
Stainless steel crownsStainless steel crowns
Stainless steel crownsmahesh kumar
 
Isolation in dentistry
Isolation in dentistryIsolation in dentistry
Isolation in dentistryPiyush Verma
 
4.furcation involvement and its treatment
4.furcation involvement and its treatment4.furcation involvement and its treatment
4.furcation involvement and its treatmentpunitnaidu07
 

What's hot (20)

Root canal preparation techniques _ endodontic treatment
Root canal preparation techniques _ endodontic treatment Root canal preparation techniques _ endodontic treatment
Root canal preparation techniques _ endodontic treatment
 
Space maintainer
Space maintainerSpace maintainer
Space maintainer
 
Non carious lesion
Non  carious lesionNon  carious lesion
Non carious lesion
 
Jaw relation
Jaw relationJaw relation
Jaw relation
 
Biomechanical preparation in endodontics
Biomechanical preparation in endodonticsBiomechanical preparation in endodontics
Biomechanical preparation in endodontics
 
dentin bonding agents
dentin bonding agentsdentin bonding agents
dentin bonding agents
 
Caries activity test
Caries activity testCaries activity test
Caries activity test
 
07.non carious lesions
07.non carious lesions07.non carious lesions
07.non carious lesions
 
Mandibular Anesthesia : Inferior alveolar nerve block
Mandibular Anesthesia : Inferior alveolar nerve blockMandibular Anesthesia : Inferior alveolar nerve block
Mandibular Anesthesia : Inferior alveolar nerve block
 
Oral screen
Oral screenOral screen
Oral screen
 
Access cavity preparation
Access cavity preparationAccess cavity preparation
Access cavity preparation
 
Pulpectomy
PulpectomyPulpectomy
Pulpectomy
 
Principle of tooth preparation
Principle of tooth preparationPrinciple of tooth preparation
Principle of tooth preparation
 
Pulpotomy
Pulpotomy Pulpotomy
Pulpotomy
 
Pin retained amalgam restorations
Pin retained amalgam restorationsPin retained amalgam restorations
Pin retained amalgam restorations
 
Principles of tooth preparation in Fixed Partial Dentures
Principles of tooth preparation in Fixed Partial DenturesPrinciples of tooth preparation in Fixed Partial Dentures
Principles of tooth preparation in Fixed Partial Dentures
 
Stainless steel crowns
Stainless steel crownsStainless steel crowns
Stainless steel crowns
 
Preventive resin restoration
Preventive resin restorationPreventive resin restoration
Preventive resin restoration
 
Isolation in dentistry
Isolation in dentistryIsolation in dentistry
Isolation in dentistry
 
4.furcation involvement and its treatment
4.furcation involvement and its treatment4.furcation involvement and its treatment
4.furcation involvement and its treatment
 

Similar to Complex amalgam restorations

Complex amalgam restoration
Complex amalgam restorationComplex amalgam restoration
Complex amalgam restorationZain Ayub
 
COMPLEX AMALGAM.ppt
COMPLEX AMALGAM.pptCOMPLEX AMALGAM.ppt
COMPLEX AMALGAM.pptmuktabansal8
 
Clinical technique for complex Amalgam Restoration
Clinical technique for complex Amalgam RestorationClinical technique for complex Amalgam Restoration
Clinical technique for complex Amalgam RestorationAmir Rajaey
 
Finish lines/certified fixed orthodontic courses by Indian dental academy
Finish lines/certified fixed orthodontic courses by Indian dental academy Finish lines/certified fixed orthodontic courses by Indian dental academy
Finish lines/certified fixed orthodontic courses by Indian dental academy Indian dental academy
 
Crowding in mixed dentition.ppt.pptx
Crowding in mixed dentition.ppt.pptxCrowding in mixed dentition.ppt.pptx
Crowding in mixed dentition.ppt.pptxDrSiddharthShinde
 
Finish lines/cosmetic dentistry course by Indian dental academy
Finish lines/cosmetic dentistry course by Indian dental academyFinish lines/cosmetic dentistry course by Indian dental academy
Finish lines/cosmetic dentistry course by Indian dental academyIndian dental academy
 
Matricing & Tooth Separation
Matricing & Tooth  SeparationMatricing & Tooth  Separation
Matricing & Tooth Separationssuseraf61fb
 
Interproximal Enamel Reduction (stripping)
Interproximal Enamel Reduction (stripping)Interproximal Enamel Reduction (stripping)
Interproximal Enamel Reduction (stripping)Maher Fouda
 
CDE-pin_retained_restoration-16-12-14.pptx
CDE-pin_retained_restoration-16-12-14.pptxCDE-pin_retained_restoration-16-12-14.pptx
CDE-pin_retained_restoration-16-12-14.pptxblndfarhad1
 
Stainless Steel Crowns
Stainless Steel CrownsStainless Steel Crowns
Stainless Steel CrownsAswanth E.P
 
Operative dentistry fifth year
Operative dentistry fifth year Operative dentistry fifth year
Operative dentistry fifth year Lama K Banna
 
COMPLEX AMALGAM RESTORATIONS.pptx
COMPLEX AMALGAM RESTORATIONS.pptxCOMPLEX AMALGAM RESTORATIONS.pptx
COMPLEX AMALGAM RESTORATIONS.pptxDrDithykk
 
Stripping.prof.dr.maher fouda
Stripping.prof.dr.maher foudaStripping.prof.dr.maher fouda
Stripping.prof.dr.maher foudaSamehYoussef20
 
Stainless steel crowns in pediatric dentistry ppt
Stainless steel crowns in pediatric dentistry pptStainless steel crowns in pediatric dentistry ppt
Stainless steel crowns in pediatric dentistry pptdrvinodini
 
Esthetic crowns in pediatric dentistry.pptx
Esthetic crowns in pediatric dentistry.pptxEsthetic crowns in pediatric dentistry.pptx
Esthetic crowns in pediatric dentistry.pptxgahanamuthamma
 
Stainless steel crown (Dr AMBILI AYILLIATH)
Stainless steel crown (Dr AMBILI AYILLIATH)Stainless steel crown (Dr AMBILI AYILLIATH)
Stainless steel crown (Dr AMBILI AYILLIATH)MINDS MAHE
 

Similar to Complex amalgam restorations (20)

Complex amalgam restoration
Complex amalgam restorationComplex amalgam restoration
Complex amalgam restoration
 
COMPLEX AMALGAM.ppt
COMPLEX AMALGAM.pptCOMPLEX AMALGAM.ppt
COMPLEX AMALGAM.ppt
 
Clinical technique for complex Amalgam Restoration
Clinical technique for complex Amalgam RestorationClinical technique for complex Amalgam Restoration
Clinical technique for complex Amalgam Restoration
 
Complex amalgam restoration
Complex amalgam restorationComplex amalgam restoration
Complex amalgam restoration
 
Dentin pins
Dentin pinsDentin pins
Dentin pins
 
Finish lines/certified fixed orthodontic courses by Indian dental academy
Finish lines/certified fixed orthodontic courses by Indian dental academy Finish lines/certified fixed orthodontic courses by Indian dental academy
Finish lines/certified fixed orthodontic courses by Indian dental academy
 
Crowding in mixed dentition.ppt.pptx
Crowding in mixed dentition.ppt.pptxCrowding in mixed dentition.ppt.pptx
Crowding in mixed dentition.ppt.pptx
 
Finish lines/cosmetic dentistry course by Indian dental academy
Finish lines/cosmetic dentistry course by Indian dental academyFinish lines/cosmetic dentistry course by Indian dental academy
Finish lines/cosmetic dentistry course by Indian dental academy
 
Matricing & Tooth Separation
Matricing & Tooth  SeparationMatricing & Tooth  Separation
Matricing & Tooth Separation
 
Finish lines
Finish linesFinish lines
Finish lines
 
Interproximal Enamel Reduction (stripping)
Interproximal Enamel Reduction (stripping)Interproximal Enamel Reduction (stripping)
Interproximal Enamel Reduction (stripping)
 
Pin Retained Restoration
Pin Retained RestorationPin Retained Restoration
Pin Retained Restoration
 
CDE-pin_retained_restoration-16-12-14.pptx
CDE-pin_retained_restoration-16-12-14.pptxCDE-pin_retained_restoration-16-12-14.pptx
CDE-pin_retained_restoration-16-12-14.pptx
 
Stainless Steel Crowns
Stainless Steel CrownsStainless Steel Crowns
Stainless Steel Crowns
 
Operative dentistry fifth year
Operative dentistry fifth year Operative dentistry fifth year
Operative dentistry fifth year
 
COMPLEX AMALGAM RESTORATIONS.pptx
COMPLEX AMALGAM RESTORATIONS.pptxCOMPLEX AMALGAM RESTORATIONS.pptx
COMPLEX AMALGAM RESTORATIONS.pptx
 
Stripping.prof.dr.maher fouda
Stripping.prof.dr.maher foudaStripping.prof.dr.maher fouda
Stripping.prof.dr.maher fouda
 
Stainless steel crowns in pediatric dentistry ppt
Stainless steel crowns in pediatric dentistry pptStainless steel crowns in pediatric dentistry ppt
Stainless steel crowns in pediatric dentistry ppt
 
Esthetic crowns in pediatric dentistry.pptx
Esthetic crowns in pediatric dentistry.pptxEsthetic crowns in pediatric dentistry.pptx
Esthetic crowns in pediatric dentistry.pptx
 
Stainless steel crown (Dr AMBILI AYILLIATH)
Stainless steel crown (Dr AMBILI AYILLIATH)Stainless steel crown (Dr AMBILI AYILLIATH)
Stainless steel crown (Dr AMBILI AYILLIATH)
 

Recently uploaded

Housewife Call Girls Bangalore - Call 7001305949 Rs-3500 with A/C Room Cash o...
Housewife Call Girls Bangalore - Call 7001305949 Rs-3500 with A/C Room Cash o...Housewife Call Girls Bangalore - Call 7001305949 Rs-3500 with A/C Room Cash o...
Housewife Call Girls Bangalore - Call 7001305949 Rs-3500 with A/C Room Cash o...narwatsonia7
 
Call Girls Service in Bommanahalli - 7001305949 with real photos and phone nu...
Call Girls Service in Bommanahalli - 7001305949 with real photos and phone nu...Call Girls Service in Bommanahalli - 7001305949 with real photos and phone nu...
Call Girls Service in Bommanahalli - 7001305949 with real photos and phone nu...narwatsonia7
 
Call Girls In Andheri East Call 9920874524 Book Hot And Sexy Girls
Call Girls In Andheri East Call 9920874524 Book Hot And Sexy GirlsCall Girls In Andheri East Call 9920874524 Book Hot And Sexy Girls
Call Girls In Andheri East Call 9920874524 Book Hot And Sexy Girlsnehamumbai
 
call girls in Connaught Place DELHI 🔝 >༒9540349809 🔝 genuine Escort Service ...
call girls in Connaught Place  DELHI 🔝 >༒9540349809 🔝 genuine Escort Service ...call girls in Connaught Place  DELHI 🔝 >༒9540349809 🔝 genuine Escort Service ...
call girls in Connaught Place DELHI 🔝 >༒9540349809 🔝 genuine Escort Service ...saminamagar
 
Asthma Review - GINA guidelines summary 2024
Asthma Review - GINA guidelines summary 2024Asthma Review - GINA guidelines summary 2024
Asthma Review - GINA guidelines summary 2024Gabriel Guevara MD
 
Call Girls Service Chennai Jiya 7001305949 Independent Escort Service Chennai
Call Girls Service Chennai Jiya 7001305949 Independent Escort Service ChennaiCall Girls Service Chennai Jiya 7001305949 Independent Escort Service Chennai
Call Girls Service Chennai Jiya 7001305949 Independent Escort Service ChennaiNehru place Escorts
 
Aspirin presentation slides by Dr. Rewas Ali
Aspirin presentation slides by Dr. Rewas AliAspirin presentation slides by Dr. Rewas Ali
Aspirin presentation slides by Dr. Rewas AliRewAs ALI
 
Call Girls Thane Just Call 9910780858 Get High Class Call Girls Service
Call Girls Thane Just Call 9910780858 Get High Class Call Girls ServiceCall Girls Thane Just Call 9910780858 Get High Class Call Girls Service
Call Girls Thane Just Call 9910780858 Get High Class Call Girls Servicesonalikaur4
 
Call Girls Kanakapura Road Just Call 7001305949 Top Class Call Girl Service A...
Call Girls Kanakapura Road Just Call 7001305949 Top Class Call Girl Service A...Call Girls Kanakapura Road Just Call 7001305949 Top Class Call Girl Service A...
Call Girls Kanakapura Road Just Call 7001305949 Top Class Call Girl Service A...narwatsonia7
 
High Profile Call Girls Jaipur Vani 8445551418 Independent Escort Service Jaipur
High Profile Call Girls Jaipur Vani 8445551418 Independent Escort Service JaipurHigh Profile Call Girls Jaipur Vani 8445551418 Independent Escort Service Jaipur
High Profile Call Girls Jaipur Vani 8445551418 Independent Escort Service Jaipurparulsinha
 
Bangalore Call Girls Marathahalli 📞 9907093804 High Profile Service 100% Safe
Bangalore Call Girls Marathahalli 📞 9907093804 High Profile Service 100% SafeBangalore Call Girls Marathahalli 📞 9907093804 High Profile Service 100% Safe
Bangalore Call Girls Marathahalli 📞 9907093804 High Profile Service 100% Safenarwatsonia7
 
VIP Call Girls Mumbai Arpita 9910780858 Independent Escort Service Mumbai
VIP Call Girls Mumbai Arpita 9910780858 Independent Escort Service MumbaiVIP Call Girls Mumbai Arpita 9910780858 Independent Escort Service Mumbai
VIP Call Girls Mumbai Arpita 9910780858 Independent Escort Service Mumbaisonalikaur4
 
Book Call Girls in Kasavanahalli - 7001305949 with real photos and phone numbers
Book Call Girls in Kasavanahalli - 7001305949 with real photos and phone numbersBook Call Girls in Kasavanahalli - 7001305949 with real photos and phone numbers
Book Call Girls in Kasavanahalli - 7001305949 with real photos and phone numbersnarwatsonia7
 
Hemostasis Physiology and Clinical correlations by Dr Faiza.pdf
Hemostasis Physiology and Clinical correlations by Dr Faiza.pdfHemostasis Physiology and Clinical correlations by Dr Faiza.pdf
Hemostasis Physiology and Clinical correlations by Dr Faiza.pdfMedicoseAcademics
 
Call Girl Service Bidadi - For 7001305949 Cheap & Best with original Photos
Call Girl Service Bidadi - For 7001305949 Cheap & Best with original PhotosCall Girl Service Bidadi - For 7001305949 Cheap & Best with original Photos
Call Girl Service Bidadi - For 7001305949 Cheap & Best with original Photosnarwatsonia7
 
Russian Call Girls Chickpet - 7001305949 Booking and charges genuine rate for...
Russian Call Girls Chickpet - 7001305949 Booking and charges genuine rate for...Russian Call Girls Chickpet - 7001305949 Booking and charges genuine rate for...
Russian Call Girls Chickpet - 7001305949 Booking and charges genuine rate for...narwatsonia7
 
Call Girls Jp Nagar Just Call 7001305949 Top Class Call Girl Service Available
Call Girls Jp Nagar Just Call 7001305949 Top Class Call Girl Service AvailableCall Girls Jp Nagar Just Call 7001305949 Top Class Call Girl Service Available
Call Girls Jp Nagar Just Call 7001305949 Top Class Call Girl Service Availablenarwatsonia7
 
Call Girls Whitefield Just Call 7001305949 Top Class Call Girl Service Available
Call Girls Whitefield Just Call 7001305949 Top Class Call Girl Service AvailableCall Girls Whitefield Just Call 7001305949 Top Class Call Girl Service Available
Call Girls Whitefield Just Call 7001305949 Top Class Call Girl Service Availablenarwatsonia7
 
Call Girls Electronic City Just Call 7001305949 Top Class Call Girl Service A...
Call Girls Electronic City Just Call 7001305949 Top Class Call Girl Service A...Call Girls Electronic City Just Call 7001305949 Top Class Call Girl Service A...
Call Girls Electronic City Just Call 7001305949 Top Class Call Girl Service A...narwatsonia7
 

Recently uploaded (20)

Housewife Call Girls Bangalore - Call 7001305949 Rs-3500 with A/C Room Cash o...
Housewife Call Girls Bangalore - Call 7001305949 Rs-3500 with A/C Room Cash o...Housewife Call Girls Bangalore - Call 7001305949 Rs-3500 with A/C Room Cash o...
Housewife Call Girls Bangalore - Call 7001305949 Rs-3500 with A/C Room Cash o...
 
Call Girls Service in Bommanahalli - 7001305949 with real photos and phone nu...
Call Girls Service in Bommanahalli - 7001305949 with real photos and phone nu...Call Girls Service in Bommanahalli - 7001305949 with real photos and phone nu...
Call Girls Service in Bommanahalli - 7001305949 with real photos and phone nu...
 
Call Girls In Andheri East Call 9920874524 Book Hot And Sexy Girls
Call Girls In Andheri East Call 9920874524 Book Hot And Sexy GirlsCall Girls In Andheri East Call 9920874524 Book Hot And Sexy Girls
Call Girls In Andheri East Call 9920874524 Book Hot And Sexy Girls
 
call girls in Connaught Place DELHI 🔝 >༒9540349809 🔝 genuine Escort Service ...
call girls in Connaught Place  DELHI 🔝 >༒9540349809 🔝 genuine Escort Service ...call girls in Connaught Place  DELHI 🔝 >༒9540349809 🔝 genuine Escort Service ...
call girls in Connaught Place DELHI 🔝 >༒9540349809 🔝 genuine Escort Service ...
 
Asthma Review - GINA guidelines summary 2024
Asthma Review - GINA guidelines summary 2024Asthma Review - GINA guidelines summary 2024
Asthma Review - GINA guidelines summary 2024
 
Call Girls Service Chennai Jiya 7001305949 Independent Escort Service Chennai
Call Girls Service Chennai Jiya 7001305949 Independent Escort Service ChennaiCall Girls Service Chennai Jiya 7001305949 Independent Escort Service Chennai
Call Girls Service Chennai Jiya 7001305949 Independent Escort Service Chennai
 
Aspirin presentation slides by Dr. Rewas Ali
Aspirin presentation slides by Dr. Rewas AliAspirin presentation slides by Dr. Rewas Ali
Aspirin presentation slides by Dr. Rewas Ali
 
Call Girls Thane Just Call 9910780858 Get High Class Call Girls Service
Call Girls Thane Just Call 9910780858 Get High Class Call Girls ServiceCall Girls Thane Just Call 9910780858 Get High Class Call Girls Service
Call Girls Thane Just Call 9910780858 Get High Class Call Girls Service
 
Call Girls Kanakapura Road Just Call 7001305949 Top Class Call Girl Service A...
Call Girls Kanakapura Road Just Call 7001305949 Top Class Call Girl Service A...Call Girls Kanakapura Road Just Call 7001305949 Top Class Call Girl Service A...
Call Girls Kanakapura Road Just Call 7001305949 Top Class Call Girl Service A...
 
High Profile Call Girls Jaipur Vani 8445551418 Independent Escort Service Jaipur
High Profile Call Girls Jaipur Vani 8445551418 Independent Escort Service JaipurHigh Profile Call Girls Jaipur Vani 8445551418 Independent Escort Service Jaipur
High Profile Call Girls Jaipur Vani 8445551418 Independent Escort Service Jaipur
 
Bangalore Call Girls Marathahalli 📞 9907093804 High Profile Service 100% Safe
Bangalore Call Girls Marathahalli 📞 9907093804 High Profile Service 100% SafeBangalore Call Girls Marathahalli 📞 9907093804 High Profile Service 100% Safe
Bangalore Call Girls Marathahalli 📞 9907093804 High Profile Service 100% Safe
 
VIP Call Girls Mumbai Arpita 9910780858 Independent Escort Service Mumbai
VIP Call Girls Mumbai Arpita 9910780858 Independent Escort Service MumbaiVIP Call Girls Mumbai Arpita 9910780858 Independent Escort Service Mumbai
VIP Call Girls Mumbai Arpita 9910780858 Independent Escort Service Mumbai
 
Book Call Girls in Kasavanahalli - 7001305949 with real photos and phone numbers
Book Call Girls in Kasavanahalli - 7001305949 with real photos and phone numbersBook Call Girls in Kasavanahalli - 7001305949 with real photos and phone numbers
Book Call Girls in Kasavanahalli - 7001305949 with real photos and phone numbers
 
Hemostasis Physiology and Clinical correlations by Dr Faiza.pdf
Hemostasis Physiology and Clinical correlations by Dr Faiza.pdfHemostasis Physiology and Clinical correlations by Dr Faiza.pdf
Hemostasis Physiology and Clinical correlations by Dr Faiza.pdf
 
sauth delhi call girls in Bhajanpura 🔝 9953056974 🔝 escort Service
sauth delhi call girls in Bhajanpura 🔝 9953056974 🔝 escort Servicesauth delhi call girls in Bhajanpura 🔝 9953056974 🔝 escort Service
sauth delhi call girls in Bhajanpura 🔝 9953056974 🔝 escort Service
 
Call Girl Service Bidadi - For 7001305949 Cheap & Best with original Photos
Call Girl Service Bidadi - For 7001305949 Cheap & Best with original PhotosCall Girl Service Bidadi - For 7001305949 Cheap & Best with original Photos
Call Girl Service Bidadi - For 7001305949 Cheap & Best with original Photos
 
Russian Call Girls Chickpet - 7001305949 Booking and charges genuine rate for...
Russian Call Girls Chickpet - 7001305949 Booking and charges genuine rate for...Russian Call Girls Chickpet - 7001305949 Booking and charges genuine rate for...
Russian Call Girls Chickpet - 7001305949 Booking and charges genuine rate for...
 
Call Girls Jp Nagar Just Call 7001305949 Top Class Call Girl Service Available
Call Girls Jp Nagar Just Call 7001305949 Top Class Call Girl Service AvailableCall Girls Jp Nagar Just Call 7001305949 Top Class Call Girl Service Available
Call Girls Jp Nagar Just Call 7001305949 Top Class Call Girl Service Available
 
Call Girls Whitefield Just Call 7001305949 Top Class Call Girl Service Available
Call Girls Whitefield Just Call 7001305949 Top Class Call Girl Service AvailableCall Girls Whitefield Just Call 7001305949 Top Class Call Girl Service Available
Call Girls Whitefield Just Call 7001305949 Top Class Call Girl Service Available
 
Call Girls Electronic City Just Call 7001305949 Top Class Call Girl Service A...
Call Girls Electronic City Just Call 7001305949 Top Class Call Girl Service A...Call Girls Electronic City Just Call 7001305949 Top Class Call Girl Service A...
Call Girls Electronic City Just Call 7001305949 Top Class Call Girl Service A...
 

Complex amalgam restorations

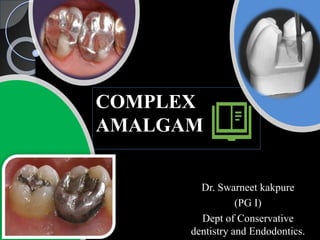
  • 1. COMPLEX AMALGAM Dr. Swarneet kakpure (PG I) Dept of Conservative dentistry and Endodontics.
  • 2. CONTENTS • Definition • Indications, Contraindications, Advantages, disadvantages • Pin-Retained Amalgam Restorations • Slot-Retained Amalgam Restorations • Amalgam foundations • Use of Desensitizer or Bonding System • Matrix Placement • Inserting the Amalgam. • Contouring and Finishing the Amalgam
  • 3. Definition  Complex amalgam restorations are the one which are used to replace one or more missing cusps of teeth that have been fractured or are severely involved with caries or existing restorative material.
  • 4. INDICATIONS when large amounts of tooth structure are missing when one or more cusps need capping when increased resistance and retention forms are needed. teeth that have a questionable pulpal and/or periodontal prognosis As definitive (final) restorations. as interim restorations
  • 5. CONTRAINDICATIONS Esthetically important areas If the tooth cannot be properly restored with a direct restoration because of anatomic and/or functional considerations
  • 6. ADVANTAGES  Conserves Tooth Structure  Appointment Time-The complex restoration can be completed in one appointment. The cast restoration requires at least two appointments.  Resistance and Retention Forms- it may be significantly increased by the use of pins, slots, and bonding.
  • 7.  Age and Health of the Patient- For some geriatric and debilitated patients, the complex amalgam restoration may be the treatment of choice over the more expensive and time-consuming cast restoration.  Economics- Compared to an indirect restoration, the amalgam restoration is a relatively inexpensive restorative procedure.
  • 8. DISADVANTAGES Dentinal Microfractures- Preparing pinholes and placing pins may create craze lines or fractures. Microleakage- In amalgam restorations using cavity varnish, microleakage around all types of pins has been demonstrated. Tooth Anatomy- Proper contours and occlusal contacts, and/or anatomy, are sometimes difficult to achieve with large complex restorations.
  • 10. Pin-Retained Amalgam Restorations  A pin retained restoration may be defined as ‘‘any restoration requiring the placement of one or more pins in the dentin to provide adequate resistance and retention forms’’. Advantages-  Amalgam restorations including pins have significantly greater retention than those using boxes only or those relying solely on bonding systems. Disadvantages-  Penetration and Perforation  Dentinal Microfractures
  • 11. Indications When severe carious destruction or cusp fracture Has resulted in loss of 4mm or more vertical coronal height. whenever adequate resistance and retention forms cannot be established with slots, locks, or undercuts only. It is an important adjunct in the restoration of teeth with extensive caries or fractures.
  • 13. CEMENTED PINS  In 1958 by Markley".  They are cemented into pinholes prepared 0.025 to 0.05 mm larger than the diameter of the pin.  The cementing medium may be any standard dental luting agent.
  • 14. How cemented pins are placed……
  • 15. FRICTION-LOCKED PIN  In 1966, by Goldstein  the diameter of the prepared pinhole is 0.025 mm smaller than the diameter of the pin.  The pins are tapped into place, retained by the resiliency of the dentin.  They are 2 to 3 times more retentive than cemented pins.
  • 16. SELF-THREADING PIN  described by Going in 1966.  The diameter of the prepared pinhole is 0.03-0.10 mm smaller than the diameter of the pin.  The threads engage the dentin as it is inserted, retaining the pin.  The elasticity (resiliency) of the dentin permits insertion of a threaded pin into a hole of smaller diameter.
  • 17.  The self-threading pin is the most retentive of the three types of pins, being three to six times more retentive than the cemented pin . Depth of pinhole 1.3-2 mm(depending on diameter of pin used) Recommonded pinhole depth 2mm
  • 18. Thread Mate System (TMS) Most widely used Because of its: • versatility • wide range of pin sizes • color-coding system • greater retentiveness
  • 19. Factors Affecting the Retention of the Pin in Dentin and Amalgam Type Surface characteristics Orientation, number, and diameter Extension into dentin and amalgam
  • 20. Type-  In the order of retentiveness in the dentin Surface characteristics- The number and depth of the elevations (serrations or threads) on the pin influence retention of the pin in the amalgam restoration  The shape of the self-threading pin gives it the greatest retention value. Cemented pin Friction locked pin Self-threading pin
  • 21. Orientation, number, and diameter-  Placing pins in a nonparallel manner increases their retention.  Bending pins to improve retention in amalgam is not desirable because bends may interfere with adequate condensation of amalgam around the pin and thereby decrease amalgam retention. Increasing the number of pins Increases retention  But As the number of pins increases: (1) the crazing of the dentin and the potential for fracture increase, (2) the amount of available dentin between the pins decreases; (3) the strength of the amalgam restoration decreases.
  • 22. As Diameter of the pin increases Retention in dentin and amalgam increases number, depth, and diameter of pins increase danger of perforating into the pulp or the external tooth surface increases Extension into dentin and amalgam  Approx 1.5-2 mm to preserve strength of dentin and amalgam  Extension greater than this is contraindicated.
  • 23. Pin Placement Factors and Techniques size Color code Regular (0.78mm) Gold Minim (0.61mm) Silver Minikin (0.48mm) Red Minuta (0.38mm) Pink  Four sizes of TMS pins are available each with corresponding color coded drill.
  • 24. Regular (0.78mm):  Larger diameter pin have greatest retention.  Of all 4 pins,regular pin is associated with highest incidence of dentinal crack communition with pulp chamber. Minim (0.64mm)- Used as a backup incase the pinhole minikin is overprepared or pin threads strip dentin during placement resulting in lack of minikin pin retention in dentin.
  • 25. Minikin (0.48mm)- Pin of choice for severely involved posterior teeth. Advantages- 1. Reduce risk of dentin crazing 2. Reduce risk of pulpal penetration 3. Reduce risk of root surface perforation. Minuta (0.38mm):  Half as retentive as minikin & 1/3 rd as retentive as minim pin.  Too small to provide retention in posterior teeth.
  • 26. Number of pins  Several factors must be considered when deciding how many pins are required.  As a rule, one pin per missing axial line angle should be used. The amount of missing tooth structure The amount of retention required The amount of dentin available to receive pins safely The size of the pins.
  • 27. Location  Several factors aid in determining pinhole locations: knowledge of normal pulp anatomy and external tooth contours a current radiograph of the tooth the patient's age
  • 28. In the cervical one third of molars and premolars pinholes should be located near the line angles of the tooth. The pinhole should be positioned no closer than 0.5 to 1 mm to the DEJ or no closer than 1 to 1.5 mm to the external surface of the tooth, whichever distance is greater. Check gingival crevice if any abnormal contours exist that would predispose the tooth to an external perforation. As a rule, the pinhole should be parallel to the adjacent external surface of the tooth.
  • 29.  Position of pinhole must not result in pin being so close to vertical wall that condensation of amalgam against pin or wall get hampered.
  • 30. minimum 0.5mm clearance around the circumferance of pin for adequate condensation of amalgam. if pin is inappropriately placed, the operator should provide clearance around the pin to provide sufficient space for smallest condenser nib. A no 169L bur may be used for this. Pinhole should be prepared on flat surface Whenever three or more pinholes are placed, they should be located at different vertical levels on tooth (which reduces stress).
  • 31. Minimum interpin distance  Maximal interpin distance results in lower levels of stress in dentin.  furcal areas should be avoided.Specifically, external perforation may result from pinhole placement. Minikin 3mm Minim 5mm over the prominent mesial concavity of the maxillary first premolar At the midlingual and midfacial bifurcations of the mandibular first and second molars at the midfacial, midmesial, and middistal furcations of the maxillary first and second molars.
  • 32.  Pulpal penetration may result from pin placement at the mesiofacial corner of the maxillary first molar and the mandibular first molar.  When possible, the location of pinholes on the distal surface of mandibular molars and lingual surface of maxillary molars should be avoided.
  • 33.  Obtaining the proper direction for preparing a pinhole in these locations is difficult because of the abrupt flaring of the roots just apical to the cemento-enamel junction (CEJ).  If the pinhole is placed parallel to the external surface of the tooth crown in these areas, penetration into the pulp is likely. When the pinhole locations have been determined,
  • 34.  A No. 1/ 4 bur is first used to prepare a pilot hole (dimple) approximately one half the diameter of the bur at each location.  The purpose of this hole is to permit more accurate placement of the twist drill and to prevent the drill from "crawling" once it has begun to rotate.
  • 35. Pinhole preparation  The Kodex drill (a twist drill) should be used for preparing pinholes .  The aluminum shank of drill, which acts as a heat absorber, is color coded so that it can be easily matched with the appropriate pin size.  Because the optimal depth of the pinhole into the dentin is 2 mm (only 1.5 mm for the Minikin pin), a depth-limiting drill should be used to prepare the hole.
  • 36.  Only when this type of drill prepares a hole on a flat surface that is perpendicular to the drill it will prepare the pinhole to the correct depth.  When the location for starting a pinhole is neither flat nor perpendicular to the desired pinhole direction, either flatten the location area or use the standard twist drill, whose blades are 4 to 5 mm in length, to prepare a pinhole that has an effective depth.
  • 37. Technique of creating properly aligned pinhole view the drill from a 90-degree angle to the previous viewing position to acertain that the drill is also correctly angled in this plane without changing the angulation obtained from the crevice position, move the handpiece occlusally and place the drill in the previously prepared pilot hole. position it until it lies flat against the external surface of the tooth, place the drill in the gingival crevice beside the location for the pinhole, Place drill in the latch-type contra-angle handpiece
  • 38. The drill should never stop rotating (from insertion to removal from the pinhole) to prevent the drill from breaking while in the pinhole. a steady stream of air may be applied to the drill to dissipate heat. Incorrect angulation of the drill may result in pulpal exposure or external perforation.
  • 39. Pin design  For each of the sizes of TMS pins, several designs are available: standard self- shearing two-in one Link Series Link Plus
  • 40. The Link Series pin  Contained in a color-coded plastic sleeve that fits a latch-type contra-angle handpiece or the specially designed plastic hand wrench.  The pin is somewhat free floating in the plastic sleeve to allow it to align itself as it is threaded into the pinhole.  When the pin reaches the bottom of the hole, the top portion of the pin shears off, leaving a length of pin extending from the dentin. The plastic sleeve is then discarded.
  • 41.  The Minuta, Minikin, Minim, and Regular pins are available in the Link Series. The Link Series pins are recommended because of their versatility, self-aligning ability, and retentiveness.
  • 42. The Link Plus pins  are self-shearing and are available as a single or two-in-one pin contained in a color-coded plastic sleeve.  This design has a sharper thread, a shoulder stop at 2 mm, and a tapered tip to more readily fit the bottom of the pinhole as prepared by the twist drill.  It also provides a 2.7-mm length of pin to extend out of the dentin, which usually needs to be shortened.
  • 43. Pin insertion  Instruments for insertion of threaded pins are available: 1. conventional latch-type contra-angle handpiece , 2. TMS hand wrenches.
  • 44.  When using the latch-type handpiece, insert a Link Series or a Link Plus pin into the handpiece and place the pin in the pinhole.  Activate the handpiece at low speed until the plastic sleeve shears from the pin.  Then, remove the sleeve and discard it.  For low-speed handpieces with a low gear, the low gear should be used.  Using low gear increases the torque and increases the tactile sense of operator. The latch-type handpiece is recommended for the insertion of the Link Series and the Link Plus pins The hand wrench is recommended for the insertion of standard pins.
  • 45.  It also reduces the risk of stripping the threads in the dentin once the pin is in place.  A standard design pin is placed in the appropriate wrench and slowly threaded clockwise into the pinhole until a definite resistance is felt when the pin reaches the bottom of the hole.  The pin should then be rotated one-quarter to one-half turn counterclockwise to reduce the dentinal stress created by the end of the pin pressing the dentin.
  • 46.  Carefully remove the hand wrench from the pin. If the hand wrench is used without rubber dam isolation, a gauze throat shield must be in place, and a strand of dental tape approximately 12 to 15 inches (30 to 38 cm) in length should be securely tied to the end of the wrench.  These precautions will prevent the patient from swallowing or aspirating the hand wrench should it be dropped accidentally.
  • 47.  Once the pins are placed, evaluate their length. Any length of pin greater than 2 mm should be removed.  2 mm of pin length into amalgam is optimal. Also, whenever possible, it is desirable to have at least 2 mm thickness of amalgam occlusal to the end of the pin to prevent unnecessary weakening of the restoration.  To remove the excess length of pin, use a sharp No. 1/a, 1/2, or 169L bur at high speed and oriented perpendicular to the pin.
  • 48.  During removal of excess pin length, the assistant may apply a steady stream of air to the pin and have the evacuator tip positioned to remove the pin segment.  After placement, the pin should be tight, immobile, and not easily withdrawn.
  • 49.  Using a mirror, view the preparation from all directions (particularly from the occlusal) to determine if any pins need to be bent to position them within the anticipated contour of the final restoration.  Pins are not to be bent to make them parallel or to increase their retentiveness. However, occasionally, bending a pin may be necessary to allow for condensation of amalgam occluso-gingivally.
  • 50.  When pins require bending, the TMS bending tool must be used.  The bending tool should be placed on the pin where the pin is to be bent, and with firm controlled pressure, the bending tool should be rotated until the desired amount of bend is achieved.  Use of the bending tool allows placement of the fulcrum at some point along the length of the exposed pin.
  • 51.  A hand instrument such as an amalgam condenser or Black spoon excavator should not be used to bend a pin because the location of the fulcrum will be at the orifice of the pinhole.  These hand instruments may cause crazing or fracture of the dentin, and the abrupt or sharp bend that usually results, increases the chance of breaking the pin.  Also, the operator has less control when pressure is applied with a hand instrument, and the chance of slipping is increased.
  • 52. Possible Problems With Pins • Failure of pin-retained restorations • Broken drills and broken pins • Loose pins. • Penetration into the pulp and perforation of the external tooth surface
  • 53. Slot-Retained Amalgam Restorations Indications- Definition- a slot is a retention groove in dentin Slots are particularly indicated in horizontal areas of short clinical crowns where loss of vertical height is appox. 2-4 mm. Slot retention may be used in conjunction with pin retention, or as an alternative to it.
  • 54. Tooth Preparation for Slot-Retained Amalgam  Slot are prepared in the gingival floor of preperation with no 330 bur.  Slots should be,  Increasing width and depth doesn’t increase retentive strength  Shorter slots provide much resistance to horizontal forces as do longer slots. • 1mm wide ,1mm deep • Placed in line angle areas of tooth • 2-4mm in length • Positioned 0.5-1mm inside DEJ • One slot per missing line angle
  • 55. Amalgam Foundations  A foundation is an initial restoration of a severely involved tooth & serve to replace lost tooth structure necessary to provide resistance & retention forms for final indirect restoration (eg. crown or bridge).  The foundation also should provide resistance form against forces that otherwise might fracture the remaining tooth structure.
  • 56.  Unlike a conventional amalgam restoration, an amalgam foundation may not depend primarily on remaining coronal tooth structure for support. Instead, it may rely mainly on secondary preparation retention features (pins, slots, coves, and proximal retention locks) and somewhat on bonding benefits.  A temporary or caries control restoration is used to restore a tooth temporarily and/or to control caries in a tooth. when definitive treatment is uncertain when several teeth require immediate attention for control of caries. when a tooth's prognosis is questionable.
  • 57.  foundations are placed in preparation for a full crown, especially in endodontically treated teeth.  The restorative materials used for foundations include amalgam, composite, and reinforced glass ionomer cermets.  Of the direct filling materials, amalgam is preferred because it is easy to use and stronger than composite or cermets
  • 58. RESTORATIVE TECHNIQUES Use of Desensitizer or Bonding System Matrix Placement Inserting the Amalgam Contouring and Finishing the Amalgam.
  • 59. Use of Desensitizer or Bonding System  Once the preparation is completed with the necessary resistance and retention forms incorporated, clean the preparation, if indicated, with air/water spray and remove visible moisture without desiccating the tooth.  Inspect for detection and removal of any debris.  to reduce dentin permeability and seal the dentin, use a dentin desensitizer.
  • 60. Matrix Placement  One of the most difficult steps in restoring a severely involved posterior tooth is development of a satisfactory matrix. Universal Matrix-  The Tofflemire retainer and band can be used successfully for the majority of posterior amalgam restorations.  It requires sufficient tooth structure to retain the band after it is applied.
  • 61.  Loosen the Tofflemire retainer one-half turn, and insert the strip of matrix material next to the opening, between the matrix band and the tooth.  Tighten the retainer and complete the matrix.  Sometimes, it is helpful to condense a small amount of softened compound between the strip and open aspect of the band retainer to stabilize and support the strip further.  When very little tooth structure remains and deep gingival margins are present, the Tofflemire matrix may not function successfully. In the following sections the Automatrix system (Dentsply Caulk, Milford, Delaware) is presented for use when minimal tooth structure is available.
  • 62. Automatrix  The Automatrix is a retainerless matrix system designed for any tooth regardless of its circumference and height. The Automatrix bands are supplied in three widths:  The medium band is available in two thicknesses [0.038 and 0.05 mm].  The 3/16 and 5/16 inch band widths are available in the 0.002-inch thickness only. 3/16 inch 1/4 inch 5/16 inch
  • 63. Advantages- convenience improved visibility because of absence of a retainer decreased time for application as compared to the copper band matrix ability to place the autolock loop on the facial or lingual surface of the tooth,
  • 64. Disadvantages- band is flat and difficult to burnish development of proper proximal contours and contacts can be difficult with the Automatrix bands
  • 65. Inserting the Amalgam.  A high-copper alloy is strongly recommended for the complex amalgam restoration because of excellent clinical performance and high early compressive strengths.  spherical alloys can be condensed quicker with less pressure to ensure good adaptation around the pins.  However, proximal contacts may be easier to achieve with admixed alloys because of their condensability.
  • 66. Triturate a mix of amalgam and with the amalgam carrier, transfer some of the amalgam to the gingival portion of the preparation. Using appropriately sized condensers, condense each increment of amalgam. condense the amalgam thoroughly in and around the retentive features of the preparation, such as slots, grooves and pins If amalgam becomes dry or crumbly, immediately triturate a new mix Continue condensation until the preparation is overfilled Do not spend too much time on occlusal carving without allowing adequate time for carving the more inaccessible gingival margins and proximal and axial contours. First, remove the bulk of excess amalgam on the occlusal surface and grossly develop the anatomy, Accurately developed marginal ridge heights and embrasures reduce the potential of fracturing the marginal ridge(s) when the matrix is removed
  • 67.  If the matrix is removed prematurely, there is risk of amalgam fracture causing loss of the restoration.  Tofflemire-retained matrices are removed first by loosening and removing the retainer, and then removing the matrix band with laterally oriented, short-range movements  Do not attempt to remove any matrix vertically because this will apply dislodging forces on the recently placed restoration.  Automatrix bands are removed by using the system's instruments and once the band is open, by the same technique described for the Tofflemire-retained matrices.
  • 68. With the wedges still in place to maintain passive pressure on the band from the adjacent tooth, remove the Tofflemire retainer from the band Then, remove each end of the band by sliding it in an oblique direction (i.e., move the band facially or lingually while simultaneously moving it in an occlusal direction). remove the wedges and with an explorer remove any interproximal gingival excess. Develop facial and lingual contours with a Hollenback carver, amalgam knife, or an explorer to complete the carving rotary instruments can be used to complete the occlusal carving if the amalgam has set to a hardness Appropriate round and flame- shaped burs can be used to develop occlusal anatomy.
  • 69. Evaluate the margins with an explorer and correct any discrepancy. Evaluate the adequacy of each proximal contact by using a mirror occlusally and lingually to ensure that no light can be reflected between the restoration and the adjacent tooth at the level of the proximal contact. The amalgam forming the walls of this "ideal" preparation must have sufficient bulk to prevent future fracture. Remove the rubber dam and evaluate the occlusal contacts Thin, unwaxed dental floss may be passed through the proximal contacts one time to help smooth the amalgam proximal surface Passing the floss through a contact more than once may weaken a contact
  • 70.  Caution the patient not to apply biting forces to the restoration for several hours.  When an amalgam foundation is being placed, if a fast-setting high- copper amalgam is used, the final crown or onlay preparation can be initiated within 30 to 45 minutes of insertion of the foundation. Contouring and Finishing the Amalgam  Finish and polish the amalgam restoration, if desired.