This document provides instructions for using Photoshop templates to create a gift with multiple photos. The steps include:
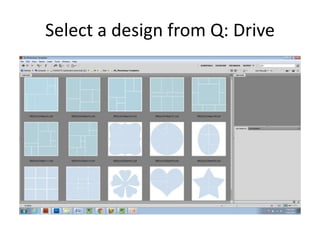
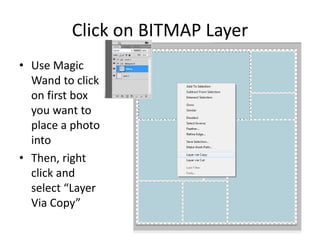
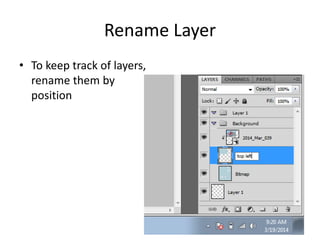
1. Selecting a template design from the Q drive and clicking on the bitmap layer.
2. Using the magic wand tool to select boxes for photos, then copying the layer.
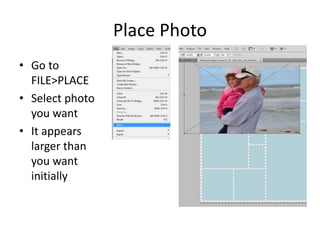
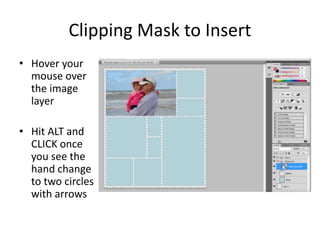
3. Placing and resizing photos so they fit in the boxes using the transform and clipping mask tools.
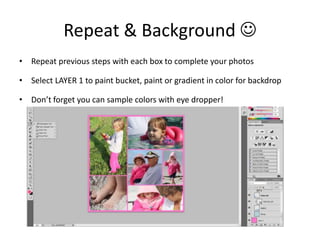
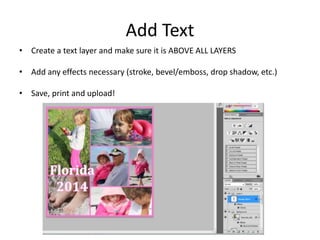
4. Repeating for each photo box and adding a background color. Finally, adding text above all layers before saving and sharing the completed design.
How to add a drop shadow to your product images in Adobe PhotoshopPixc
Are you looking to take your product images to the next level? One good way to do so is with a drop shadow, sometimes called a box shadow. A drop shadow can add depth to your product images and make them look a lot more natural.
If you’re taking your product photos in a studio, it can be hard to create the perfect shadow, especially if you’re not a professional photographer. Luckily, it’s pretty easy to add a drop shadow using Adobe Photoshop, during post-production. Here's how.
Learn how to create Sticky Note effect using photoshop. Please visit our website to learn more in tips our blog, and also to find cheap photography supplies.
Raw images aren’t ready for commercial use. So we need to manage it and prepare it for use by applying for many editing works. There are many ways for the cut out image but when we are going to Cut out image with hard hair mask from a model image sometimes it’s become harder. In that case, we need to apply advanced editing services or technique.
5. Place Photo
• Go to
FILE>PLACE
• Select photo
you want
• It appears
larger than
you want
initially
6. Resize Photo
• Photo is
automatically
in transform
(CTRL T) mode
• Click on LOCK
tool
• Resize just a bit
larger than the
size you need
• Hit ENTER to
get X over box
to disappear
7. Clipping Mask to Insert
• Hover your
mouse over
the image
layer
• Hit ALT and
CLICK once
you see the
hand change
to two circles
with arrows
8. Repeat & Background
• Repeat previous steps with each box to complete your photos
• Select LAYER 1 to paint bucket, paint or gradient in color for backdrop
• Don’t forget you can sample colors with eye dropper!
9. Add Text
• Create a text layer and make sure it is ABOVE ALL LAYERS
• Add any effects necessary (stroke, bevel/emboss, drop shadow, etc.)
• Save, print and upload!