The document provides instructions for 5 image editing techniques:
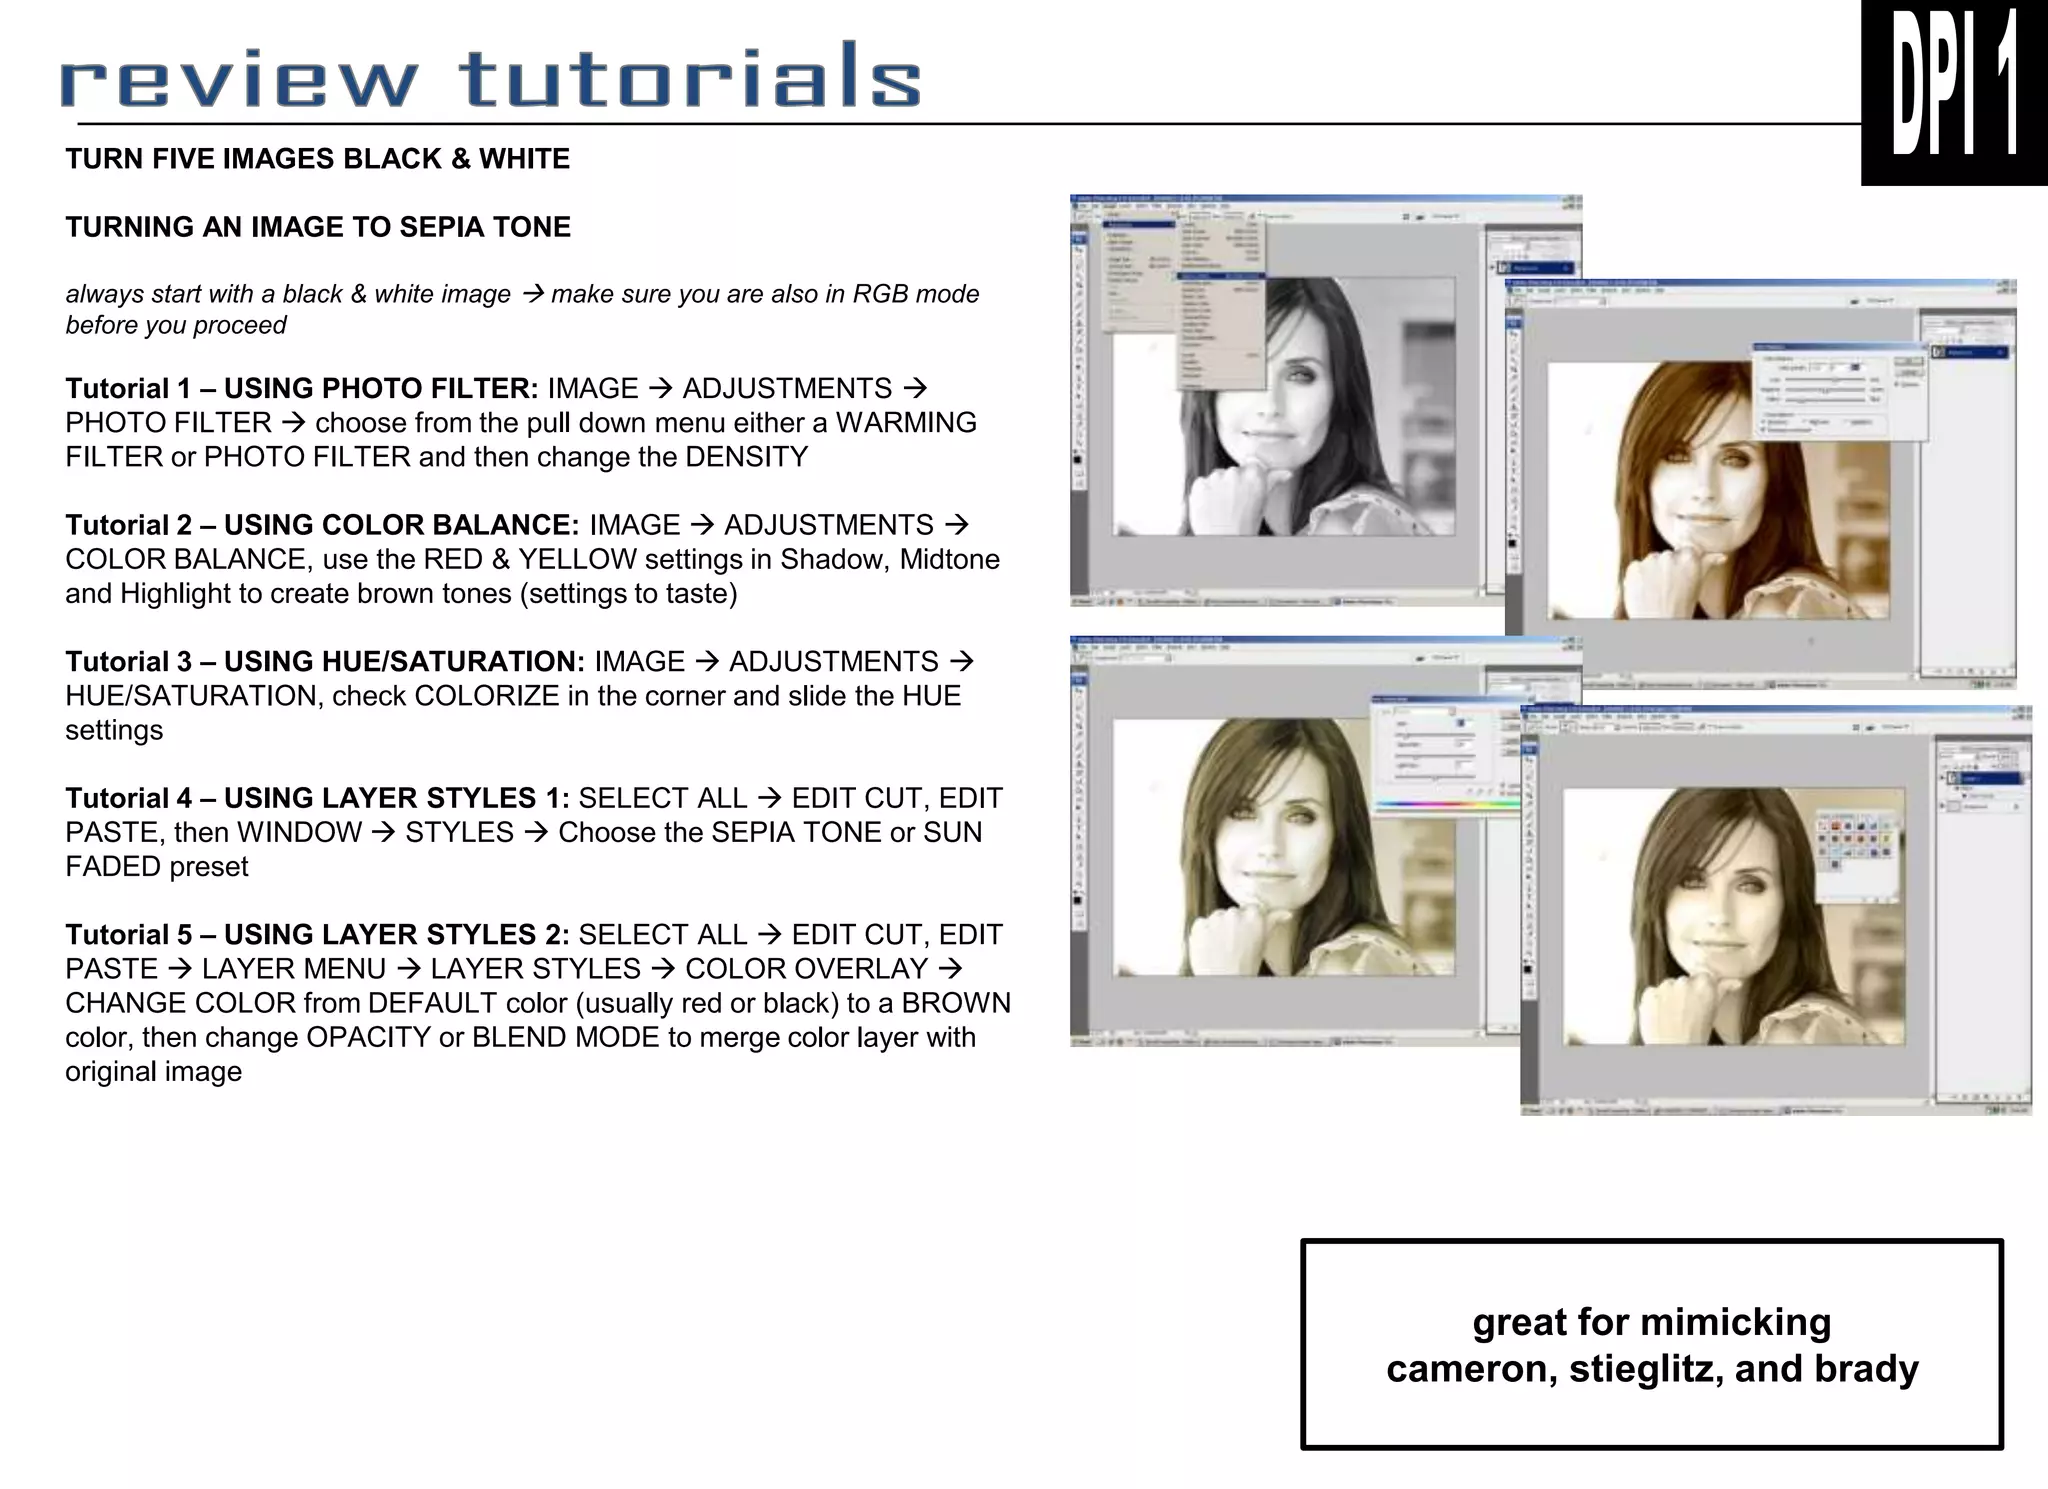
1. Converting an image to sepia tone using photo filters, color balance, hue/saturation, or layer styles.
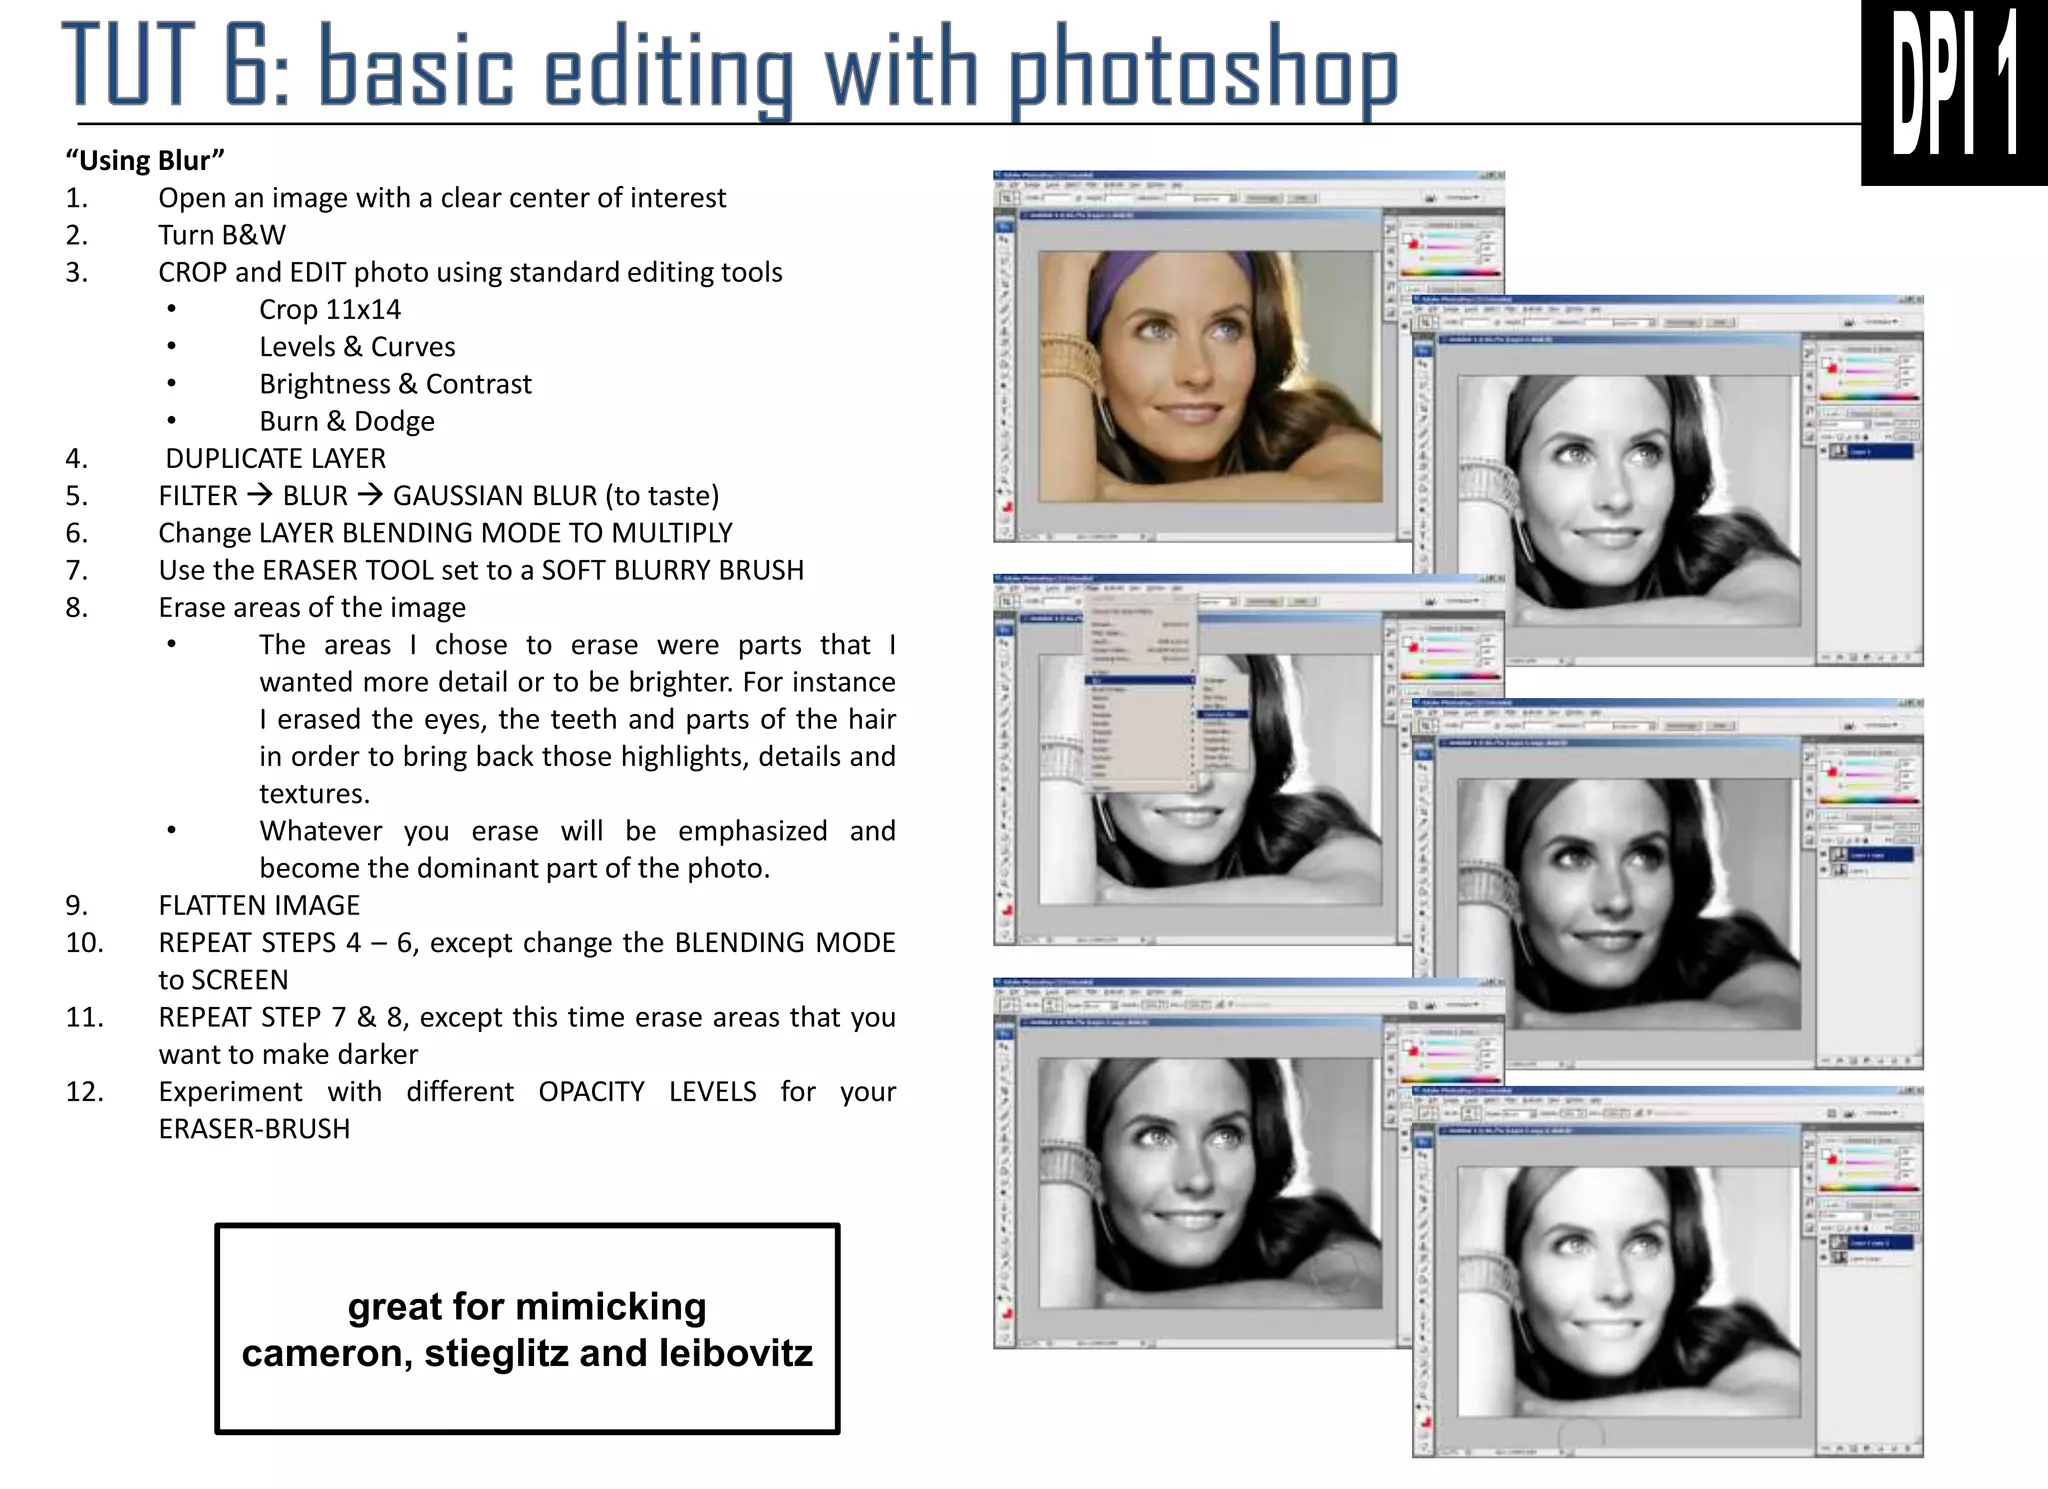
2. Applying blur to duplicate layers set to multiply or screen blending modes to emphasize or de-emphasize parts of an image.
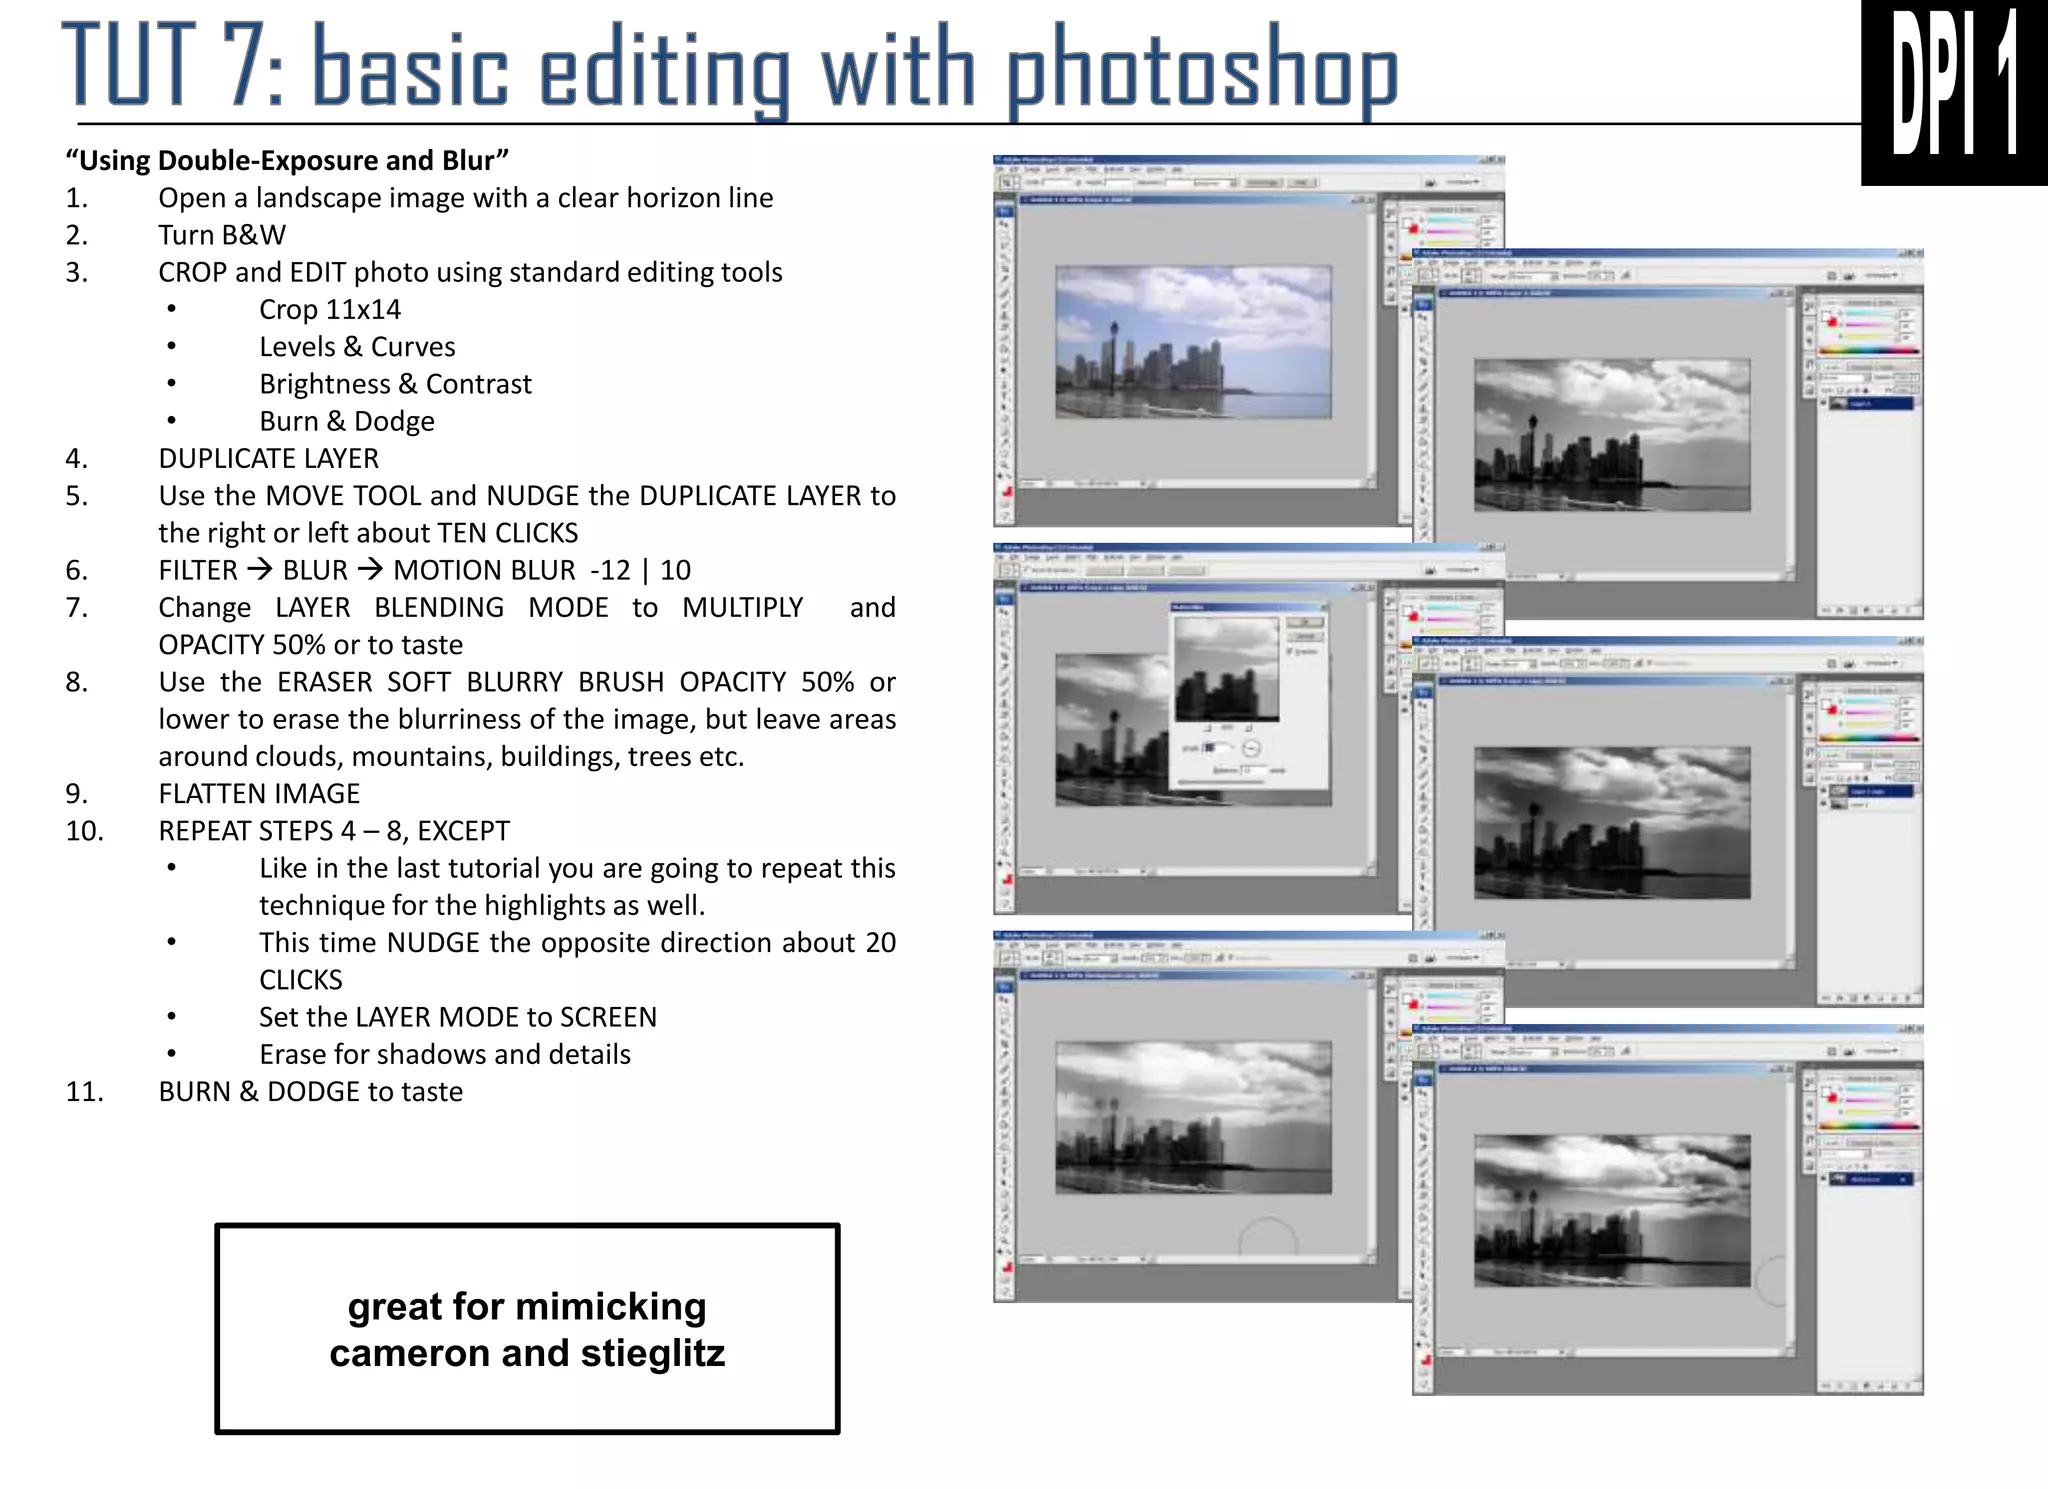
3. Creating double exposures by nudging and blurring duplicate layers set to multiply or screen blending modes.
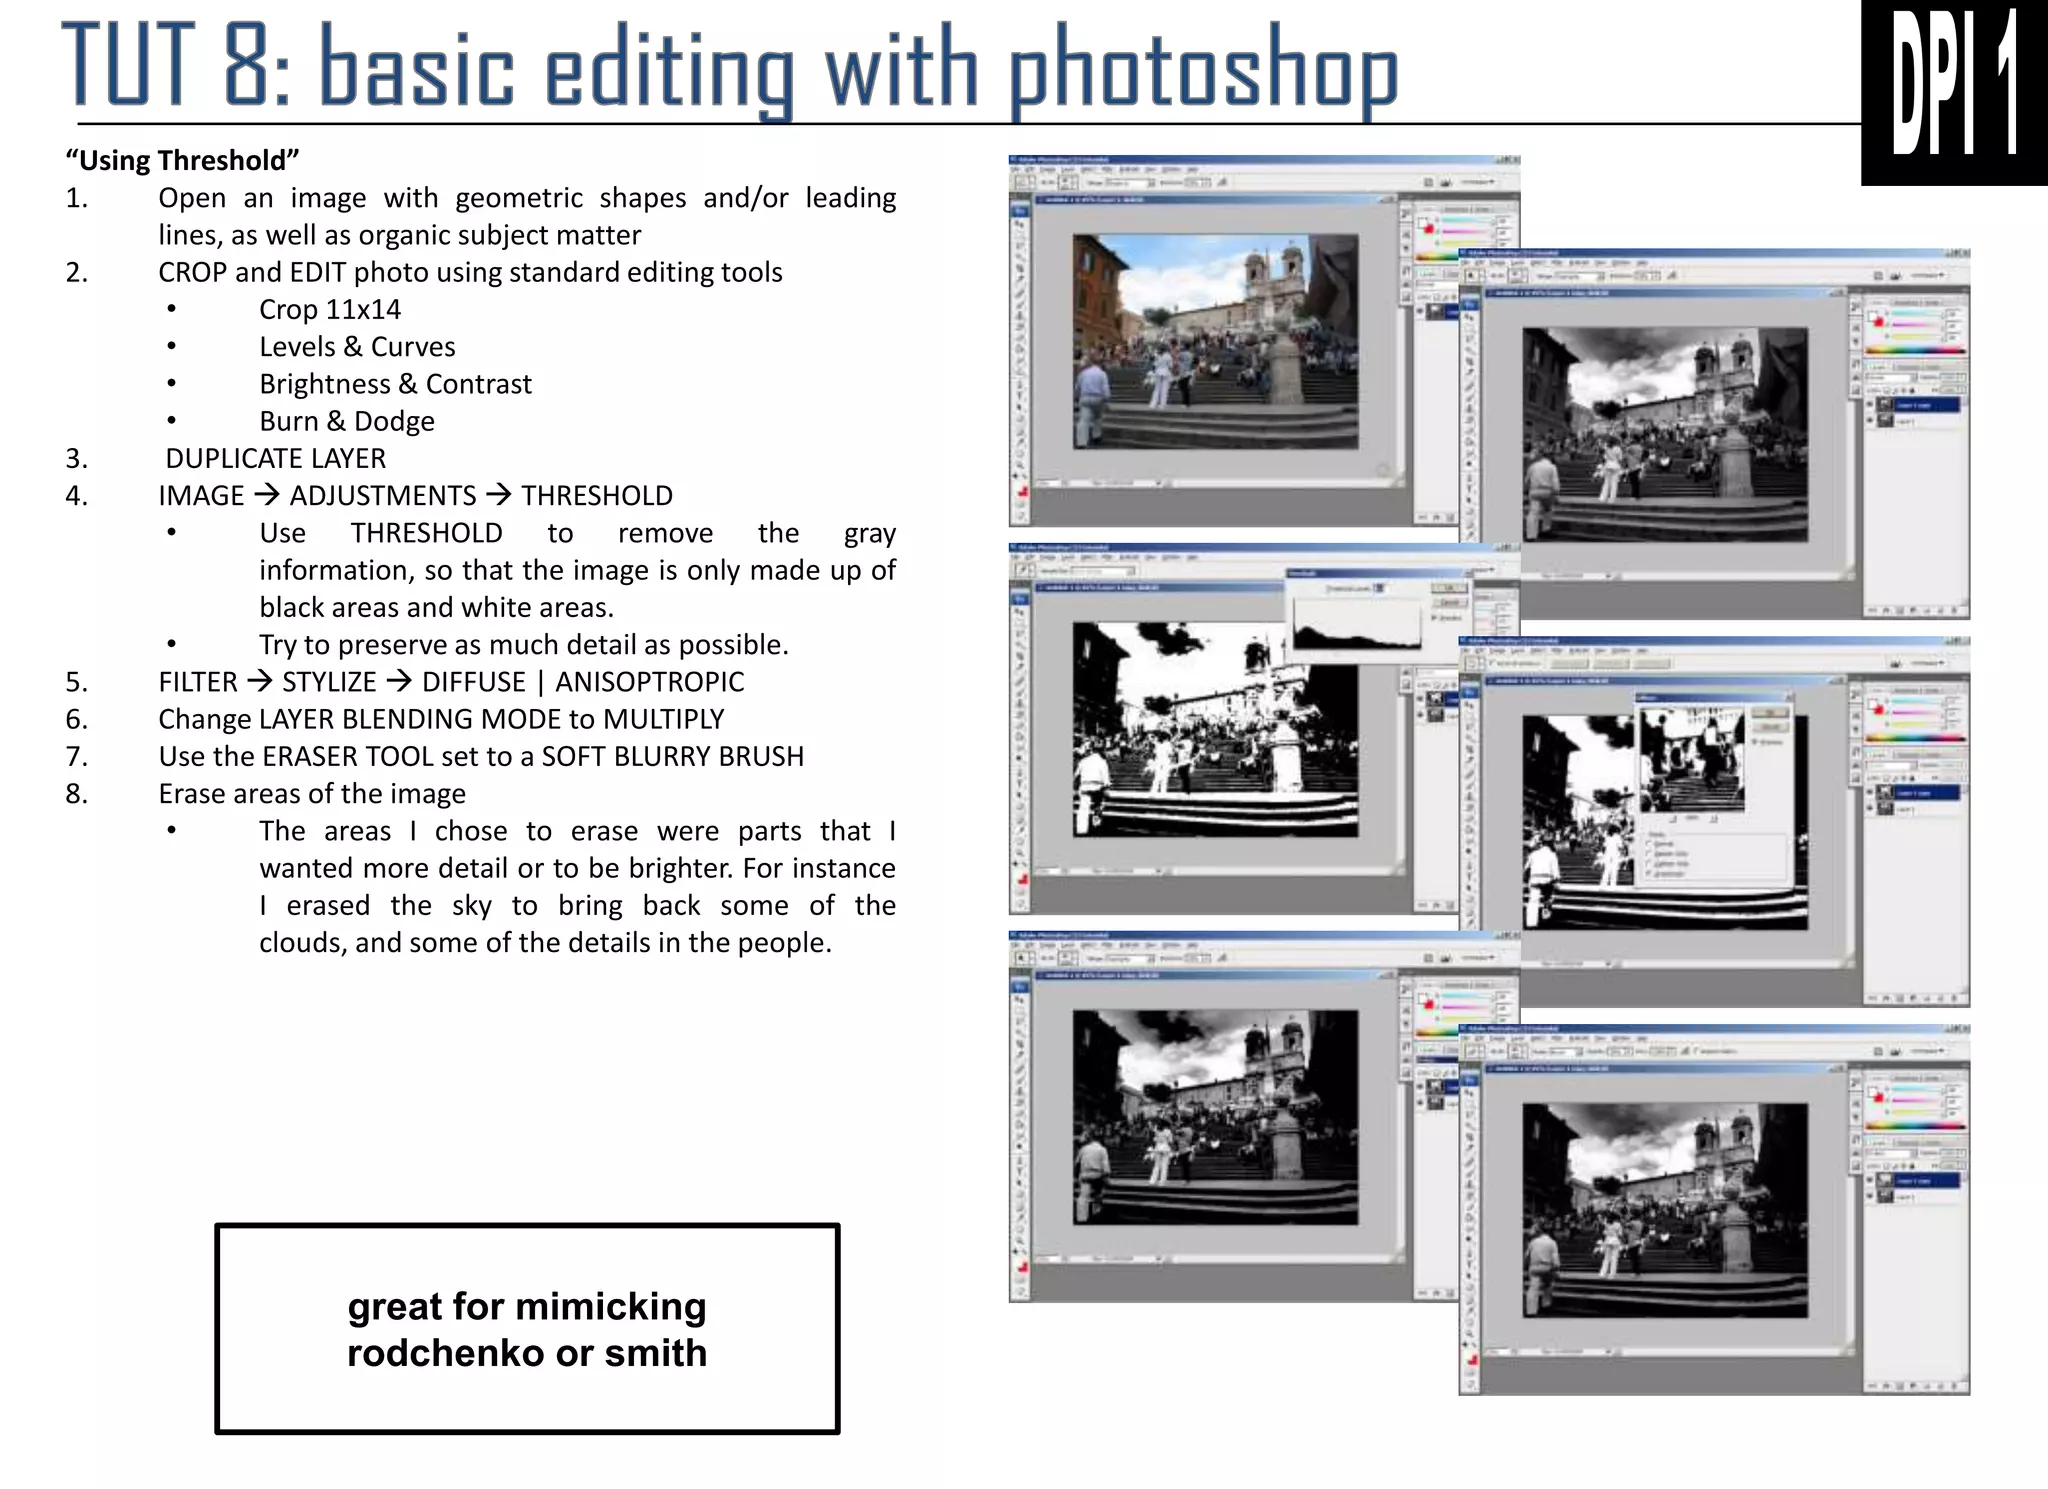
4. Applying a threshold to remove gray values, then diffusing to stylize images with geometric shapes.
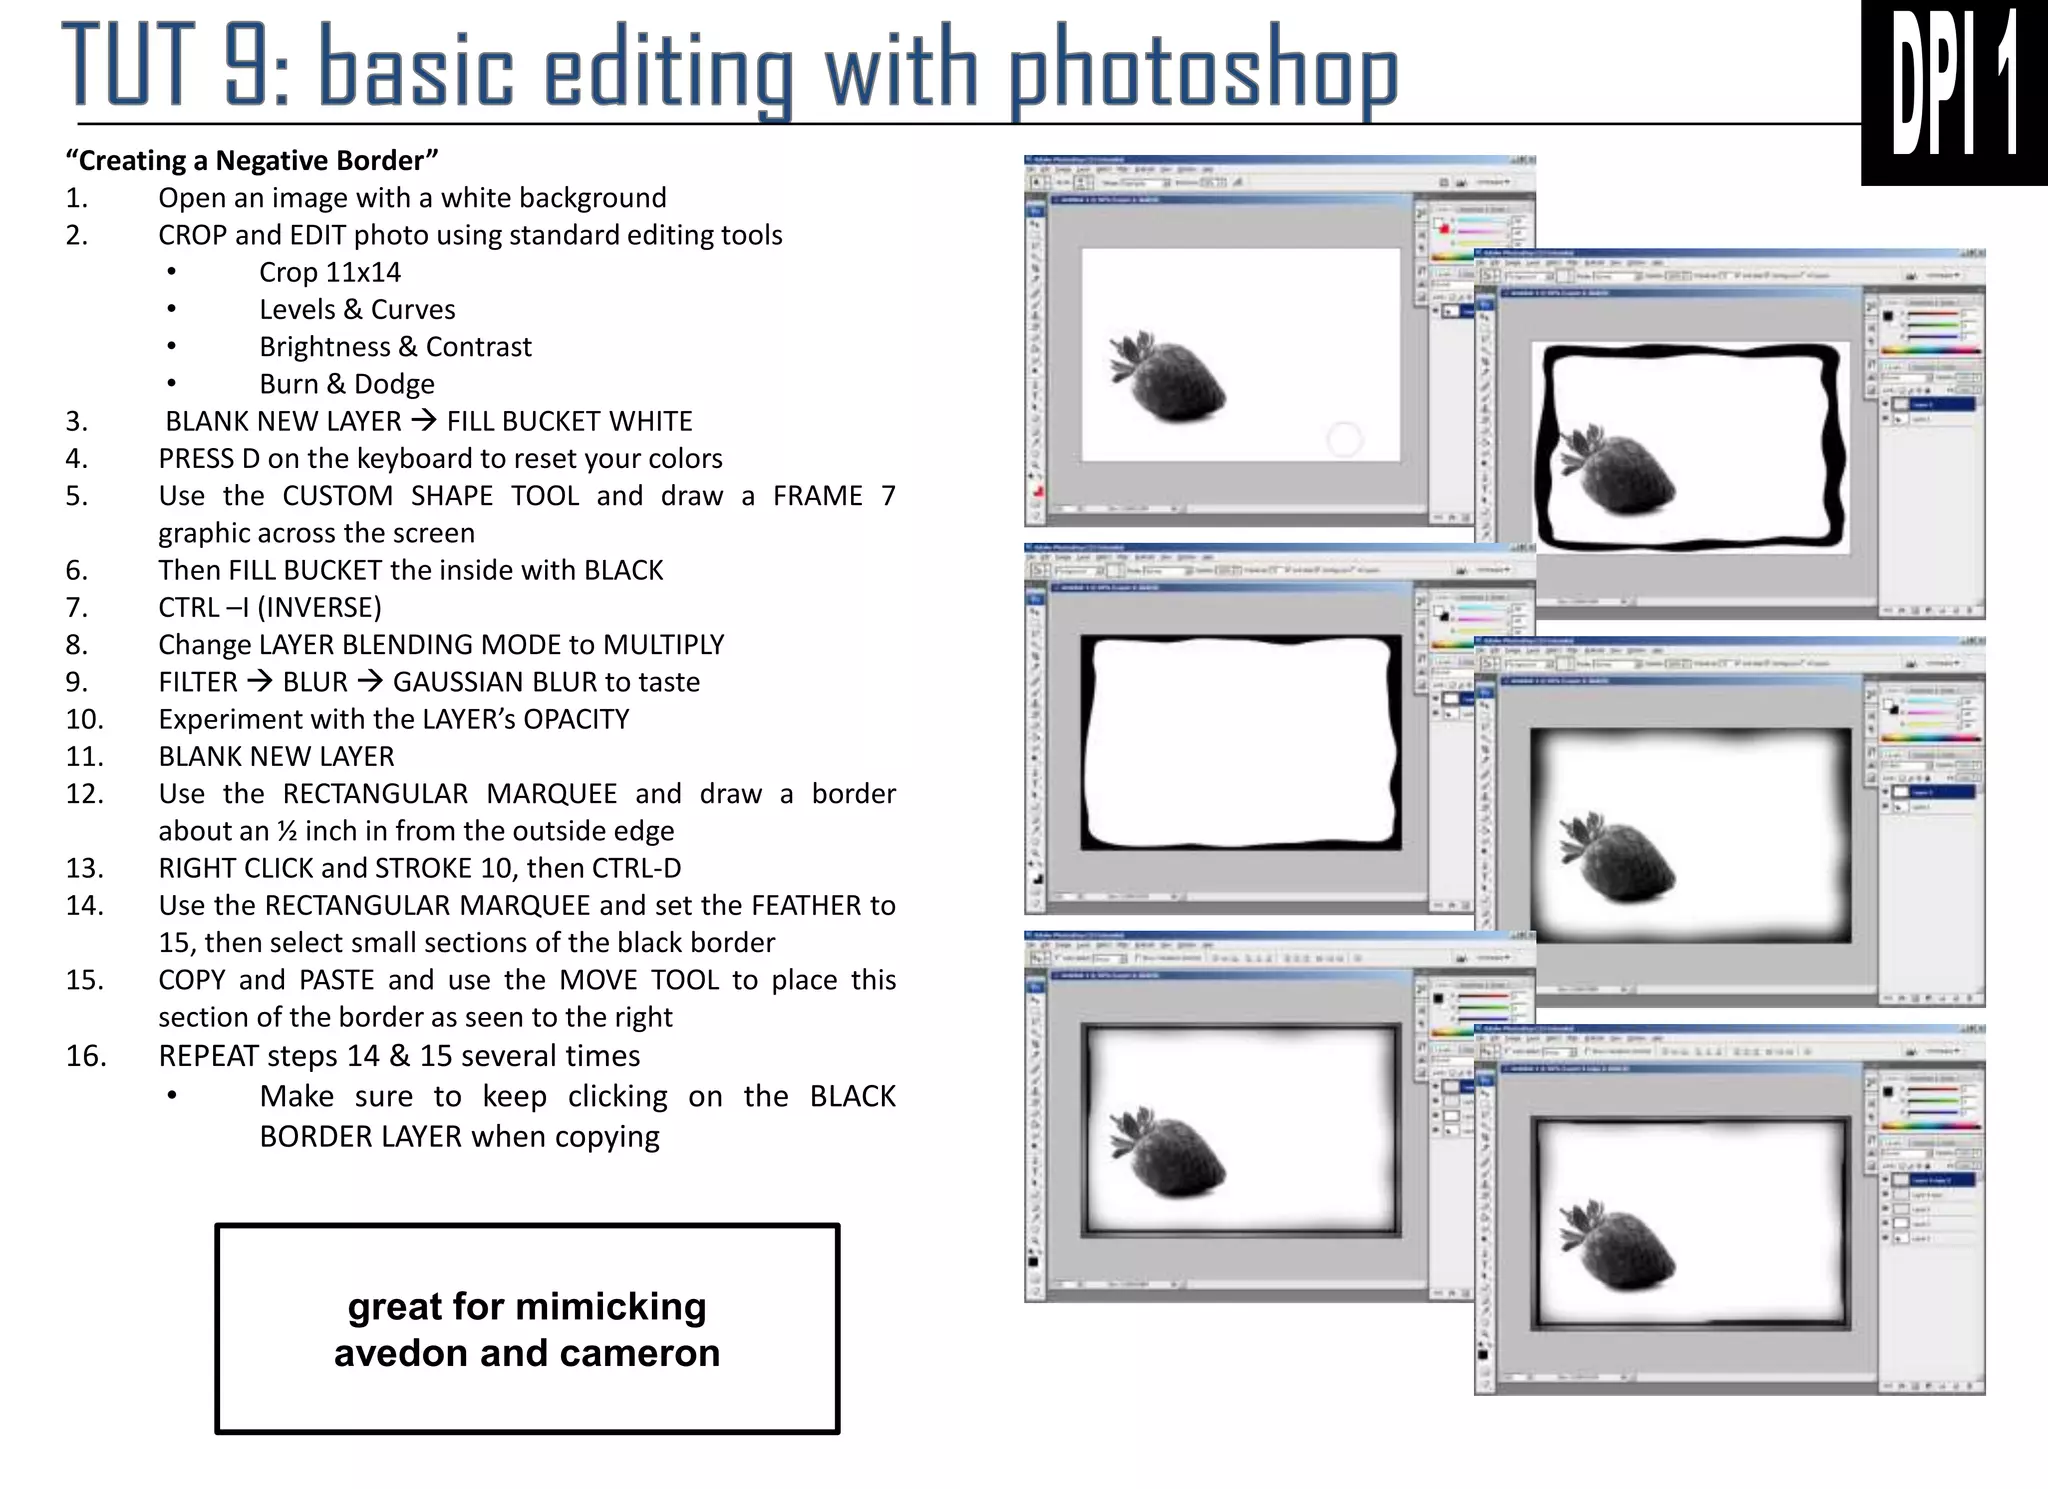
5. Creating a negative border by drawing shapes and frames, blurring, and experimenting with opacity and layer blending modes.


![Steps to work_on_photoshop[1]](https://cdn.slidesharecdn.com/ss_thumbnails/stepstoworkonphotoshop1-110902192923-phpapp01-thumbnail.jpg?width=640&height=640&fit=bounds)
![Steps to work_on_photoshop[1]](https://cdn.slidesharecdn.com/ss_thumbnails/stepstoworkonphotoshop1-110902192646-phpapp02-thumbnail.jpg?width=640&height=640&fit=bounds)


![Coded Agents – with UiPath SDK + LangGraph [Virtual Hands-on Workshop]](https://cdn.slidesharecdn.com/ss_thumbnails/codedagentsdeck-251215155422-5497c599-thumbnail.jpg?width=640&height=640&fit=bounds)


