Downloaded 347 times


![Failure of the lung to fully reexpand: This is rarely due to blockage of the tubes, and change of tubes seldom helps. The common causes of nonexpansion of the lung are as follows: Bronchial blockage leading to collapse, usually by retained sputum (Fiberoptic bronchoscopy helps clear secretions and rule out other causes of bronchial obstruction [eg, tumor].) The presence of a fibrinous "peel" (cortex) over the lung (This is the thickened visceral pleura over the collapsed lung tissue and is usual in cases of delayed treatment of an empyema. A decortication is the best way to deal with this problem) Infections: Infections occur rarely with chest drains but can range from wound infection to empyemas. They reflect breaks in sterility and incorrect management of the chest drai Re-expansion pulmonary edema: This is also a rare chest drain complication and is seen when large effusions are drained in a short period of time. It is best prevented by gradual decompression Chest drain complications](https://image.slidesharecdn.com/tubethoracostomymanagement-090507044506-phpapp02/75/Tube-Thoracostomy-Management-35-2048.jpg)


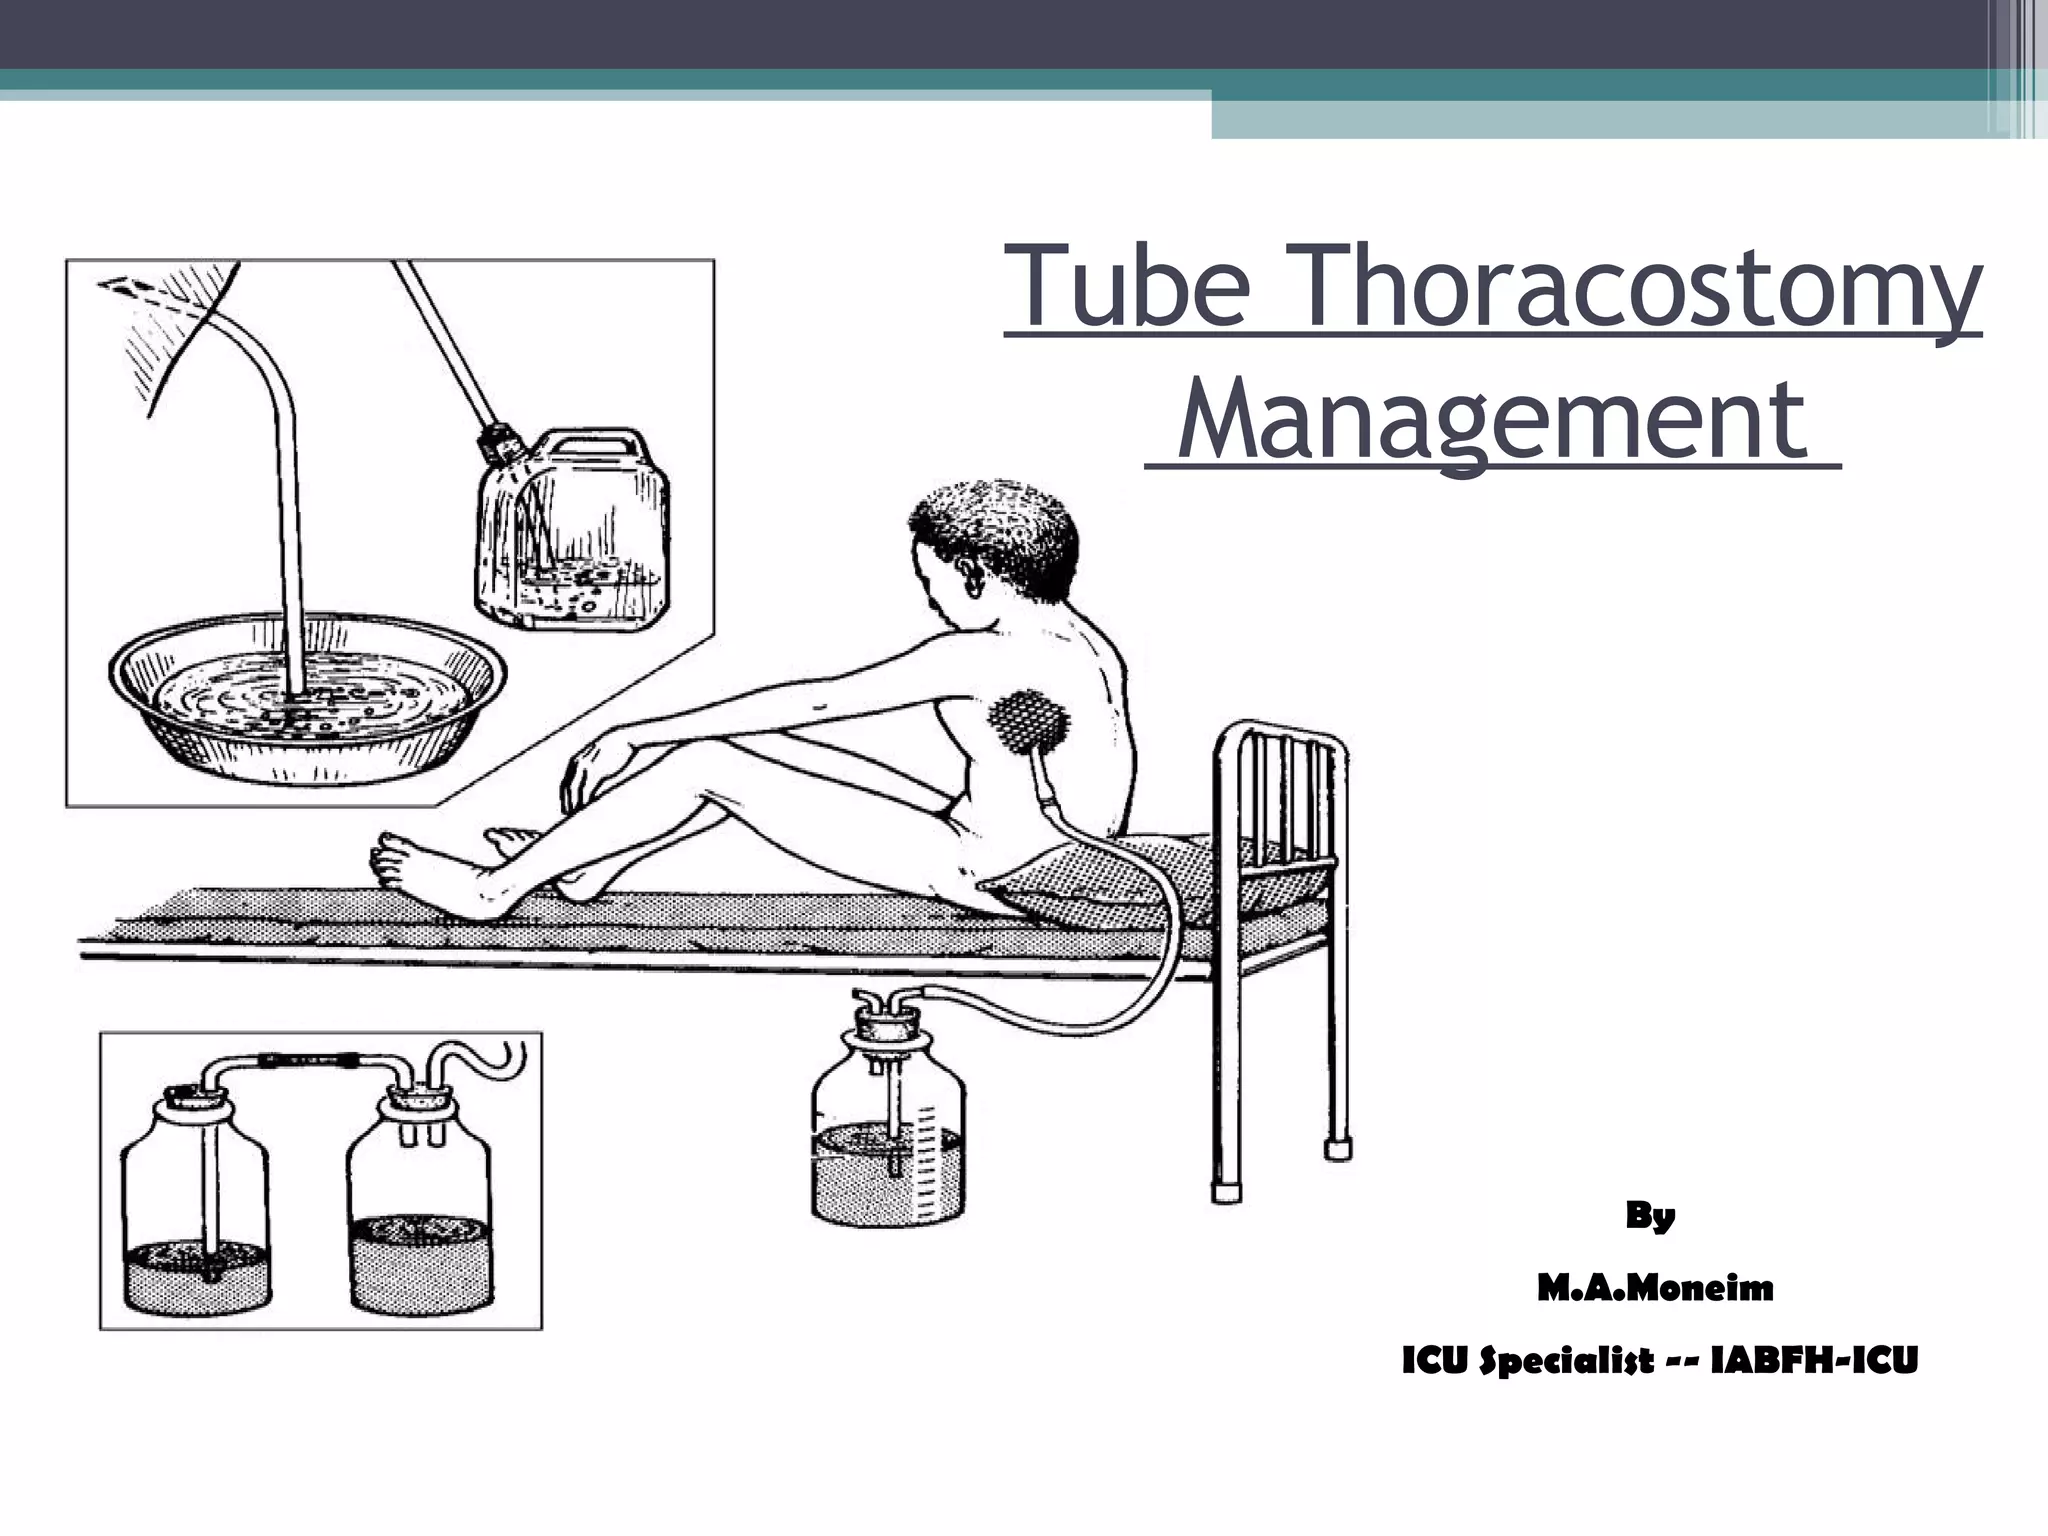
Tube thoracostomy is a procedure to drain air or fluid from the pleural space using a chest tube. The tube is connected to a drainage system that uses water seals and suction to remove collections while preventing reentry of air or fluid. Key components of the drainage system include collection bottles, water seals, and suction regulators. Proper positioning and management of the chest tube and drainage system is important to monitor drainage and ensure full lung reexpansion.


