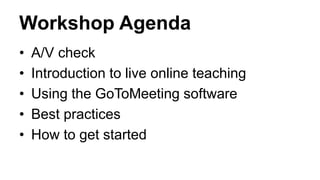
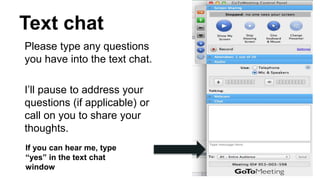
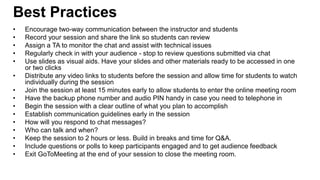
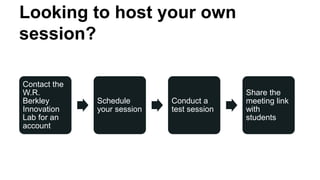
THE LIVE
ONLINE CLASS
Kristen Sosulski
Director of Education for the W.R. Berkley Innovation Lab
Clinical Associate Professor of Information Systems
Workshop Agenda
• A/V check
• Introduction to live online teaching
• Using the GoToMeeting software
• Best practices
• How to get started
AV CHECK
• Let’s ensure you can hear, see, and can
communicate through voice and text.
• To ensure this, I’m going to ask you to
engage in a few simple activities.
Center for Innovation in Teaching and Learning
Text chat
If you can hear me, type
“yes” in the text chat
window
Please type any questions
you have into the text chat.
I’ll pause to address your
questions (if applicable) or
call on you to share your
thoughts.
Audio: What do you do if you
cannot hear?
Ensure you have
– your speakers turned
on
– volume raised
– headset or built-in
microphone
Your setup
• Is your lighting adequate?
• Camera position: Is your image centered?
• Are you comfortable with the backdrop of
your image?
• Will you be sharing your screen? Are the
applications you will be using open?
Center for Innovation in Teaching and Learning
Screen sharing
Can you see my slides?
Webcam: Seeing
Next, let’s
ensure you
can see me
(and set
yourself up so
we can see
each other).
Audio: Speaking
• Let’s go around the virtual room and
introduce ourselves.
• Share one thing you would like to learn
from this workshop.
Center for Innovation in Teaching and Learning
LIVE ONLINE
MEETINGS FOR
COURSES
Ways to incorporate live online
meetings into your course
• Class make-up
• In-class substitute
• Office hours
• Guest speakers
• Student presentations
• Tutorials
• Study sessions
Teaching formats supported
Lecture Discussion
Student
presentations
Guest
speakers
Student
centered
Training
Steps to success
• Your setup
– Good technology (computer, connection, etc.)
• Participants setup
• Practice
– Managing chatting, presenting, muting audio, screensharing, control video,
joining/ending a meeting
• Preparation
– Communication around expectations and behavior
– Testing your content
• Support (your TF?)
• Build in breaks. At least one every hour.
SOFTWARE FOR
LIVE ONLINE
MEETINGS
Synchronous features include:
• Voice
• Webcam sharing
• Screensharing
• Text chatting
• Polling
Synchronous platforms
• GoToMeeting
• GoToTraining
• GoToWebinar
• Adobe Connect
• WebEx
• join.me
Roles and responsibilities
Center for Innovation in Teaching and Learning
The Organizer
• Schedules meetings and invites attendees
• Starts and ends the meeting
• Manages in-session controls
The Presenter
• Screensharing
• The presenter role can be assigned to different people
throughout the meeting
The Attendees
• Can use the chat function to communicate with the organizer or
other attendees
The interface
Center for Innovation in Teaching and Learning
1. Expand & collapse the Panel
2. View and select your audio
3. Submit a question or comment via chat
4. Manage your own muting
5. Share and manage your webcam
Features
1
2
3
4
5
The GoToMeeting organizer interface
Screen Sharing Pane
When an attendee becomes a presenter, the control
panel adjusts to incorporate the presenter
Screen Sharing pane at the top.
The Screen Sharing Pane provides the presenter
with access to the presentation controls:
a) The Broadcasting Status field notifies
presenters of the status of screen sharing.
a) The Show My Screen button starts or pauses a presenter’s ability to show the entire desktop
to attendees.
b) The Screen drop-down button allows the presenter to share specific application windows, or a
clean screen with meeting attendees.
c) The Give Keyboard & Mouse button grants shared mouse and keyboard control to another
attendee.
d) The Change Presenter button passes the presenter role to another attendee.
Let’s try it.
• Request organizer access
from ilabed@stern.nyu.edu
• Open GoToMeeting
• Select Schedule Meeting.
• On the Schedule a Meeting dialog (See
Right), enter a subject, date and time, and
then select the audio information you want
to provide your attendees. When you’re
done, click Schedule.
• You will see a GoToMeeting invitation email
appear in your default email client, which
you can send to attendees.
Scheduling a meeting
Center for Innovation in Teaching and Learning
• Open GoToMeeting
• Select My Meetings.
• On the My Meetings dialog (See
Right), select the meeting you
want to start and then click the
Start button.
Starting a meeting
Inviting students to join the meeting
You must have the meeting ID handy to give your students
1. Go to www.joingotomeeting.com.
2. On the Join the Meeting dialog,
enter the Meeting ID from your
meeting invite
3. If prompted, click Yes, Grant, or Trust to accept the download.
4. If requested, enter the meeting password provided by your meeting
organizer.
5. You will be launched into the meeting where you will see your Control
Panel and GoToMeeting Viewer.
Sample student email
Dear Students,
Please join tomorrow’s online session by clicking the link below:
https://global.gotomeeting.com/join/467501197
Meeting ID: 467-501-197
Wednesday, April 8, 2015 at 12:30pm EDT
After clicking the link, you will be prompted to download the GoToMeeting launcher, which may take between 1-3 minutes. We recommend
joining the meeting early to start this process ahead of time.
Use your microphone and speakers (VoIP) - a headset is recommended. Or, call in using your telephone:
Dial +1 (872) 240-3412
Access Code: 467-501-197
Audio PIN: Shown after joining the meeting
Please enter the meeting room 10 minutes before the start of the session to ensure your speakers, microphone, and camera are working. If
you encounter any problems before or during the session, contact the TF at 212-998-0919
Best,
Professor Smith
Recording a meeting
Organizers can record meetings and make the file
available to attendees once the meeting is over.
• Once the meeting has started, Click View in the
Control Panel and Select Recording (See right).
• A button labeled Start Recording will become
visible in the Control Panel (See right). Click the
button to start recording the session.
• The button will turn red to indicate that the session
is recording. Click the red button at any time to stop
recording.
• At the end of the meeting, a video file will be saved
to the organizer’s computer.
• Recordings can be posted to NYU Classes or
shared with attendees individually.
Where do I find the recorded
meetings?
The meeting cannot continue unless an Organizer is present. You’ll need to select
another Organizer before exiting the application. (See below)
Ending or Leaving a Meeting
Center for Innovation in Teaching and Learning
SAMPLE CLASS
DEMONSTRATION
BEST PRACTICES
Download at: http://bit.ly/2hEKDxg
• Encourage two-way communication between the instructor and students
• Record your session and share the link so students can review
• Assign a TA to monitor the chat and assist with technical issues
• Regularly check in with your audience - stop to review questions submitted via chat
• Use slides as visual aids. Have your slides and other materials ready to be accessed in one
or two clicks
• Distribute any video links to students before the session and allow time for students to watch
individually during the session
• Join the session at least 15 minutes early to allow students to enter the online meeting room
• Have the backup phone number and audio PIN handy in case you need to telephone in
• Begin the session with a clear outline of what you plan to accomplish
• Establish communication guidelines early in the session
• How will you respond to chat messages?
• Who can talk and when?
• Keep the session to 2 hours or less. Build in breaks and time for Q&A.
• Include questions or polls to keep participants engaged and to get audience feedback
• Exit GoToMeeting at the end of your session to close the meeting room.
Best Practices
Center for Innovation in Teaching and Learning
Looking to host your own
session?
Contact the
W.R.
Berkley
Innovation
Lab for an
account
Schedule
your session
Conduct a
test session
Share the
meeting link
with
students
Download the session checklist
Pre
During
Post
Center for Innovation in
http://bit.ly/2i6SDIx
Consultations with faculty
• Use of technology in teaching and learning
• Application of teaching best practices
• Demonstration new approaches to learning
• Collaboration on projects (degrees, courses,
classes, lessons, or assignments)
Center for Innovation in Teaching and Learning
Workshops
• The flipped classroom
• Online teaching
and learning
• Skype for the classroom
• Creating effective visuals
• Intro to learning sciences
• Social tools for learning
• Creating teaching videos
Video Digital content
Online teaching Interactive learning
Faculty grant program
• Projects
– New learning formats: Online, blended, flipped, experiential and global /
multi-campus;
– Student-centered learning experiences: Projects, group activities, and
events; and
– Use of technology to enhance learning: Apps, social platforms, and
collaborative tools.
• Awards range from $1,000 to $10,000 to partner with the W.R.
Berkley Innovation Lab to create innovative educational experience
for your students.
Questions
Contact us and learn more
W.R. Berkley Innovation Lab
Tisch Hall
Suite 400
ilabed@stern.nyu.edu
Blog post:
http://www.kristensosulski.com/2016/12/effective-
practices-for-live-online-teaching/
Center for Innovation in Teaching and Learning
THANK YOU
Kristen Sosulski
Associate Professor of Information Systems @ NYU Stern
Director of Education for the NYU Stern W.R. Berkley Innovation Lab
@sosulski | ks123@nyu.edu | kristensosulski.com
z POSSIBLE

The Live Online Class

  • 1.
  • 2.
    Kristen Sosulski Director ofEducation for the W.R. Berkley Innovation Lab Clinical Associate Professor of Information Systems
  • 3.
    Workshop Agenda • A/Vcheck • Introduction to live online teaching • Using the GoToMeeting software • Best practices • How to get started
  • 4.
  • 5.
    • Let’s ensureyou can hear, see, and can communicate through voice and text. • To ensure this, I’m going to ask you to engage in a few simple activities. Center for Innovation in Teaching and Learning
  • 6.
    Text chat If youcan hear me, type “yes” in the text chat window Please type any questions you have into the text chat. I’ll pause to address your questions (if applicable) or call on you to share your thoughts.
  • 7.
    Audio: What doyou do if you cannot hear? Ensure you have – your speakers turned on – volume raised – headset or built-in microphone
  • 8.
    Your setup • Isyour lighting adequate? • Camera position: Is your image centered? • Are you comfortable with the backdrop of your image? • Will you be sharing your screen? Are the applications you will be using open?
  • 9.
    Center for Innovationin Teaching and Learning
  • 10.
    Screen sharing Can yousee my slides?
  • 11.
    Webcam: Seeing Next, let’s ensureyou can see me (and set yourself up so we can see each other).
  • 13.
    Audio: Speaking • Let’sgo around the virtual room and introduce ourselves. • Share one thing you would like to learn from this workshop. Center for Innovation in Teaching and Learning
  • 14.
  • 15.
    Ways to incorporatelive online meetings into your course • Class make-up • In-class substitute • Office hours • Guest speakers • Student presentations • Tutorials • Study sessions
  • 16.
    Teaching formats supported LectureDiscussion Student presentations Guest speakers Student centered Training
  • 17.
    Steps to success •Your setup – Good technology (computer, connection, etc.) • Participants setup • Practice – Managing chatting, presenting, muting audio, screensharing, control video, joining/ending a meeting • Preparation – Communication around expectations and behavior – Testing your content • Support (your TF?) • Build in breaks. At least one every hour.
  • 18.
  • 19.
    Synchronous features include: •Voice • Webcam sharing • Screensharing • Text chatting • Polling
  • 20.
    Synchronous platforms • GoToMeeting •GoToTraining • GoToWebinar • Adobe Connect • WebEx • join.me
  • 22.
    Roles and responsibilities Centerfor Innovation in Teaching and Learning The Organizer • Schedules meetings and invites attendees • Starts and ends the meeting • Manages in-session controls The Presenter • Screensharing • The presenter role can be assigned to different people throughout the meeting The Attendees • Can use the chat function to communicate with the organizer or other attendees
  • 23.
    The interface Center forInnovation in Teaching and Learning
  • 24.
    1. Expand &collapse the Panel 2. View and select your audio 3. Submit a question or comment via chat 4. Manage your own muting 5. Share and manage your webcam Features 1 2 3 4 5
  • 25.
    The GoToMeeting organizerinterface Screen Sharing Pane When an attendee becomes a presenter, the control panel adjusts to incorporate the presenter Screen Sharing pane at the top. The Screen Sharing Pane provides the presenter with access to the presentation controls: a) The Broadcasting Status field notifies presenters of the status of screen sharing. a) The Show My Screen button starts or pauses a presenter’s ability to show the entire desktop to attendees. b) The Screen drop-down button allows the presenter to share specific application windows, or a clean screen with meeting attendees. c) The Give Keyboard & Mouse button grants shared mouse and keyboard control to another attendee. d) The Change Presenter button passes the presenter role to another attendee.
  • 26.
  • 27.
    • Request organizeraccess from ilabed@stern.nyu.edu • Open GoToMeeting • Select Schedule Meeting. • On the Schedule a Meeting dialog (See Right), enter a subject, date and time, and then select the audio information you want to provide your attendees. When you’re done, click Schedule. • You will see a GoToMeeting invitation email appear in your default email client, which you can send to attendees. Scheduling a meeting Center for Innovation in Teaching and Learning
  • 28.
    • Open GoToMeeting •Select My Meetings. • On the My Meetings dialog (See Right), select the meeting you want to start and then click the Start button. Starting a meeting
  • 29.
    Inviting students tojoin the meeting You must have the meeting ID handy to give your students 1. Go to www.joingotomeeting.com. 2. On the Join the Meeting dialog, enter the Meeting ID from your meeting invite 3. If prompted, click Yes, Grant, or Trust to accept the download. 4. If requested, enter the meeting password provided by your meeting organizer. 5. You will be launched into the meeting where you will see your Control Panel and GoToMeeting Viewer.
  • 30.
    Sample student email DearStudents, Please join tomorrow’s online session by clicking the link below: https://global.gotomeeting.com/join/467501197 Meeting ID: 467-501-197 Wednesday, April 8, 2015 at 12:30pm EDT After clicking the link, you will be prompted to download the GoToMeeting launcher, which may take between 1-3 minutes. We recommend joining the meeting early to start this process ahead of time. Use your microphone and speakers (VoIP) - a headset is recommended. Or, call in using your telephone: Dial +1 (872) 240-3412 Access Code: 467-501-197 Audio PIN: Shown after joining the meeting Please enter the meeting room 10 minutes before the start of the session to ensure your speakers, microphone, and camera are working. If you encounter any problems before or during the session, contact the TF at 212-998-0919 Best, Professor Smith
  • 31.
    Recording a meeting Organizerscan record meetings and make the file available to attendees once the meeting is over. • Once the meeting has started, Click View in the Control Panel and Select Recording (See right). • A button labeled Start Recording will become visible in the Control Panel (See right). Click the button to start recording the session. • The button will turn red to indicate that the session is recording. Click the red button at any time to stop recording. • At the end of the meeting, a video file will be saved to the organizer’s computer. • Recordings can be posted to NYU Classes or shared with attendees individually.
  • 32.
    Where do Ifind the recorded meetings?
  • 33.
    The meeting cannotcontinue unless an Organizer is present. You’ll need to select another Organizer before exiting the application. (See below) Ending or Leaving a Meeting Center for Innovation in Teaching and Learning
  • 34.
  • 35.
    BEST PRACTICES Download at:http://bit.ly/2hEKDxg
  • 36.
    • Encourage two-waycommunication between the instructor and students • Record your session and share the link so students can review • Assign a TA to monitor the chat and assist with technical issues • Regularly check in with your audience - stop to review questions submitted via chat • Use slides as visual aids. Have your slides and other materials ready to be accessed in one or two clicks • Distribute any video links to students before the session and allow time for students to watch individually during the session • Join the session at least 15 minutes early to allow students to enter the online meeting room • Have the backup phone number and audio PIN handy in case you need to telephone in • Begin the session with a clear outline of what you plan to accomplish • Establish communication guidelines early in the session • How will you respond to chat messages? • Who can talk and when? • Keep the session to 2 hours or less. Build in breaks and time for Q&A. • Include questions or polls to keep participants engaged and to get audience feedback • Exit GoToMeeting at the end of your session to close the meeting room. Best Practices Center for Innovation in Teaching and Learning
  • 37.
    Looking to hostyour own session? Contact the W.R. Berkley Innovation Lab for an account Schedule your session Conduct a test session Share the meeting link with students
  • 38.
    Download the sessionchecklist Pre During Post Center for Innovation in http://bit.ly/2i6SDIx
  • 39.
    Consultations with faculty •Use of technology in teaching and learning • Application of teaching best practices • Demonstration new approaches to learning • Collaboration on projects (degrees, courses, classes, lessons, or assignments) Center for Innovation in Teaching and Learning
  • 40.
    Workshops • The flippedclassroom • Online teaching and learning • Skype for the classroom • Creating effective visuals • Intro to learning sciences • Social tools for learning • Creating teaching videos Video Digital content Online teaching Interactive learning
  • 41.
    Faculty grant program •Projects – New learning formats: Online, blended, flipped, experiential and global / multi-campus; – Student-centered learning experiences: Projects, group activities, and events; and – Use of technology to enhance learning: Apps, social platforms, and collaborative tools. • Awards range from $1,000 to $10,000 to partner with the W.R. Berkley Innovation Lab to create innovative educational experience for your students.
  • 42.
  • 43.
    Contact us andlearn more W.R. Berkley Innovation Lab Tisch Hall Suite 400 ilabed@stern.nyu.edu Blog post: http://www.kristensosulski.com/2016/12/effective- practices-for-live-online-teaching/ Center for Innovation in Teaching and Learning
  • 44.
    THANK YOU Kristen Sosulski AssociateProfessor of Information Systems @ NYU Stern Director of Education for the NYU Stern W.R. Berkley Innovation Lab @sosulski | ks123@nyu.edu | kristensosulski.com
  • 45.

Editor's Notes

  • #25 Notes: This slide provides a detailed tour of the GoToMeeting Attendee interface. Notes on slide performance: Click 1 – Expands the control panel Click 2 – Highlights Audio pane Click 3 – Highlights Chat pane Click 4 – Highlights muting control Click 5 – Highlights webcam pane and controls
  • #26 Note: Instructors will have to contact CITL for Organizer access.