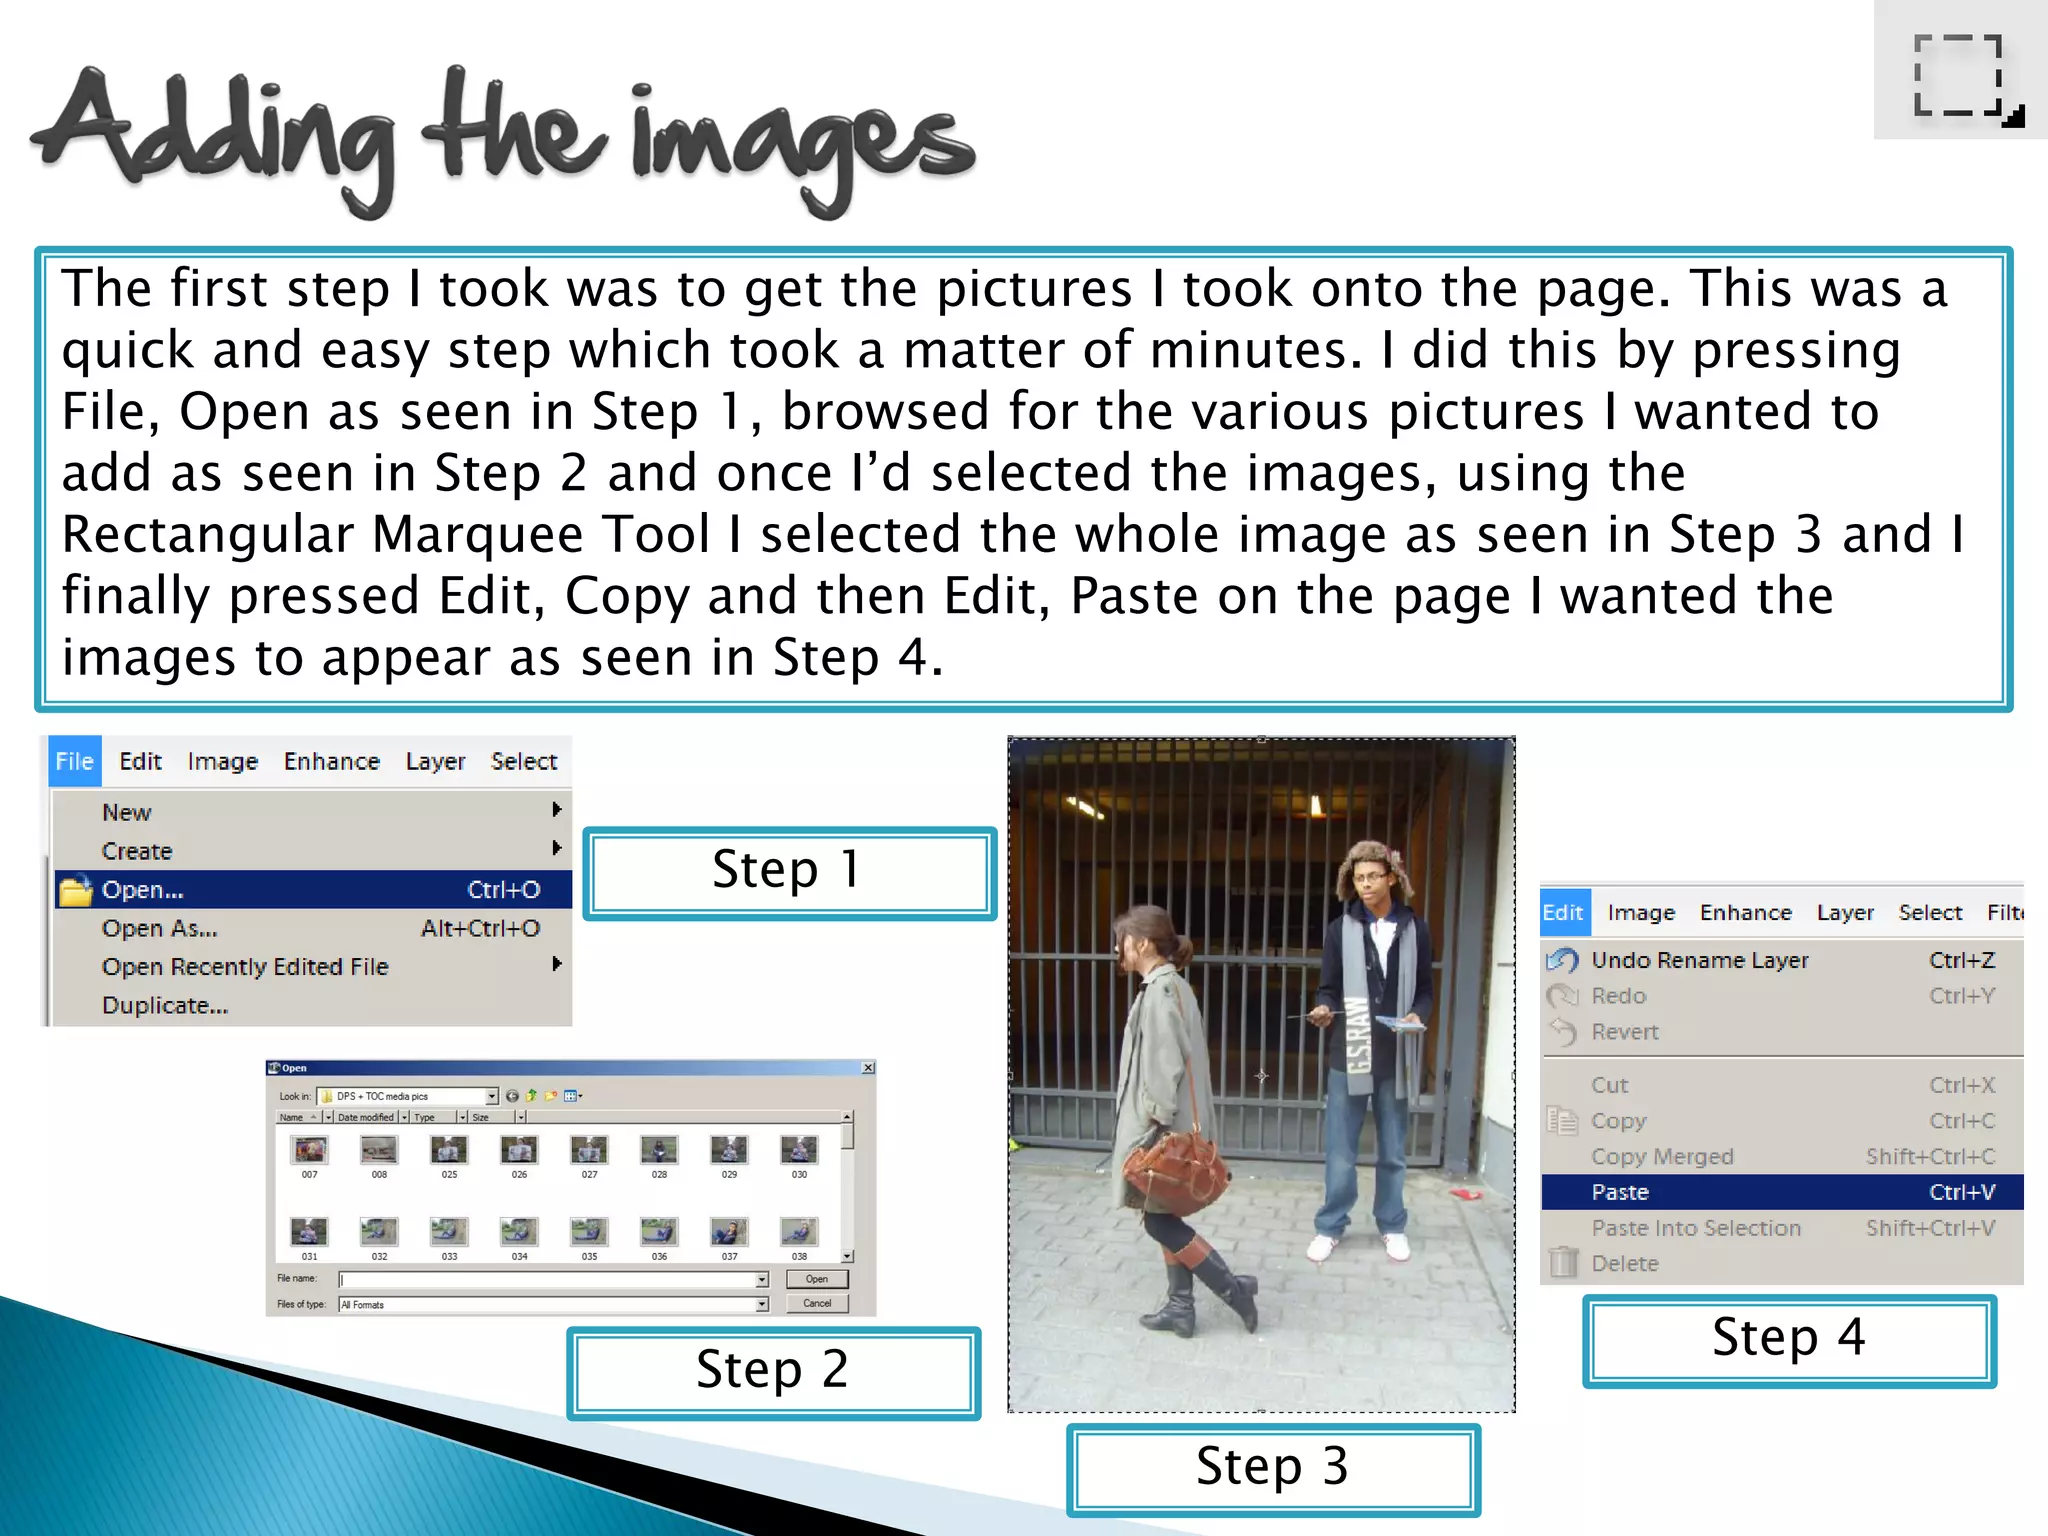
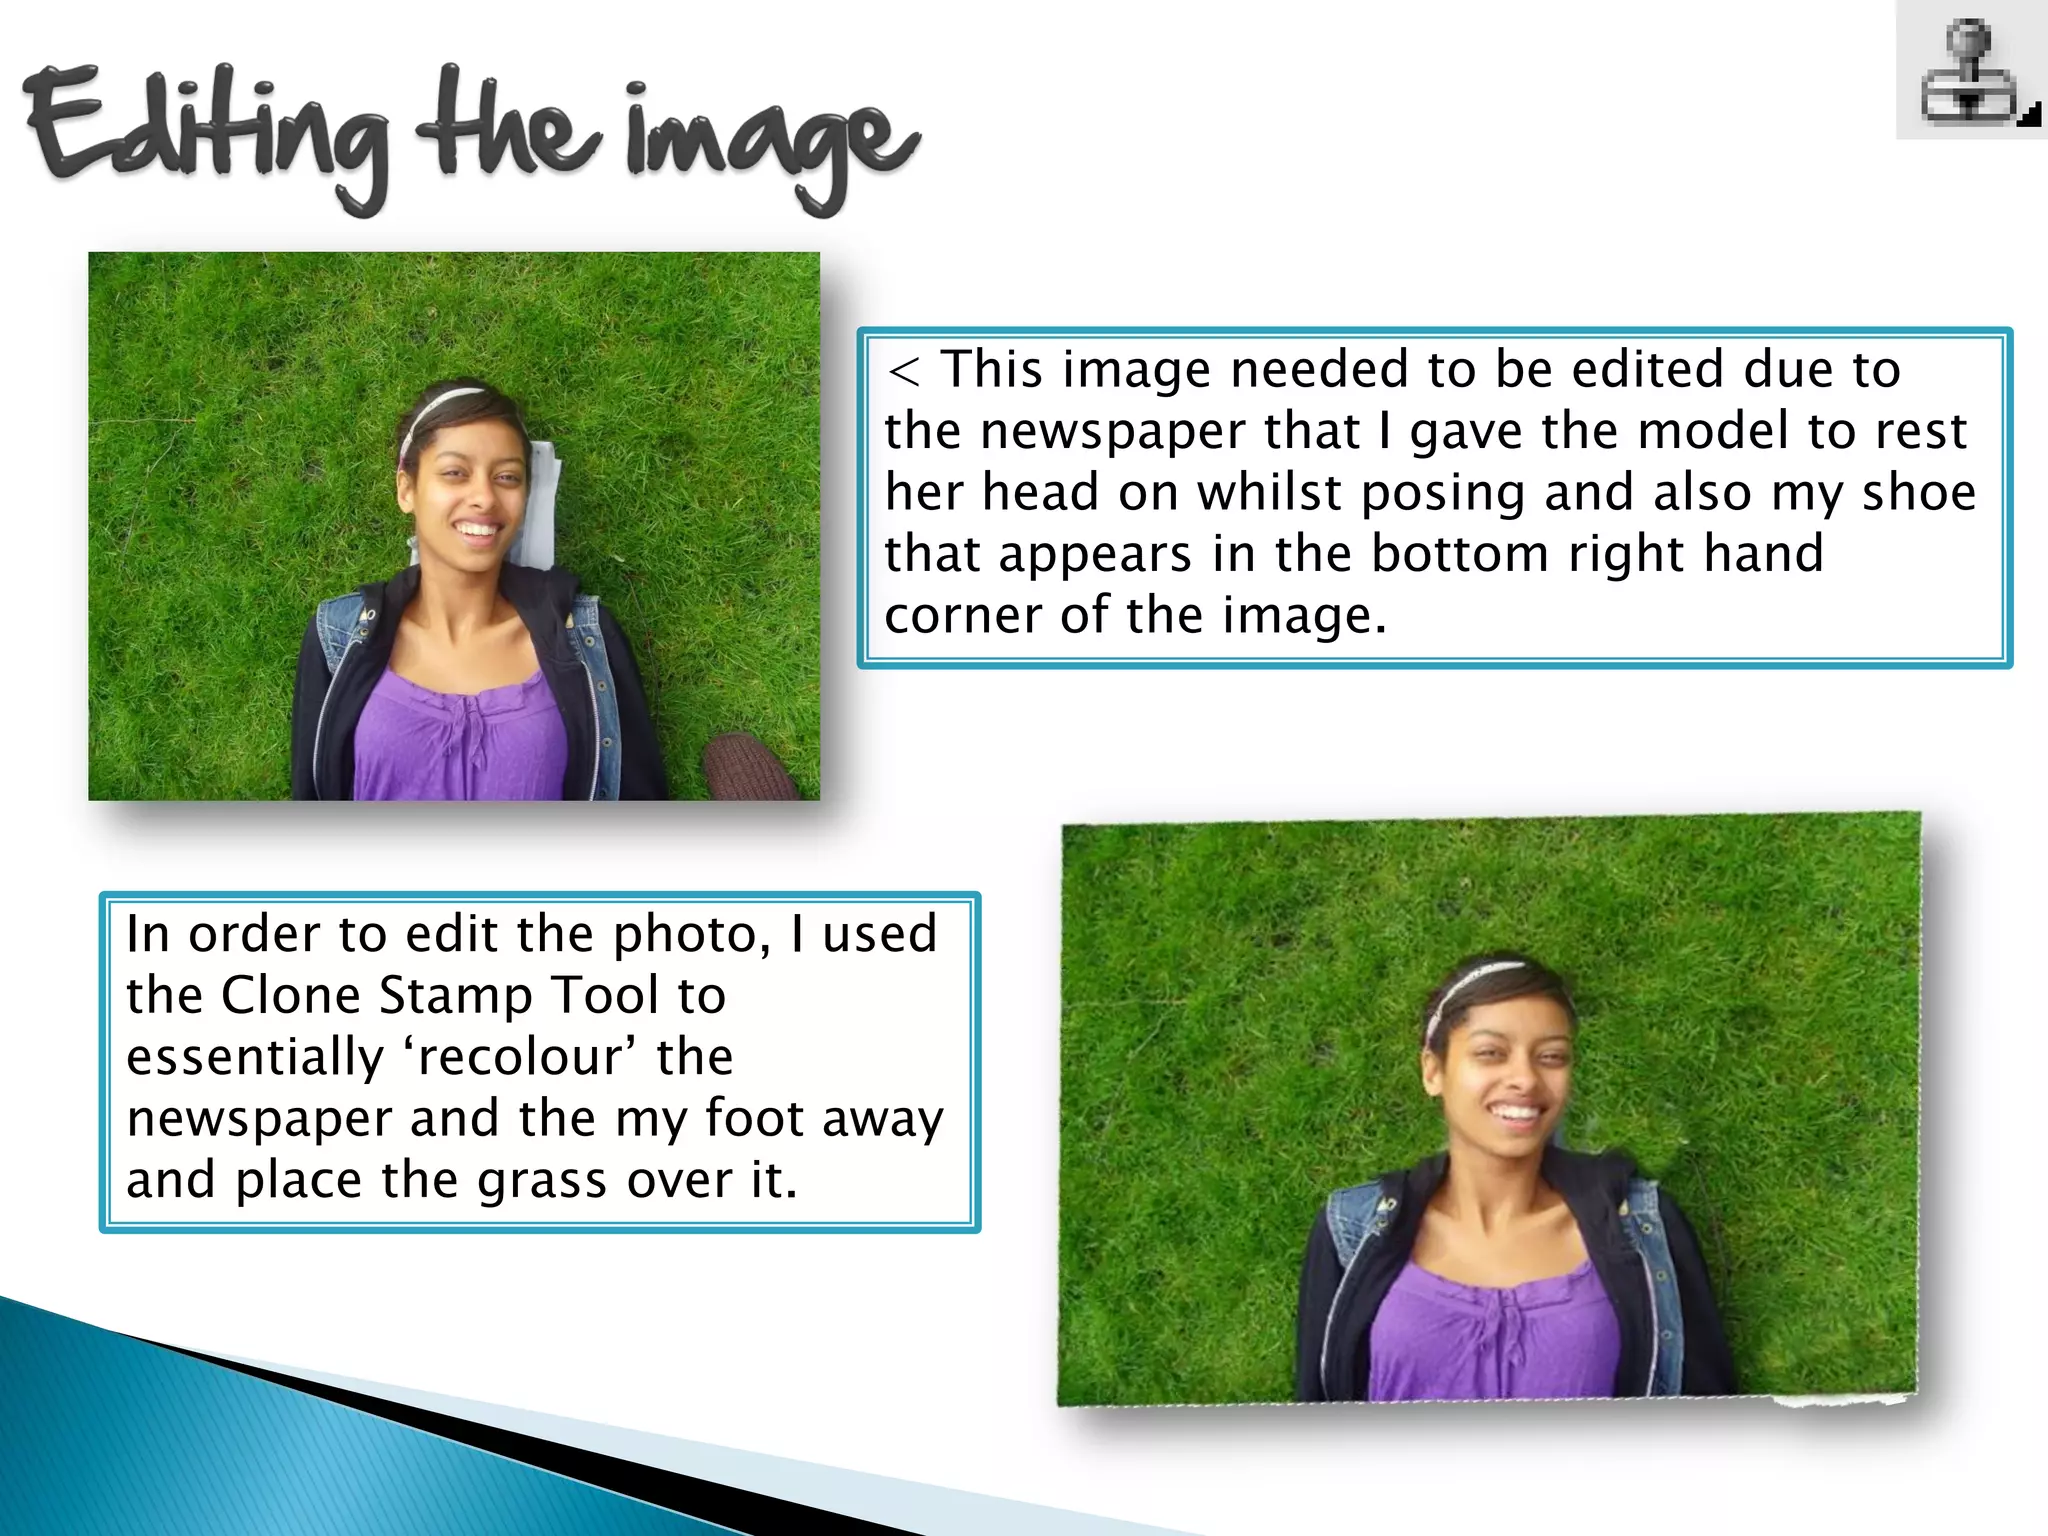
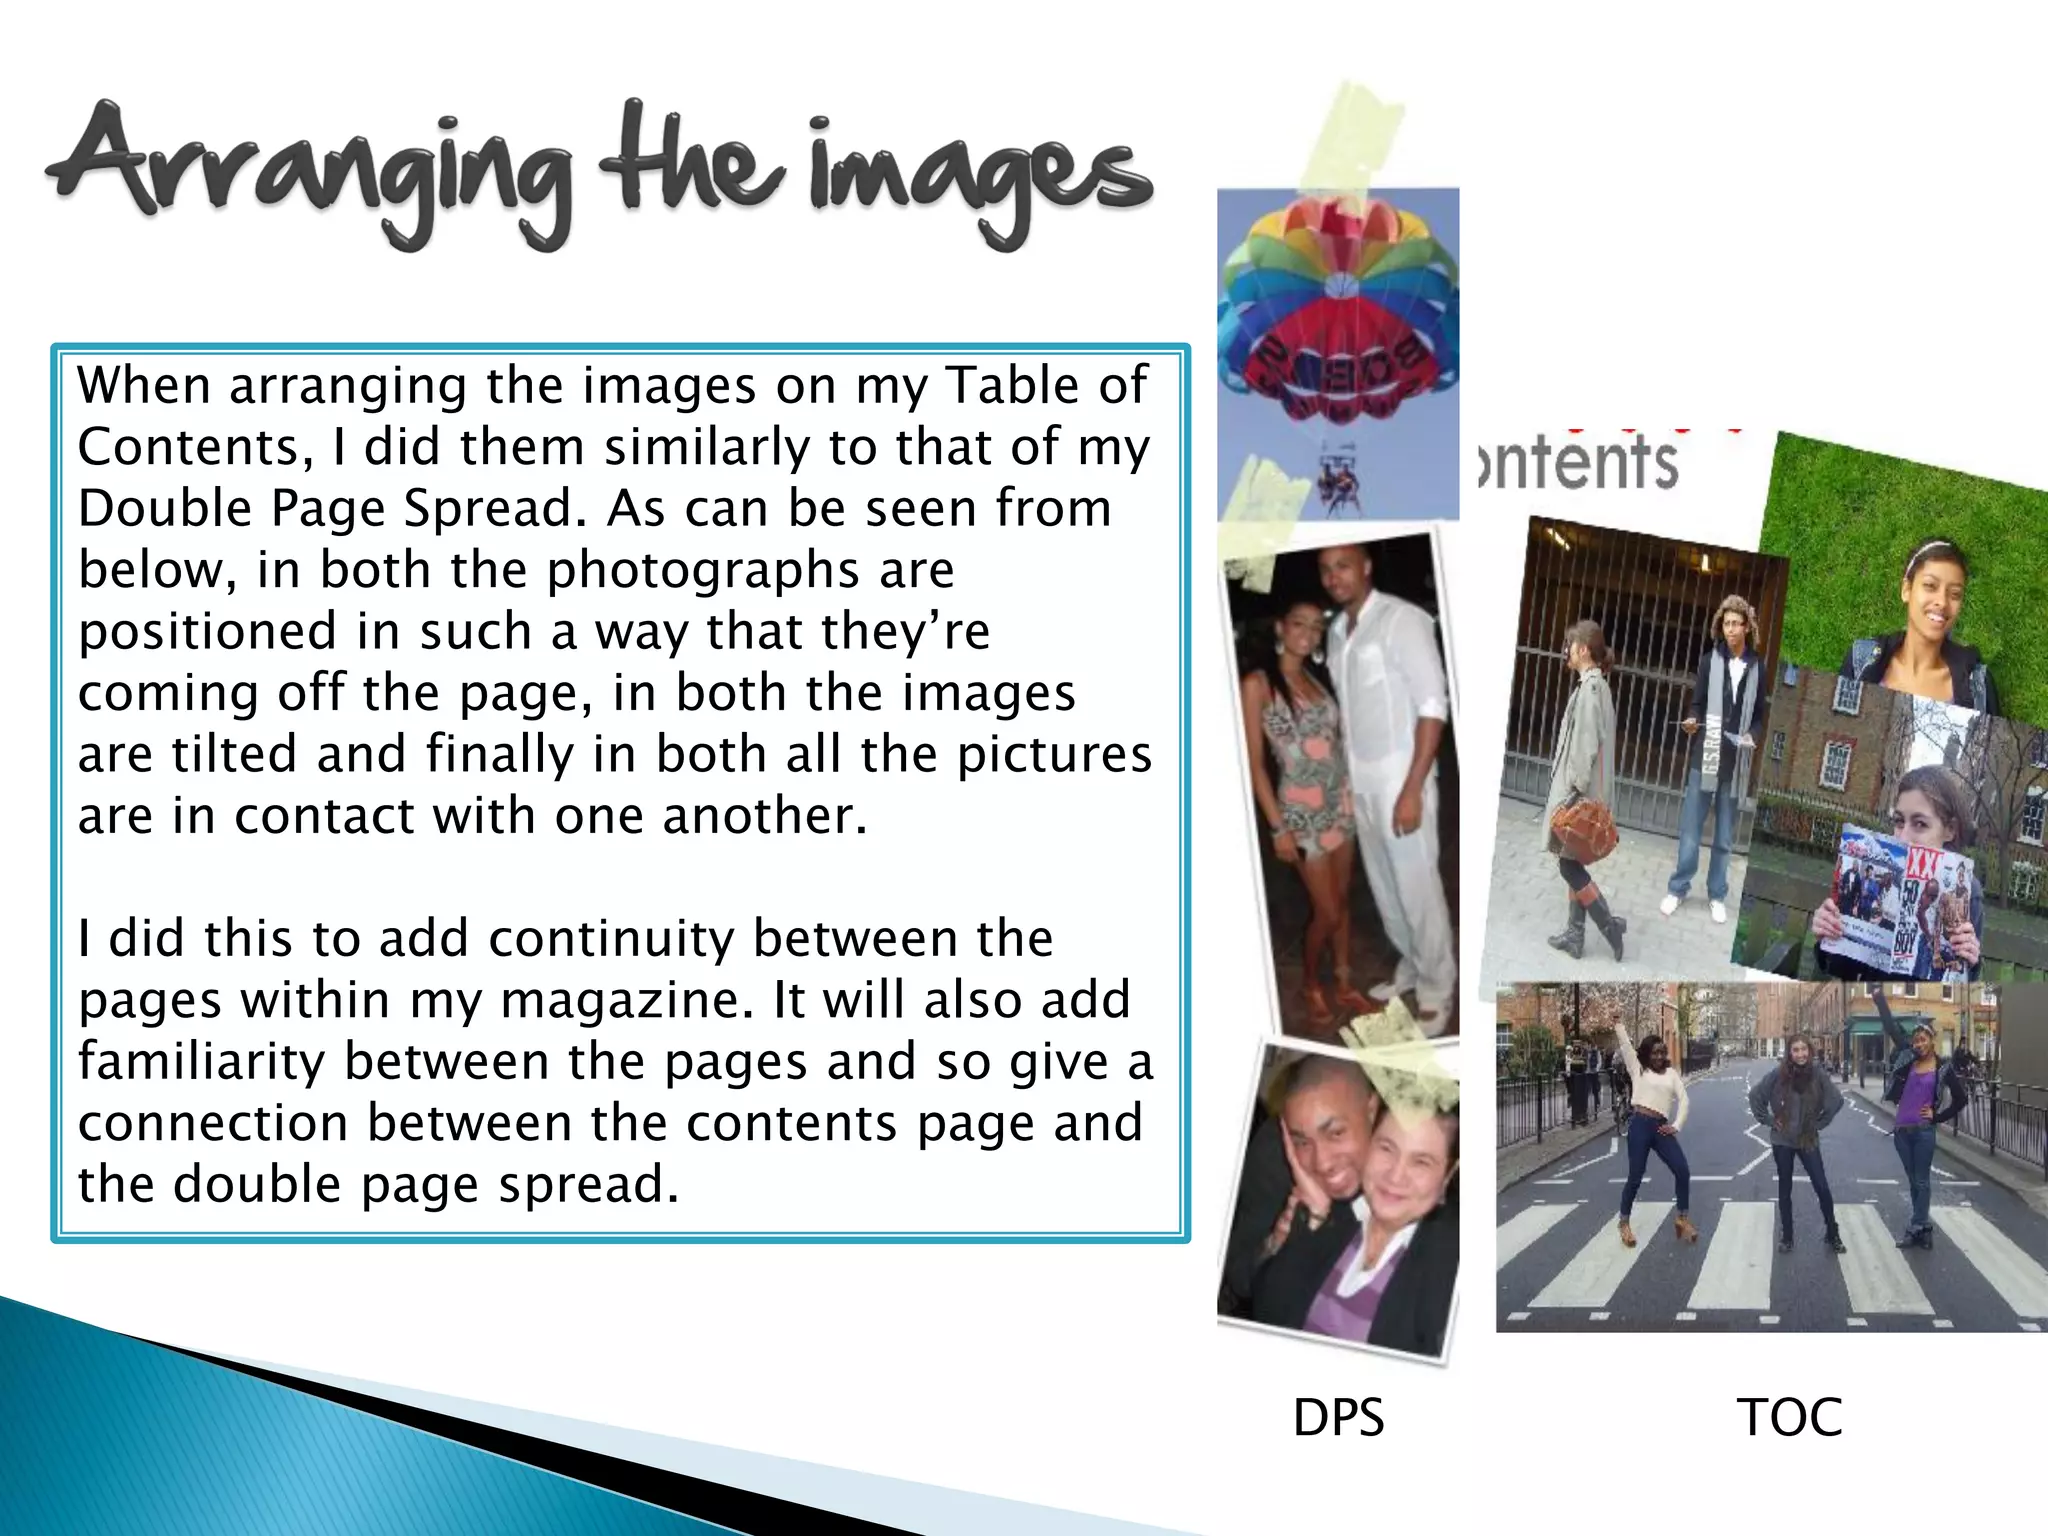
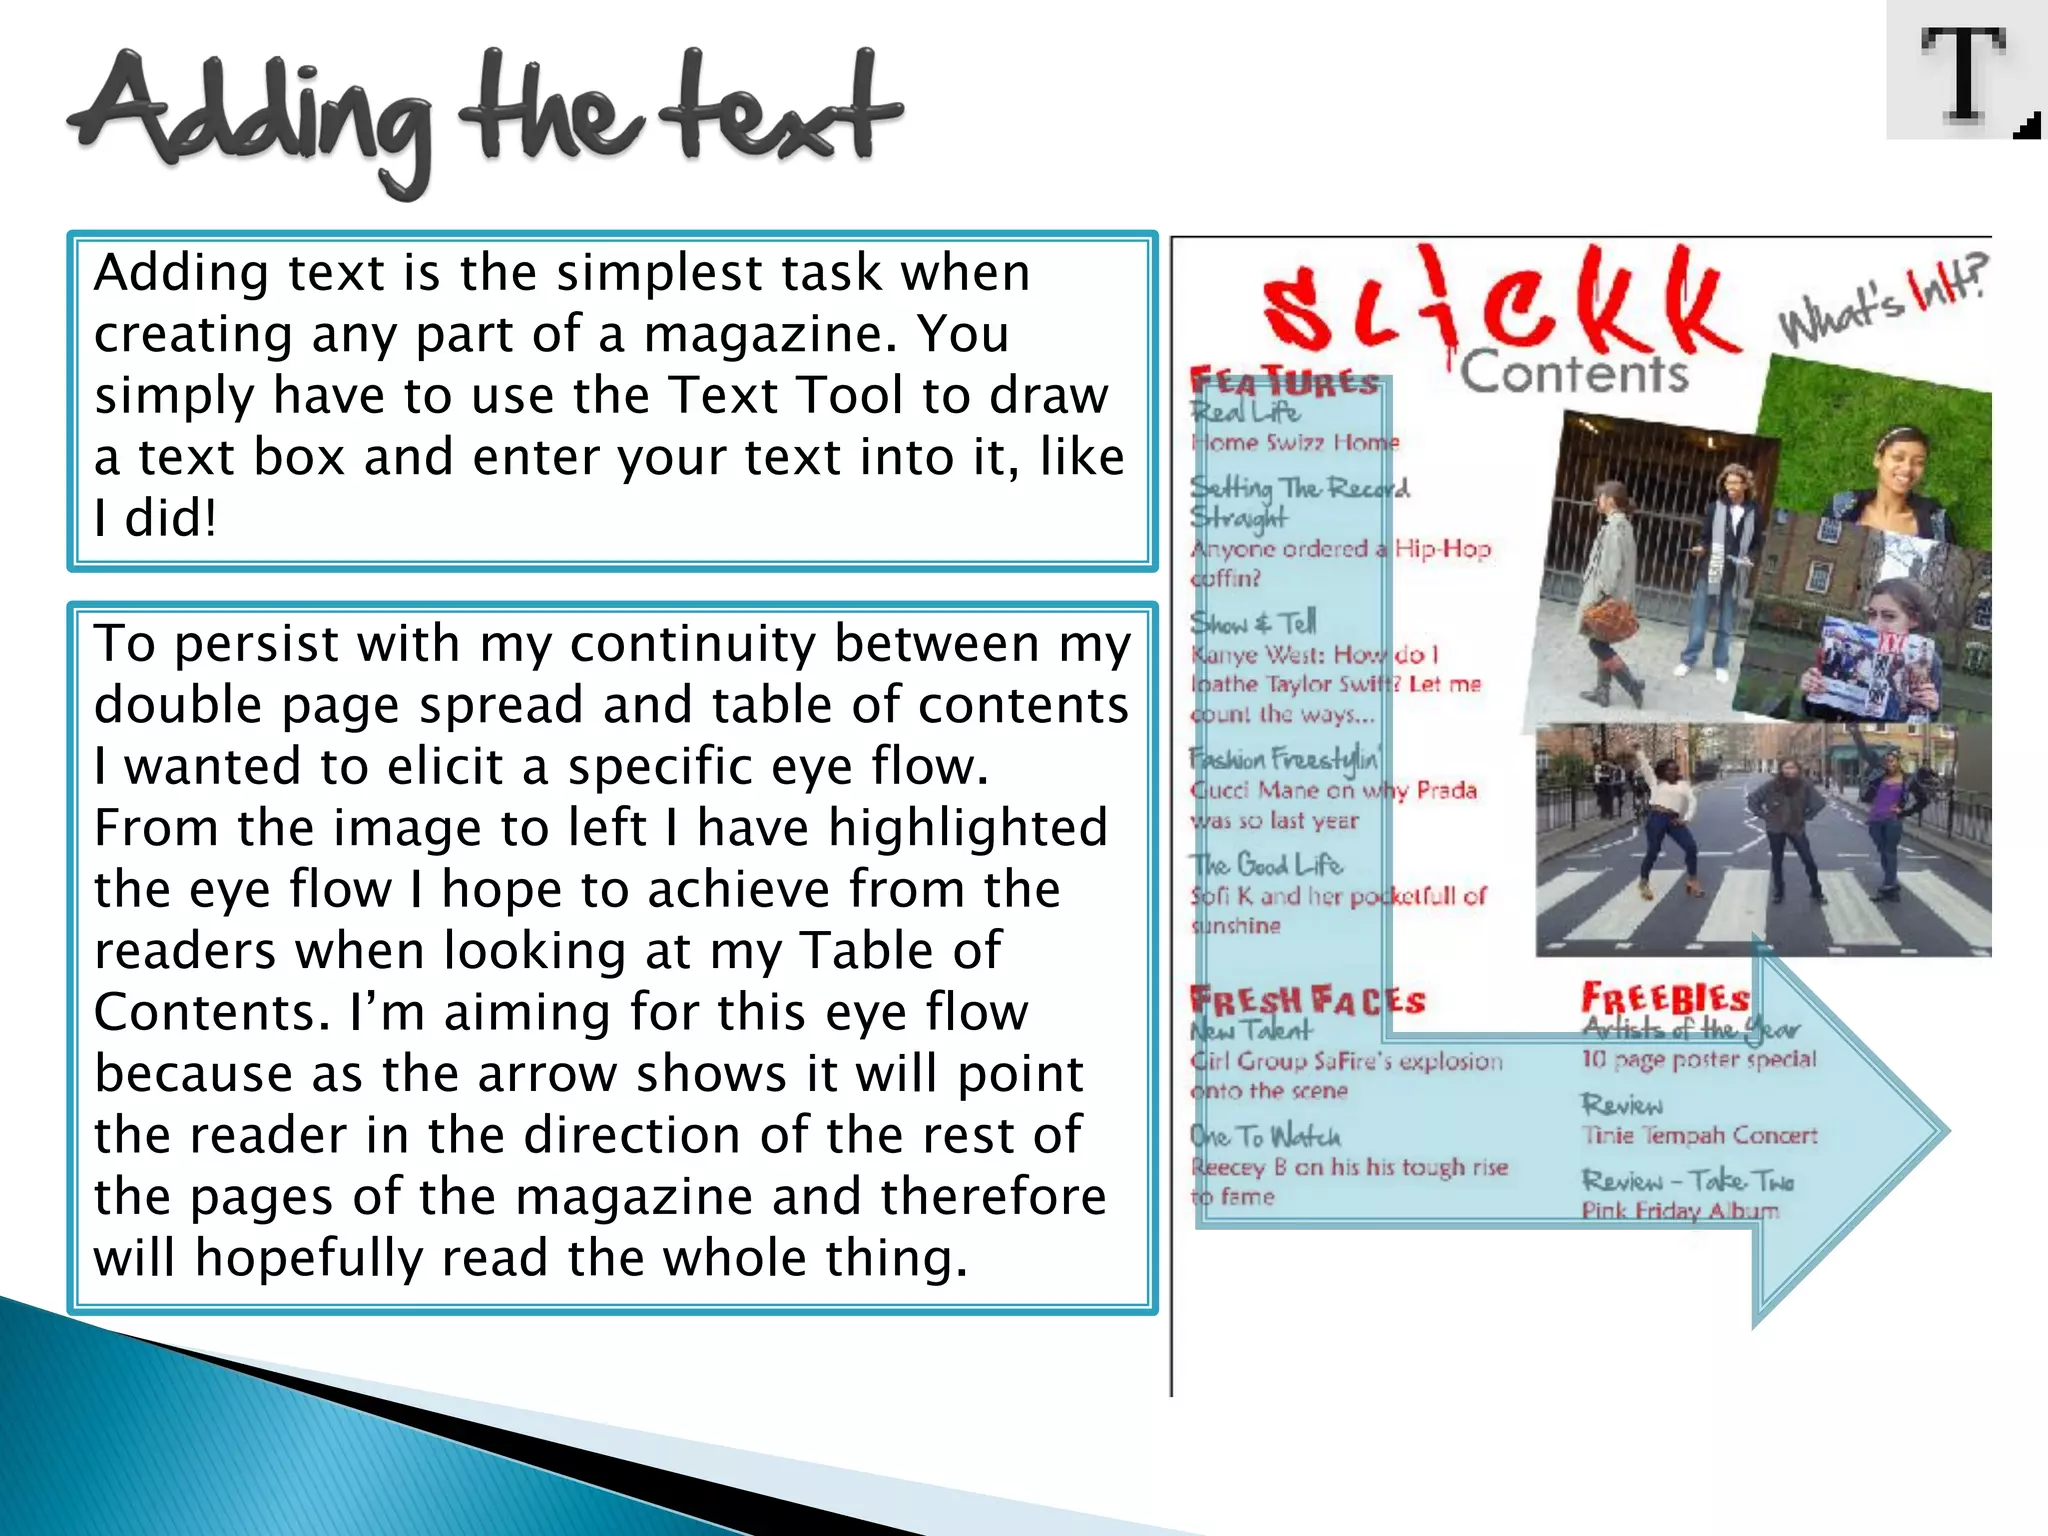
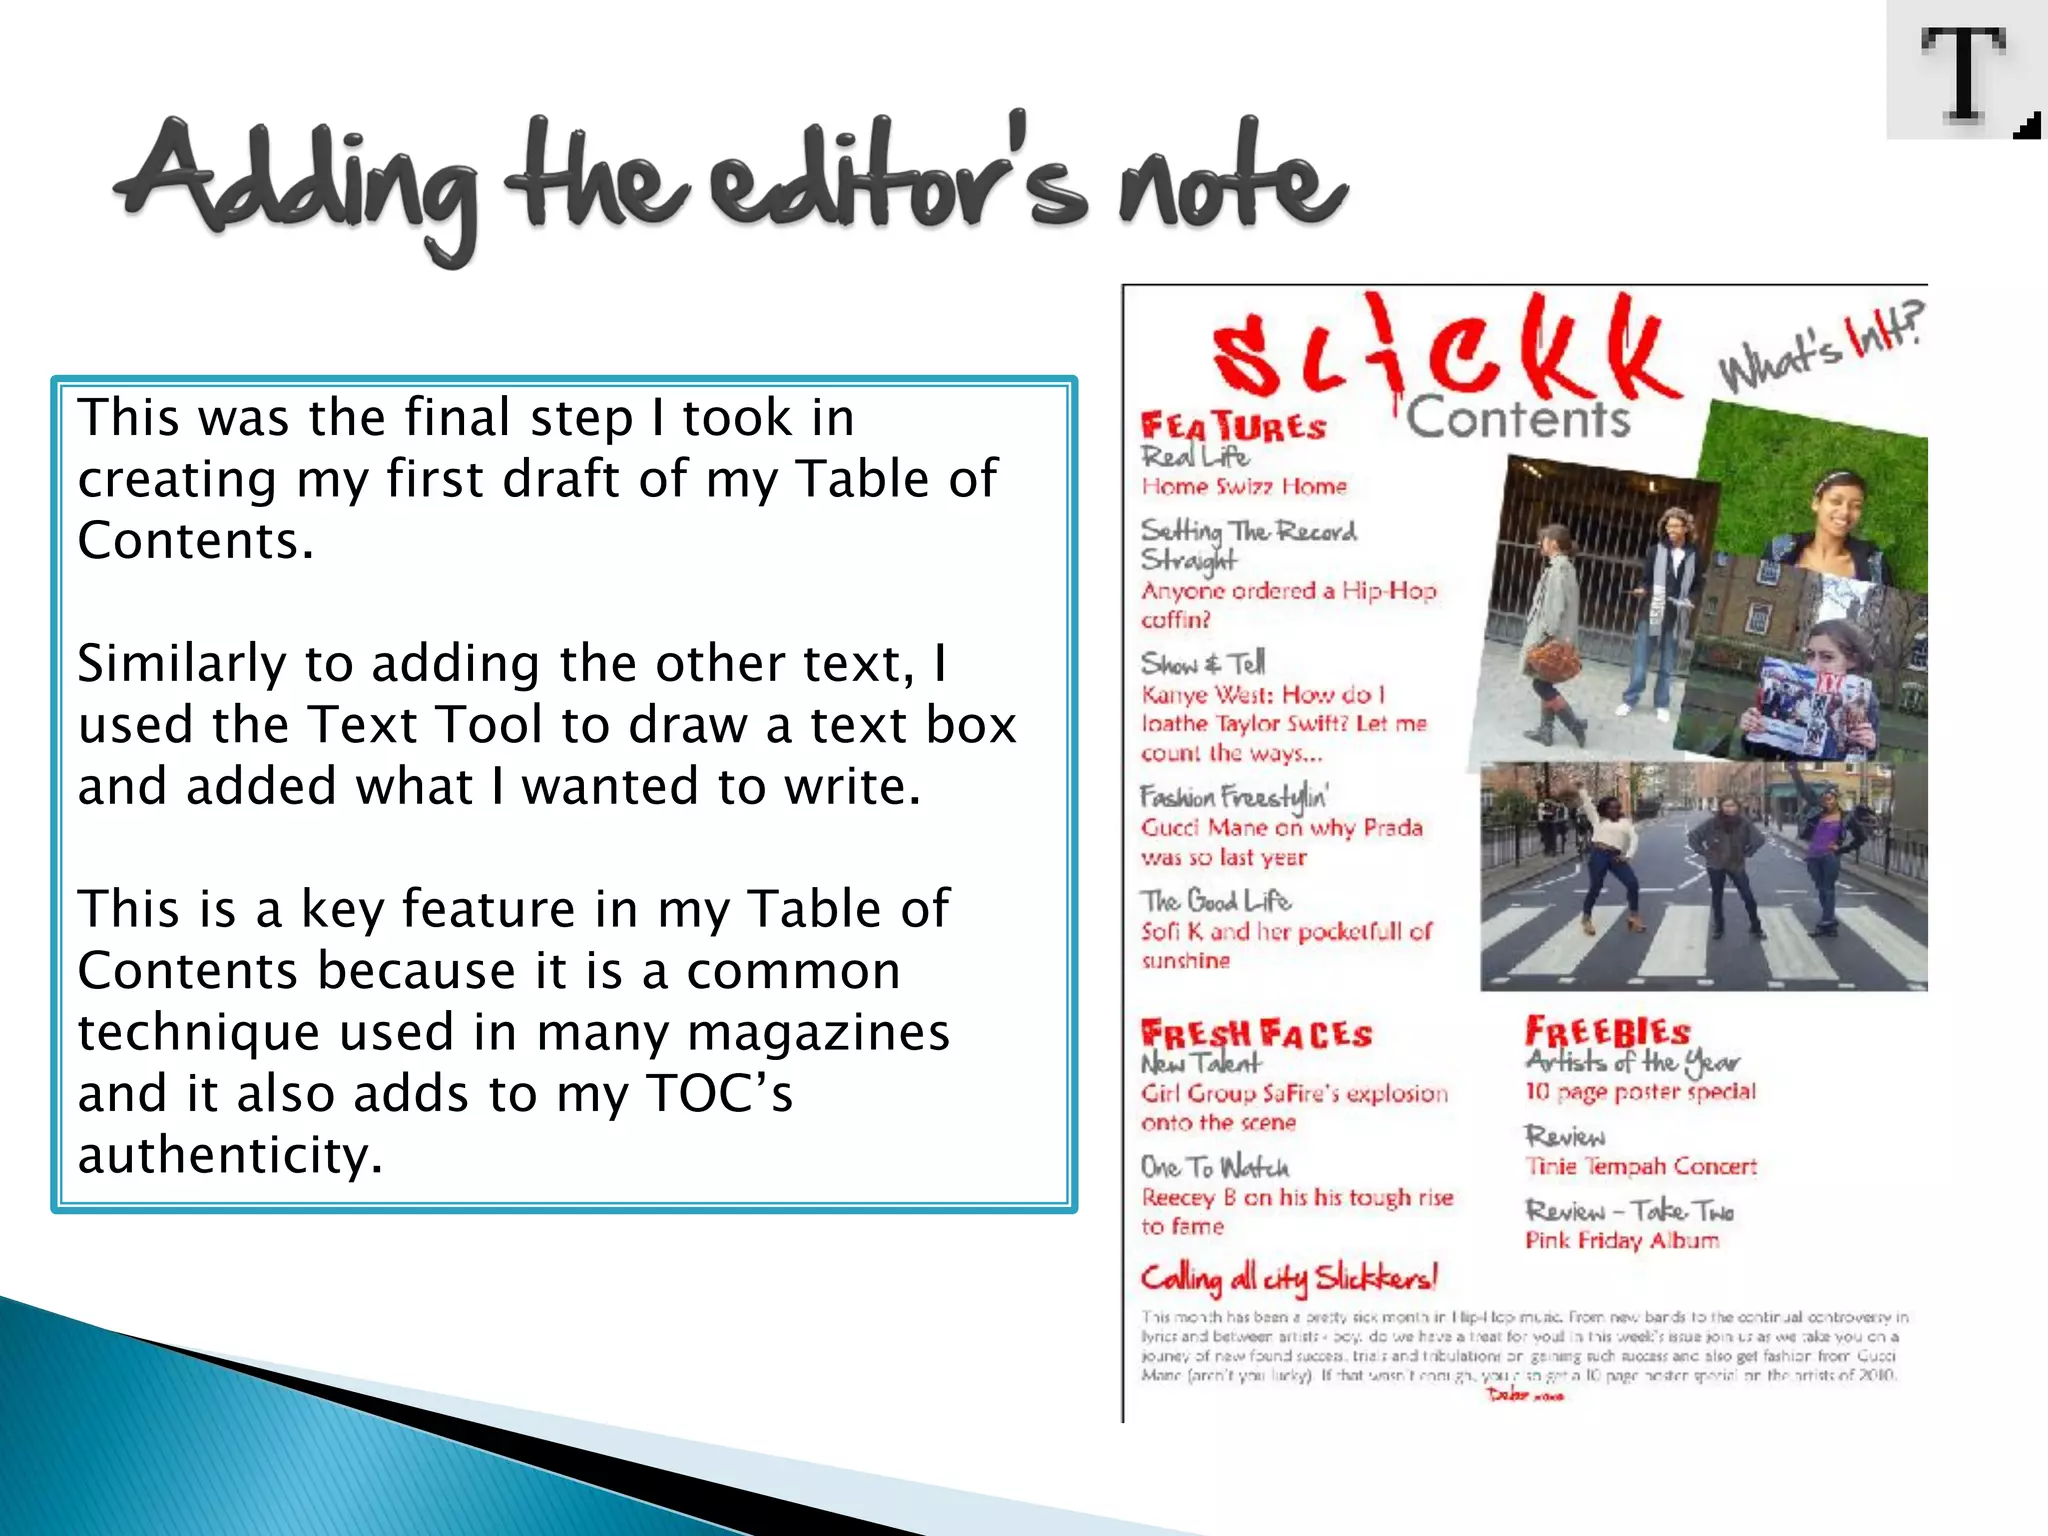
By Debbie Onyemelukwe
The first step I took was to get the pictures I took onto the page. This was a
quick and easy step which took a matter of minutes. I did this by pressing
File, Open as seen in Step 1, browsed for the various pictures I wanted to
add as seen in Step 2 and once I’d selected the images, using the
Rectangular Marquee Tool I selected the whole image as seen in Step 3 and I
finally pressed Edit, Copy and then Edit, Paste on the page I wanted the
images to appear as seen in Step 4.


                          Step 1


                                                                   Step 4
                          Step 2
                                              Step 3
< This image needed to be edited due to
                               the newspaper that I gave the model to rest
                               her head on whilst posing and also my shoe
                               that appears in the bottom right hand
                               corner of the image.


In order to edit the photo, I used
the Clone Stamp Tool to
essentially ‘recolour’ the
newspaper and the my foot away
and place the grass over it.
When arranging the images on my Table of
Contents, I did them similarly to that of my
Double Page Spread. As can be seen from
below, in both the photographs are
positioned in such a way that they’re
coming off the page, in both the images
are tilted and finally in both all the pictures
are in contact with one another.

I did this to add continuity between the
pages within my magazine. It will also add
familiarity between the pages and so give a
connection between the contents page and
the double page spread.


                                                  DPS   TOC
Adding text is the simplest task when
creating any part of a magazine. You
simply have to use the Text Tool to draw
a text box and enter your text into it, like
I did!

To persist with my continuity between my
double page spread and table of contents
I wanted to elicit a specific eye flow.
From the image to left I have highlighted
the eye flow I hope to achieve from the
readers when looking at my Table of
Contents. I’m aiming for this eye flow
because as the arrow shows it will point
the reader in the direction of the rest of
the pages of the magazine and therefore
will hopefully read the whole thing.
This was the final step I took in
creating my first draft of my Table of
Contents.

Similarly to adding the other text, I
used the Text Tool to draw a text box
and added what I wanted to write.

This is a key feature in my Table of
Contents because it is a common
technique used in many magazines
and it also adds to my TOC’s
authenticity.

Table of contents making process pdf

  • 1.
  • 2.
    The first stepI took was to get the pictures I took onto the page. This was a quick and easy step which took a matter of minutes. I did this by pressing File, Open as seen in Step 1, browsed for the various pictures I wanted to add as seen in Step 2 and once I’d selected the images, using the Rectangular Marquee Tool I selected the whole image as seen in Step 3 and I finally pressed Edit, Copy and then Edit, Paste on the page I wanted the images to appear as seen in Step 4. Step 1 Step 4 Step 2 Step 3
  • 3.
    < This imageneeded to be edited due to the newspaper that I gave the model to rest her head on whilst posing and also my shoe that appears in the bottom right hand corner of the image. In order to edit the photo, I used the Clone Stamp Tool to essentially ‘recolour’ the newspaper and the my foot away and place the grass over it.
  • 4.
    When arranging theimages on my Table of Contents, I did them similarly to that of my Double Page Spread. As can be seen from below, in both the photographs are positioned in such a way that they’re coming off the page, in both the images are tilted and finally in both all the pictures are in contact with one another. I did this to add continuity between the pages within my magazine. It will also add familiarity between the pages and so give a connection between the contents page and the double page spread. DPS TOC
  • 5.
    Adding text isthe simplest task when creating any part of a magazine. You simply have to use the Text Tool to draw a text box and enter your text into it, like I did! To persist with my continuity between my double page spread and table of contents I wanted to elicit a specific eye flow. From the image to left I have highlighted the eye flow I hope to achieve from the readers when looking at my Table of Contents. I’m aiming for this eye flow because as the arrow shows it will point the reader in the direction of the rest of the pages of the magazine and therefore will hopefully read the whole thing.
  • 6.
    This was thefinal step I took in creating my first draft of my Table of Contents. Similarly to adding the other text, I used the Text Tool to draw a text box and added what I wanted to write. This is a key feature in my Table of Contents because it is a common technique used in many magazines and it also adds to my TOC’s authenticity.