SlideShare a Scribd company logo
CHAPTER 1
Creating HTML forms using
KompoZer
Use of IDE to create a form
• Full form of IDE is Integrated Development
Environment
• Creating a form using HTML tags is tedious process.
• An IDE is a software application that provides
complete facilities to programmer to develop software.
• IDE provides
1)GUI – Graphical User Interface
2)Text/code Editor
3) compiler and/or interpreter and
4) a debugger.
• 1) Kompozer, 2) Eclipse, 3) JBuilder and 4) Netbeans
are all examples of some open source IDEs.
Introduction to KompoZer
• KompoZer is a free open source web development
IDE.
• KompoZer can be downloaded from
http://www.KompoZer.net.
• It provides a webpage editor which has a simple
graphical interface known as WYSIWYG
• WYSIWYG means “What You See is What You Get”
• It is a complete web authoring system which
integrates 1) webpage development and 2) web
file management.
Interface to KompoZer
• Open KompoZer::::
– ApplicationsProgrammingKompoZer
– Double click KompoZer icon on desktop
• To view the different toolbars and status bar , click on
View -> Show/Hide
• Different Toolbar: Composite Toolbar, Format Toolbar1,
Format Toolbar2, Edit Mode Toolbar and Status bar.
• Site Manager and Rulers option also be listed.
• KompoZer has eight menus:- File, Edit, View, Insert, Format,
Table, Tools and Help.
• 3 Toolbars below Menu bar:- Composite Toolbar, Format
Toolbar-1 and Format Toolbar-2
– The composite toolbar is used to create new file, open a file, save a
file or publish a web page.
– The format toolbar1 and format toolbar2 are used to format the
text, add bullets, numbering and perform similar formatting
operations.
2 Panes in the center of the Kompozer Window:
In the centre of the window, you can see two panes:
Site Manager and blank web page
• Site Manager:
– Site Manager is a powerful tool used to navigate within the site or
between the sites.
– KompoZer incorporates a Site Manager which gives rapid access
to the files on both local machines and remote servers
– We can close the site manager pane by clicking on close button or
press F9.
• Blank webpage (Page Pane):
– The page pane shows a blank untitled webpage.
Edit Mode toolbar
The bottom right side of the window shows Edit mode toolbar
with three viewing modes: Normal, HTML tags and Preview
– The Normal View mode
– Webpage along with the table outlines are visible.
– Normal view is very similar to preview mode.
– HTML tags View:
– A Yellow marker is used to indicate the start tag for all
elements.
– Preview Mode:
– The Preview mode offers the page view as seen in a
browser.
– In the Preview mode the script do not run and
therefore their effects will not be seen.
– The links also does not operate in preview mode
3 tabs on the Left side of the page pane:
– The Design tab is used to design the web page.
– The Split tab display the HTML source of the
current element.
– Source tab shows all details of the HTML code. It
helps in editing the source code.
Status Bar
– On the bottom of the window.
– When any item in page is clicked, its structure
appears in the status bar.
Introduction to Form
• With the increase in the use of Internet many activities have
become online.
• Web page is used to fill various information about ourselves or
product.
• HTML forms are used to help the visitors of the website to input
data.
• A form in HTML is a container used to collect different kinds of
inputs from the user.
• It allows for more interactivity and control in data entry.
• Well organized structure designed to input the required the data
and information of website is called form.
• HTML contains elements like label, checkbox, text input field, radio
button, submit button, reset button and many more.
• The form elements are used to enter the data as well as validate
the data within the forms.
Four elements are used in a form:
1) Form
2) Input
3) Textarea
4) Select and option
Form Elements
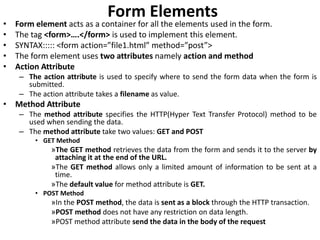
• Form element acts as a container for all the elements used in the form.
• The tag <form>….</form> is used to implement this element.
• SYNTAX::::: <form action=”file1.html” method=”post”>
• The form element uses two attributes namely action and method
• Action Attribute
– The action attribute is used to specify where to send the form data when the form is
submitted.
– The action attribute takes a filename as value.
• Method Attribute
– The method attribute specifies the HTTP(Hyper Text Transfer Protocol) method to be
used when sending the data.
– The method attribute take two values: GET and POST
• GET Method
»The GET method retrieves the data from the form and sends it to the server by
attaching it at the end of the URL.
»The GET method allows only a limited amount of information to be sent at a
time.
»The default value for method attribute is GET.
• POST Method
»In the POST method, the data is sent as a block through the HTTP transaction.
»POST method does not have any restriction on data length.
»POST method attribute send the data in the body of the request
Input Elements
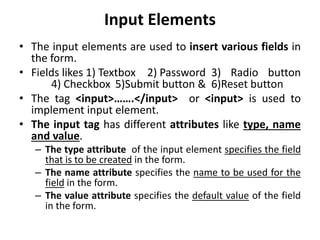
• The input elements are used to insert various fields in
the form.
• Fields likes 1) Textbox 2) Password 3) Radio button
4) Checkbox 5)Submit button & 6)Reset button
• The tag <input>…….</input> or <input> is used to
implement input element.
• The input tag has different attributes like type, name
and value.
– The type attribute of the input element specifies the field
that is to be created in the form.
– The name attribute specifies the name to be used for the
field in the form.
– The value attribute specifies the default value of the field
in the form.
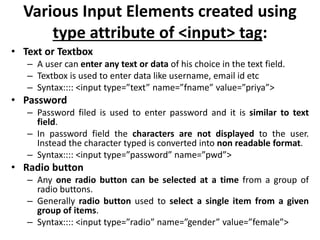
Various Input Elements created using
type attribute of <input> tag:
• Text or Textbox
– A user can enter any text or data of his choice in the text field.
– Textbox is used to enter data like username, email id etc
– Syntax:::: <input type=”text” name=”fname” value=”priya”>
• Password
– Password filed is used to enter password and it is similar to text
field.
– In password field the characters are not displayed to the user.
Instead the character typed is converted into non readable format.
– Syntax:::: <input type=”password” name=”pwd”>
• Radio button
– Any one radio button can be selected at a time from a group of
radio buttons.
– Generally radio button used to select a single item from a given
group of items.
– Syntax:::: <input type=”radio” name=”gender” value=”female”>
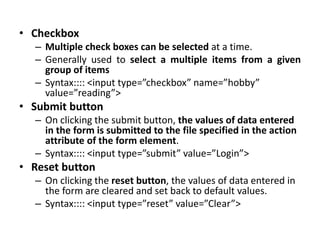
• Checkbox
– Multiple check boxes can be selected at a time.
– Generally used to select a multiple items from a given
group of items
– Syntax:::: <input type=”checkbox” name=”hobby”
value=”reading”>
• Submit button
– On clicking the submit button, the values of data entered
in the form is submitted to the file specified in the action
attribute of the form element.
– Syntax:::: <input type=”submit” value=”Login”>
• Reset button
– On clicking the reset button, the values of data entered in
the form are cleared and set back to default values.
– Syntax:::: <input type=”reset” value=”Clear”>
Textarea Element
• The textarea element allows multi line text input
• The tag <textarea>….</textarea> is used to implement
textarea element.
• Textarea allows entering unlimited number of characters.
• Textarea can be used to enter comment, report or a long
description of product.
• The size of a textarea element can be specifies using rows
and cols attributes.
• The row attribute is used to set the number of rows of text
that will be visible without scrolling up and down.
• The cols attribute is used to set the number of columns of
text that will be visible without scrolling right or left.
• Syntax:::: <textarea name=”address” rows=”5” cols=”20”>
Some content goes here </textarea>
Select and option Element (Drop
down menu)
• The select element is used to create a drop down list
or menu in a form.
• The tag <select>….</select> is used to create a drop
down menu.
• The tag <option>…</option> is used to create the
elements within the menu.
• Selected attribute is optional.
• Syntax::::
<select>
<option> Bhuj</option>
<option>Gandhidham</option>
</select>
Changing background color to the form
• To give a background color to the form from
white color to any other color, go to
FormatPage Colors and Background
• Select “Use custom colors” option. Click the
background option and this display “Block
Background Color” dialog box. Select the
color and click on OK button.
Thank You

More Related Content

What's hot

HTML: Tables and Forms
HTML: Tables and FormsHTML: Tables and Forms
HTML: Tables and Forms
BG Java EE Course
 
Html frames
Html framesHtml frames
Html frames
eShikshak
 
Html forms
Html formsHtml forms
Html forms
Himanshu Pathak
 
Std 12 Computer Chapter 7 Java Basics (Part 1)
Std 12 Computer Chapter 7 Java Basics (Part 1)Std 12 Computer Chapter 7 Java Basics (Part 1)
Std 12 Computer Chapter 7 Java Basics (Part 1)
Nuzhat Memon
 
Introduction to html
Introduction to htmlIntroduction to html
Introduction to html
eShikshak
 
Anchor tag HTML Presentation
Anchor tag HTML PresentationAnchor tag HTML Presentation
Anchor tag HTML Presentation
Nimish Gupta
 
HTML (Web) basics for a beginner
HTML (Web) basics for a beginnerHTML (Web) basics for a beginner
HTML (Web) basics for a beginner
Jayapal Reddy Nimmakayala
 
Html frames
Html framesHtml frames
Html frames
Arslan Elahi
 
CSS Basics
CSS BasicsCSS Basics
CSS Basics
WordPress Memphis
 
HTML
HTMLHTML
Datatype in JavaScript
Datatype in JavaScriptDatatype in JavaScript
Datatype in JavaScript
Rajat Saxena
 
Introduction to CSS
Introduction to CSSIntroduction to CSS
Introduction to CSS
Amit Tyagi
 
Html Form Controls
Html Form ControlsHtml Form Controls
Dom
DomDom
Js ppt
Js pptJs ppt
Js ppt
Rakhi Thota
 
HTML Introduction
HTML IntroductionHTML Introduction
HTML Introduction
Hameda Hurmat
 
Xml
XmlXml
Javascript 101
Javascript 101Javascript 101
Javascript 101
Shlomi Komemi
 
Css backgrounds
Css   backgroundsCss   backgrounds
Css backgrounds
AbhishekMondal42
 
Images and Lists in HTML
Images and Lists in HTMLImages and Lists in HTML
Images and Lists in HTML
Marlon Jamera
 

What's hot (20)

HTML: Tables and Forms
HTML: Tables and FormsHTML: Tables and Forms
HTML: Tables and Forms
 
Html frames
Html framesHtml frames
Html frames
 
Html forms
Html formsHtml forms
Html forms
 
Std 12 Computer Chapter 7 Java Basics (Part 1)
Std 12 Computer Chapter 7 Java Basics (Part 1)Std 12 Computer Chapter 7 Java Basics (Part 1)
Std 12 Computer Chapter 7 Java Basics (Part 1)
 
Introduction to html
Introduction to htmlIntroduction to html
Introduction to html
 
Anchor tag HTML Presentation
Anchor tag HTML PresentationAnchor tag HTML Presentation
Anchor tag HTML Presentation
 
HTML (Web) basics for a beginner
HTML (Web) basics for a beginnerHTML (Web) basics for a beginner
HTML (Web) basics for a beginner
 
Html frames
Html framesHtml frames
Html frames
 
CSS Basics
CSS BasicsCSS Basics
CSS Basics
 
HTML
HTMLHTML
HTML
 
Datatype in JavaScript
Datatype in JavaScriptDatatype in JavaScript
Datatype in JavaScript
 
Introduction to CSS
Introduction to CSSIntroduction to CSS
Introduction to CSS
 
Html Form Controls
Html Form ControlsHtml Form Controls
Html Form Controls
 
Dom
DomDom
Dom
 
Js ppt
Js pptJs ppt
Js ppt
 
HTML Introduction
HTML IntroductionHTML Introduction
HTML Introduction
 
Xml
XmlXml
Xml
 
Javascript 101
Javascript 101Javascript 101
Javascript 101
 
Css backgrounds
Css   backgroundsCss   backgrounds
Css backgrounds
 
Images and Lists in HTML
Images and Lists in HTMLImages and Lists in HTML
Images and Lists in HTML
 

Similar to Std 12 Computer Chapter 1 Creating Html Forms Using KompoZer

CSS_Forms.pdf
CSS_Forms.pdfCSS_Forms.pdf
CSS_Forms.pdf
gunjansingh599205
 
Web forms and html lecture Number 4
Web forms and html lecture Number 4Web forms and html lecture Number 4
Web forms and html lecture Number 4
Mudasir Syed
 
Web forms and html (lect 4)
Web forms and html (lect 4)Web forms and html (lect 4)
Web forms and html (lect 4)
Salman Memon
 
uptu web technology unit 2 html
uptu web technology unit 2 htmluptu web technology unit 2 html
uptu web technology unit 2 html
Abhishek Kesharwani
 
Html4
Html4Html4
Forms Part 1
Forms Part 1Forms Part 1
Forms Part 1
kjkleindorfer
 
Html4
Html4Html4
The Complete HTML
The Complete HTMLThe Complete HTML
The Complete HTML
Rohit Buddabathina
 
Html forms
Html formsHtml forms
Chapter 9: Forms
Chapter 9: FormsChapter 9: Forms
Chapter 9: Forms
Steve Guinan
 
css and Input attributes
css and Input attributescss and Input attributes
css and Input attributes
Siji P
 
Introduction to Web Development.pptx
Introduction to Web Development.pptxIntroduction to Web Development.pptx
Introduction to Web Development.pptx
Alisha Kamat
 
Introduction to Web Development.pptx
Introduction to Web Development.pptxIntroduction to Web Development.pptx
Introduction to Web Development.pptx
GDSCVJTI
 
Introduction to Web Development.pptx
Introduction to Web Development.pptxIntroduction to Web Development.pptx
Introduction to Web Development.pptx
Alisha Kamat
 
Gitika html ppt
Gitika html pptGitika html ppt
Gitika html ppt
gitika -
 
Html tables, forms and audio video
Html tables, forms and audio videoHtml tables, forms and audio video
Html tables, forms and audio video
Saad Sheikh
 
HTML 5 Basics Part Three
HTML 5 Basics Part ThreeHTML 5 Basics Part Three
HTML 5 Basics Part Three
M Ashraful Islam Jewel
 
Web topic 20 2 html forms
Web topic 20 2  html formsWeb topic 20 2  html forms
Web topic 20 2 html forms
CK Yang
 
Forms
FormsForms
Forms
myrajendra
 
Web topic 20 1 html forms
Web topic 20 1  html formsWeb topic 20 1  html forms
Web topic 20 1 html forms
CK Yang
 

Similar to Std 12 Computer Chapter 1 Creating Html Forms Using KompoZer (20)

CSS_Forms.pdf
CSS_Forms.pdfCSS_Forms.pdf
CSS_Forms.pdf
 
Web forms and html lecture Number 4
Web forms and html lecture Number 4Web forms and html lecture Number 4
Web forms and html lecture Number 4
 
Web forms and html (lect 4)
Web forms and html (lect 4)Web forms and html (lect 4)
Web forms and html (lect 4)
 
uptu web technology unit 2 html
uptu web technology unit 2 htmluptu web technology unit 2 html
uptu web technology unit 2 html
 
Html4
Html4Html4
Html4
 
Forms Part 1
Forms Part 1Forms Part 1
Forms Part 1
 
Html4
Html4Html4
Html4
 
The Complete HTML
The Complete HTMLThe Complete HTML
The Complete HTML
 
Html forms
Html formsHtml forms
Html forms
 
Chapter 9: Forms
Chapter 9: FormsChapter 9: Forms
Chapter 9: Forms
 
css and Input attributes
css and Input attributescss and Input attributes
css and Input attributes
 
Introduction to Web Development.pptx
Introduction to Web Development.pptxIntroduction to Web Development.pptx
Introduction to Web Development.pptx
 
Introduction to Web Development.pptx
Introduction to Web Development.pptxIntroduction to Web Development.pptx
Introduction to Web Development.pptx
 
Introduction to Web Development.pptx
Introduction to Web Development.pptxIntroduction to Web Development.pptx
Introduction to Web Development.pptx
 
Gitika html ppt
Gitika html pptGitika html ppt
Gitika html ppt
 
Html tables, forms and audio video
Html tables, forms and audio videoHtml tables, forms and audio video
Html tables, forms and audio video
 
HTML 5 Basics Part Three
HTML 5 Basics Part ThreeHTML 5 Basics Part Three
HTML 5 Basics Part Three
 
Web topic 20 2 html forms
Web topic 20 2  html formsWeb topic 20 2  html forms
Web topic 20 2 html forms
 
Forms
FormsForms
Forms
 
Web topic 20 1 html forms
Web topic 20 1  html formsWeb topic 20 1  html forms
Web topic 20 1 html forms
 

More from Nuzhat Memon

Std 10 chapter 11 data type, expression and operators important MCQs
Std 10 chapter 11 data type, expression and operators important MCQsStd 10 chapter 11 data type, expression and operators important MCQs
Std 10 chapter 11 data type, expression and operators important MCQs
Nuzhat Memon
 
Std 10 Chapter 10 Introduction to C Language Important MCQs
Std 10 Chapter 10 Introduction to C Language Important MCQsStd 10 Chapter 10 Introduction to C Language Important MCQs
Std 10 Chapter 10 Introduction to C Language Important MCQs
Nuzhat Memon
 
Std 12 chapter 7 Java Basics Important MCQs
Std 12 chapter 7 Java Basics Important MCQsStd 12 chapter 7 Java Basics Important MCQs
Std 12 chapter 7 Java Basics Important MCQs
Nuzhat Memon
 
Std 12 computer chapter 8 classes and objects in java important MCQs
Std 12 computer chapter 8 classes and objects in java important MCQsStd 12 computer chapter 8 classes and objects in java important MCQs
Std 12 computer chapter 8 classes and objects in java important MCQs
Nuzhat Memon
 
Std 12 Computer Chapter 6 object oriented concept important mcqs
Std 12 Computer Chapter 6 object oriented concept important mcqsStd 12 Computer Chapter 6 object oriented concept important mcqs
Std 12 Computer Chapter 6 object oriented concept important mcqs
Nuzhat Memon
 
Std 12 computer chapter 6 object oriented concepts (part 1)
Std 12 computer chapter 6 object oriented concepts (part 1)Std 12 computer chapter 6 object oriented concepts (part 1)
Std 12 computer chapter 6 object oriented concepts (part 1)
Nuzhat Memon
 
Std 12 computer chapter 6 object oriented concepts (part 2)
Std 12 computer chapter 6 object oriented concepts (part 2)Std 12 computer chapter 6 object oriented concepts (part 2)
Std 12 computer chapter 6 object oriented concepts (part 2)
Nuzhat Memon
 
Std 12 computer java basics part 3 control structure
Std 12 computer java basics part 3 control structureStd 12 computer java basics part 3 control structure
Std 12 computer java basics part 3 control structure
Nuzhat Memon
 
Std 12 Computer Chapter 7 Java Basics (Part 2)
Std 12 Computer Chapter 7 Java Basics (Part 2)Std 12 Computer Chapter 7 Java Basics (Part 2)
Std 12 Computer Chapter 7 Java Basics (Part 2)
Nuzhat Memon
 
Std 12 Computer Chapter 13 other useful free tools and services important MCQs
Std 12 Computer Chapter 13 other useful free tools and services important MCQsStd 12 Computer Chapter 13 other useful free tools and services important MCQs
Std 12 Computer Chapter 13 other useful free tools and services important MCQs
Nuzhat Memon
 
Std 12 Computer Chapter 9 Working with Array and String in Java important MCQs
Std 12 Computer Chapter 9 Working with Array and String in Java important MCQsStd 12 Computer Chapter 9 Working with Array and String in Java important MCQs
Std 12 Computer Chapter 9 Working with Array and String in Java important MCQs
Nuzhat Memon
 
Std 12 computer chapter 8 classes and object in java (part 2)
Std 12 computer chapter 8 classes and object in java (part 2)Std 12 computer chapter 8 classes and object in java (part 2)
Std 12 computer chapter 8 classes and object in java (part 2)
Nuzhat Memon
 
Std 10 computer chapter 10 introduction to c language (part2)
Std 10 computer chapter 10 introduction to c language (part2)Std 10 computer chapter 10 introduction to c language (part2)
Std 10 computer chapter 10 introduction to c language (part2)
Nuzhat Memon
 
Std 10 computer chapter 10 introduction to c language (part1)
Std 10 computer chapter 10 introduction to c language (part1)Std 10 computer chapter 10 introduction to c language (part1)
Std 10 computer chapter 10 introduction to c language (part1)
Nuzhat Memon
 
Std 10 computer chapter 9 Problems and Problem Solving
Std 10 computer chapter 9 Problems and Problem SolvingStd 10 computer chapter 9 Problems and Problem Solving
Std 10 computer chapter 9 Problems and Problem Solving
Nuzhat Memon
 
Std 11 Computer Chapter 5 Using Pictures in Synfig (Practical 3: Masking to R...
Std 11 Computer Chapter 5 Using Pictures in Synfig (Practical 3: Masking to R...Std 11 Computer Chapter 5 Using Pictures in Synfig (Practical 3: Masking to R...
Std 11 Computer Chapter 5 Using Pictures in Synfig (Practical 3: Masking to R...
Nuzhat Memon
 
Chapter 5 Using Pictures in Synfig (Practical 2: Masking to hide area in synfig)
Chapter 5 Using Pictures in Synfig (Practical 2: Masking to hide area in synfig)Chapter 5 Using Pictures in Synfig (Practical 2: Masking to hide area in synfig)
Chapter 5 Using Pictures in Synfig (Practical 2: Masking to hide area in synfig)
Nuzhat Memon
 
Std 11 Computer Chapter 5 Using Pictures in Synfig (Practical 1 Basics Opera...
Std 11 Computer Chapter 5 Using Pictures in Synfig (Practical 1  Basics Opera...Std 11 Computer Chapter 5 Using Pictures in Synfig (Practical 1  Basics Opera...
Std 11 Computer Chapter 5 Using Pictures in Synfig (Practical 1 Basics Opera...
Nuzhat Memon
 
Std 11 Computer Chapter 4 Introduction to Layers (Part 3 Solving Textual Exe...
Std 11 Computer Chapter 4 Introduction to Layers  (Part 3 Solving Textual Exe...Std 11 Computer Chapter 4 Introduction to Layers  (Part 3 Solving Textual Exe...
Std 11 Computer Chapter 4 Introduction to Layers (Part 3 Solving Textual Exe...
Nuzhat Memon
 
Std 11 Computer Chapter 4 Introduction to Layers (Part 2 Practical :Rotation ...
Std 11 Computer Chapter 4 Introduction to Layers (Part 2 Practical :Rotation ...Std 11 Computer Chapter 4 Introduction to Layers (Part 2 Practical :Rotation ...
Std 11 Computer Chapter 4 Introduction to Layers (Part 2 Practical :Rotation ...
Nuzhat Memon
 

More from Nuzhat Memon (20)

Std 10 chapter 11 data type, expression and operators important MCQs
Std 10 chapter 11 data type, expression and operators important MCQsStd 10 chapter 11 data type, expression and operators important MCQs
Std 10 chapter 11 data type, expression and operators important MCQs
 
Std 10 Chapter 10 Introduction to C Language Important MCQs
Std 10 Chapter 10 Introduction to C Language Important MCQsStd 10 Chapter 10 Introduction to C Language Important MCQs
Std 10 Chapter 10 Introduction to C Language Important MCQs
 
Std 12 chapter 7 Java Basics Important MCQs
Std 12 chapter 7 Java Basics Important MCQsStd 12 chapter 7 Java Basics Important MCQs
Std 12 chapter 7 Java Basics Important MCQs
 
Std 12 computer chapter 8 classes and objects in java important MCQs
Std 12 computer chapter 8 classes and objects in java important MCQsStd 12 computer chapter 8 classes and objects in java important MCQs
Std 12 computer chapter 8 classes and objects in java important MCQs
 
Std 12 Computer Chapter 6 object oriented concept important mcqs
Std 12 Computer Chapter 6 object oriented concept important mcqsStd 12 Computer Chapter 6 object oriented concept important mcqs
Std 12 Computer Chapter 6 object oriented concept important mcqs
 
Std 12 computer chapter 6 object oriented concepts (part 1)
Std 12 computer chapter 6 object oriented concepts (part 1)Std 12 computer chapter 6 object oriented concepts (part 1)
Std 12 computer chapter 6 object oriented concepts (part 1)
 
Std 12 computer chapter 6 object oriented concepts (part 2)
Std 12 computer chapter 6 object oriented concepts (part 2)Std 12 computer chapter 6 object oriented concepts (part 2)
Std 12 computer chapter 6 object oriented concepts (part 2)
 
Std 12 computer java basics part 3 control structure
Std 12 computer java basics part 3 control structureStd 12 computer java basics part 3 control structure
Std 12 computer java basics part 3 control structure
 
Std 12 Computer Chapter 7 Java Basics (Part 2)
Std 12 Computer Chapter 7 Java Basics (Part 2)Std 12 Computer Chapter 7 Java Basics (Part 2)
Std 12 Computer Chapter 7 Java Basics (Part 2)
 
Std 12 Computer Chapter 13 other useful free tools and services important MCQs
Std 12 Computer Chapter 13 other useful free tools and services important MCQsStd 12 Computer Chapter 13 other useful free tools and services important MCQs
Std 12 Computer Chapter 13 other useful free tools and services important MCQs
 
Std 12 Computer Chapter 9 Working with Array and String in Java important MCQs
Std 12 Computer Chapter 9 Working with Array and String in Java important MCQsStd 12 Computer Chapter 9 Working with Array and String in Java important MCQs
Std 12 Computer Chapter 9 Working with Array and String in Java important MCQs
 
Std 12 computer chapter 8 classes and object in java (part 2)
Std 12 computer chapter 8 classes and object in java (part 2)Std 12 computer chapter 8 classes and object in java (part 2)
Std 12 computer chapter 8 classes and object in java (part 2)
 
Std 10 computer chapter 10 introduction to c language (part2)
Std 10 computer chapter 10 introduction to c language (part2)Std 10 computer chapter 10 introduction to c language (part2)
Std 10 computer chapter 10 introduction to c language (part2)
 
Std 10 computer chapter 10 introduction to c language (part1)
Std 10 computer chapter 10 introduction to c language (part1)Std 10 computer chapter 10 introduction to c language (part1)
Std 10 computer chapter 10 introduction to c language (part1)
 
Std 10 computer chapter 9 Problems and Problem Solving
Std 10 computer chapter 9 Problems and Problem SolvingStd 10 computer chapter 9 Problems and Problem Solving
Std 10 computer chapter 9 Problems and Problem Solving
 
Std 11 Computer Chapter 5 Using Pictures in Synfig (Practical 3: Masking to R...
Std 11 Computer Chapter 5 Using Pictures in Synfig (Practical 3: Masking to R...Std 11 Computer Chapter 5 Using Pictures in Synfig (Practical 3: Masking to R...
Std 11 Computer Chapter 5 Using Pictures in Synfig (Practical 3: Masking to R...
 
Chapter 5 Using Pictures in Synfig (Practical 2: Masking to hide area in synfig)
Chapter 5 Using Pictures in Synfig (Practical 2: Masking to hide area in synfig)Chapter 5 Using Pictures in Synfig (Practical 2: Masking to hide area in synfig)
Chapter 5 Using Pictures in Synfig (Practical 2: Masking to hide area in synfig)
 
Std 11 Computer Chapter 5 Using Pictures in Synfig (Practical 1 Basics Opera...
Std 11 Computer Chapter 5 Using Pictures in Synfig (Practical 1  Basics Opera...Std 11 Computer Chapter 5 Using Pictures in Synfig (Practical 1  Basics Opera...
Std 11 Computer Chapter 5 Using Pictures in Synfig (Practical 1 Basics Opera...
 
Std 11 Computer Chapter 4 Introduction to Layers (Part 3 Solving Textual Exe...
Std 11 Computer Chapter 4 Introduction to Layers  (Part 3 Solving Textual Exe...Std 11 Computer Chapter 4 Introduction to Layers  (Part 3 Solving Textual Exe...
Std 11 Computer Chapter 4 Introduction to Layers (Part 3 Solving Textual Exe...
 
Std 11 Computer Chapter 4 Introduction to Layers (Part 2 Practical :Rotation ...
Std 11 Computer Chapter 4 Introduction to Layers (Part 2 Practical :Rotation ...Std 11 Computer Chapter 4 Introduction to Layers (Part 2 Practical :Rotation ...
Std 11 Computer Chapter 4 Introduction to Layers (Part 2 Practical :Rotation ...
 

Recently uploaded

How to Manage Your Lost Opportunities in Odoo 17 CRM
How to Manage Your Lost Opportunities in Odoo 17 CRMHow to Manage Your Lost Opportunities in Odoo 17 CRM
How to Manage Your Lost Opportunities in Odoo 17 CRM
Celine George
 
How to Add Chatter in the odoo 17 ERP Module
How to Add Chatter in the odoo 17 ERP ModuleHow to Add Chatter in the odoo 17 ERP Module
How to Add Chatter in the odoo 17 ERP Module
Celine George
 
CACJapan - GROUP Presentation 1- Wk 4.pdf
CACJapan - GROUP Presentation 1- Wk 4.pdfCACJapan - GROUP Presentation 1- Wk 4.pdf
CACJapan - GROUP Presentation 1- Wk 4.pdf
camakaiclarkmusic
 
Digital Artifact 1 - 10VCD Environments Unit
Digital Artifact 1 - 10VCD Environments UnitDigital Artifact 1 - 10VCD Environments Unit
Digital Artifact 1 - 10VCD Environments Unit
chanes7
 
Executive Directors Chat Leveraging AI for Diversity, Equity, and Inclusion
Executive Directors Chat  Leveraging AI for Diversity, Equity, and InclusionExecutive Directors Chat  Leveraging AI for Diversity, Equity, and Inclusion
Executive Directors Chat Leveraging AI for Diversity, Equity, and Inclusion
TechSoup
 
The basics of sentences session 5pptx.pptx
The basics of sentences session 5pptx.pptxThe basics of sentences session 5pptx.pptx
The basics of sentences session 5pptx.pptx
heathfieldcps1
 
Introduction to AI for Nonprofits with Tapp Network
Introduction to AI for Nonprofits with Tapp NetworkIntroduction to AI for Nonprofits with Tapp Network
Introduction to AI for Nonprofits with Tapp Network
TechSoup
 
PCOS corelations and management through Ayurveda.
PCOS corelations and management through Ayurveda.PCOS corelations and management through Ayurveda.
PCOS corelations and management through Ayurveda.
Dr. Shivangi Singh Parihar
 
Film vocab for eal 3 students: Australia the movie
Film vocab for eal 3 students: Australia the movieFilm vocab for eal 3 students: Australia the movie
Film vocab for eal 3 students: Australia the movie
Nicholas Montgomery
 
S1-Introduction-Biopesticides in ICM.pptx
S1-Introduction-Biopesticides in ICM.pptxS1-Introduction-Biopesticides in ICM.pptx
S1-Introduction-Biopesticides in ICM.pptx
tarandeep35
 
clinical examination of hip joint (1).pdf
clinical examination of hip joint (1).pdfclinical examination of hip joint (1).pdf
clinical examination of hip joint (1).pdf
Priyankaranawat4
 
Smart-Money for SMC traders good time and ICT
Smart-Money for SMC traders good time and ICTSmart-Money for SMC traders good time and ICT
Smart-Money for SMC traders good time and ICT
simonomuemu
 
Top five deadliest dog breeds in America
Top five deadliest dog breeds in AmericaTop five deadliest dog breeds in America
Top five deadliest dog breeds in America
Bisnar Chase Personal Injury Attorneys
 
ISO/IEC 27001, ISO/IEC 42001, and GDPR: Best Practices for Implementation and...
ISO/IEC 27001, ISO/IEC 42001, and GDPR: Best Practices for Implementation and...ISO/IEC 27001, ISO/IEC 42001, and GDPR: Best Practices for Implementation and...
ISO/IEC 27001, ISO/IEC 42001, and GDPR: Best Practices for Implementation and...
PECB
 
The basics of sentences session 6pptx.pptx
The basics of sentences session 6pptx.pptxThe basics of sentences session 6pptx.pptx
The basics of sentences session 6pptx.pptx
heathfieldcps1
 
Assessment and Planning in Educational technology.pptx
Assessment and Planning in Educational technology.pptxAssessment and Planning in Educational technology.pptx
Assessment and Planning in Educational technology.pptx
Kavitha Krishnan
 
How to Fix the Import Error in the Odoo 17
How to Fix the Import Error in the Odoo 17How to Fix the Import Error in the Odoo 17
How to Fix the Import Error in the Odoo 17
Celine George
 
ANATOMY AND BIOMECHANICS OF HIP JOINT.pdf
ANATOMY AND BIOMECHANICS OF HIP JOINT.pdfANATOMY AND BIOMECHANICS OF HIP JOINT.pdf
ANATOMY AND BIOMECHANICS OF HIP JOINT.pdf
Priyankaranawat4
 
Hindi varnamala | hindi alphabet PPT.pdf
Hindi varnamala | hindi alphabet PPT.pdfHindi varnamala | hindi alphabet PPT.pdf
Hindi varnamala | hindi alphabet PPT.pdf
Dr. Mulla Adam Ali
 
A Survey of Techniques for Maximizing LLM Performance.pptx
A Survey of Techniques for Maximizing LLM Performance.pptxA Survey of Techniques for Maximizing LLM Performance.pptx
A Survey of Techniques for Maximizing LLM Performance.pptx
thanhdowork
 

Recently uploaded (20)

How to Manage Your Lost Opportunities in Odoo 17 CRM
How to Manage Your Lost Opportunities in Odoo 17 CRMHow to Manage Your Lost Opportunities in Odoo 17 CRM
How to Manage Your Lost Opportunities in Odoo 17 CRM
 
How to Add Chatter in the odoo 17 ERP Module
How to Add Chatter in the odoo 17 ERP ModuleHow to Add Chatter in the odoo 17 ERP Module
How to Add Chatter in the odoo 17 ERP Module
 
CACJapan - GROUP Presentation 1- Wk 4.pdf
CACJapan - GROUP Presentation 1- Wk 4.pdfCACJapan - GROUP Presentation 1- Wk 4.pdf
CACJapan - GROUP Presentation 1- Wk 4.pdf
 
Digital Artifact 1 - 10VCD Environments Unit
Digital Artifact 1 - 10VCD Environments UnitDigital Artifact 1 - 10VCD Environments Unit
Digital Artifact 1 - 10VCD Environments Unit
 
Executive Directors Chat Leveraging AI for Diversity, Equity, and Inclusion
Executive Directors Chat  Leveraging AI for Diversity, Equity, and InclusionExecutive Directors Chat  Leveraging AI for Diversity, Equity, and Inclusion
Executive Directors Chat Leveraging AI for Diversity, Equity, and Inclusion
 
The basics of sentences session 5pptx.pptx
The basics of sentences session 5pptx.pptxThe basics of sentences session 5pptx.pptx
The basics of sentences session 5pptx.pptx
 
Introduction to AI for Nonprofits with Tapp Network
Introduction to AI for Nonprofits with Tapp NetworkIntroduction to AI for Nonprofits with Tapp Network
Introduction to AI for Nonprofits with Tapp Network
 
PCOS corelations and management through Ayurveda.
PCOS corelations and management through Ayurveda.PCOS corelations and management through Ayurveda.
PCOS corelations and management through Ayurveda.
 
Film vocab for eal 3 students: Australia the movie
Film vocab for eal 3 students: Australia the movieFilm vocab for eal 3 students: Australia the movie
Film vocab for eal 3 students: Australia the movie
 
S1-Introduction-Biopesticides in ICM.pptx
S1-Introduction-Biopesticides in ICM.pptxS1-Introduction-Biopesticides in ICM.pptx
S1-Introduction-Biopesticides in ICM.pptx
 
clinical examination of hip joint (1).pdf
clinical examination of hip joint (1).pdfclinical examination of hip joint (1).pdf
clinical examination of hip joint (1).pdf
 
Smart-Money for SMC traders good time and ICT
Smart-Money for SMC traders good time and ICTSmart-Money for SMC traders good time and ICT
Smart-Money for SMC traders good time and ICT
 
Top five deadliest dog breeds in America
Top five deadliest dog breeds in AmericaTop five deadliest dog breeds in America
Top five deadliest dog breeds in America
 
ISO/IEC 27001, ISO/IEC 42001, and GDPR: Best Practices for Implementation and...
ISO/IEC 27001, ISO/IEC 42001, and GDPR: Best Practices for Implementation and...ISO/IEC 27001, ISO/IEC 42001, and GDPR: Best Practices for Implementation and...
ISO/IEC 27001, ISO/IEC 42001, and GDPR: Best Practices for Implementation and...
 
The basics of sentences session 6pptx.pptx
The basics of sentences session 6pptx.pptxThe basics of sentences session 6pptx.pptx
The basics of sentences session 6pptx.pptx
 
Assessment and Planning in Educational technology.pptx
Assessment and Planning in Educational technology.pptxAssessment and Planning in Educational technology.pptx
Assessment and Planning in Educational technology.pptx
 
How to Fix the Import Error in the Odoo 17
How to Fix the Import Error in the Odoo 17How to Fix the Import Error in the Odoo 17
How to Fix the Import Error in the Odoo 17
 
ANATOMY AND BIOMECHANICS OF HIP JOINT.pdf
ANATOMY AND BIOMECHANICS OF HIP JOINT.pdfANATOMY AND BIOMECHANICS OF HIP JOINT.pdf
ANATOMY AND BIOMECHANICS OF HIP JOINT.pdf
 
Hindi varnamala | hindi alphabet PPT.pdf
Hindi varnamala | hindi alphabet PPT.pdfHindi varnamala | hindi alphabet PPT.pdf
Hindi varnamala | hindi alphabet PPT.pdf
 
A Survey of Techniques for Maximizing LLM Performance.pptx
A Survey of Techniques for Maximizing LLM Performance.pptxA Survey of Techniques for Maximizing LLM Performance.pptx
A Survey of Techniques for Maximizing LLM Performance.pptx
 

Std 12 Computer Chapter 1 Creating Html Forms Using KompoZer

  • 1. CHAPTER 1 Creating HTML forms using KompoZer
  • 2. Use of IDE to create a form • Full form of IDE is Integrated Development Environment • Creating a form using HTML tags is tedious process. • An IDE is a software application that provides complete facilities to programmer to develop software. • IDE provides 1)GUI – Graphical User Interface 2)Text/code Editor 3) compiler and/or interpreter and 4) a debugger. • 1) Kompozer, 2) Eclipse, 3) JBuilder and 4) Netbeans are all examples of some open source IDEs.
  • 3. Introduction to KompoZer • KompoZer is a free open source web development IDE. • KompoZer can be downloaded from http://www.KompoZer.net. • It provides a webpage editor which has a simple graphical interface known as WYSIWYG • WYSIWYG means “What You See is What You Get” • It is a complete web authoring system which integrates 1) webpage development and 2) web file management.
  • 4. Interface to KompoZer • Open KompoZer:::: – ApplicationsProgrammingKompoZer – Double click KompoZer icon on desktop • To view the different toolbars and status bar , click on View -> Show/Hide • Different Toolbar: Composite Toolbar, Format Toolbar1, Format Toolbar2, Edit Mode Toolbar and Status bar. • Site Manager and Rulers option also be listed. • KompoZer has eight menus:- File, Edit, View, Insert, Format, Table, Tools and Help. • 3 Toolbars below Menu bar:- Composite Toolbar, Format Toolbar-1 and Format Toolbar-2 – The composite toolbar is used to create new file, open a file, save a file or publish a web page. – The format toolbar1 and format toolbar2 are used to format the text, add bullets, numbering and perform similar formatting operations.
  • 5. 2 Panes in the center of the Kompozer Window: In the centre of the window, you can see two panes: Site Manager and blank web page • Site Manager: – Site Manager is a powerful tool used to navigate within the site or between the sites. – KompoZer incorporates a Site Manager which gives rapid access to the files on both local machines and remote servers – We can close the site manager pane by clicking on close button or press F9. • Blank webpage (Page Pane): – The page pane shows a blank untitled webpage.
  • 6. Edit Mode toolbar The bottom right side of the window shows Edit mode toolbar with three viewing modes: Normal, HTML tags and Preview – The Normal View mode – Webpage along with the table outlines are visible. – Normal view is very similar to preview mode. – HTML tags View: – A Yellow marker is used to indicate the start tag for all elements. – Preview Mode: – The Preview mode offers the page view as seen in a browser. – In the Preview mode the script do not run and therefore their effects will not be seen. – The links also does not operate in preview mode
  • 7. 3 tabs on the Left side of the page pane: – The Design tab is used to design the web page. – The Split tab display the HTML source of the current element. – Source tab shows all details of the HTML code. It helps in editing the source code. Status Bar – On the bottom of the window. – When any item in page is clicked, its structure appears in the status bar.
  • 8. Introduction to Form • With the increase in the use of Internet many activities have become online. • Web page is used to fill various information about ourselves or product. • HTML forms are used to help the visitors of the website to input data. • A form in HTML is a container used to collect different kinds of inputs from the user. • It allows for more interactivity and control in data entry. • Well organized structure designed to input the required the data and information of website is called form. • HTML contains elements like label, checkbox, text input field, radio button, submit button, reset button and many more. • The form elements are used to enter the data as well as validate the data within the forms.
  • 9. Four elements are used in a form: 1) Form 2) Input 3) Textarea 4) Select and option
  • 10. Form Elements • Form element acts as a container for all the elements used in the form. • The tag <form>….</form> is used to implement this element. • SYNTAX::::: <form action=”file1.html” method=”post”> • The form element uses two attributes namely action and method • Action Attribute – The action attribute is used to specify where to send the form data when the form is submitted. – The action attribute takes a filename as value. • Method Attribute – The method attribute specifies the HTTP(Hyper Text Transfer Protocol) method to be used when sending the data. – The method attribute take two values: GET and POST • GET Method »The GET method retrieves the data from the form and sends it to the server by attaching it at the end of the URL. »The GET method allows only a limited amount of information to be sent at a time. »The default value for method attribute is GET. • POST Method »In the POST method, the data is sent as a block through the HTTP transaction. »POST method does not have any restriction on data length. »POST method attribute send the data in the body of the request
  • 11. Input Elements • The input elements are used to insert various fields in the form. • Fields likes 1) Textbox 2) Password 3) Radio button 4) Checkbox 5)Submit button & 6)Reset button • The tag <input>…….</input> or <input> is used to implement input element. • The input tag has different attributes like type, name and value. – The type attribute of the input element specifies the field that is to be created in the form. – The name attribute specifies the name to be used for the field in the form. – The value attribute specifies the default value of the field in the form.
  • 12. Various Input Elements created using type attribute of <input> tag: • Text or Textbox – A user can enter any text or data of his choice in the text field. – Textbox is used to enter data like username, email id etc – Syntax:::: <input type=”text” name=”fname” value=”priya”> • Password – Password filed is used to enter password and it is similar to text field. – In password field the characters are not displayed to the user. Instead the character typed is converted into non readable format. – Syntax:::: <input type=”password” name=”pwd”> • Radio button – Any one radio button can be selected at a time from a group of radio buttons. – Generally radio button used to select a single item from a given group of items. – Syntax:::: <input type=”radio” name=”gender” value=”female”>
  • 13. • Checkbox – Multiple check boxes can be selected at a time. – Generally used to select a multiple items from a given group of items – Syntax:::: <input type=”checkbox” name=”hobby” value=”reading”> • Submit button – On clicking the submit button, the values of data entered in the form is submitted to the file specified in the action attribute of the form element. – Syntax:::: <input type=”submit” value=”Login”> • Reset button – On clicking the reset button, the values of data entered in the form are cleared and set back to default values. – Syntax:::: <input type=”reset” value=”Clear”>
  • 14. Textarea Element • The textarea element allows multi line text input • The tag <textarea>….</textarea> is used to implement textarea element. • Textarea allows entering unlimited number of characters. • Textarea can be used to enter comment, report or a long description of product. • The size of a textarea element can be specifies using rows and cols attributes. • The row attribute is used to set the number of rows of text that will be visible without scrolling up and down. • The cols attribute is used to set the number of columns of text that will be visible without scrolling right or left. • Syntax:::: <textarea name=”address” rows=”5” cols=”20”> Some content goes here </textarea>
  • 15. Select and option Element (Drop down menu) • The select element is used to create a drop down list or menu in a form. • The tag <select>….</select> is used to create a drop down menu. • The tag <option>…</option> is used to create the elements within the menu. • Selected attribute is optional. • Syntax:::: <select> <option> Bhuj</option> <option>Gandhidham</option> </select>
  • 16. Changing background color to the form • To give a background color to the form from white color to any other color, go to FormatPage Colors and Background • Select “Use custom colors” option. Click the background option and this display “Block Background Color” dialog box. Select the color and click on OK button.