Download to read offline

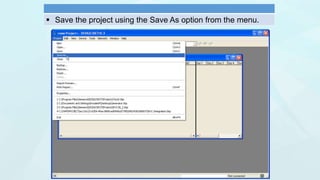
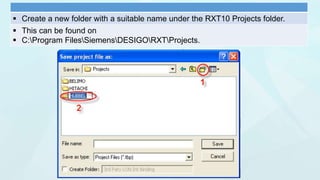
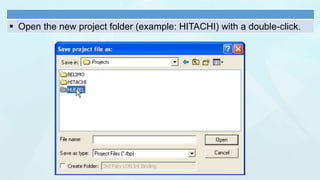
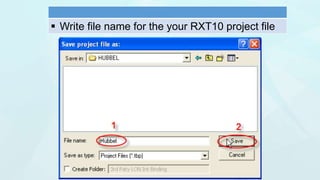
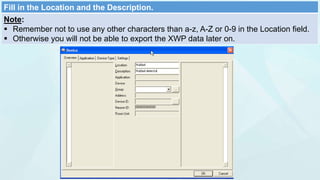
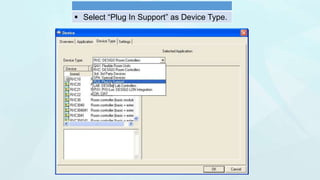
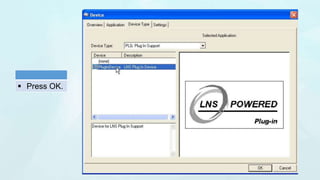
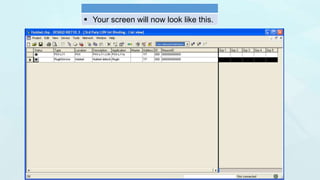
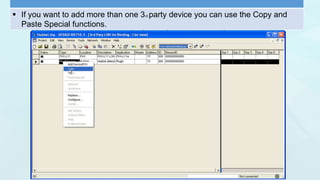
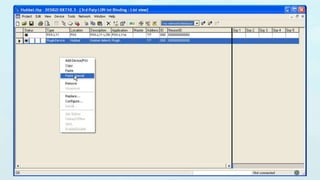
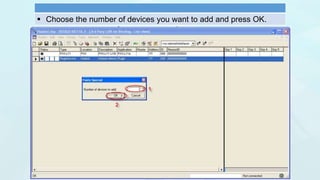
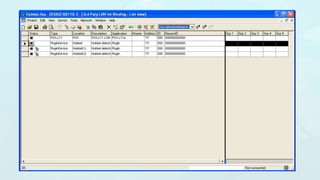

This document is a step-by-step guide for integrating third-party Lon devices into Siemens Desigo V4 systems, detailing the required hardware and software. It outlines the necessary modules, communication protocols, and installation tools, including specific instructions for using the rxt10.3 tool for project creation and device addition. Key configuration notes emphasize the importance of proper file naming and character restrictions to ensure successful data export in the integration process.


![Nemo outdoor 6_training_aug2011 [compatibility mode]](https://cdn.slidesharecdn.com/ss_thumbnails/nemooutdoor6trainingaug2011compatibilitymode-130826015745-phpapp02-thumbnail.jpg?width=640&height=640&fit=bounds)


