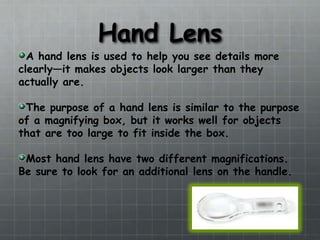
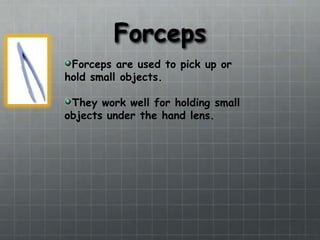
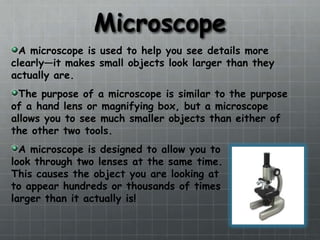
A thermometer measures temperature, a dropper moves small amounts of liquid, and a tape measure measures curved surfaces. Other tools described include a spring scale, ruler, measuring cup, magnifying box, hand lens, forceps, balance, and microscope. The document provides details on how to properly use each tool and emphasizes the importance of safety in the science lab.
This is a powerpoint for a 3rd grade class about heat sources. It can be used as a game to determine what is a heat source and what isn't. It also discusses insulation.
In depth description of the Moon/s phases and why they are as they are. Uses some great internet animations of various situations explaining why we see what we see from Earth. Also discusses the tides and why they are caused by the moon's gravity.
This presentation emphasizes on assessing science based on learning competencies, selecting appropriate forms of assessment and developing written and performance based tasks on science.
A thermometer is an instrument we can use to measure temperature. An analog thermometer consists of a sealed tube with markings on it. These markings are increasing temperatures in Celsius or Fahrenheit. The markings on a clinical and weather thermometer are different, but they work in the same way.
Learn more about the thermometer, how it works, and the different kinds of thermometers with this interactive media article for kids, visit: http://mocomi.com/what-is-a-thermometer/
Fluke offers the latest in non-contact infrared (IR) thermometers (sometimes known as infrared pyrometers) and contact thermometers, probes, accessories, and application expertise for a complete range of temperature applications. Fluke backs all of its handheld thermometers with a no-hassle 2-year warranty and the highest level of customer service.
Gives a brief introduction about temperature measurement and its unit. it also enumerates the different techniques employed in temperature measurement.
A 2000+ slide PowerPoint presentation from www.sciencepowerpoint.com becomes the roadmap for an amazing learning experience. Complete with homework package, built-in activities with directions, built-in quizzes, unit notes, follow along worksheets, answer keys, video links, review games, rubrics, and much more.
Also included are directions on how create a student version of the unit that is much like the teachers but missing the answer keys, quizzes, PowerPoint review games, hidden box challenges, owl, and surprises meant for the classroom. This is a great resource to distribute to your students and support professionals and will only take you a few minutes to create.
This is a great introductory unit that covers science topics associated with Lab Safety, Magnification, Base Units of the Metric System, Scientific Method, Inferences, and Observation Skills (See list below for more topics covered). This unit includes an interactive and engaging PowerPoint Presentation of 2000 slides with built in class notes (Red Slides), lab activities, project ideas, discussion questions, assessments (Quiz Wiz), and challenge questions with answers.
Text is in large print (32 font) and is placed at the top of each slide so it can seen and read from all angles of a classroom. A shade technique, as well as color coded text helps to increase student focus and allows teacher to control pace of the lessons. Also included is a 10 page assessment / bundled homework that chronologically follows the slideshow for nightly homework and end of the unit assessment, as well as a 9 page modified assessment. 14 pages of class notes with images are also included for students who require modifications, as well as answer keys to both of the assessments for support professionals, teachers, and home school parents. Several video links are provided and a slide within the slideshow cues teacher / parent when the videos are most relevant to play. Video shorts usually range from 2-7 minutes. One PowerPoint review game (125+ slides)is included. Answers to the PowerPoint review game are provided in PowerPoint form so students can self-assess. Lastly, several class games such as guess the hidden picture beneath the boxes, and the find the hidden owl somewhere within the slideshow are provided. Difficulty rating of 5 (Ten is most difficult)
Thank you for time and if you have any questions please feel free to contact me at www.sciencepowerpoint@gmail.com. Best wishes.
Teaching Duration = 4+ Weeks
Sincerely,
Ryan Murphy M.Ed
Science PowerPoints
Elevating Tactical DDD Patterns Through Object CalisthenicsDorra BARTAGUIZ
After immersing yourself in the blue book and its red counterpart, attending DDD-focused conferences, and applying tactical patterns, you're left with a crucial question: How do I ensure my design is effective? Tactical patterns within Domain-Driven Design (DDD) serve as guiding principles for creating clear and manageable domain models. However, achieving success with these patterns requires additional guidance. Interestingly, we've observed that a set of constraints initially designed for training purposes remarkably aligns with effective pattern implementation, offering a more ‘mechanical’ approach. Let's explore together how Object Calisthenics can elevate the design of your tactical DDD patterns, offering concrete help for those venturing into DDD for the first time!
Encryption in Microsoft 365 - ExpertsLive Netherlands 2024Albert Hoitingh
In this session I delve into the encryption technology used in Microsoft 365 and Microsoft Purview. Including the concepts of Customer Key and Double Key Encryption.
Welocme to ViralQR, your best QR code generator.ViralQR
Welcome to ViralQR, your best QR code generator available on the market!
At ViralQR, we design static and dynamic QR codes. Our mission is to make business operations easier and customer engagement more powerful through the use of QR technology. Be it a small-scale business or a huge enterprise, our easy-to-use platform provides multiple choices that can be tailored according to your company's branding and marketing strategies.
Our Vision
We are here to make the process of creating QR codes easy and smooth, thus enhancing customer interaction and making business more fluid. We very strongly believe in the ability of QR codes to change the world for businesses in their interaction with customers and are set on making that technology accessible and usable far and wide.
Our Achievements
Ever since its inception, we have successfully served many clients by offering QR codes in their marketing, service delivery, and collection of feedback across various industries. Our platform has been recognized for its ease of use and amazing features, which helped a business to make QR codes.
Our Services
At ViralQR, here is a comprehensive suite of services that caters to your very needs:
Static QR Codes: Create free static QR codes. These QR codes are able to store significant information such as URLs, vCards, plain text, emails and SMS, Wi-Fi credentials, and Bitcoin addresses.
Dynamic QR codes: These also have all the advanced features but are subscription-based. They can directly link to PDF files, images, micro-landing pages, social accounts, review forms, business pages, and applications. In addition, they can be branded with CTAs, frames, patterns, colors, and logos to enhance your branding.
Pricing and Packages
Additionally, there is a 14-day free offer to ViralQR, which is an exceptional opportunity for new users to take a feel of this platform. One can easily subscribe from there and experience the full dynamic of using QR codes. The subscription plans are not only meant for business; they are priced very flexibly so that literally every business could afford to benefit from our service.
Why choose us?
ViralQR will provide services for marketing, advertising, catering, retail, and the like. The QR codes can be posted on fliers, packaging, merchandise, and banners, as well as to substitute for cash and cards in a restaurant or coffee shop. With QR codes integrated into your business, improve customer engagement and streamline operations.
Comprehensive Analytics
Subscribers of ViralQR receive detailed analytics and tracking tools in light of having a view of the core values of QR code performance. Our analytics dashboard shows aggregate views and unique views, as well as detailed information about each impression, including time, device, browser, and estimated location by city and country.
So, thank you for choosing ViralQR; we have an offer of nothing but the best in terms of QR code services to meet business diversity!
Epistemic Interaction - tuning interfaces to provide information for AI supportAlan Dix
Paper presented at SYNERGY workshop at AVI 2024, Genoa, Italy. 3rd June 2024
https://alandix.com/academic/papers/synergy2024-epistemic/
As machine learning integrates deeper into human-computer interactions, the concept of epistemic interaction emerges, aiming to refine these interactions to enhance system adaptability. This approach encourages minor, intentional adjustments in user behaviour to enrich the data available for system learning. This paper introduces epistemic interaction within the context of human-system communication, illustrating how deliberate interaction design can improve system understanding and adaptation. Through concrete examples, we demonstrate the potential of epistemic interaction to significantly advance human-computer interaction by leveraging intuitive human communication strategies to inform system design and functionality, offering a novel pathway for enriching user-system engagements.
LF Energy Webinar: Electrical Grid Modelling and Simulation Through PowSyBl -...DanBrown980551
Do you want to learn how to model and simulate an electrical network from scratch in under an hour?
Then welcome to this PowSyBl workshop, hosted by Rte, the French Transmission System Operator (TSO)!
During the webinar, you will discover the PowSyBl ecosystem as well as handle and study an electrical network through an interactive Python notebook.
PowSyBl is an open source project hosted by LF Energy, which offers a comprehensive set of features for electrical grid modelling and simulation. Among other advanced features, PowSyBl provides:
- A fully editable and extendable library for grid component modelling;
- Visualization tools to display your network;
- Grid simulation tools, such as power flows, security analyses (with or without remedial actions) and sensitivity analyses;
The framework is mostly written in Java, with a Python binding so that Python developers can access PowSyBl functionalities as well.
What you will learn during the webinar:
- For beginners: discover PowSyBl's functionalities through a quick general presentation and the notebook, without needing any expert coding skills;
- For advanced developers: master the skills to efficiently apply PowSyBl functionalities to your real-world scenarios.
UiPath Test Automation using UiPath Test Suite series, part 4DianaGray10
Welcome to UiPath Test Automation using UiPath Test Suite series part 4. In this session, we will cover Test Manager overview along with SAP heatmap.
The UiPath Test Manager overview with SAP heatmap webinar offers a concise yet comprehensive exploration of the role of a Test Manager within SAP environments, coupled with the utilization of heatmaps for effective testing strategies.
Participants will gain insights into the responsibilities, challenges, and best practices associated with test management in SAP projects. Additionally, the webinar delves into the significance of heatmaps as a visual aid for identifying testing priorities, areas of risk, and resource allocation within SAP landscapes. Through this session, attendees can expect to enhance their understanding of test management principles while learning practical approaches to optimize testing processes in SAP environments using heatmap visualization techniques
What will you get from this session?
1. Insights into SAP testing best practices
2. Heatmap utilization for testing
3. Optimization of testing processes
4. Demo
Topics covered:
Execution from the test manager
Orchestrator execution result
Defect reporting
SAP heatmap example with demo
Speaker:
Deepak Rai, Automation Practice Lead, Boundaryless Group and UiPath MVP
A tale of scale & speed: How the US Navy is enabling software delivery from l...sonjaschweigert1
Rapid and secure feature delivery is a goal across every application team and every branch of the DoD. The Navy’s DevSecOps platform, Party Barge, has achieved:
- Reduction in onboarding time from 5 weeks to 1 day
- Improved developer experience and productivity through actionable findings and reduction of false positives
- Maintenance of superior security standards and inherent policy enforcement with Authorization to Operate (ATO)
Development teams can ship efficiently and ensure applications are cyber ready for Navy Authorizing Officials (AOs). In this webinar, Sigma Defense and Anchore will give attendees a look behind the scenes and demo secure pipeline automation and security artifacts that speed up application ATO and time to production.
We will cover:
- How to remove silos in DevSecOps
- How to build efficient development pipeline roles and component templates
- How to deliver security artifacts that matter for ATO’s (SBOMs, vulnerability reports, and policy evidence)
- How to streamline operations with automated policy checks on container images
Le nuove frontiere dell'AI nell'RPA con UiPath Autopilot™UiPathCommunity
In questo evento online gratuito, organizzato dalla Community Italiana di UiPath, potrai esplorare le nuove funzionalità di Autopilot, il tool che integra l'Intelligenza Artificiale nei processi di sviluppo e utilizzo delle Automazioni.
📕 Vedremo insieme alcuni esempi dell'utilizzo di Autopilot in diversi tool della Suite UiPath:
Autopilot per Studio Web
Autopilot per Studio
Autopilot per Apps
Clipboard AI
GenAI applicata alla Document Understanding
👨🏫👨💻 Speakers:
Stefano Negro, UiPath MVPx3, RPA Tech Lead @ BSP Consultant
Flavio Martinelli, UiPath MVP 2023, Technical Account Manager @UiPath
Andrei Tasca, RPA Solutions Team Lead @NTT Data
Transcript: Selling digital books in 2024: Insights from industry leaders - T...BookNet Canada
The publishing industry has been selling digital audiobooks and ebooks for over a decade and has found its groove. What’s changed? What has stayed the same? Where do we go from here? Join a group of leading sales peers from across the industry for a conversation about the lessons learned since the popularization of digital books, best practices, digital book supply chain management, and more.
Link to video recording: https://bnctechforum.ca/sessions/selling-digital-books-in-2024-insights-from-industry-leaders/
Presented by BookNet Canada on May 28, 2024, with support from the Department of Canadian Heritage.
Accelerate your Kubernetes clusters with Varnish CachingThijs Feryn
A presentation about the usage and availability of Varnish on Kubernetes. This talk explores the capabilities of Varnish caching and shows how to use the Varnish Helm chart to deploy it to Kubernetes.
This presentation was delivered at K8SUG Singapore. See https://feryn.eu/presentations/accelerate-your-kubernetes-clusters-with-varnish-caching-k8sug-singapore-28-2024 for more details.
DevOps and Testing slides at DASA ConnectKari Kakkonen
My and Rik Marselis slides at 30.5.2024 DASA Connect conference. We discuss about what is testing, then what is agile testing and finally what is Testing in DevOps. Finally we had lovely workshop with the participants trying to find out different ways to think about quality and testing in different parts of the DevOps infinity loop.
2. Science Inquiry Tools What kinds of tools do scientists use? View this slide show to learn about many of the tools used in scientific inquiry.
3. Thermometer A thermometer is used to measure the temperature of water or the temperature of air. In science, the unit of measurement used on the thermometer is degrees Celsius (which can be abbreviated °C). For everyday use, the unit of measurement most commonly used is degrees Fahrenheit (which can be abbreviated °F).
4. Using a Thermometer When measuring the temperature of a liquid, place the thermometer in the liquid. Never stir the liquid with the thermometer. When measuring the temperature of the air, keep the thermometer away from the sun or bright lights. When you are measuring the temperature of a material that is not in the process of being heated or cooled, wait about five minutes to be sure the temperature reading has stopped changing. When the material you are measuring is being heated or cooled, read the temperature as quickly as you can. To read the temperature, move so that your eyes are even with the scale line on the thermometer.
5. Dropper A dropper is used to move small amounts of liquid from one place to another. A dropper can also be used to measure the volume of liquids by counting drops. It is used when an exact measurement is not necessary.
6. Using a Dropper Gently squeeze the bulb on the dropper. Holding the dropper upright, put the tip of the dropper in the liquid. Stop squeezing the bulb on the dropper to allow the liquid to fill the dropper. Keeping the dropper upright, hold it over the place where you want to put the liquid. Gently squeeze the bulb on the dropper to release the liquid one drop at a time.
7. Tape Measure A tape measure is used to measure the length of curved or irregular surfaces. It can also be used to measure distances that are too great for a ruler or meter stick to measure. In science, the units of measurement used on a tape measure are millimeters (which can be abbreviated mm), centimeters (which can be abbreviated cm), and meters (which can be abbreviated m).
8. Using a Tape Measure Find the zero end of the tape measure. Place the tape measure around the object or along the distance you would like to measure. If you are measuring aroundan object, read the place on the tape measure’s scale where it meets the zero end of the tape measure. If you are measuring a length or width, read the place on the tape measure’s scale where it meets the end of the object or distance you are measuring. When you are measuring a long distance, you will need a partner to hold the zero end of the tape measure while you read the place on the scale of the tape measure where it meets the end of the distance you are measuring.
9. Spring Scale A spring scale measures forces, such as weight (the amount of gravitational pull on an object) or friction (a force that works to prevent motion). In science, the units of measurement used on a spring scale are newtons (which can be abbreviated N) and grams (which can be abbreviated g).
10. Using a Spring ScaleTo Measure an Object’s Weight Hook the spring scale to the object you want to measure. Lift the scale and object with a smooth motion—do not jerk the object upward. Wait until the spring stops moving, then read the force on the scale. You can measure the weight of objects that will not fit on the hook. Place the object in a lightweight plastic bag and hang the bag on the hook.
11. Using a Spring ScaleTo Measure the Amount of Force Required to Move an Object Set the object on a flat surface, and hook the spring scale to the object. Pull the object smoothly across the flat surface—do not jerk the object. As you pull, have a partner read the amount of force registered on the scale.
12. Ruler A ruler is used to measure the length and width of objects. In science the units of measurement used on a ruler are millimeters (which can be abbreviated mm) and centimeters (which can be abbreviated cm).
13. Using a Ruler Find the zero mark on the ruler. Be careful! Sometimes the mark is exactly at the end of the ruler; sometimes it’s a few millimeters from the end. Place the zero mark of the ruler next to the left end of the object you want to measure. On the other end of the ruler, find the place next to the right end of the object. Read the scale on the ruler next to the right end of the object; this will tell you the length of the object.
14. Measuring Cup A measuring cup is used to measure the volume of liquids. In science, the units of measurement used on a measuring cup are milliliters (which can be abbreviated mL) and liters (which can be abbreviated L).
15. Using a Measuring Cup Pour the liquid that you want to measure into the measuring cup. Put the measuring cup on a flat surface. Move so that your eyes are level with the surface of the liquid in the measuring cup. Read the volume of the liquid by finding the line on the scale of the cup that is even with the surface of the liquid.
16. Magnifying Box A magnifying box is used to help you see the details of objects more clearly—it makes objects look larger than they actually are. It is used for small objects that fit inside of the box.
17. Using a Magnifying Box Place the magnifying box on a flat surface. Remove the lid of the box, and place a small object inside. Replace the lid on the box, then look through it to observe the object. If you are using the magnifying box to observe a living insect, look at it briefly, and then release it.
18. Hand Lens A hand lens is used to help you see details more clearly—it makes objects look larger than they actually are. The purpose of a hand lens is similar to the purpose of a magnifying box, but it works well for objects that are too large to fit inside the box. Most hand lens have two different magnifications. Be sure to look for an additional lens on the handle.
19. Using a Hand Lens Hold the hand lens about 12 centimeters from your eye. Bring the object that you want to observe towards the lens until it comes into focus. Remember to check to see if there is more than one lens so that you can observe your object using different magnifications.
20. Forceps Forceps are used to pick up or hold small objects. They work well for holding small objects under the hand lens.
21. Using Forceps To pick up an object, place the tips of the forceps around the object. Squeeze the forces’ handles together with your thumb and first finger until they tighten snugly around the object. To release the object, slowly loosen your grip on the forceps’ handles.
22. Balance A balance is used to measure the mass of an object. Mass is the amount of matter in an object—it is not the same thing as the weight of the object. In science, the units of measurement used on the balance are grams (which can be abbreviated g) and kilograms (which can be abbreviated kg).
23. Using a Balance Find the pointer on the balance and make sure it points to the middle mark on the scale. Place the object that you want to measure in the pan on the left side of the balance. You should see the pointer move away from the middle mark on the scale. Add standard masses to the pan on the right side of the balance. As you add masses, you should notice the pointer moving back towards the middle mark on the scale. When the pointer is back at the middle mark, the pans are balance. Add up the numbers on all the standard masses that you put in the pan on the right side of the balance. The total is the mass of your object.
24. Microscope A microscope is used to help you see details more clearly—it makes small objects look larger than they actually are. The purpose of a microscope is similar to the purpose of a hand lens or magnifying box, but a microscope allows you to see much smaller objects than either of the other two tools. A microscope is designed to allow you to look through two lenses at the same time. This causes the object you are looking at to appear hundreds or thousands of times larger than it actually is!
25. Parts of a Microscope Eyepiece Adjustment Knob Nosepiece Lens Stage Clip Stage Base Light or Mirror
26. Using a Microscope If your microscope uses a light, make sure it is plugged in and turned on. If your microscope uses a mirror, make sure you have an available light source. Raise the eyepiece as far as it will go by turning the coarse adjustment knob. Turn the lowest power lens into place. Move the stage clips off the stage, and center your slide over the hole in the stage. Replace the stage clips to secure the slide in place. Turn the coarse adjustment knob to lower the eyepiece until the object on the slide is close to being in focus. S-l-o-w-l-y turn the fine adjustment knob until the object on the slide is in focus. If you wish to observe your object under a higher magnification, turn the nosepiece to a higher power lens, being careful to make sure the lens does not hit the slide. If necessary, use the fine adjustment knob to bring the object into focus.
27. Be Safe in the Lab! When using science tools, be sure to observe the science safety rules.