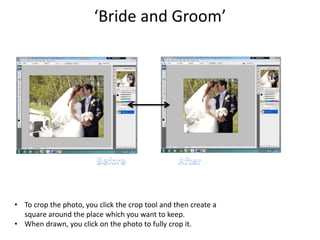
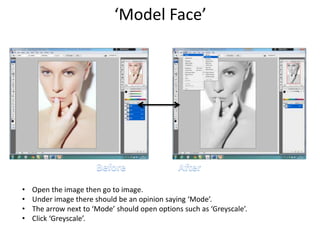
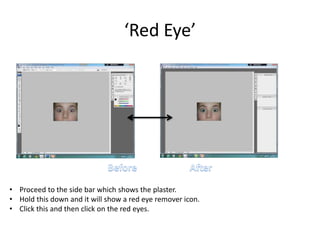
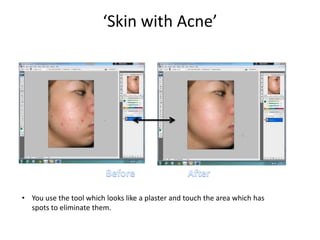
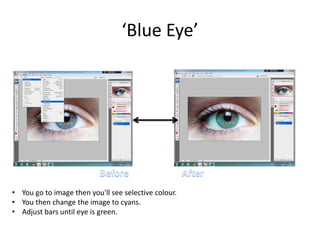
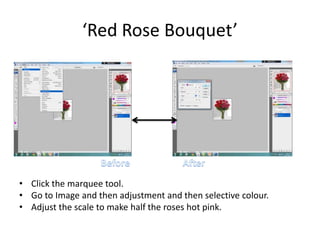
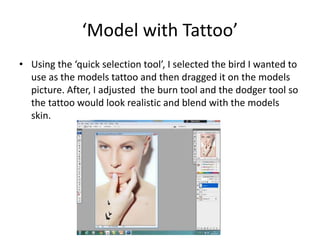
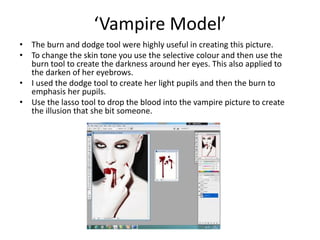
The document provides instructions for completing various photo editing tasks in Photoshop, including cropping images, changing images to grayscale, adjusting brightness and contrast, removing red eye, eliminating skin blemishes, changing eye color, adjusting colors of objects in photos using selective color, cutting out and placing objects on new backgrounds, and adding tattoos and other elements to models to change their appearance.
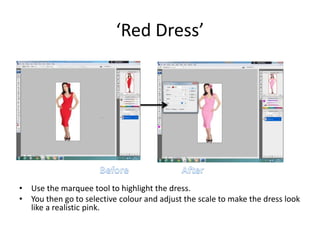
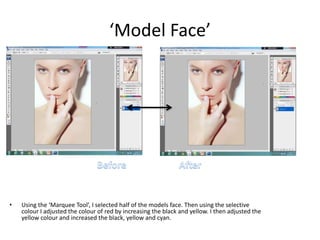
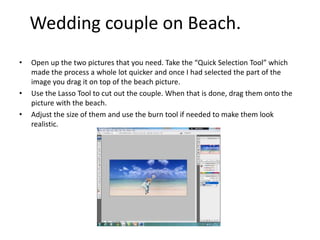
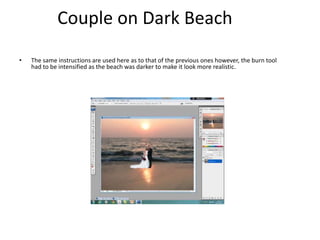
2. âBride and Groomâ
⢠To crop the photo, you click the crop tool and then create a
square around the place which you want to keep.
⢠When drawn, you click on the photo to fully crop it.
3. âModel Faceâ
⢠Open the image then go to image.
⢠Under image there should be an opinion saying âModeâ.
⢠The arrow next to âModeâ should open options such as âGreyscaleâ.
⢠Click âGreyscaleâ.
4. âWedding Balloonsâ
⢠Select the marquee tool for the side you want to edit.
⢠Go to Image and then adjustment and then go to brightness/contrast.
⢠Adjust the scale to make it seem crisp.
5. âRed Eyeâ
⢠Proceed to the side bar which shows the plaster.
⢠Hold this down and it will show a red eye remover icon.
⢠Click this and then click on the red eyes.
6. âSkin with Acneâ
⢠You use the tool which looks like a plaster and touch the area which has
spots to eliminate them.
7. âBlue Eyeâ
⢠You go to image then you'll see selective colour.
⢠You then change the image to cyans.
⢠Adjust bars until eye is green.
8. âRed Rose Bouquetâ
⢠Click the marquee tool.
⢠Go to Image and then adjustment and then selective colour.
⢠Adjust the scale to make half the roses hot pink.
9. âRed Dressâ
⢠Use the marquee tool to highlight the dress.
⢠You then go to selective colour and adjust the scale to make the dress look
like a realistic pink.
10. âGreen Dressâ
⢠Using the lasso tool, I was able to zoom in and select the part of the dress that I needed to
change brown
⢠Eye dropping the green I was able to select the part that I selected. I then increased the
fuzziness so it was clearer to see. By adjusting the hue and decreasing it, it had changed the
bottom of the dress to brown.
11. âModel Faceâ
⢠Using the âMarquee Toolâ, I selected half of the models face. Then using the selective
colour I adjusted the colour of red by increasing the black and yellow. I then adjusted the
yellow colour and increased the black, yellow and cyan.
12. ⢠Open up the two pictures that you need. Take the âQuick Selection Toolâ which
made the process a whole lot quicker and once I had selected the part of the
image you drag it on top of the beach picture.
⢠Use the Lasso Tool to cut out the couple. When that is done, drag them onto the
picture with the beach.
⢠Adjust the size of them and use the burn tool if needed to make them look
realistic.
Wedding couple on Beach.
13. ⢠The same instructions are used here as to that of the previous ones however, the burn tool
had to be intensified as the beach was darker to make it look more realistic.
Couple on Dark Beach
14. âModel with Tattooâ
⢠Using the âquick selection toolâ, I selected the bird I wanted to
use as the models tattoo and then dragged it on the models
picture. After, I adjusted the burn tool and the dodger tool so
the tattoo would look realistic and blend with the models
skin.
15. âVampire Modelâ
⢠The burn and dodge tool were highly useful in creating this picture.
⢠To change the skin tone you use the selective colour and then use the
burn tool to create the darkness around her eyes. This also applied to
the darken of her eyebrows.
⢠I used the dodge tool to create her light pupils and then the burn to
emphasis her pupils.
⢠Use the lasso tool to drop the blood into the vampire picture to create
the illusion that she bit someone.