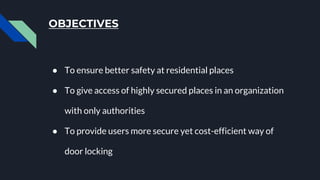
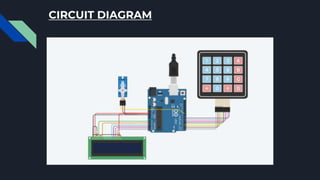
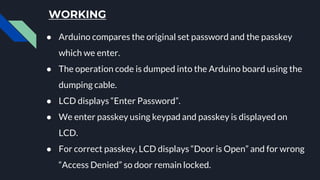
This document describes an IoT password door lock mini-project using an Arduino Uno. The system uses a keypad, LCD display, and micro servo motor to allow access through a door only when the correct password is entered. It is designed to provide secure access to homes, offices, or other places through a simple circuit with low power needs. The system architecture and code implementation are presented, along with advantages like programmable passwords and applications for security and access control.


![CODE
#include <Keypad.h>
#include <LiquidCrystal.h>
#include <Servo.h>
#define Password_Length 5
Servo myservo;
LiquidCrystal lcd(A0, A1, A2, A3, A4, A5);
int pos = 0;
char Data[Password_Length];
char Master[Password_Length] =
"1234";
byte data_count = 0, master_count = 0;
bool Pass_is_good;
bool door = false;
char customKey;
/*---preparing keypad---*/
const byte ROWS = 4;
const byte COLS = 4;
char keys[ROWS][COLS] = {
{'1', '2', '3', 'A'},
{'4', '5', '6', 'B'},
{'7', '8', '9', 'C'},
{'*', '0', '#', 'D'}};
byte rowPins[ROWS] = {0, 1, 2, 3};
byte colPins[COLS] = {4, 5, 6, 7};
Keypad customKeypad( makeKeymap(keys), rowPins,
colPins, ROWS, COLS);
/*--- Main Action ---*/
void setup()
{
myservo.attach(9, 2000, 2400);
ServoClose();
lcd.begin(16, 2);
lcd.print("Protected Door");
loading("Loading");
lcd.clear();
}](https://image.slidesharecdn.com/passworddoorlocksystem1-230807085442-9f47a9f8/85/PASSWORD-DOOR-LOCK-SYSTEM-pptx-15-320.jpg)
![CODE
void loop()
{
if (door == true)
{
customKey = customKeypad.getKey();
if (customKey == '#')
{
lcd.clear();
ServoClose();
lcd.print("Door is closed");
delay(3000);
door = false;
}
}
else
Open();
}
void loading (char msg[]) {
lcd.setCursor(0, 1);
lcd.print(msg);
for (int i = 0; i < 9; i++) {
delay(1000);
lcd.print(".");
}
}
void clearData()
{
while (data_count != 0)
{
Data[data_count--] = 0;
}
return;
}](https://image.slidesharecdn.com/passworddoorlocksystem1-230807085442-9f47a9f8/85/PASSWORD-DOOR-LOCK-SYSTEM-pptx-16-320.jpg)
![CODE
void ServoClose()
{
for (pos = 90; pos >= 0; pos -= 10) {
myservo.write(pos);
}
}
void ServoOpen()
{
for (pos = 0; pos <= 90; pos += 10) {
myservo.write(pos);
}
}
void Open()
{
lcd.setCursor(0, 0);
lcd.print("Enter Password");
customKey = customKeypad.getKey();
if (customKey)
{
Data[data_count] = customKey;
lcd.setCursor(data_count, 1);
lcd.print(Data[data_count]);
data_count++;
}
if (data_count == Password_Length - 1)
{
if (!strcmp(Data, Master))
{
lcd.clear(); ServoOpen(); lcd.print(" Door is Open
"); door = true; delay(5000);
loading("Waiting"); lcd.clear(); lcd.print(" Time is
up! "); delay(1000); ServoClose(); door = false;
}
else{
lcd.clear();
lcd.print(" Wrong Password ");
door = false;
}delay(1000);lcd.clear(); clearData();}
}](https://image.slidesharecdn.com/passworddoorlocksystem1-230807085442-9f47a9f8/85/PASSWORD-DOOR-LOCK-SYSTEM-pptx-17-320.jpg)