Direction : Howare the following are
following are being observe. Accomplish
the table using our in call messages box.
Looking Back
Organism What do we used to observed? (naked eye,
magnifying glass, or microscope
Pet Dog
Covid Virus
Animal Cell
Plant Cell
6.
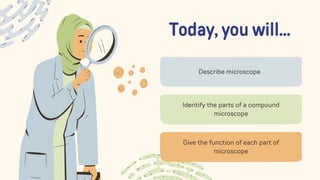
Today, you will...
Describemicroscope
Identify the parts of a compound
microscope
Give the function of each part of
microscope
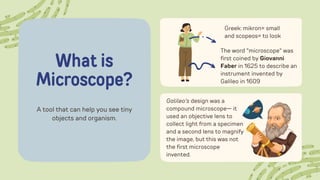
A tool thatcan help you see tiny
objects and organism.
What is
Microscope?
Greek: mikron= small
and scopeos= to look
The word "microscope" was
first coined by Giovanni
Faber in 1625 to describe an
instrument invented by
Galileo in 1609
Galileo's design was a
compound microscope— it
used an objective lens to
collect light from a specimen
and a second lens to magnify
the image, but this was not
the first microscope
invented.
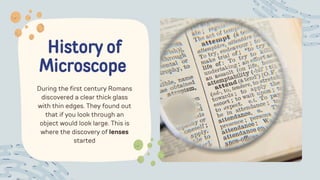
9.
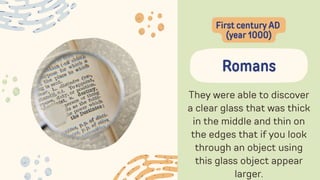
During the firstcentury Romans
discovered a clear thick glass
with thin edges. They found out
that if you look through an
object would look large. This is
where the discovery of lenses
started
History of
Microscope
10.
They were ableto discover
a clear glass that was thick
in the middle and thin on
the edges that if you look
through an object using
this glass object appear
larger.
Romans
First century AD
(year 1000)
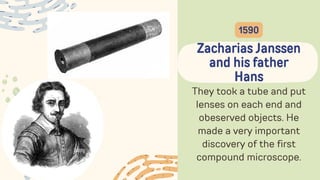
11.
They took atube and put
lenses on each end and
obeserved objects. He
made a very important
discovery of the first
compound microscope.
Zacharias Janssen
and his father
Hans
1590
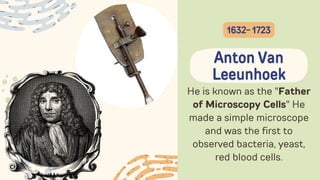
12.
He is knownas the "Father
of Microscopy Cells" He
made a simple microscope
and was the first to
observed bacteria, yeast,
red blood cells.
Anton Van
Leeunhoek
1632- 1723
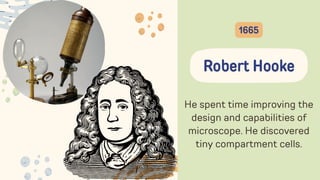
13.
He spent timeimproving the
design and capabilities of
microscope. He discovered
tiny compartment cells.
Robert Hooke
1665
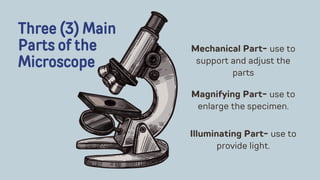
Three (3) Main
Partsof the
Microscope
Mechanical Part- use to
support and adjust the
parts
Magnifying Part- use to
enlarge the specimen.
Illuminating Part- use to
provide light.
16.
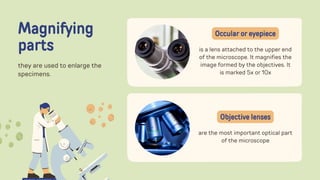
Magnifying
parts
they are usedto enlarge the
specimens.
is a lens attached to the upper end
of the microscope. It magnifies the
image formed by the objectives. It
is marked 5x or 10x
Occular or eyepiece
are the most important optical part
of the microscope
Objective lenses
17.
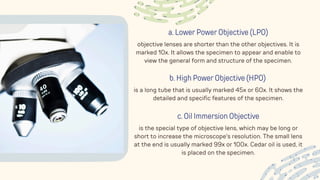
a. Lower PowerObjective (LPO)
objective lenses are shorter than the other objectives. It is
marked 10x. It allows the specimen to appear and enable to
view the general form and structure of the specimen.
b. High Power Objective (HPO)
is a long tube that is usually marked 45x or 60x. It shows the
detailed and specific features of the specimen.
c. Oil Immersion Objective
is the special type of objective lens, which may be long or
short to increase the microscope's resolution. The small lens
at the end is usually marked 99x or 100x. Cedar oil is used, it
is placed on the specimen.
18.
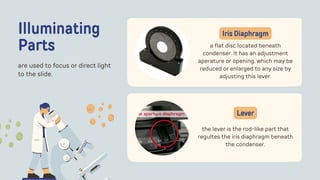
Illuminating
Parts
are used tofocus or direct light
to the slide.
A miroor collects and reflects light
from an external light source up
into the micrscope. It may be
convex or concave mirror.
Mirror
consist of condensing lens that
directs the maximum amount of
light upon an object.
Condenser
19.
Illuminating
Parts
are used tofocus or direct light
to the slide.
a flat disc located beneath
condenser. It has an adjustment
aperature or opening, which may be
reduced or enlarged to any size by
adjusting this lever.
Iris Diaphragm
the lever is the rod-like part that
regultes the iris diaphragm beneath
the condenser.
Lever
20.
Mechanical
Parts
are used tosupport and move
parts of the microscope.
The stage is the platform where the
slide is placed. It has the stag clips
that holds the slide with specimen
in place.
Stage
are the parts of the microscope
that bring thee object into focus so
that the image of the specimen
appears shap and clear.
Adjusment Kobs
21.
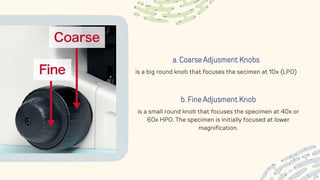
a. Coarse AdjusmentKnobs
is a big round knob that focuses the secimen at 10x (LPO)
b. Fine Adjusment Knob
is a small round knob that focuses the specimen at 40x or
60x HPO. The specimen is initially focused at lower
magnification.
22.
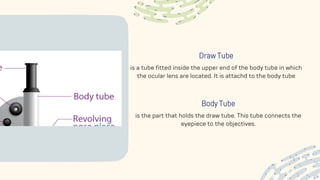
Draw Tube
is atube fitted inside the upper end of the body tube in which
the ocular lens are located. It is attachd to the body tube
Body Tube
is the part that holds the draw tube. This tube connects the
eyepiece to the objectives.
23.
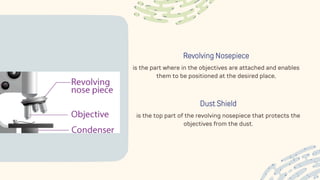
Revolving Nosepiece
is thepart where in the objectives are attached and enables
them to be positioned at the desired place,
Dust Shield
is the top part of the revolving nosepiece that protects the
objectives from the dust.
24.
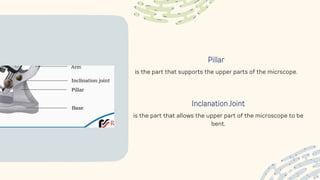
Pillar
is the partthat supports the upper parts of the micrscope.
Inclanation Joint
is the part that allows the upper part of the microscope to be
bent.
Quiz 2.1
For thosewho have their book, you can see this on page 305.
Fot those who doesn't have a book, kindly answer this on
your notebook.
27.
How to Usea
Microscope
If you have never used a light
microscope before, this handy
guide will explain how it’s done!
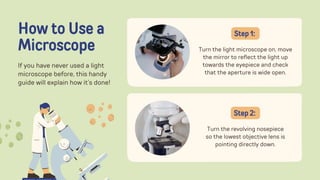
Turn the light microscope on, move
the mirror to reflect the light up
towards the eyepiece and check
that the aperture is wide open.
Step 1:
Turn the revolving nosepiece
so the lowest objective lens is
pointing directly down.
Step 2:
28.
How to Usea
Microscope
If you have never used a light
microscope before, this handy
guide will explain how it’s done!
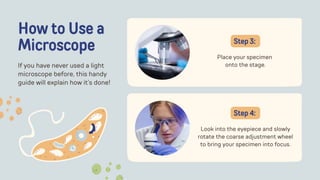
Place your specimen
onto the stage.
Step 3:
Look into the eyepiece and slowly
rotate the coarse adjustment wheel
to bring your specimen into focus.
Step 4:
29.
How to Usea
Microscope
If you have never used a light
microscope before, this handy
guide will explain how it’s done!
Turn the light microscope on, move
the mirror to reflect the light up
towards the eyepiece and check
that the aperture is wide open.
Step 1:
Turn the revolving nosepiece
so the lowest objective lens is
pointing directly down.
Step 2:
30.
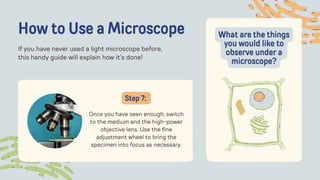
How to Usea Microscope
If you have never used a light microscope before,
this handy guide will explain how it’s done!
Once you have seen enough, switch
to the medium and the high-power
objective lens. Use the fine
adjustment wheel to bring the
specimen into focus as necessary.
Step 7:
What are the things
you would like to
observe under a
microscope?
31.
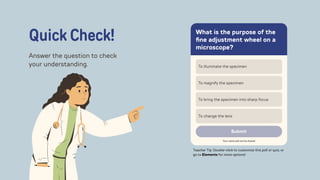
What is thepurpose of the
fine adjustment wheel on a
microscope?
To illuminate the specimen
To magnify the specimen
To bring the specimen into sharp focus
To change the lens
Submit
Your name will not be shared
Quick Check!
Answer the question to check
your understanding.
Teacher Tip: Double-click to customize this poll or quiz, or
go to Elements for more options!
32.
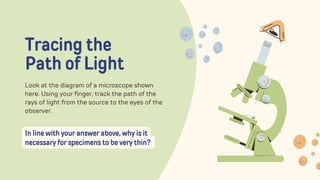
Tracing the
Path ofLight
Look at the diagram of a microscope shown
here. Using your finger, track the path of the
rays of light from the source to the eyes of the
observer.
In line with your answer above, why is it
necessary for specimens to be very thin?
33.
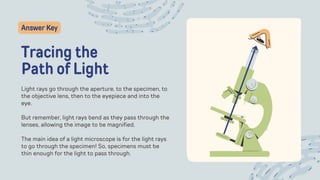
Tracing the
Path ofLight
Light rays go through the aperture, to the specimen, to
the objective lens, then to the eyepiece and into the
eye.
But remember, light rays bend as they pass through the
lenses, allowing the image to be magnified.
The main idea of a light microscope is for the light rays
to go through the specimen! So, specimens must be
thin enough for the light to pass through.
Answer Key
34.
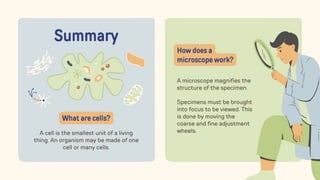
Summary
A cell isthe smallest unit of a living
thing. An organism may be made of one
cell or many cells.
What are cells?
A microscope magnifies the
structure of the specimen.
Specimens must be brought
into focus to be viewed. This
is done by moving the
coarse and fine adjustment
wheels.
How does a
microscope work?
35.
Assignment: Preparing theSpecimen
Use the internet or resources in your
library to find the answer to this
question. Then, get ready to collect
and prepare the specimen the
following day.
How do you prepare
mounts of both cheek cells
and onion epidermis?
36.
Resource
Page
Use these iconsand
illustrations in your Canva
Presentation. Happy designing!
Don't forget to delete this page
before presenting.
37.
Try this backgroundfor online class.
*Please delete this section before downloading.