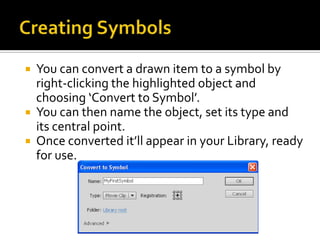
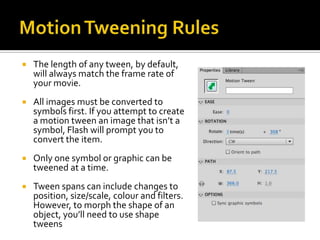
1. Convert the airplane and runway images to graphic symbols.
2. Drag instances of the runway symbol onto the stage.
3. Drag an instance of the airplane symbol onto the stage above the runway.
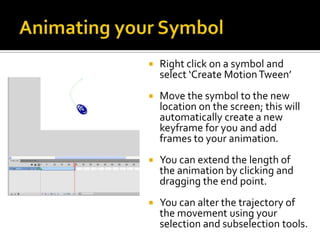
4. Right click the airplane symbol and select "Create Motion Tween" to make it move down to the runway over time.
5. Adjust the trajectory and length of the tween as needed.
6. Test the animation by previewing the SWF file in Flash or by uploading it to Moodle.