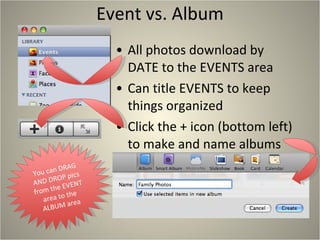
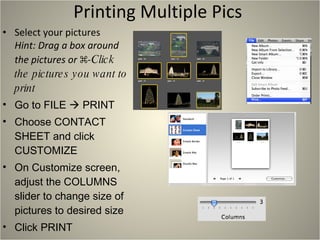
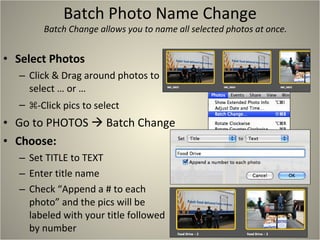
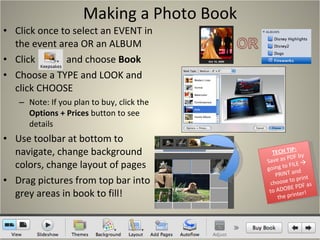
1. The document discusses various advanced features in the photo organizing and editing software iPhoto including importing photos, organizing into events and albums, editing photos, printing photos, batch renaming photos, creating slideshows and photo books.
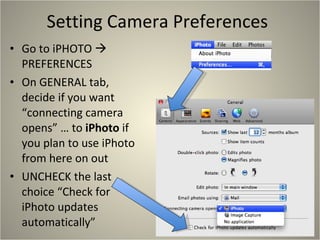
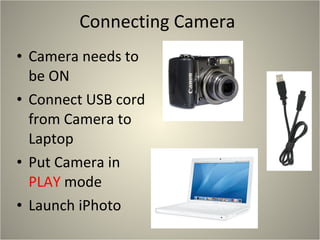
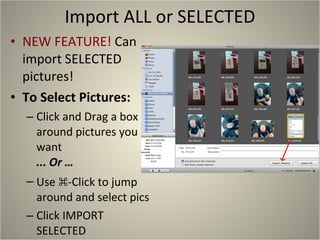
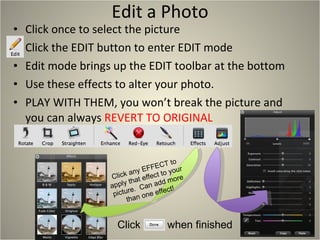
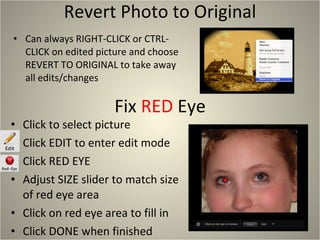
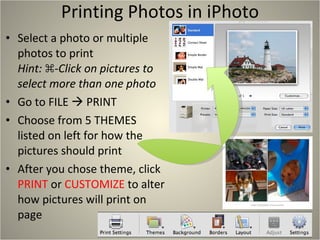
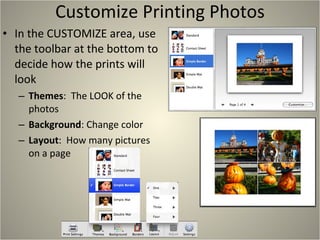
2. It provides step-by-step instructions for tasks like connecting a camera to import photos, editing photos using effects, fixing red eye, printing multiple photos on a single page, and customizing slideshow and book layouts.
3. Additional tips are included like exporting photos from iPhoto by dragging them onto the desktop, resizing images for websites, and saving photo books as PDF files.


![Getting Started with Apache Spark: Big Data Made Simple [Free Meetup]](https://cdn.slidesharecdn.com/ss_thumbnails/apachesparkgettingstarted-260203175547-8361bcc3-thumbnail.jpg?width=640&height=640&fit=bounds)