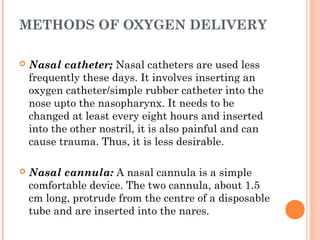
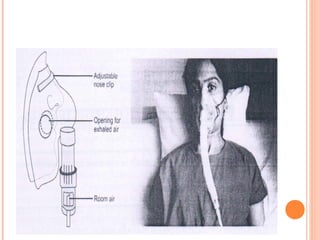
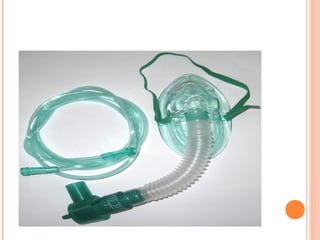
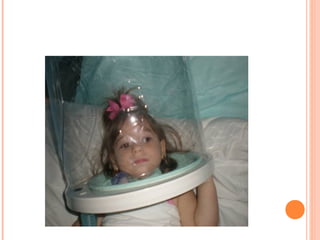
GCS COLLEGE OF NURSING
AHMEDABAD
TOPIC: O2(OXYGEN)
THERAPY
PREPARED BY:
KHUSHBU PATEL
DEFINITION
Oxygen is a colorless, odorless,
tasteless and combustible gas.
Oxygen therapy is defined as the
administration of oxygen by
inhalation from a cylinder, piped in
system liquid oxygen reservoir or
oxygen concentration by various
methods to relieve anoxemia.
PURPOSES:
To relieve dyspnea.
To facilitate normal metabolism of
the tissues.
To reduce/correct arterial hypoxemia
and tissue hypoxia.
INDICATIONS
 Cyanosis.
 Breathlessness or labored breathing.
 High altitudes- environment low in oxygen
content.
 Shock and circulatory failure.
 Patients under anesthesia.
 Patients who are critically ill.
 Patients with a decreased respiratory capacity.
 Asphyxia.
COMPLICATIONS OF OXYGEN
THERAPY
 Infection- The use of the contaminated equipment can
cause an infection in the patient.
 Atelactasis- Collapse of alveoli develops as a result of
increased oxygen concentrations in the inspired air.
 Oxygen toxicity- the symptoms of oxygen toxicity
initially include those of a mild trachea bronchitis
starting as a tracheal irritation and cough.
 Drying of the mucus membranes of the respiratory
tract.
 Oxygen induced apnea- The carbon dioxide is
completely washed off from the blood by a high
concentration of oxygen. Carbon dioxide remaining in
the blood stimulates the respiratory centre.
 Combustion- fire.
METHODS OF OXYGEN DELIVERY
 Nasal catheter; Nasal catheters are used less
frequently these days. It involves inserting an
oxygen catheter/simple rubber catheter into the
nose upto the nasopharynx. It needs to be
changed at least every eight hours and inserted
into the other nostril, it is also painful and can
cause trauma. Thus, it is less desirable.
 Nasal cannula: A nasal cannula is a simple
comfortable device. The two cannula, about 1.5
cm long, protrude from the centre of a disposable
tube and are inserted into the nares.
 Trans- tracheal oxygen: In trans tracheal
oxygenation, oxygen is delivered directly into the
trachea via a catheter into the trachea through a
surgical opening in the lower neck.
 Oxygen masks/B.L.B. Mask (Boothby Lovelace
and Bulbulian): Oxygen mask is a device used to
administer humified oxygen. It is strapped to fit
snugly to the mouth and nose and is secured in place
with a strap.
 Oxygen tent/ the Seymour tent: When a patient has
facial injuries or for any other reason cannot tolerate
an oxygen mask, then this method can be used. The
tent is first flooded with oxygen and then a flow of 4-5
liters per minute is given
GENERAL INSTRUCTIONS
 Oxygen should be treated as drug; the five rights
of medication administration is also pertain to
oxygen.
 When using an oxygen cylinder or central supply
oxygen, use a regulator and humidifier.
 Every part of the apparatus should be clean
prevent infection.
 Change nasal catheter at least every eight hours
or more often to prevent blockage of the nasal
catheter by a mucus plug.
 When oxygen therapy is to be discontinued, it
should be done gradually.
CONTD……
 Pay attention to conditions that can interfere
with the flow of oxygen from source to the
patient. This may include tubing, loose
connections and faulty humidifying apparatus.
 Always keep a spare oxygen cylinder in close
vicinity.
 Watch the patients receiving oxygen therapy
continuously to detect the early sign of oxygen
toxicity.
 Since oxygen supports combustion, fire
precautions are to be taken when oxygen is on
flow.
CARE OF OXYGEN CYLINDER
 Always use the cylinder with metal case to
prevent the danger of falling and breaking.
 Oxygen cylinders should be placed at the head
end of the bed, away from the traffic areas where
these are likely to be knocked down.
 Any source of the fire should be kept away from
the cylinder for fear of fire.
 Oxygen cylinders should be stored in a cool
temperature away from the heaters.
CONTD…..
 The supply of the oxygen must always be
equipped with a regulator to control the flow of
gas and prevent wastage.
 Put the warning signs( “No Smoking”) in the unit
where oxygen is on.
 Mark the empty cylinders and send for filling.
 Inspect the apparatus at frequent intervals for
its working condition.
PROCEEDURE
 Preparation of the patient
 Check name, bed No., and other identification
marks of the patient. Check the diagnosis and
the need of the oxygen therapy.
 Check doctor’s order for initiation of the therapy
and the dosage.
 Assess the patient for any clinical anoxia.
 Assess the patient’s vital signs and breathing
patterns carefully before starting the therapy.
 Explain the need of the oxygen therapy, and the
sequence of the procedure.
 Gain the patient’s confidence.
 Keep the patient in a propped up position or
Fowler’s position.
PREPARATION OF ARTICLES
Articles Rationale
Oxygen cylinder with stand, central supply
oxygen with a flow meter, humidifier/ Wolff’s
bottle and connecting tubing.


A tray containing
1.Nasal catheter/cannula /oxygen mask of an
appropriate size clean/ disposable type in a
covered container.
To deliver oxygen. To check the amount of oxygen
ongoing to the patient.
To humidify oxygen.
To prevent infection
 
1. Water soluble lubricating jelly
 
To lubricate the nasal catheter.
 
1. Adhesive tape.
 
To attach the nasal catheter.
 
1. A bowl of water.
 
To check oxygen flow.
 
1. Flash light & tongue depressor
 
To help to assess the correct placement of the catheter.
1. Swab sticks and normal saline in container. For cleaning nostrils.
 
1. Kidney tray
 
 
To receive the wastes and the used tongue depressor.
 
1. Rag pieces or gauze pieces in a container.
 
To wipe off the secretions from the nose and mouth
during the proceedure.
1. No smoking Indicator.
 
To take fire precautions.
STEPS OF THE PROCEDURE
Steps Rationale Scientific
Principles
Nursing
Principles
Wash hands. Reduces transmission of micro-
organisms. Soap and water reduce
surface tension and thus remove the dirt
and check the growth of micro-
organisms.
Micro-
Biology.
Safety.
Attach cannula/ catheter
mask to oxygen tubing and
humidified oxygen source
adjusted to the prescribed
flow rate.
Prevents drying of nasal and oral mucous
membranes and airway secretions. Use of
a humidifier prevents drying of mucus
membranes.
Physics. Safety,
Comfort.
Place tips of cannula into the
patient’s nares. If mask,
apply snuggly to face.
Directs flow of oxygen into the upper
respiratory tract. Prevents loss of oxygen.
Therapu-
Etics,
effective-
ness,
safety
Check cannula/ equipment
every eight hours.
Ensures patency of cannula and oxygen
flow. Also ensure safe delivery of
prescribed oxygen.
Safety
Keep the
humidification jar filled
at all times.
Prevents inhalation of
dehumidified oxygen. Prevents
drying of mucus membranes.
Safety &
Thera-
Puetic
Effective-
ness.
Observe the patient’s
nares and superior
surface of both the ears
and skin breakdown.
Oxygen therapy can dry nasal
mucosa. Pressure on ears from
cannula tubing/ elastic can cause
skin irritation.
Safety,
Comfort.
Check the oxygen flow
rate and physician’s
orders every eight
hours.
Ensures delivery of the
prescribed oxygen flow rate.
Safety. Thera-
Peutics
Effective-
ness
Wash hands before
removing the oxygen
mask or tube.
Reduces transmission of micro
organisms.
Micro-
Biology.
Safety.
Inspect the patient
for relief of
symptoms
associated with
hypoxia.
Indicates that hypoxia is
reduced/treated.
Anatom
y &
Physio-
logy.
Thera-
peutics
Effectiv
e-ness.
Record procedure
in the nurse’s
notes.
Documents correct use of
oxygen therapy and the
patient’s response.
Safety,
Good
Workm
an-ship.
PROCEDURE- NASAL CATHETER
METHOD
Steps Reason
Wash hands. To prevent cross infection.
Measure the length of the nasal
catheter from the tip of the nose to the
ear lobe.
The catheter should extend from the anterior
nares to the level of the uvula. The tip should
be visible when the uvula is elevated. The
distance from the tip of the nose to the ear lobe
roughly equals the distance from the anterior
nares to the uvula.
If the catheter is not reaching the oro pharynx
there is a chance for the oxygen lost through
the mouth. If the tip goes beyond the level of
the uvula into the oesophagus, there is a
chance for the gas to be introduced into the
stomach and can cause distension of the
abdomen.
Check the apparatus for the working
condition.
To see whether the apparatus is in working
condition or not.
Attach the catheter to the connecting
tube and check the flow of the oxygen
through the catheter by submerging it
under the water in the bowl.
To assess the patency of the tube and to assess
the flow rate.
Attach the catheter to the connecting
tube and check the flow of the oxygen
through the catheter by submerging it
under the water in the bowl.
To assess the patency of the tube and to assess
the flow rate.
Lubricate the tip of the catheter
sparingly with water soluble jelly and
then check the flow by immersing it in
the water.
Lubricating the tube prevents irritation of the
nasal mucosa. Checking the flow of oxygen
again under the water helps to know whether
the terminal holes are plugged with the
lubricant.
Introduce catheter slowly into one of
the nostrils to the previously marked
distance. If any obstruction in
encountered withdraw the catheter a
little, rotate it and introduce it again.
Never use the force.
Forcing the catheter can cause injury to the
mucus membranes. It can also cause kinking
of the tube in the nasal cavity.
Check the position of the catheter in
the oropharynx at the level of the
uvula. It can be checked by asking the
patient to open his mouth widely,
depressing the tongue with a tongue
depressor and directing the flash light
into the throat.
Checking is done to make sure that the
catheter is positioned in a correct place and not
kinked.
Fix the catheter either over the
forehead or at the cheek with adhesive
straps. Secure the connecting tube to
the bed clothers or patient’s gown
using an elastic band and a safety pin.
AFTER CARE OF THE PATIENT
AND ARTICLES
 Stay with the patient till he/she is at ease.
 Keep the patient warm and comfortable.
 Evaluate the patient’s progress by observing the vital signs
and symptoms.
 Watch the patient for any deteriorating symptoms after the
removal of the oxygen inhalation. Inform the doctor.
 Record the procedure with date and time.
 Request for an arterial blood gas analysis at specified
intervals to make sure hypoxia is treated.
 Take all articles into the utility room.
 Clean nasal catheter with cold water, then warm soapy
water and finally with clean water. Boil and store or end
for sterilization.

 
RECORD OF OXYGEN THERAPY
Name of the Patient:
Age:
Bed No;
Indoor No.
Dr’s Unit:
Date Time Temp
F
Pulse/
Min
Respi/
Min
Blood
Pressure
Mm Hg
O2 started
at
Flow
rate
Remarks
THANK YOU

O2 therapy procedure

  • 1.
    GCS COLLEGE OFNURSING AHMEDABAD TOPIC: O2(OXYGEN) THERAPY PREPARED BY: KHUSHBU PATEL
  • 2.
    DEFINITION Oxygen is acolorless, odorless, tasteless and combustible gas. Oxygen therapy is defined as the administration of oxygen by inhalation from a cylinder, piped in system liquid oxygen reservoir or oxygen concentration by various methods to relieve anoxemia.
  • 3.
    PURPOSES: To relieve dyspnea. Tofacilitate normal metabolism of the tissues. To reduce/correct arterial hypoxemia and tissue hypoxia.
  • 4.
    INDICATIONS  Cyanosis.  Breathlessnessor labored breathing.  High altitudes- environment low in oxygen content.  Shock and circulatory failure.  Patients under anesthesia.  Patients who are critically ill.  Patients with a decreased respiratory capacity.  Asphyxia.
  • 5.
    COMPLICATIONS OF OXYGEN THERAPY Infection- The use of the contaminated equipment can cause an infection in the patient.  Atelactasis- Collapse of alveoli develops as a result of increased oxygen concentrations in the inspired air.  Oxygen toxicity- the symptoms of oxygen toxicity initially include those of a mild trachea bronchitis starting as a tracheal irritation and cough.  Drying of the mucus membranes of the respiratory tract.  Oxygen induced apnea- The carbon dioxide is completely washed off from the blood by a high concentration of oxygen. Carbon dioxide remaining in the blood stimulates the respiratory centre.  Combustion- fire.
  • 6.
    METHODS OF OXYGENDELIVERY  Nasal catheter; Nasal catheters are used less frequently these days. It involves inserting an oxygen catheter/simple rubber catheter into the nose upto the nasopharynx. It needs to be changed at least every eight hours and inserted into the other nostril, it is also painful and can cause trauma. Thus, it is less desirable.  Nasal cannula: A nasal cannula is a simple comfortable device. The two cannula, about 1.5 cm long, protrude from the centre of a disposable tube and are inserted into the nares.
  • 7.
     Trans- trachealoxygen: In trans tracheal oxygenation, oxygen is delivered directly into the trachea via a catheter into the trachea through a surgical opening in the lower neck.  Oxygen masks/B.L.B. Mask (Boothby Lovelace and Bulbulian): Oxygen mask is a device used to administer humified oxygen. It is strapped to fit snugly to the mouth and nose and is secured in place with a strap.  Oxygen tent/ the Seymour tent: When a patient has facial injuries or for any other reason cannot tolerate an oxygen mask, then this method can be used. The tent is first flooded with oxygen and then a flow of 4-5 liters per minute is given
  • 12.
    GENERAL INSTRUCTIONS  Oxygenshould be treated as drug; the five rights of medication administration is also pertain to oxygen.  When using an oxygen cylinder or central supply oxygen, use a regulator and humidifier.  Every part of the apparatus should be clean prevent infection.  Change nasal catheter at least every eight hours or more often to prevent blockage of the nasal catheter by a mucus plug.  When oxygen therapy is to be discontinued, it should be done gradually.
  • 13.
    CONTD……  Pay attentionto conditions that can interfere with the flow of oxygen from source to the patient. This may include tubing, loose connections and faulty humidifying apparatus.  Always keep a spare oxygen cylinder in close vicinity.  Watch the patients receiving oxygen therapy continuously to detect the early sign of oxygen toxicity.  Since oxygen supports combustion, fire precautions are to be taken when oxygen is on flow.
  • 14.
    CARE OF OXYGENCYLINDER  Always use the cylinder with metal case to prevent the danger of falling and breaking.  Oxygen cylinders should be placed at the head end of the bed, away from the traffic areas where these are likely to be knocked down.  Any source of the fire should be kept away from the cylinder for fear of fire.  Oxygen cylinders should be stored in a cool temperature away from the heaters.
  • 15.
    CONTD…..  The supplyof the oxygen must always be equipped with a regulator to control the flow of gas and prevent wastage.  Put the warning signs( “No Smoking”) in the unit where oxygen is on.  Mark the empty cylinders and send for filling.  Inspect the apparatus at frequent intervals for its working condition.
  • 16.
    PROCEEDURE  Preparation ofthe patient  Check name, bed No., and other identification marks of the patient. Check the diagnosis and the need of the oxygen therapy.  Check doctor’s order for initiation of the therapy and the dosage.  Assess the patient for any clinical anoxia.  Assess the patient’s vital signs and breathing patterns carefully before starting the therapy.  Explain the need of the oxygen therapy, and the sequence of the procedure.  Gain the patient’s confidence.  Keep the patient in a propped up position or Fowler’s position.
  • 17.
    PREPARATION OF ARTICLES ArticlesRationale Oxygen cylinder with stand, central supply oxygen with a flow meter, humidifier/ Wolff’s bottle and connecting tubing.           A tray containing 1.Nasal catheter/cannula /oxygen mask of an appropriate size clean/ disposable type in a covered container. To deliver oxygen. To check the amount of oxygen ongoing to the patient. To humidify oxygen. To prevent infection   1. Water soluble lubricating jelly   To lubricate the nasal catheter.   1. Adhesive tape.   To attach the nasal catheter.   1. A bowl of water.   To check oxygen flow.   1. Flash light & tongue depressor   To help to assess the correct placement of the catheter. 1. Swab sticks and normal saline in container. For cleaning nostrils.   1. Kidney tray     To receive the wastes and the used tongue depressor.   1. Rag pieces or gauze pieces in a container.   To wipe off the secretions from the nose and mouth during the proceedure. 1. No smoking Indicator.   To take fire precautions.
  • 18.
    STEPS OF THEPROCEDURE Steps Rationale Scientific Principles Nursing Principles Wash hands. Reduces transmission of micro- organisms. Soap and water reduce surface tension and thus remove the dirt and check the growth of micro- organisms. Micro- Biology. Safety. Attach cannula/ catheter mask to oxygen tubing and humidified oxygen source adjusted to the prescribed flow rate. Prevents drying of nasal and oral mucous membranes and airway secretions. Use of a humidifier prevents drying of mucus membranes. Physics. Safety, Comfort. Place tips of cannula into the patient’s nares. If mask, apply snuggly to face. Directs flow of oxygen into the upper respiratory tract. Prevents loss of oxygen. Therapu- Etics, effective- ness, safety Check cannula/ equipment every eight hours. Ensures patency of cannula and oxygen flow. Also ensure safe delivery of prescribed oxygen. Safety
  • 19.
    Keep the humidification jarfilled at all times. Prevents inhalation of dehumidified oxygen. Prevents drying of mucus membranes. Safety & Thera- Puetic Effective- ness. Observe the patient’s nares and superior surface of both the ears and skin breakdown. Oxygen therapy can dry nasal mucosa. Pressure on ears from cannula tubing/ elastic can cause skin irritation. Safety, Comfort. Check the oxygen flow rate and physician’s orders every eight hours. Ensures delivery of the prescribed oxygen flow rate. Safety. Thera- Peutics Effective- ness Wash hands before removing the oxygen mask or tube. Reduces transmission of micro organisms. Micro- Biology. Safety.
  • 20.
    Inspect the patient forrelief of symptoms associated with hypoxia. Indicates that hypoxia is reduced/treated. Anatom y & Physio- logy. Thera- peutics Effectiv e-ness. Record procedure in the nurse’s notes. Documents correct use of oxygen therapy and the patient’s response. Safety, Good Workm an-ship.
  • 21.
    PROCEDURE- NASAL CATHETER METHOD StepsReason Wash hands. To prevent cross infection. Measure the length of the nasal catheter from the tip of the nose to the ear lobe. The catheter should extend from the anterior nares to the level of the uvula. The tip should be visible when the uvula is elevated. The distance from the tip of the nose to the ear lobe roughly equals the distance from the anterior nares to the uvula. If the catheter is not reaching the oro pharynx there is a chance for the oxygen lost through the mouth. If the tip goes beyond the level of the uvula into the oesophagus, there is a chance for the gas to be introduced into the stomach and can cause distension of the abdomen. Check the apparatus for the working condition. To see whether the apparatus is in working condition or not. Attach the catheter to the connecting tube and check the flow of the oxygen through the catheter by submerging it under the water in the bowl. To assess the patency of the tube and to assess the flow rate.
  • 22.
    Attach the catheterto the connecting tube and check the flow of the oxygen through the catheter by submerging it under the water in the bowl. To assess the patency of the tube and to assess the flow rate. Lubricate the tip of the catheter sparingly with water soluble jelly and then check the flow by immersing it in the water. Lubricating the tube prevents irritation of the nasal mucosa. Checking the flow of oxygen again under the water helps to know whether the terminal holes are plugged with the lubricant.
  • 23.
    Introduce catheter slowlyinto one of the nostrils to the previously marked distance. If any obstruction in encountered withdraw the catheter a little, rotate it and introduce it again. Never use the force. Forcing the catheter can cause injury to the mucus membranes. It can also cause kinking of the tube in the nasal cavity. Check the position of the catheter in the oropharynx at the level of the uvula. It can be checked by asking the patient to open his mouth widely, depressing the tongue with a tongue depressor and directing the flash light into the throat. Checking is done to make sure that the catheter is positioned in a correct place and not kinked. Fix the catheter either over the forehead or at the cheek with adhesive straps. Secure the connecting tube to the bed clothers or patient’s gown using an elastic band and a safety pin.
  • 24.
    AFTER CARE OFTHE PATIENT AND ARTICLES  Stay with the patient till he/she is at ease.  Keep the patient warm and comfortable.  Evaluate the patient’s progress by observing the vital signs and symptoms.  Watch the patient for any deteriorating symptoms after the removal of the oxygen inhalation. Inform the doctor.  Record the procedure with date and time.  Request for an arterial blood gas analysis at specified intervals to make sure hypoxia is treated.  Take all articles into the utility room.  Clean nasal catheter with cold water, then warm soapy water and finally with clean water. Boil and store or end for sterilization.   
  • 25.
    RECORD OF OXYGENTHERAPY Name of the Patient: Age: Bed No; Indoor No. Dr’s Unit: Date Time Temp F Pulse/ Min Respi/ Min Blood Pressure Mm Hg O2 started at Flow rate Remarks
  • 26.