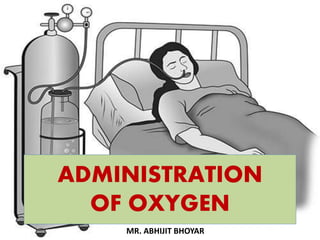
ADMINISTRATION
OF OXYGEN
MR. ABHIJIT BHOYAR
INTRODUCTION
• Patients with respiratory dysfunctions are treated with oxygen
inhalations to relieve 'anoxaemia' or 'hypoxaemia'
(deficiency of oxygen in the blood).
• The normal amount of oxygen in the arterial blood should be
in the range of 80 to 100 mm of Hg. If it falls below 60 mm of
Hg, irreversible physiologic effects may occur. Thus it is urgent
to correct anoxaemia promptly.
Remember, that the oxygen
administration treats the
effects of oxygen deficiency
(anoxaemia) but it does not
correct the underlying causes.
INDICATIONS FOR OXYGEN
THERAPY
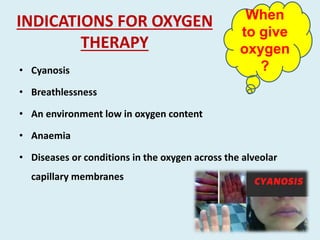
• Cyanosis
• Breathlessness
• An environment low in oxygen content
• Anaemia
• Diseases or conditions in the oxygen across the alveolar
capillary membranes
When
to give
oxygen
?
• Patients whose respiratory capacity is diminished
by some diseases or conditions e.g ., atelectasis,
pneumenectomy, thoracoplasty etc.
• Poisoning with chemical that alter the tissue's
ability to utilize oxygen e.g ., cyanide poisoning.
When
to give
oxyge
n ?
• .
When
to give
oxyge
n ?
•Shock and circulatory failure.
•Haemorrhage and air hunger.
•Patients under anaesthesia
When
to give
oxyge
n ?
• Patients who are critically ill.
• Patients with psychologically induced
breathlessness.
• Asphyxia
Asphyxia : It is a condition in which there is lack of oxygen supply in the
lungs leading to unconsciousness caused by blocking of the air passage
by foreign bodies, drowning. electrical shock, strangulation, inhalation of
poisonous gases
When
to give
oxyge
n ?
Methods of Oxygen Administration
Oxygen can be delivered to the client by
Nasal cannula,
Nasal catheter,
Face mask or mechanical ventilator.
Oxygen tent & oxygen hood
NASAL CANNULA
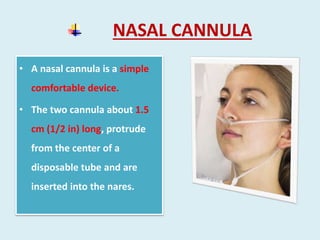
• A nasal cannula is a simple
comfortable device.
• The two cannula about 1.5
cm (1/2 in) long, protrude
from the center of a
disposable tube and are
inserted into the nares.
Conti…
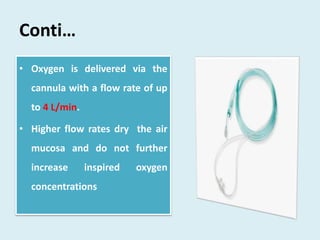
• Oxygen is delivered via the
cannula with a flow rate of up
to 4 L/min.
• Higher flow rates dry the air
mucosa and do not further
increase inspired oxygen
concentrations
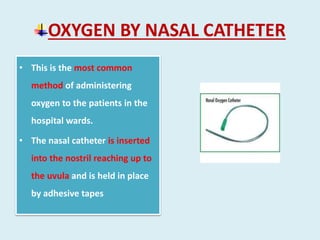
OXYGEN BY NASAL CATHETER
• This is the most common
method of administering
oxygen to the patients in the
hospital wards.
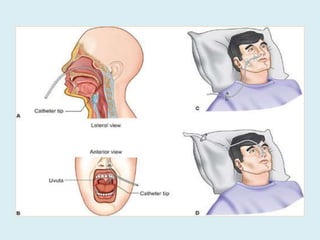
• The nasal catheter is inserted
into the nostril reaching up to
the uvula and is held in place
by adhesive tapes
• The catheter does not interfere with the patient's freedom
to eat, to talk and to move in the bed.
• Flow of 1 to 4 liters of oxygen will be sufficient to maintain
the concentration of 22 to 30% oxygen.
• The catheter must be changed at least every 8 hours and
inserted into the other nostril, to reduce pressure on the
nostril.
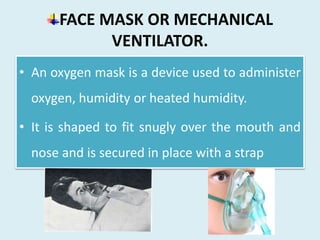
FACE MASK OR MECHANICAL
VENTILATOR.
• An oxygen mask is a device used to administer
oxygen, humidity or heated humidity.
• It is shaped to fit snugly over the mouth and
nose and is secured in place with a strap
• Simple face mask is used for short oxygen therapy
• Flow of 8 to 12 liters of oxygen will be necessary
to maintain the concentration of oxygen 25 to
60%.
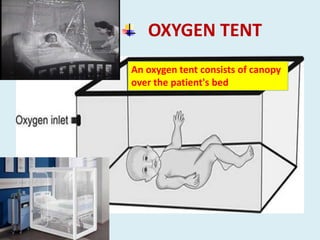
OXYGEN TENT
An oxygen tent consists of canopy
over the patient's bed
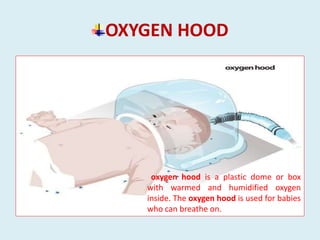
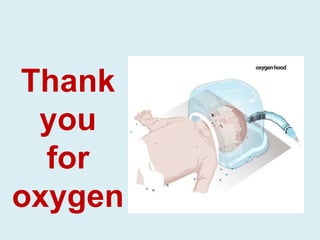
OXYGEN HOOD
oxygen hood is a plastic dome or box
with warmed and humidified oxygen
inside. The oxygen hood is used for babies
who can breathe on.
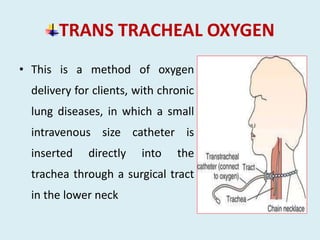
TRANS TRACHEAL OXYGEN
• This is a method of oxygen
delivery for clients, with chronic
lung diseases, in which a small
intravenous size catheter is
inserted directly into the
trachea through a surgical tract
in the lower neck
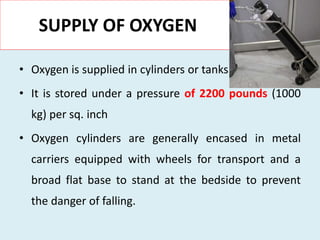
SUPPLY OF OXYGEN
• Oxygen is supplied in cylinders or tanks
• It is stored under a pressure of 2200 pounds (1000
kg) per sq. inch
• Oxygen cylinders are generally encased in metal
carriers equipped with wheels for transport and a
broad flat base to stand at the bedside to prevent
the danger of falling.
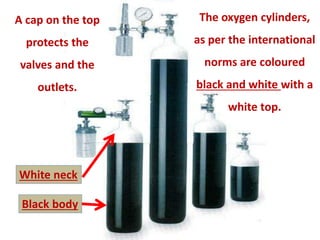
A cap on the top
protects the
valves and the
outlets.
The oxygen cylinders,
as per the international
norms are coloured
black and white with a
white top.
Black body
White neck
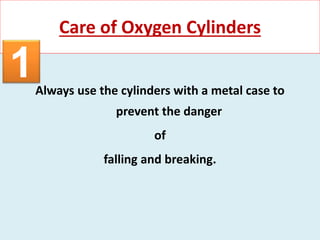
Always use the cylinders with a metal case to
prevent the danger
of
falling and breaking.
Care of Oxygen Cylinders
1
Care of Oxygen Cylinders
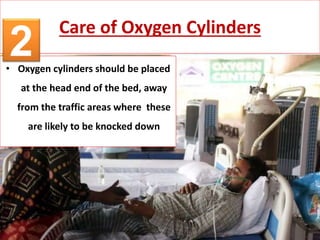
• Oxygen cylinders should be placed
at the head end of the bed, away
from the traffic areas where these
are likely to be knocked down
2
Any source of fire should be kept away from the cylinder
for fear of fire.
Oxygen is not explosive, but it supports combustion,
which means that a spark of flame can cause a major
fire in a very short time when the oxygen is on.
Care of Oxygen Cylinders
3
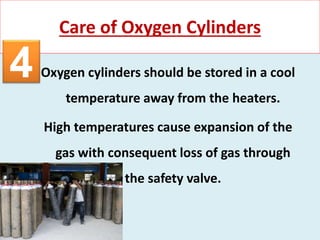
Oxygen cylinders should be stored in a cool
temperature away from the heaters.
High temperatures cause expansion of the
gas with consequent loss of gas through
the safety valve.
Care of Oxygen Cylinders
4
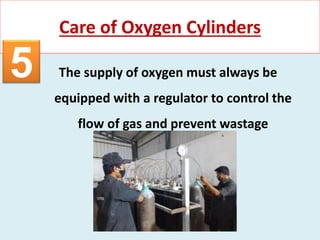
The supply of oxygen must always be
equipped with a regulator to control the
flow of gas and prevent wastage
Care of Oxygen Cylinders
5
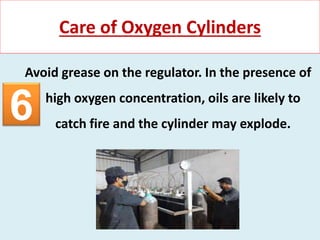
Avoid grease on the regulator. In the presence of
high oxygen concentration, oils are likely to
catch fire and the cylinder may explode.
Care of Oxygen Cylinders
6
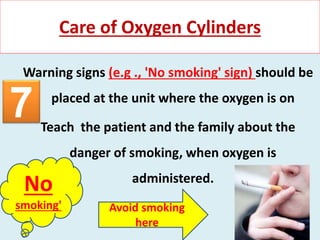
Warning signs (e.g ., 'No smoking' sign) should be
placed at the unit where the oxygen is on
Teach the patient and the family about the
danger of smoking, when oxygen is
administered.
Care of Oxygen Cylinders
No
smoking' Avoid smoking
here
7
When the cylinders are empty, always mark it
'empty' and send for filling.
Inspect the apparatus at frequent intervals and
make sure for its good working condition.
Care of Oxygen Cylinders
8
9
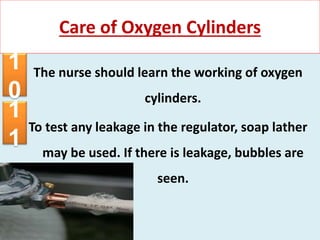
The nurse should learn the working of oxygen
cylinders.
To test any leakage in the regulator, soap lather
may be used. If there is leakage, bubbles are
seen.
Care of Oxygen Cylinders
1
0
1
1
HAZARDS OF OXYGEN INHALATION
• The use of contaminated equipment can spread
infection in the patient. The causative organisms
may be present in such places as catheters,
tracheostomy or endotracheal tubes,
humidifying water and masks.
1. Infection
HAZARDS OF OXYGEN INHALATION
• The use of contaminated equipment can spread
infection in the patient. The causative organisms
may be present in such places as catheters,
tracheostomy or endotracheal tubes,
humidifying water and masks.
2. Combusion
HAZARDS OF OXYGEN INHALATION
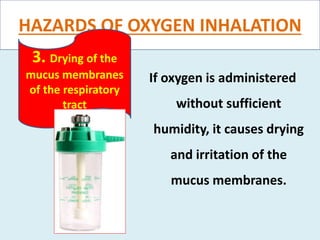
If oxygen is administered
without sufficient
humidity, it causes drying
and irritation of the
mucus membranes.
3. Drying of the
mucus membranes
of the respiratory
tract
HAZARDS OF OXYGEN INHALATION
• Starting as a tracheal irritation and cough
• Symptoms of oxygen toxicity are dryness
and irritation of the mucus membrane,
substernal pain, nausea and vomiting and
formulation of a membrane similar to
hyaline membrane on the alveolar valves,
which causes dyspnoea
4. Oxygen
toxicity
Prolonged exposure to a high concentration causes
damage to the lung tissues and ATELECTASIS.
Progressively, the exchange of oxygen
carbondioxide becomes diminished
HAZARDS OF OXYGEN INHALATION
• Collapse of the alveoli
develops as a result of
increased oxygen
concentrations in the inspired
air.
5. Atelectasis
Atelectasis is a complete or partial
collapse of the entire lung or area
(lobe) of the lung
HAZARDS OF OXYGEN INHALATION
• Since the carbondioxide is
washed off completely from
the blood by a high
concentration of oxygen, the
respiratory centre is not
stimulated sufficiently.
6. Oxygen
Induced Apnoea
HAZARDS OF OXYGEN INHALATION
• The hazards of oxygen therapy may
affect the eyes
• The eyes of the adults may also be
damaged by the oxygen
administration. Ulceration, oedema
and visual impairment etc
7. Retrolental
Fibroplasia
HAZARDS OF OXYGEN INHALATION
• Patients receiving oxygen
inhalation by means of masks
and closed tents must be
protected from the danger of
asphyxia resulting from
unexpected and unobserved
depletion of oxygen in the
oxygen cylinders.
8. Asphyxia
GENERAL
INSTRUCTIONS
1. Since oxygen acts as a drug, it must be prescribed
and administered in specific dose in order to avoid
oxygen toxicity. The dosage of oxygen is stated in
terms of concentration and rate of flow
2. When using an oxygen cylinder, use a regulator
and humidifier
GENERAL
INSTRUCTIONS
3. Every part of the apparatus should be
clean to prevent infection. Use disposable
nasal catheters or sterilized rubber catheters
4. Change the nasal catheters atleast every 8
hours or more often, because the mucus
may plug the opening of the catheter and
block the oxygen supply
GENERAL
INSTRUCTIONS
5. Lubricate the nasal catheter sparingly while the
oxygen is flowing. Then hold tip of the catheter in a
glass of water to make sure that the terminal holes are
not plugged with lubricant
6. During the administration of oxygen, the valve
controlling the rate of flow should not be handled. If
any alteration is to be made in the flow of oxygen, first
take out the catheter from the nose and then adjust the
valve
GENERAL
INSTRUCTIONS
7. Oxygen administration must never be stopped
until the factors that caused hypoxia are
reversed.
8. When oxygen therapy is discontinued, it
should be done gradually. The patient is weaned
from dependence on oxygen by reducing the
dosage and then administering it intermittently.
GENERAL
INSTRUCTIONS
9. For all patients receiving oxygen
inhalation, the temperature should be taken
rectally to get an accurate record of body
temperature.
10. When the nurse leaves the patient even
for a short period, she should leave a calling
signal near the patient.
GENERAL
INSTRUCTIONS
11. Pay attention to conditions that can interfere
with the flow of oxygen from the source to the
patient. This may include kinks in the tubing, loose
connection and faulty humidifying apparatus.
12. To prevent the deprivation of oxygen resulting
from the depletion of oxygen from the cylinder, the
nurse should get a new one ready at hand when the
gauge shows about 1/4 level in the pressure.
GENERAL
INSTRUCTIONS
13. For fear of retrolental fibroplasia the
premature babies are given oxygen
inhalation only for a short period at a very
low concentration.
14. Watch the patients receiving oxygen
therapy continuously to detect the early
signs of oxygen toxicity.
GENERAL
INSTRUCTIONS
15. When oxygen is administered through
the nasal catheters, the catheter is not
directed beyond the uvula to prevent
gaseous distension of abdomen.
16. Since oxygen supports combustion, fire
precautions are to be taken when the oxygen
is on flow.
NURSE'S RESPONSIBILITY IN THE
ADMINISTRATION OF OXYGEN BY THE
CATHETER METHOD
Preliminary Assessment
1. Check the name, bed number and other identifications of
the patient.
2. Check the diagnosis and the need for oxygen therapy.
3. Check the doctor's orders for the initiation of the therapy,
the dosage (litre/minute) etc.
4. Check the doctor's orders for specific precautions
regarding the movement and positioning of the patient.
Preliminary Assessment
5. Assess the patient for any signs of clinical anoxia, e.g .,
cyanosis.
6. Assess the patient's vital signs and the breathing patterns
carefully before starting the therapy. This will help to
determine the patient's response to therapy.
7. Check the results of arterial blood gas analysis.
8. Note any signs of pulmonary dysfunction.
9. Inspect the anterior nare’s for encrustation and irritation.
Preliminary Assessment
10. Inspect the skin on the nose and the surrounding
areas for any skin lesions. The adhesive tapes may
have to be used to fix the catheter in position.
11. Check the patient's mental state and the ability to
follow instructions.
12. Check the articles available in the unit. Check the
oxygen cylinder and its accessories for their functions.
(e.g ., check for any leakage of oxygen).
Article’s used In
OXYGENATION
SR.
NO.
ARTICLE RATIONAL
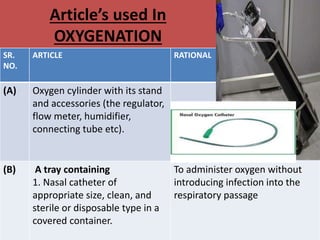
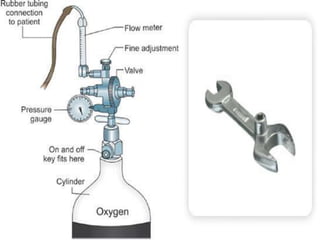
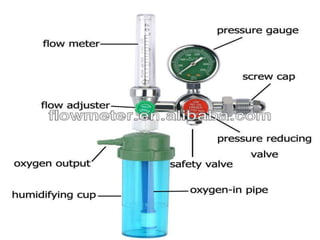
(A) Oxygen cylinder with its stand
and accessories (the regulator,
flow meter, humidifier,
connecting tube etc).
(B) A tray containing
1. Nasal catheter of
appropriate size, clean, and
sterile or disposable type in a
covered container.
To administer oxygen without
introducing infection into the
respiratory passage
Articles.
SR.
NO.
ARTICLE RATIONAL
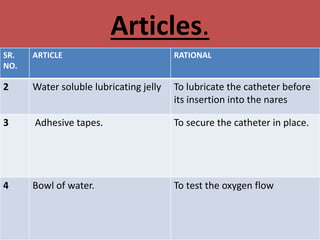
2 Water soluble lubricating jelly To lubricate the catheter before
its insertion into the nares
3 Adhesive tapes. To secure the catheter in place.
4 Bowl of water. To test the oxygen flow
Articles.
SR.
NO.
ARTICLE RATIONAL
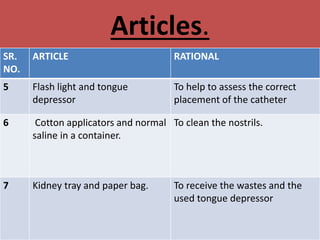
5 Flash light and tongue
depressor
To help to assess the correct
placement of the catheter
6 Cotton applicators and normal
saline in a container.
To clean the nostrils.
7 Kidney tray and paper bag. To receive the wastes and the
used tongue depressor
Articles.
SR.
NO.
ARTICLE RATIONAL
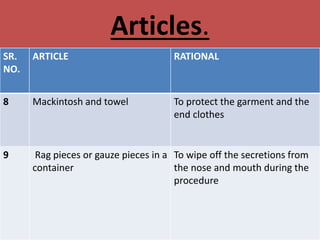
8 Mackintosh and towel To protect the garment and the
end clothes
9 Rag pieces or gauze pieces in a
container
To wipe off the secretions from
the nose and mouth during the
procedure
How to prepare Patient & the
Environment for oxygenation
1. Explain the procedure to the patient to win his
confidence and co-operation.
- Answer his questions and allay the anxiety.
- Explain the sequence of the procedure and tell him how
he can co-operate in the procedure.
- Explain the purpose of the procedure to the relatives also.
How to prepare Patient & the
Environment for oxygenation
2. Instruct the patient, the family members and the visitors,
if any' about the safety precautions required during the
oxygen therapy
3. Put up the instruction regarding fire precautions in the
unit.
4. Remove the cigars, matches, electric appliances and other
inflammable articles from the patient's unit.
How to prepare Patient & the
Environment for oxygenation
5. Assemble the equipments and arrange them conveniently
in the unit.
6. Place the patient in a comfortable position (Fowler's
position) to help in the expansion of the lungs.
7. Clean the nostrils, if there is crust formation.
8. Protect the bed and the garments by spreading the
mackintosh and towel.
Procedure
(oxygenation)
SR. NO. STEPS RATIONAL
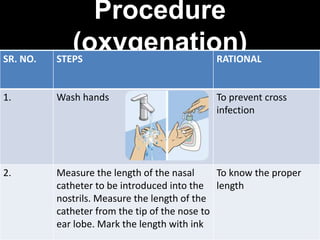
1. Wash hands To prevent cross
infection
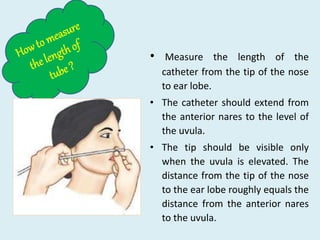
2. Measure the length of the nasal
catheter to be introduced into the
nostrils. Measure the length of the
catheter from the tip of the nose to
ear lobe. Mark the length with ink
To know the proper
length
• Measure the length of the
catheter from the tip of the nose
to ear lobe.
• The catheter should extend from
the anterior nares to the level of
the uvula.
• The tip should be visible only
when the uvula is elevated. The
distance from the tip of the nose
to the ear lobe roughly equals the
distance from the anterior nares
to the uvula.
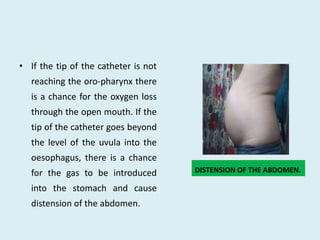
• If the tip of the catheter is not
reaching the oro-pharynx there
is a chance for the oxygen loss
through the open mouth. If the
tip of the catheter goes beyond
the level of the uvula into the
oesophagus, there is a chance
for the gas to be introduced
into the stomach and cause
distension of the abdomen.
DISTENSION OF THE ABDOMEN.
SR.
NO.
STEPS RATIONAL
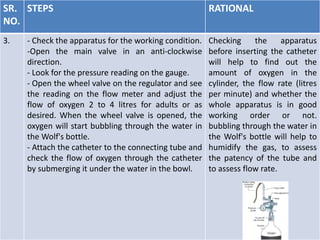
3. - Check the apparatus for the working condition.
-Open the main valve in an anti-clockwise
direction.
- Look for the pressure reading on the gauge.
- Open the wheel valve on the regulator and see
the reading on the flow meter and adjust the
flow of oxygen 2 to 4 litres for adults or as
desired. When the wheel valve is opened, the
oxygen will start bubbling through the water in
the Wolf's bottle.
- Attach the catheter to the connecting tube and
check the flow of oxygen through the catheter
by submerging it under the water in the bowl.
Checking the apparatus
before inserting the catheter
will help to find out the
amount of oxygen in the
cylinder, the flow rate (litres
per minute) and whether the
whole apparatus is in good
working order or not.
bubbling through the water in
the Wolf's bottle will help to
humidify the gas, to assess
the patency of the tube and
to assess flow rate.
SR.
NO.
STEPS RATIONAL
4. Lubricate the tip of the catheter
sparingly with water soluble jelly and
then check the flow by immersing it
in the water
Lubricating the tube prevents irritation
of the nasal mucosa. Checking the flow
of oxygen again under the water helps
to know whether the terminal holes are
plugged with the lubricant.
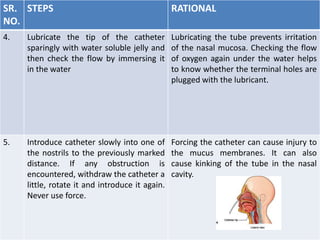
5. Introduce catheter slowly into one of
the nostrils to the previously marked
distance. If any obstruction is
encountered, withdraw the catheter a
little, rotate it and introduce it again.
Never use force.
Forcing the catheter can cause injury to
the mucus membranes. It can also
cause kinking of the tube in the nasal
cavity.
SR.
NO.
STEPS RATIONAL
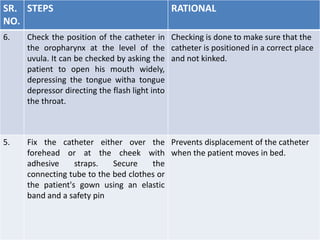
6. Check the position of the catheter in
the oropharynx at the level of the
uvula. It can be checked by asking the
patient to open his mouth widely,
depressing the tongue witha tongue
depressor directing the flash light into
the throat.
Checking is done to make sure that the
catheter is positioned in a correct place
and not kinked.
5. Fix the catheter either over the
forehead or at the cheek with
adhesive straps. Secure the
connecting tube to the bed clothes or
the patient's gown using an elastic
band and a safety pin
Prevents displacement of the catheter
when the patient moves in bed.
After Care of the Patient and the
Articles
1. Stay with the patient till he is at ease.
2. Keep the patient warm and comfortable.
3. Evaluate the patient's progress by observing the vital signs
and color. Assess the vital signs very frequently.
4. Record the procedure with date and time on the nurse's
record. Record the time at which the oxygen therapy was
started and the patient's response to the therapy.
After Care of the Patient and the
Articles
5. Check the apparatus for its good working order - the flow
rate, level of the distilled water in the humidifier, the safety
measures.
6. Arrange for blood gas analysis at specified intervals to make
sure that state of anoxaemia is treated.
7. Change the nasal catheters at every 8 hours or more
frequently, because the mucus may plug the opening of the
catheter and block the oxygen supply. Replace it with a fresh
one. Change the nostrils also.
After Care of the Patient and the
Articles
8. When the oxygen is to be stopped, do it gradually. Reduce
the volume of oxygen first, then give it intermittently.
9. To discontinue the oxygen inhalation, loosen the adhesive
tapes and take out the catheter from the nostrils. Close the
main valve first by turning it clockwise, then the wheel
valves. Disconnect the catheter and put it in the kidney tray.
After Care of the Patient and the
Articles
10. Take all articles to the utility room. Clean the catheter first
with cold water and then with warm soapy water and finally
with clean water. Boil it, dry it and store it in its place or
send it for sterilization. All other articles used should be
cleaned, dried and replaced in their proper places. Record
the time of the oxygen inhalation discontinued, in the
nurse's record.
11. Watch the patient for any deteriorating symptoms after the
removal of oxygen inhalation.
Thank
you
for
oxygen