Downloaded 69 times


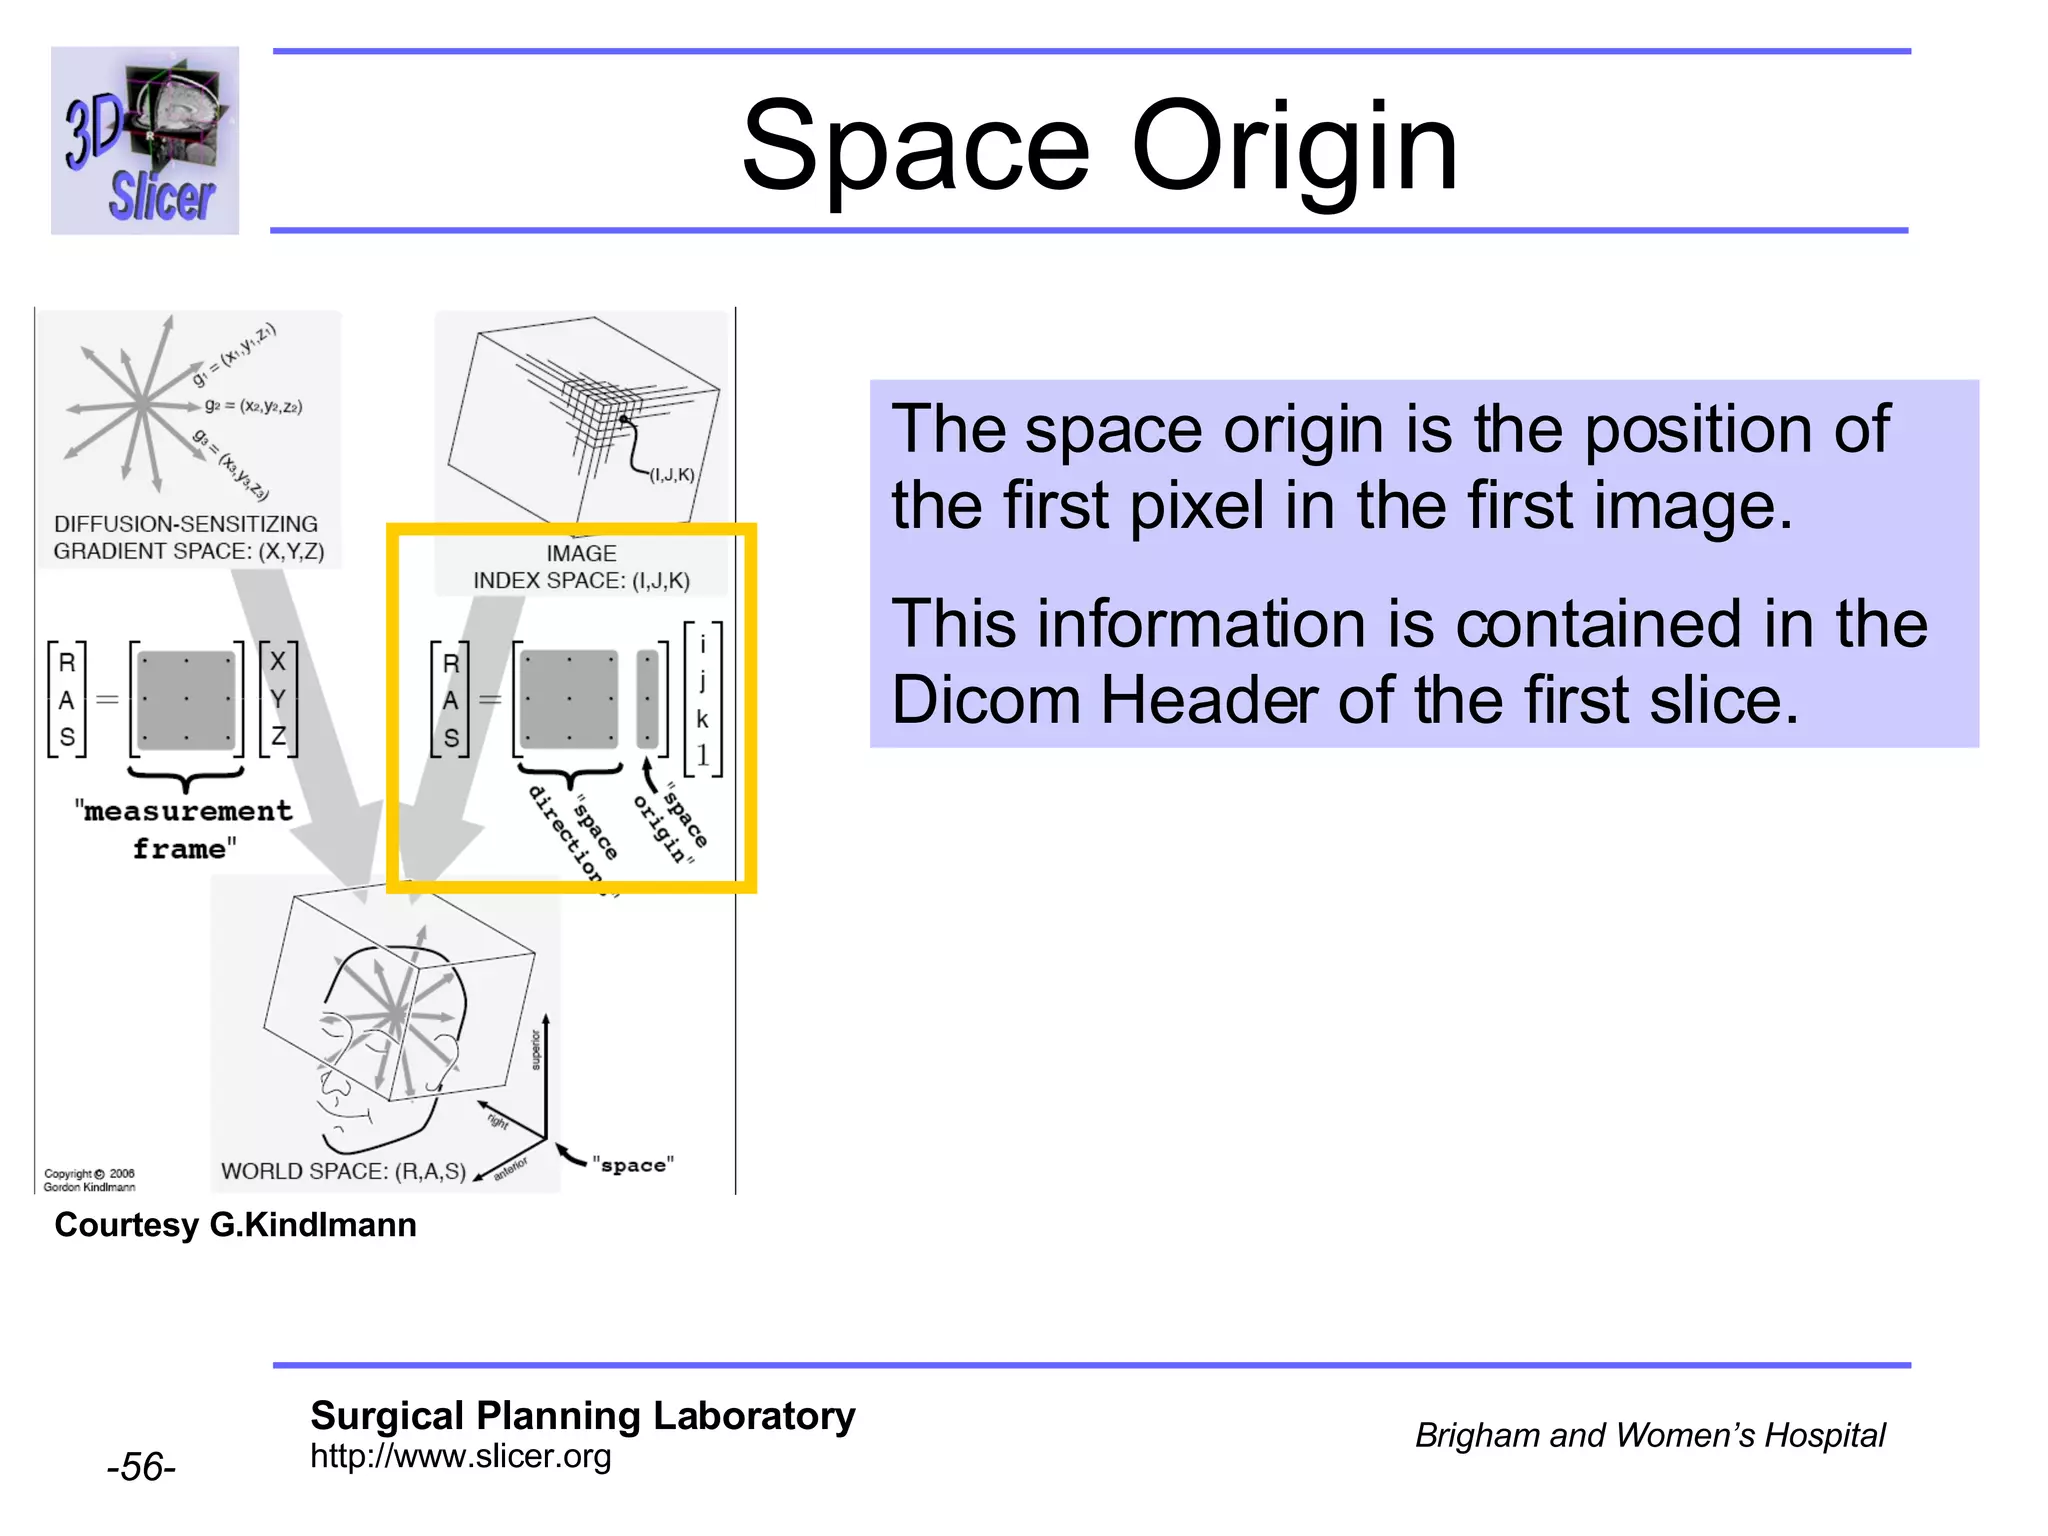
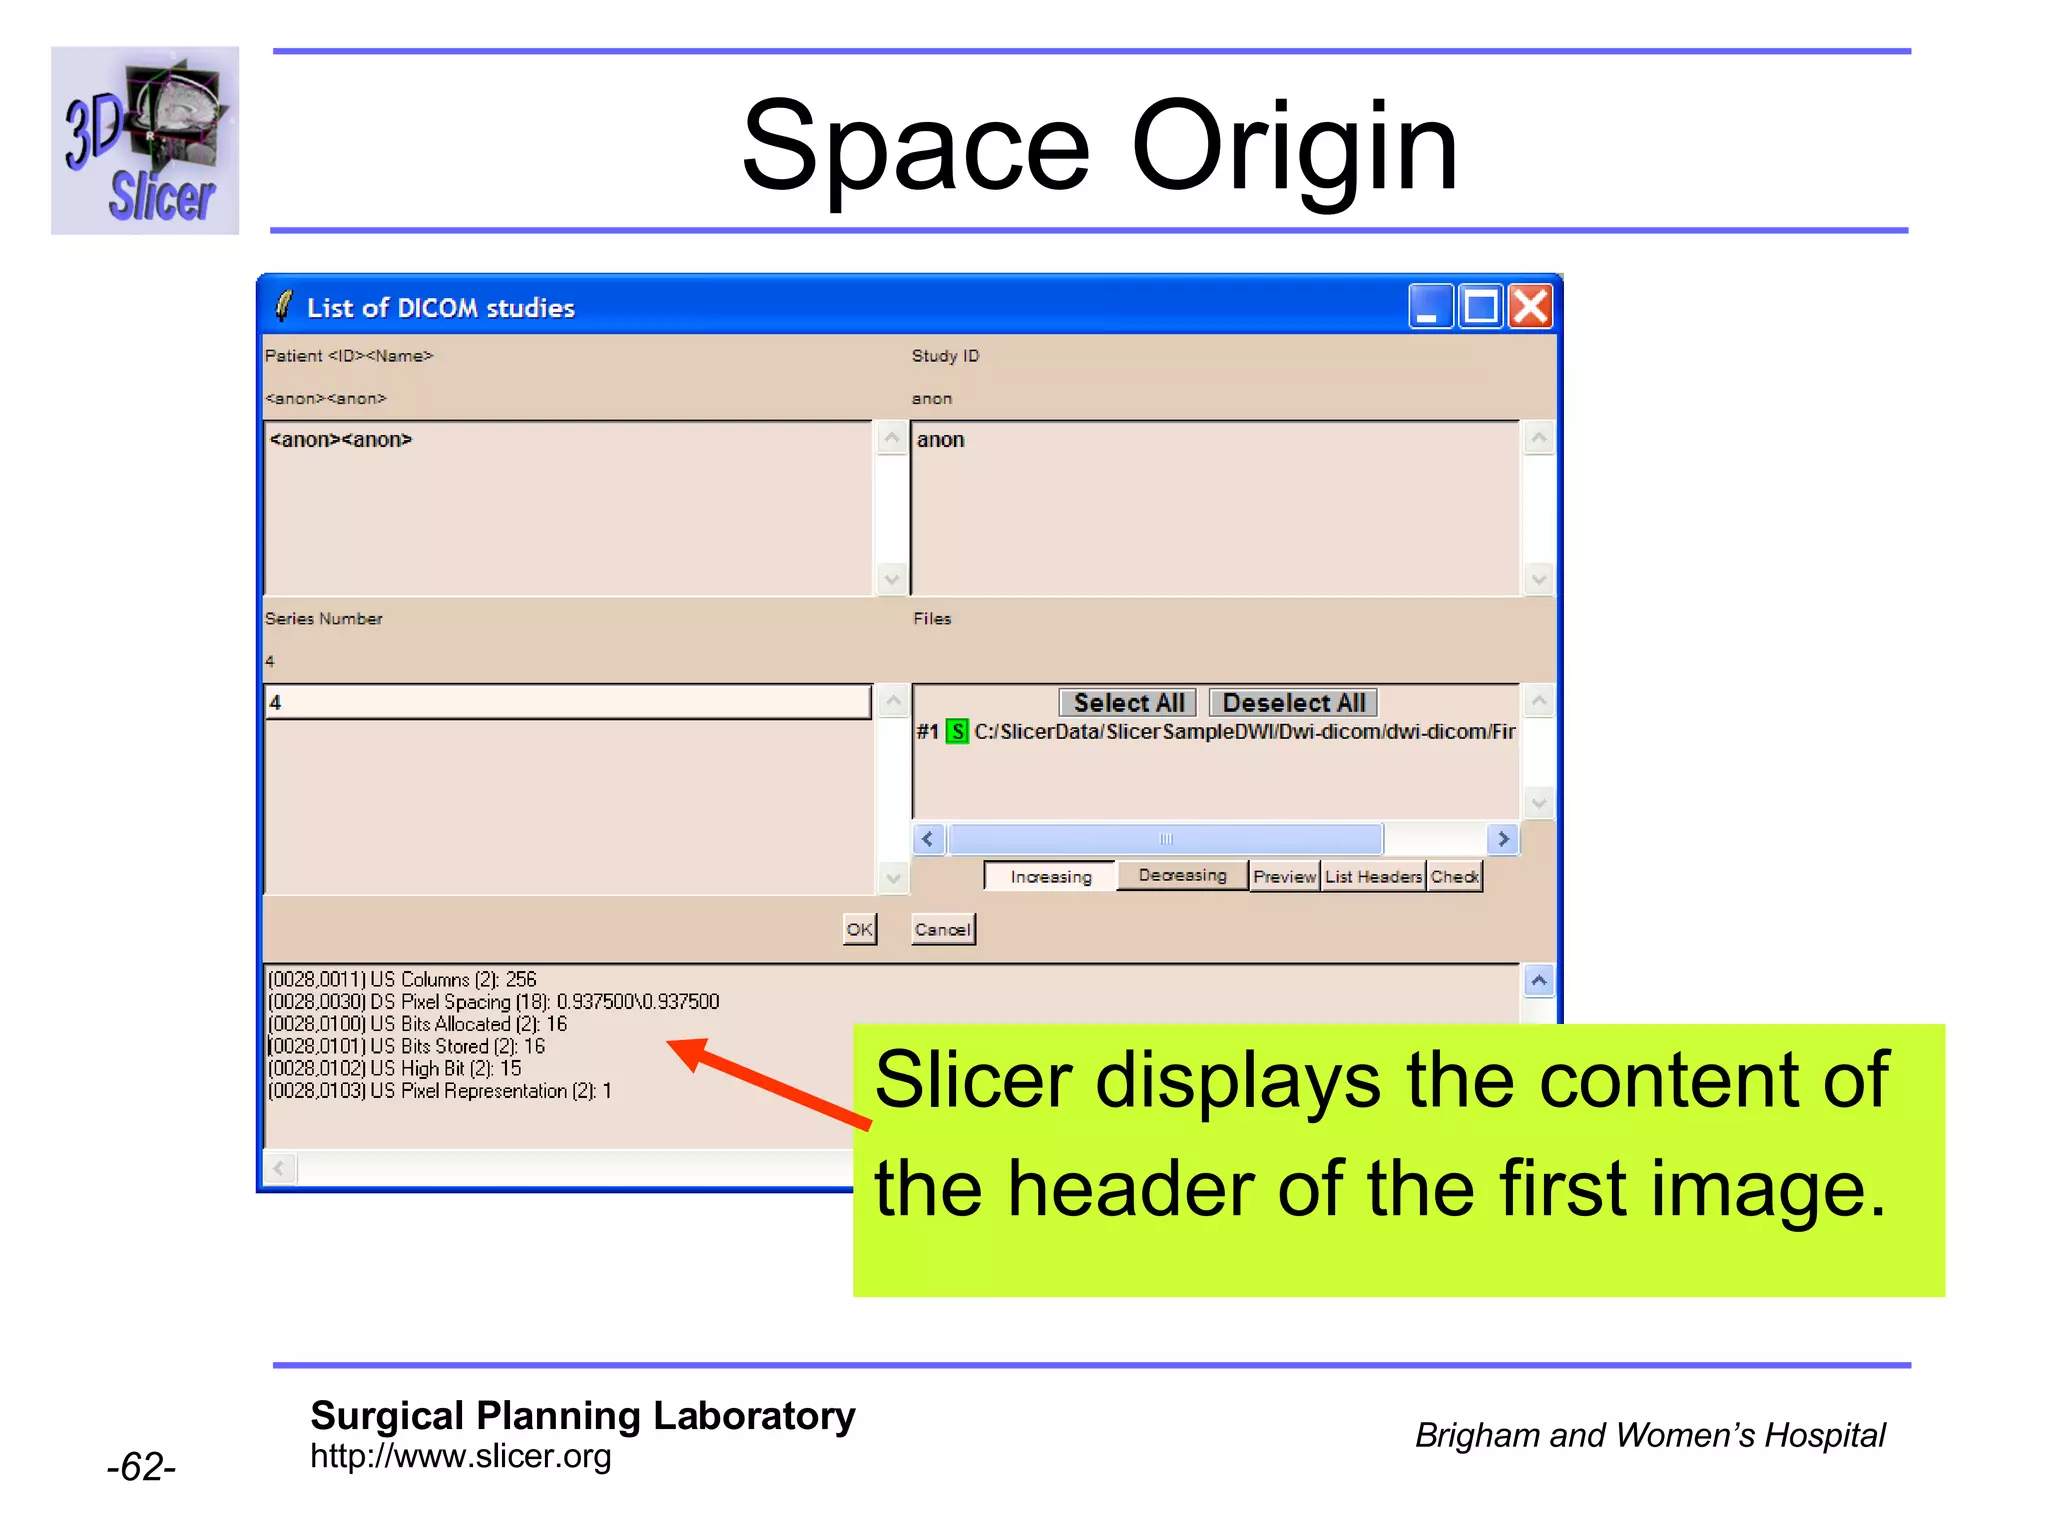
![Space Origin The space origin information is located in the Dicom header [ 0020,0032, Image Position Patient ] Courtesy G.Kindlmann](https://image.slidesharecdn.com/nrrd-to-dicom-conversion37691716/75/Nrrd-to-Dicom-Conversion-3769-57-2048.jpg)
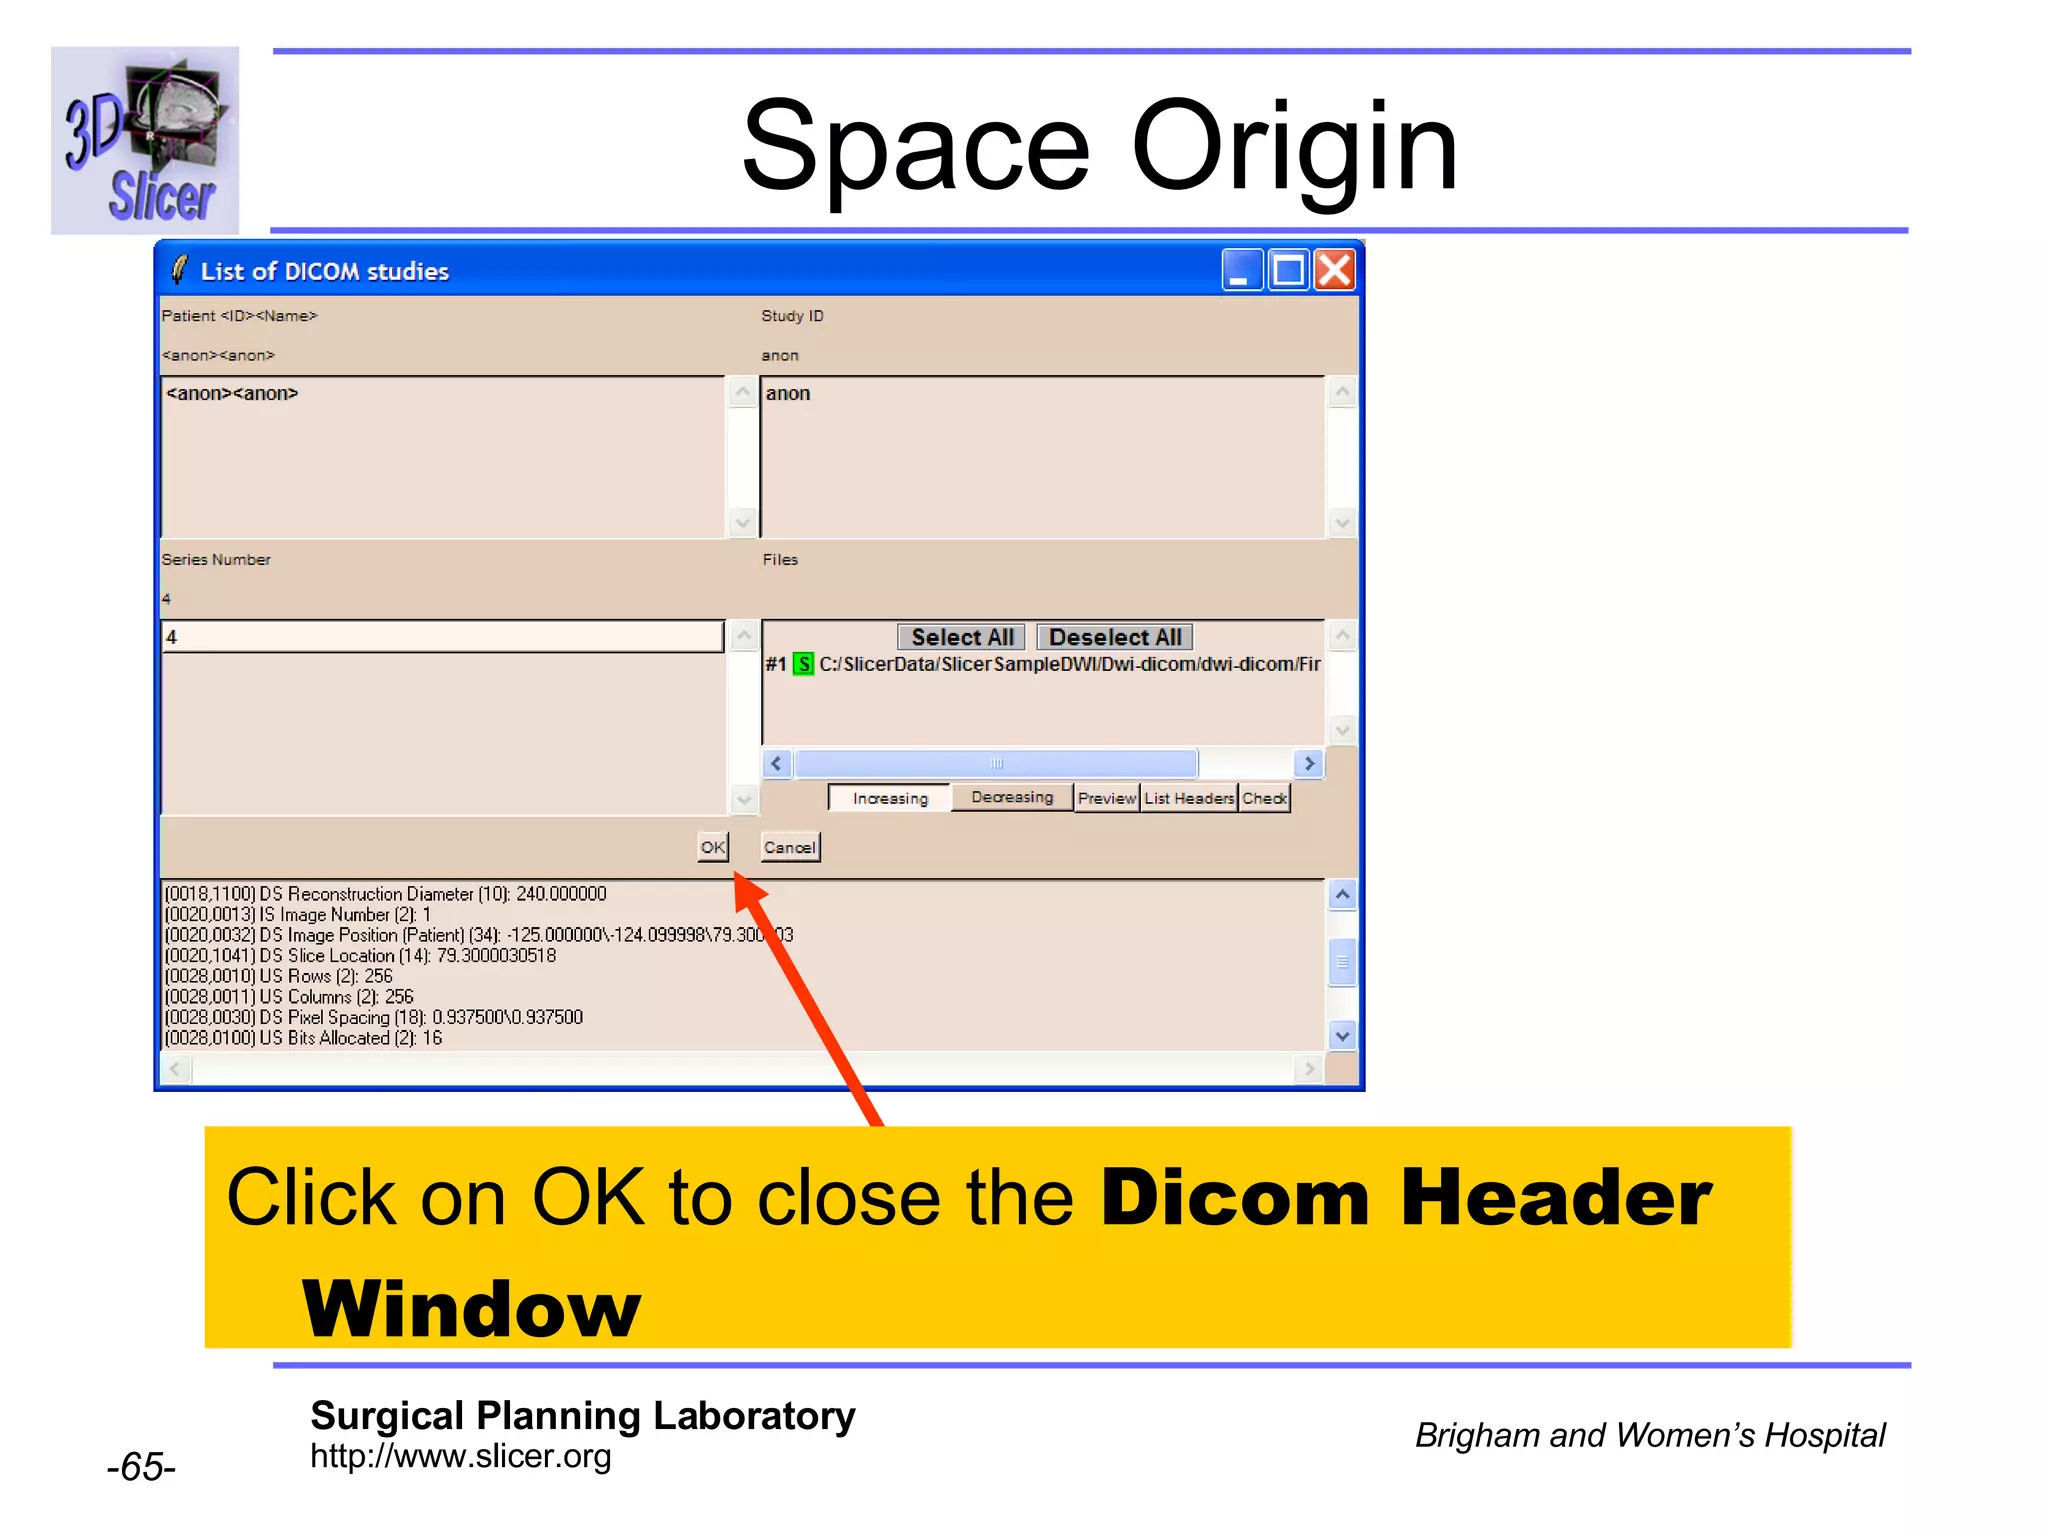
![Space Origin Scroll down to display the value of the tag [0020,0032, Image Position Patient ]](https://image.slidesharecdn.com/nrrd-to-dicom-conversion37691716/75/Nrrd-to-Dicom-Conversion-3769-63-2048.jpg)
![Space Origin [0020,0032, Image Position Patient ] = -125.0, -124.09, 79.30](https://image.slidesharecdn.com/nrrd-to-dicom-conversion37691716/75/Nrrd-to-Dicom-Conversion-3769-64-2048.jpg)

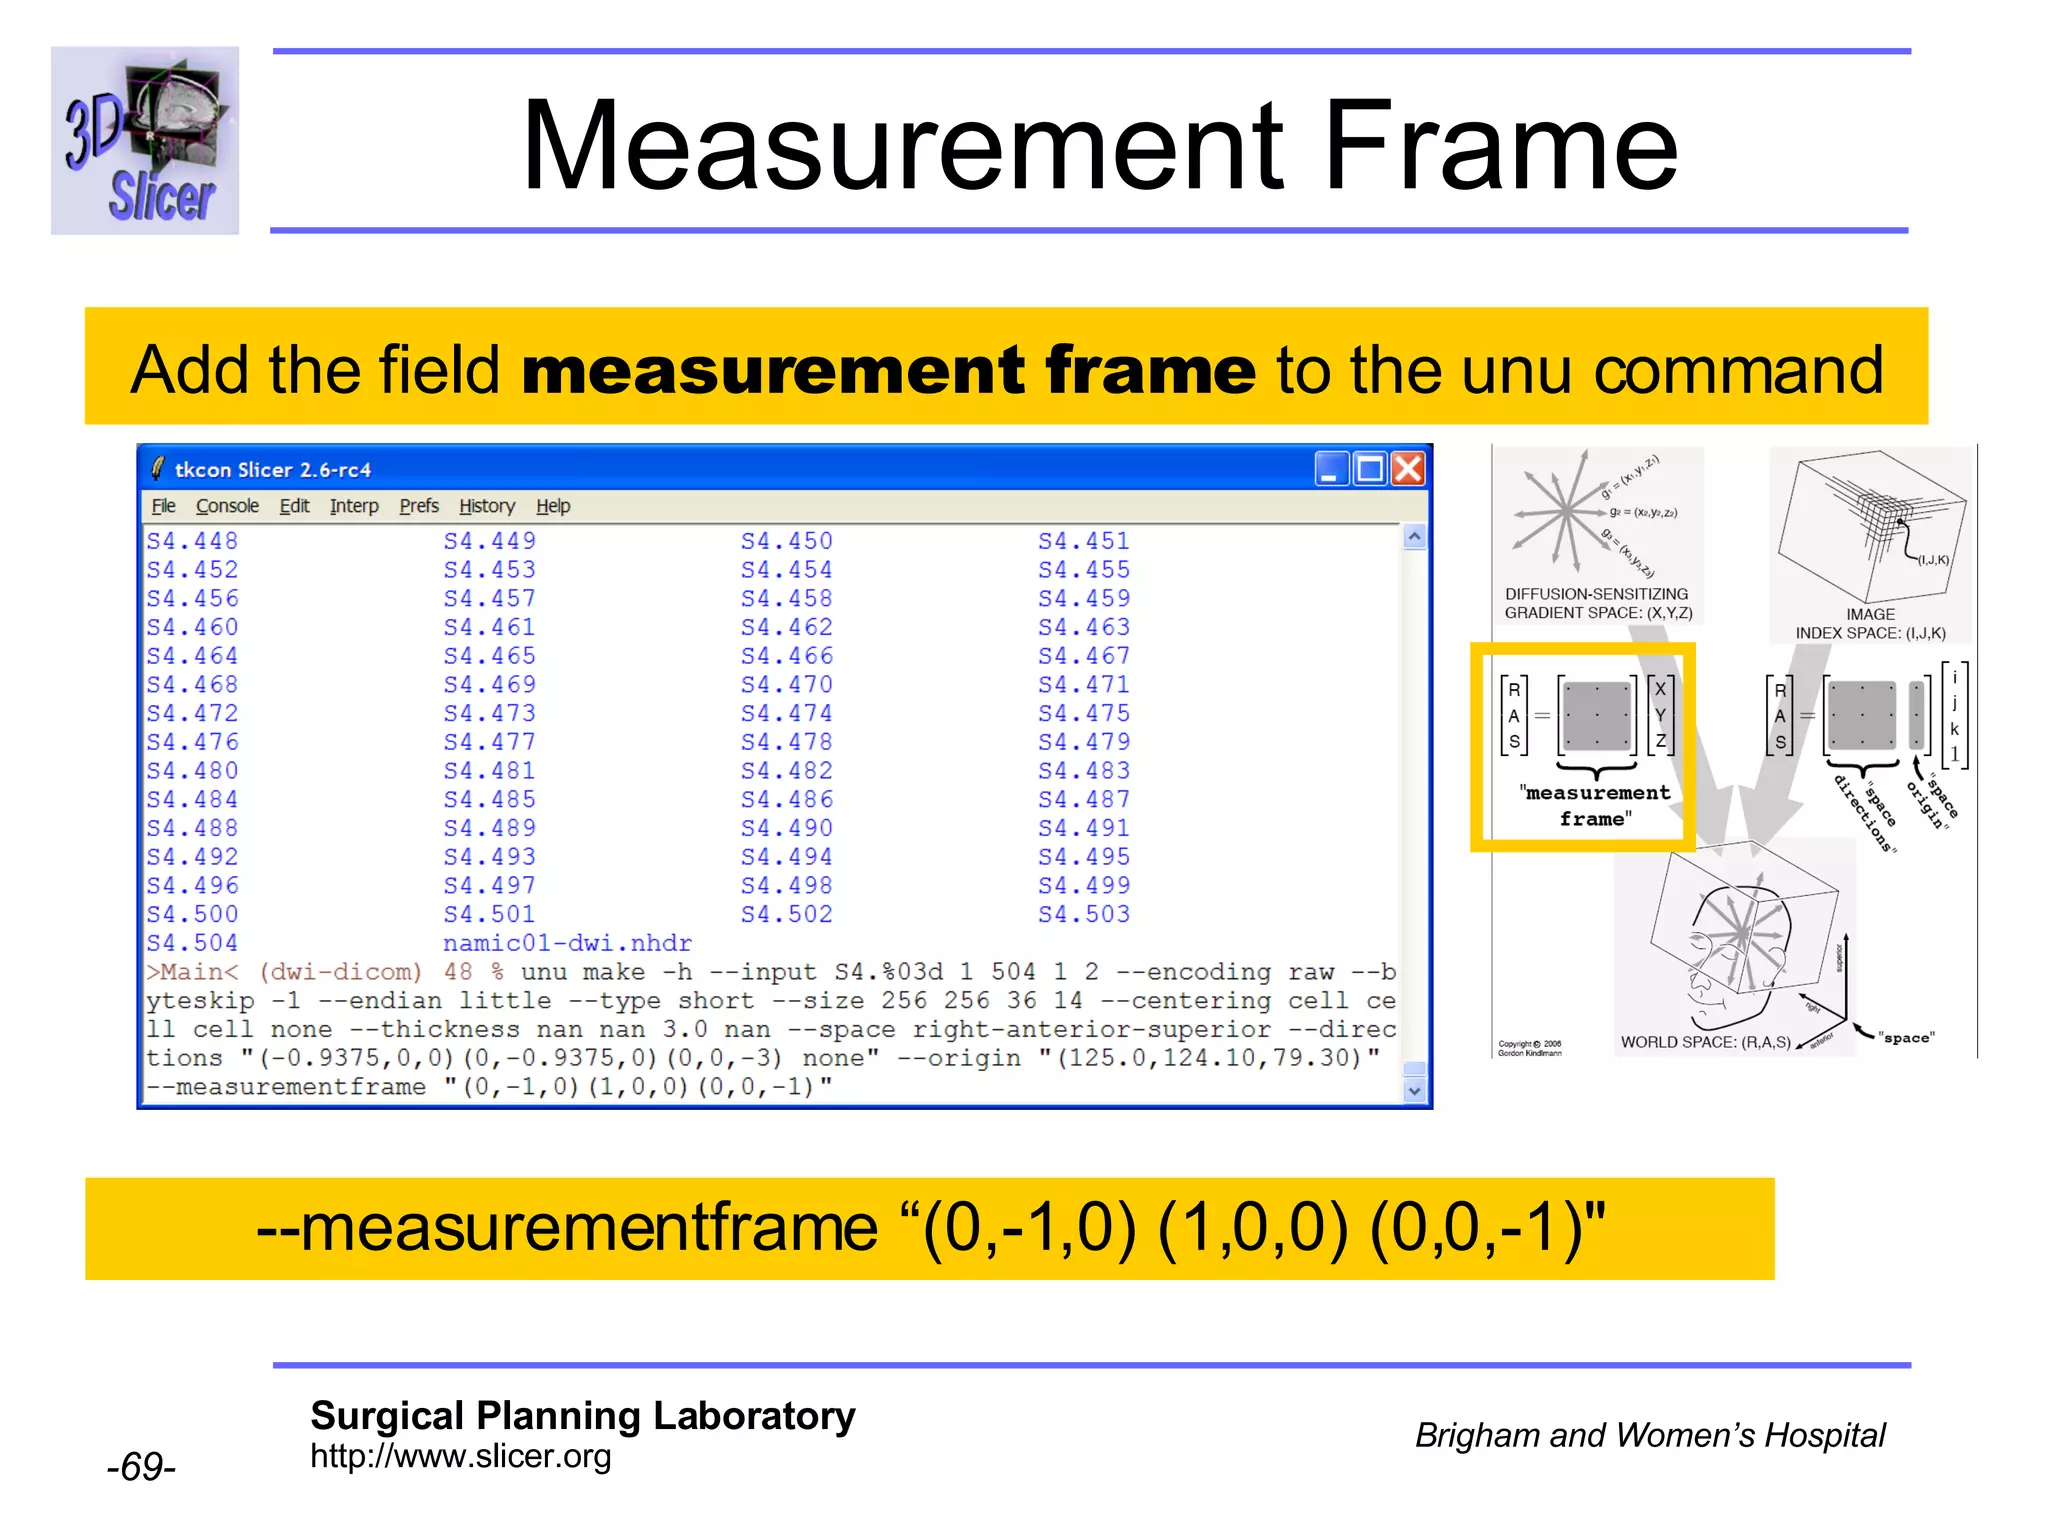
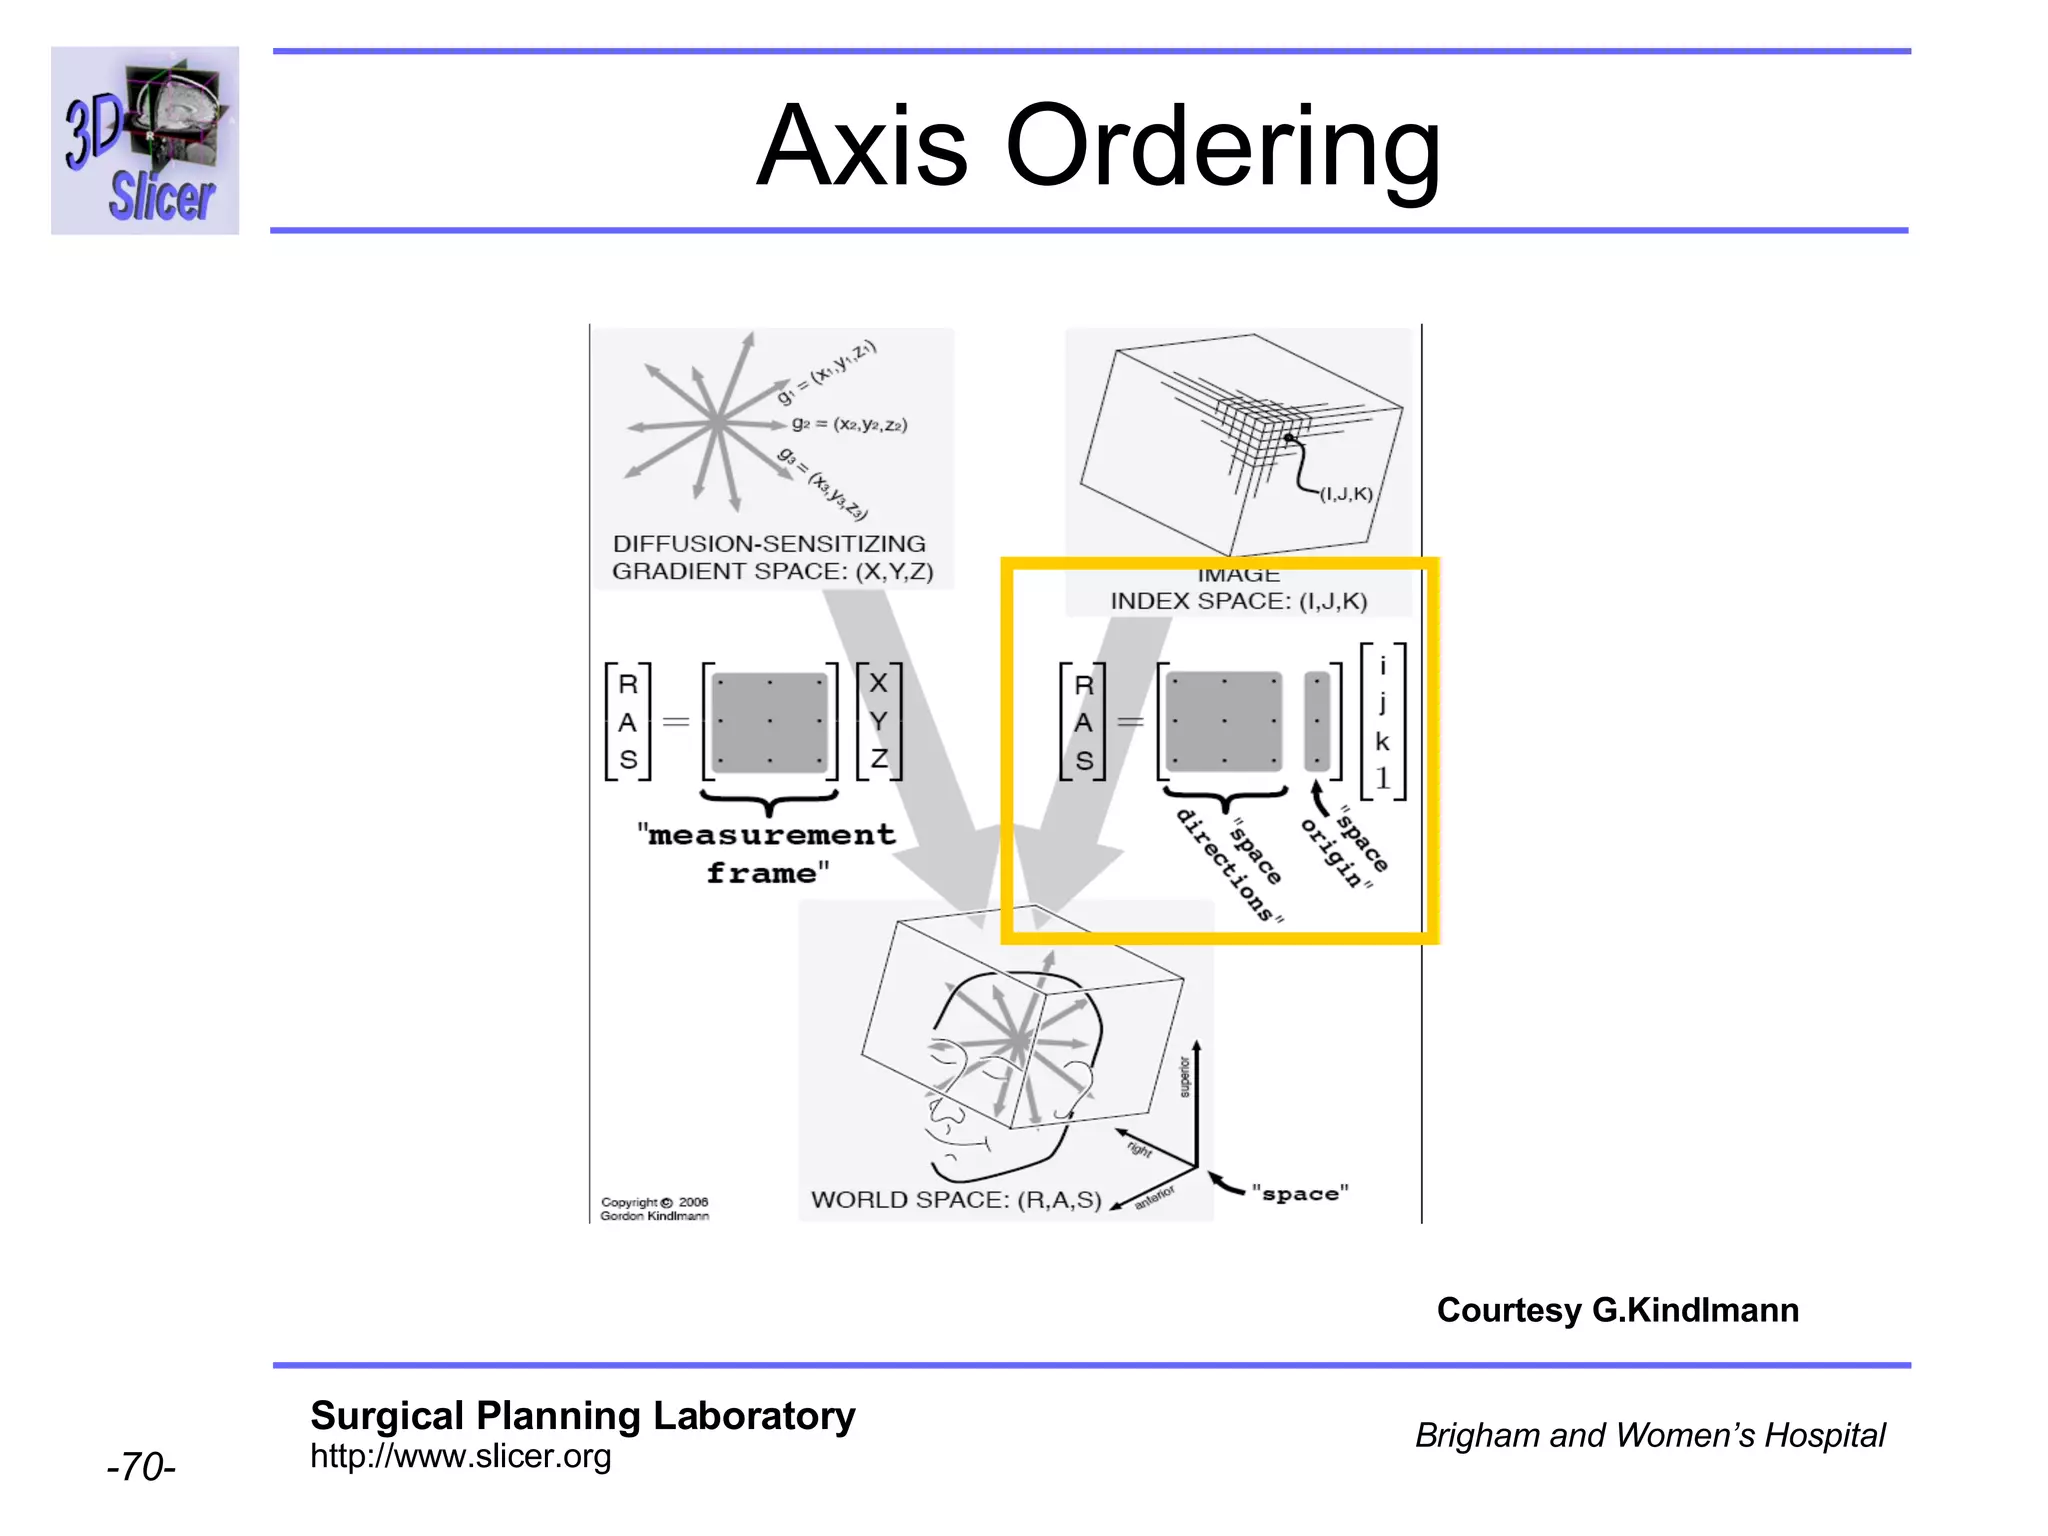
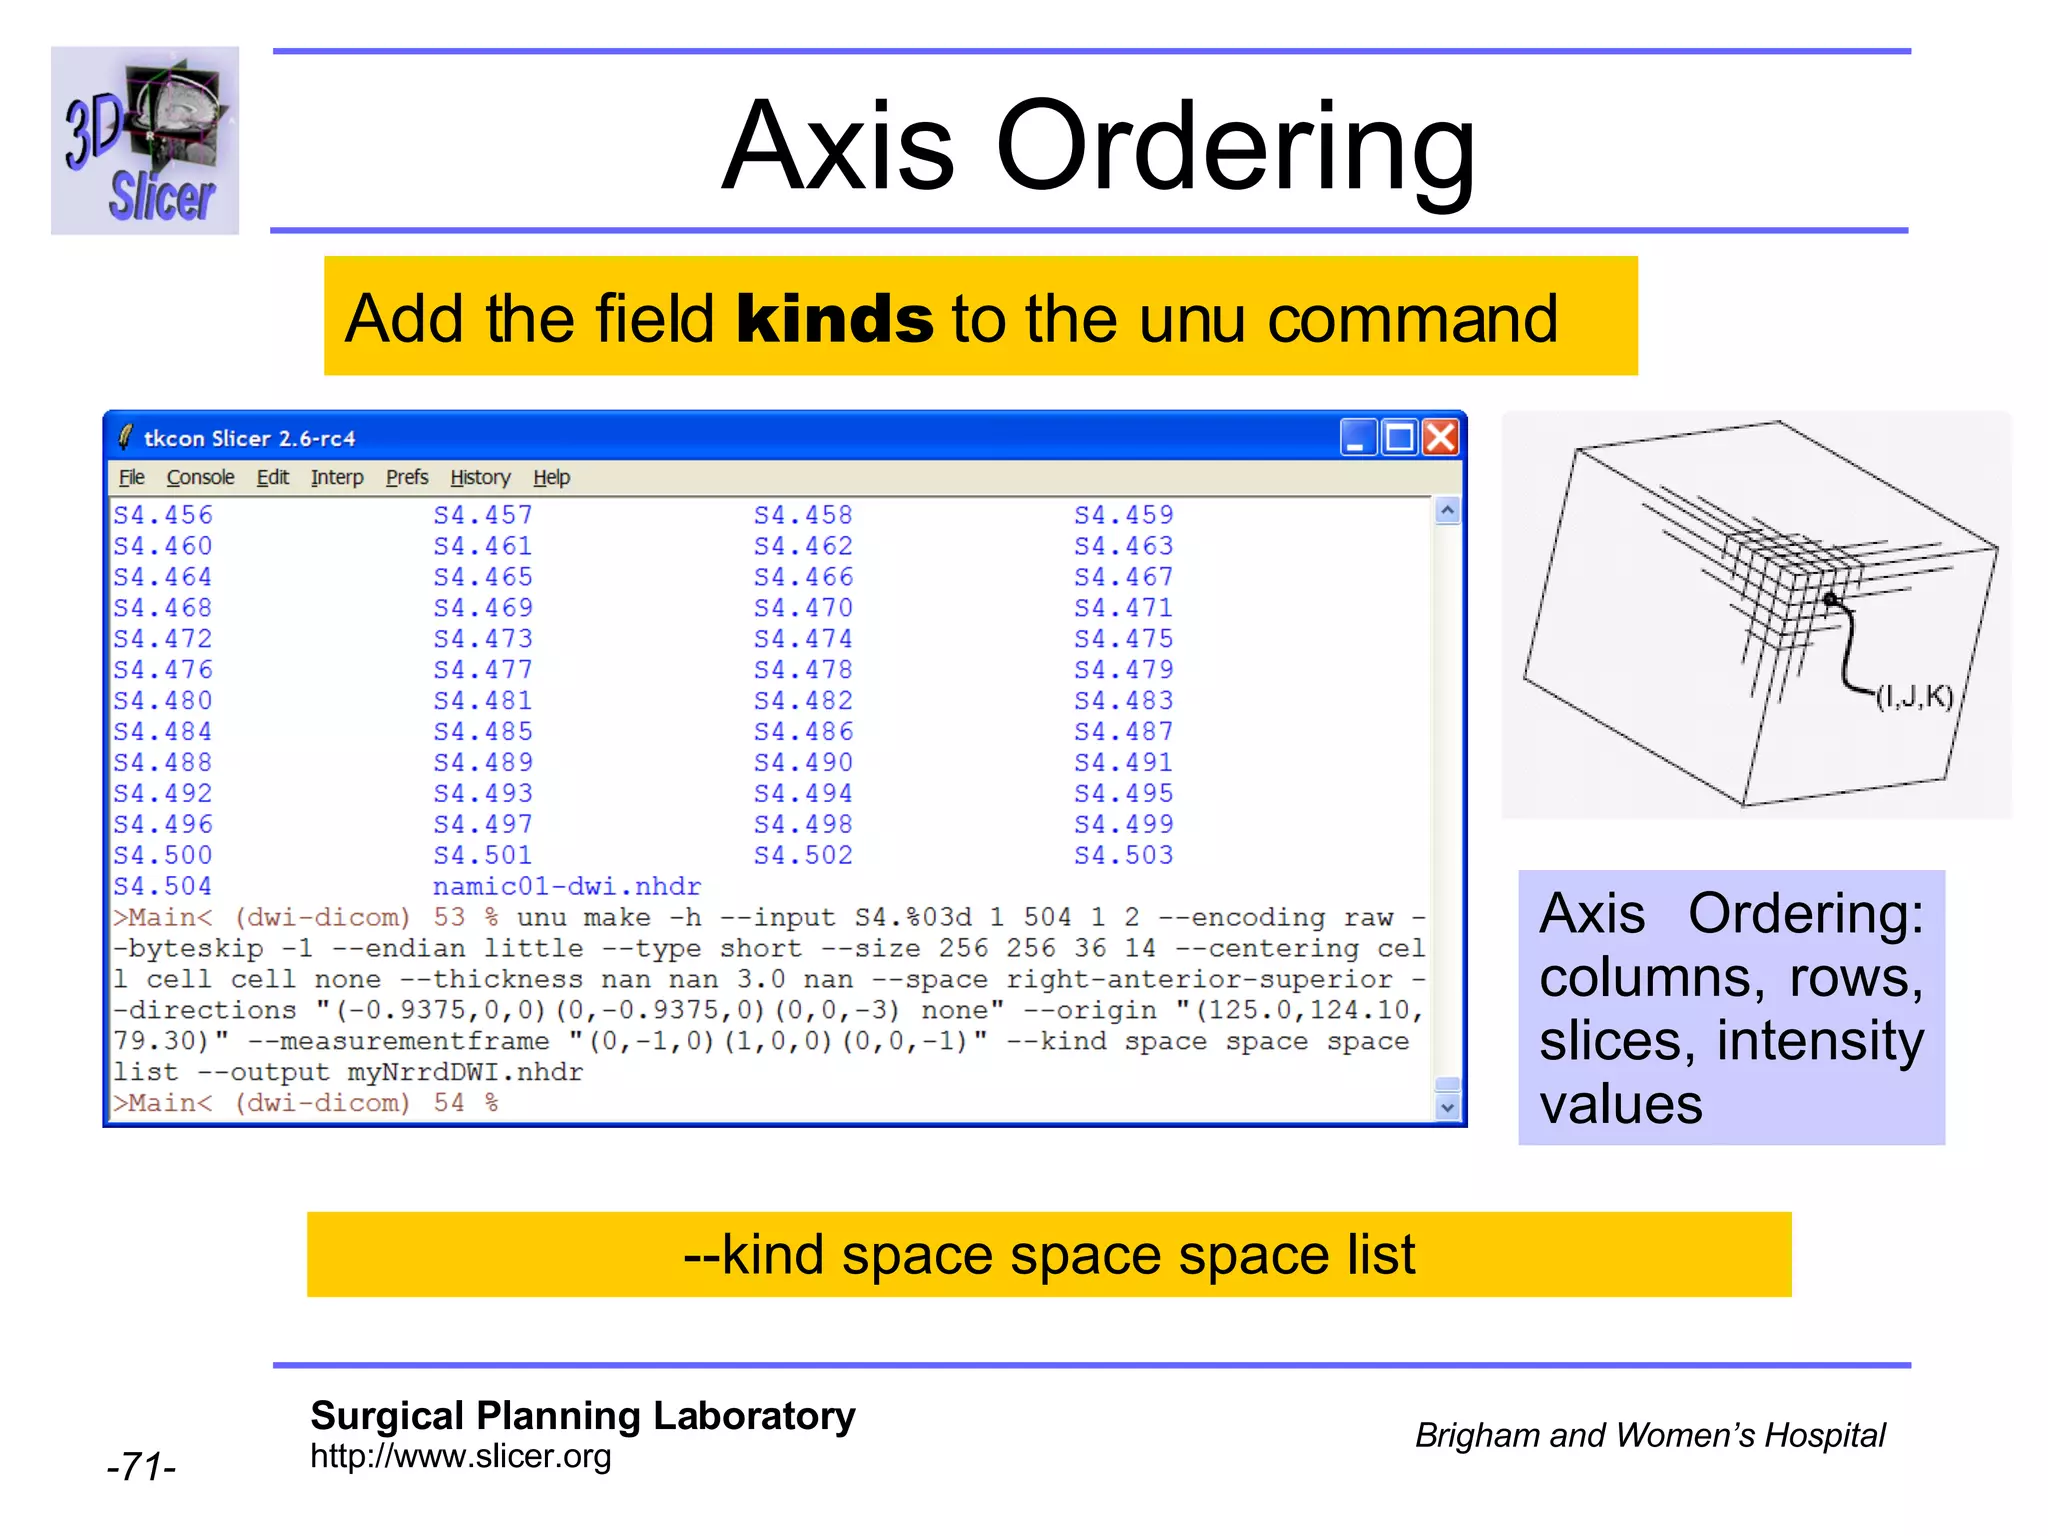
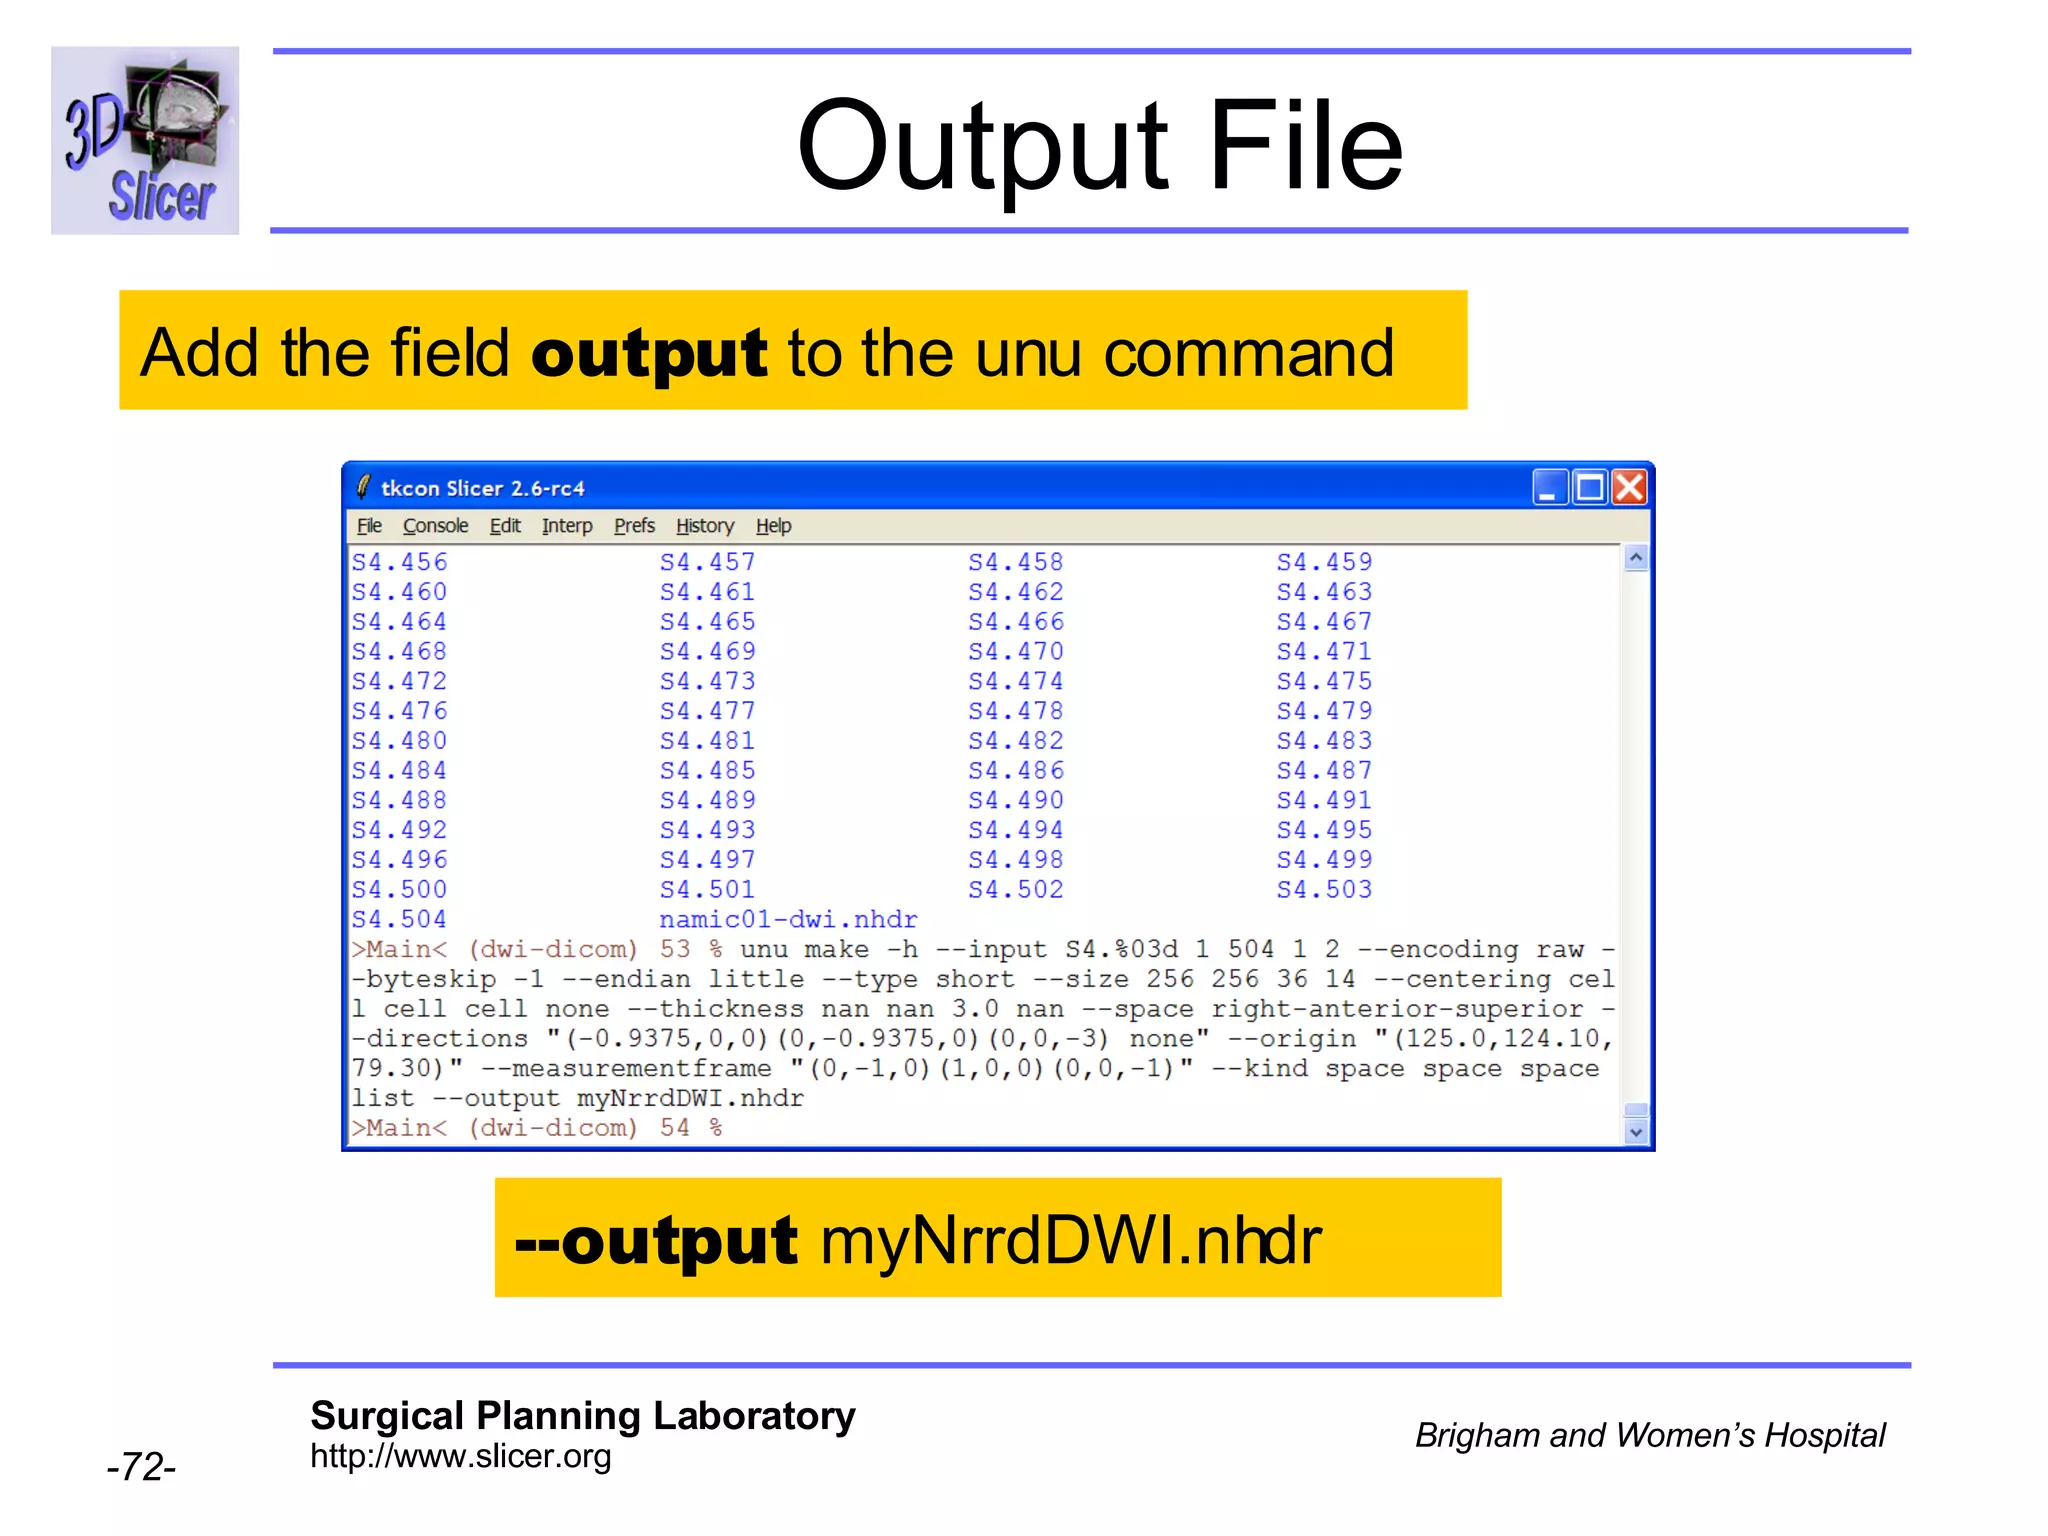
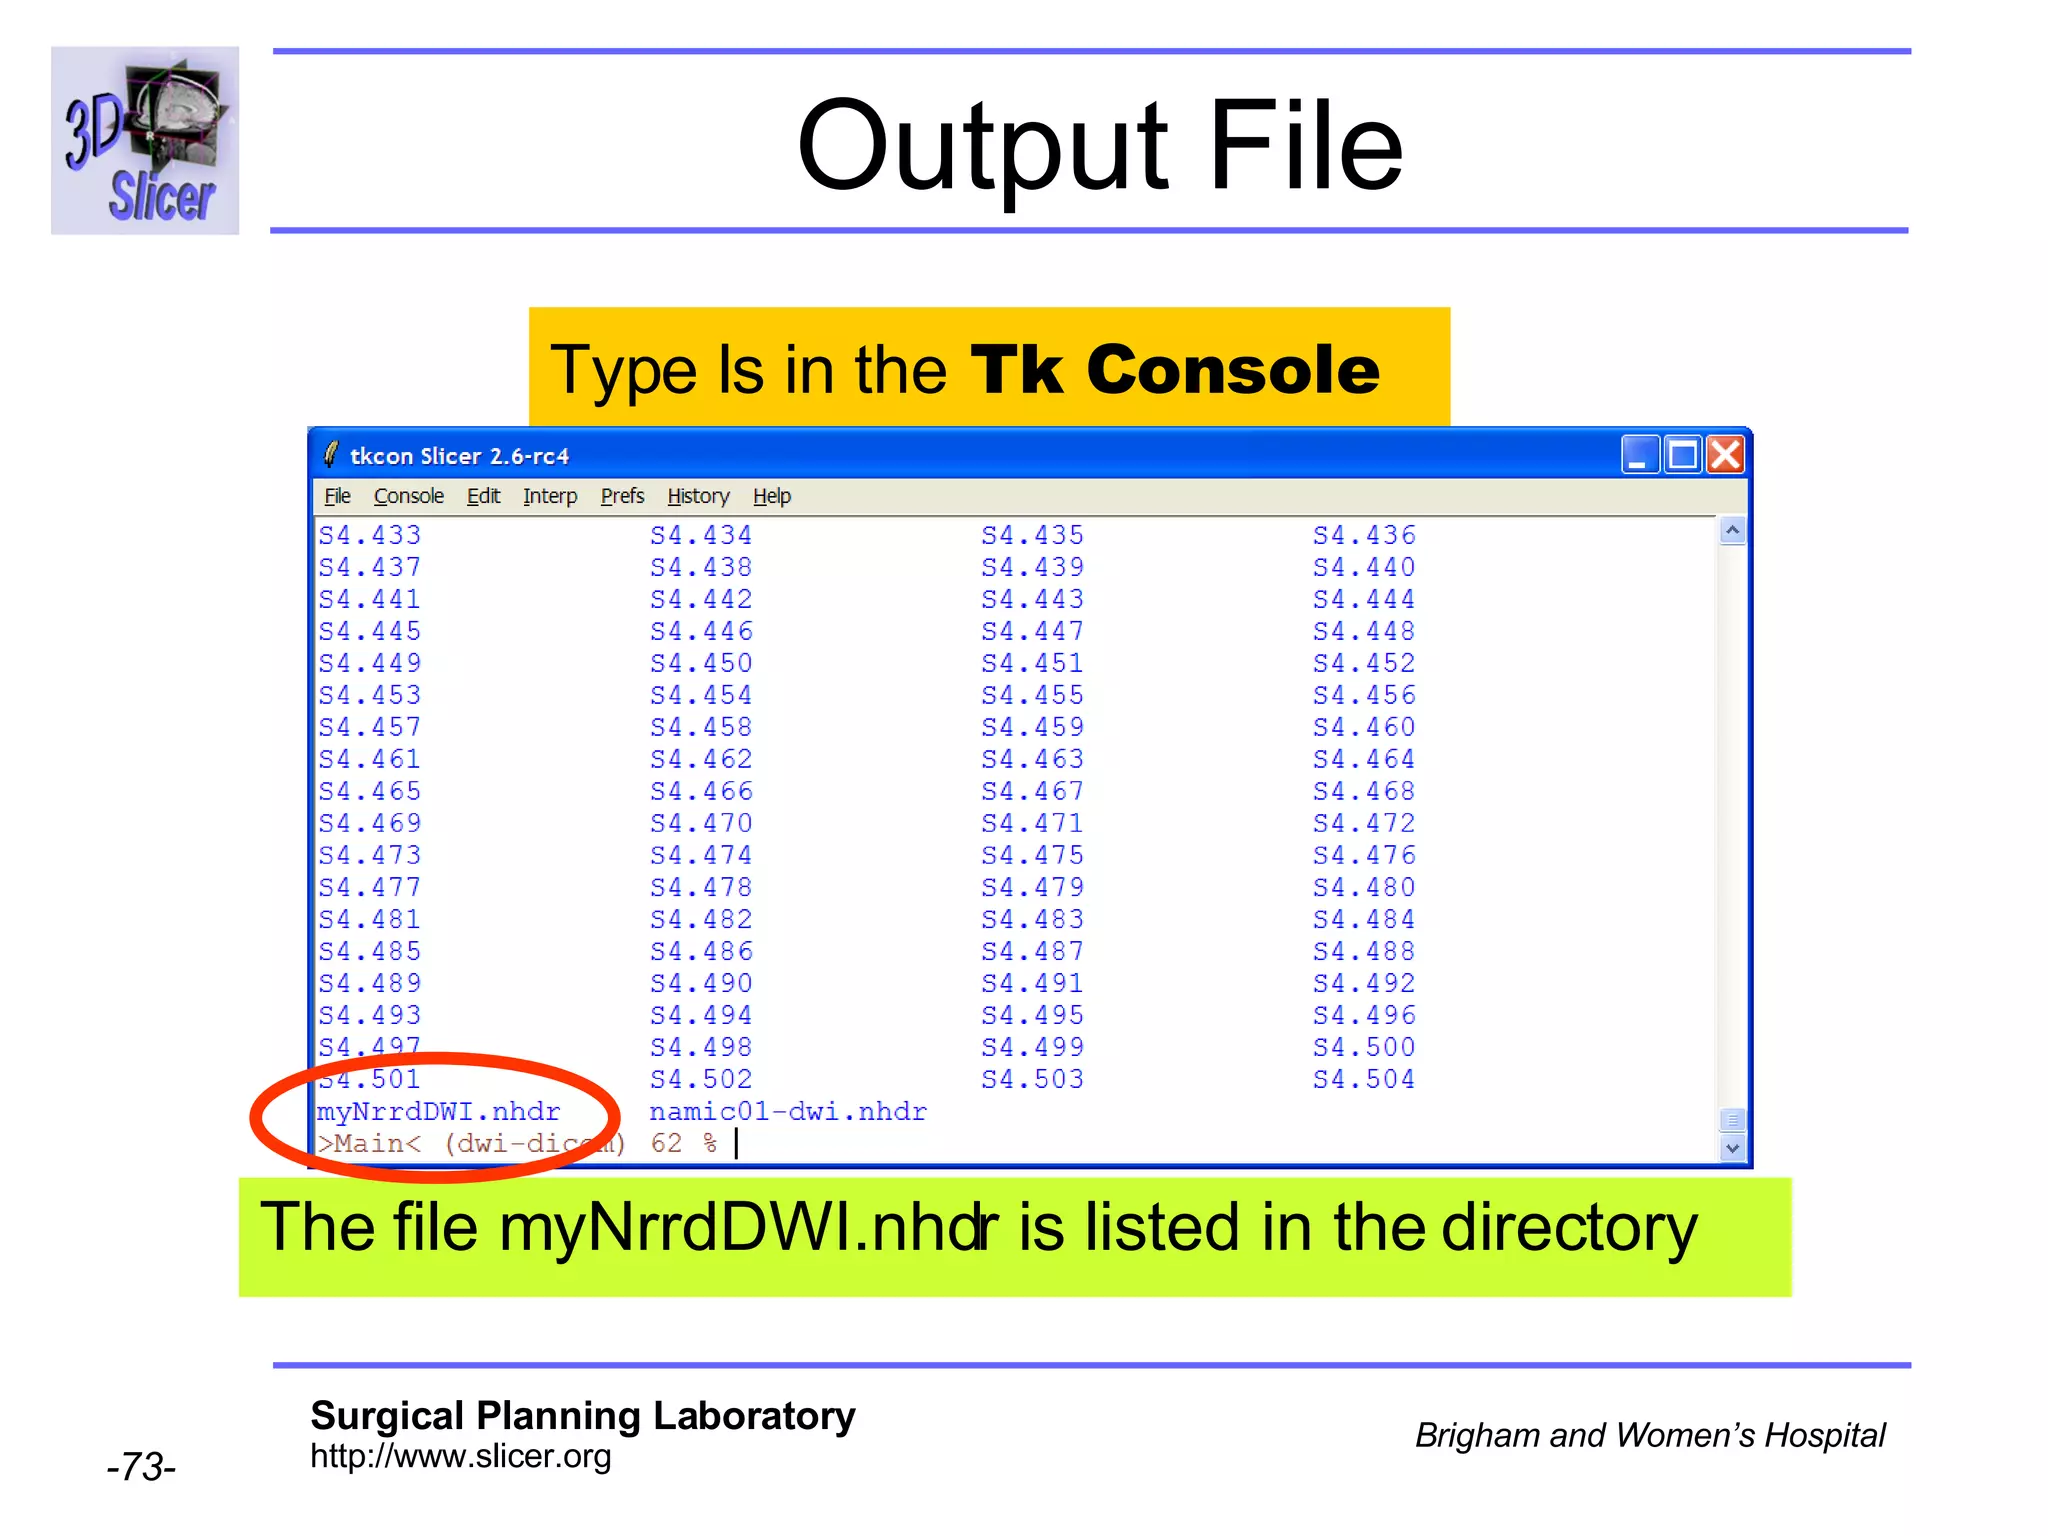
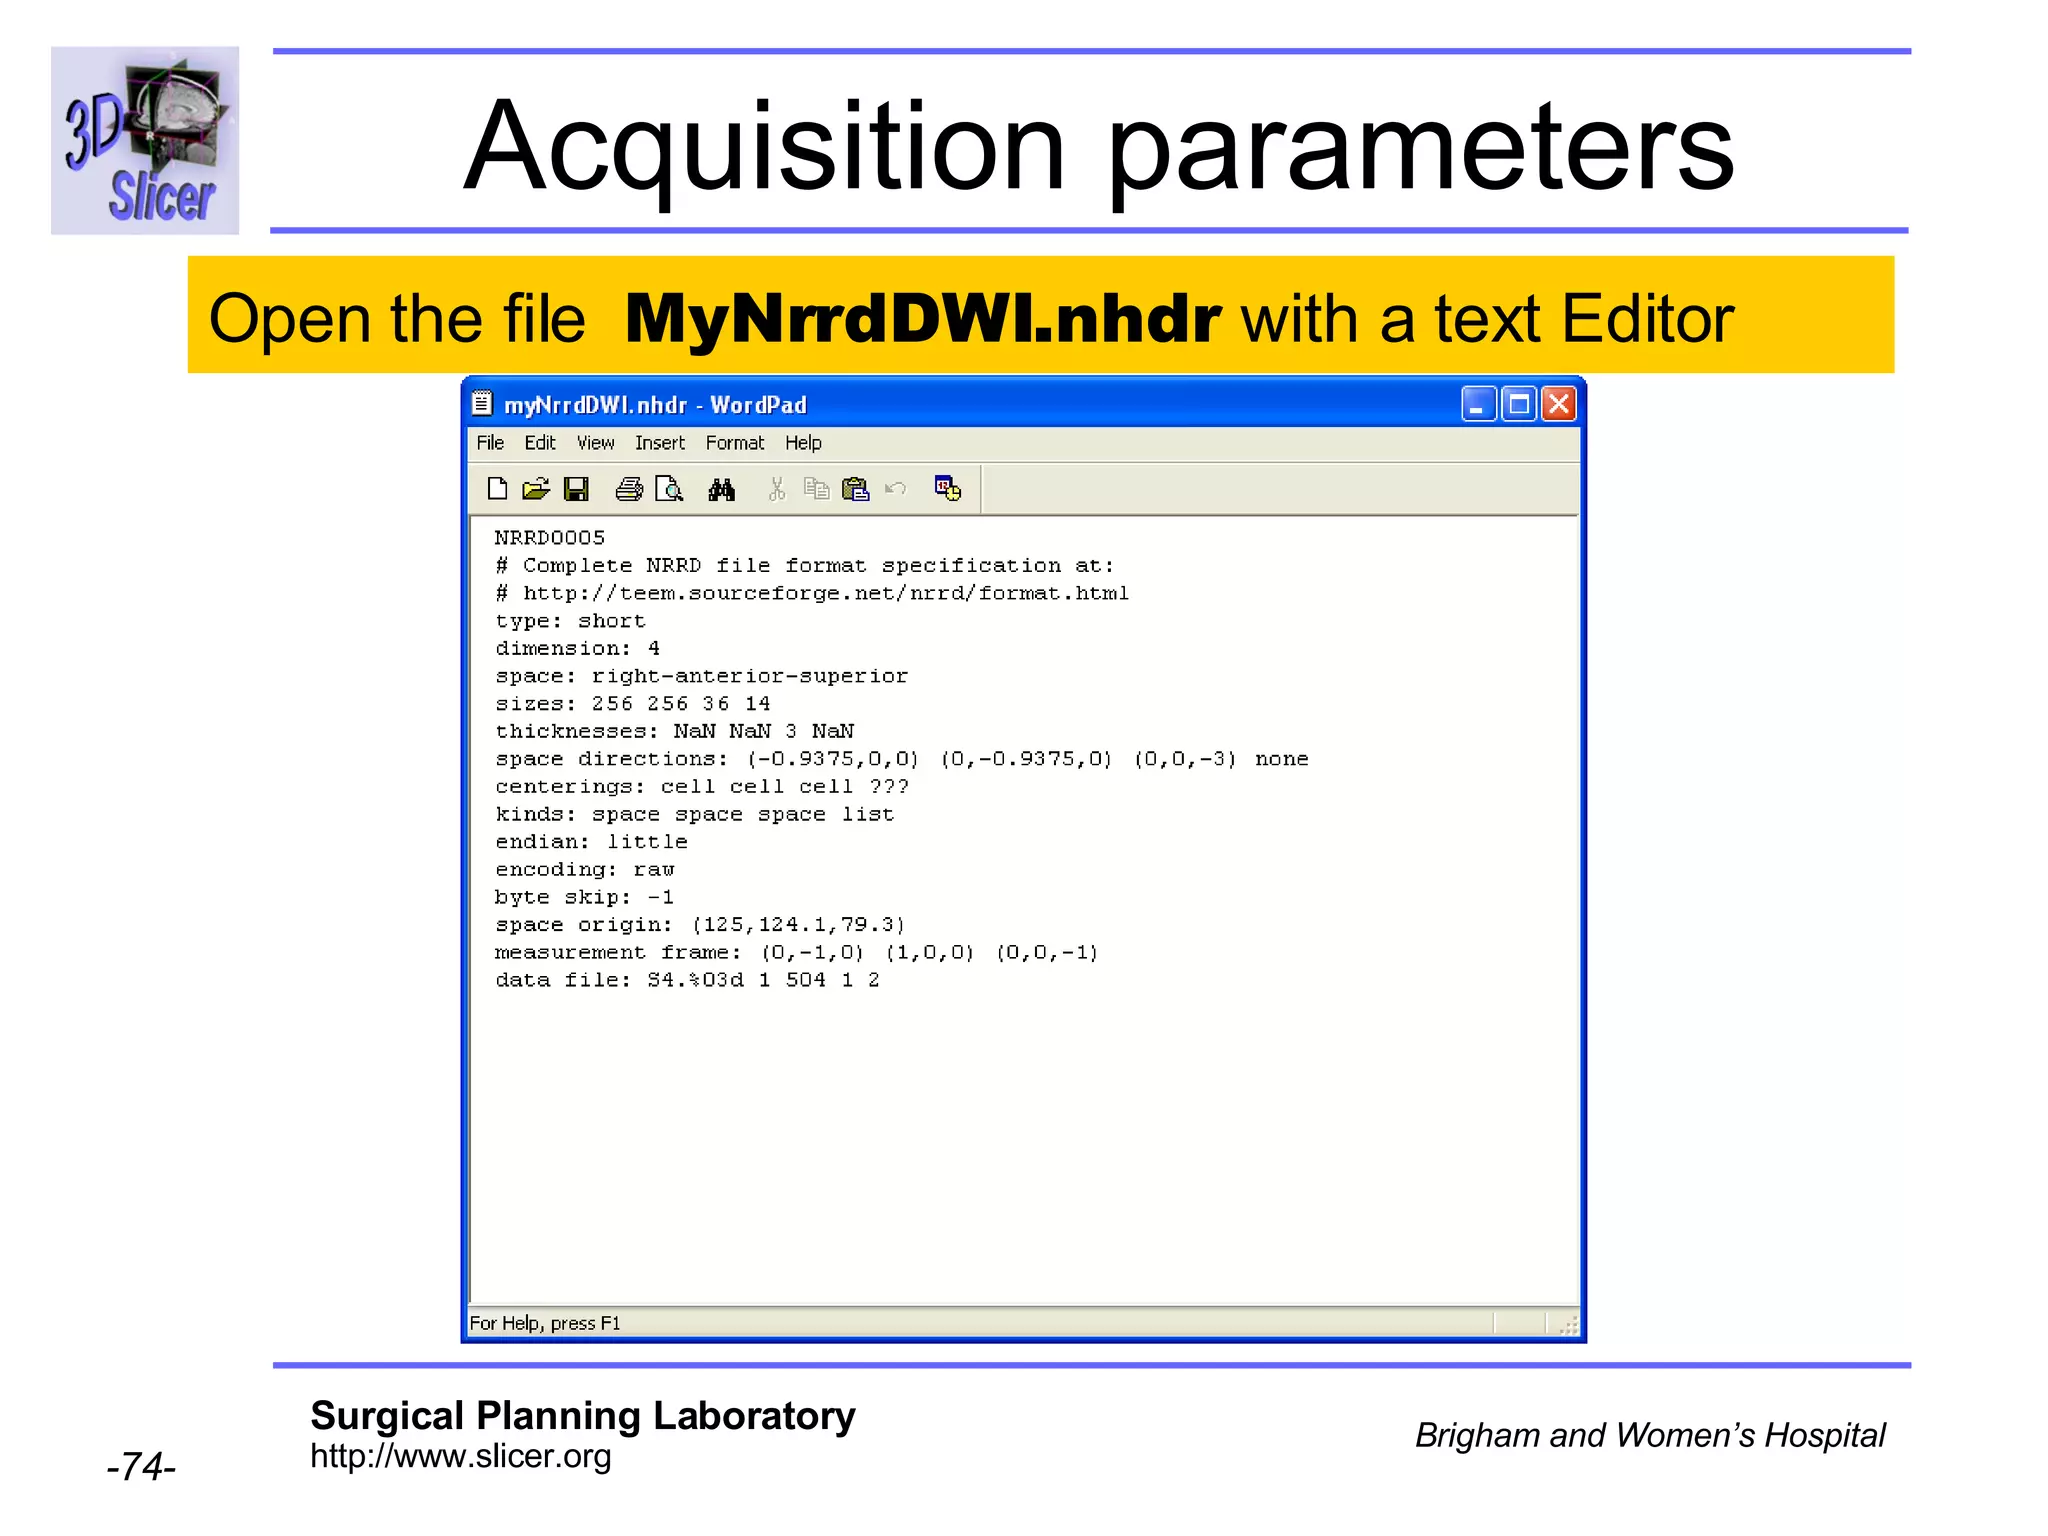
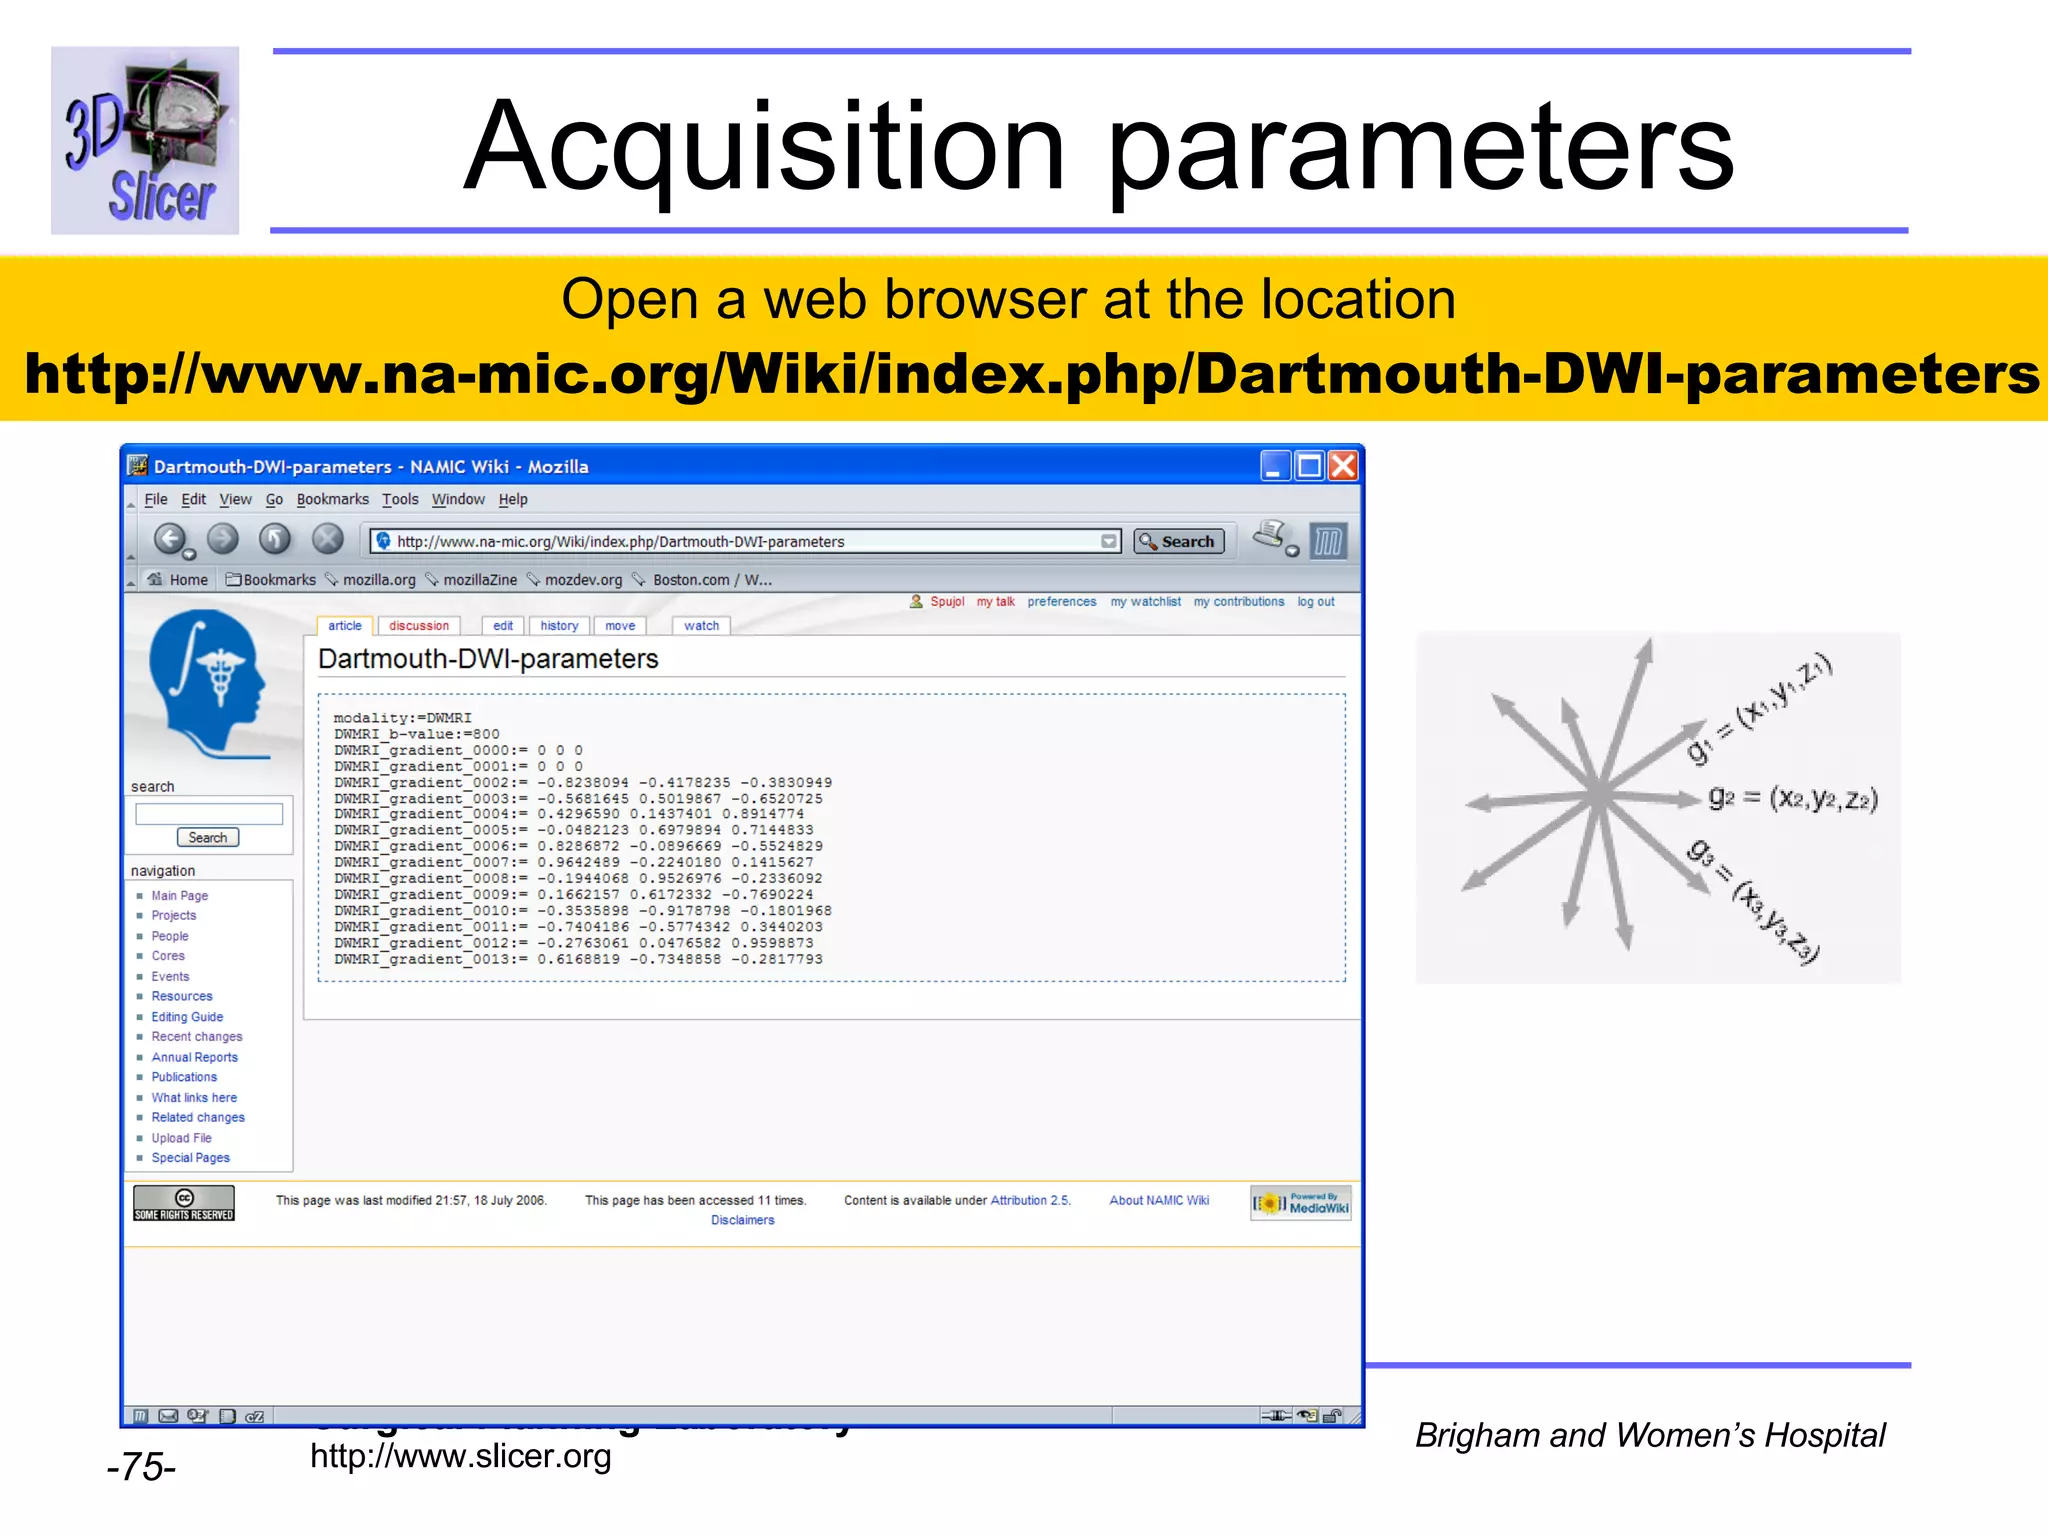
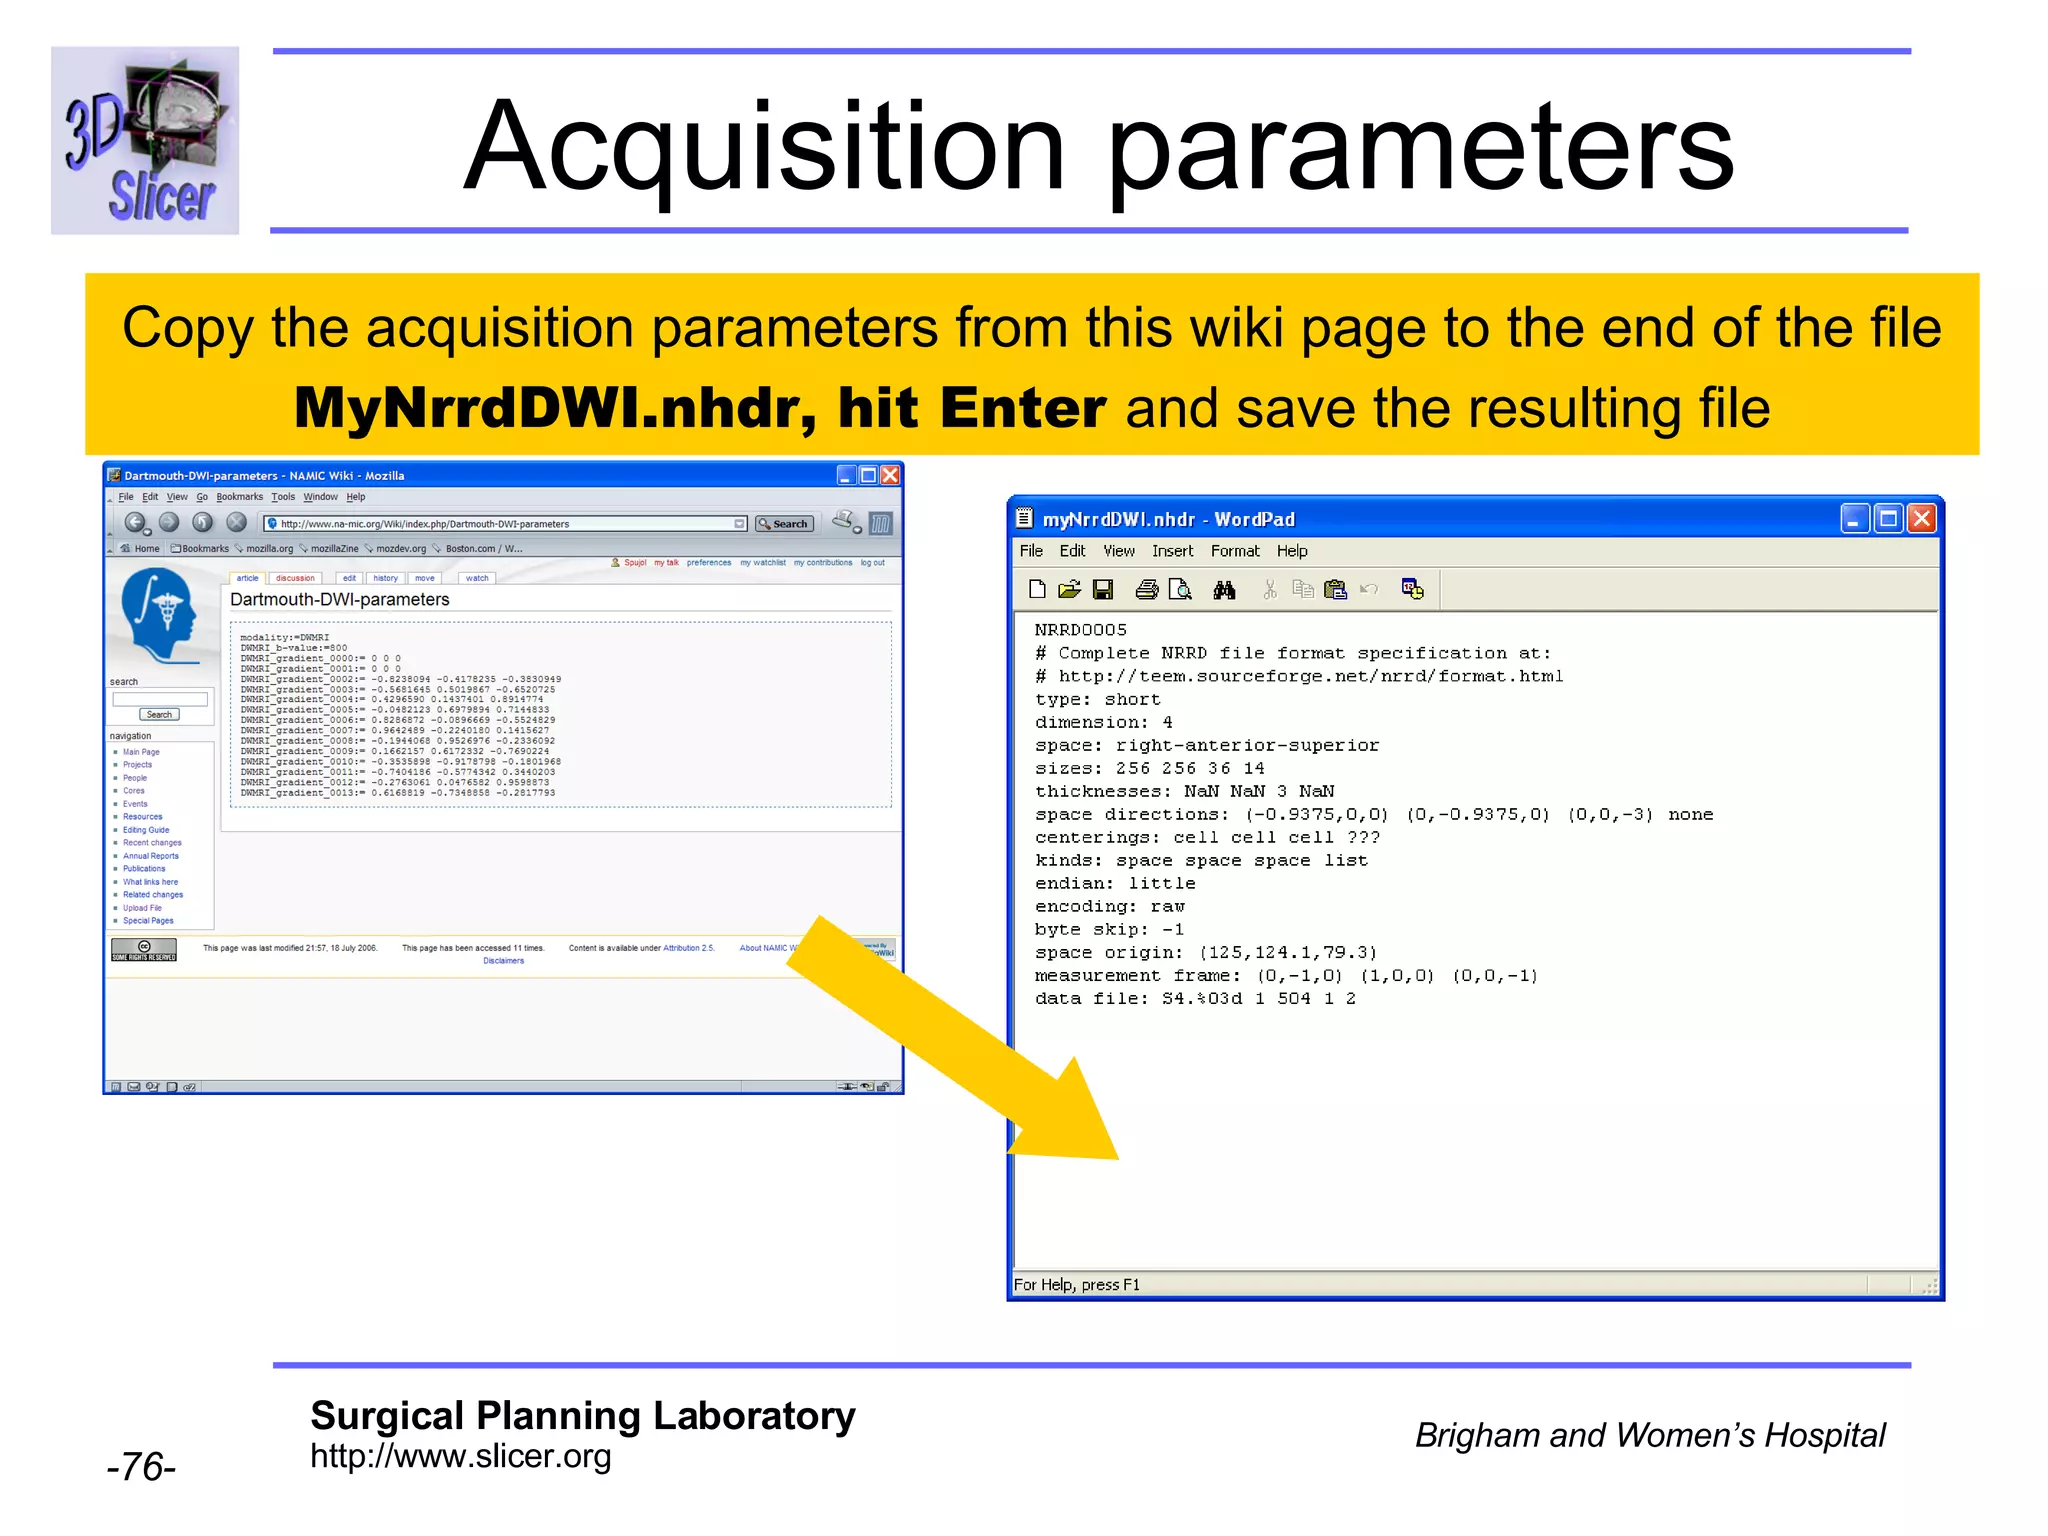
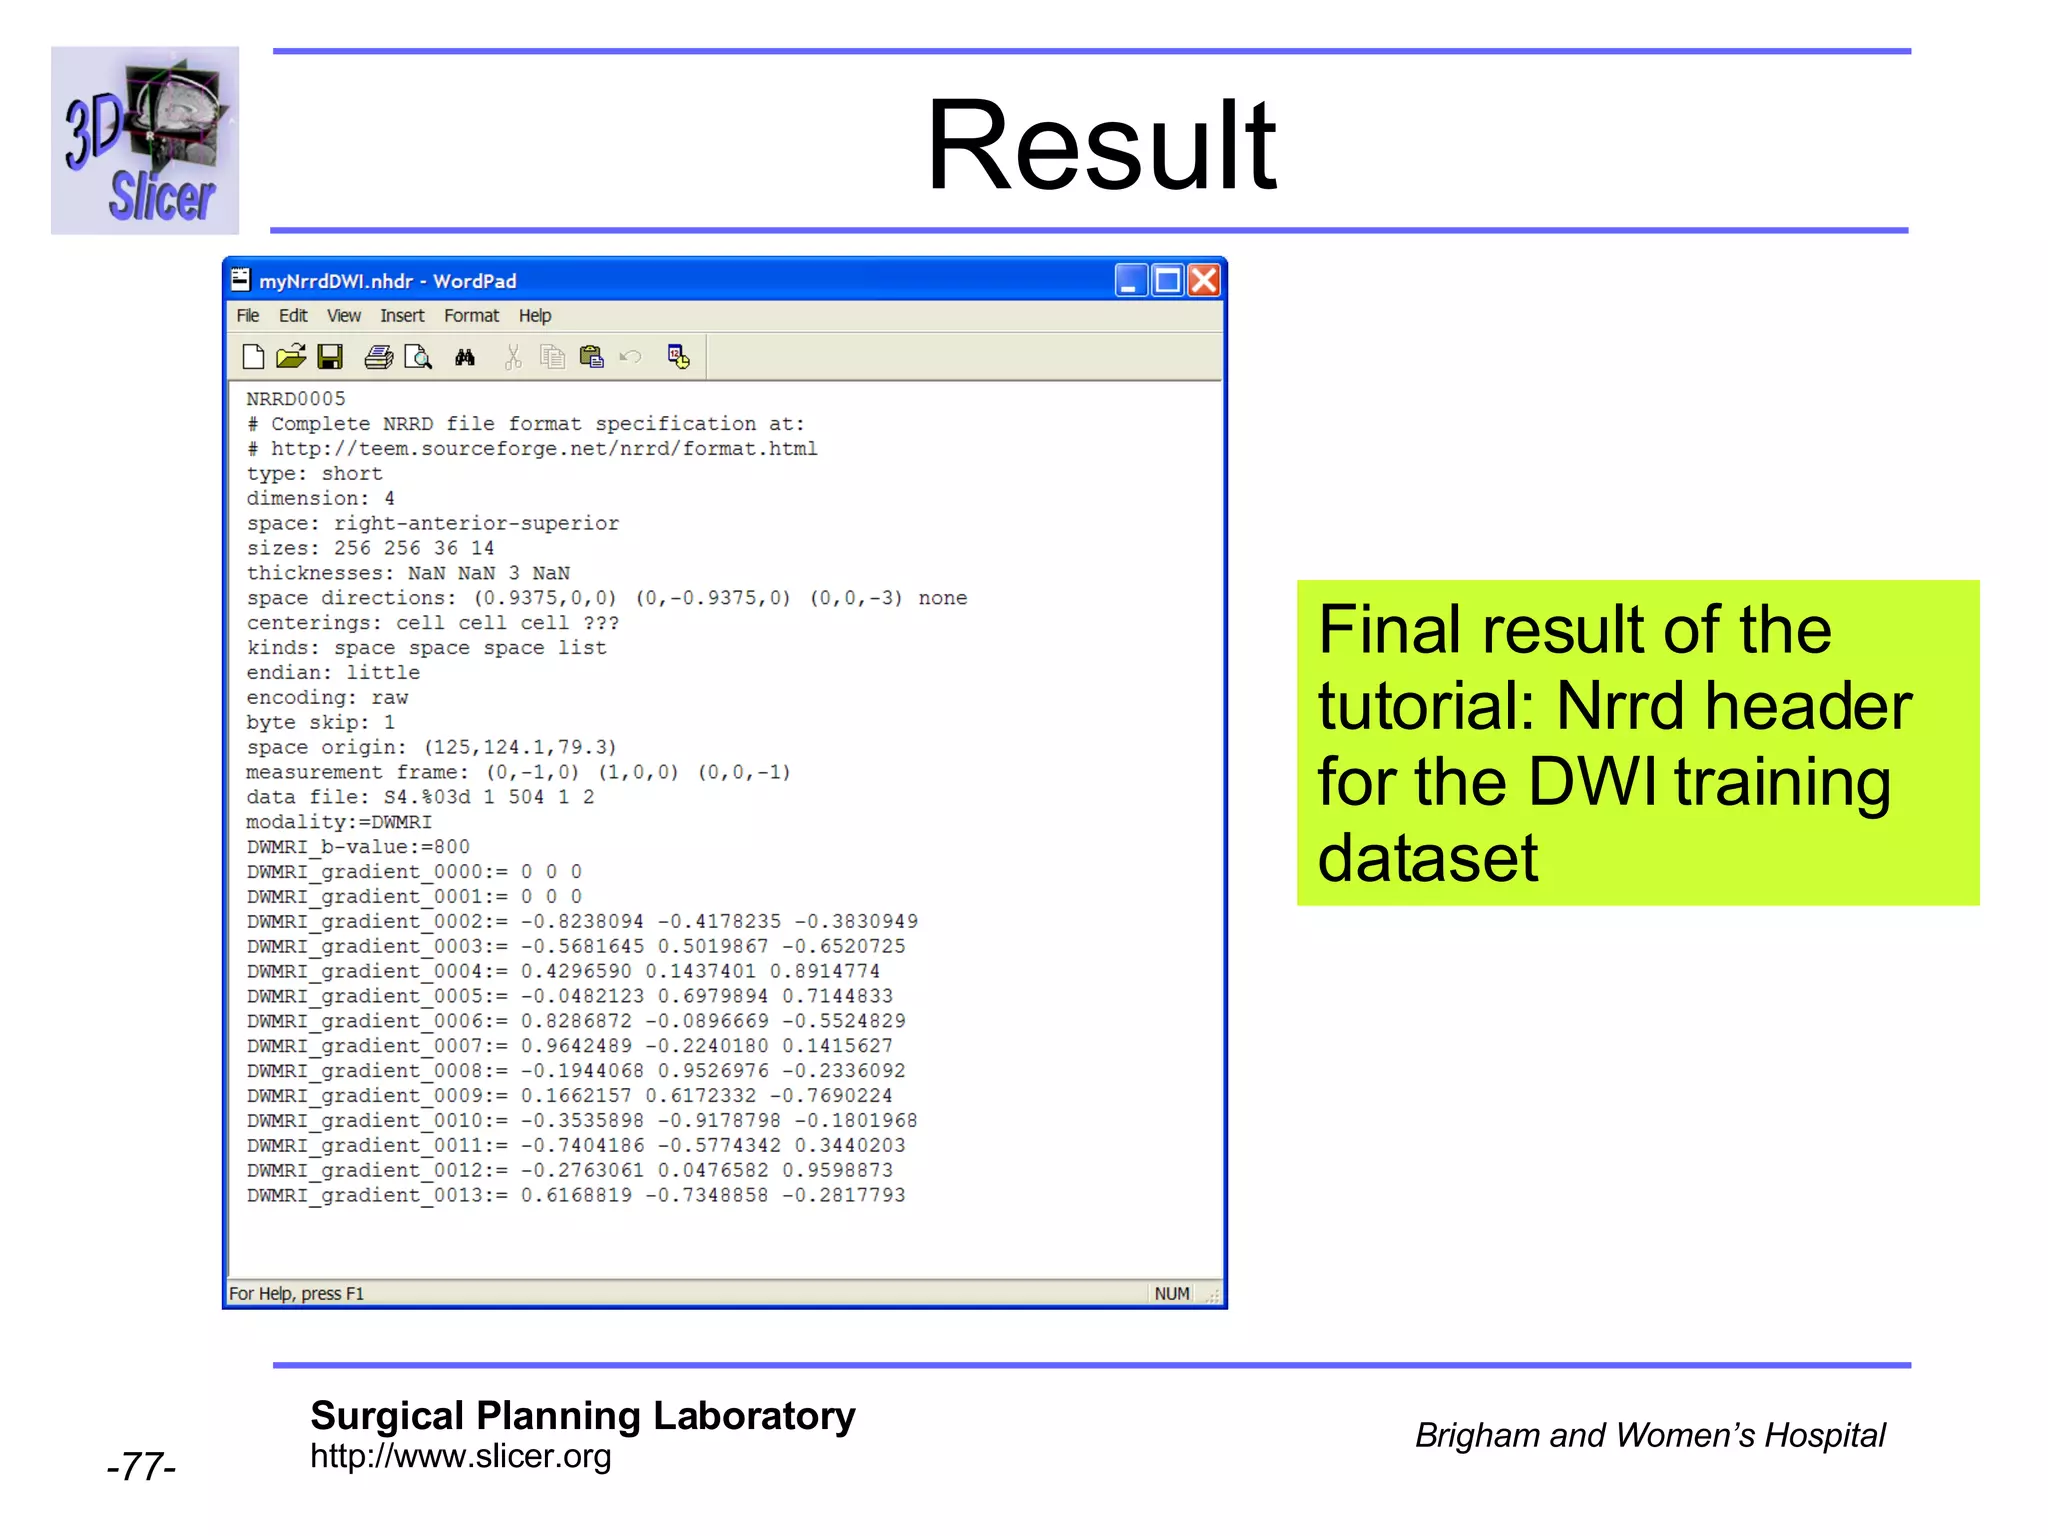
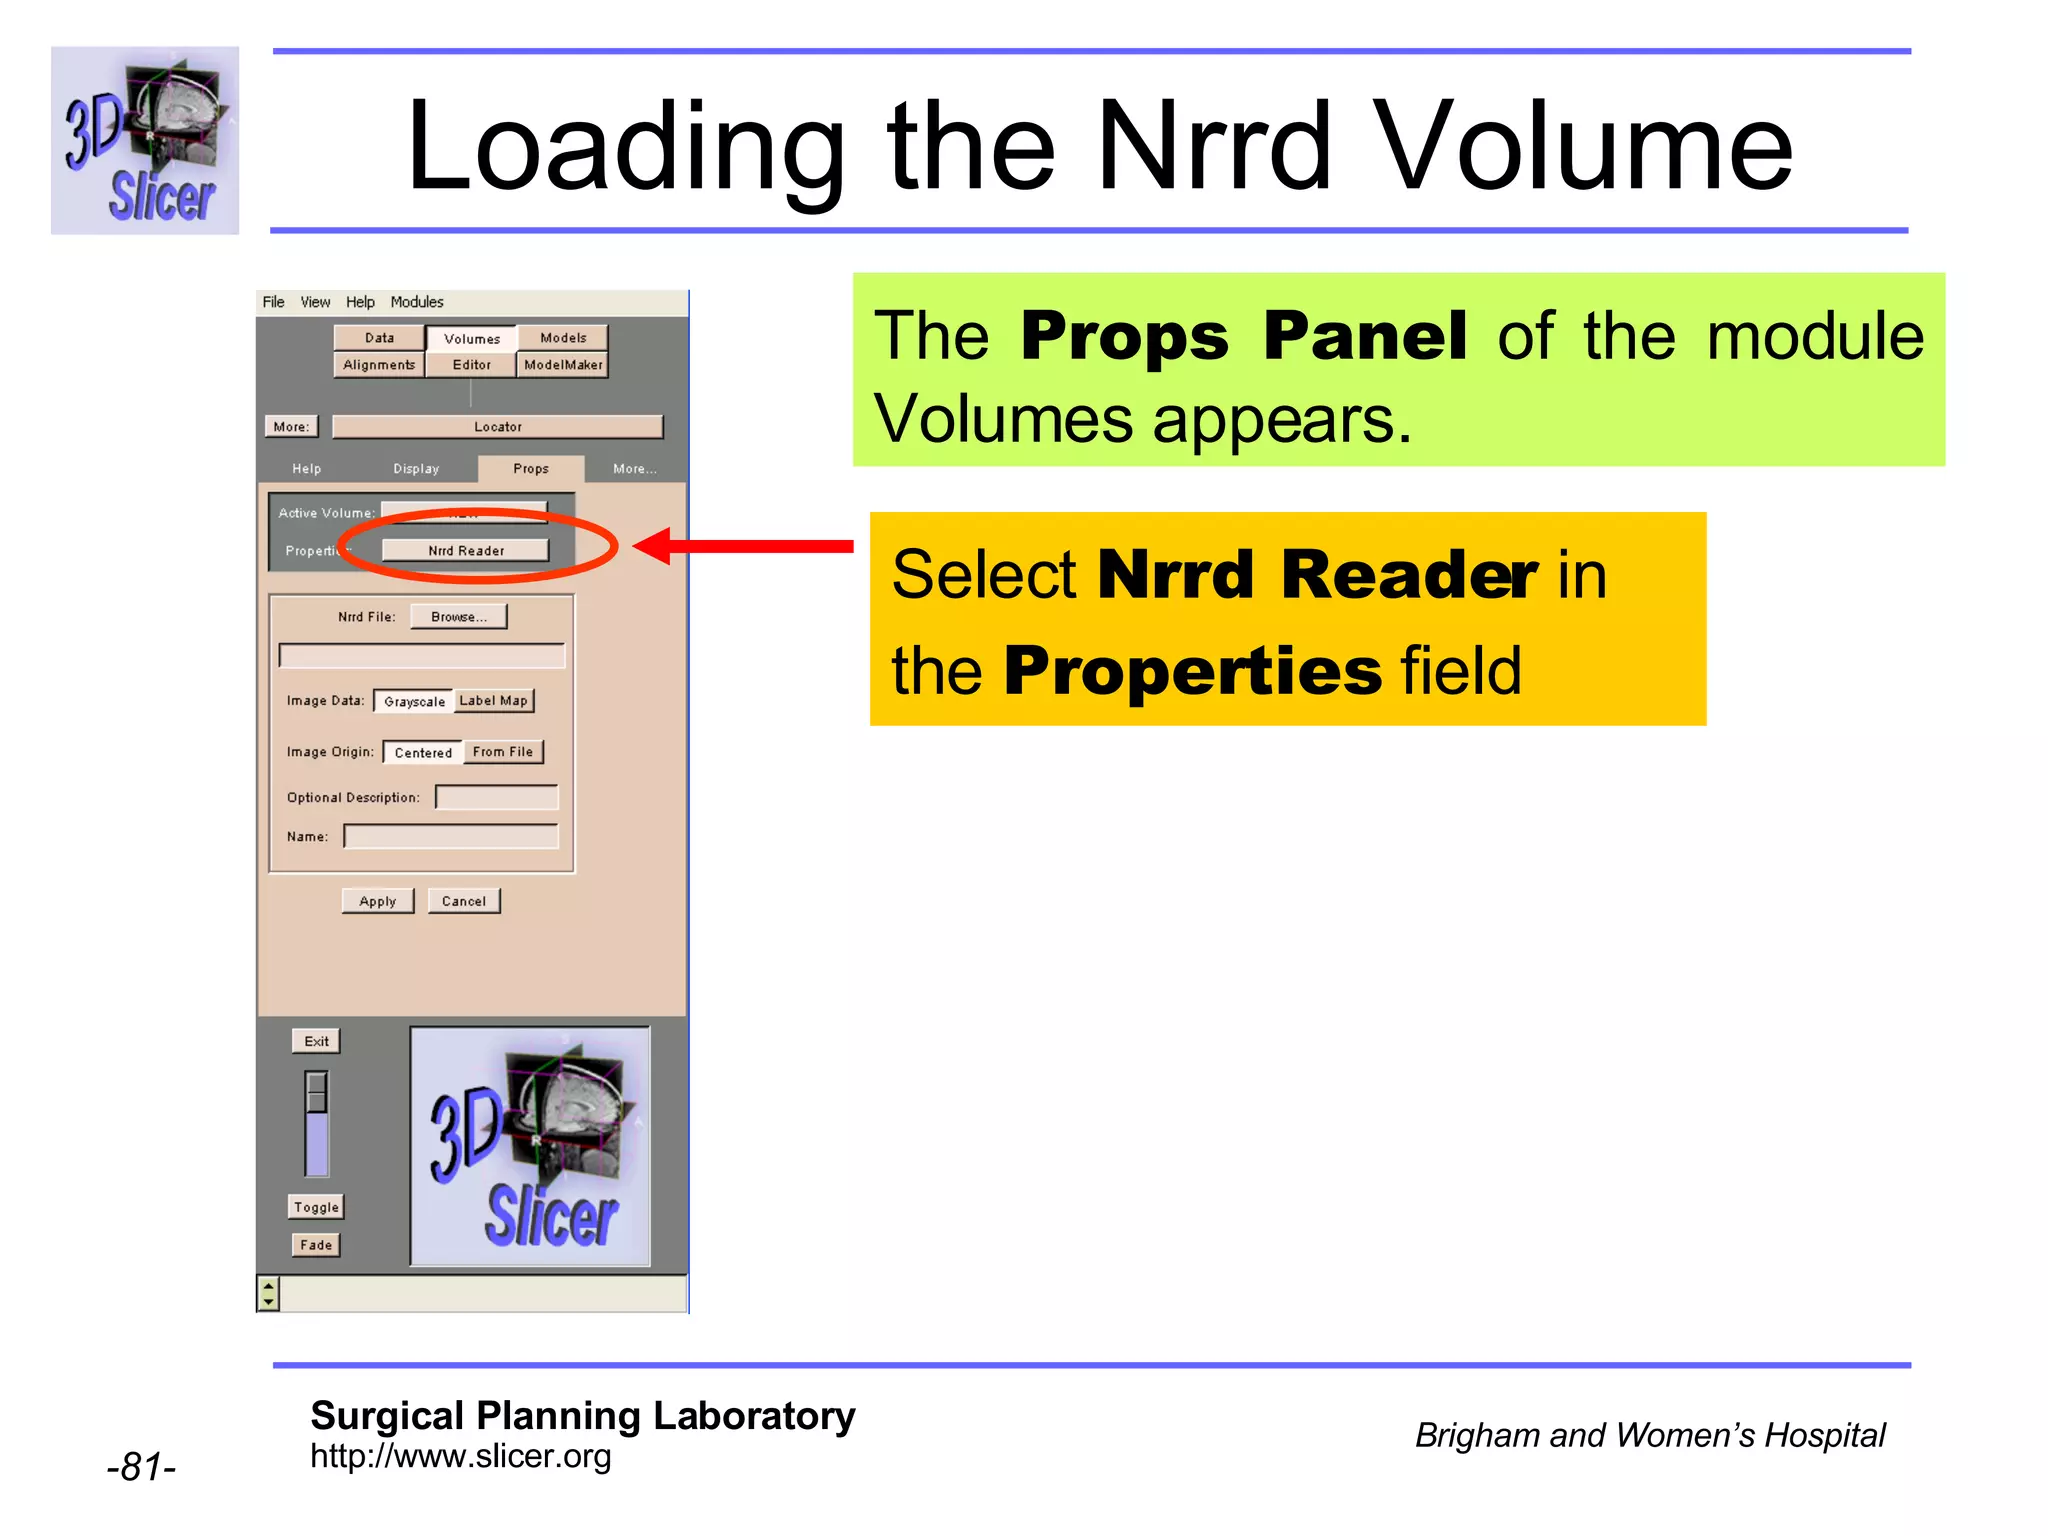
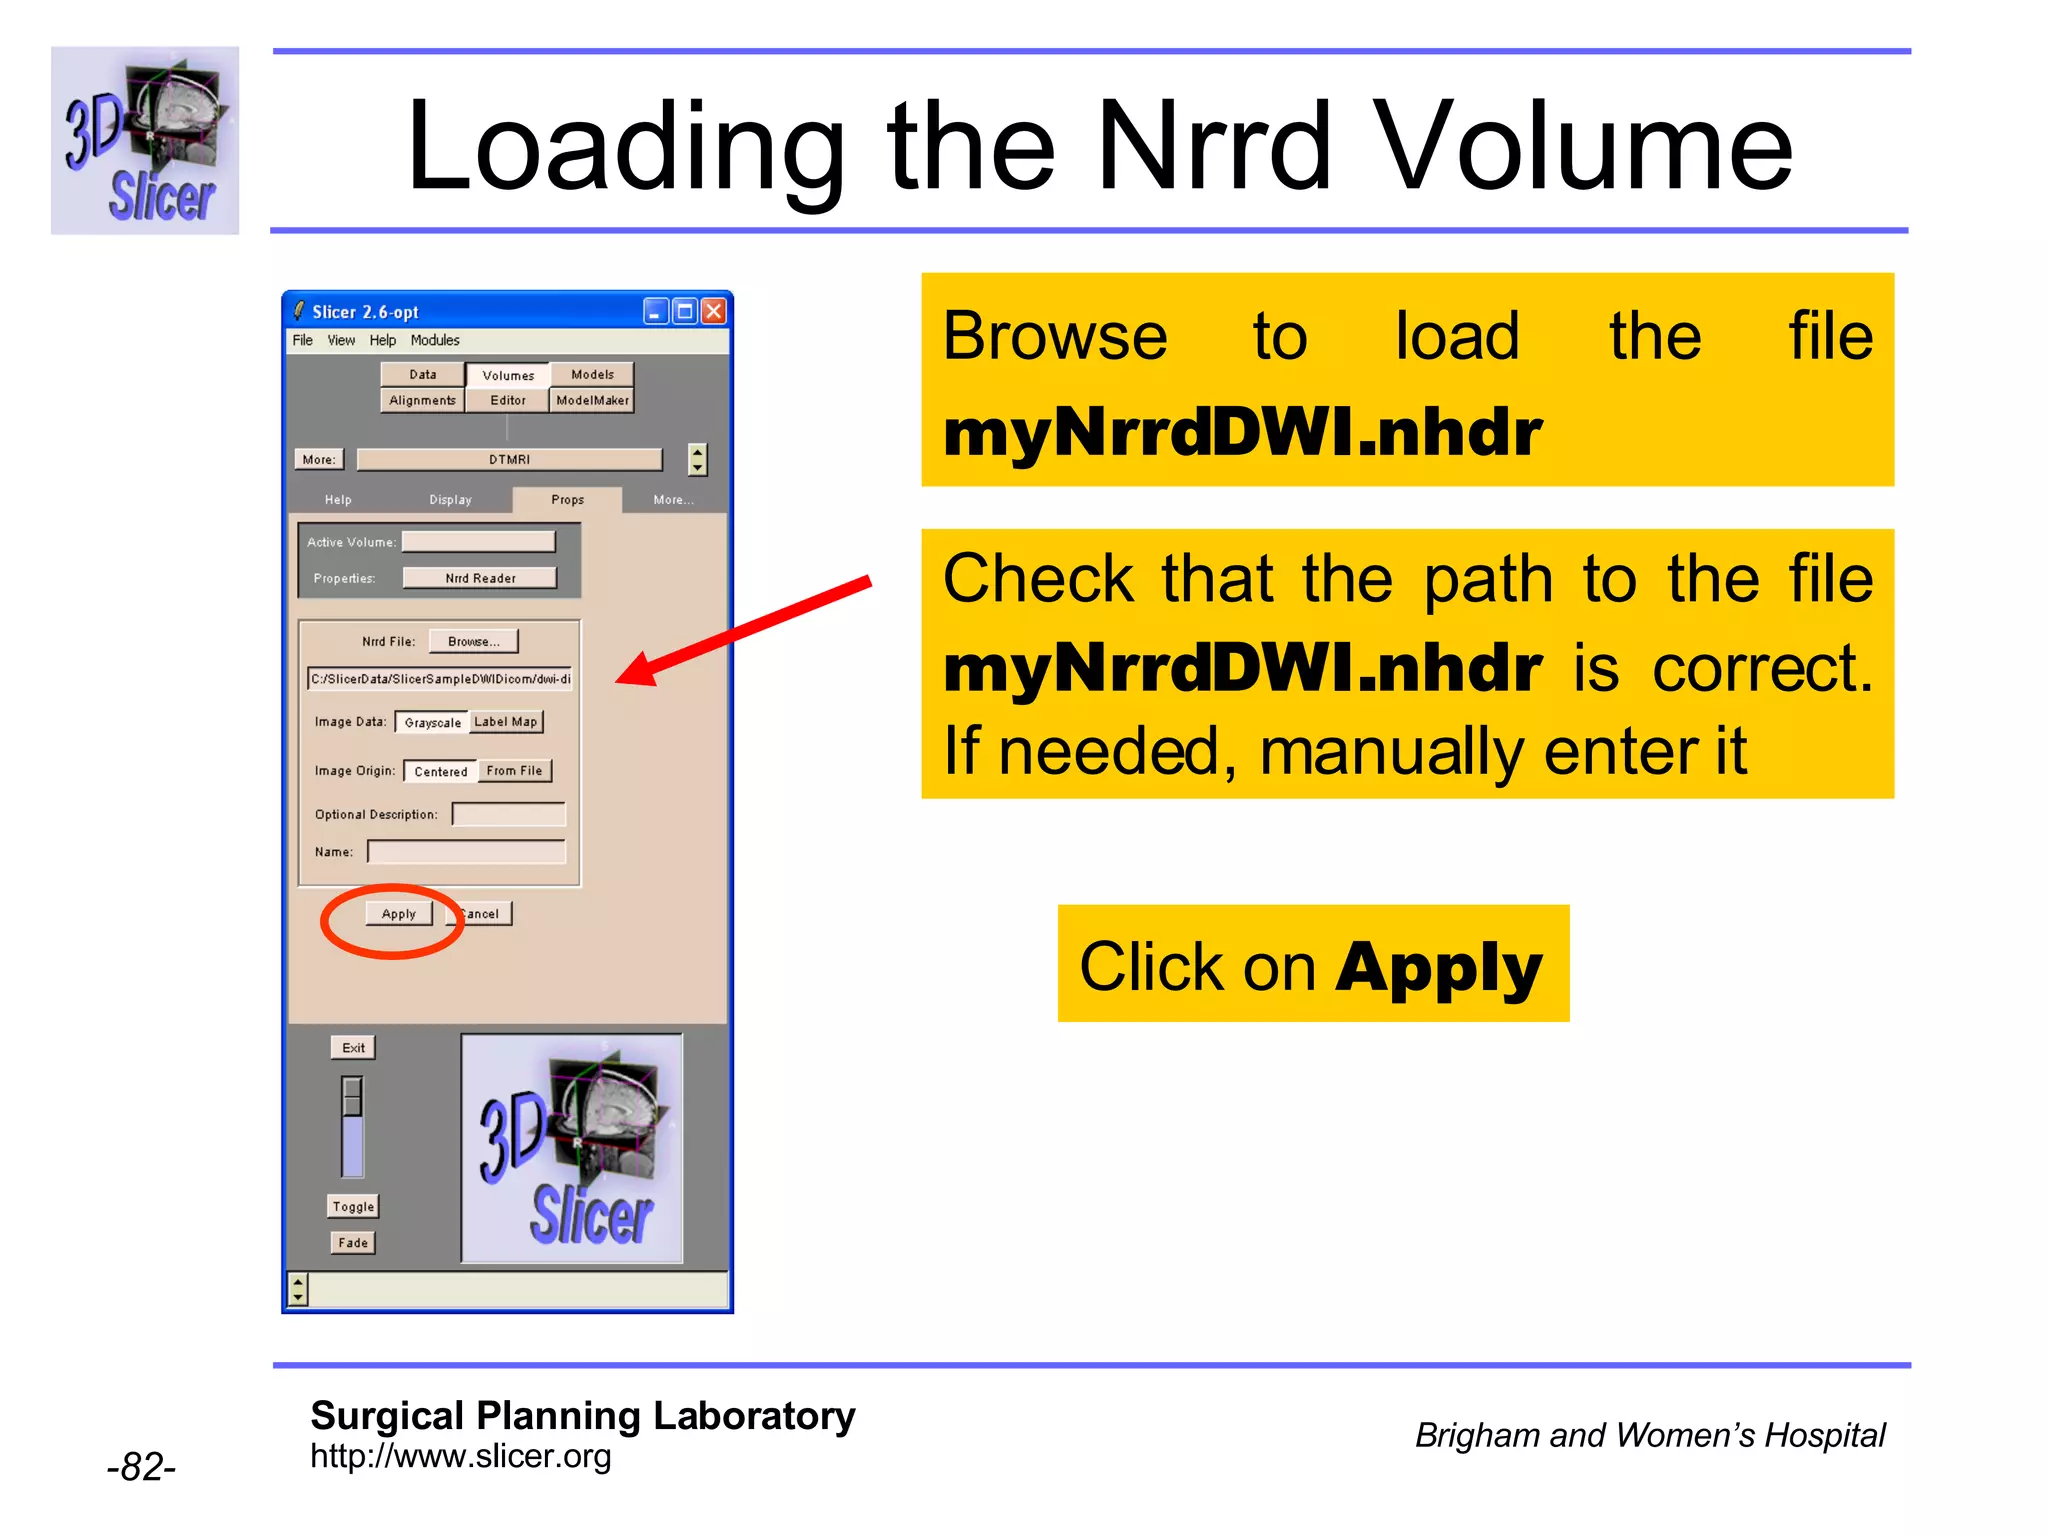
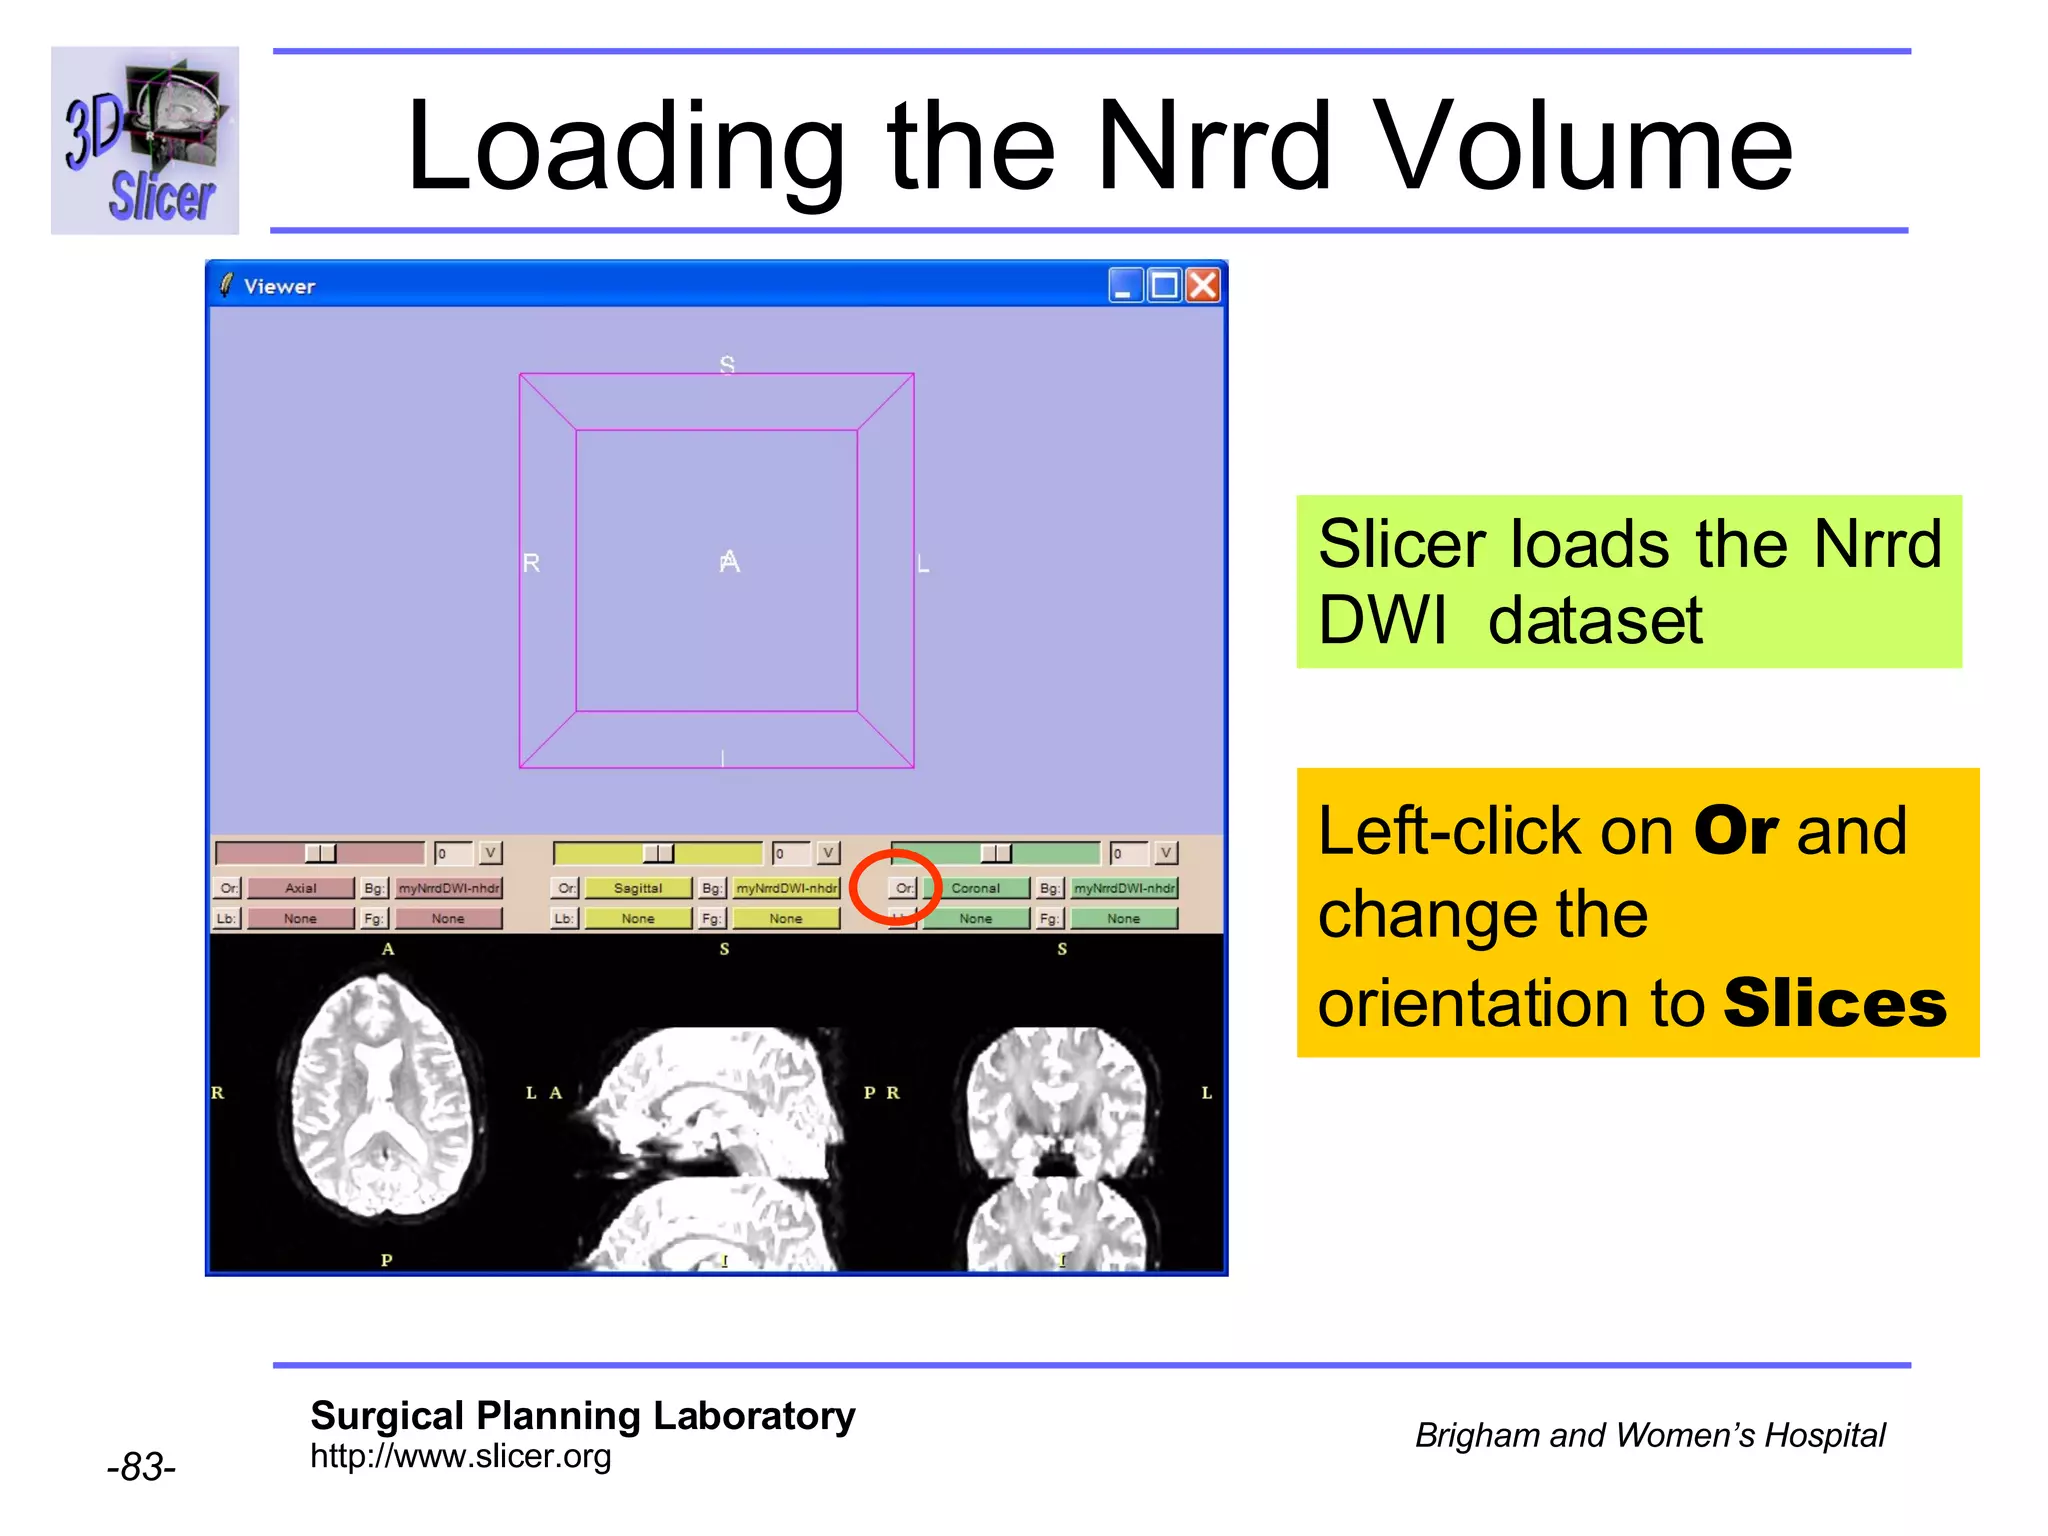
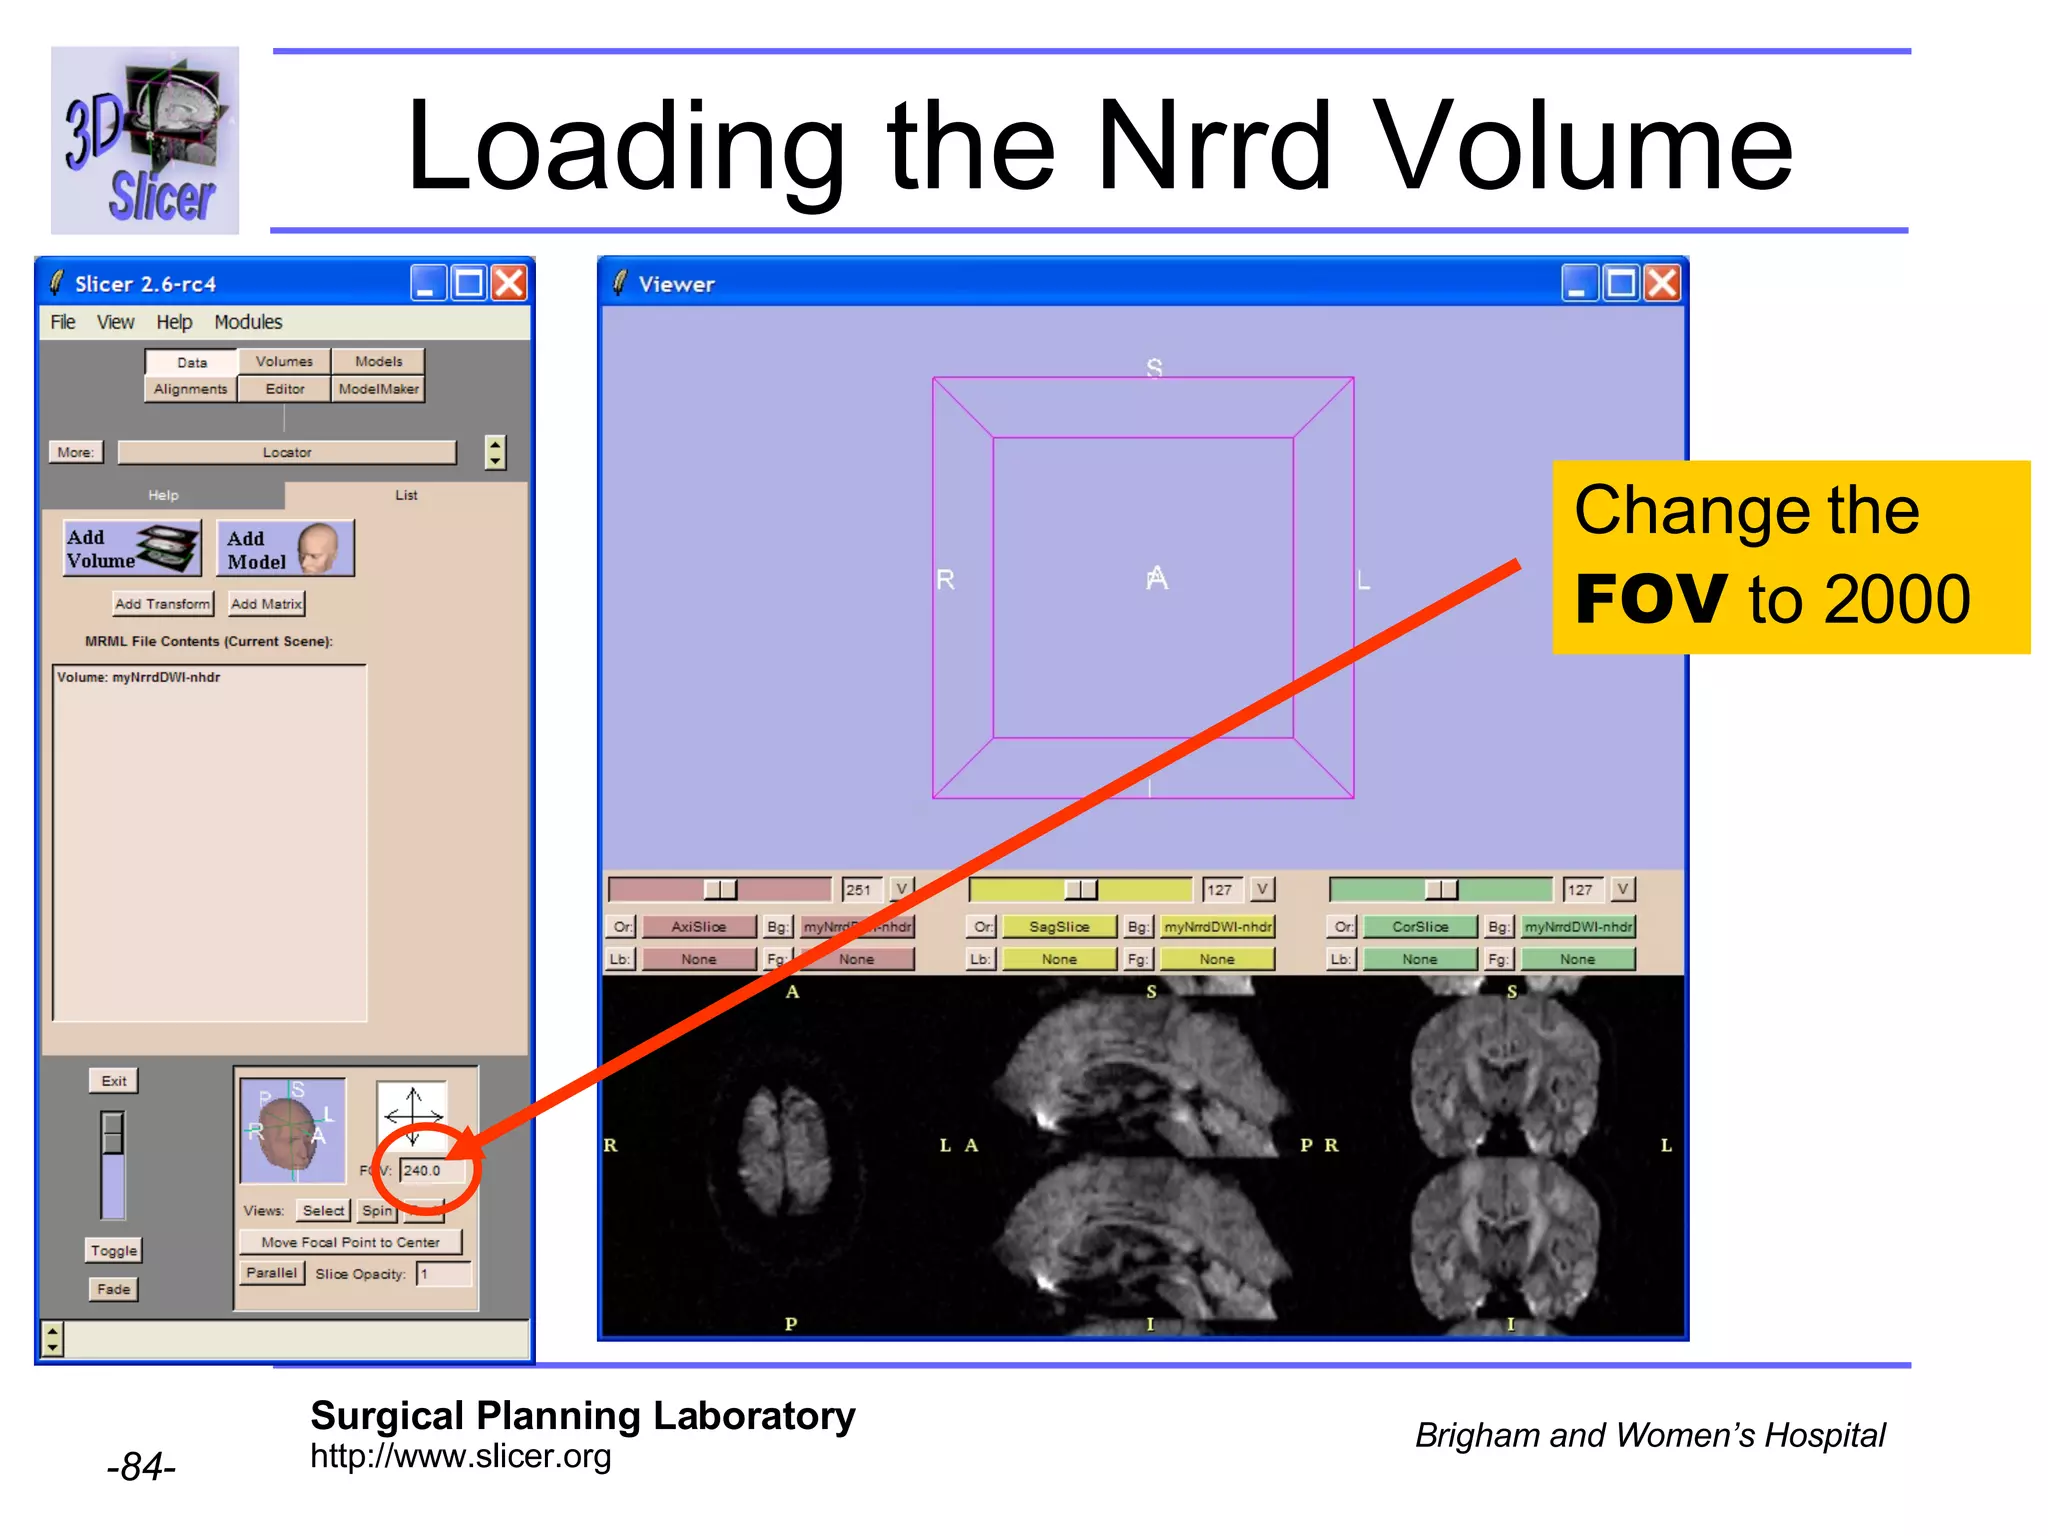
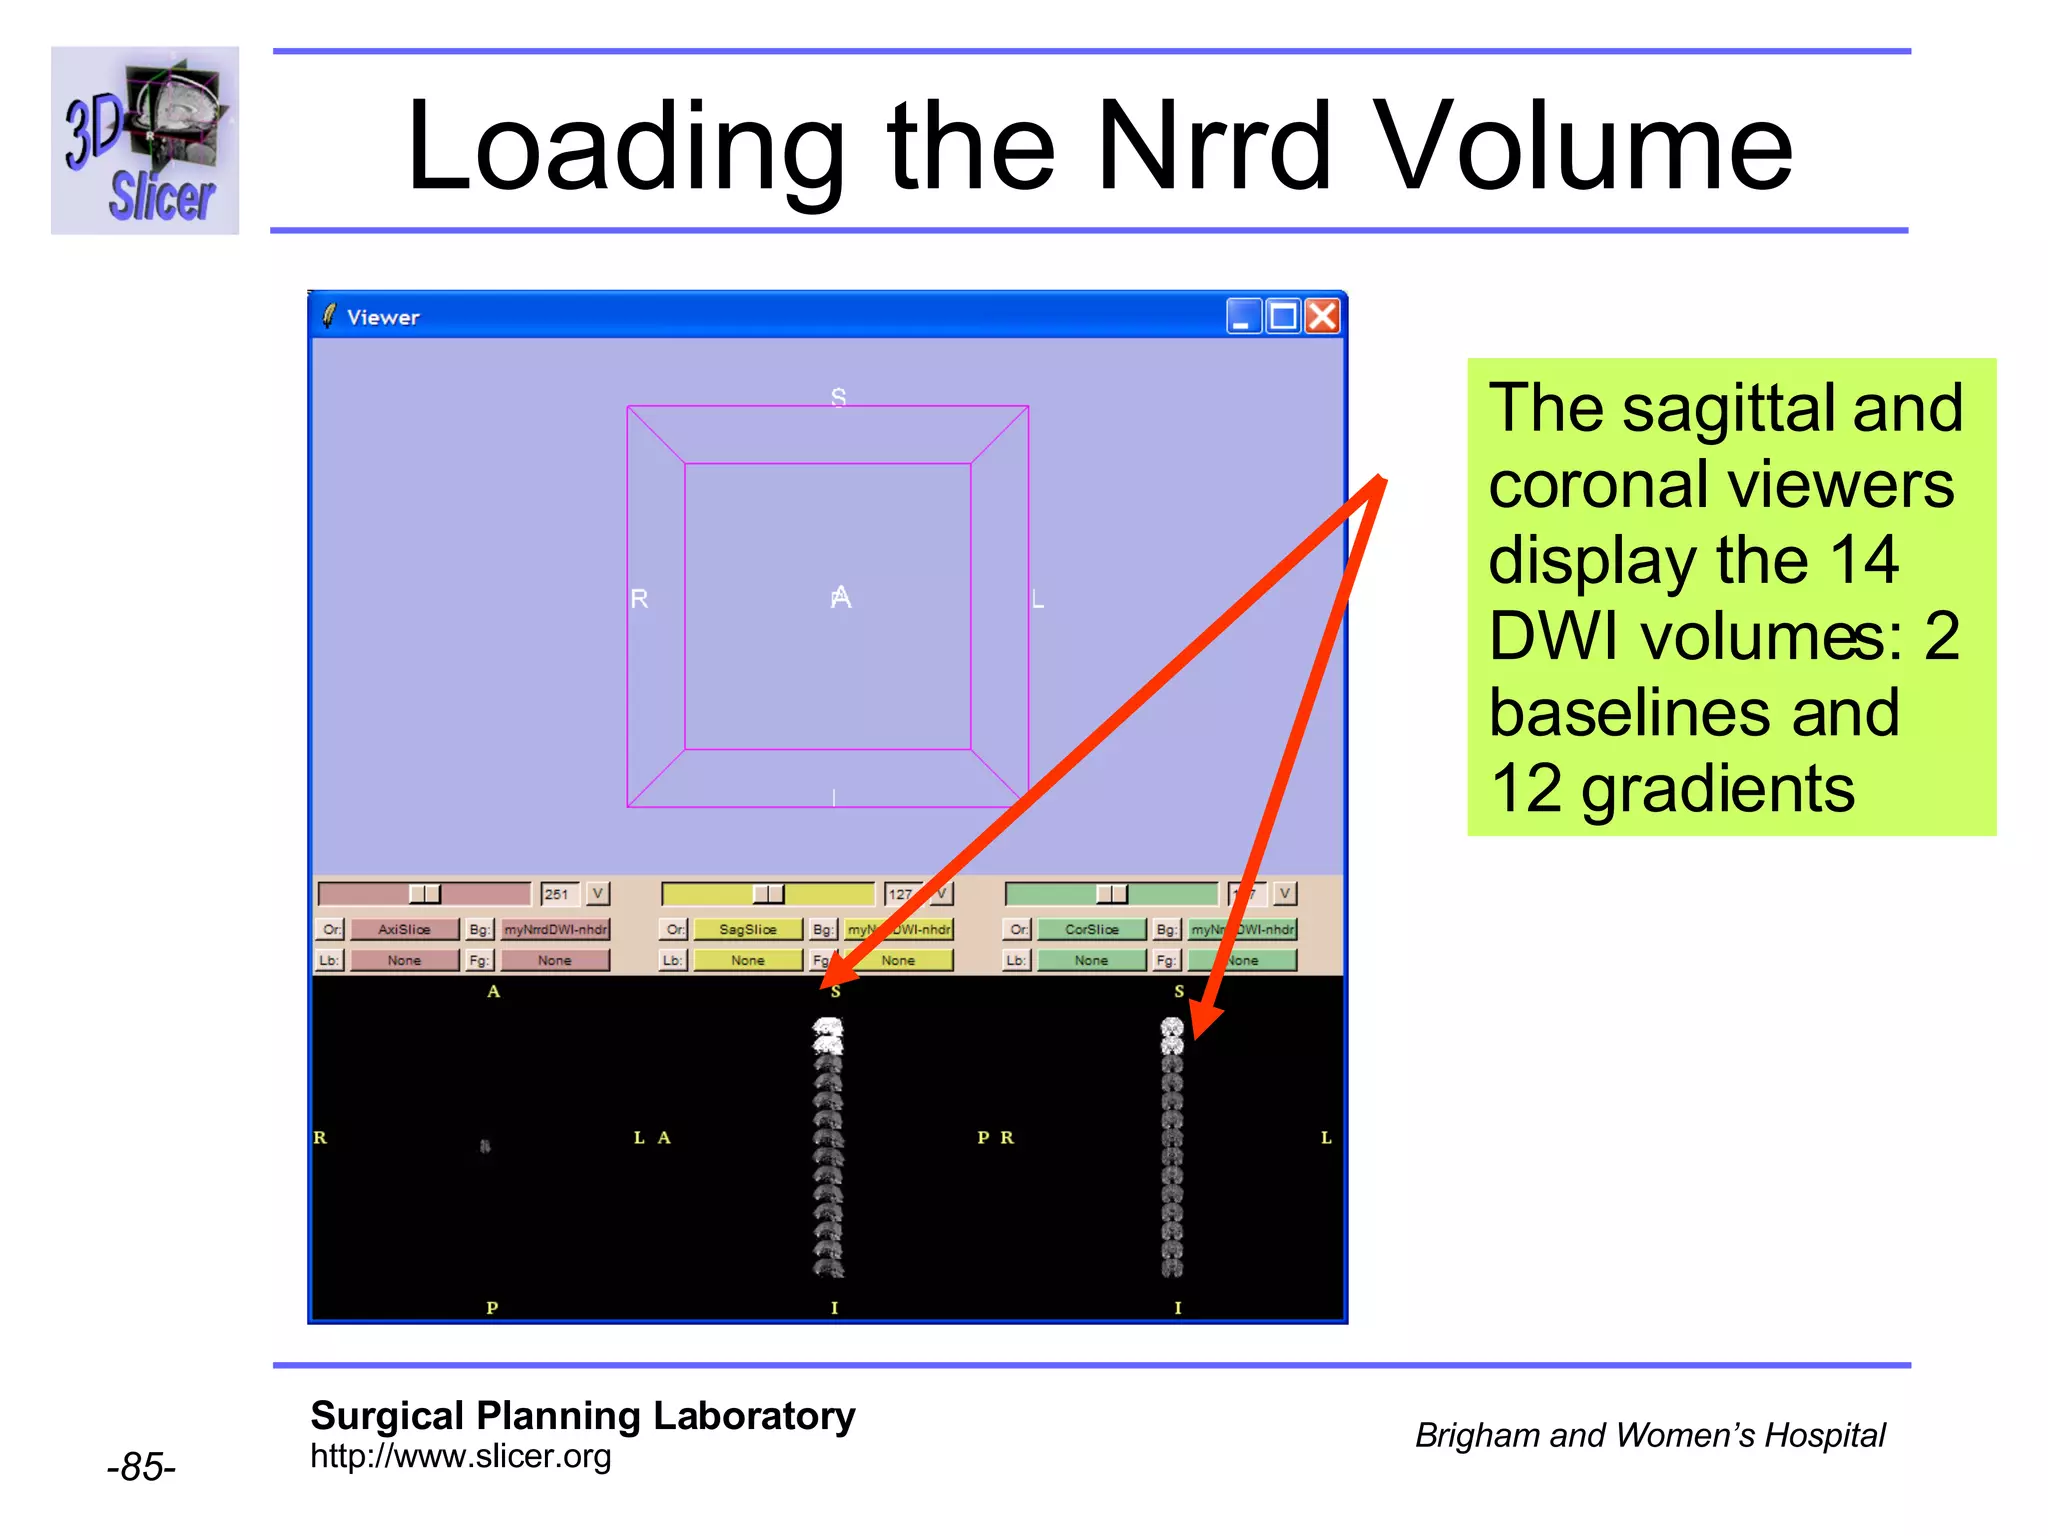
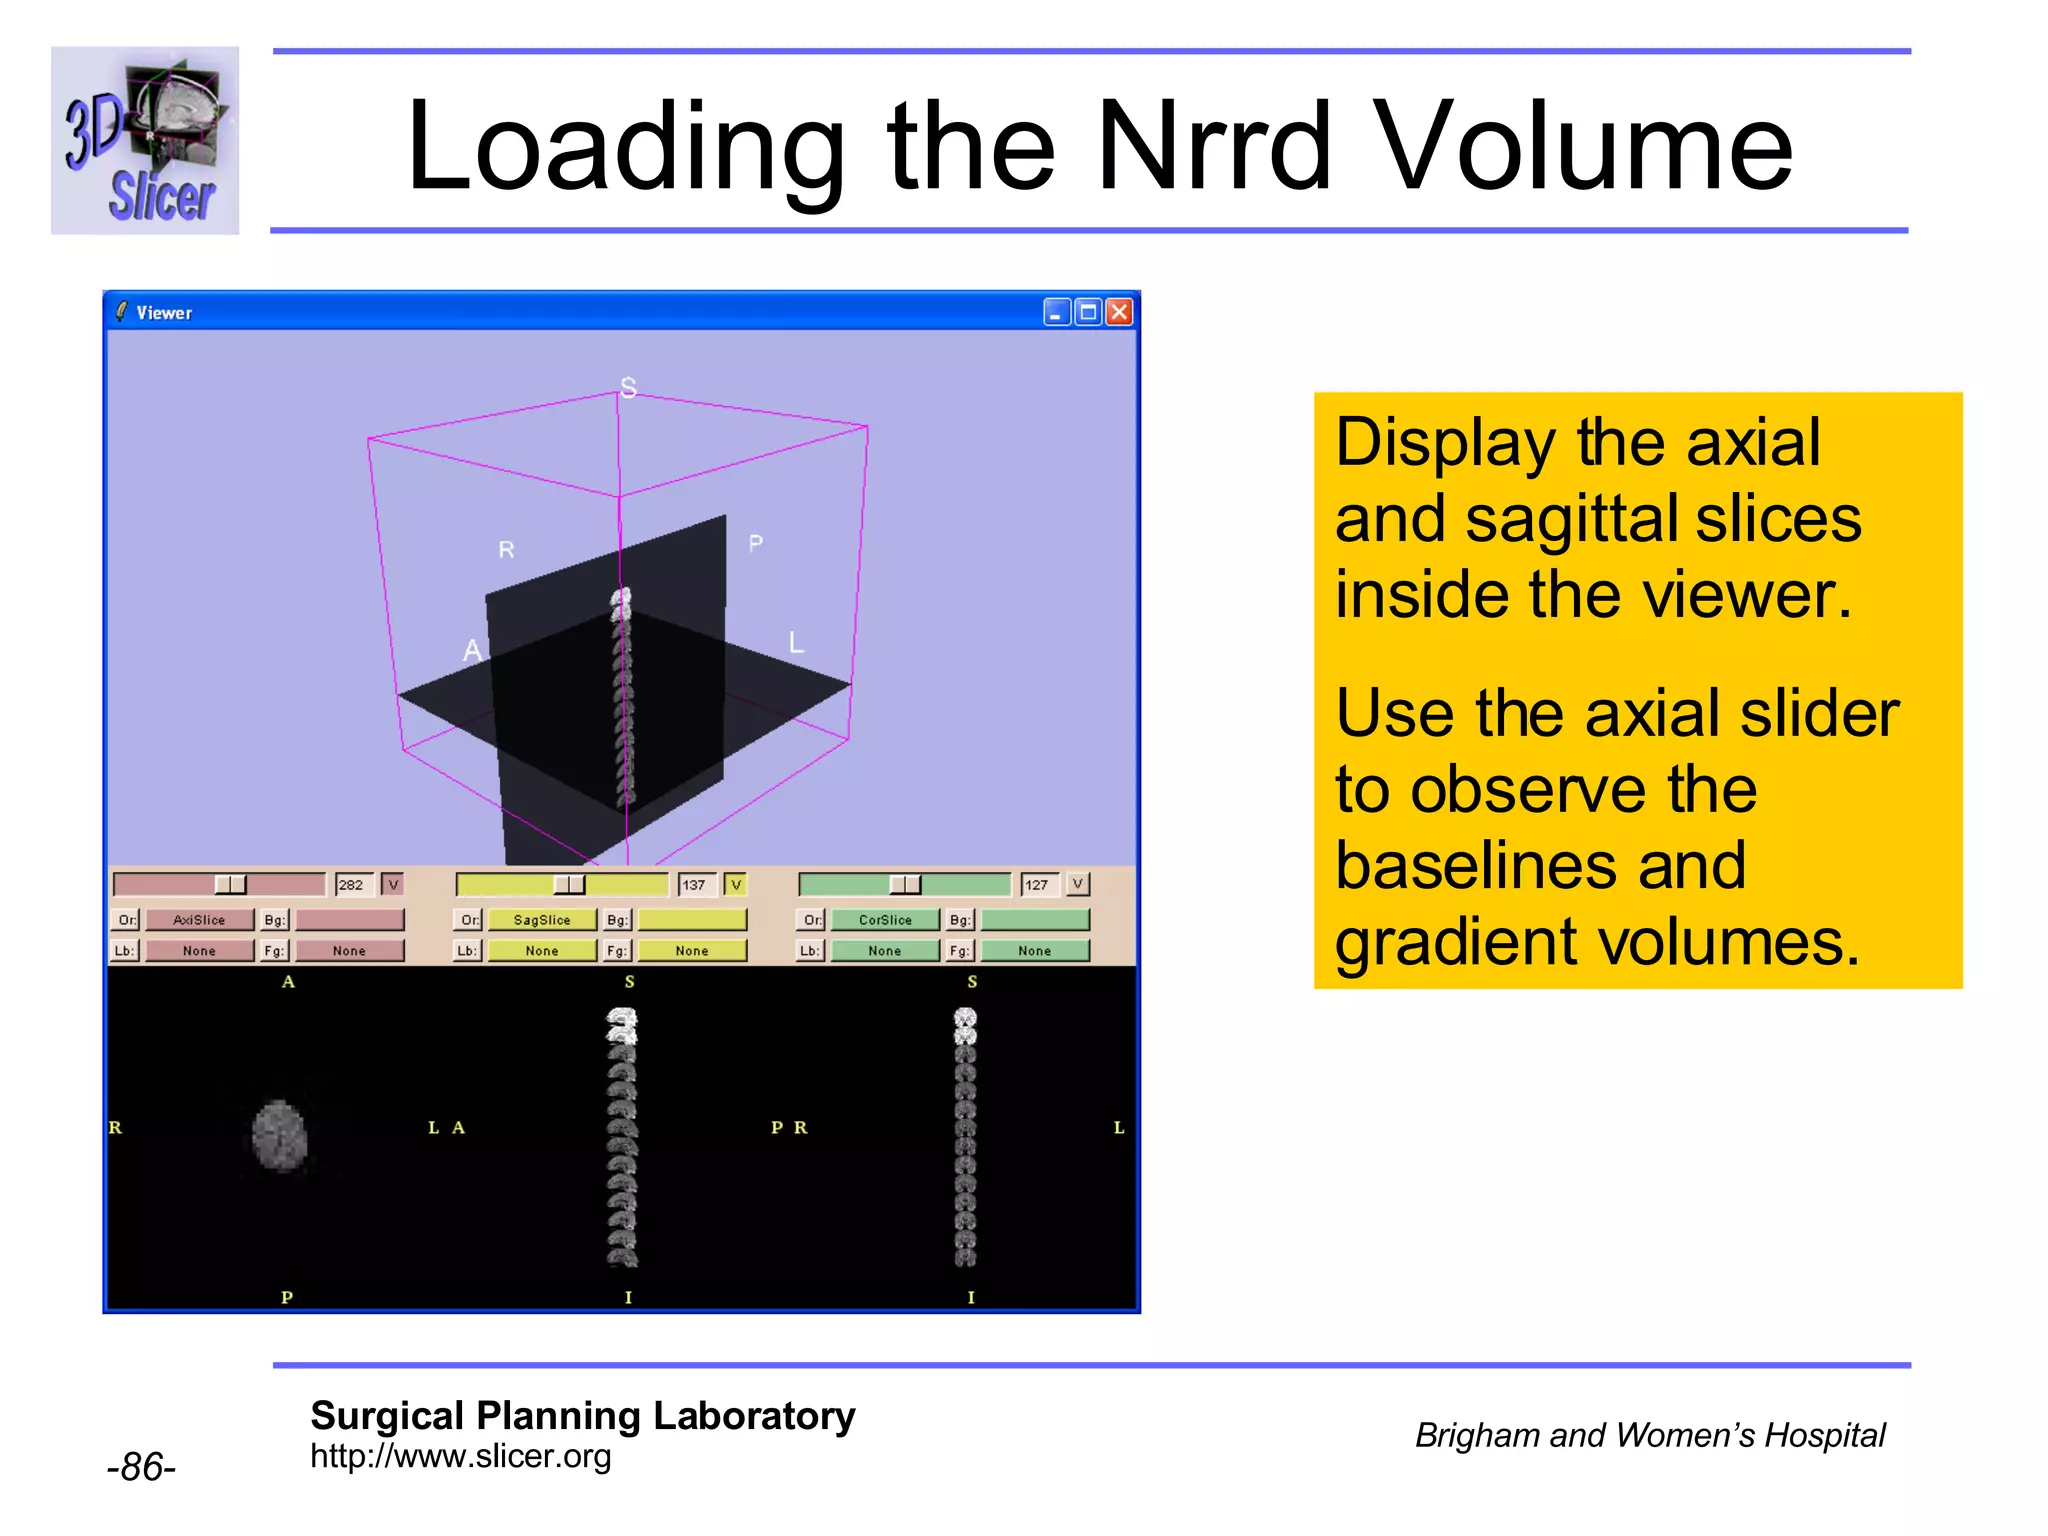
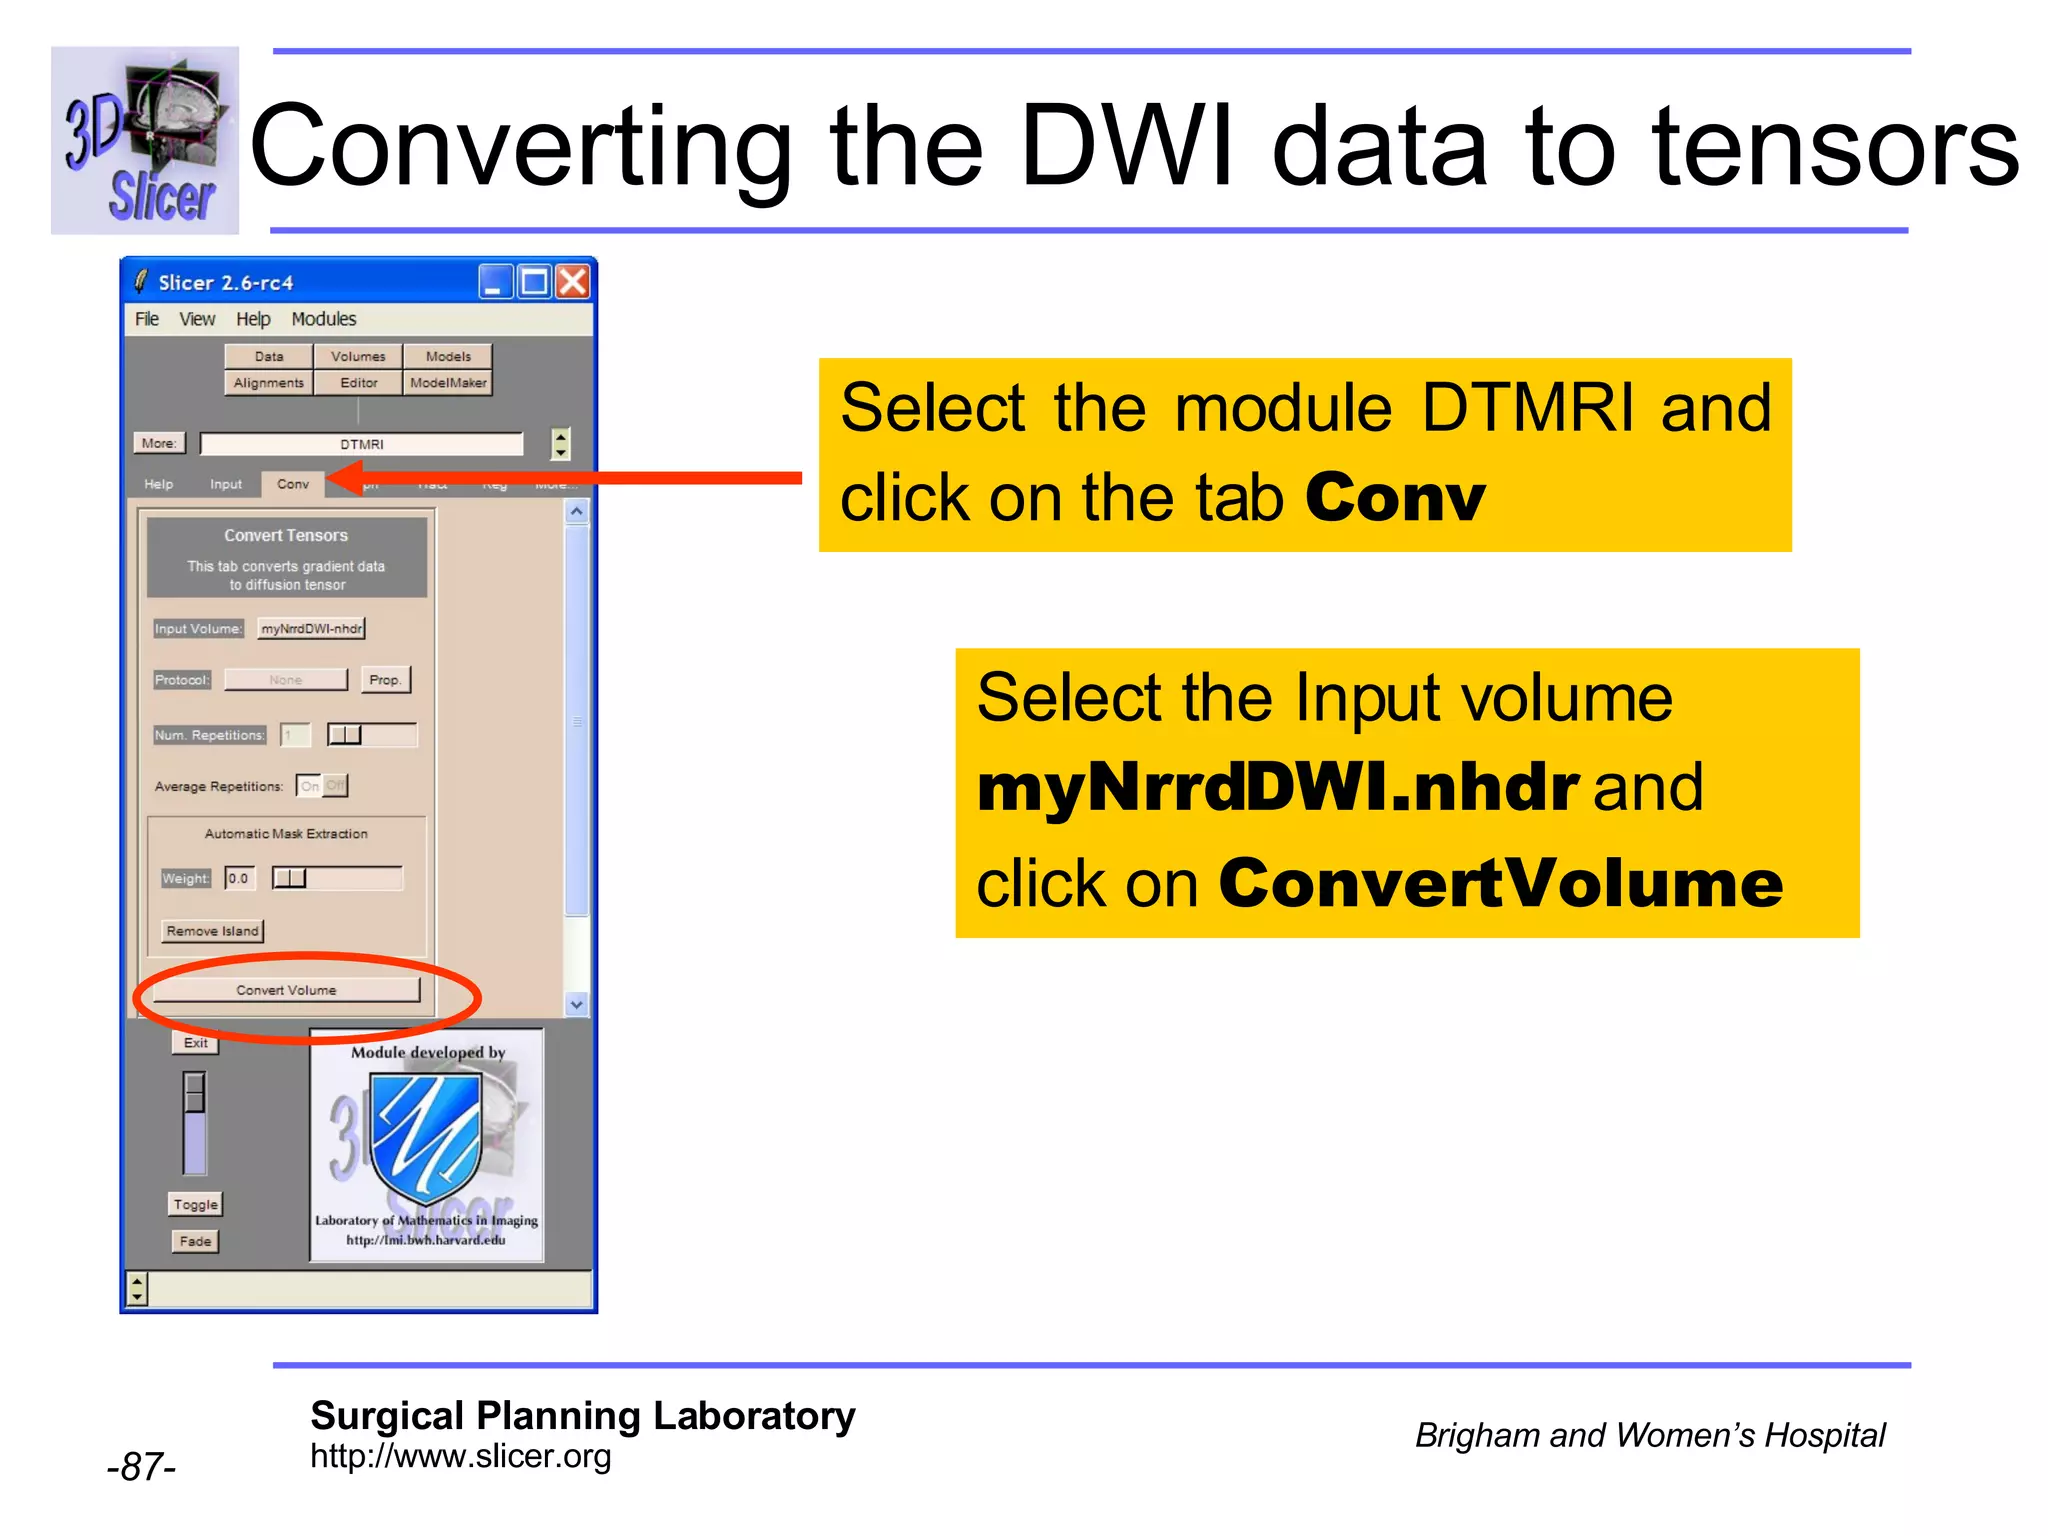
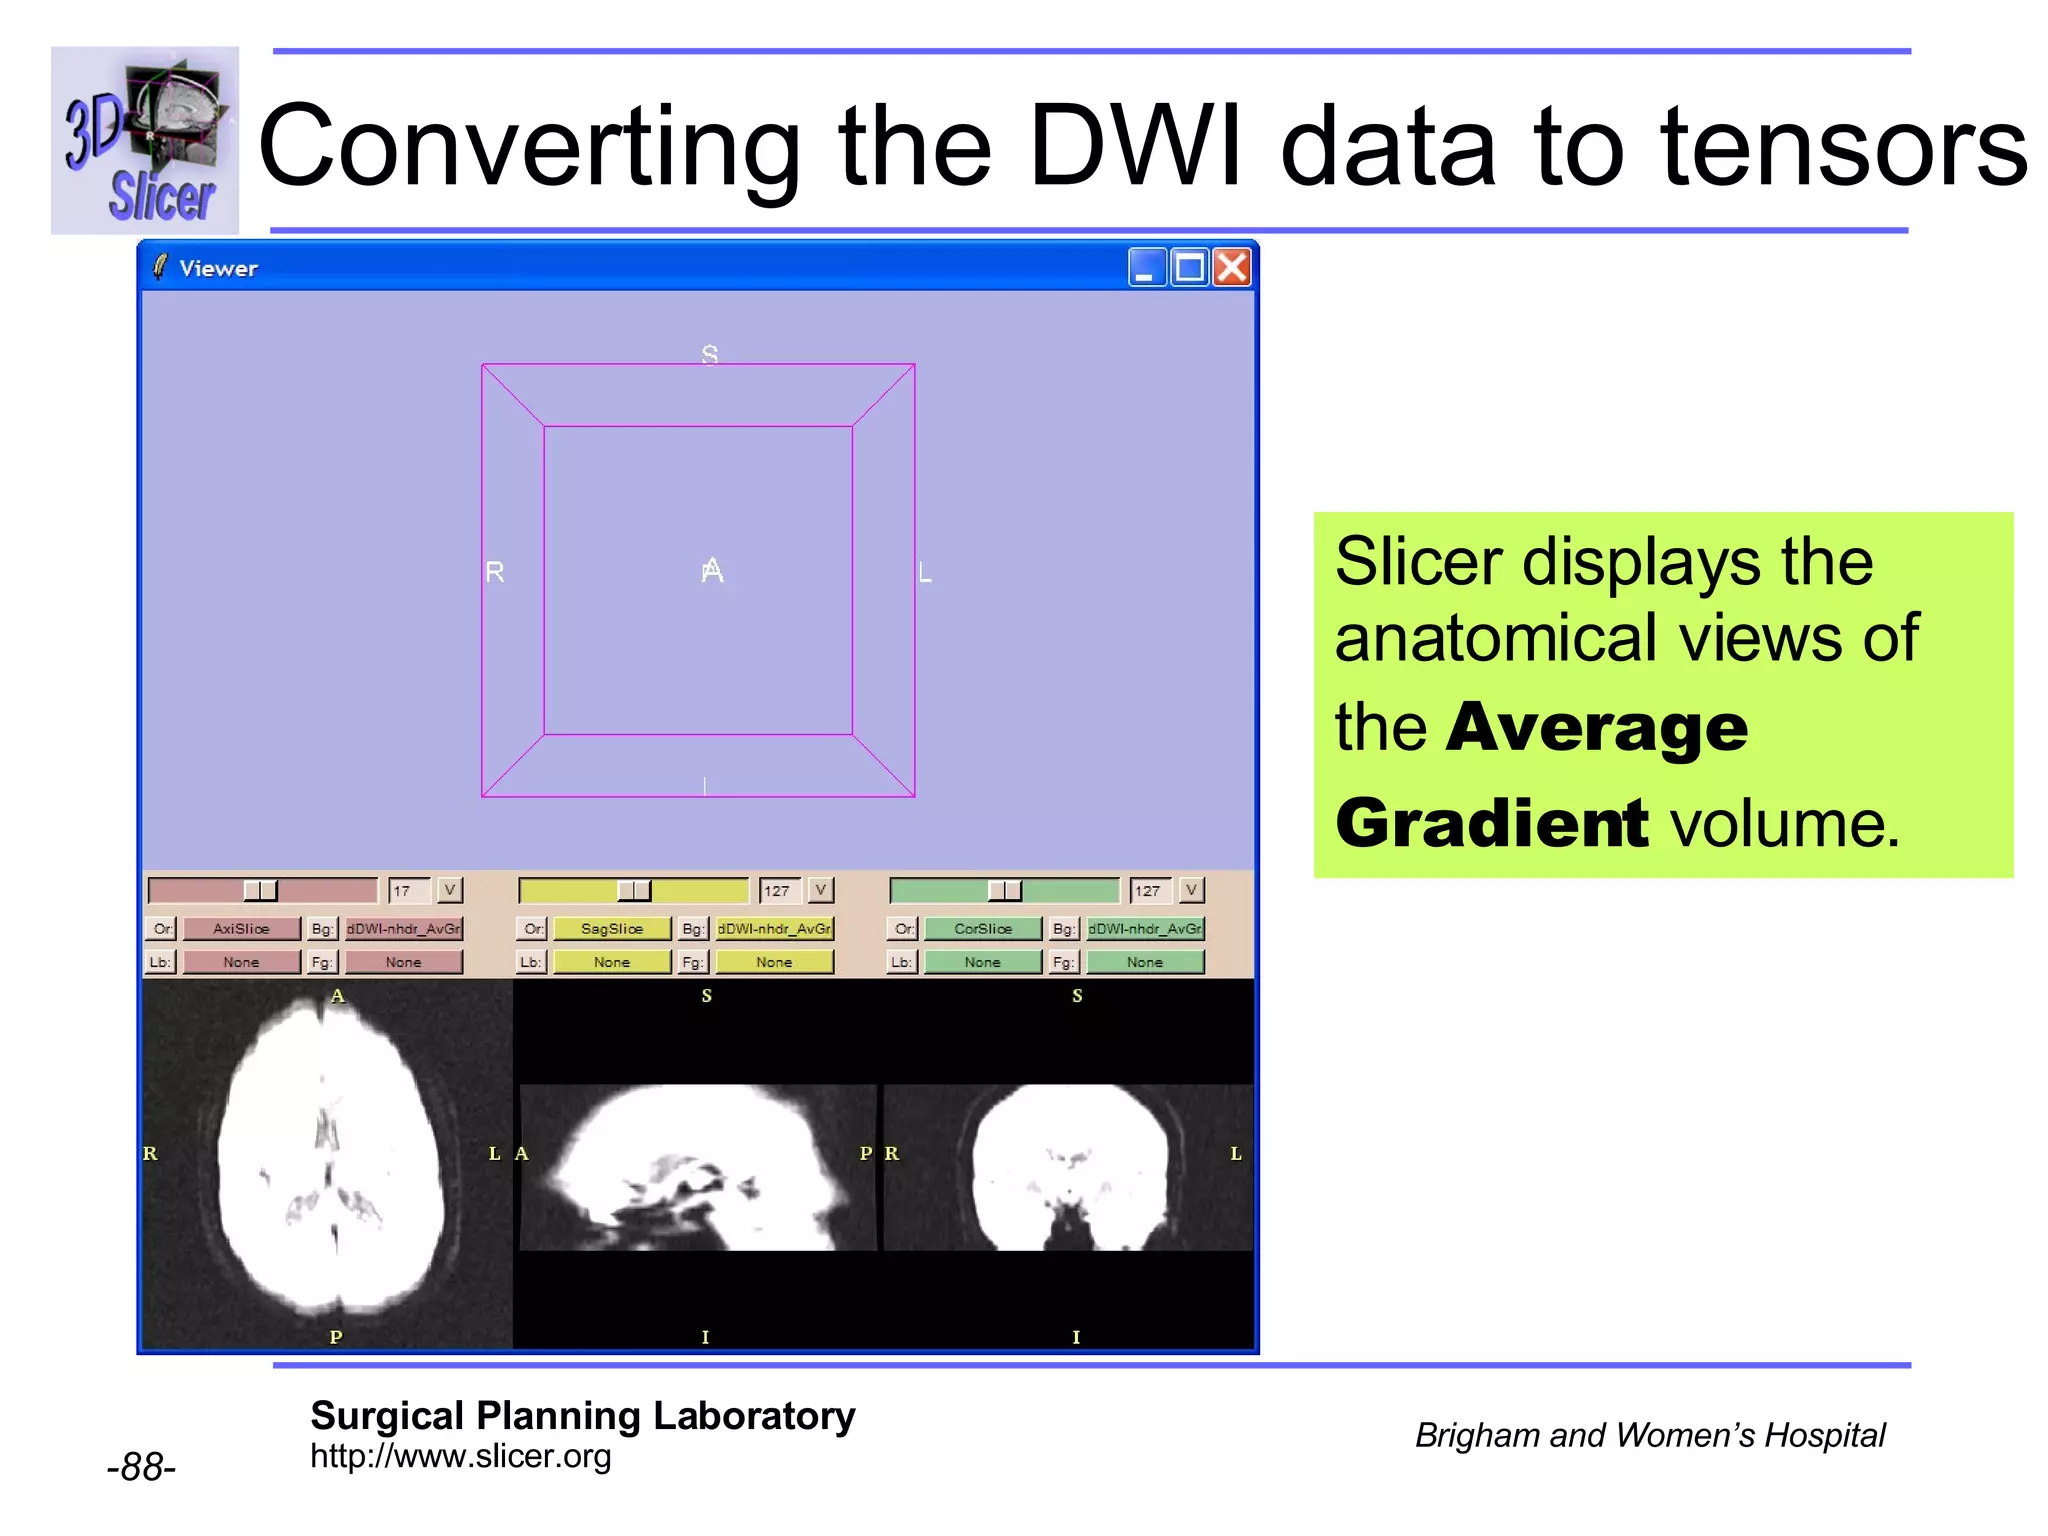

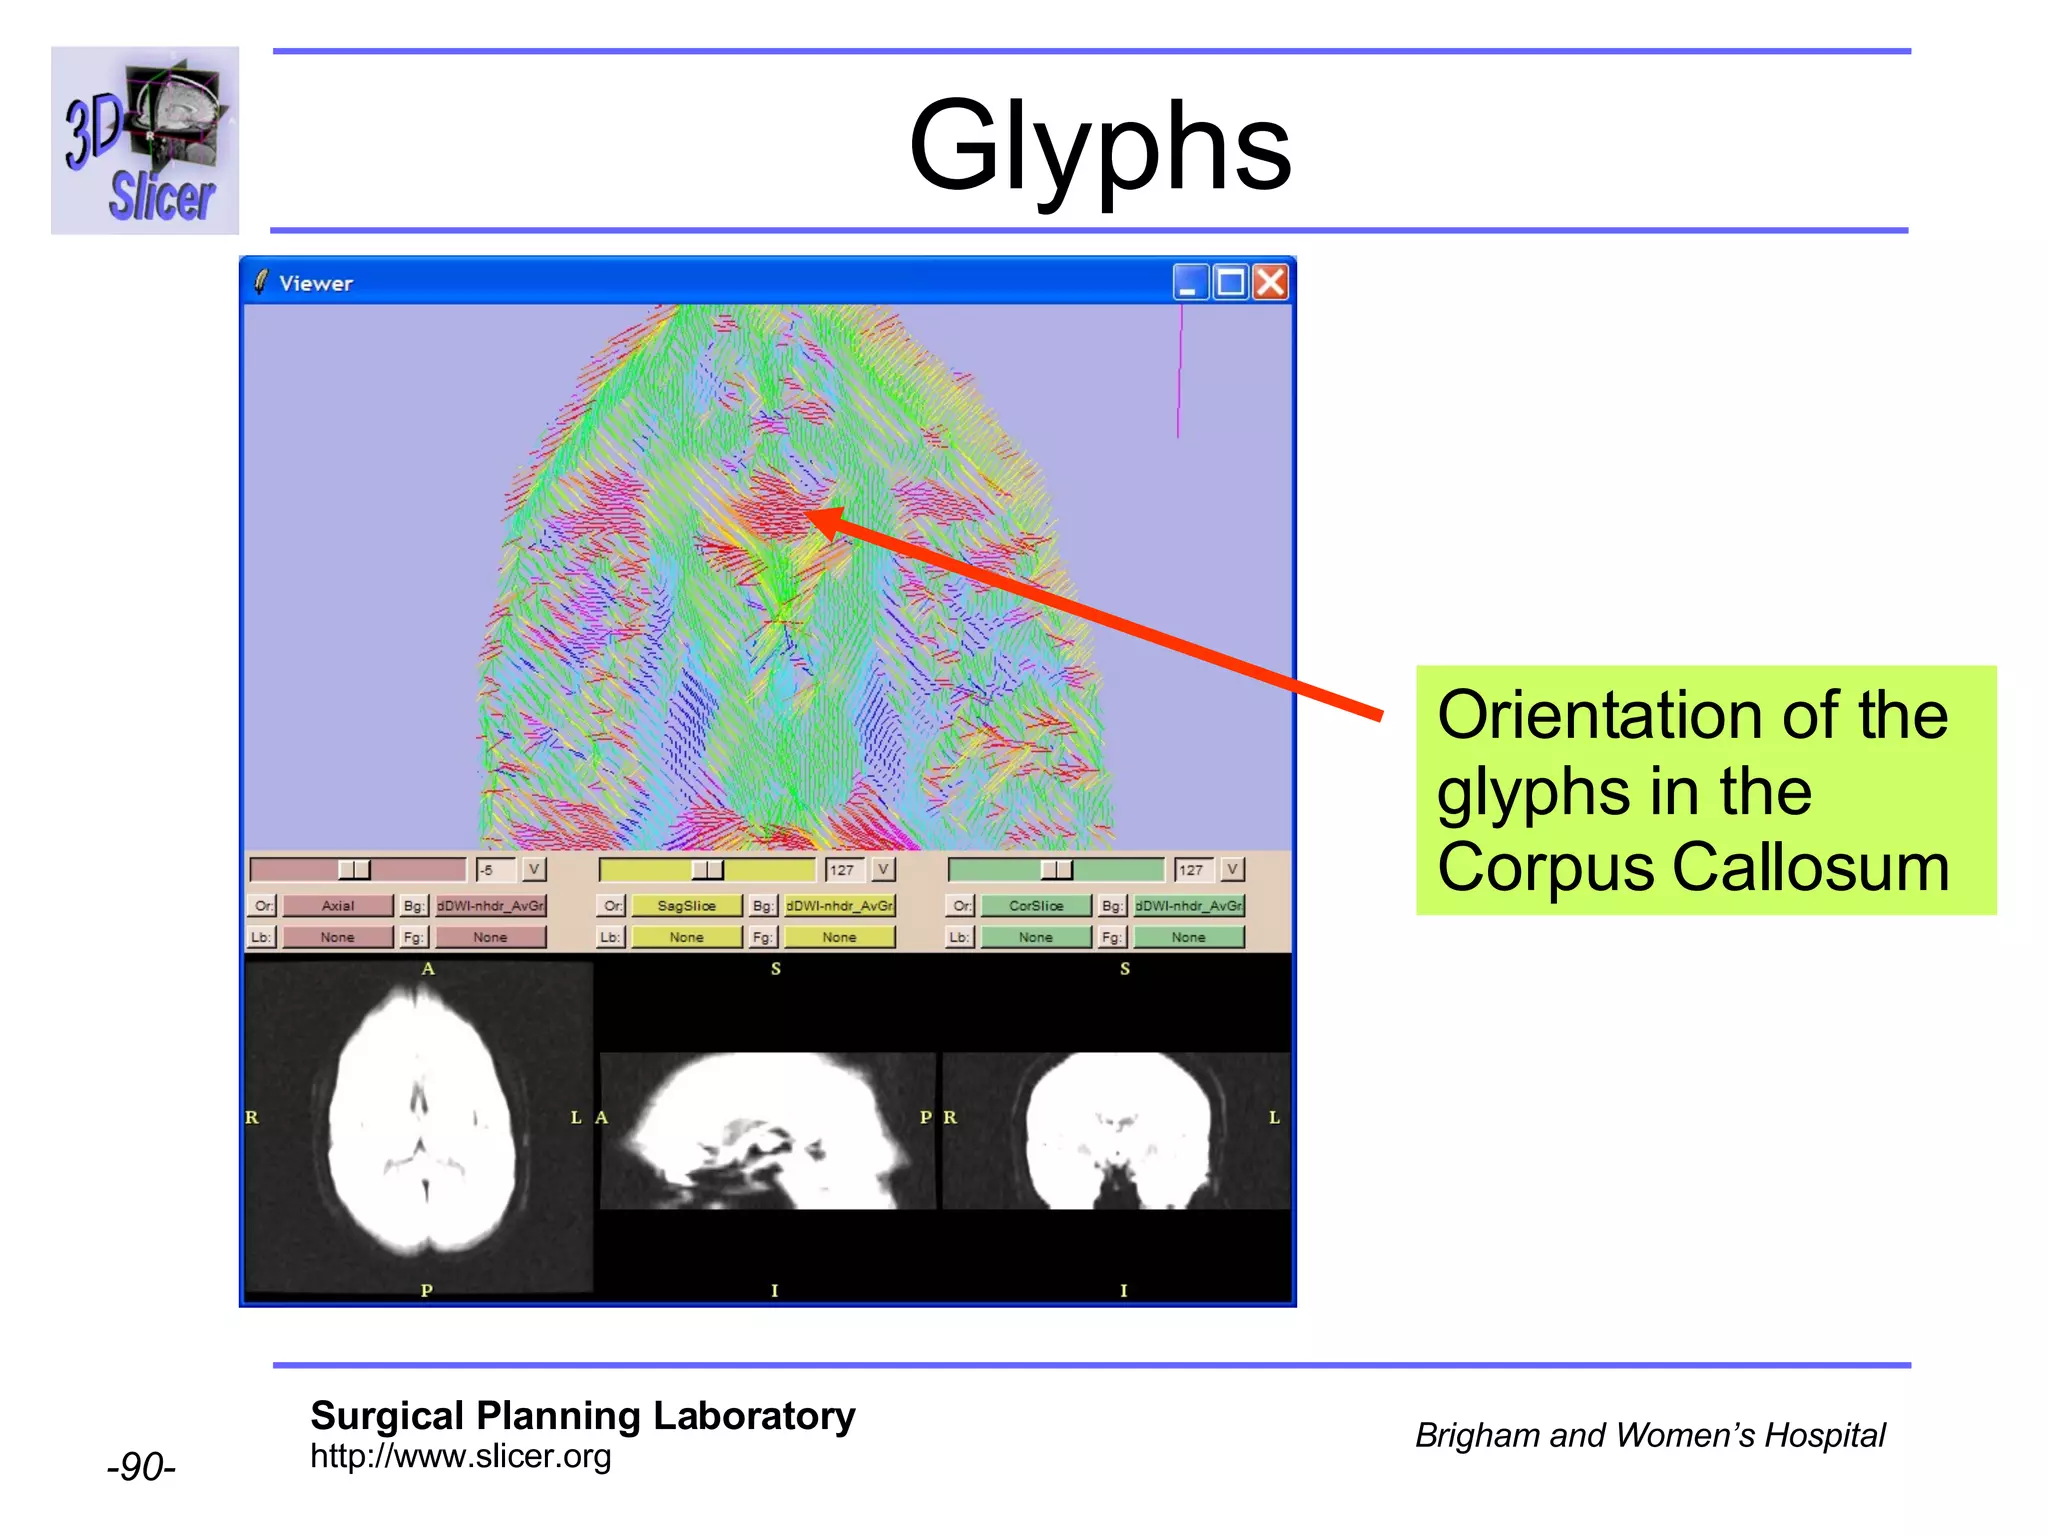

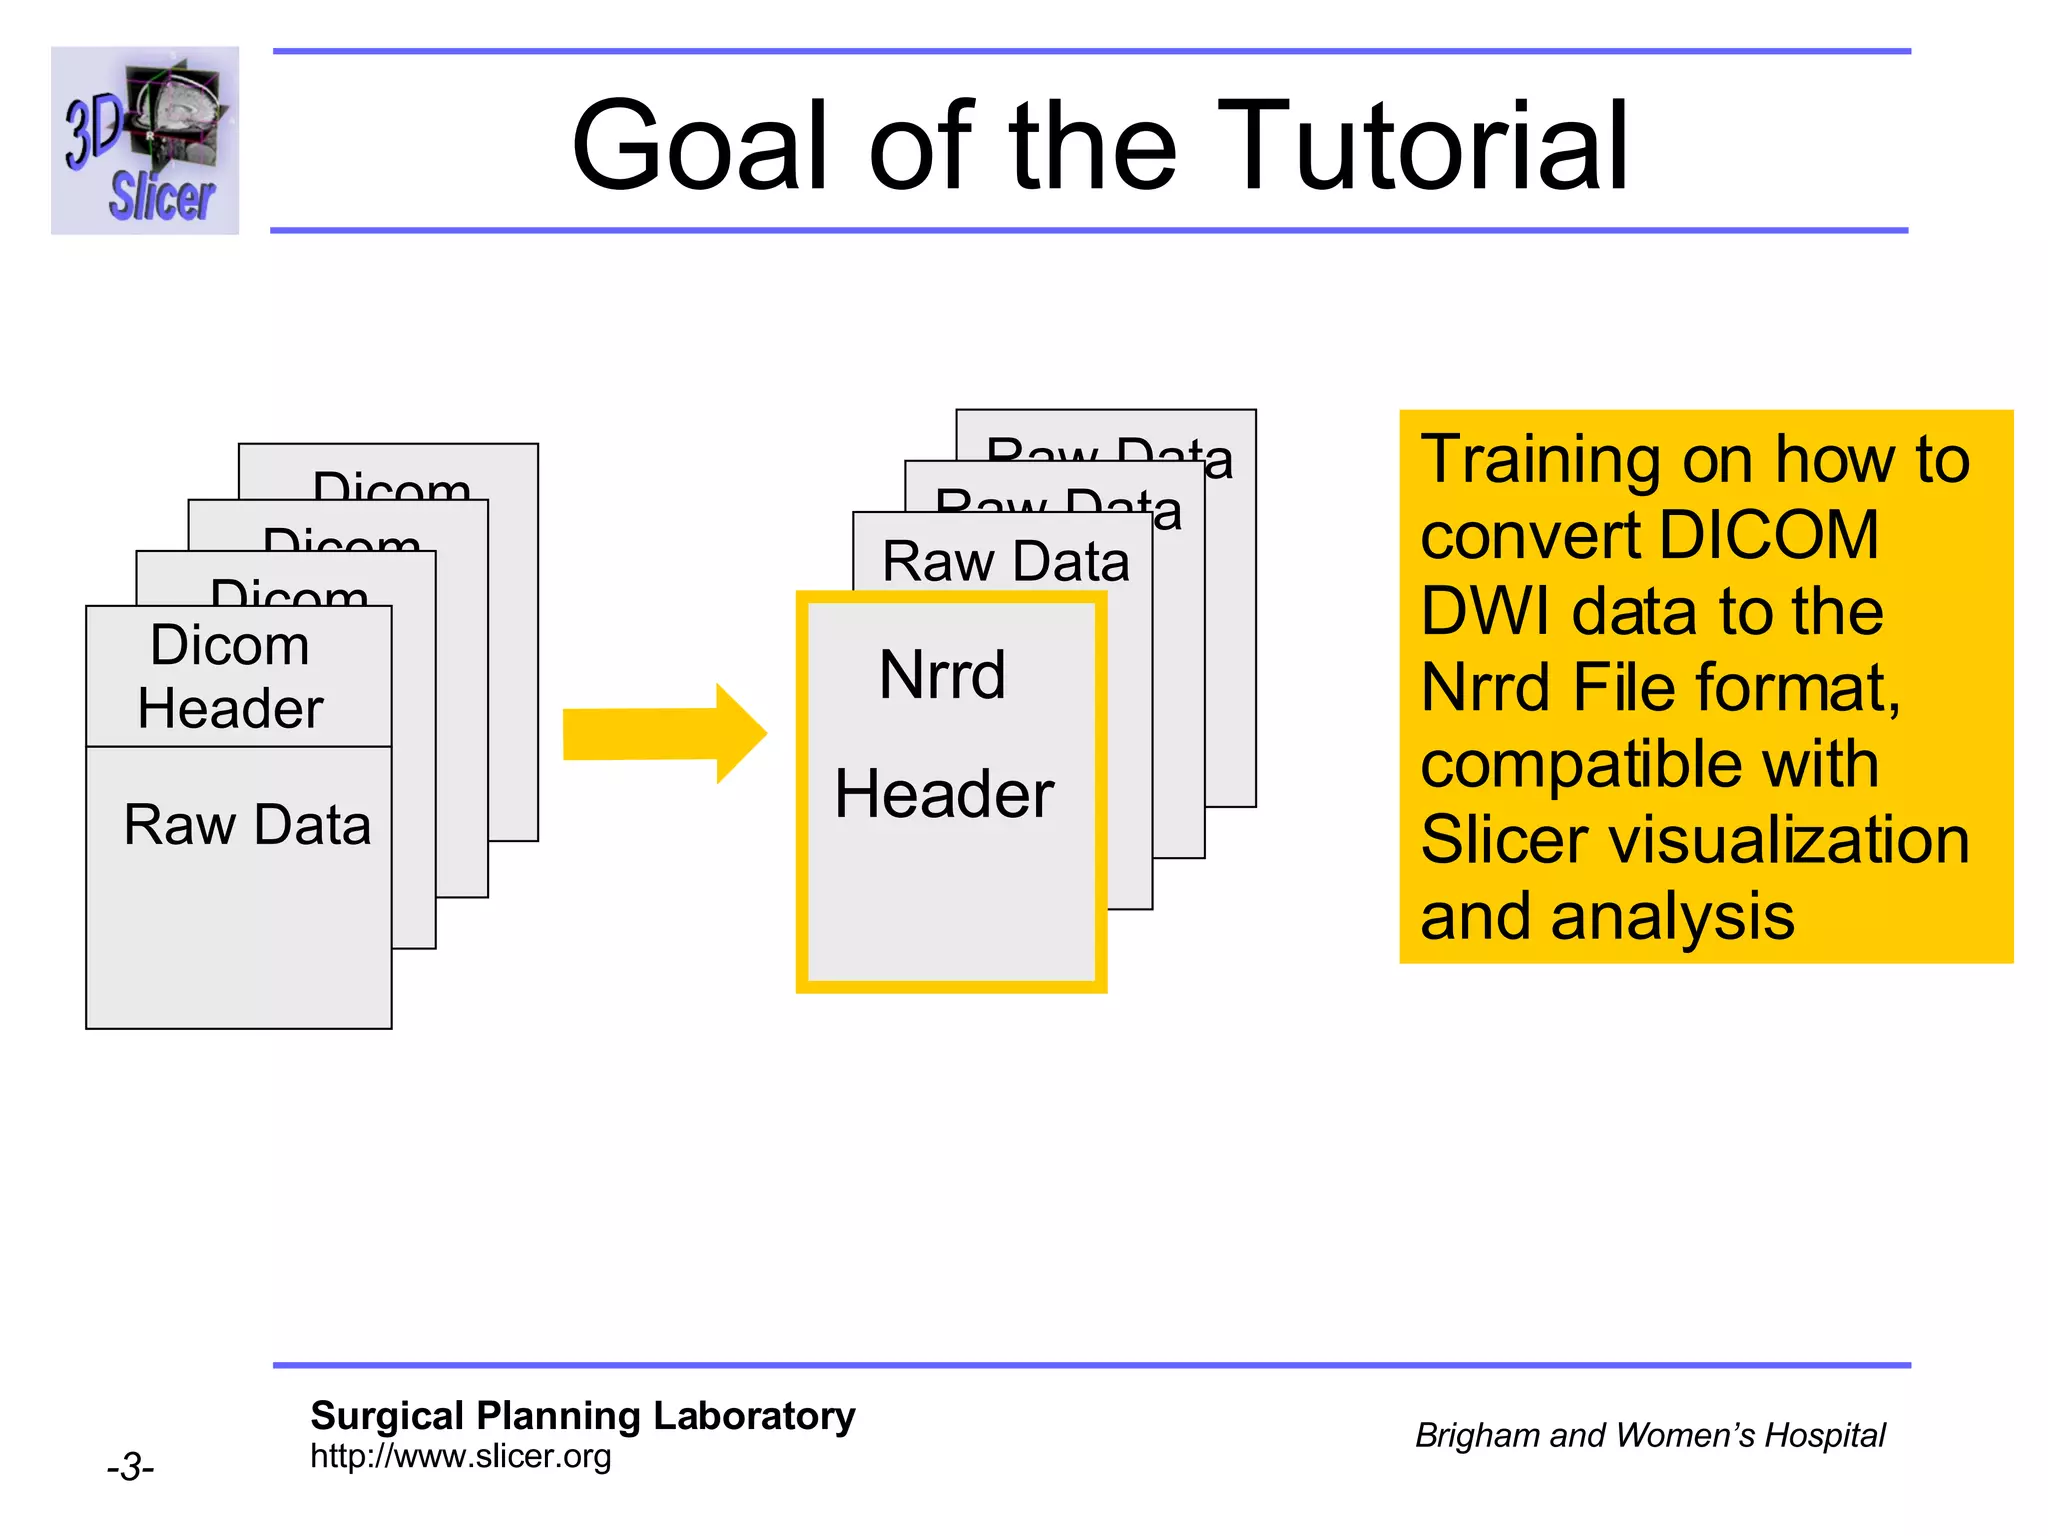
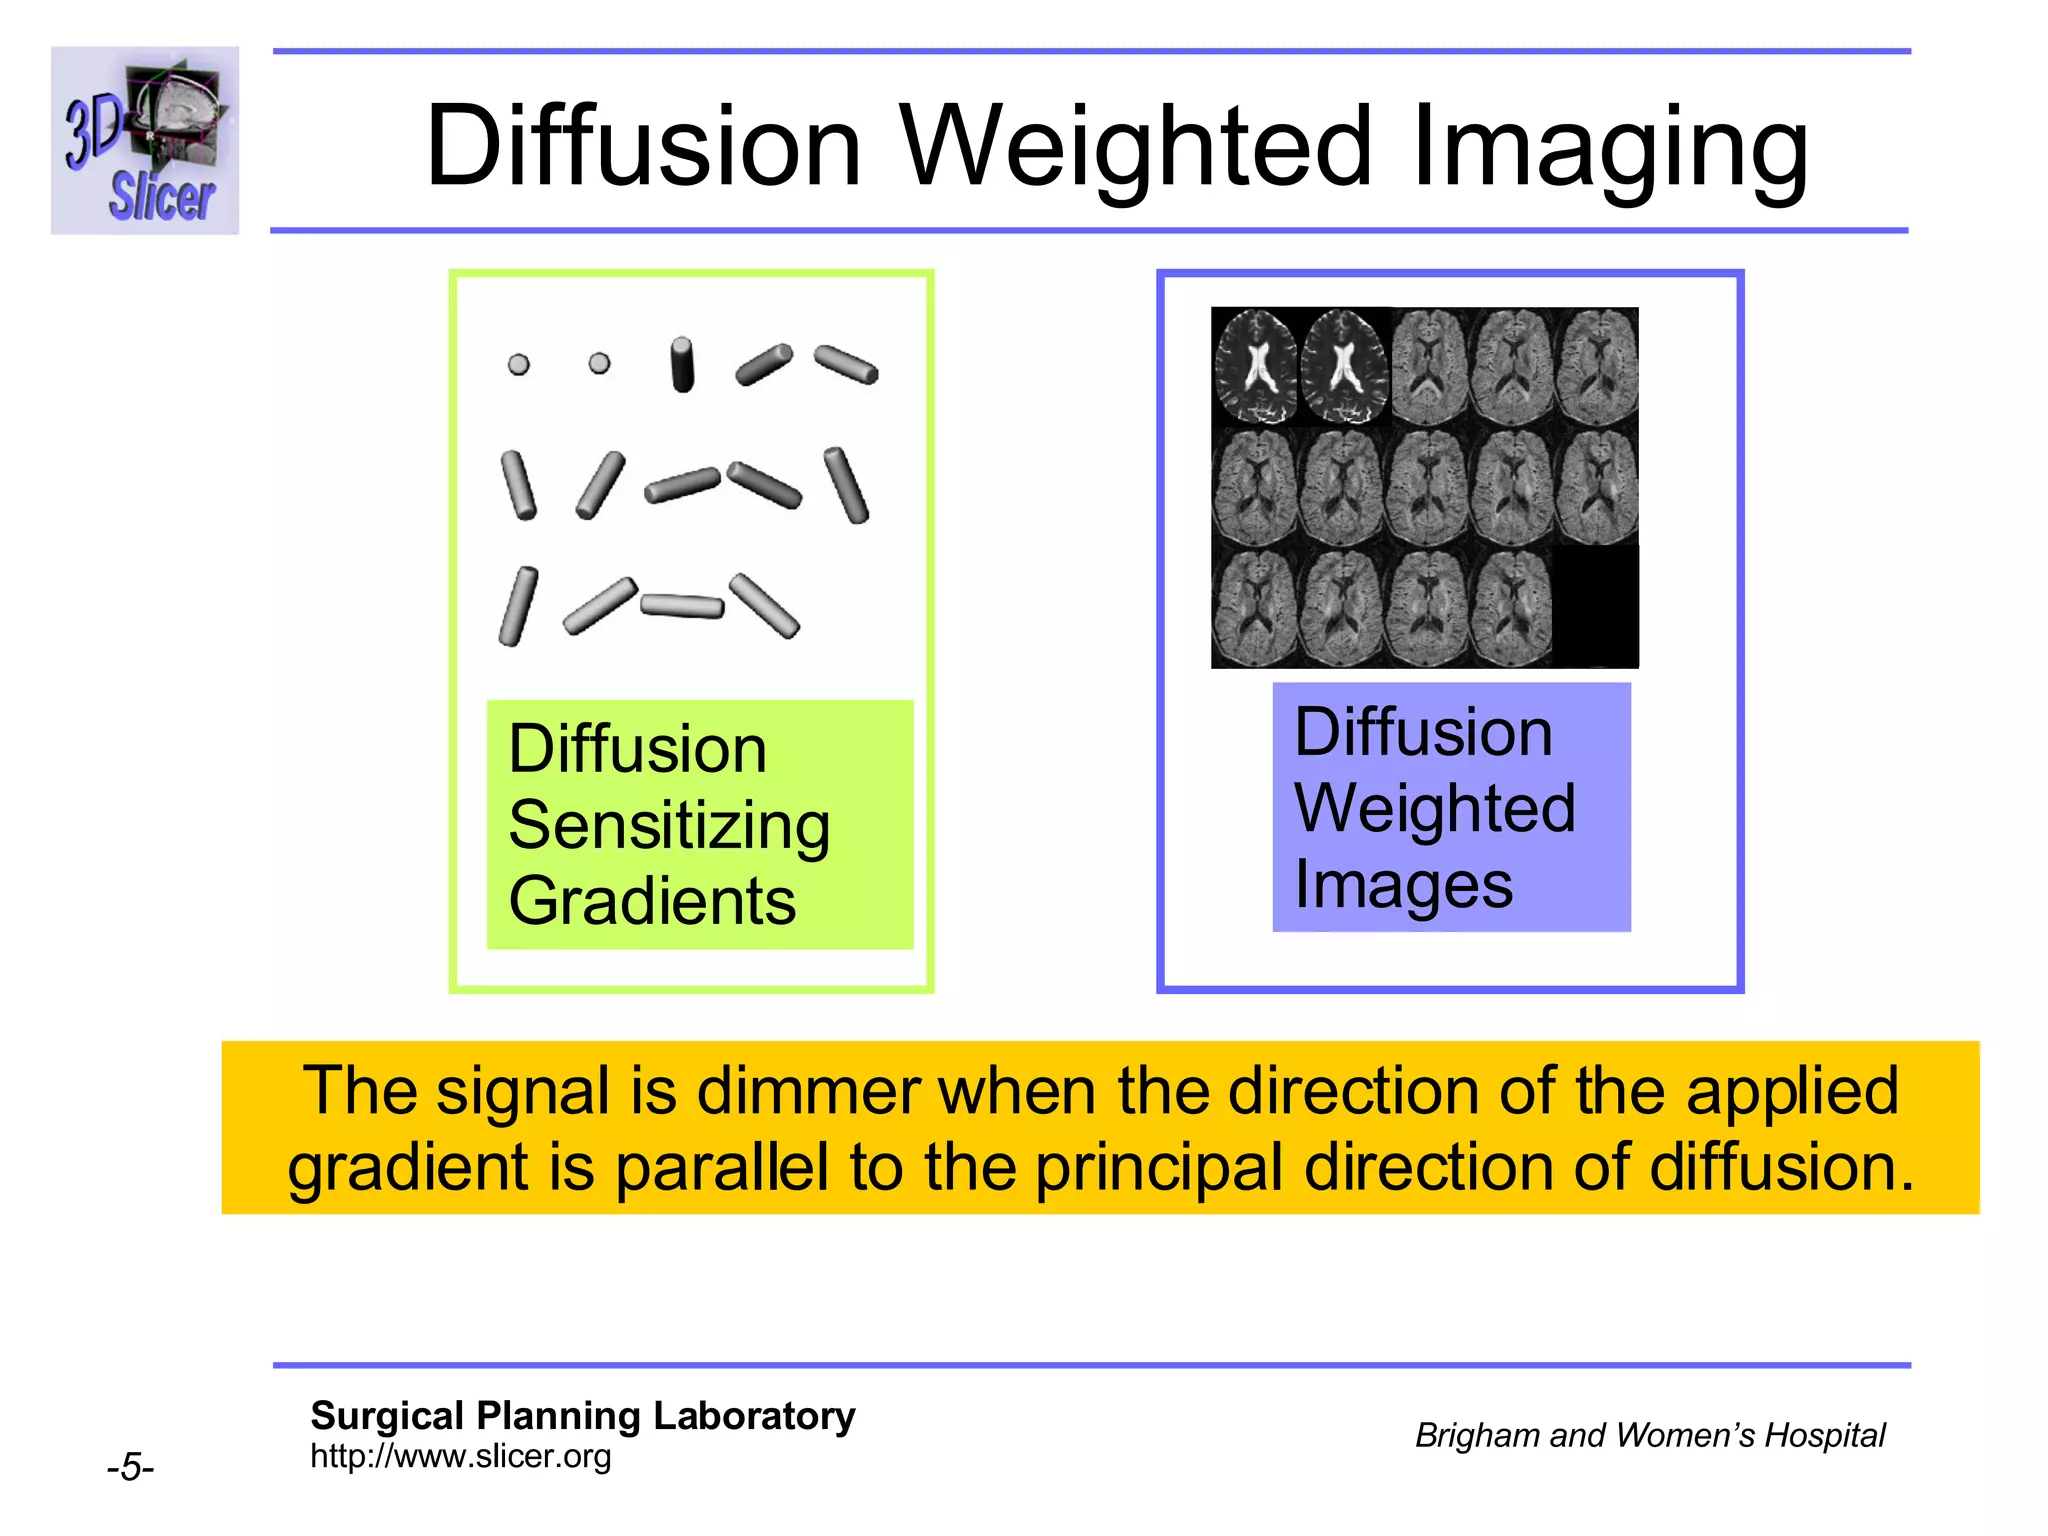
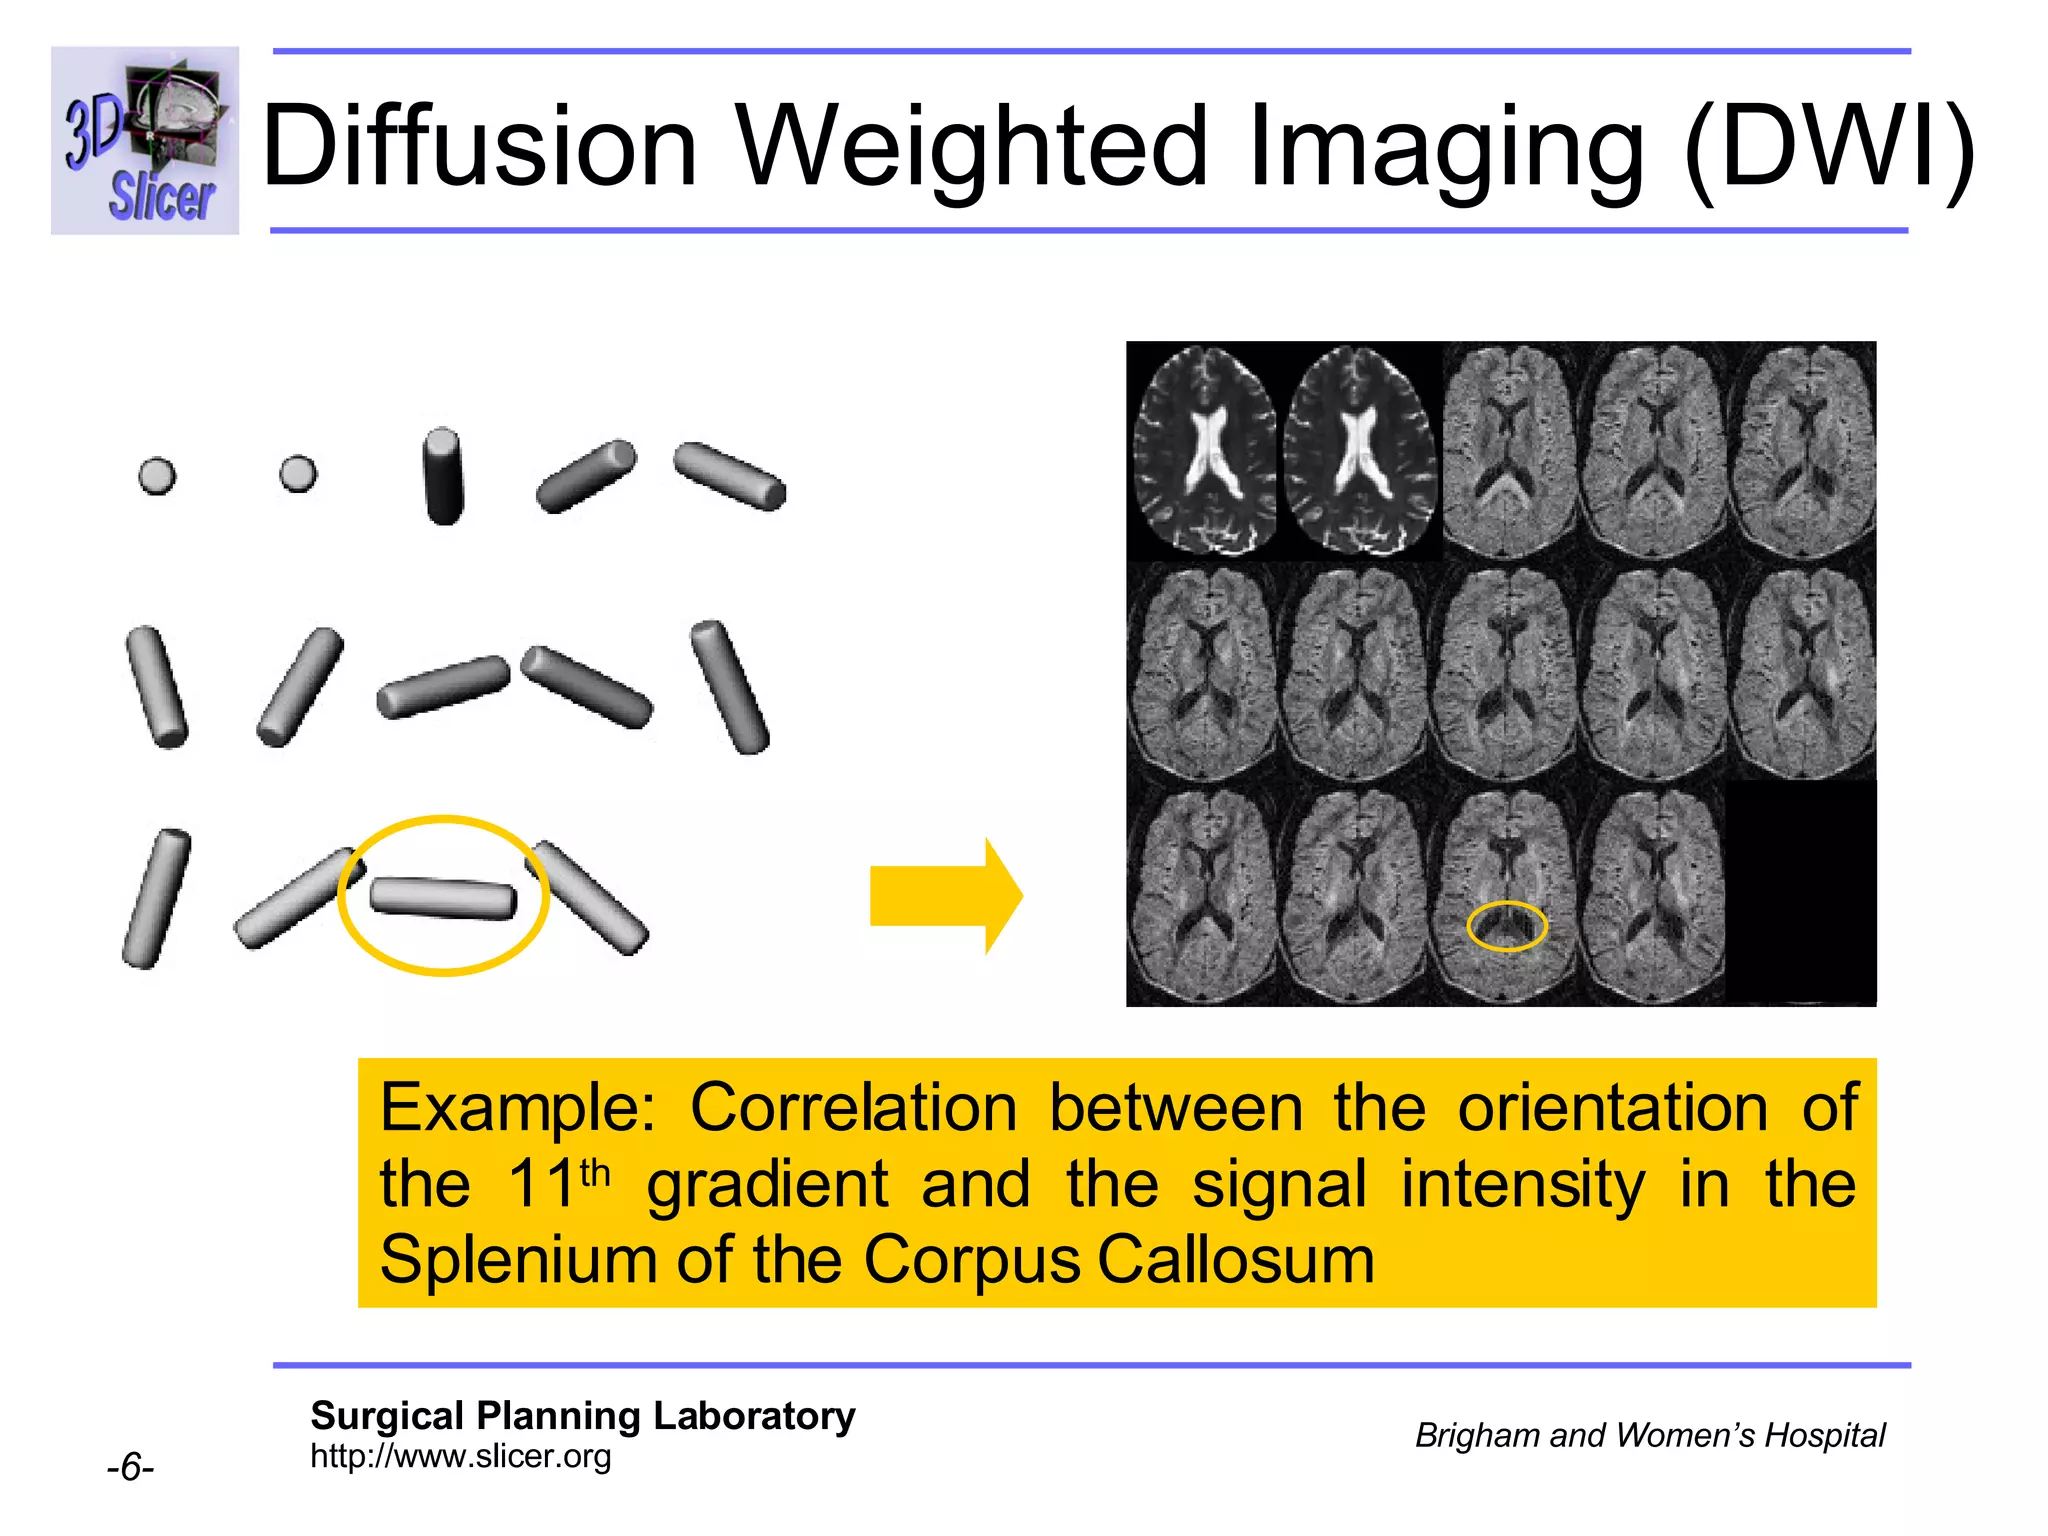
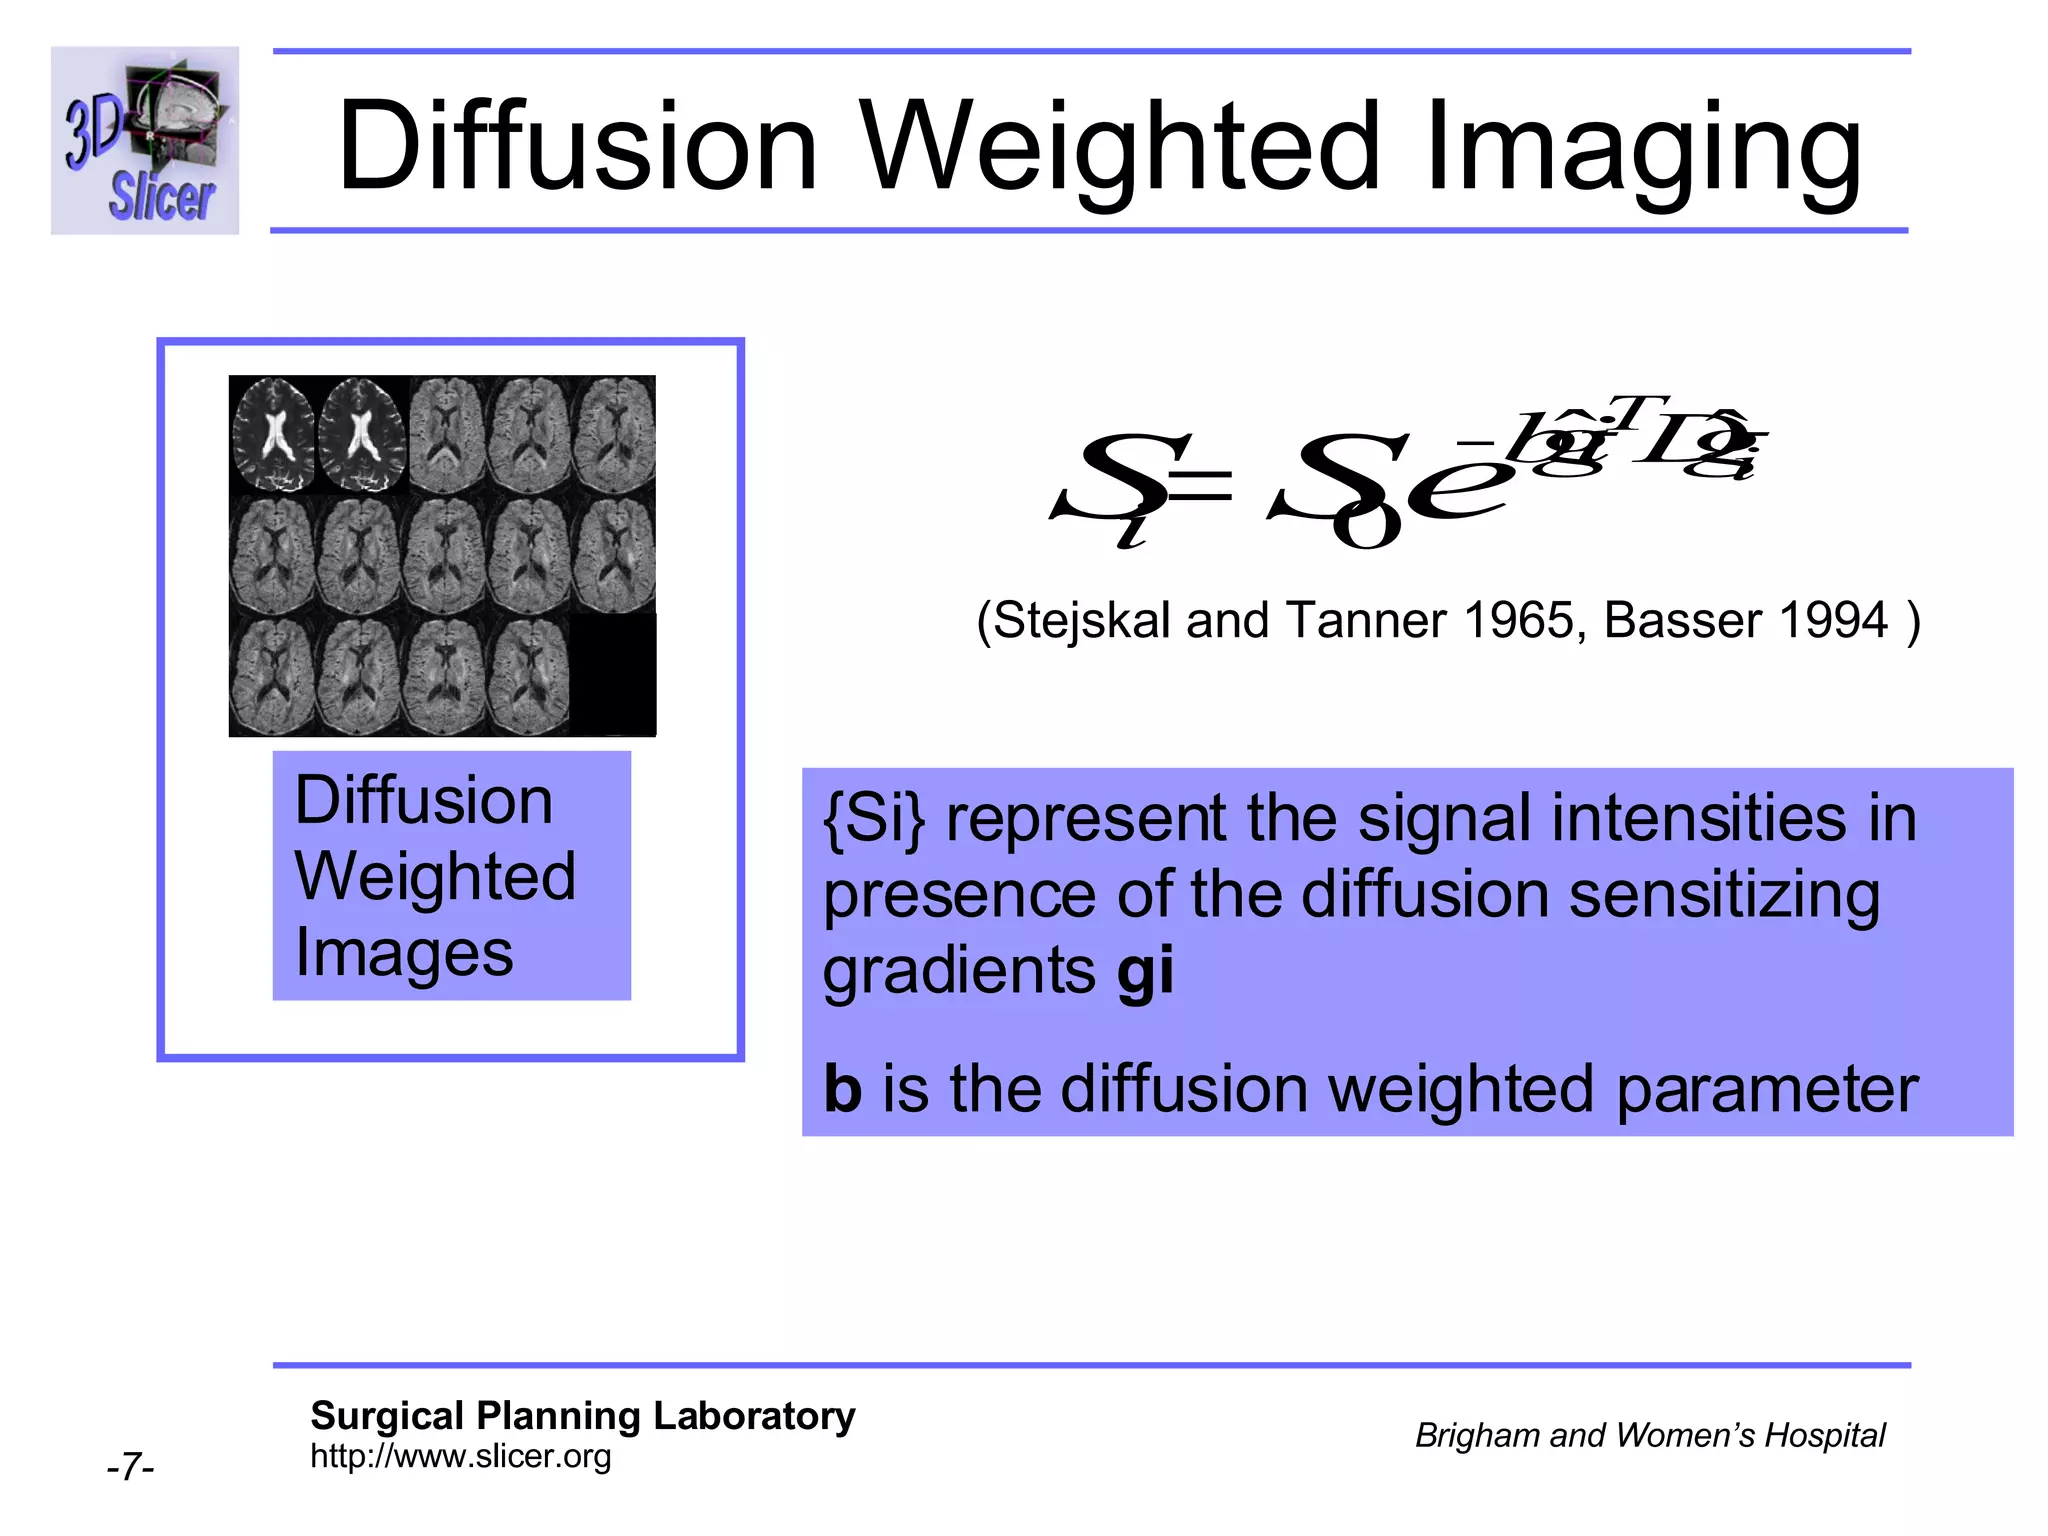
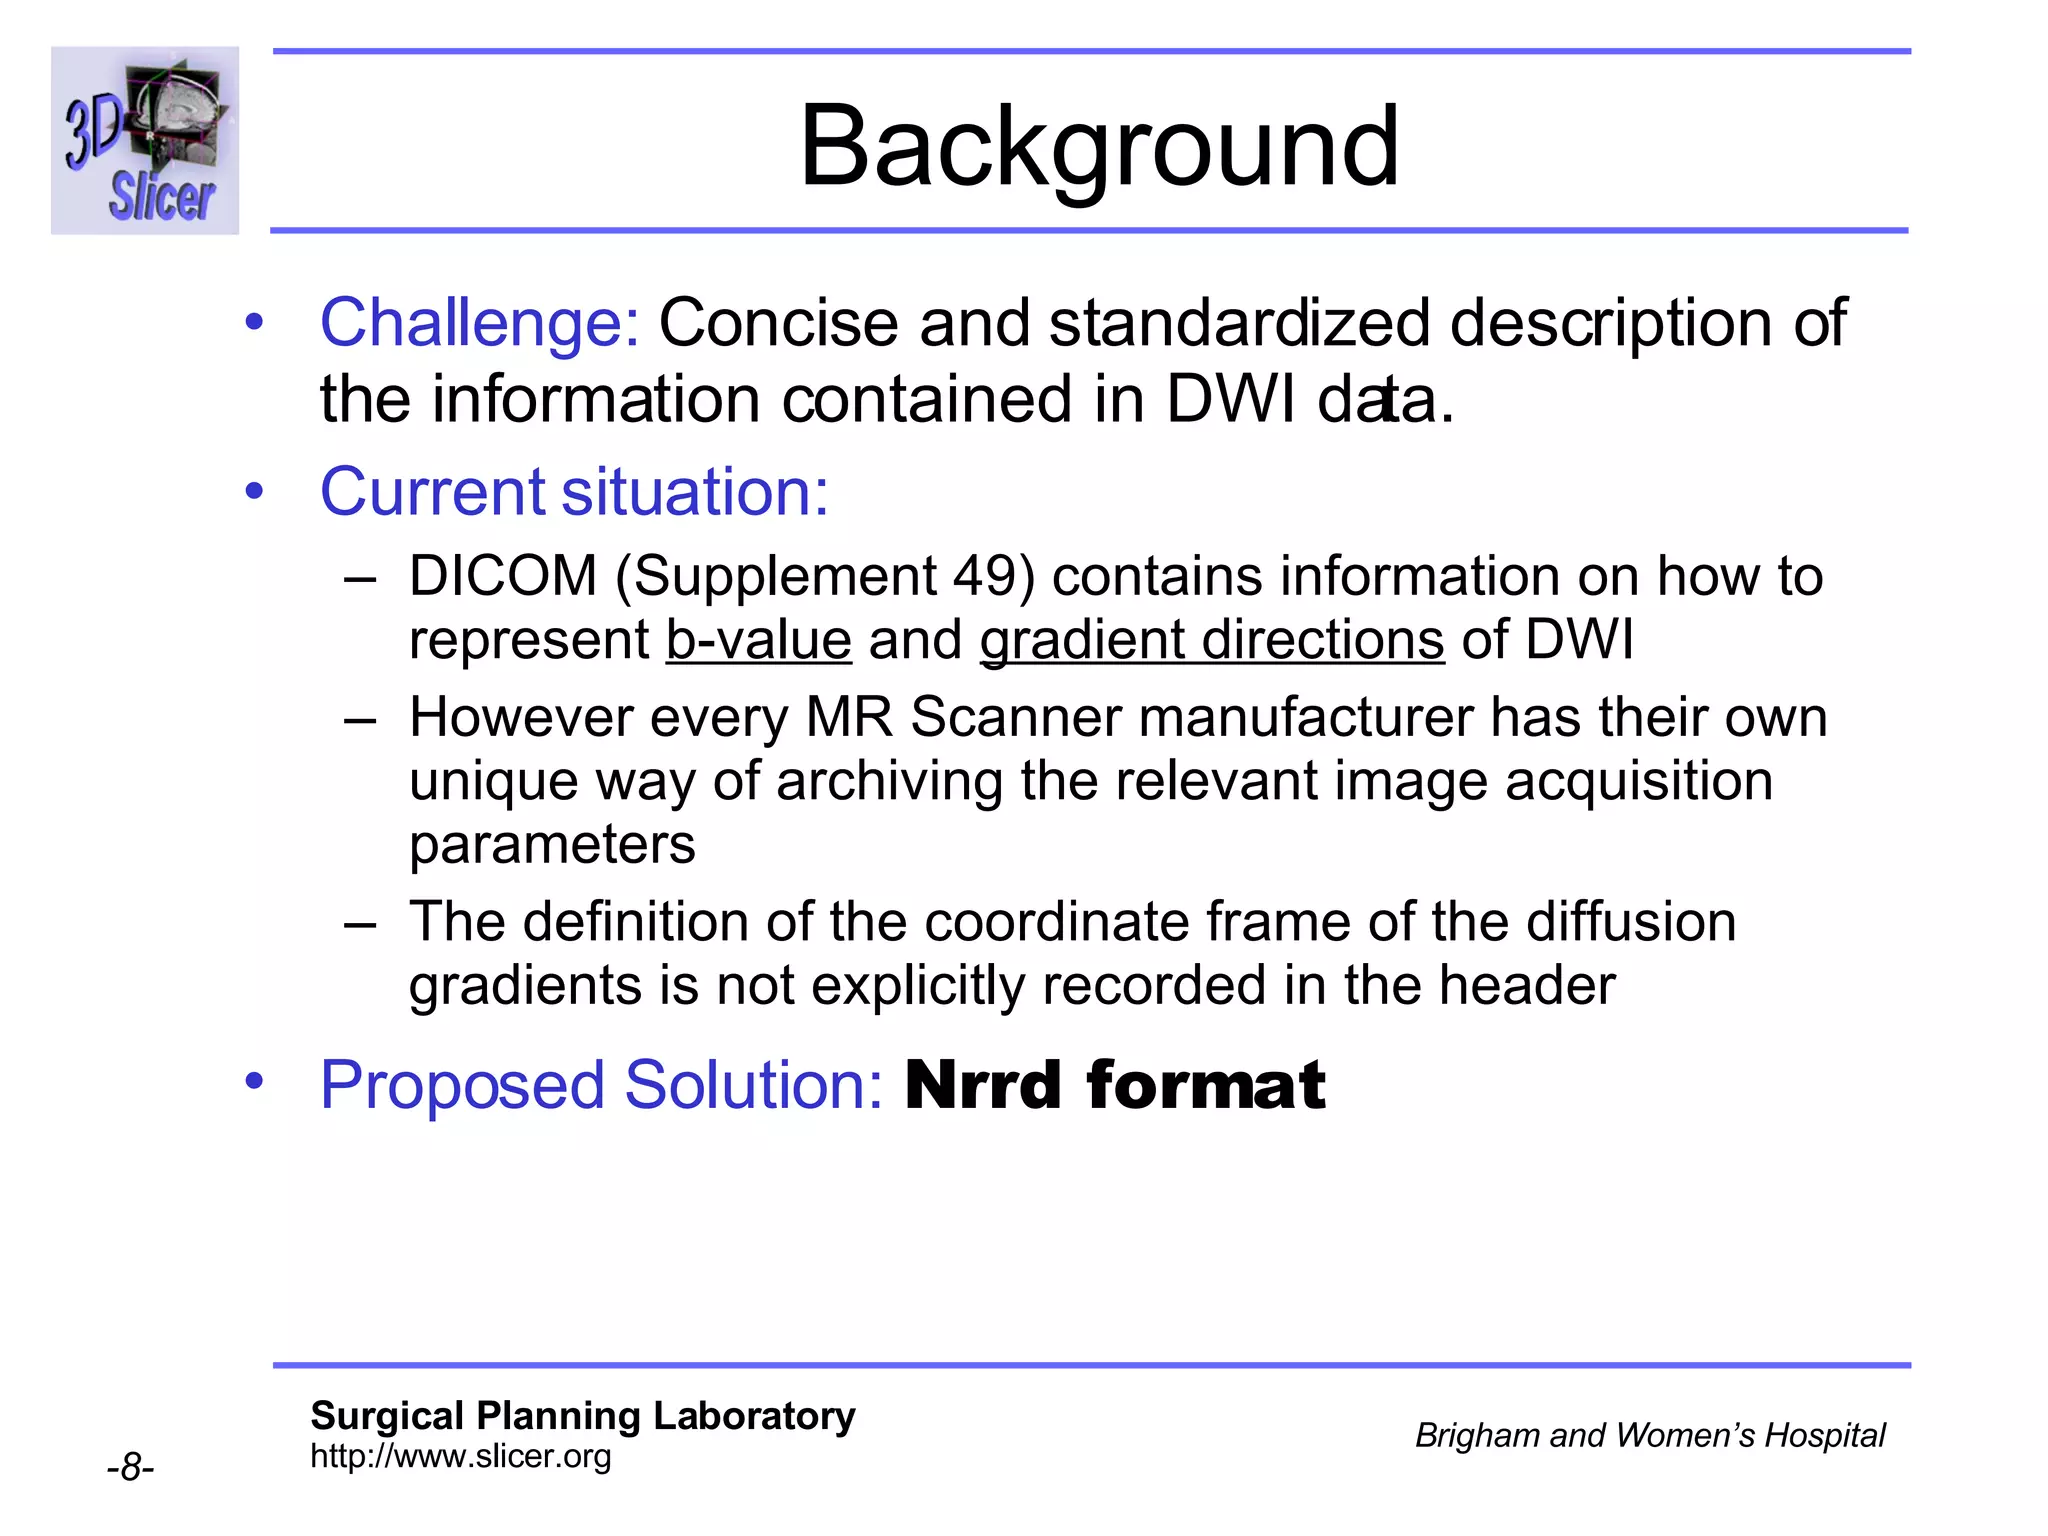
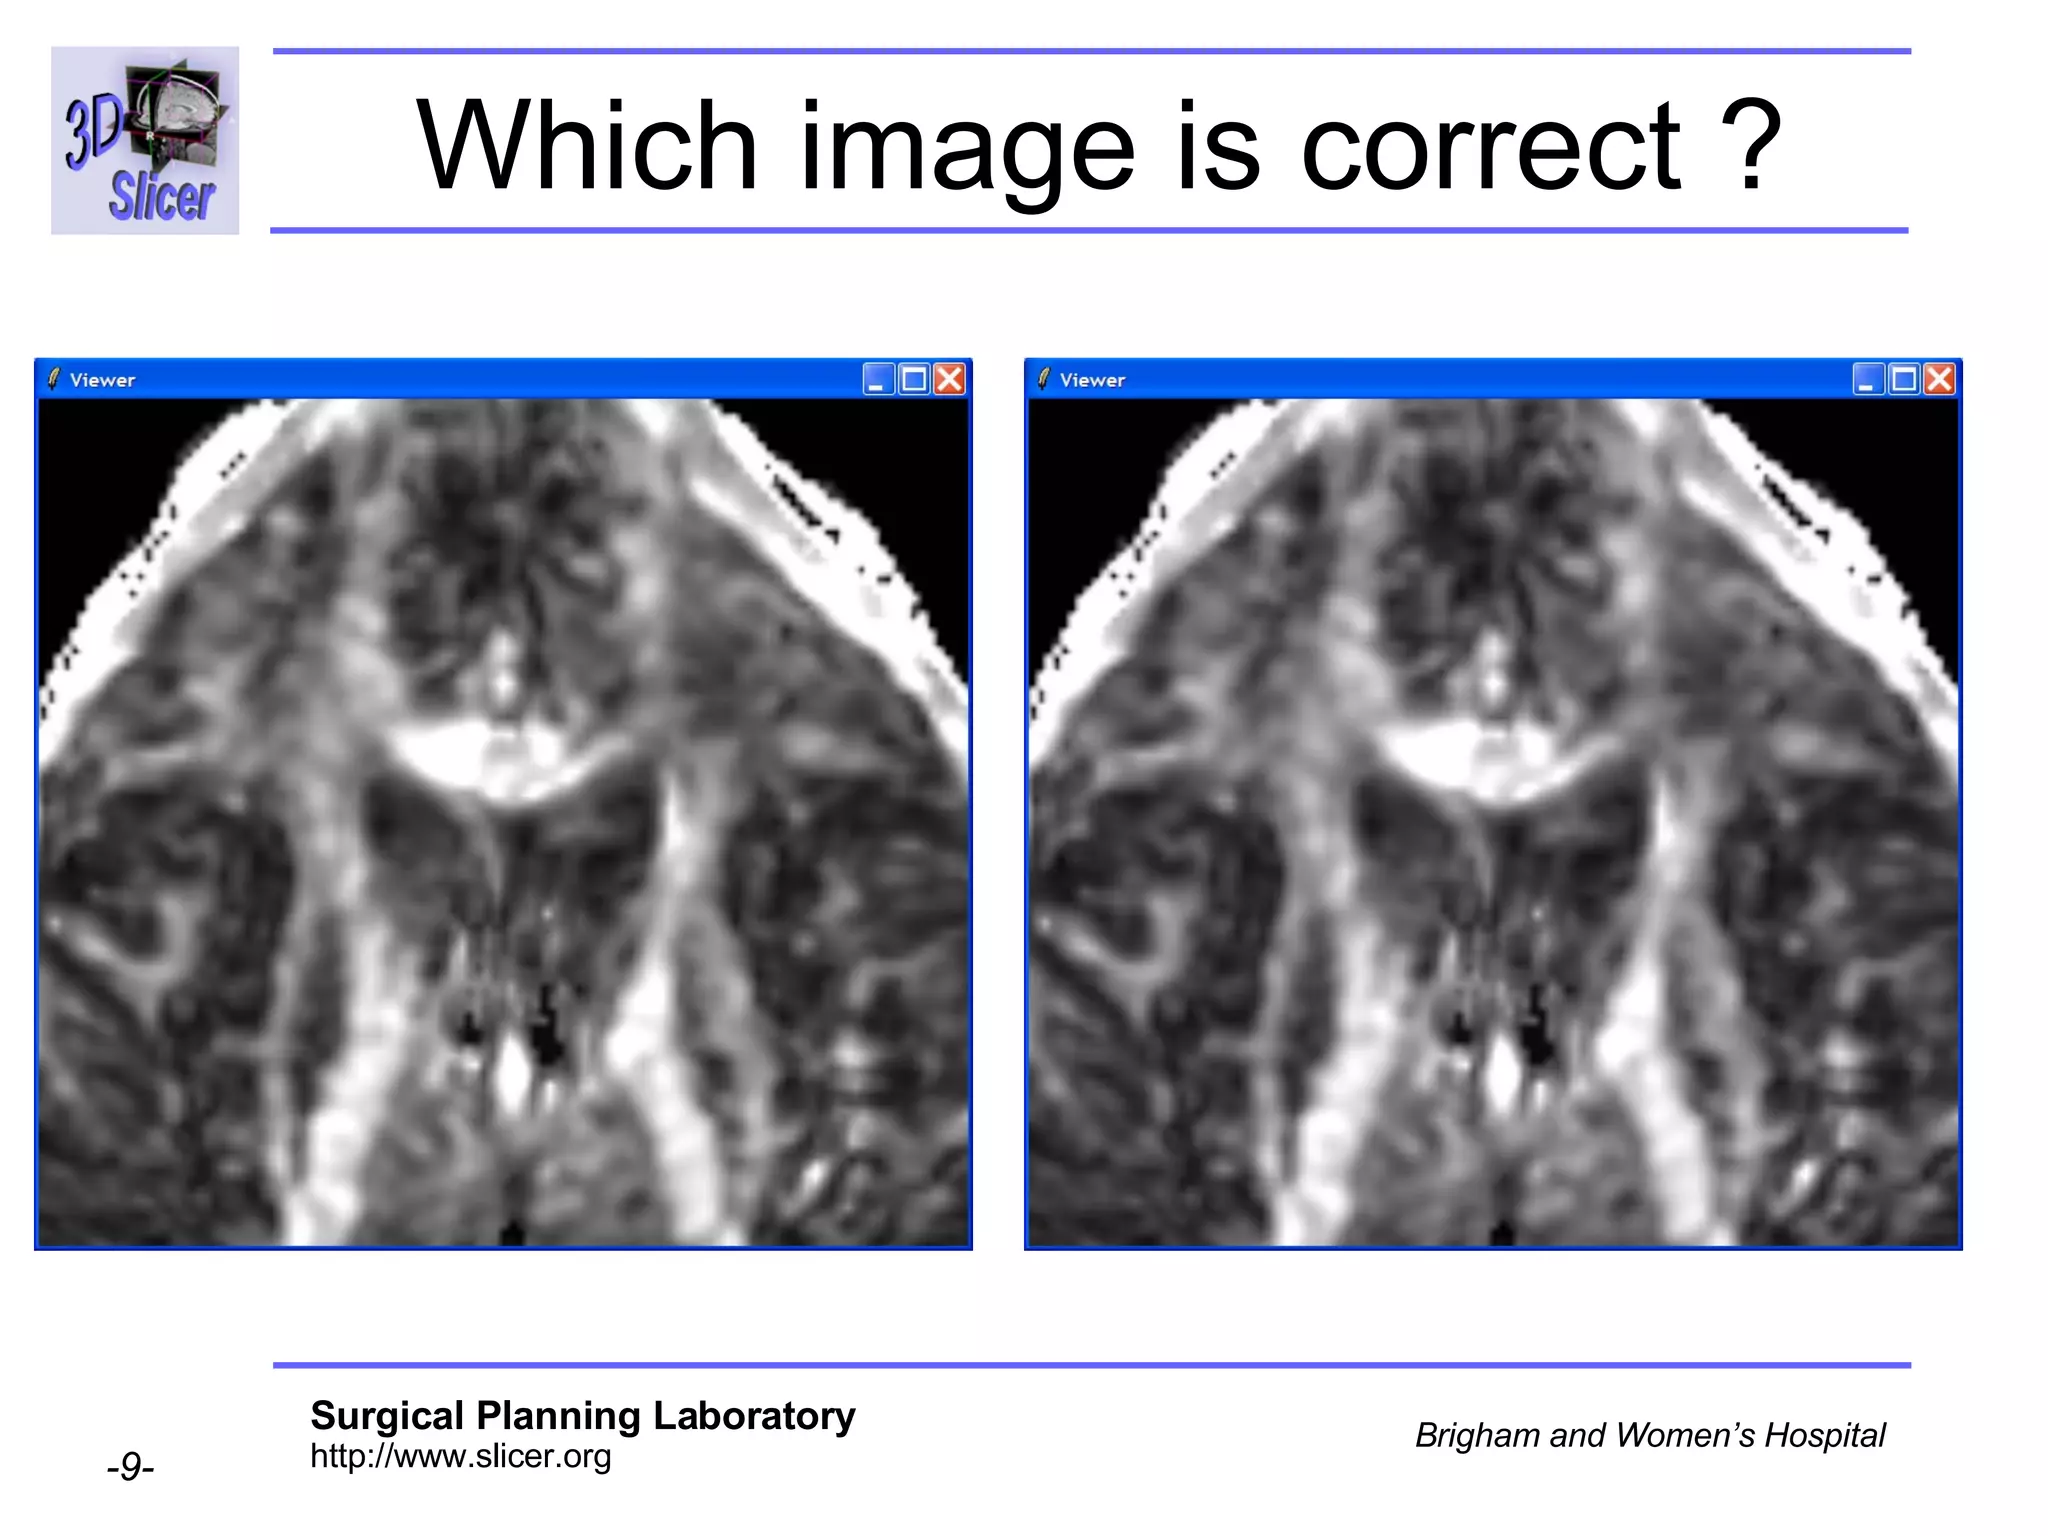
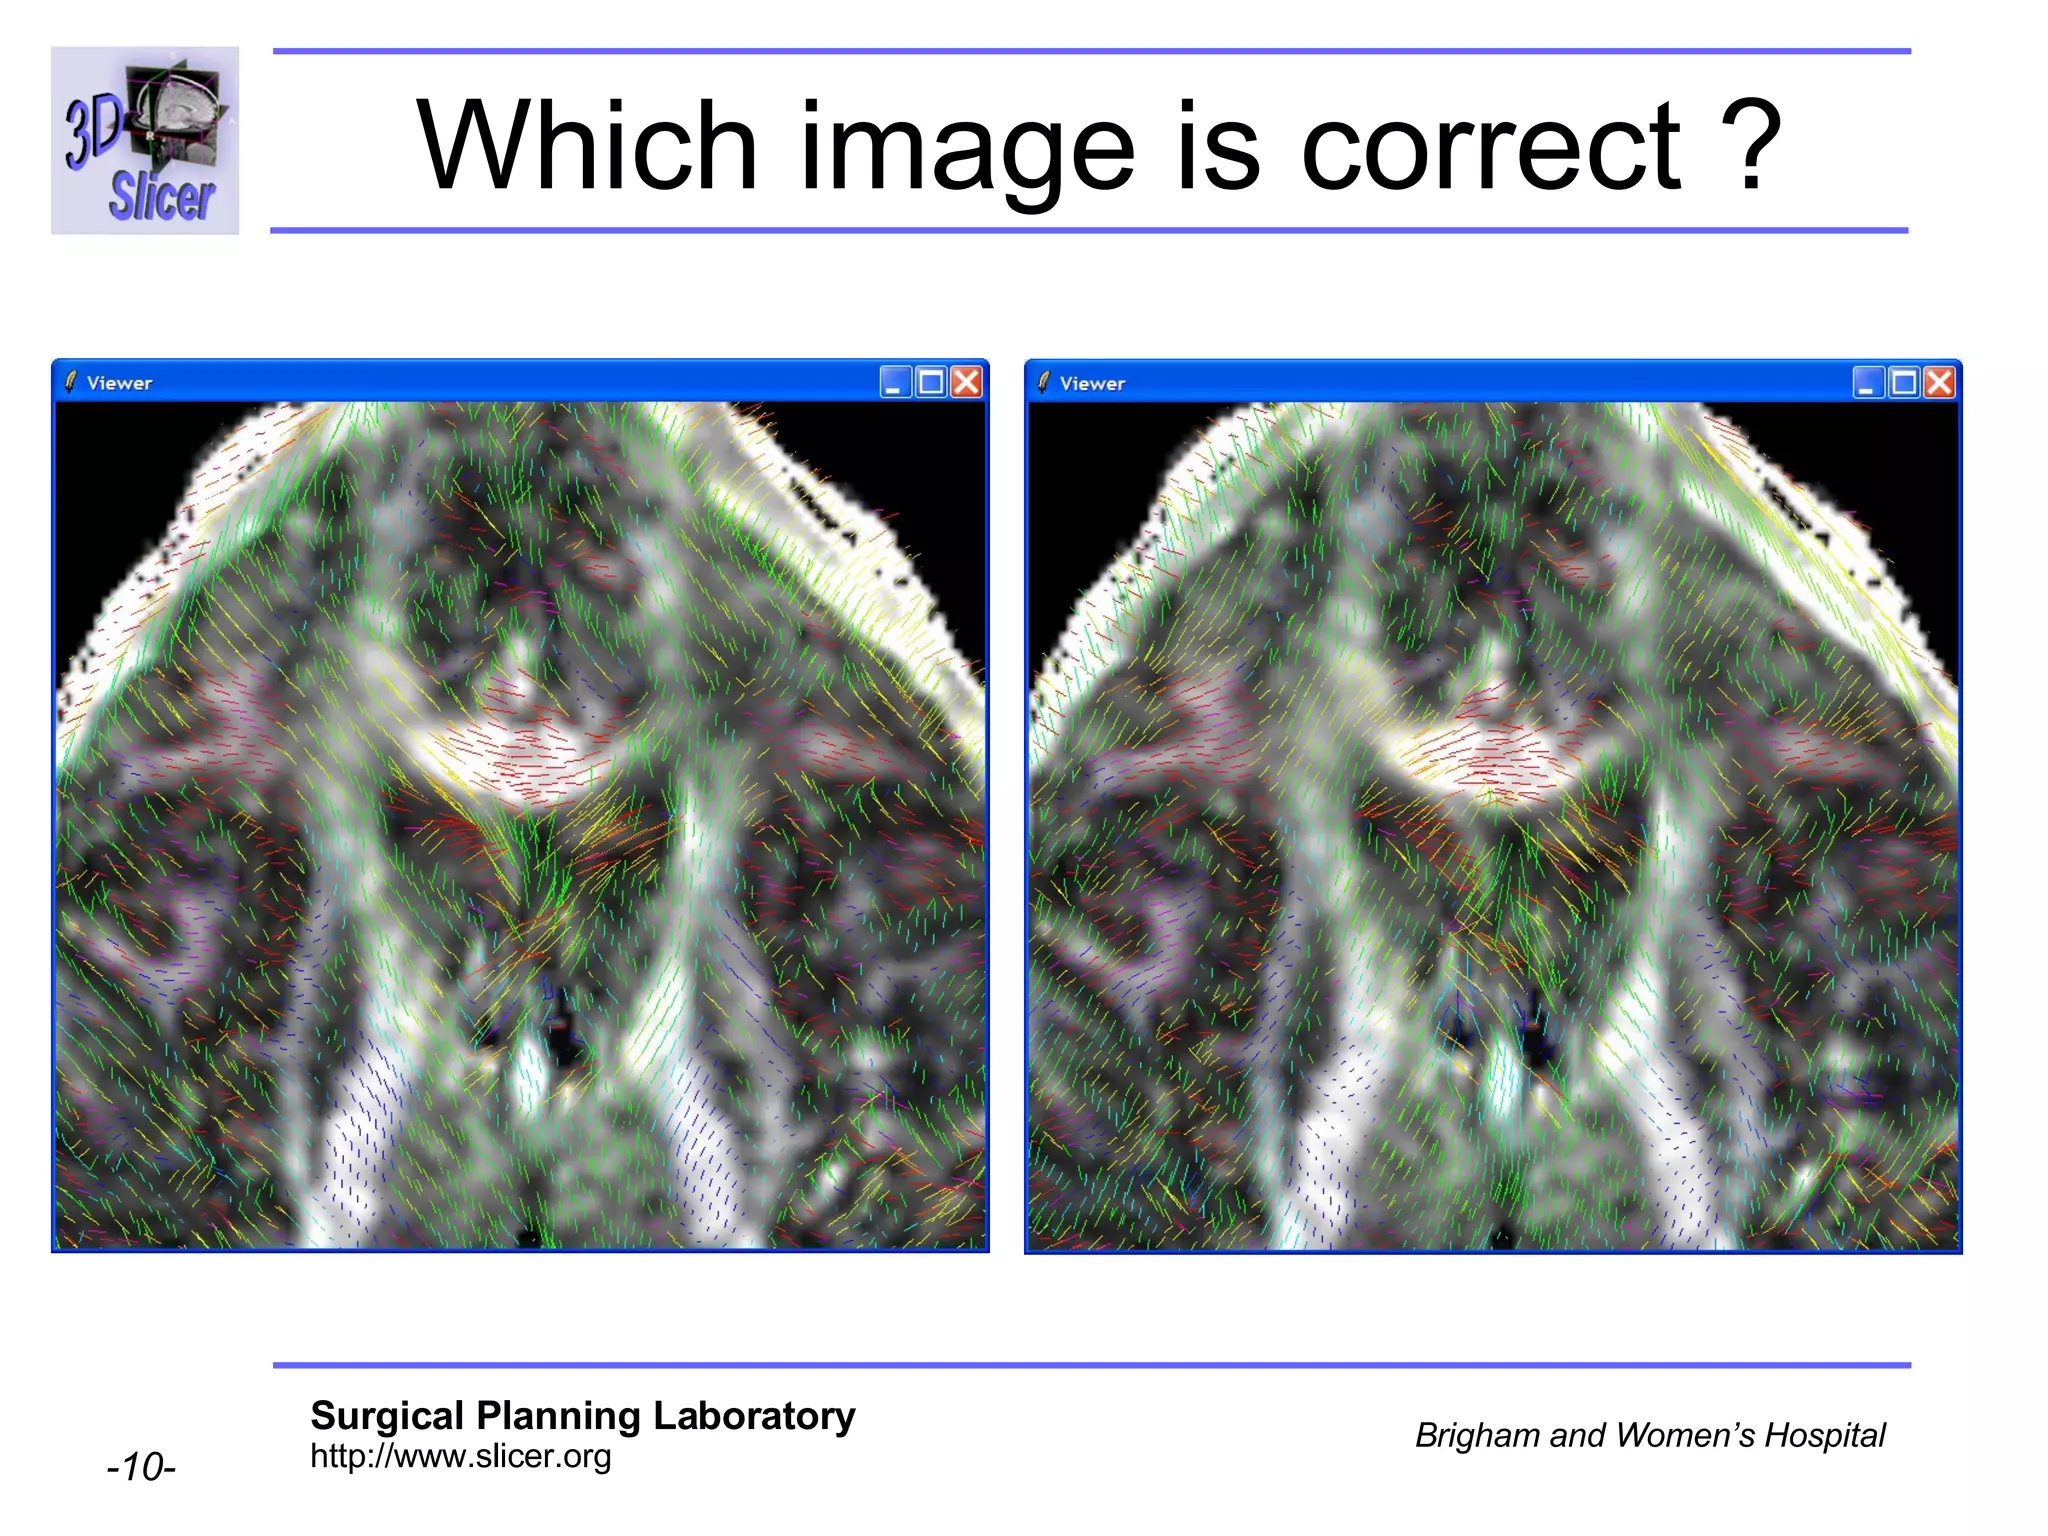
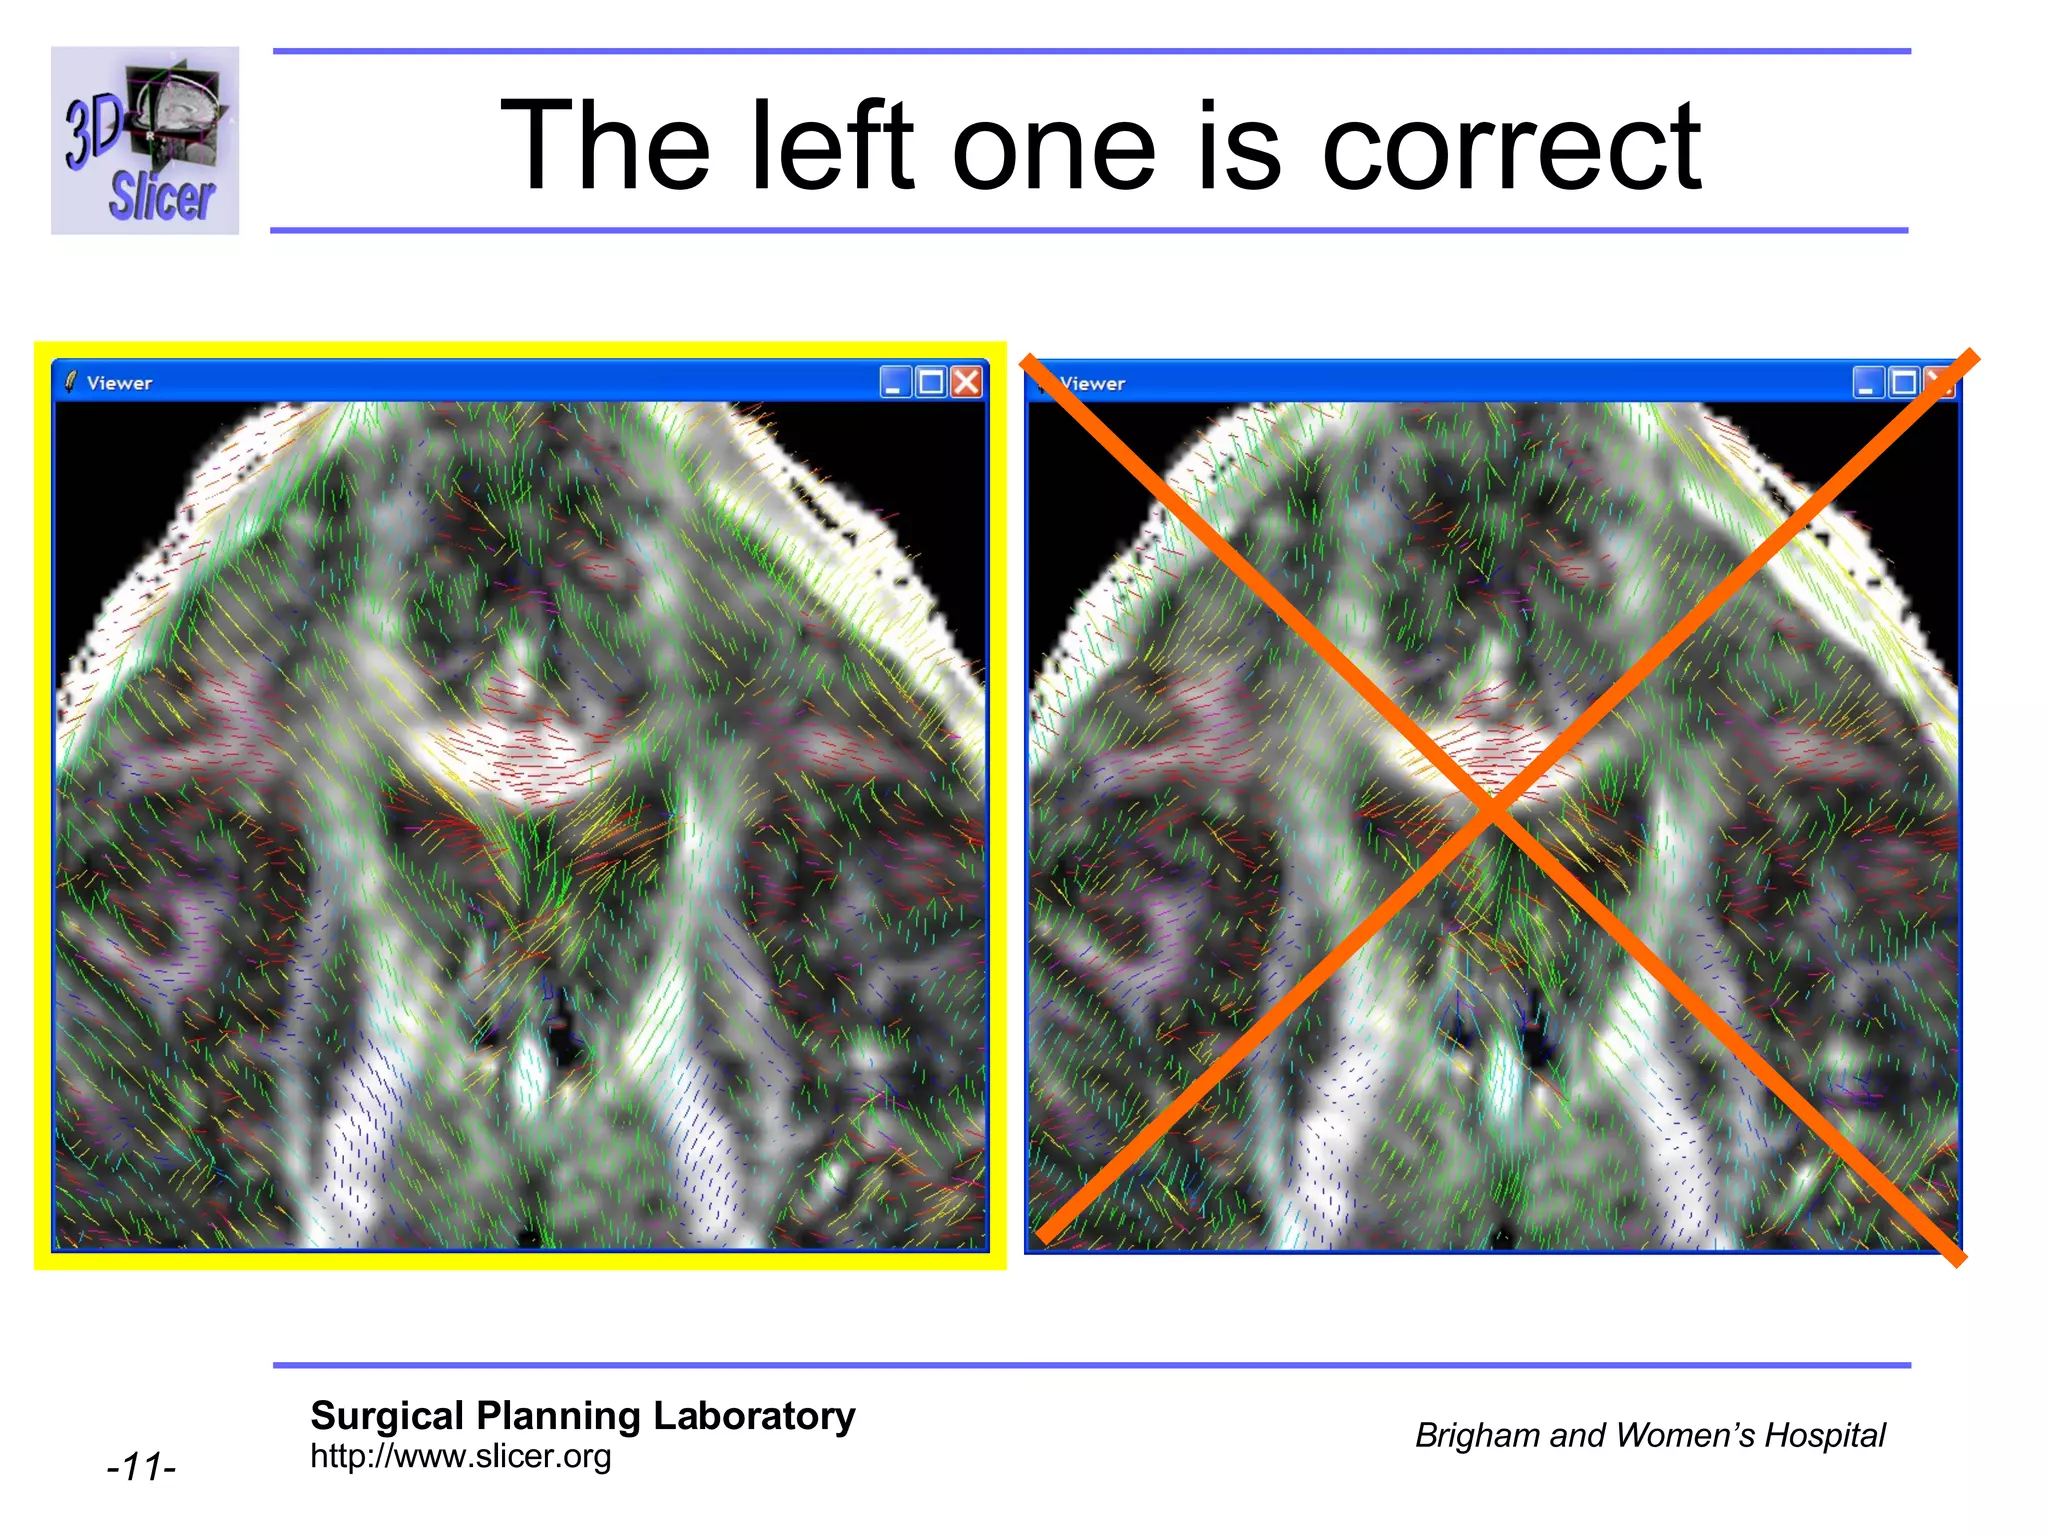
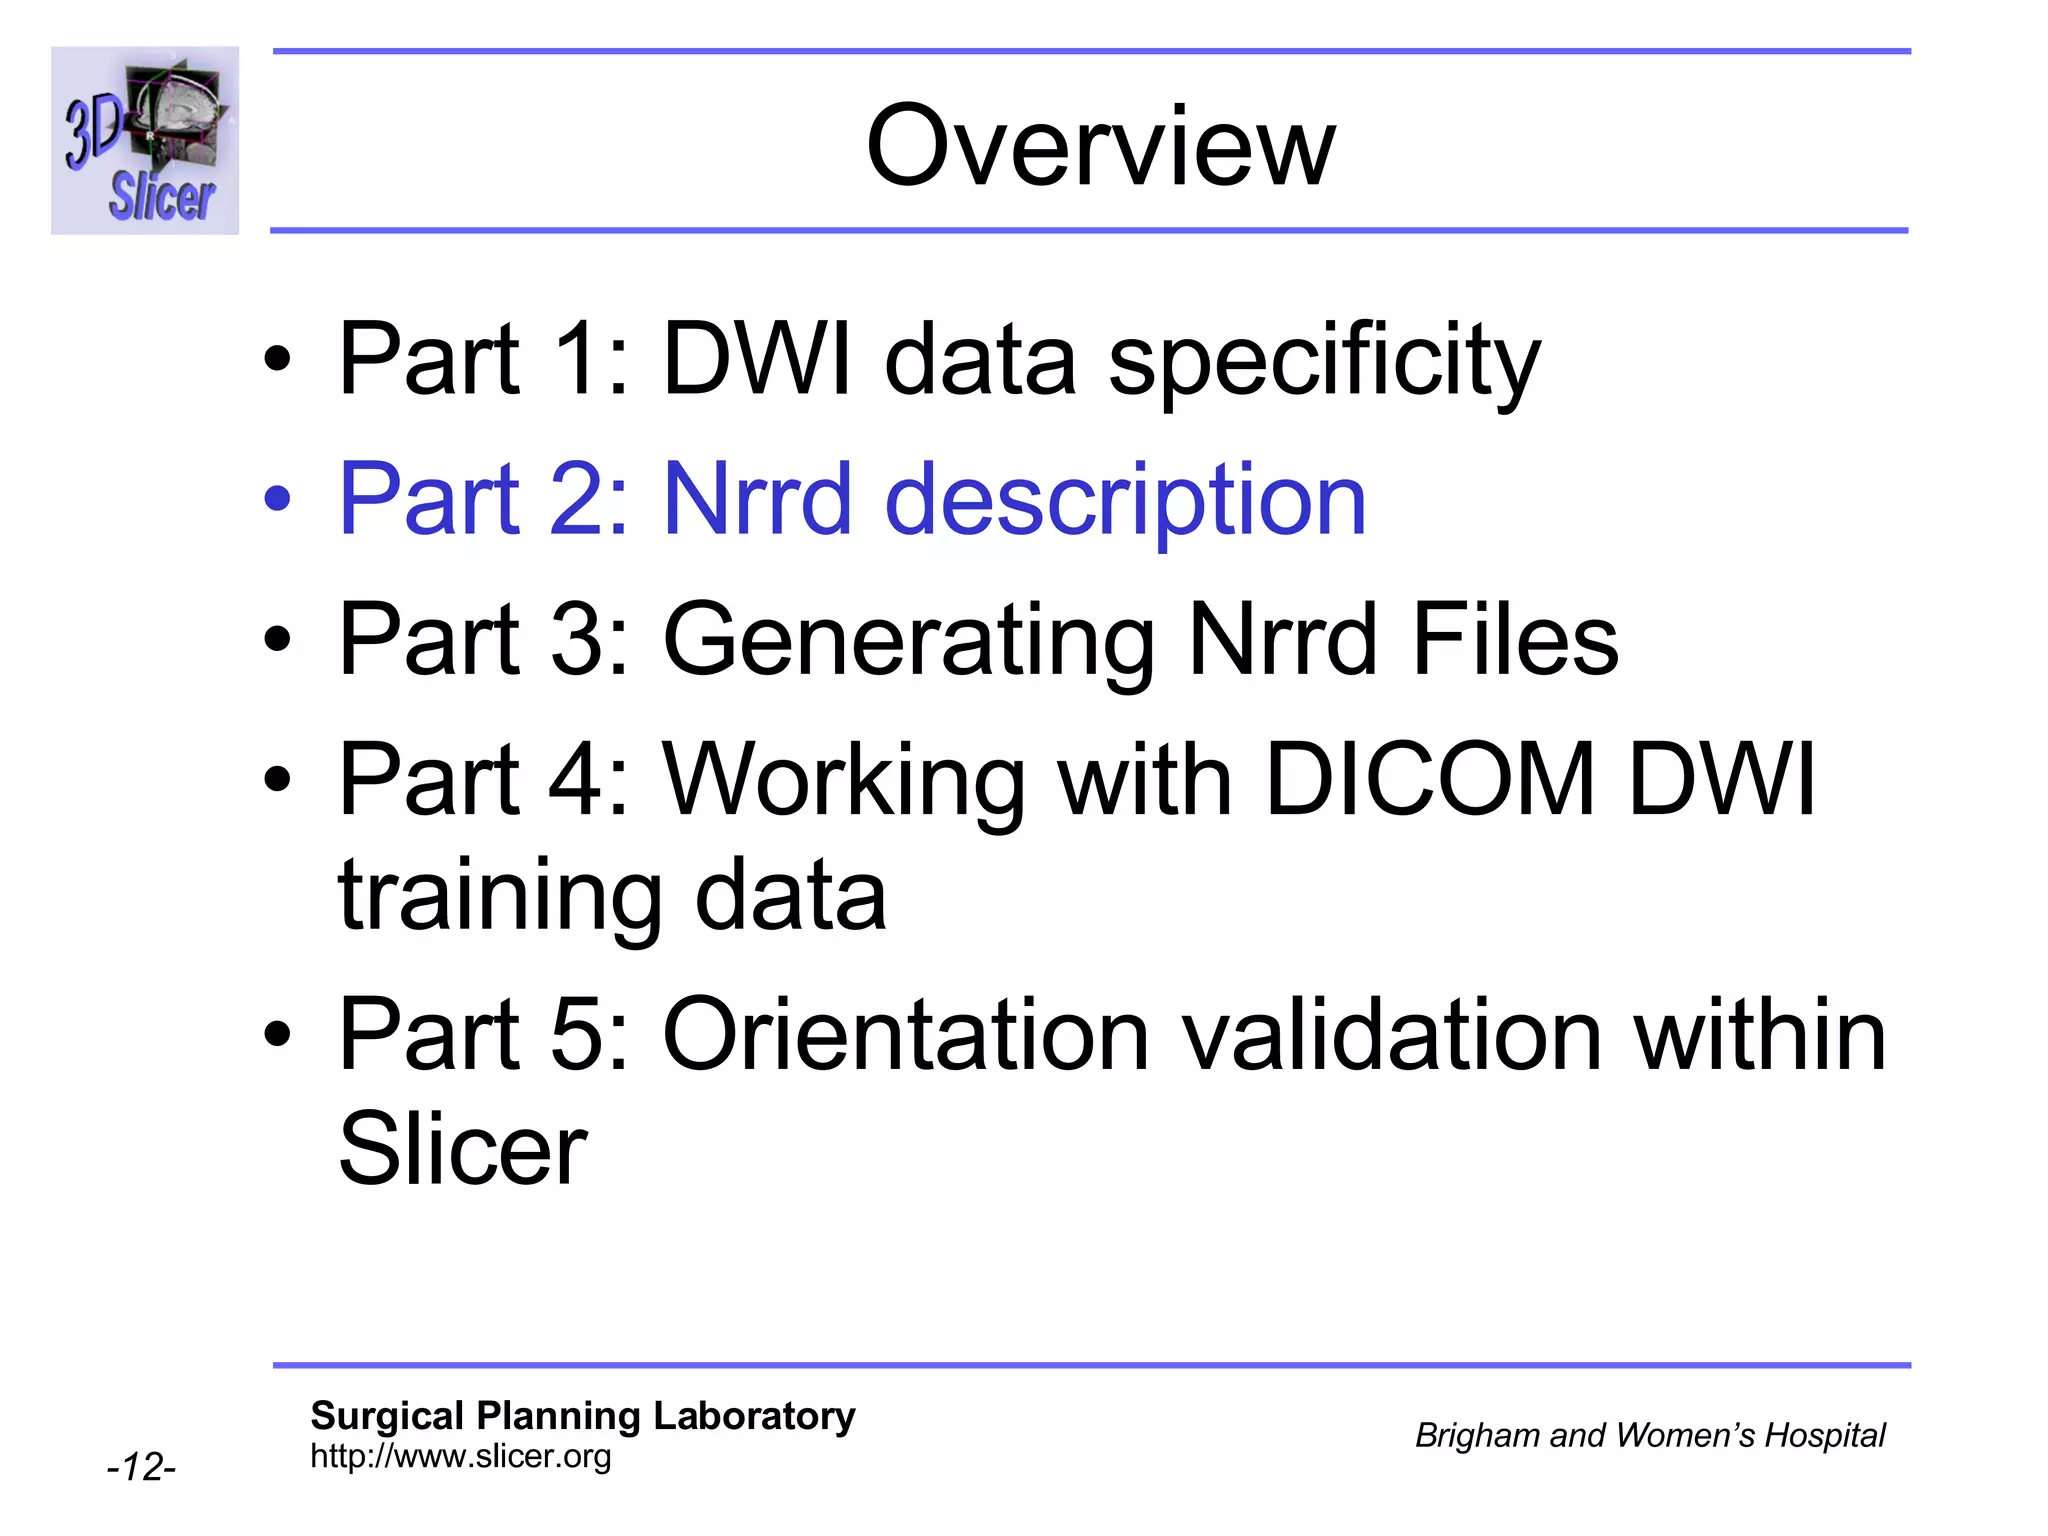
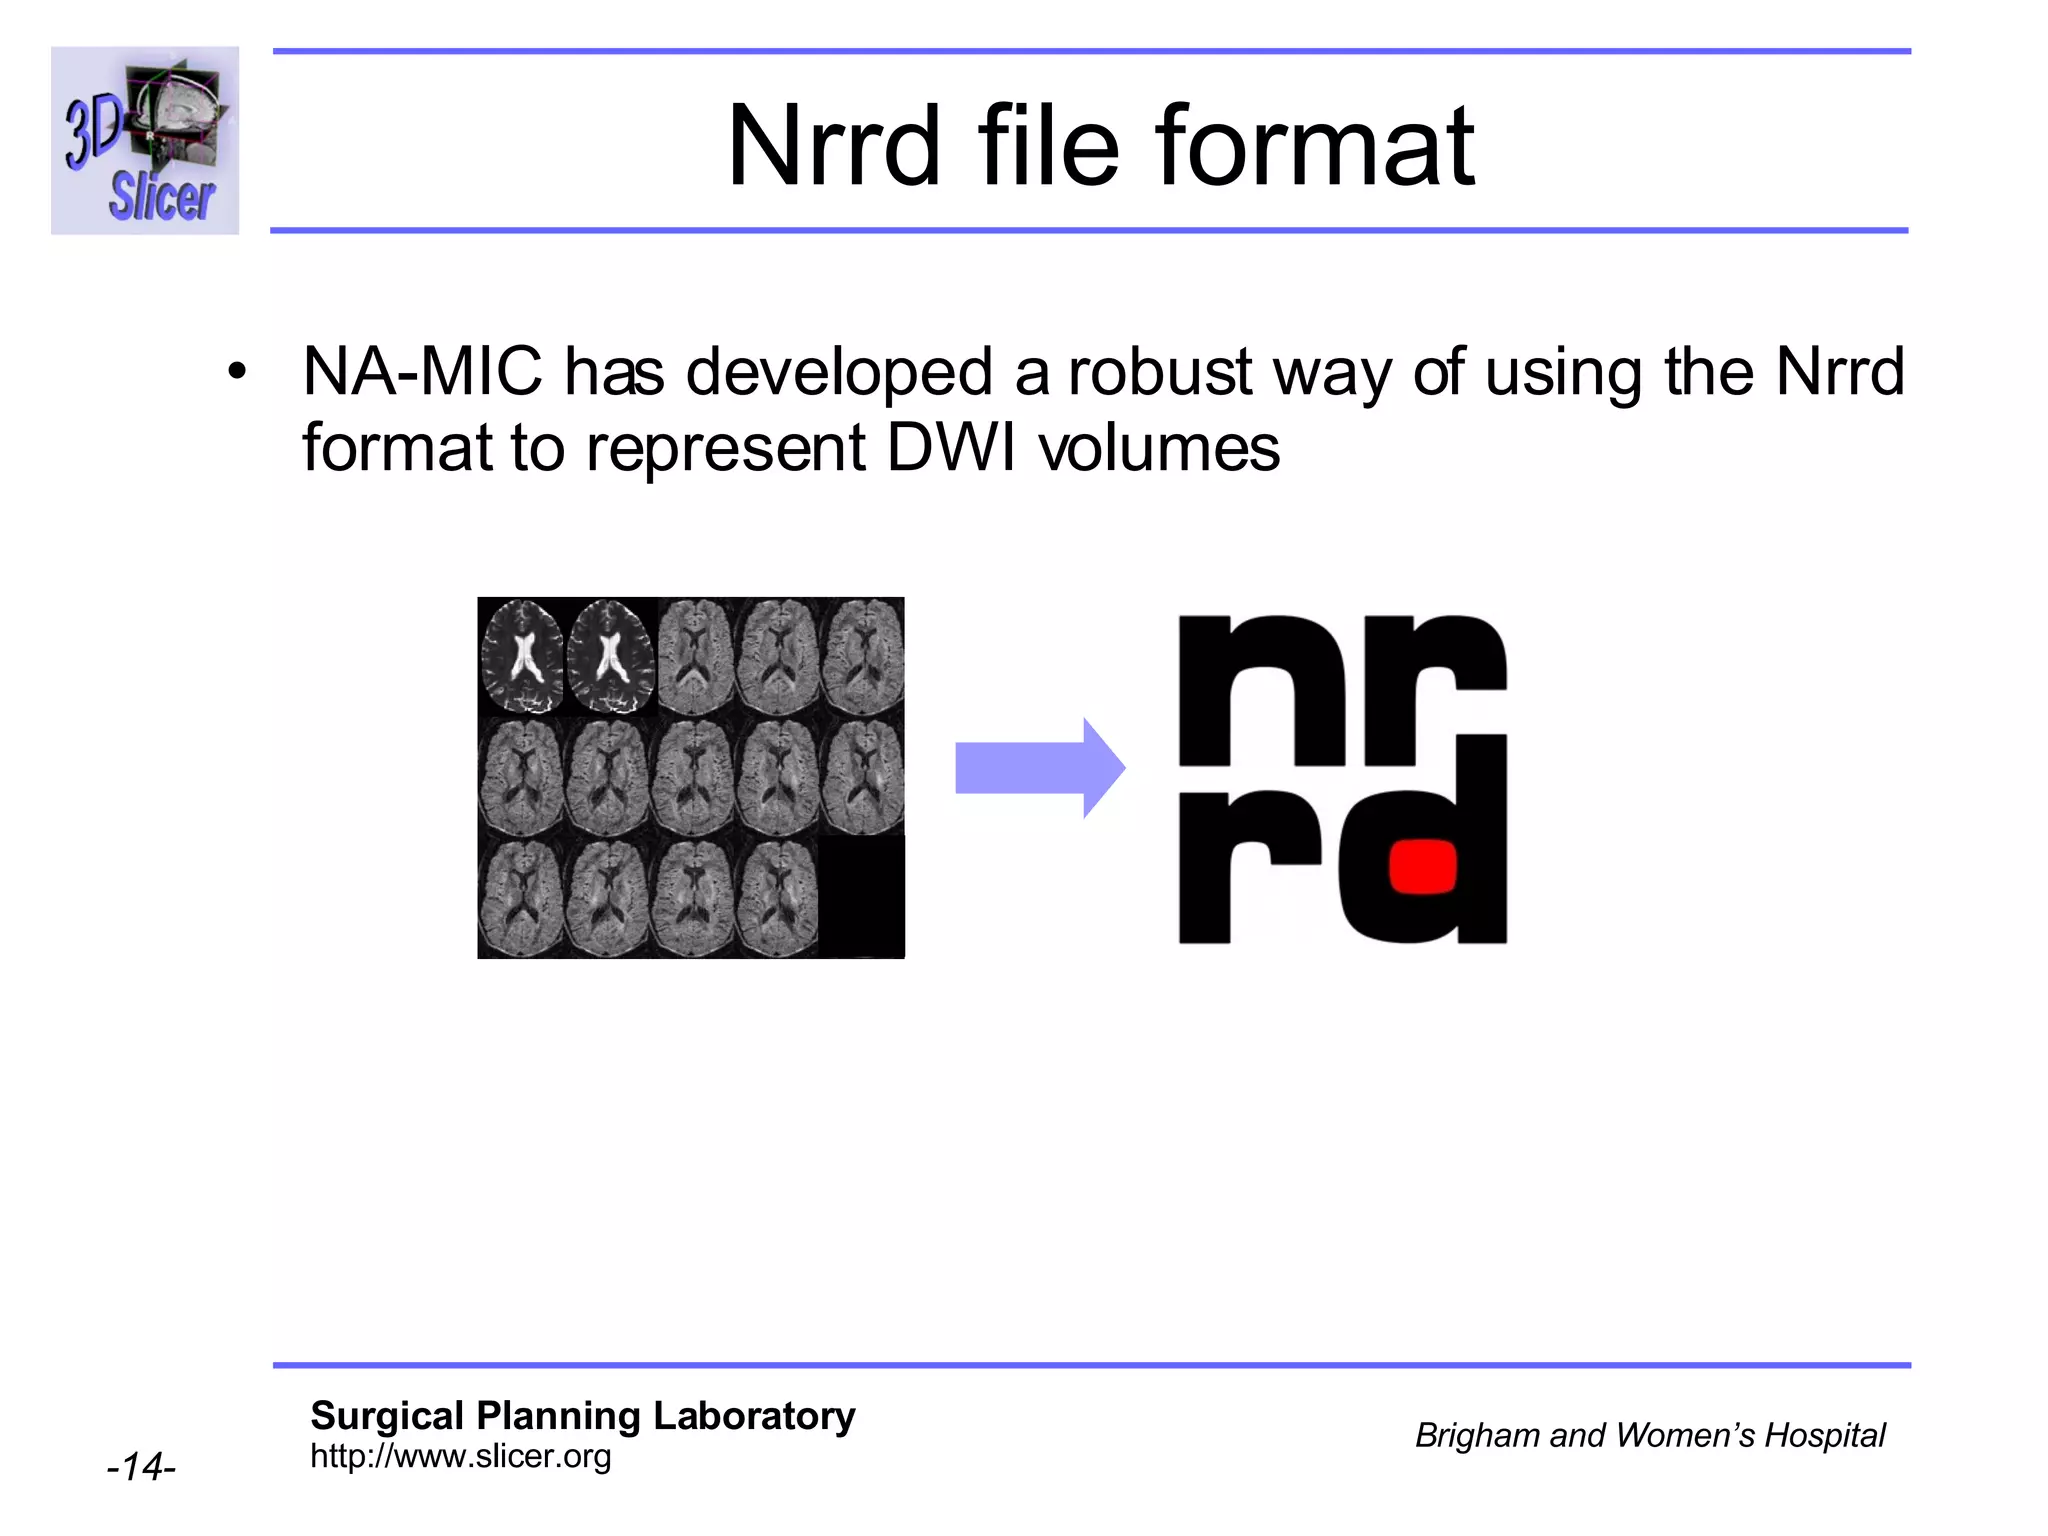
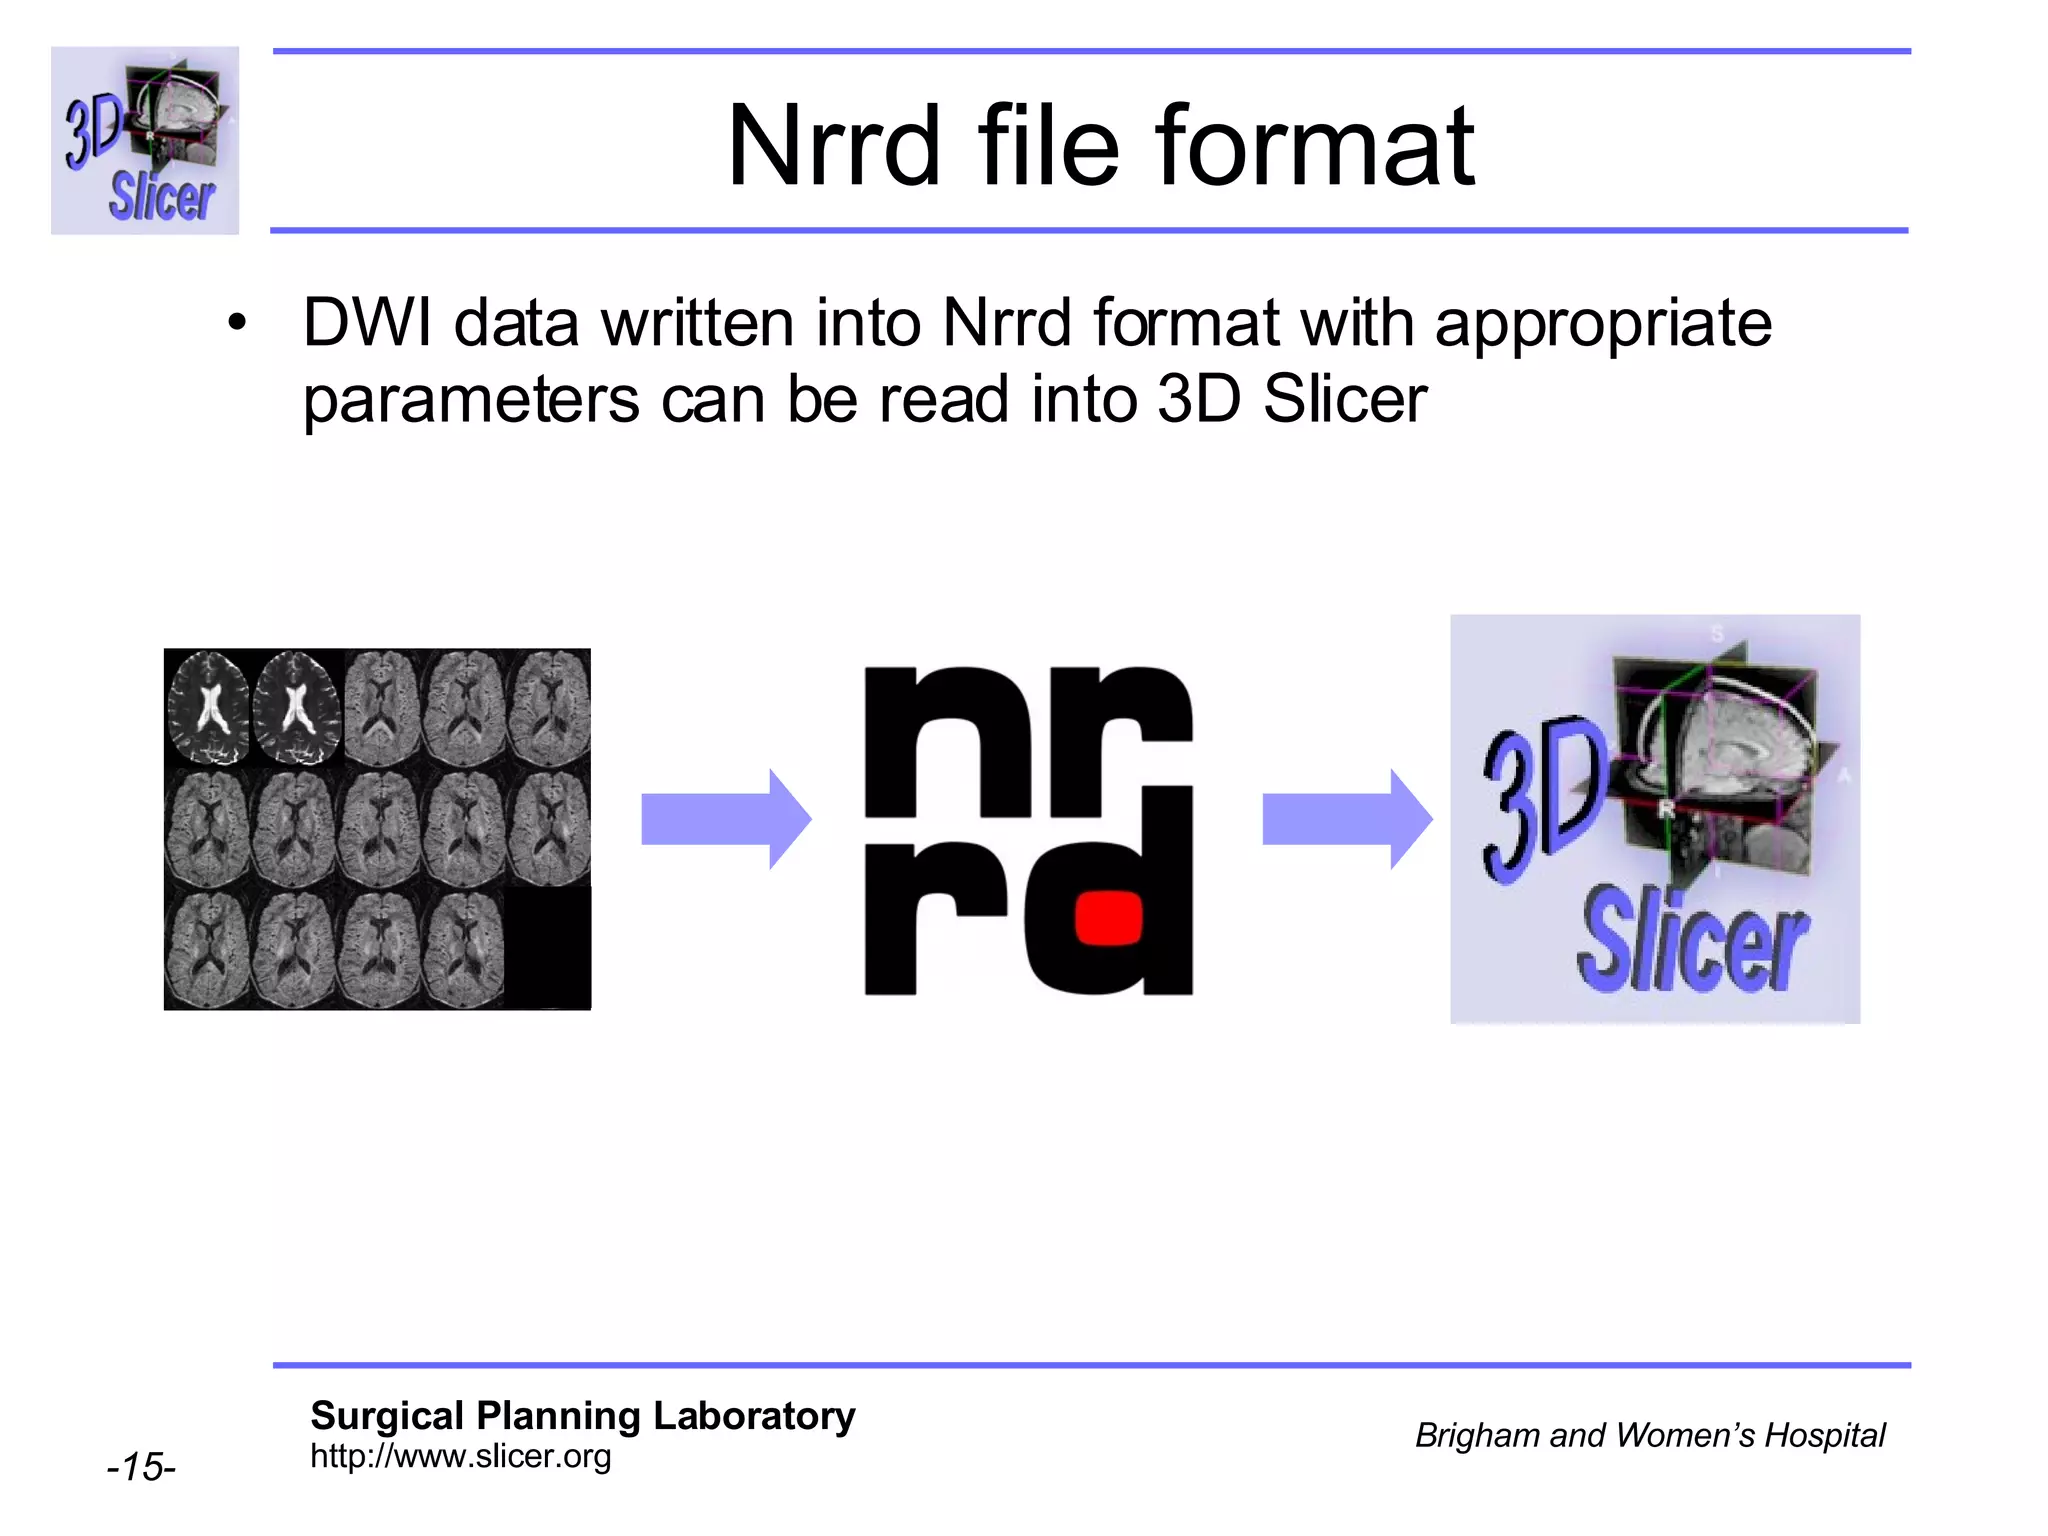
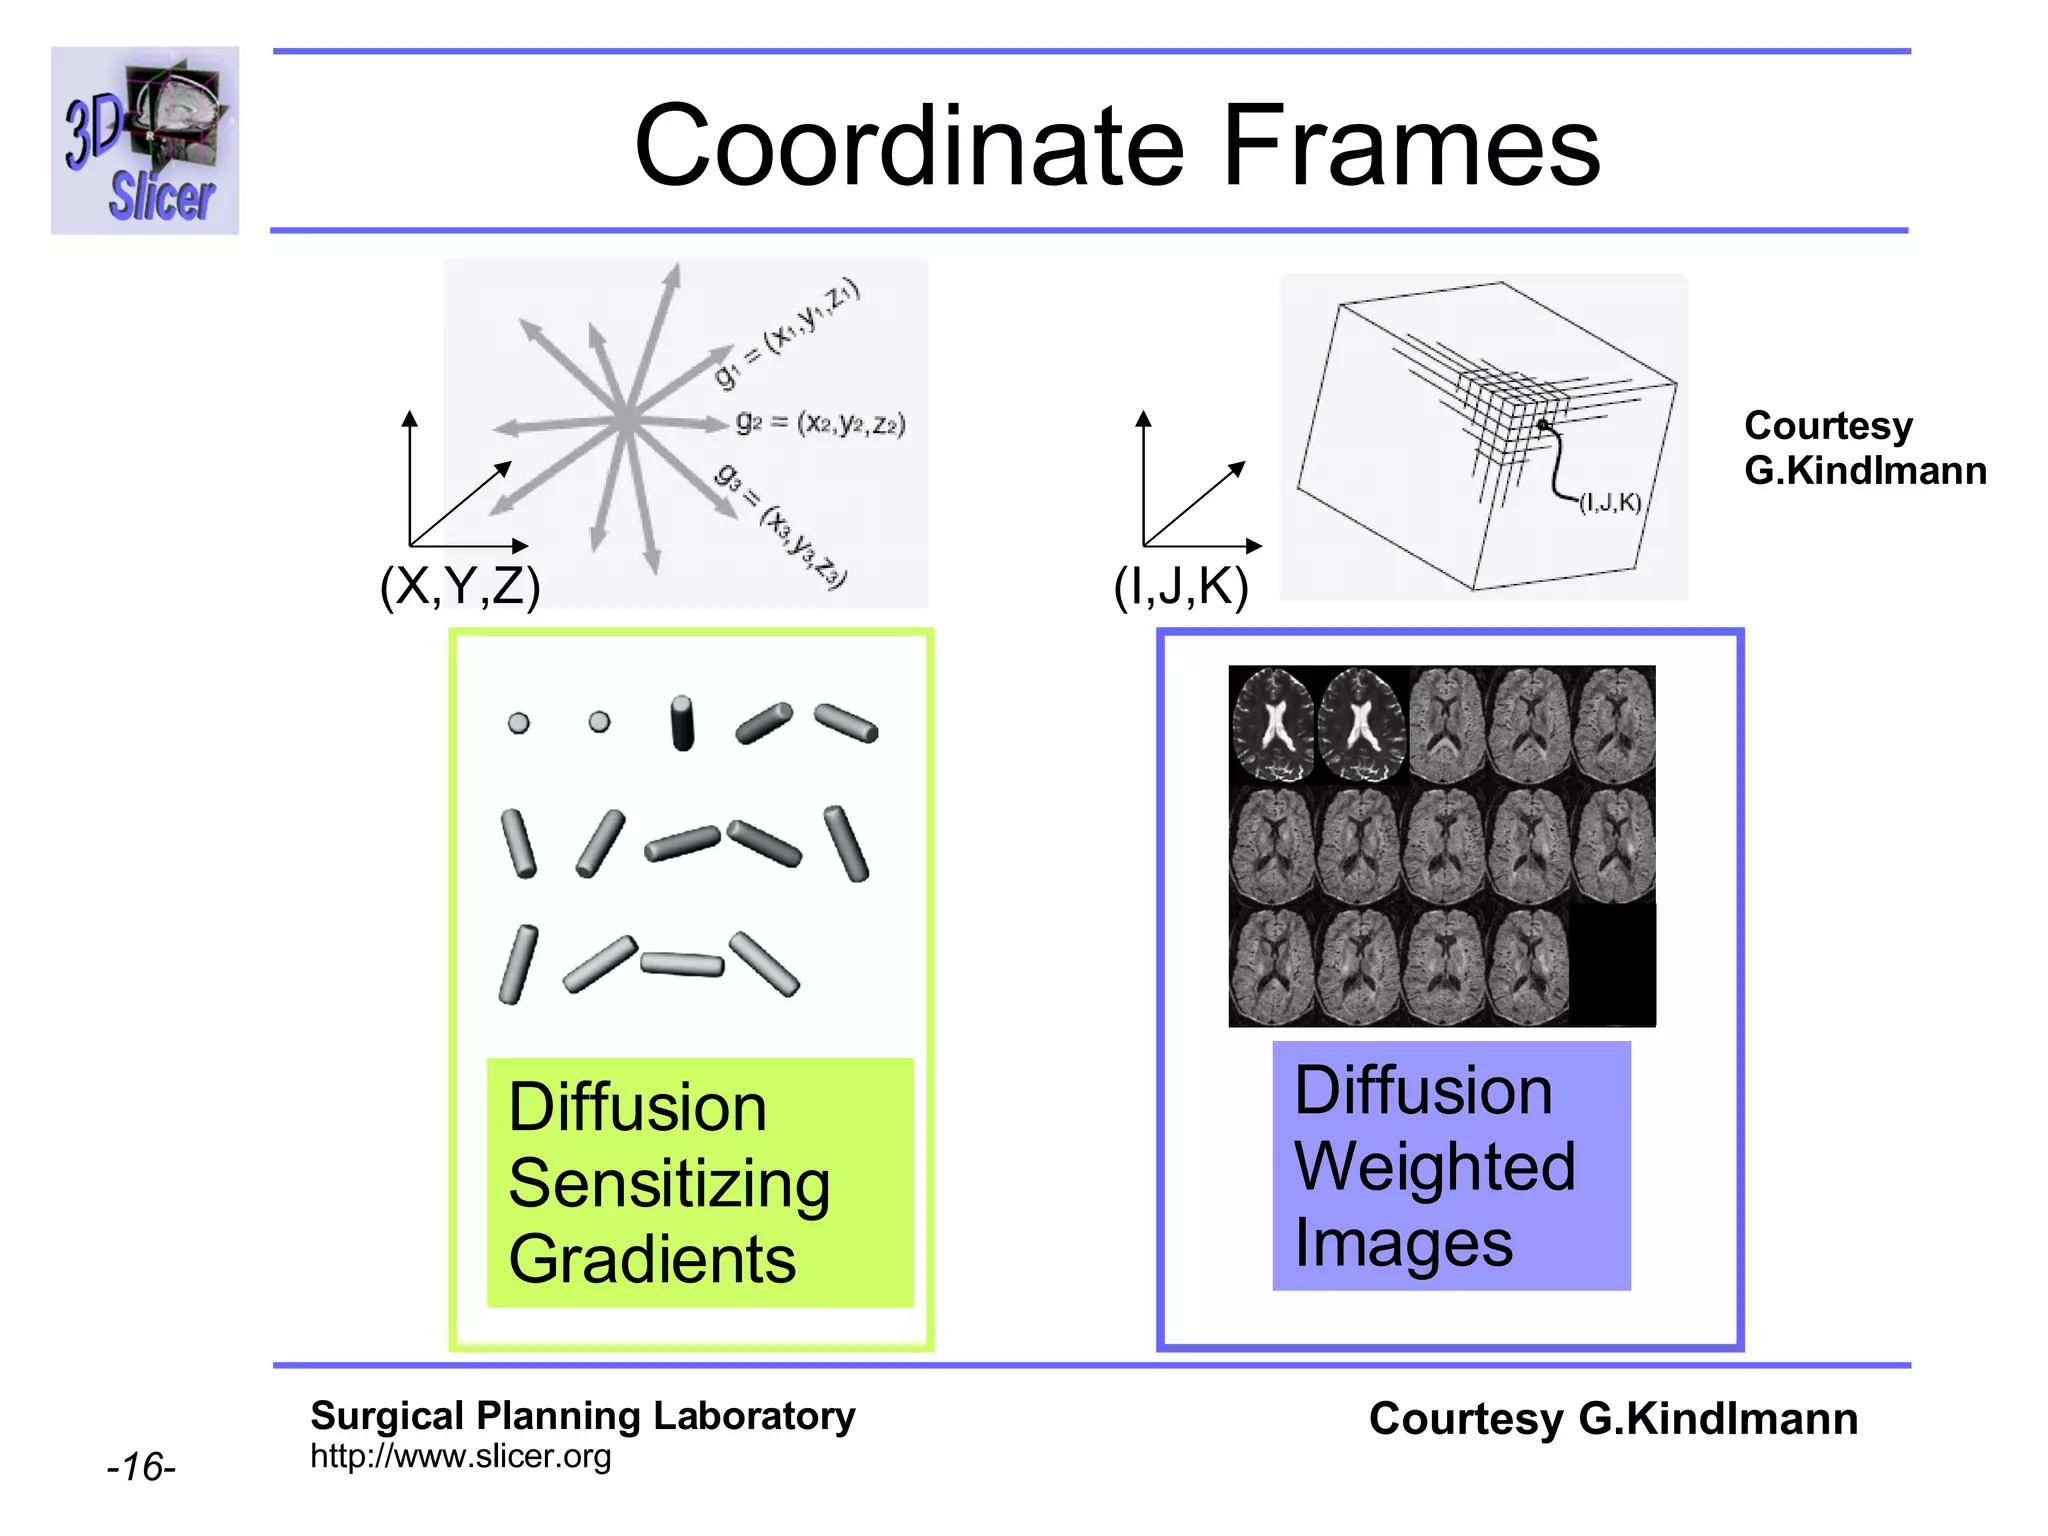
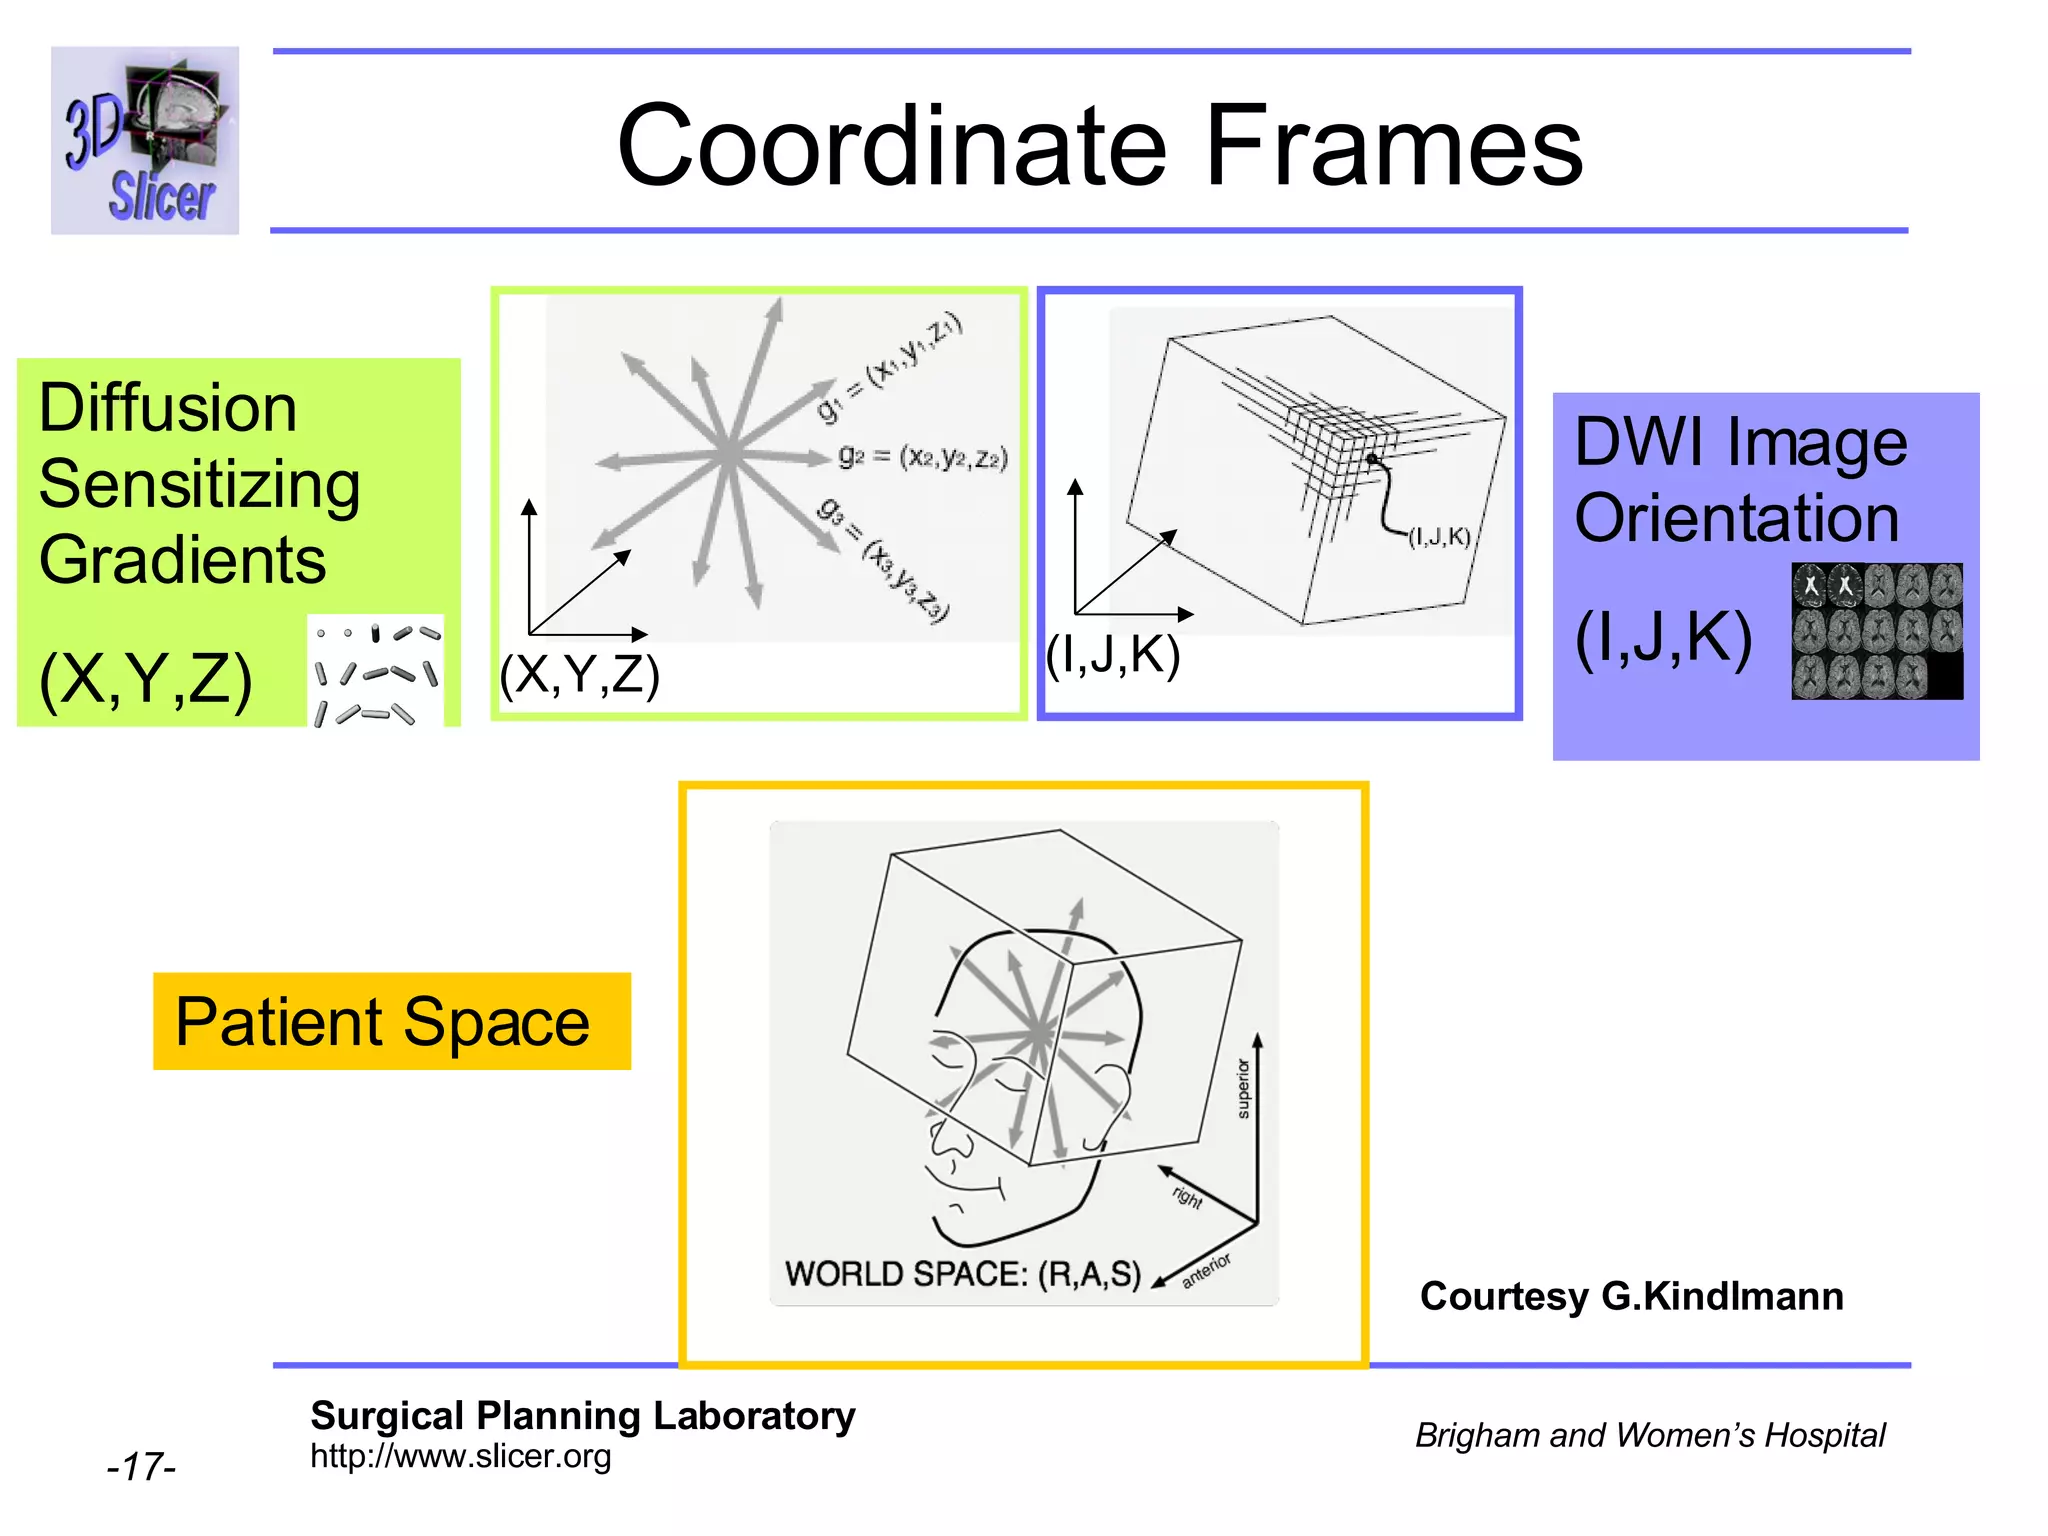
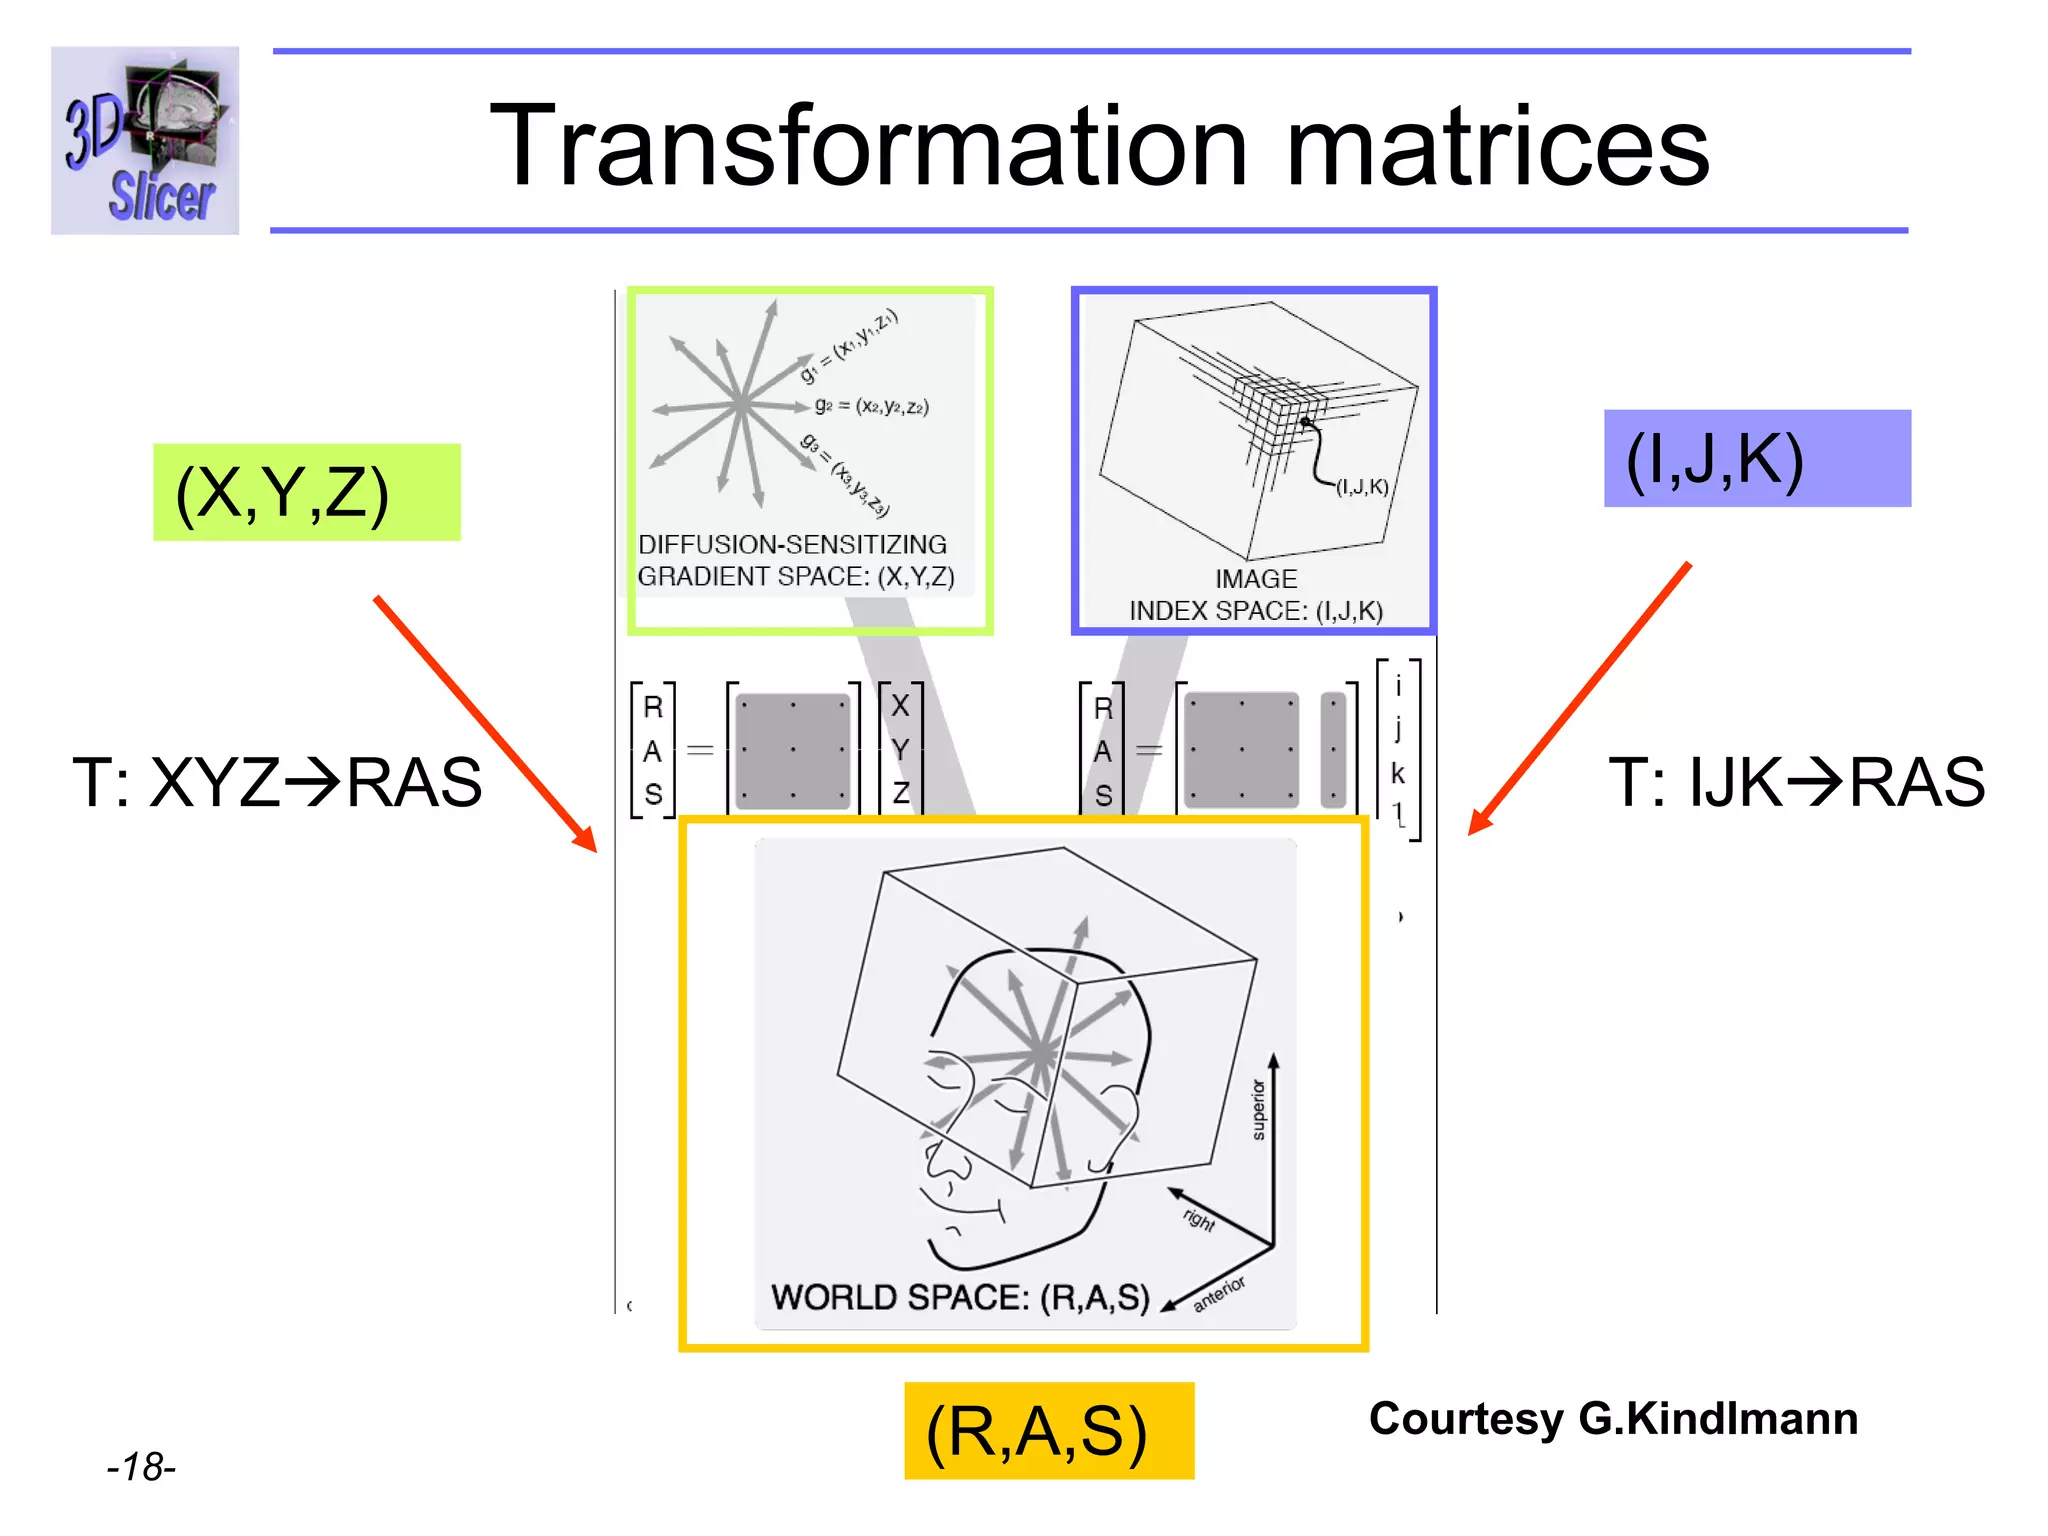
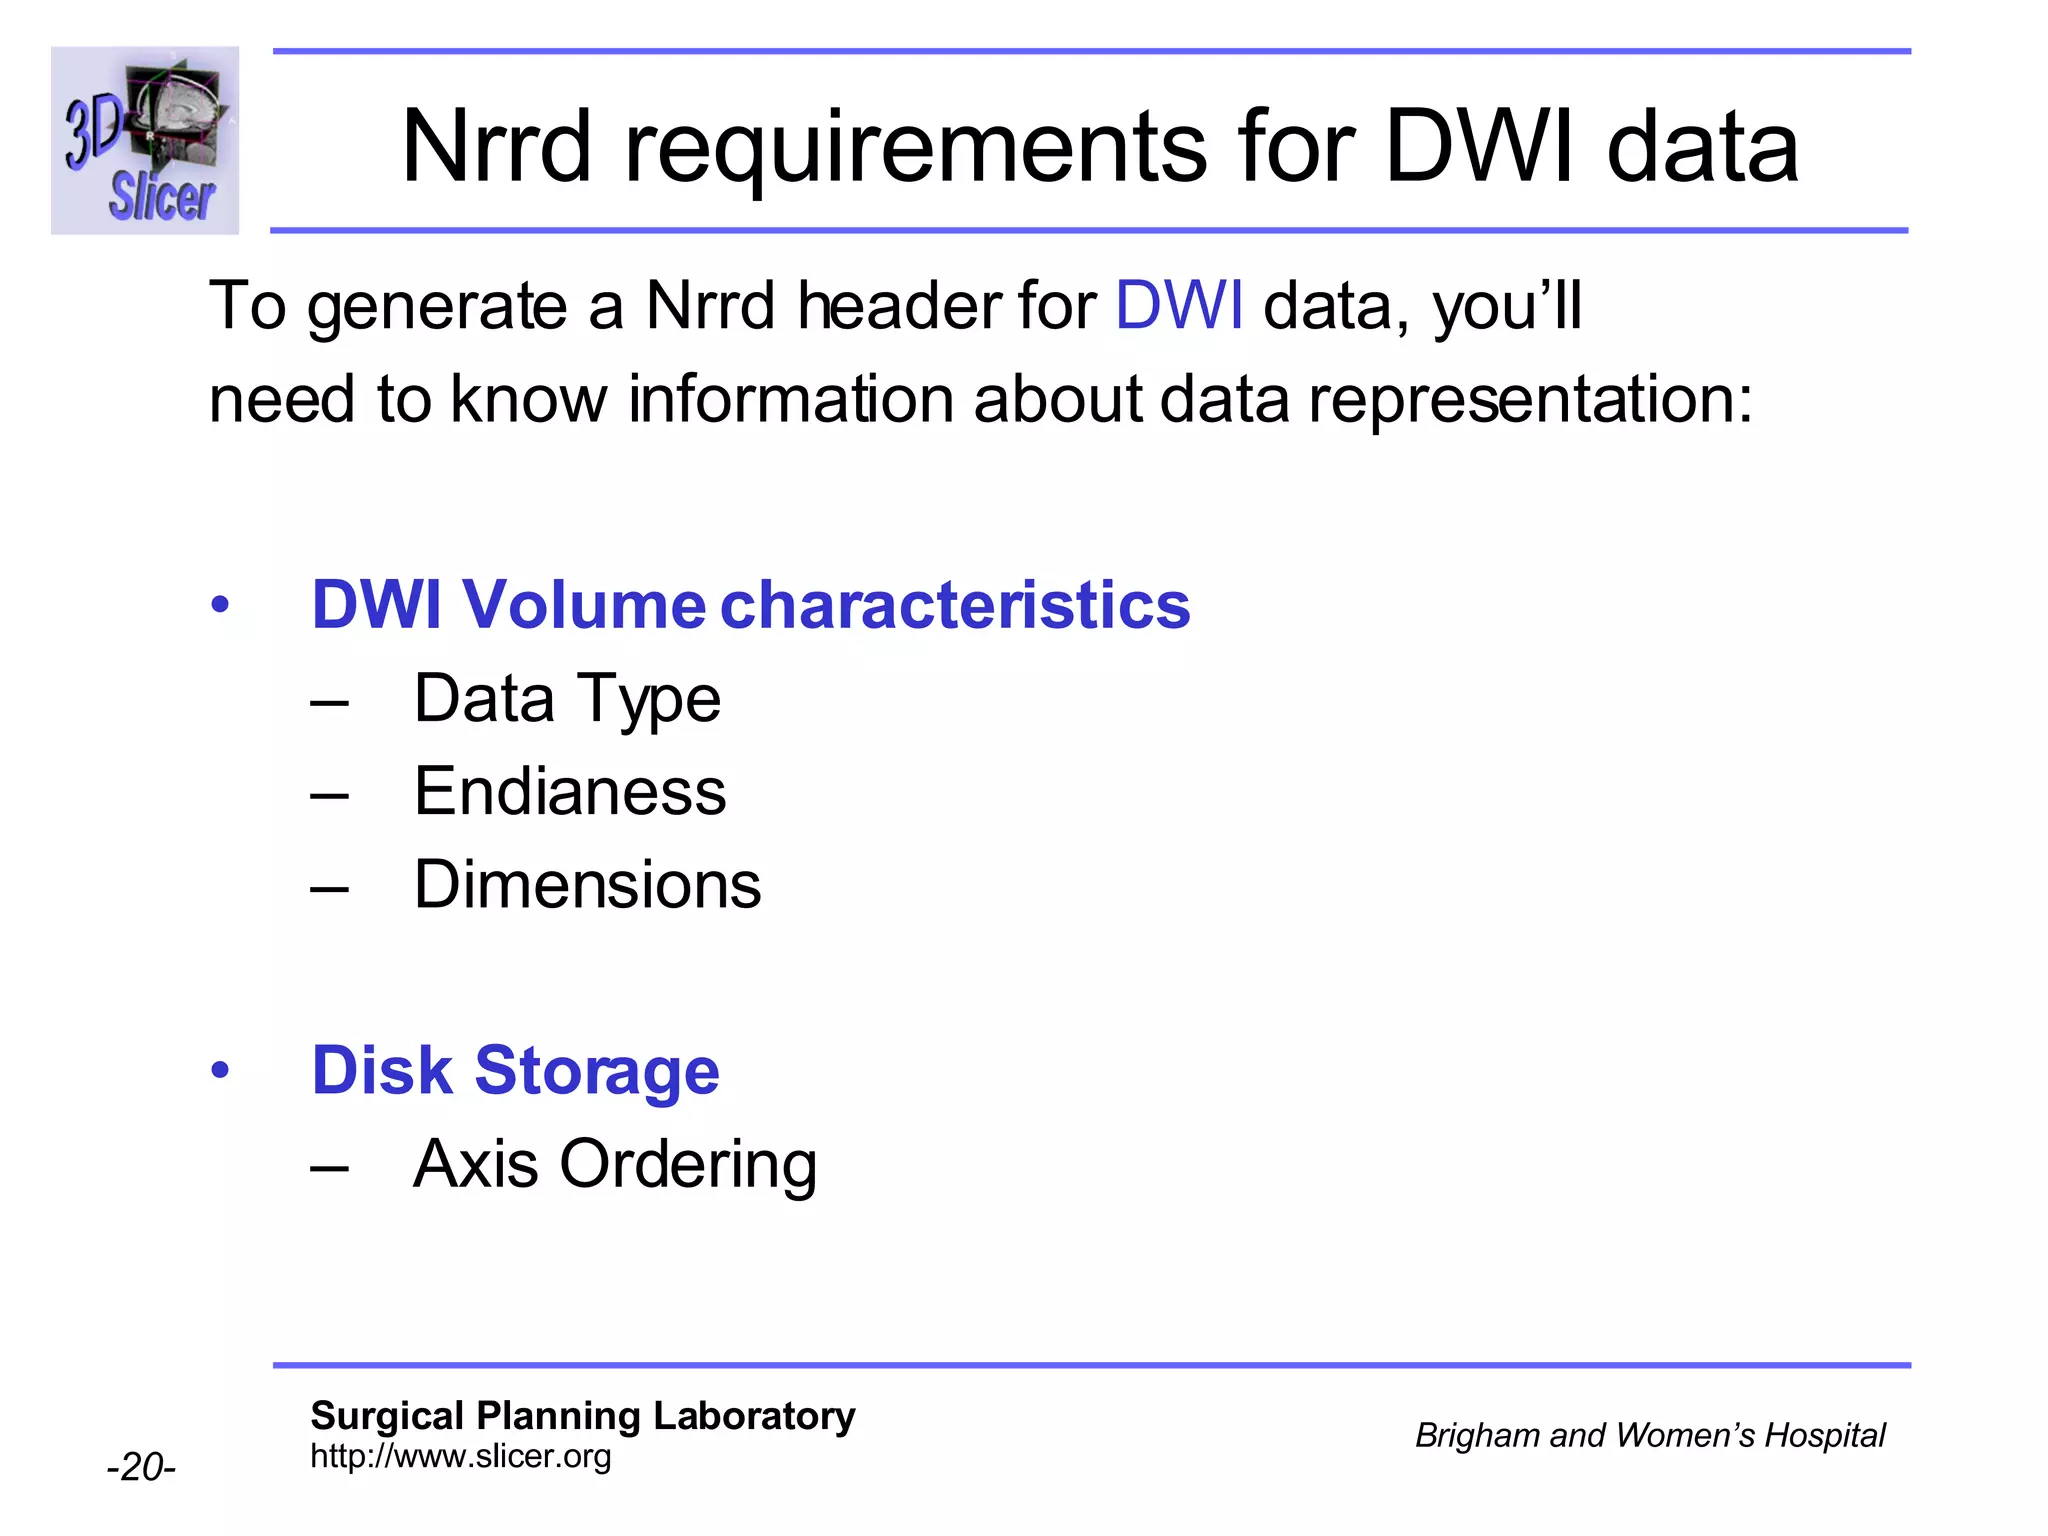
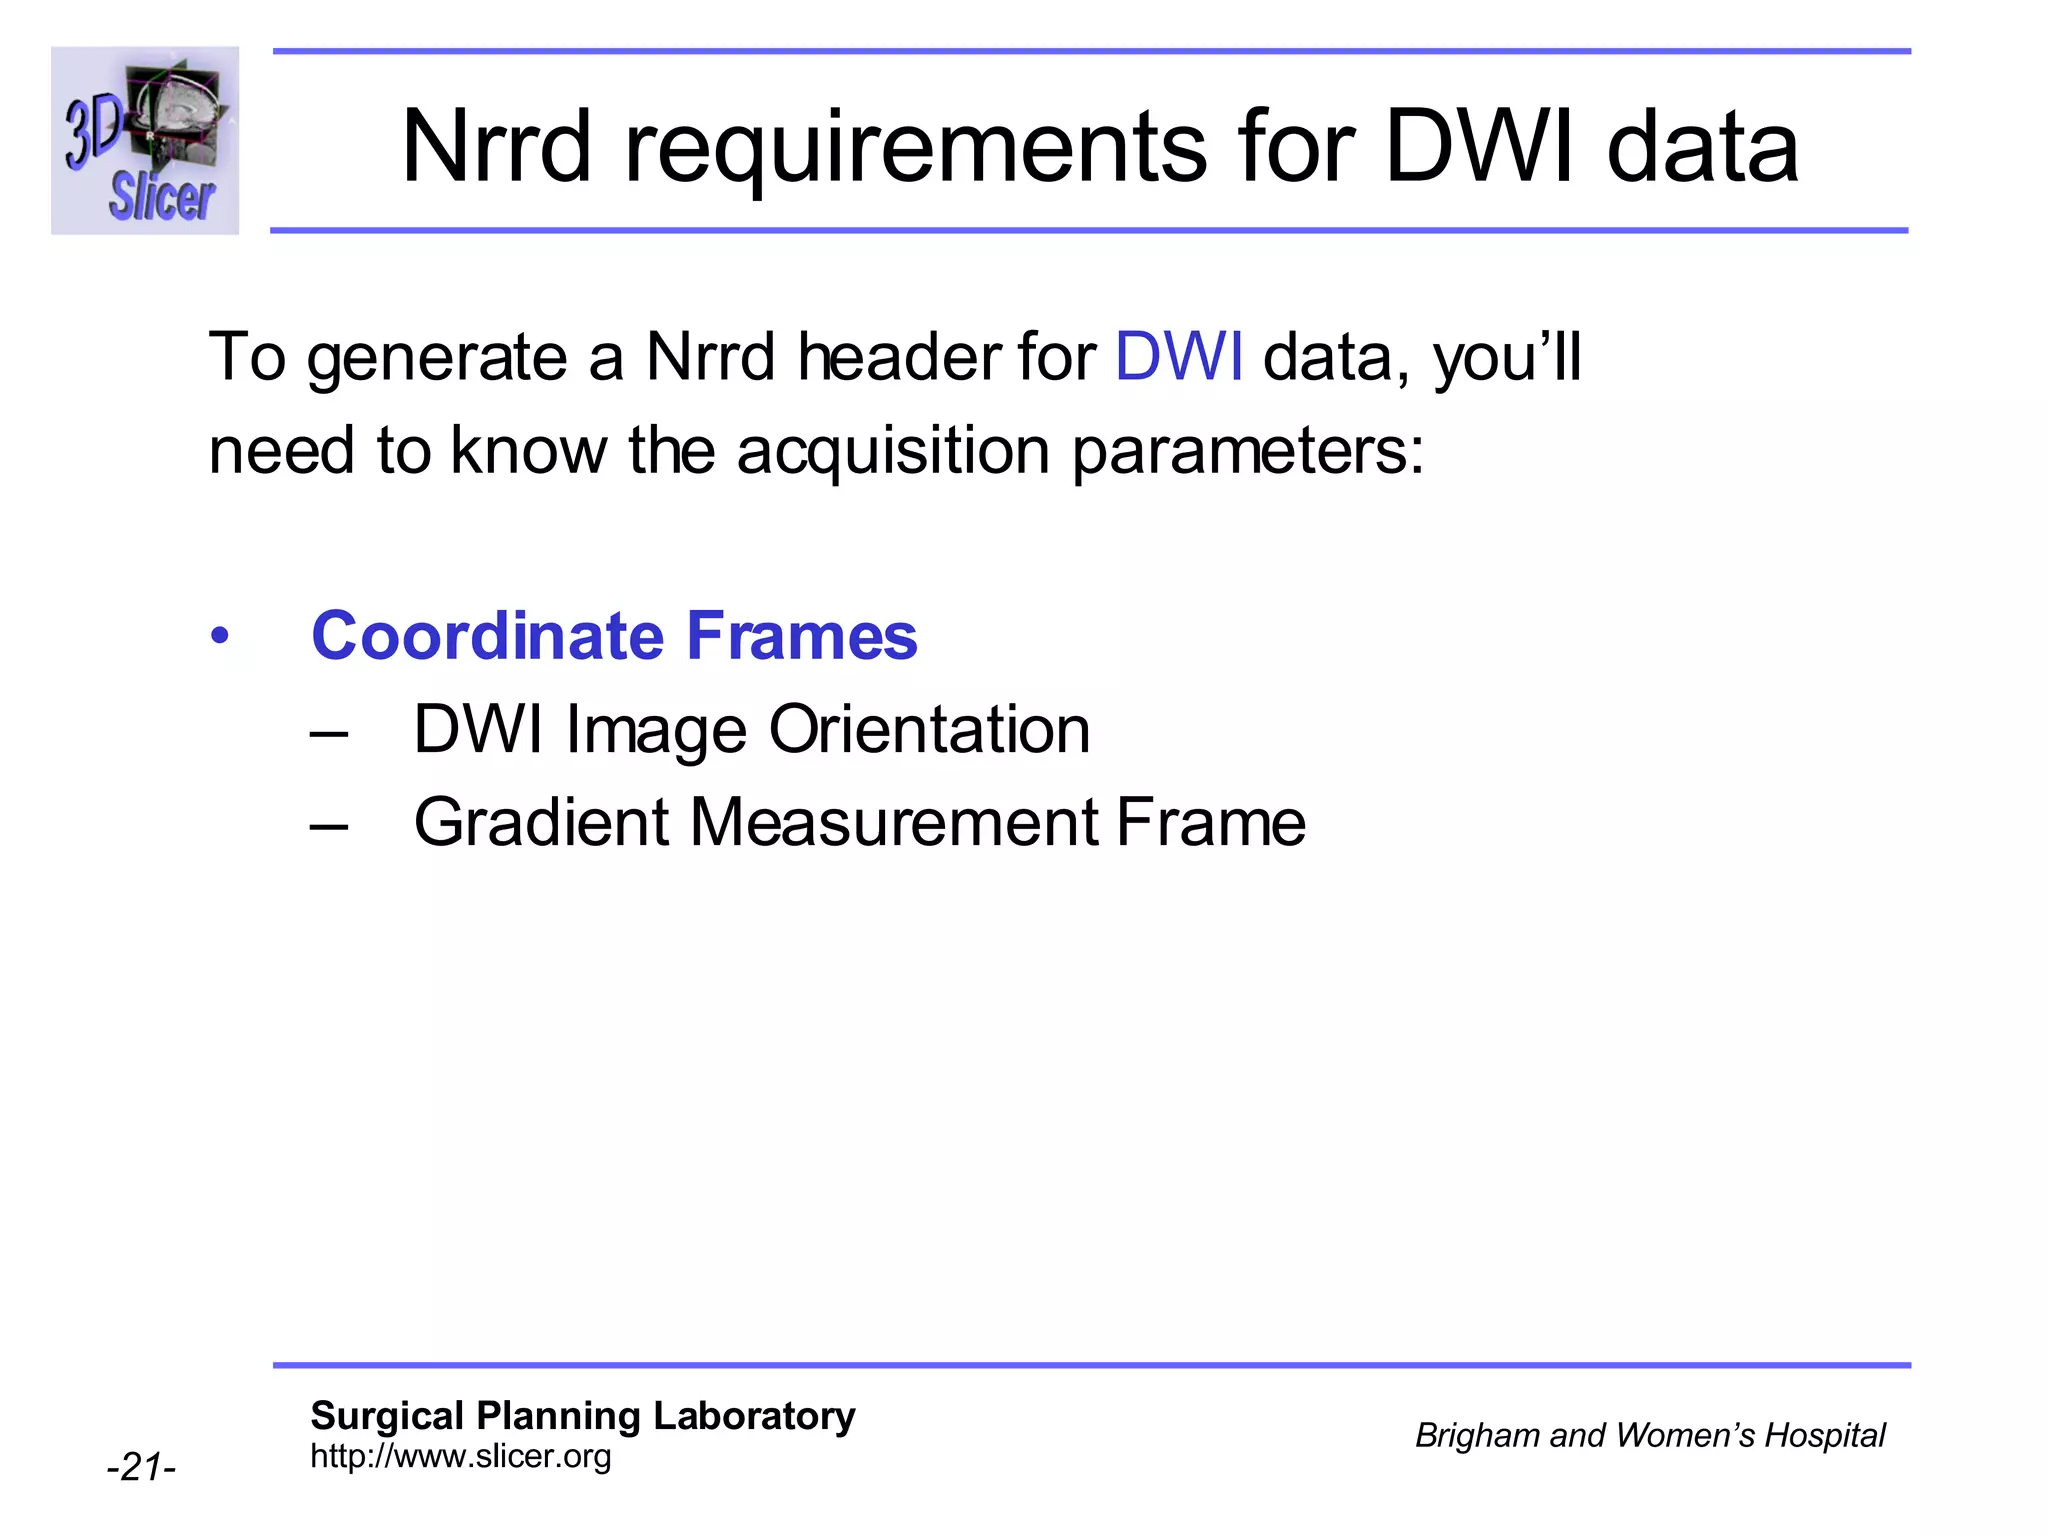
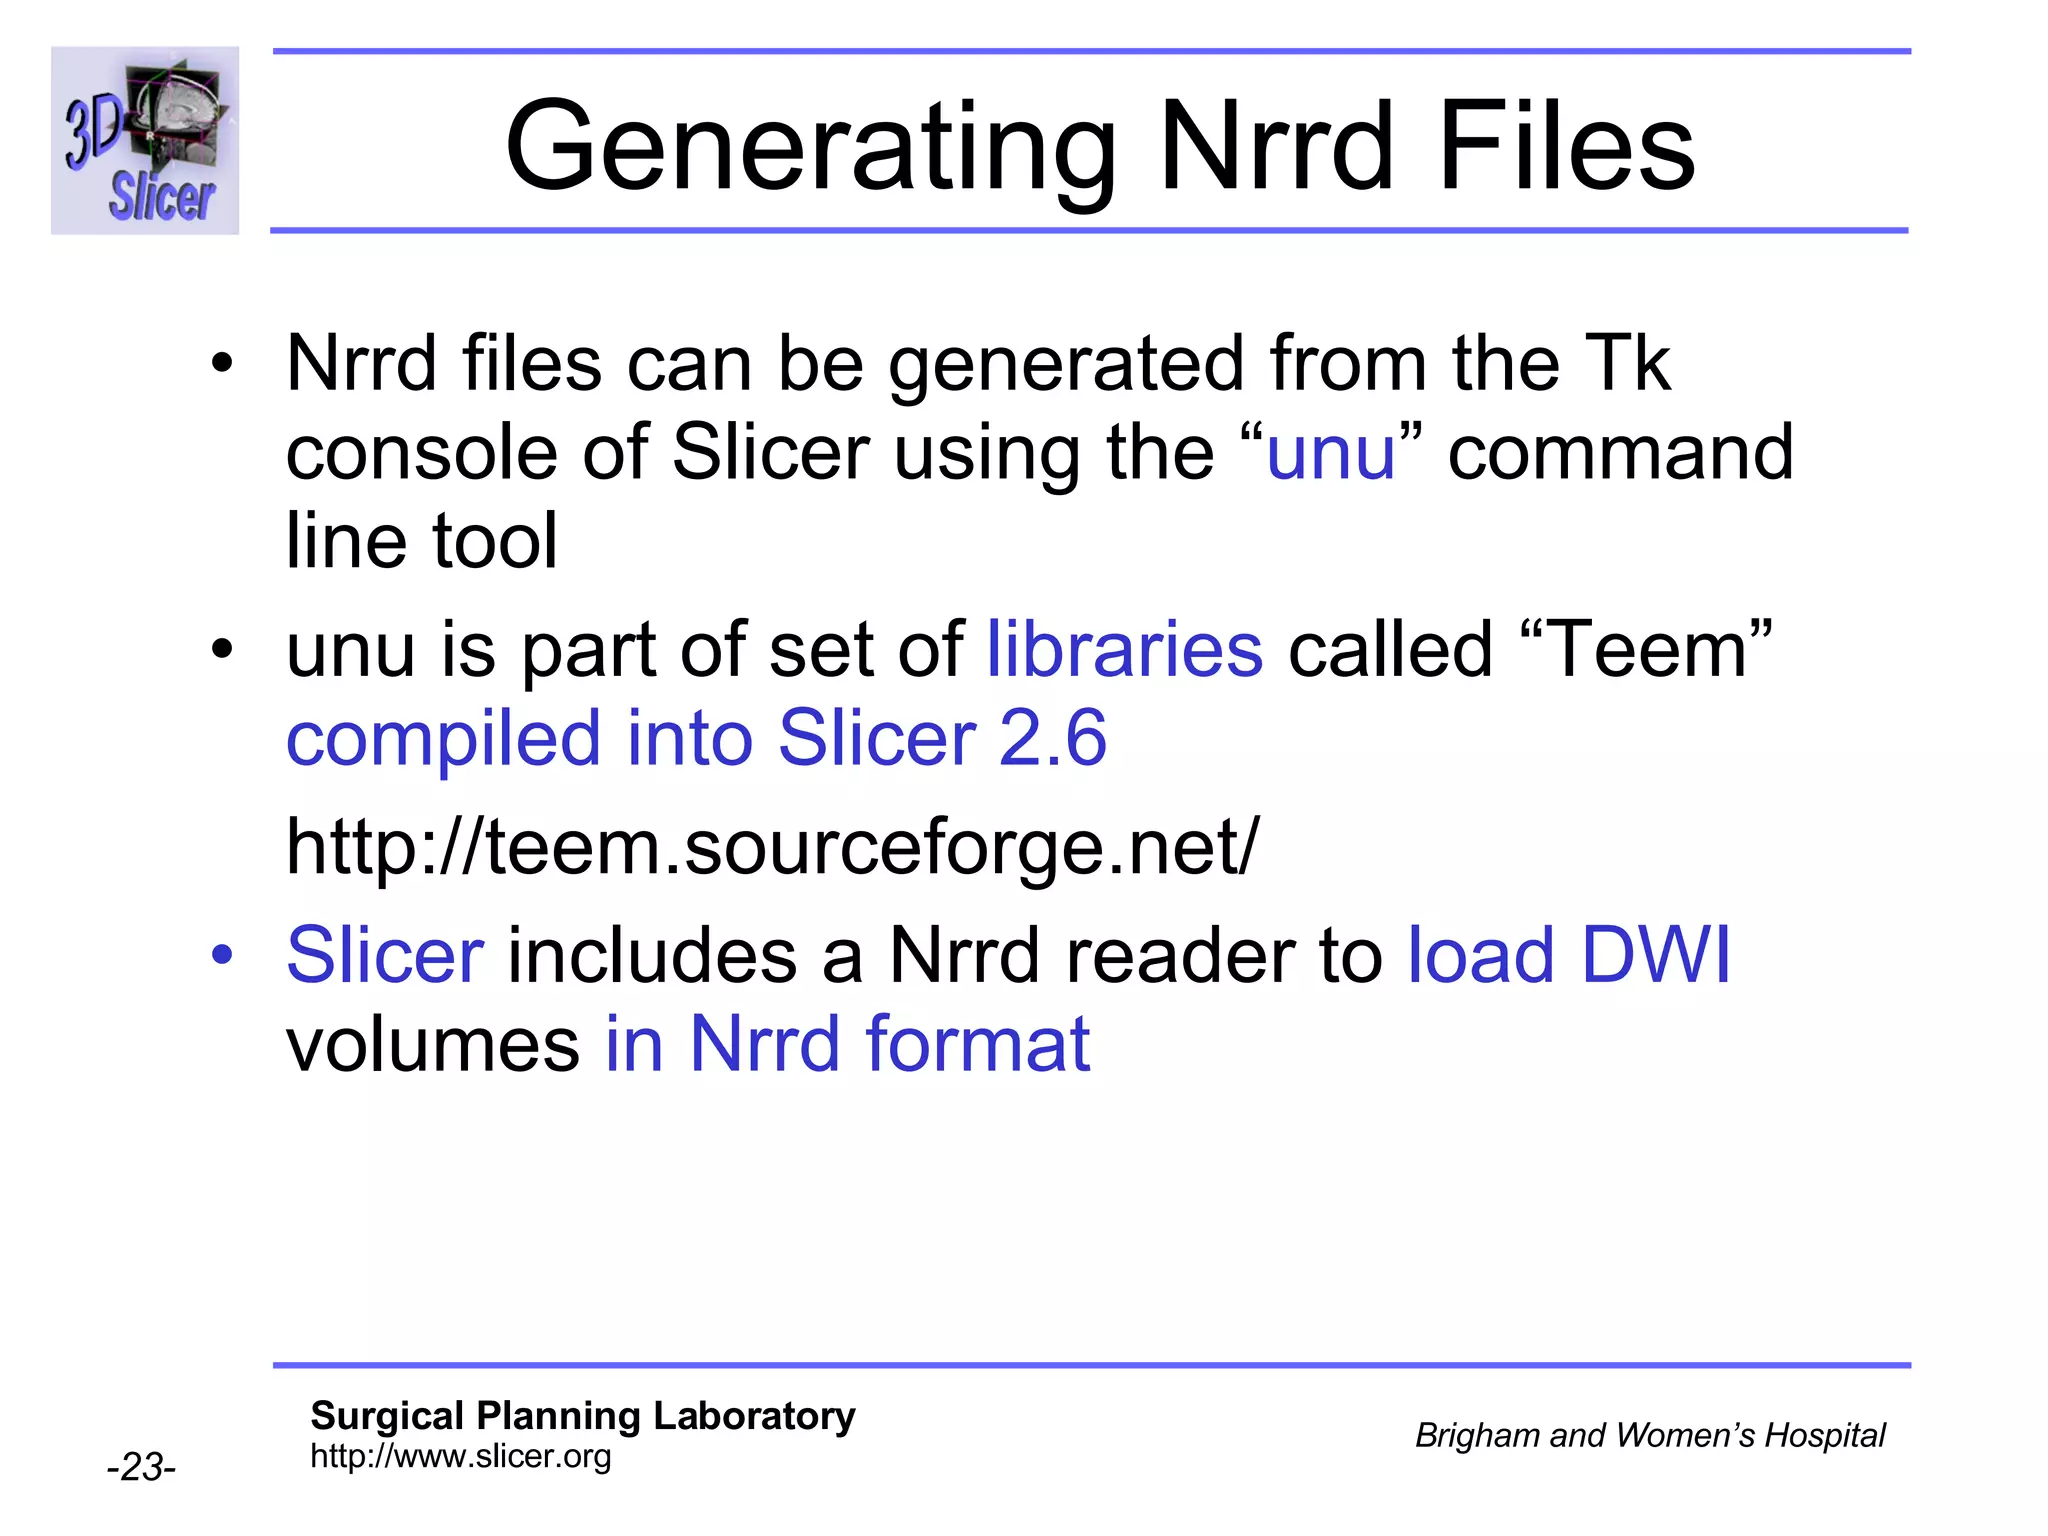
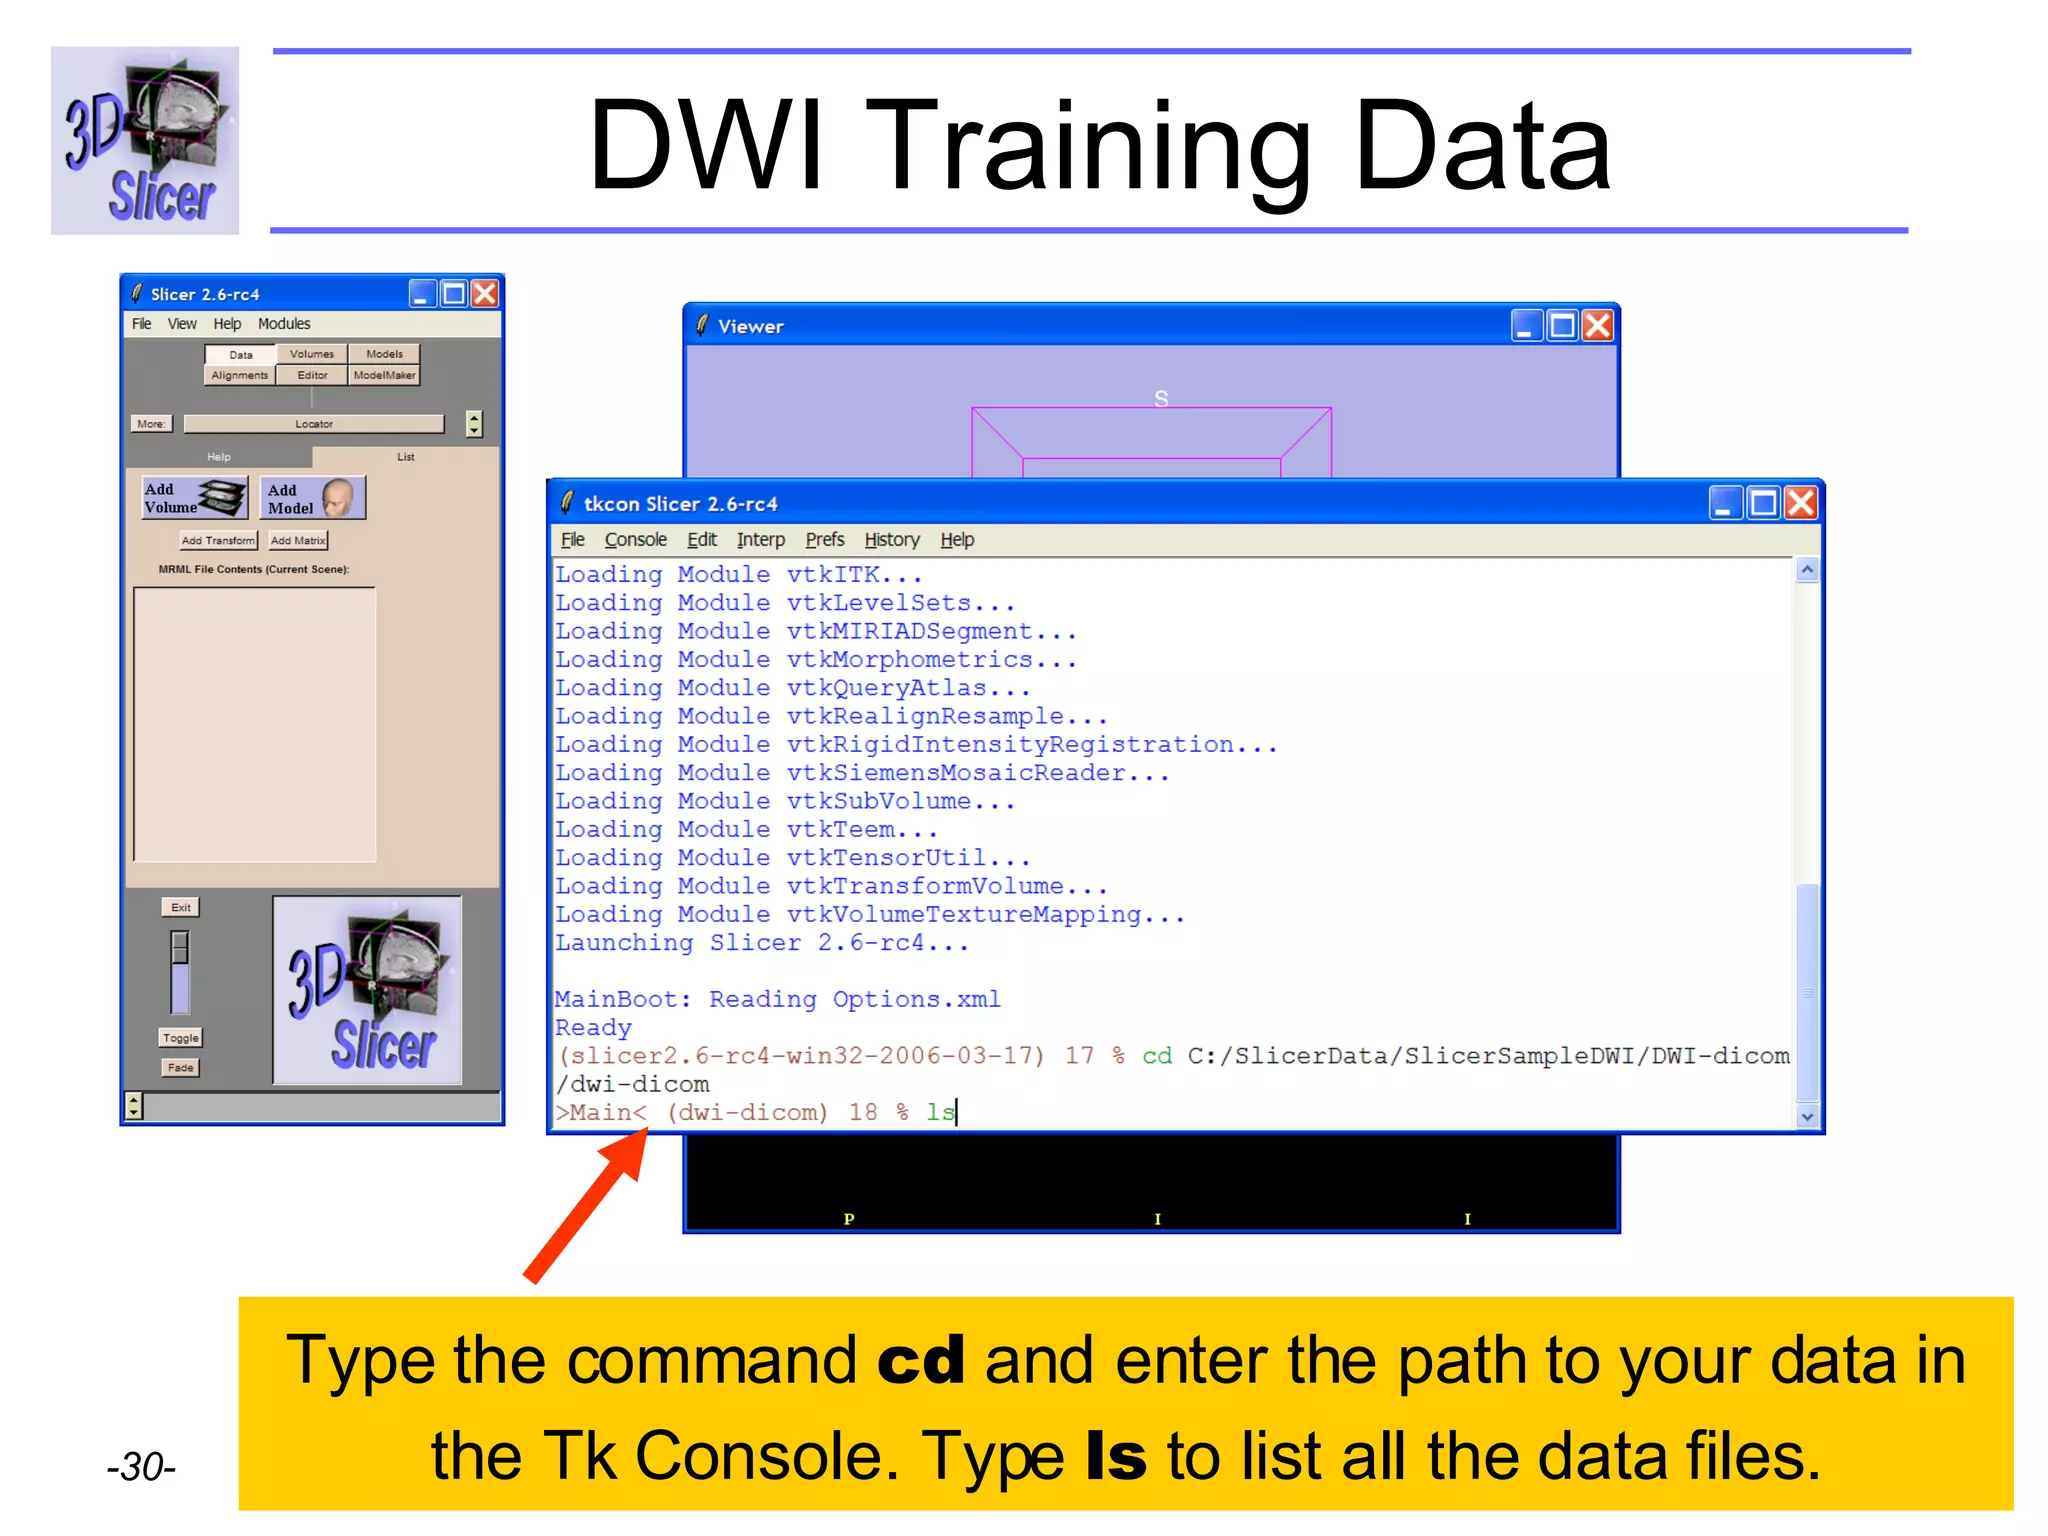
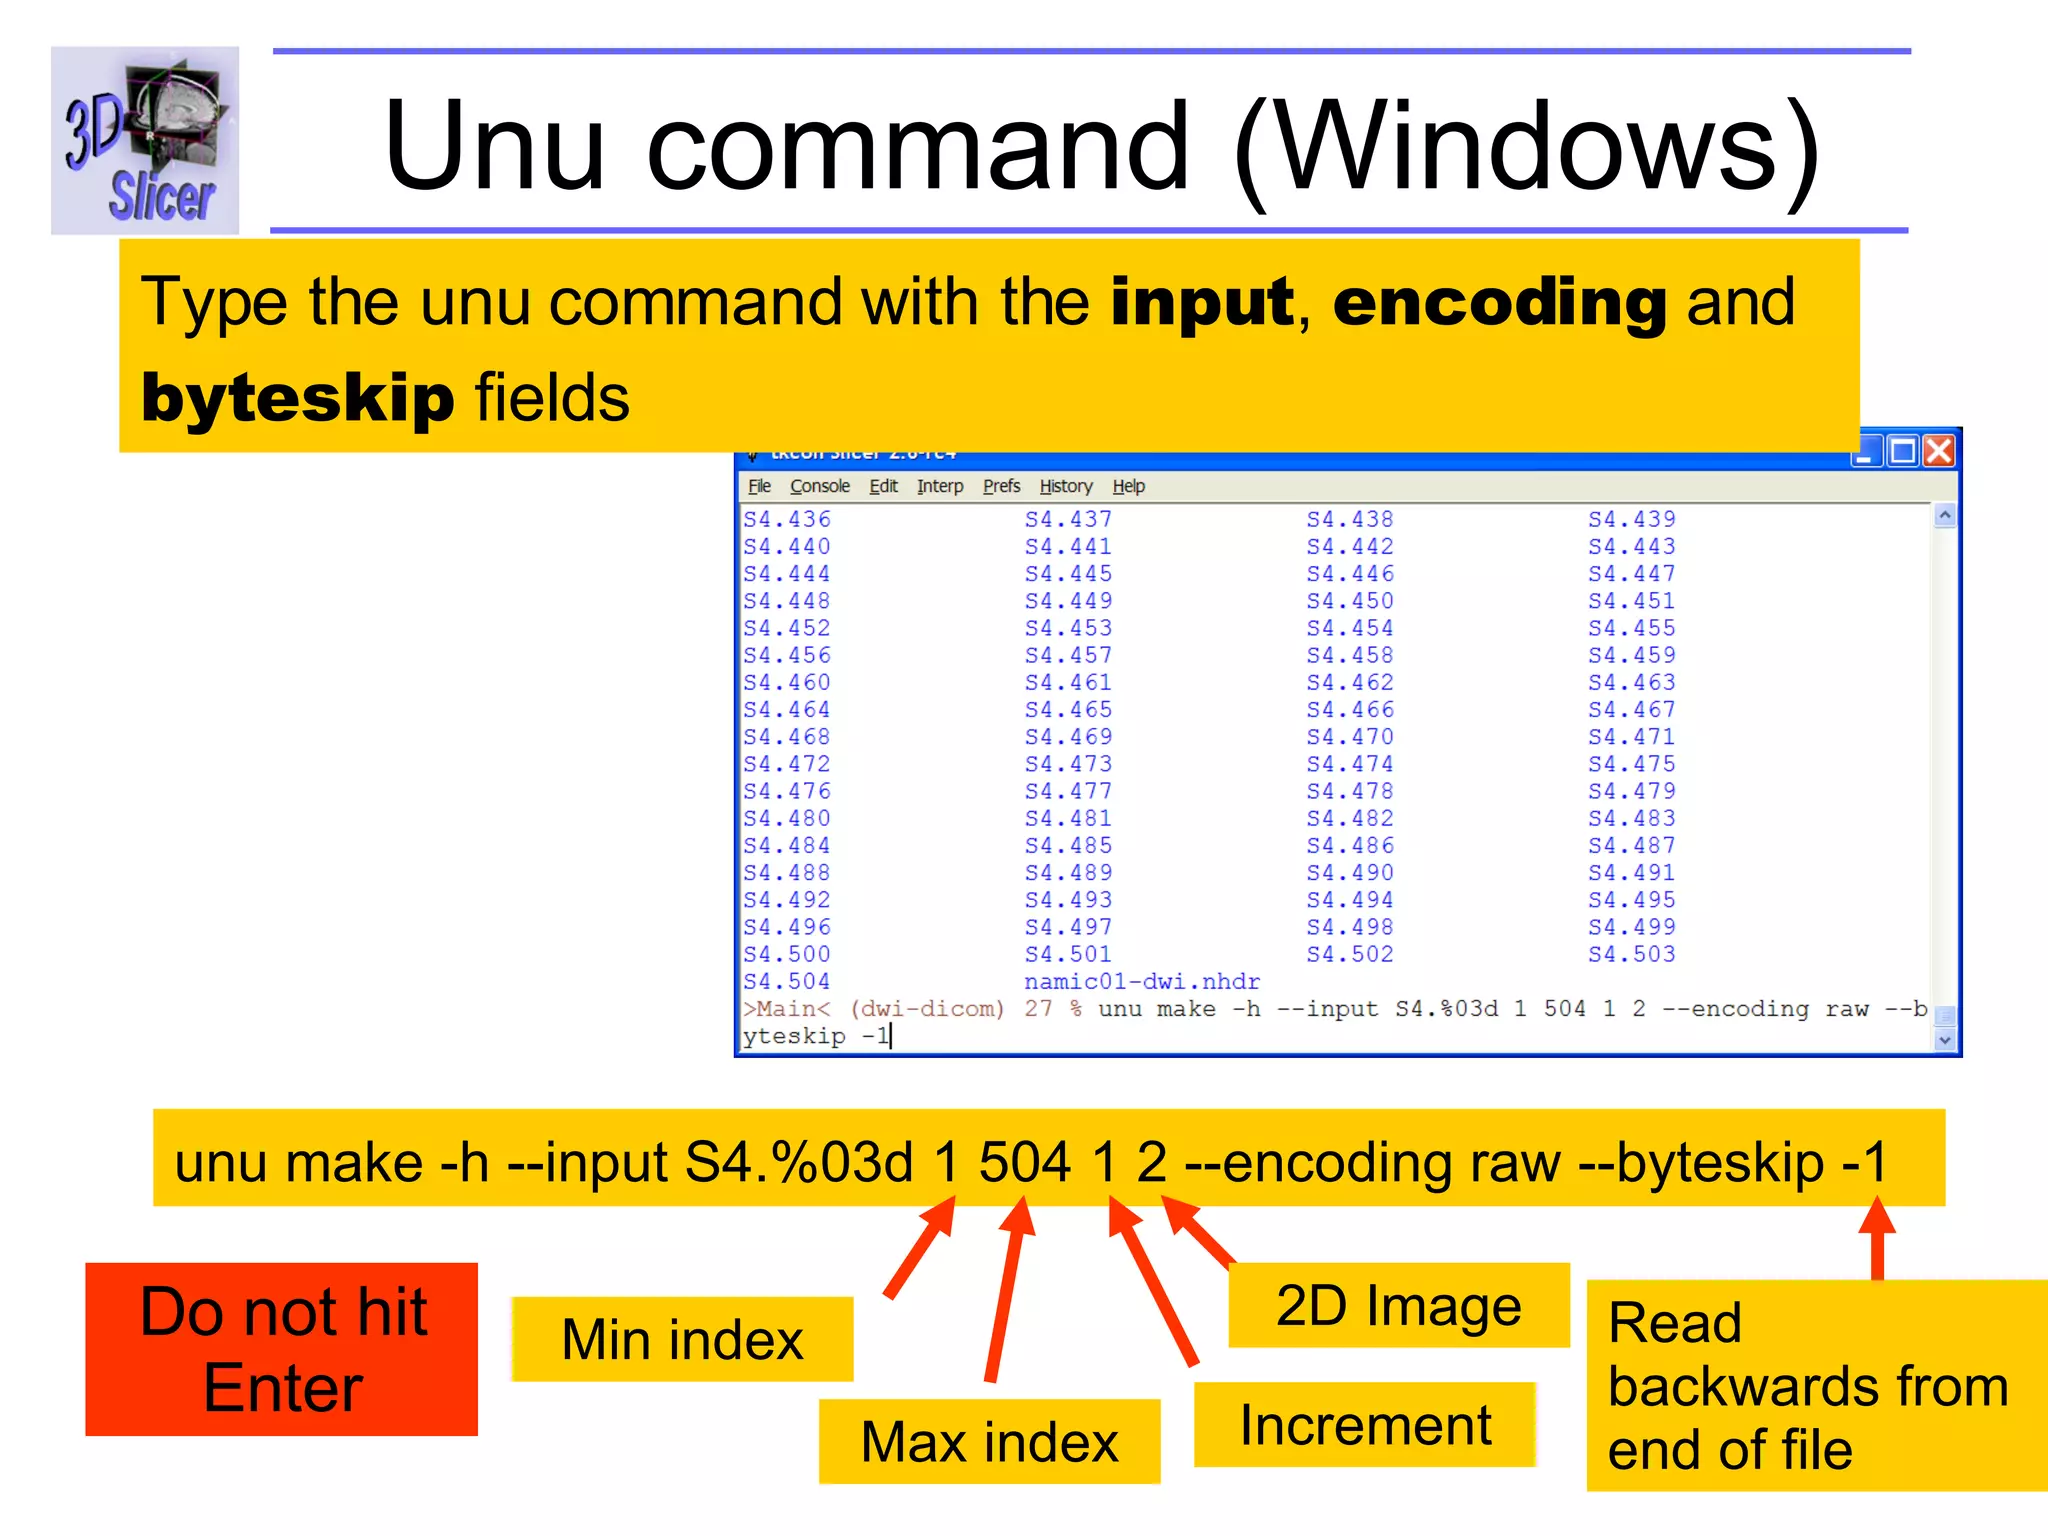
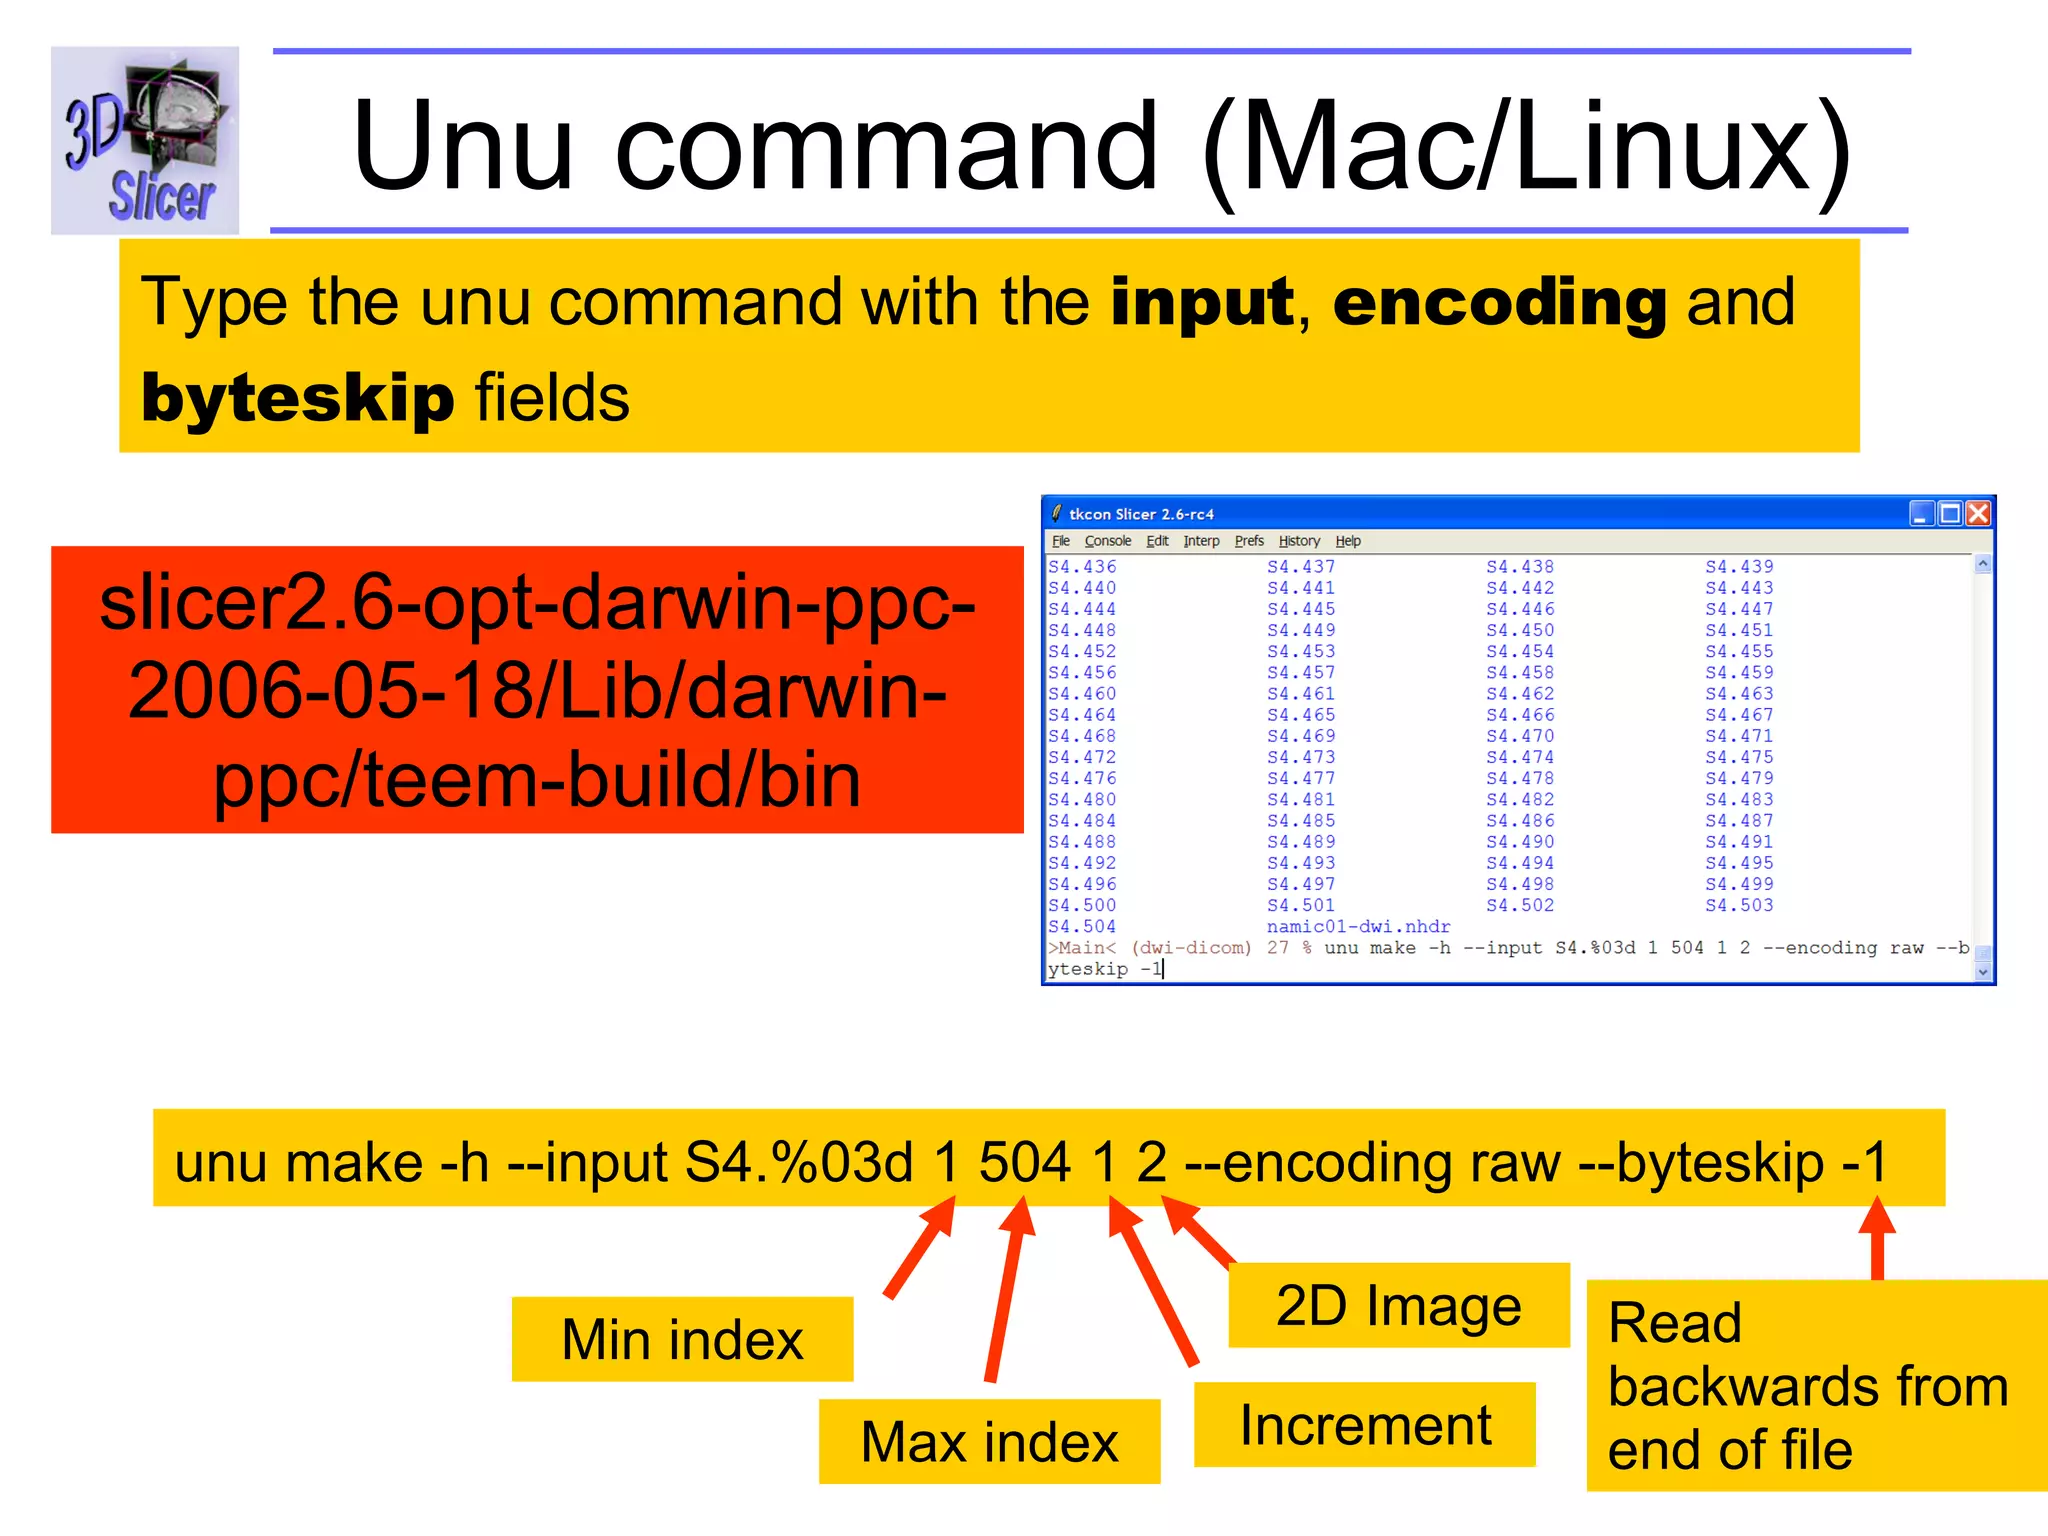
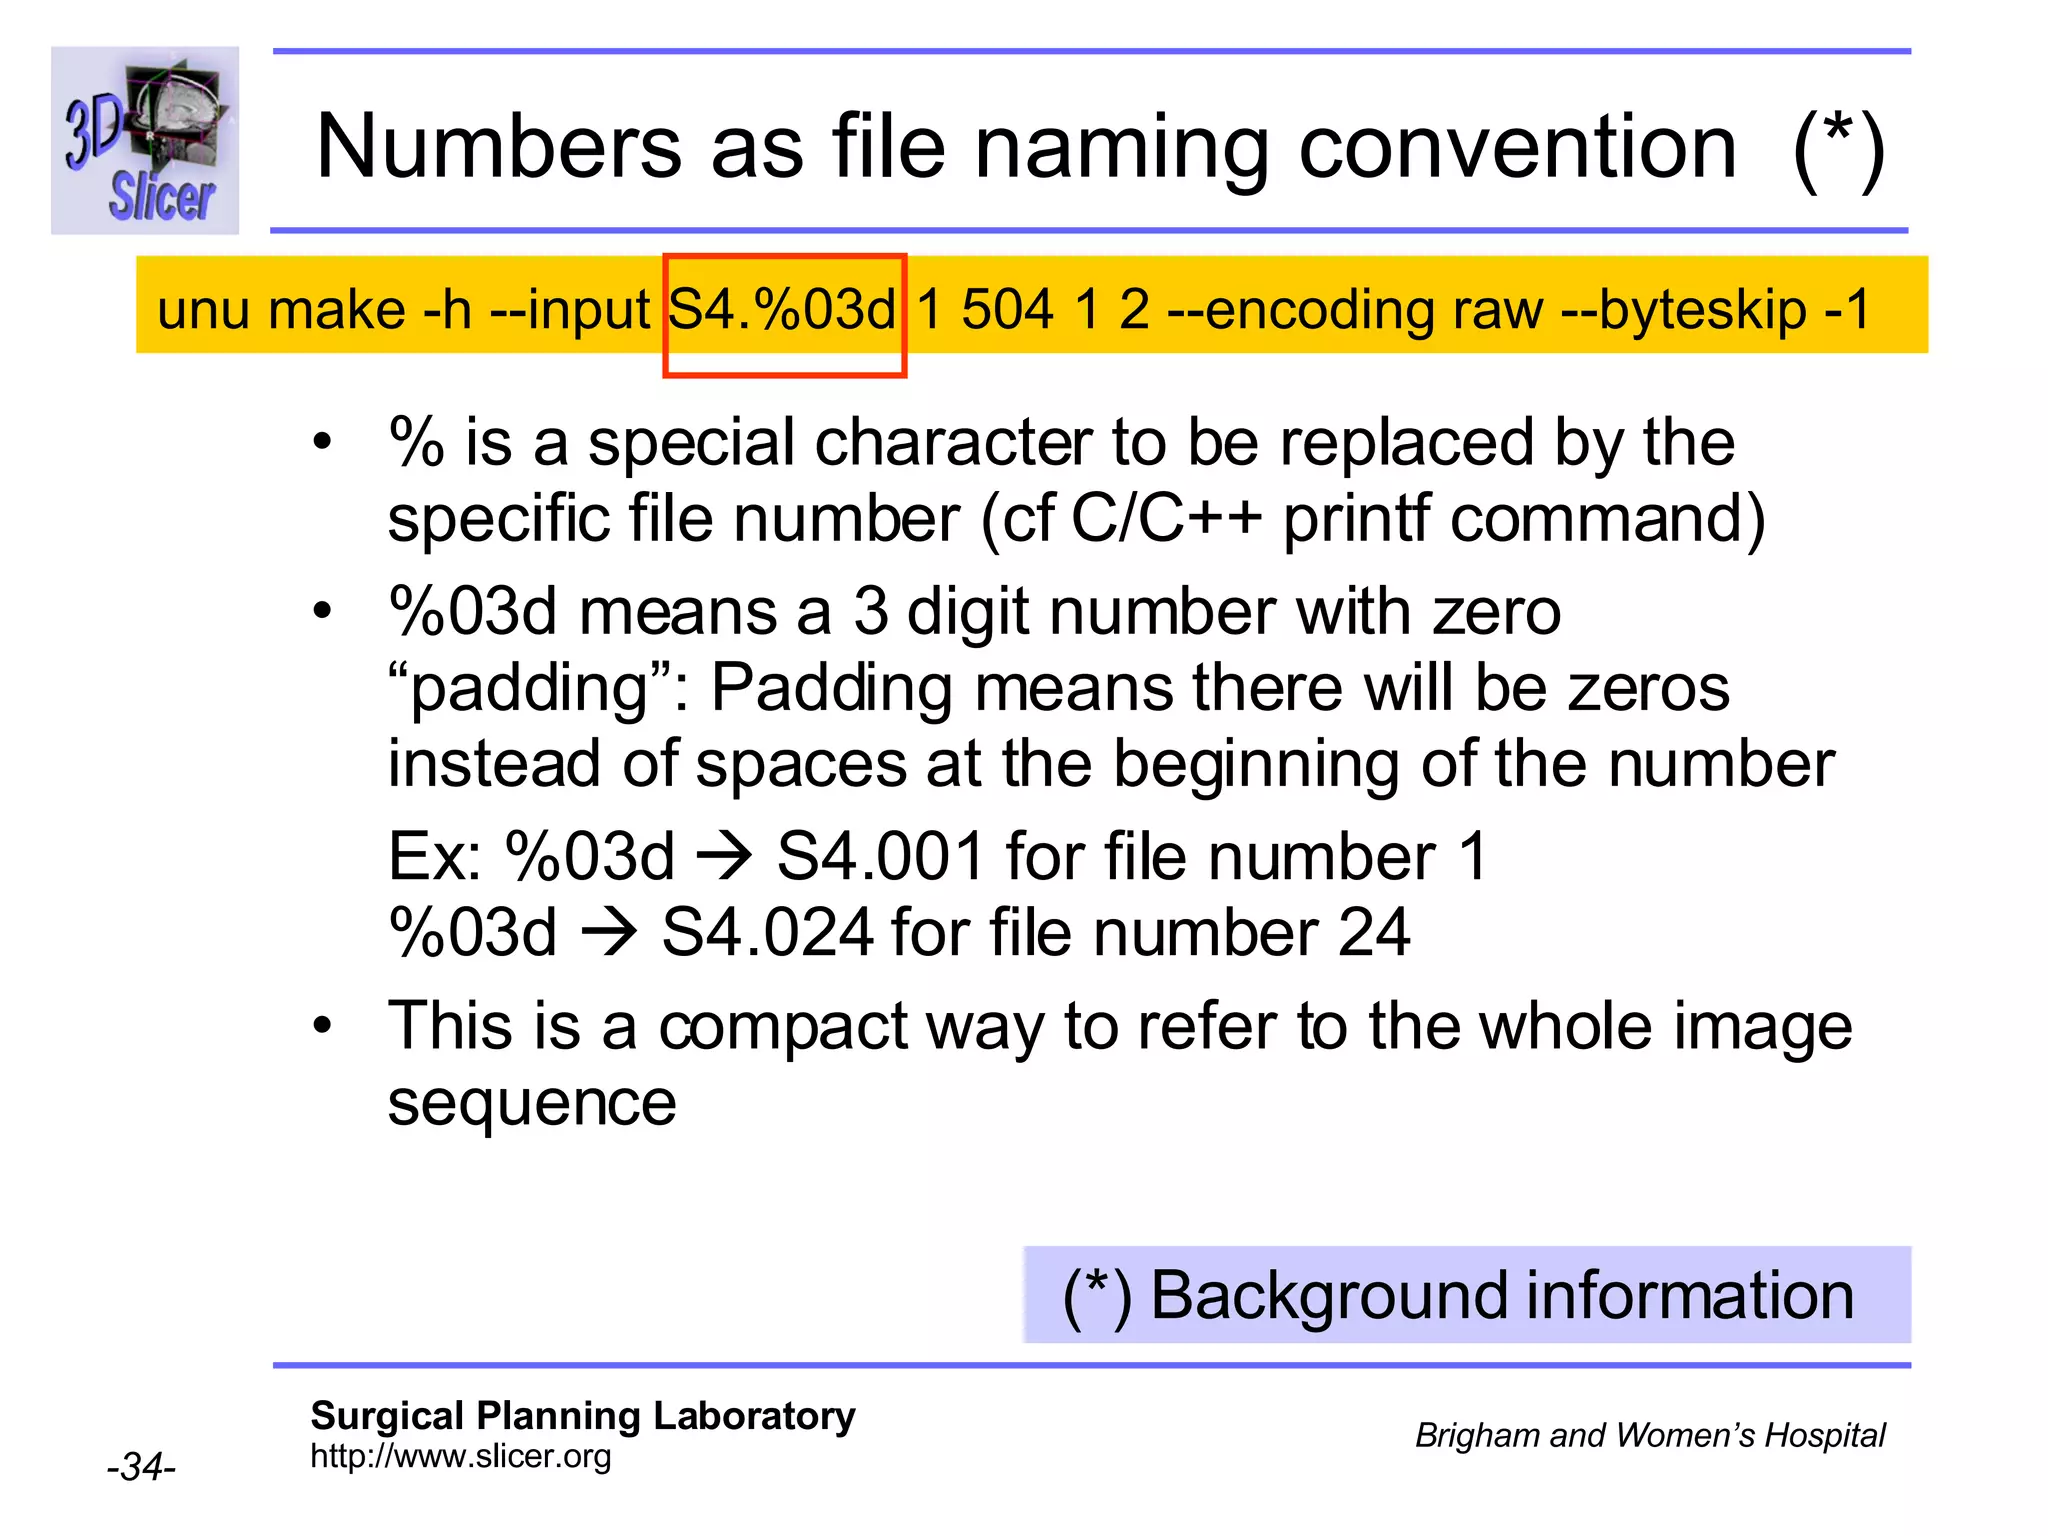
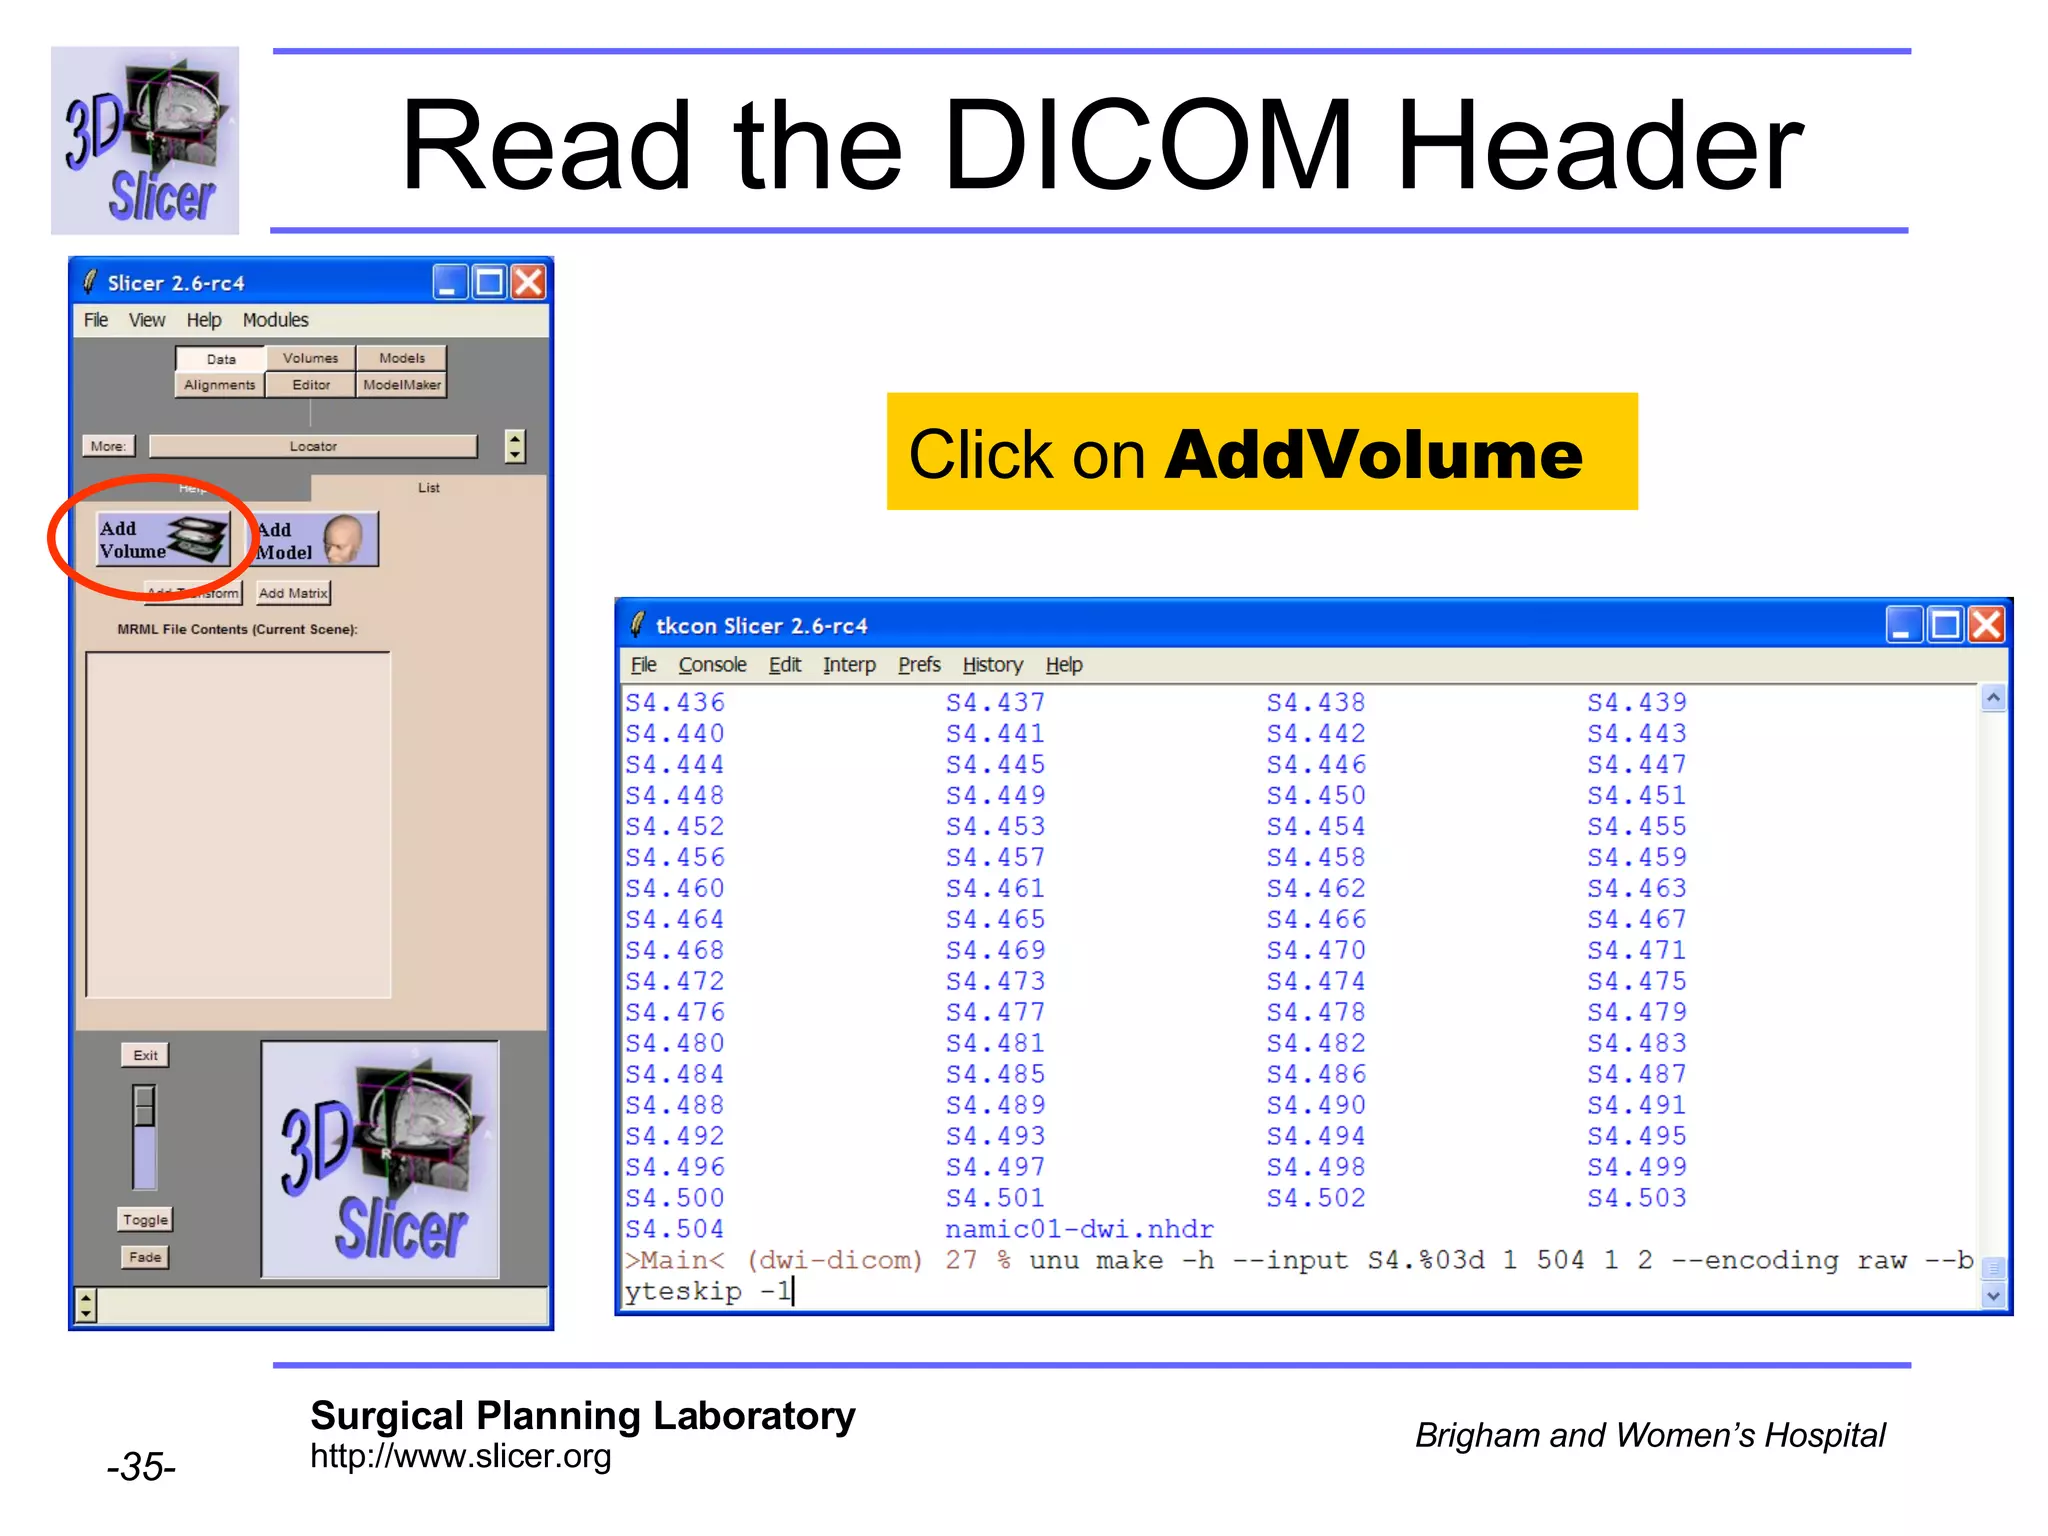
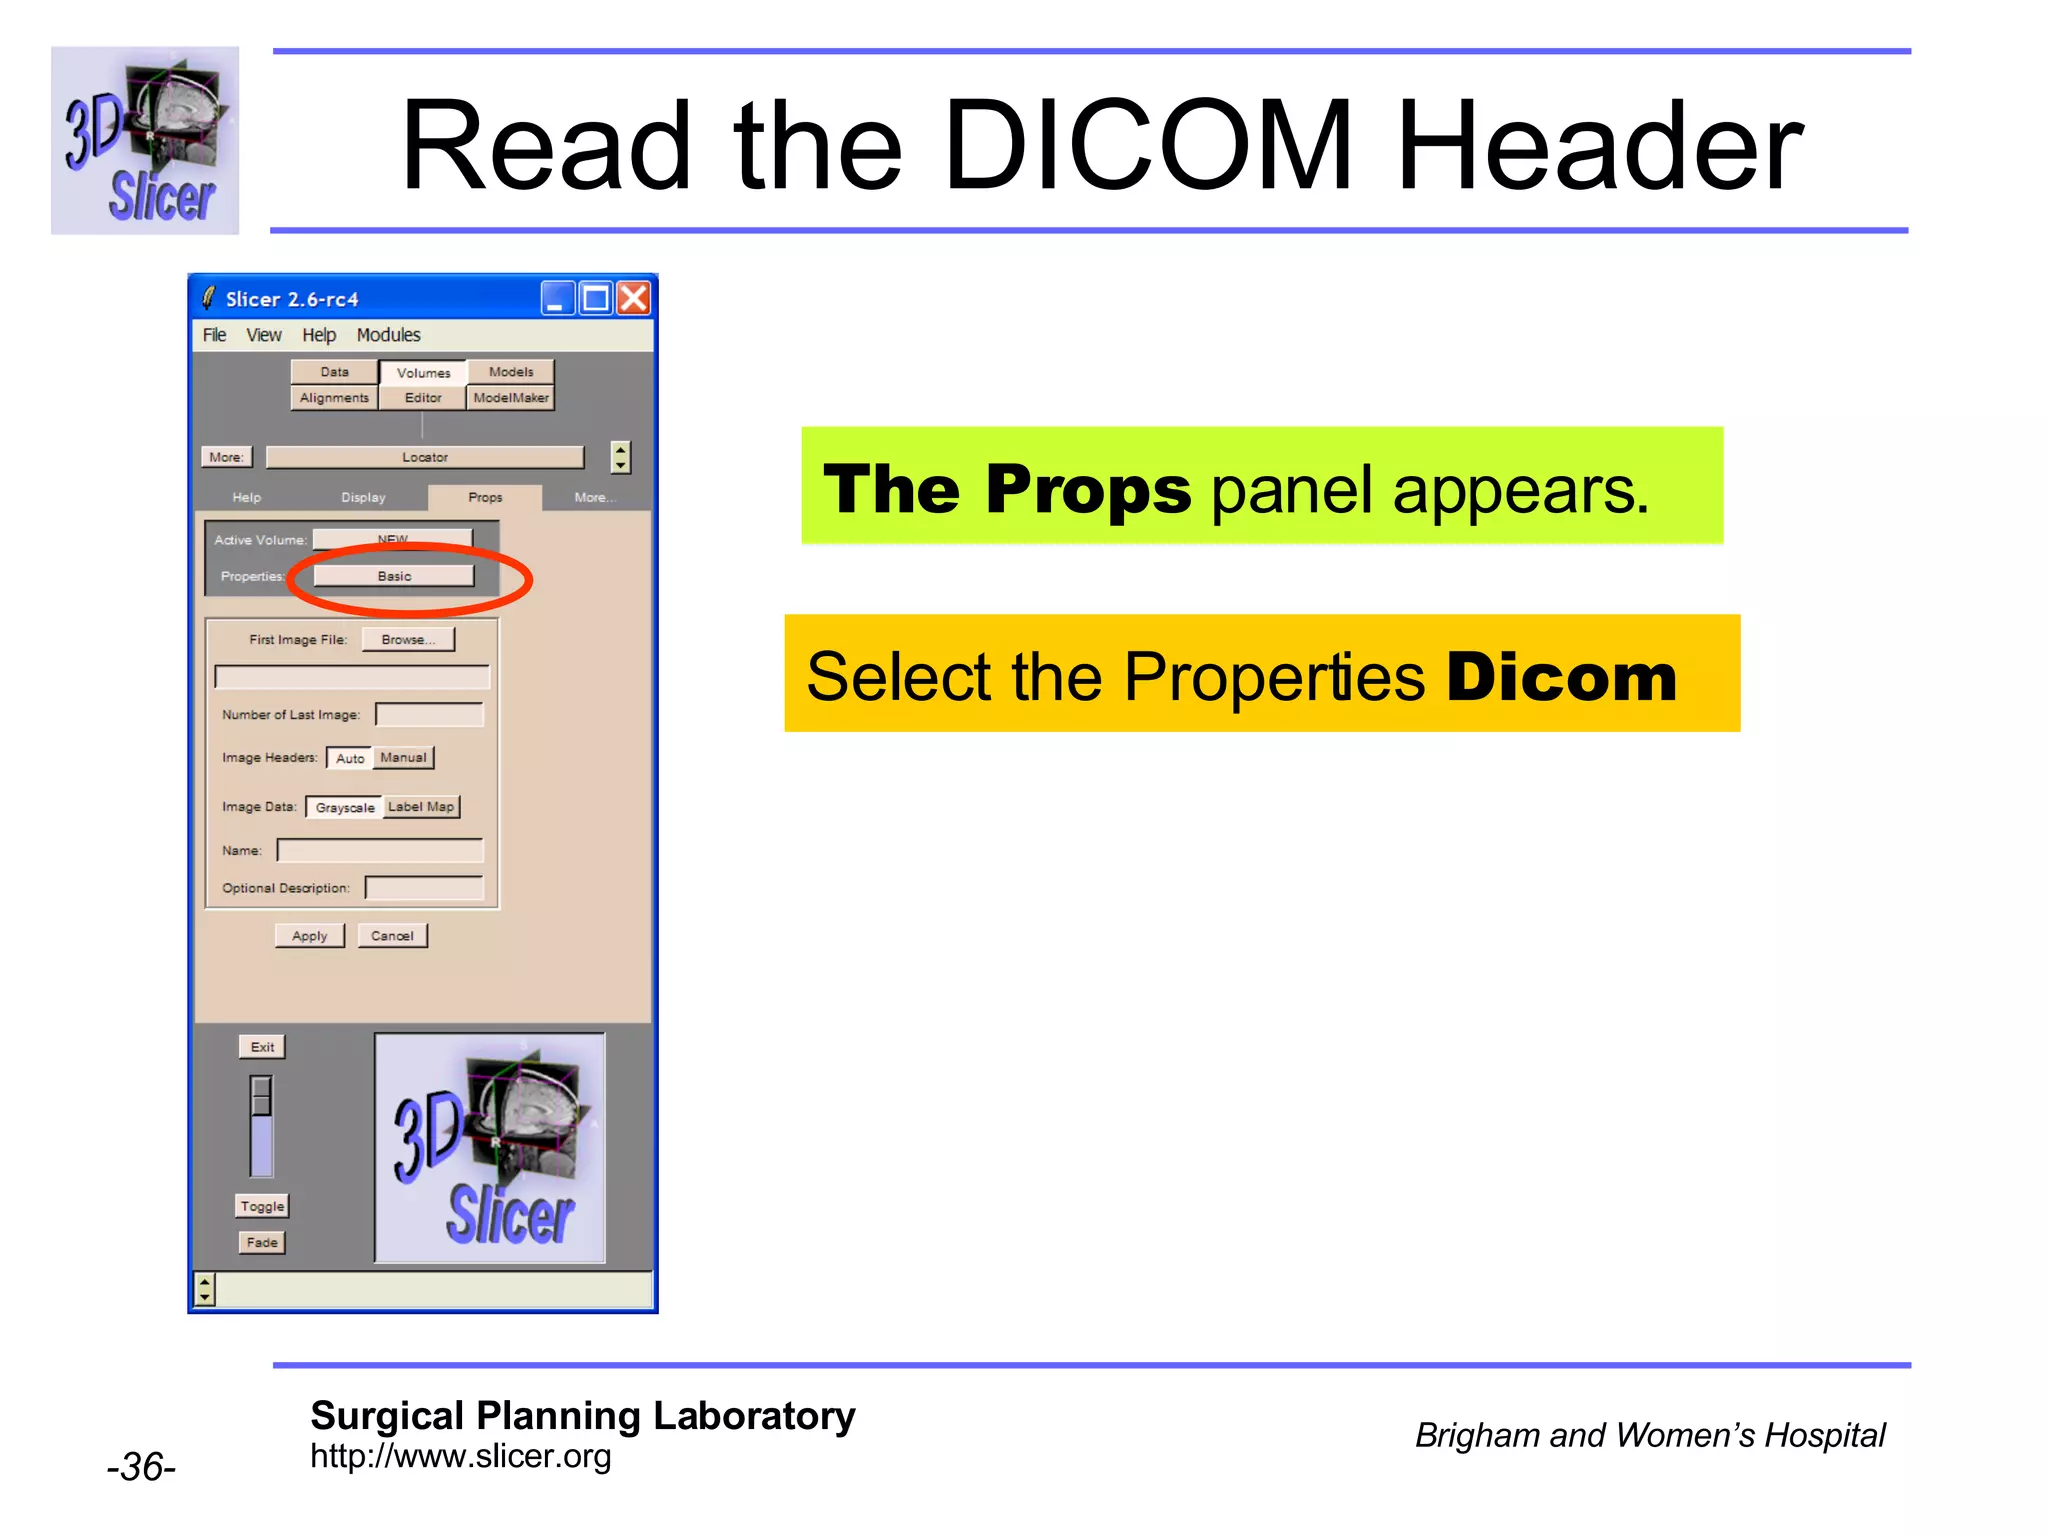
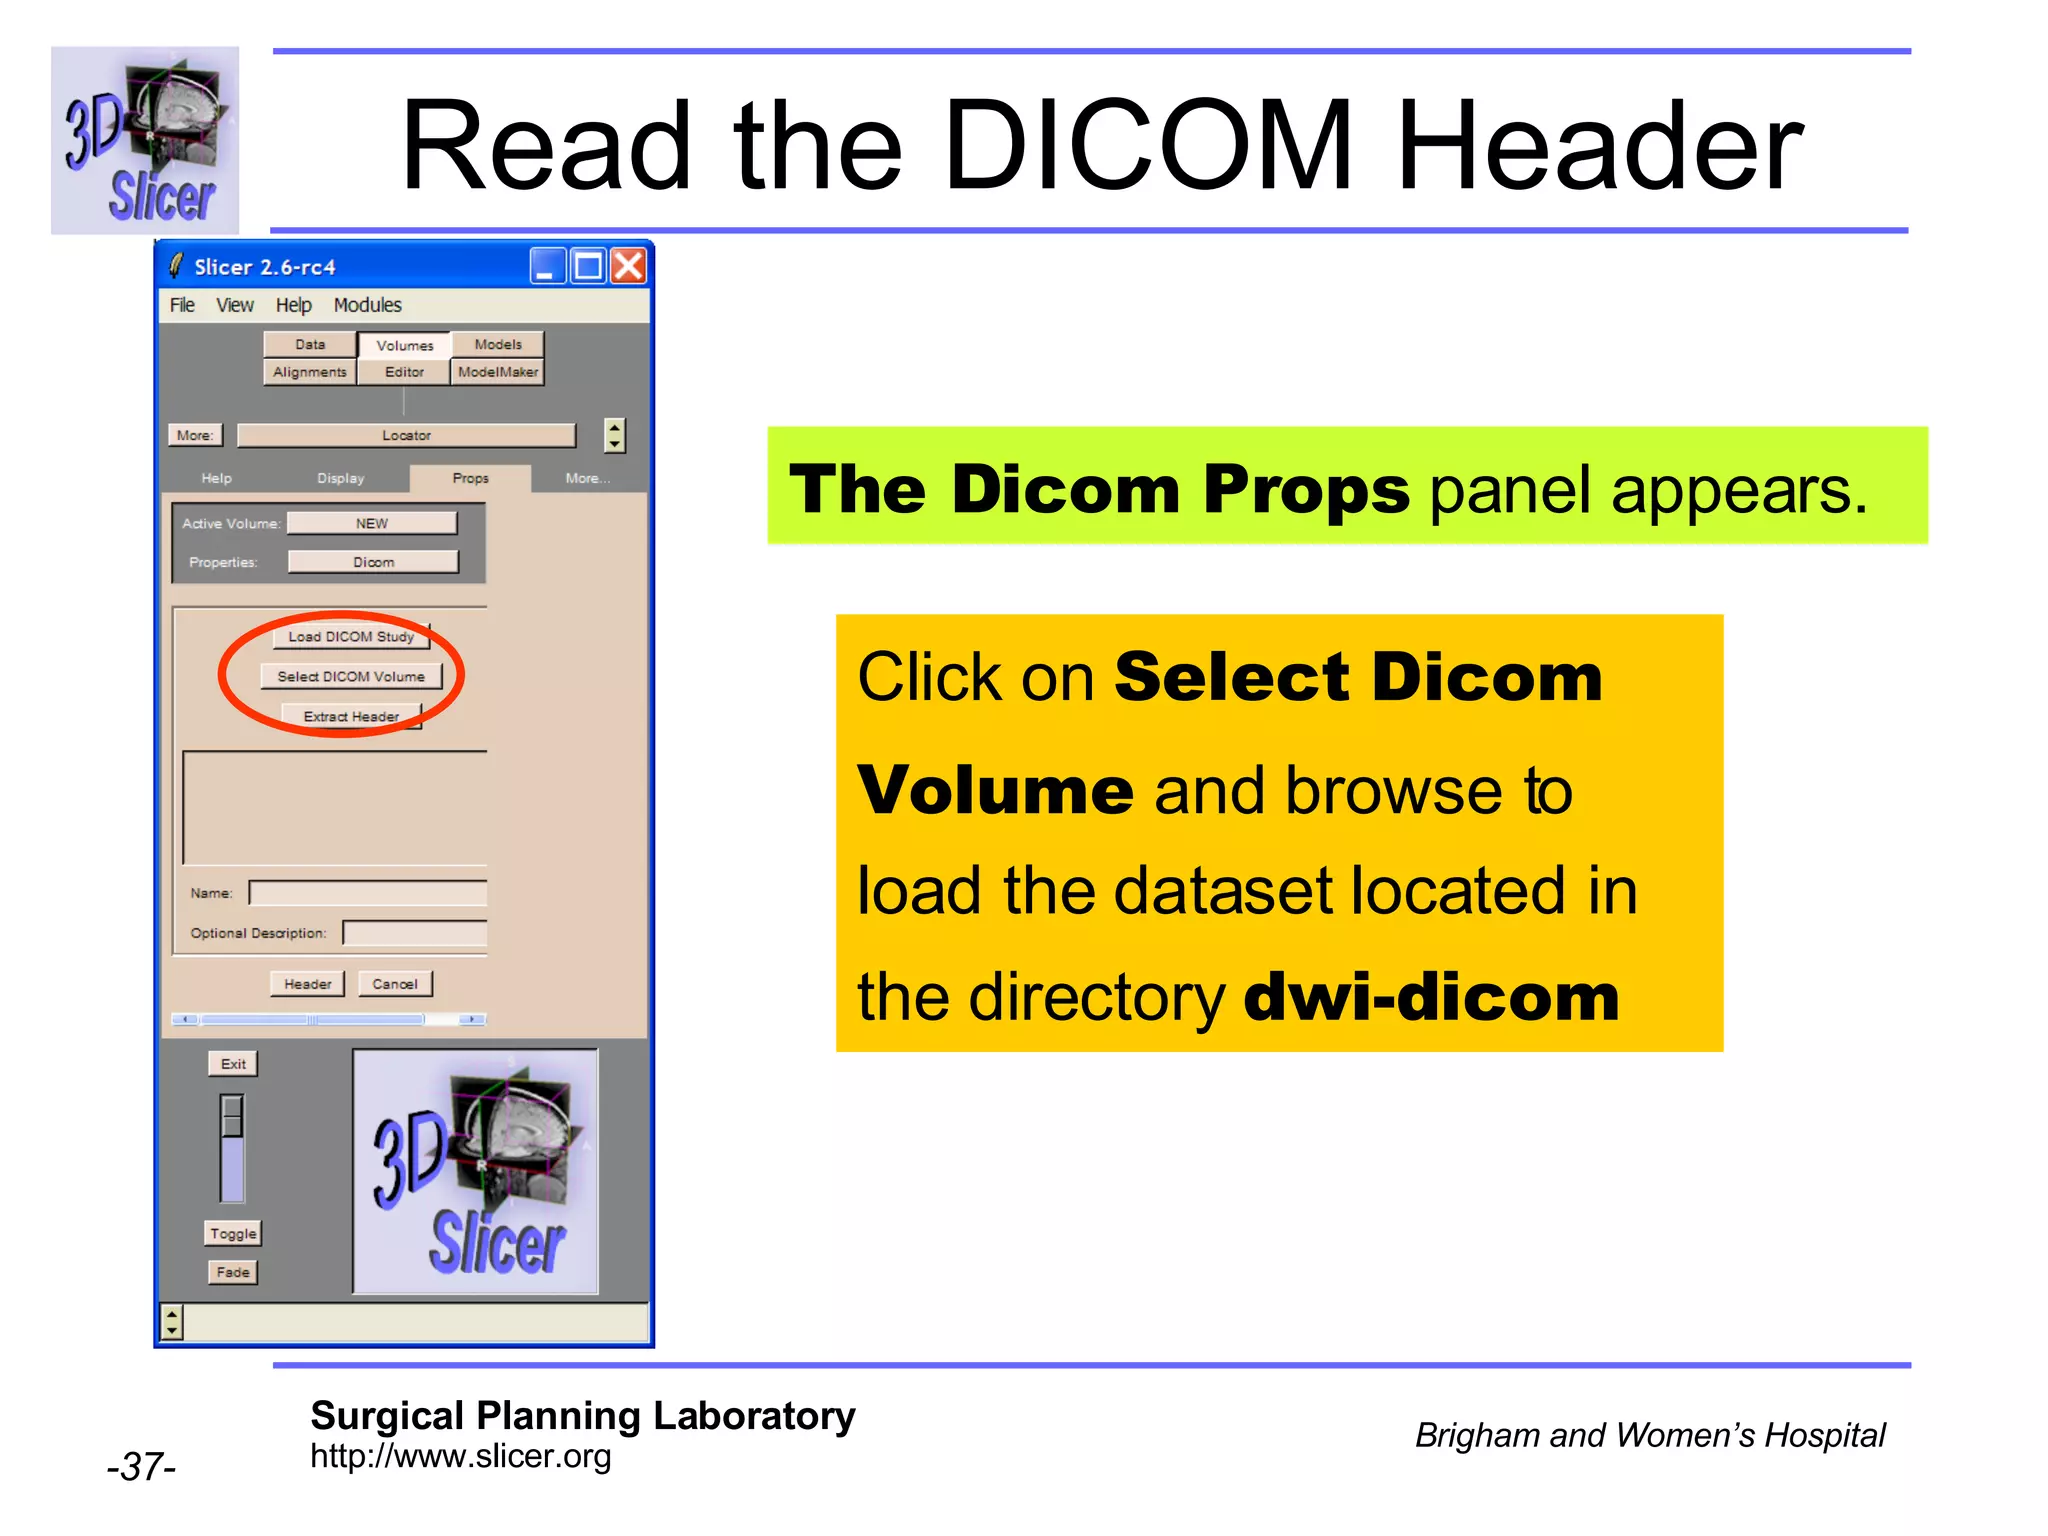
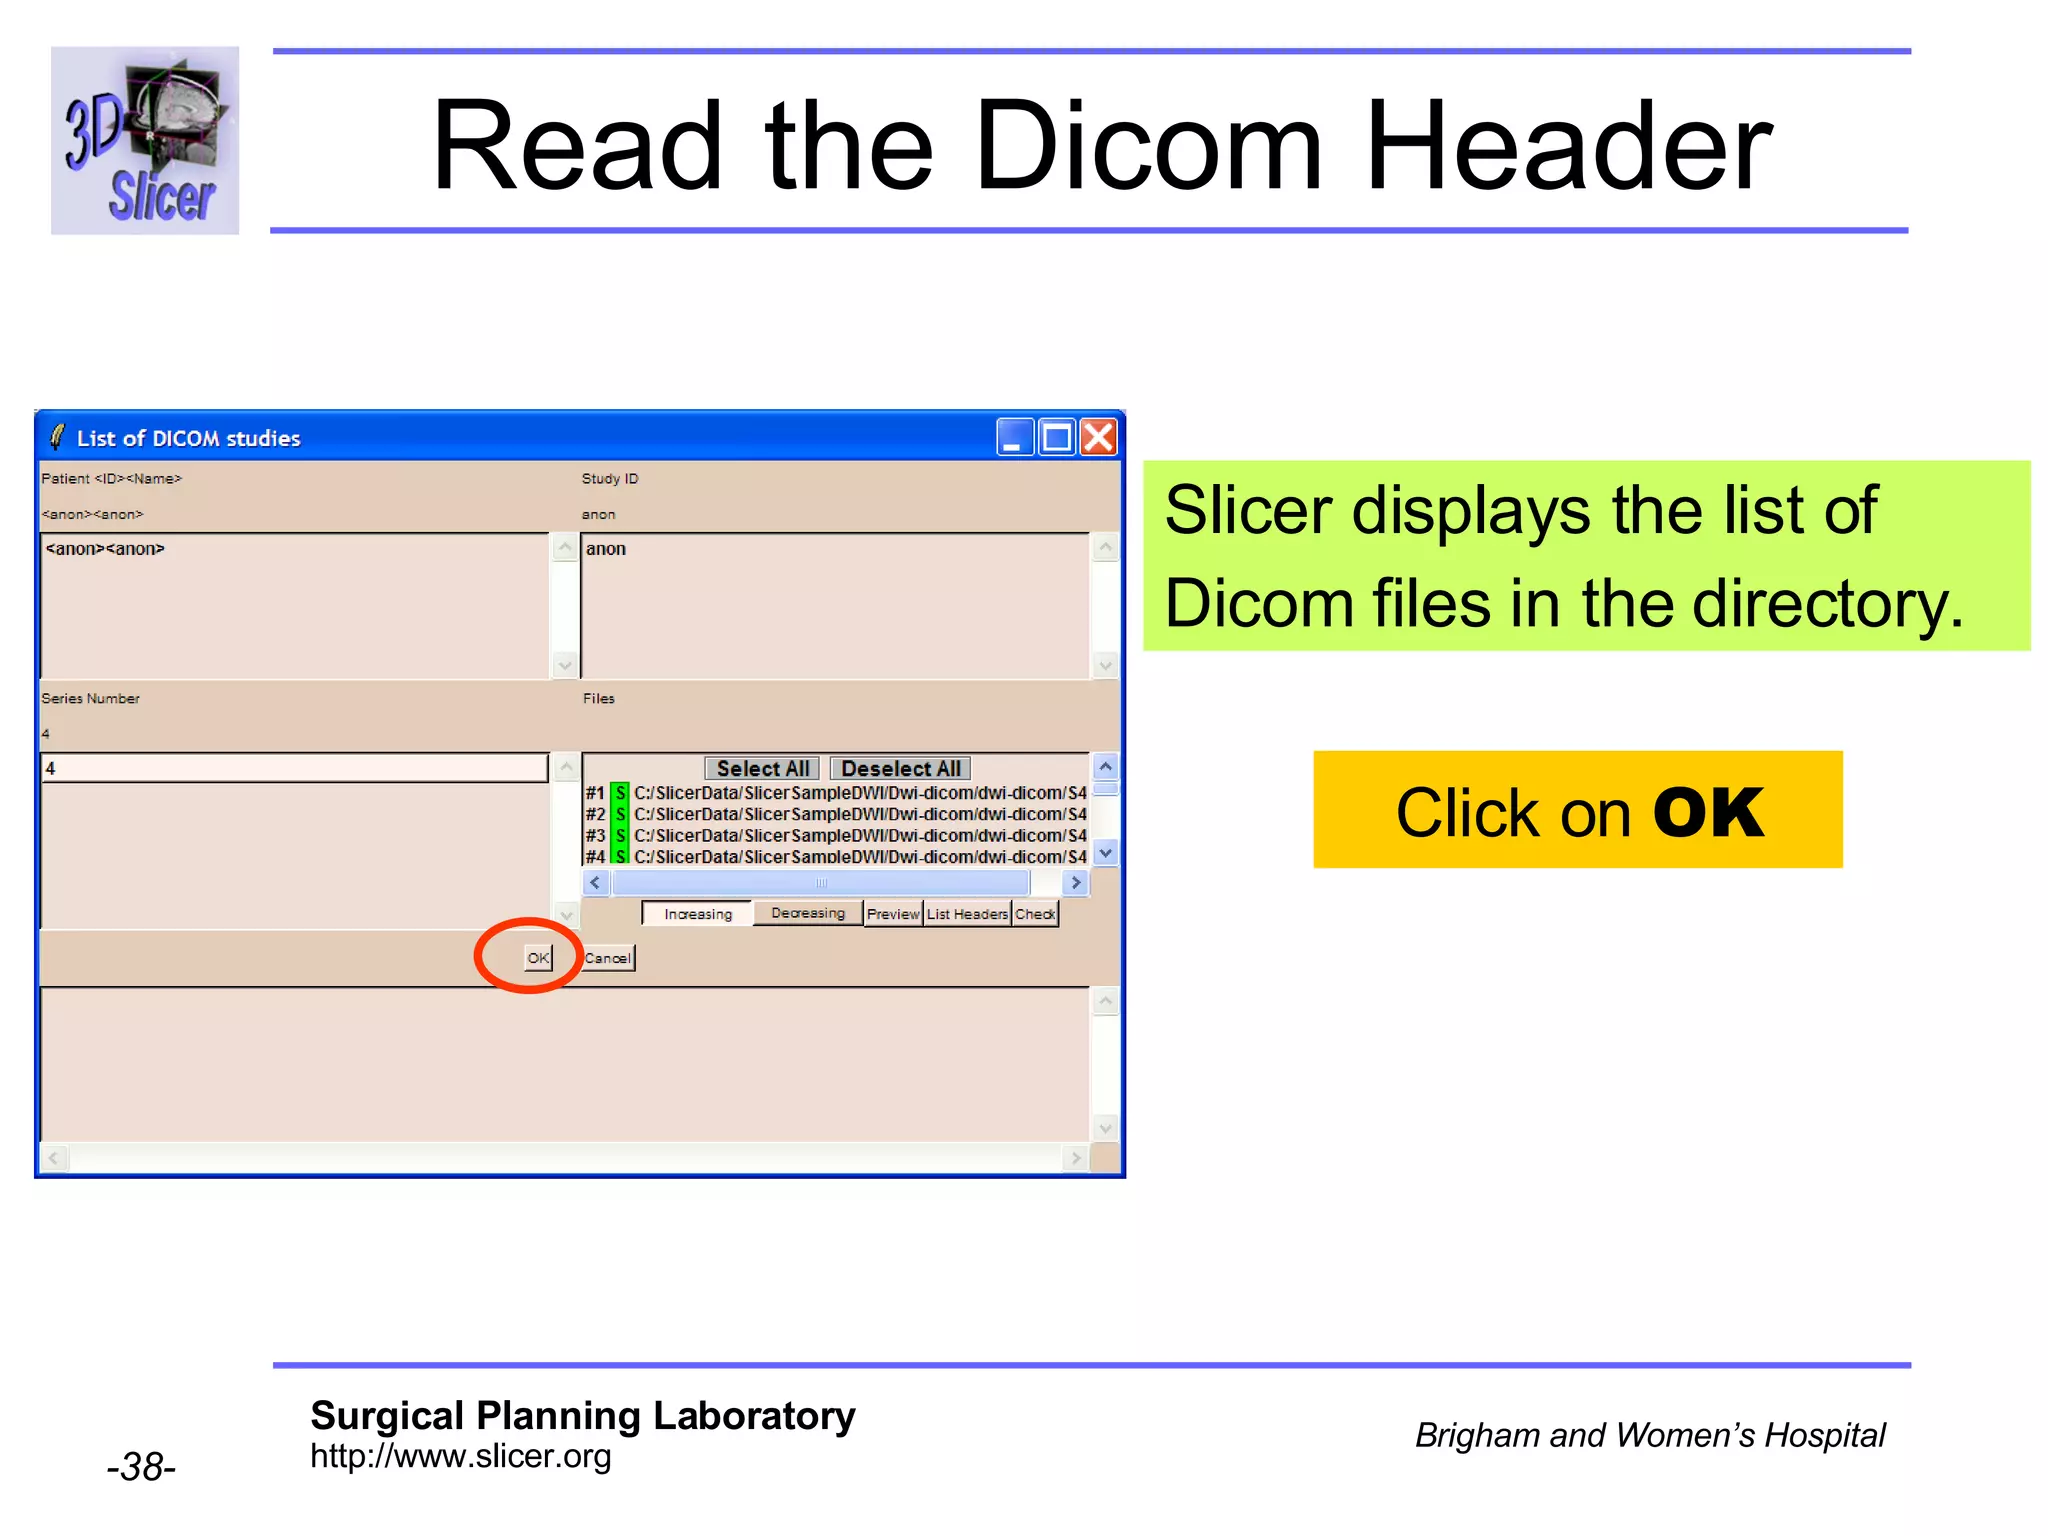
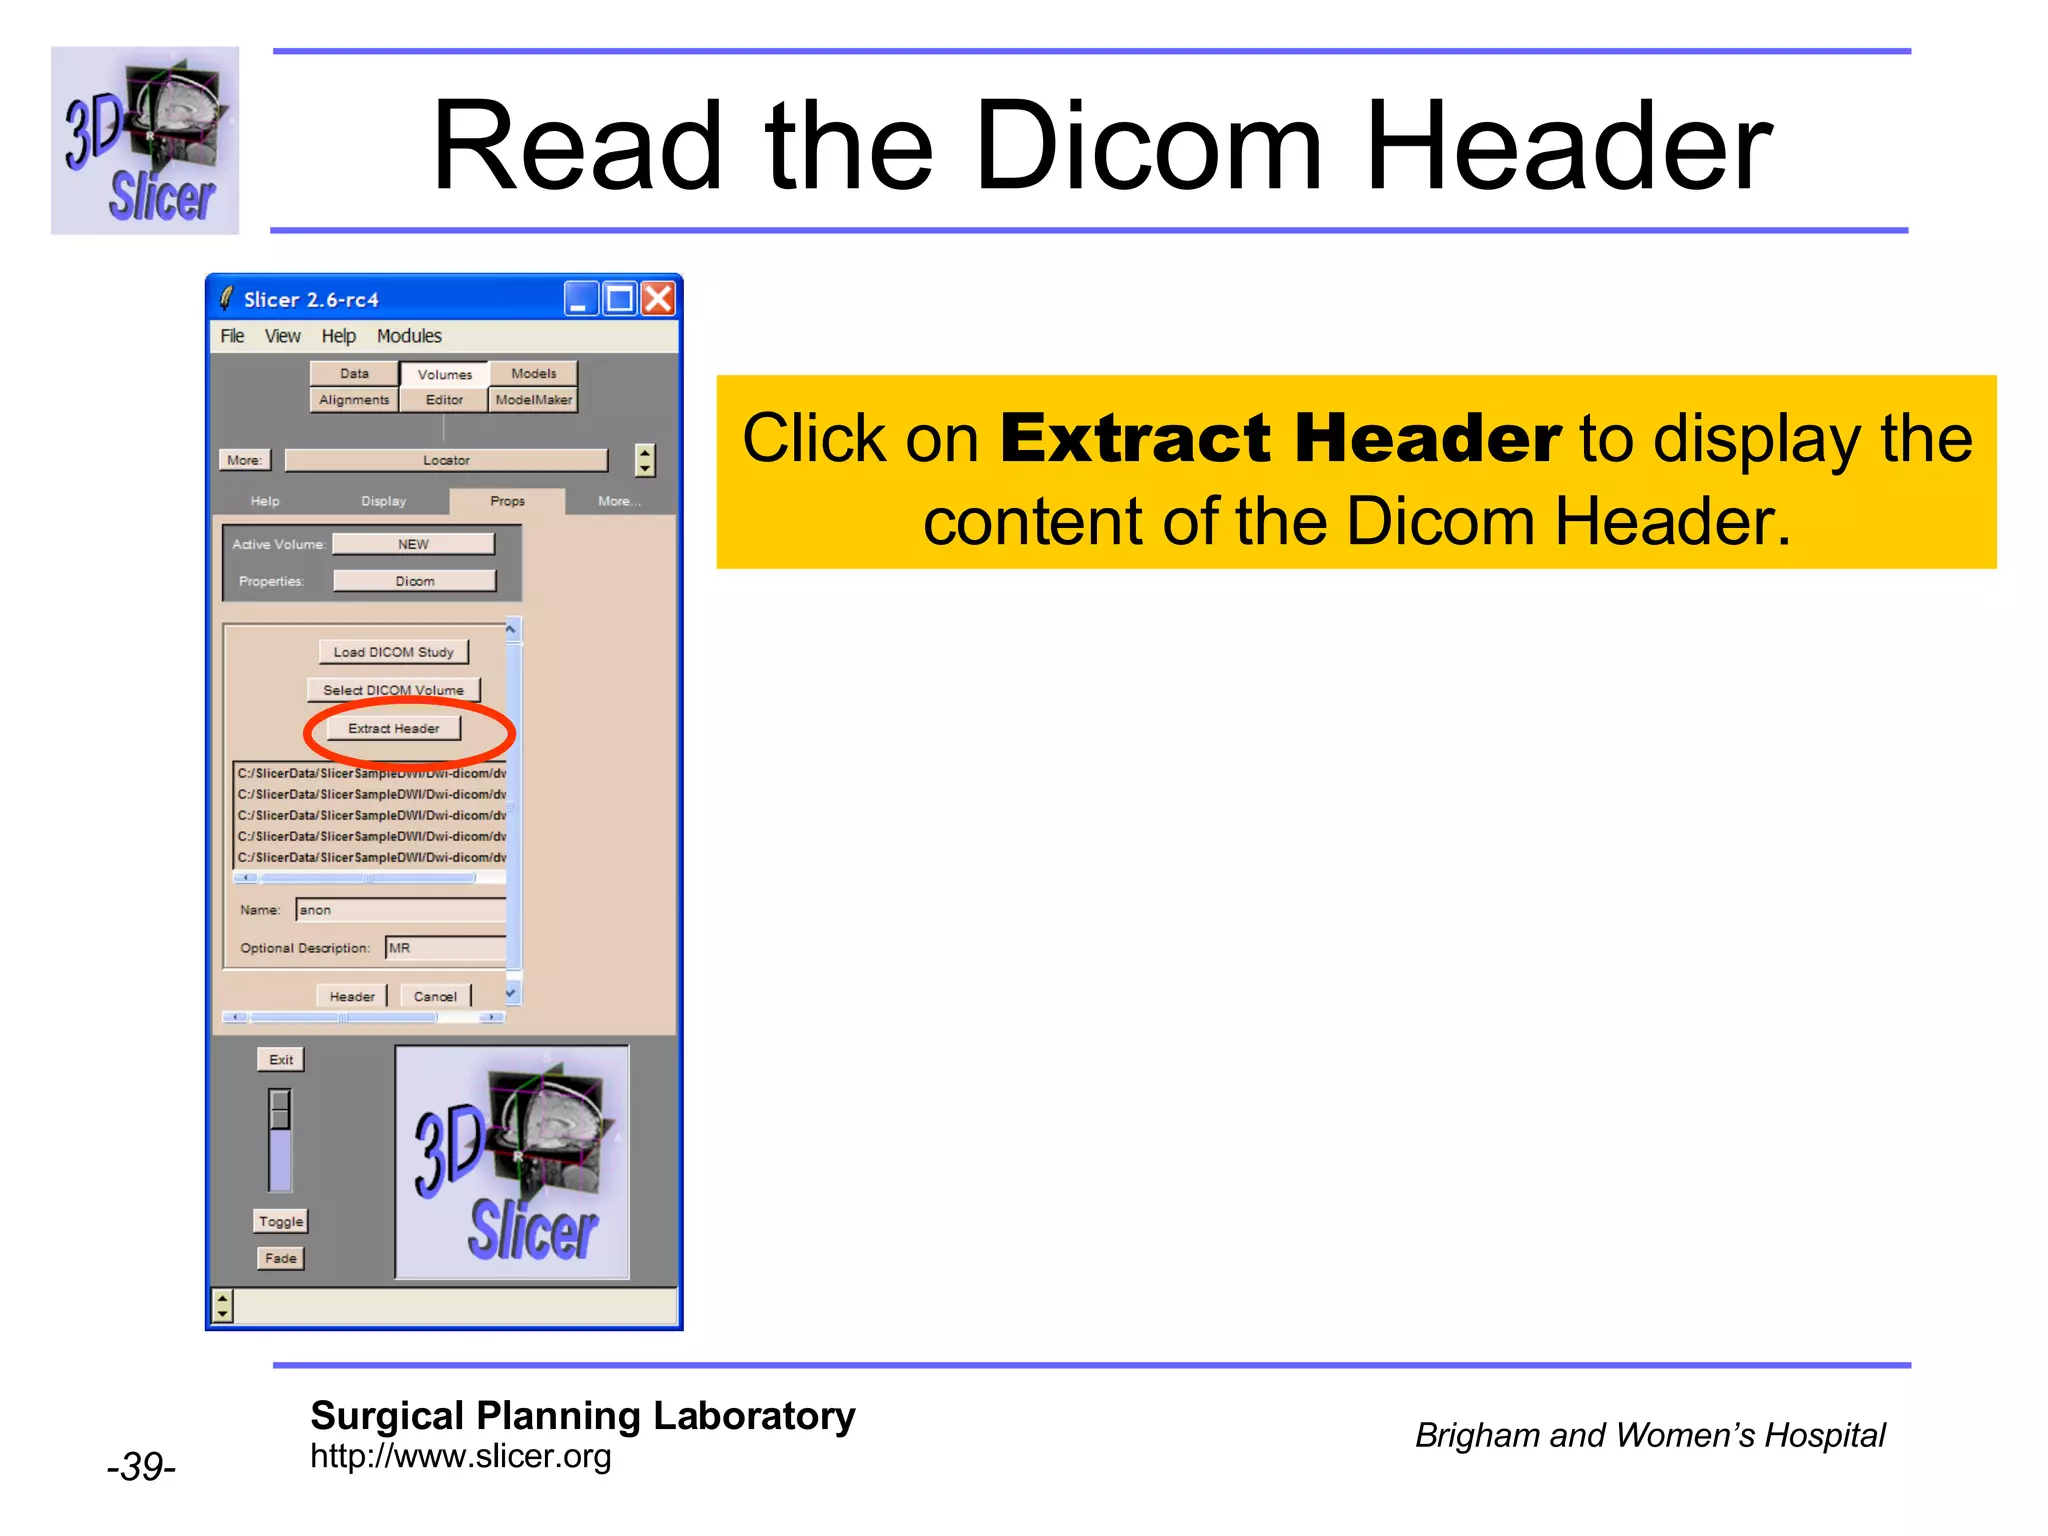
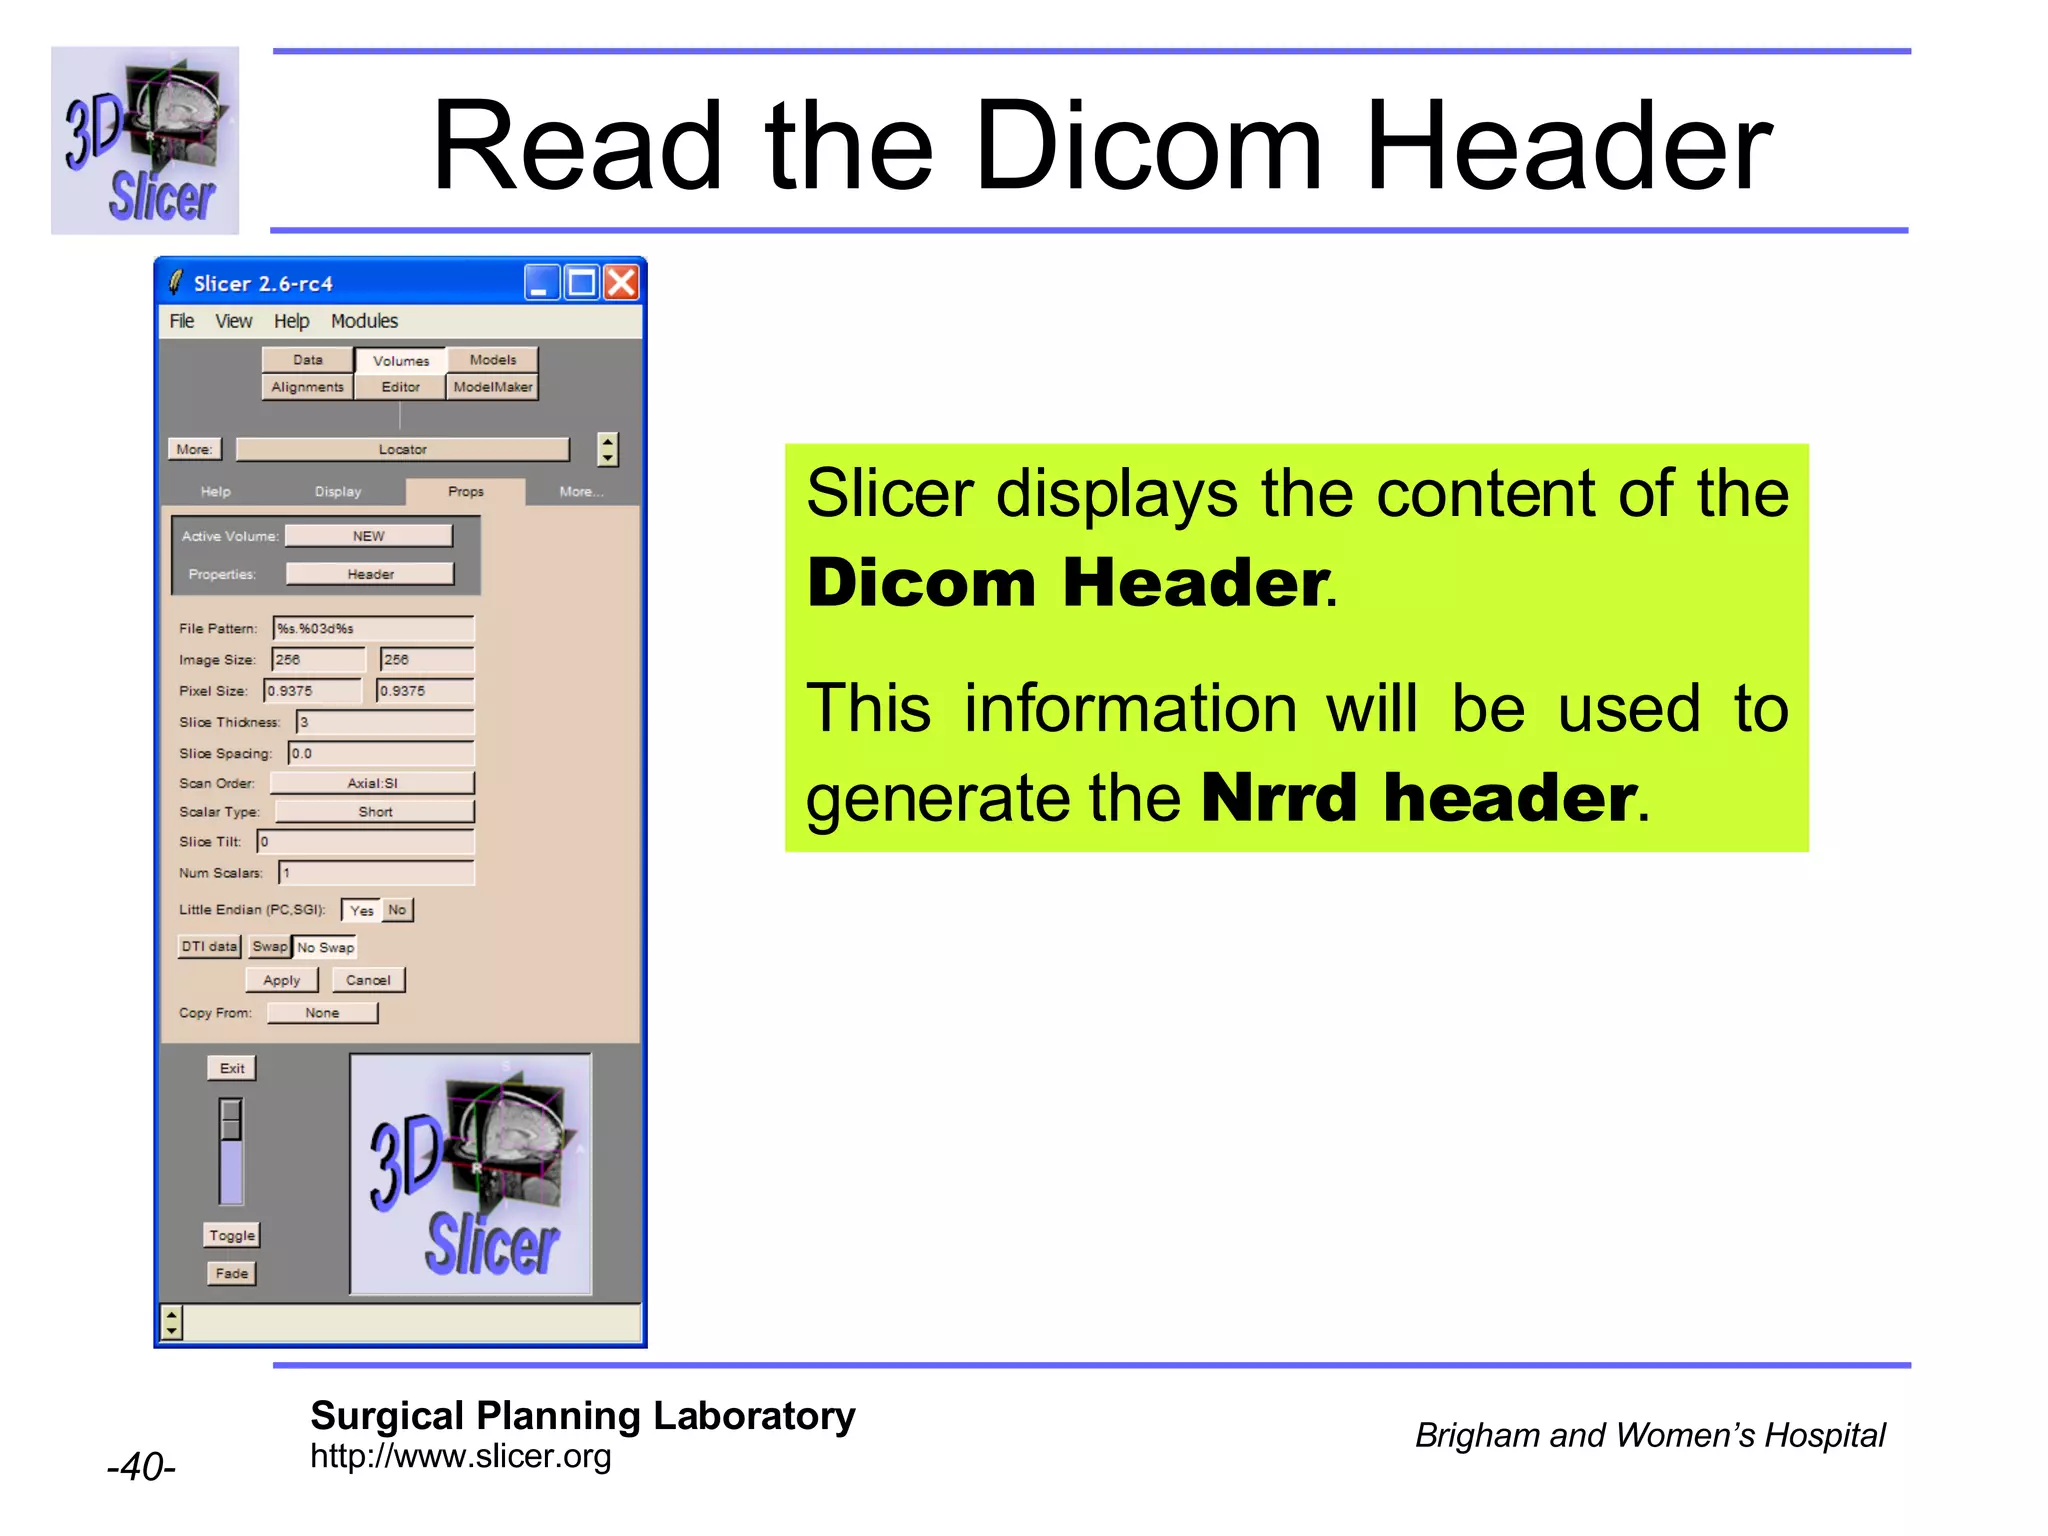
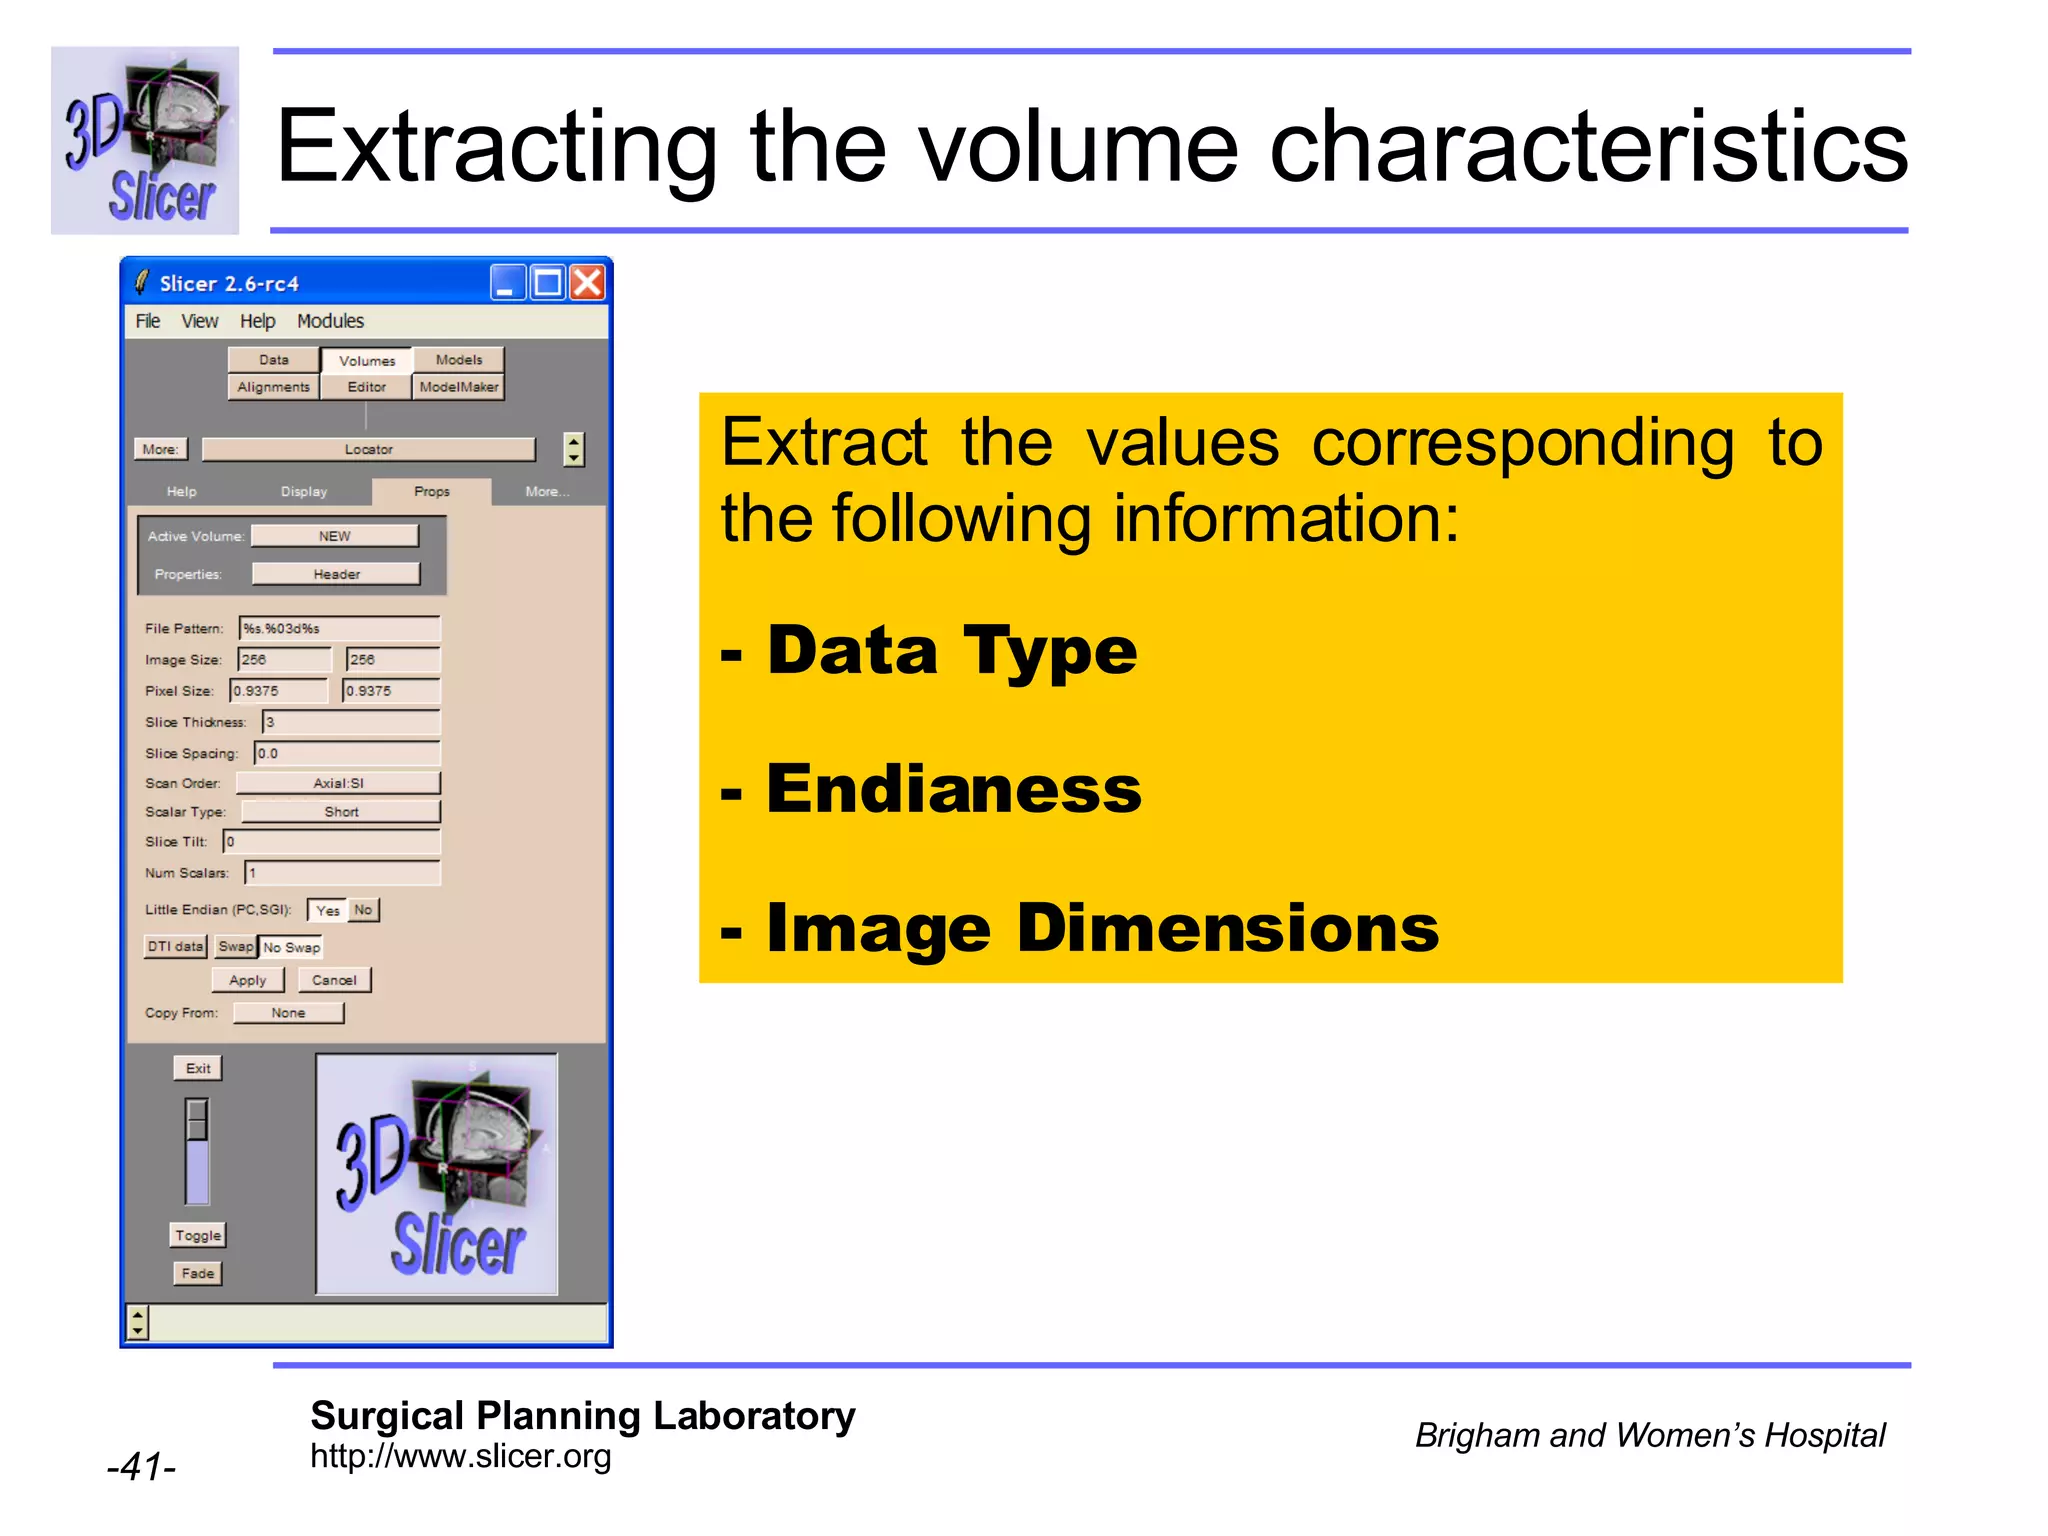
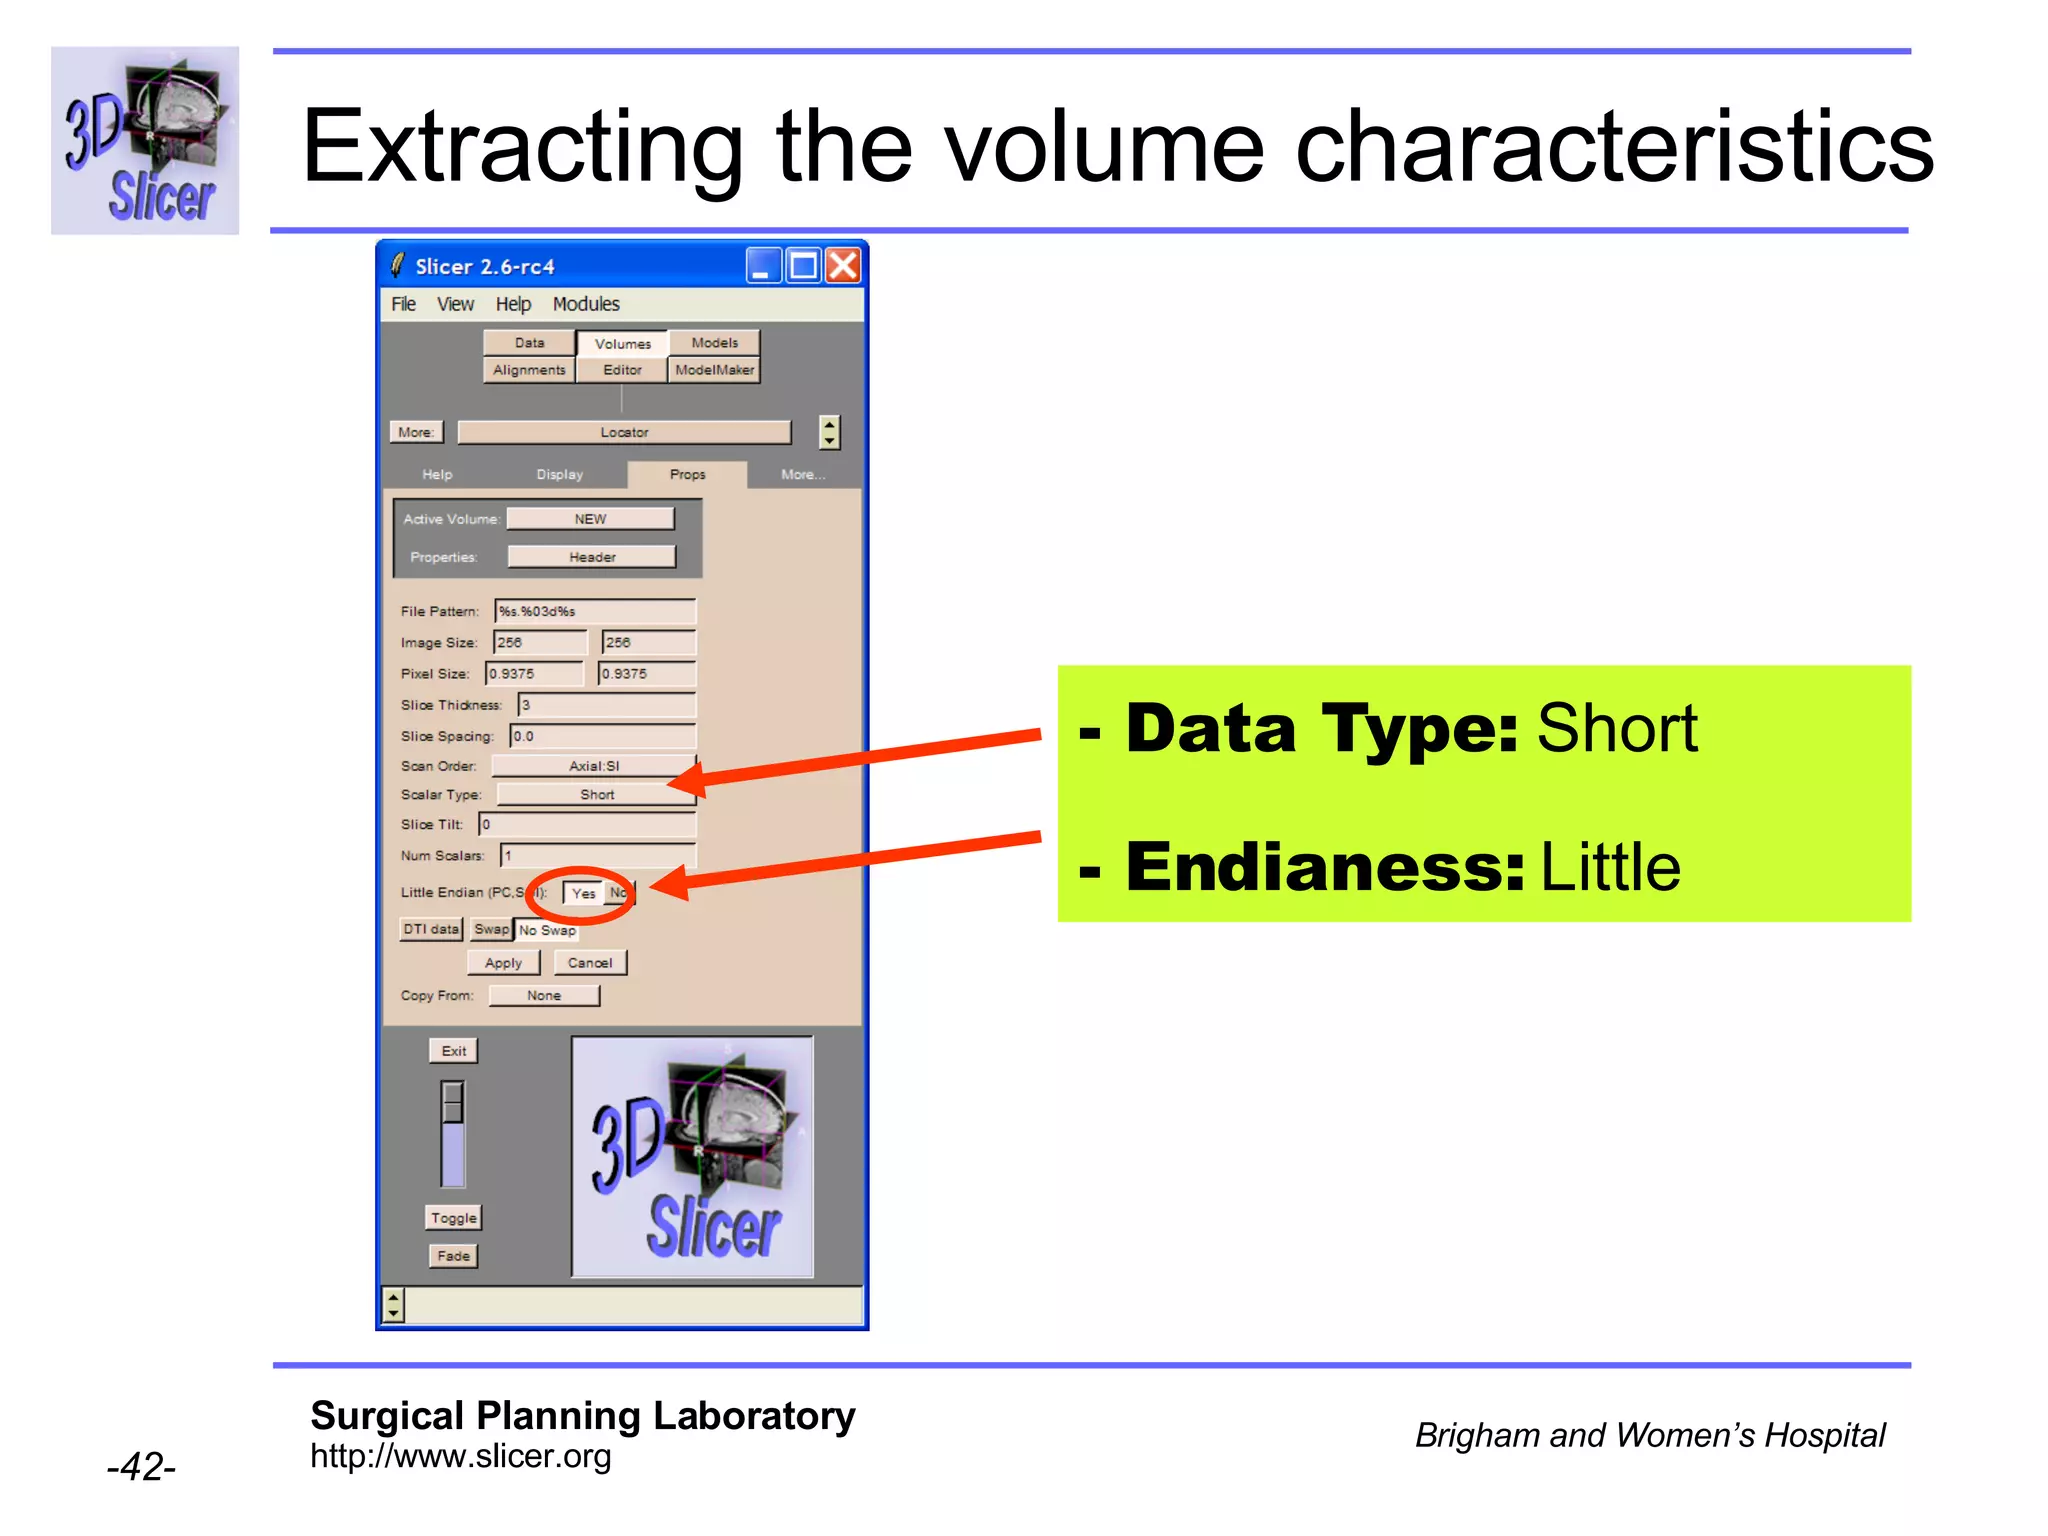
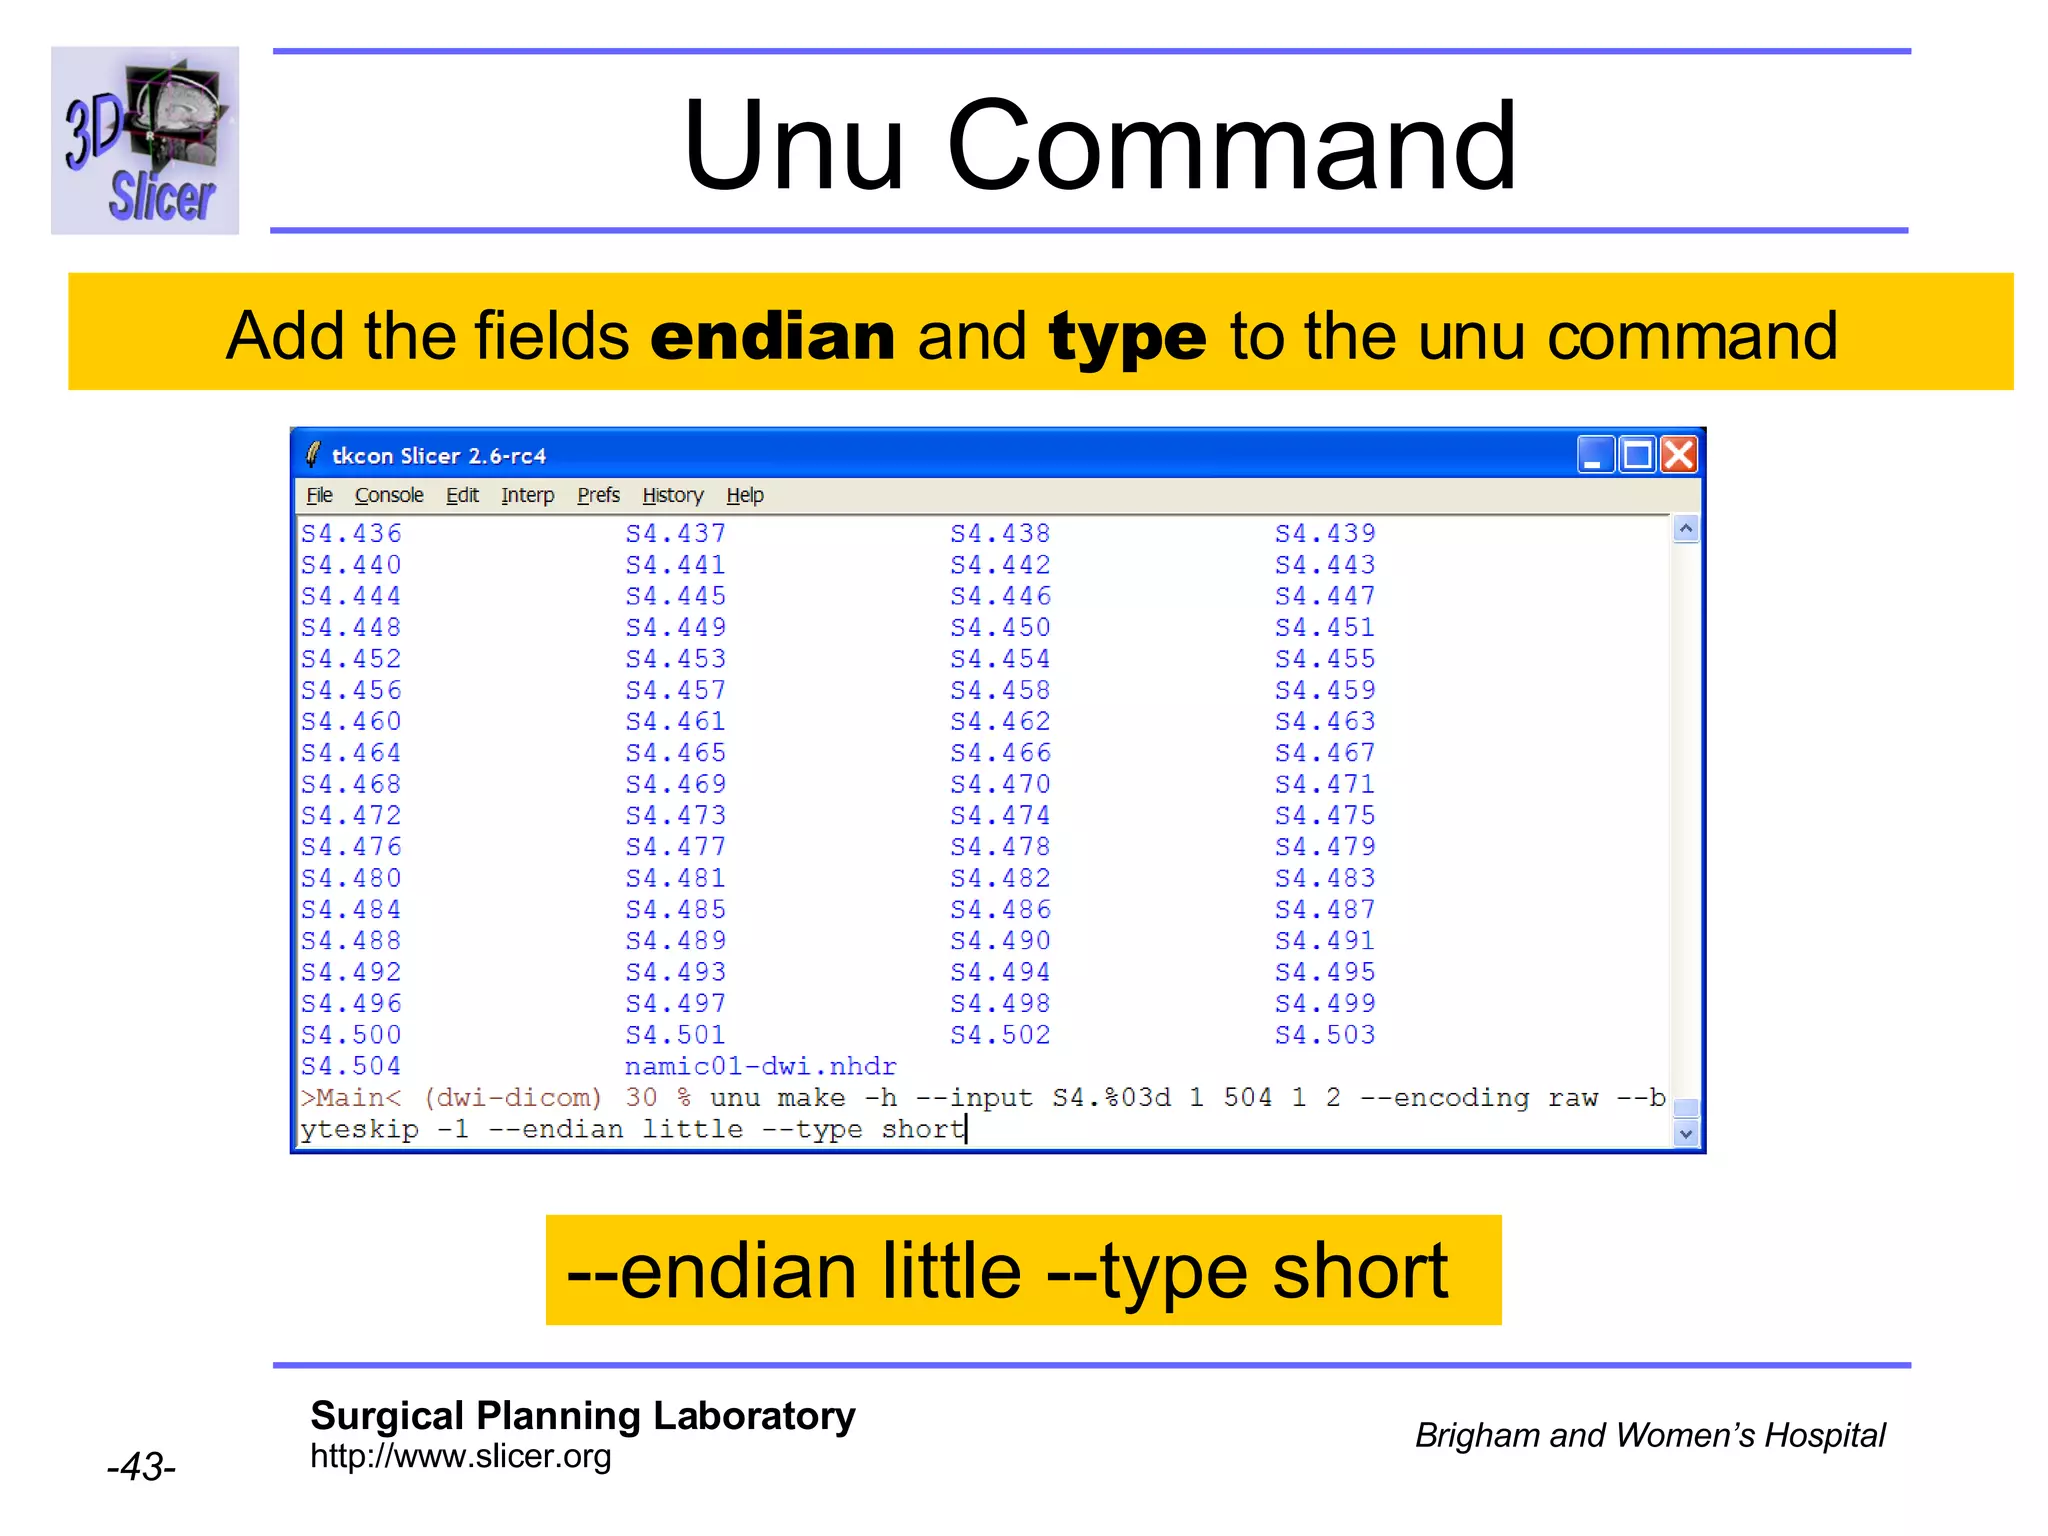
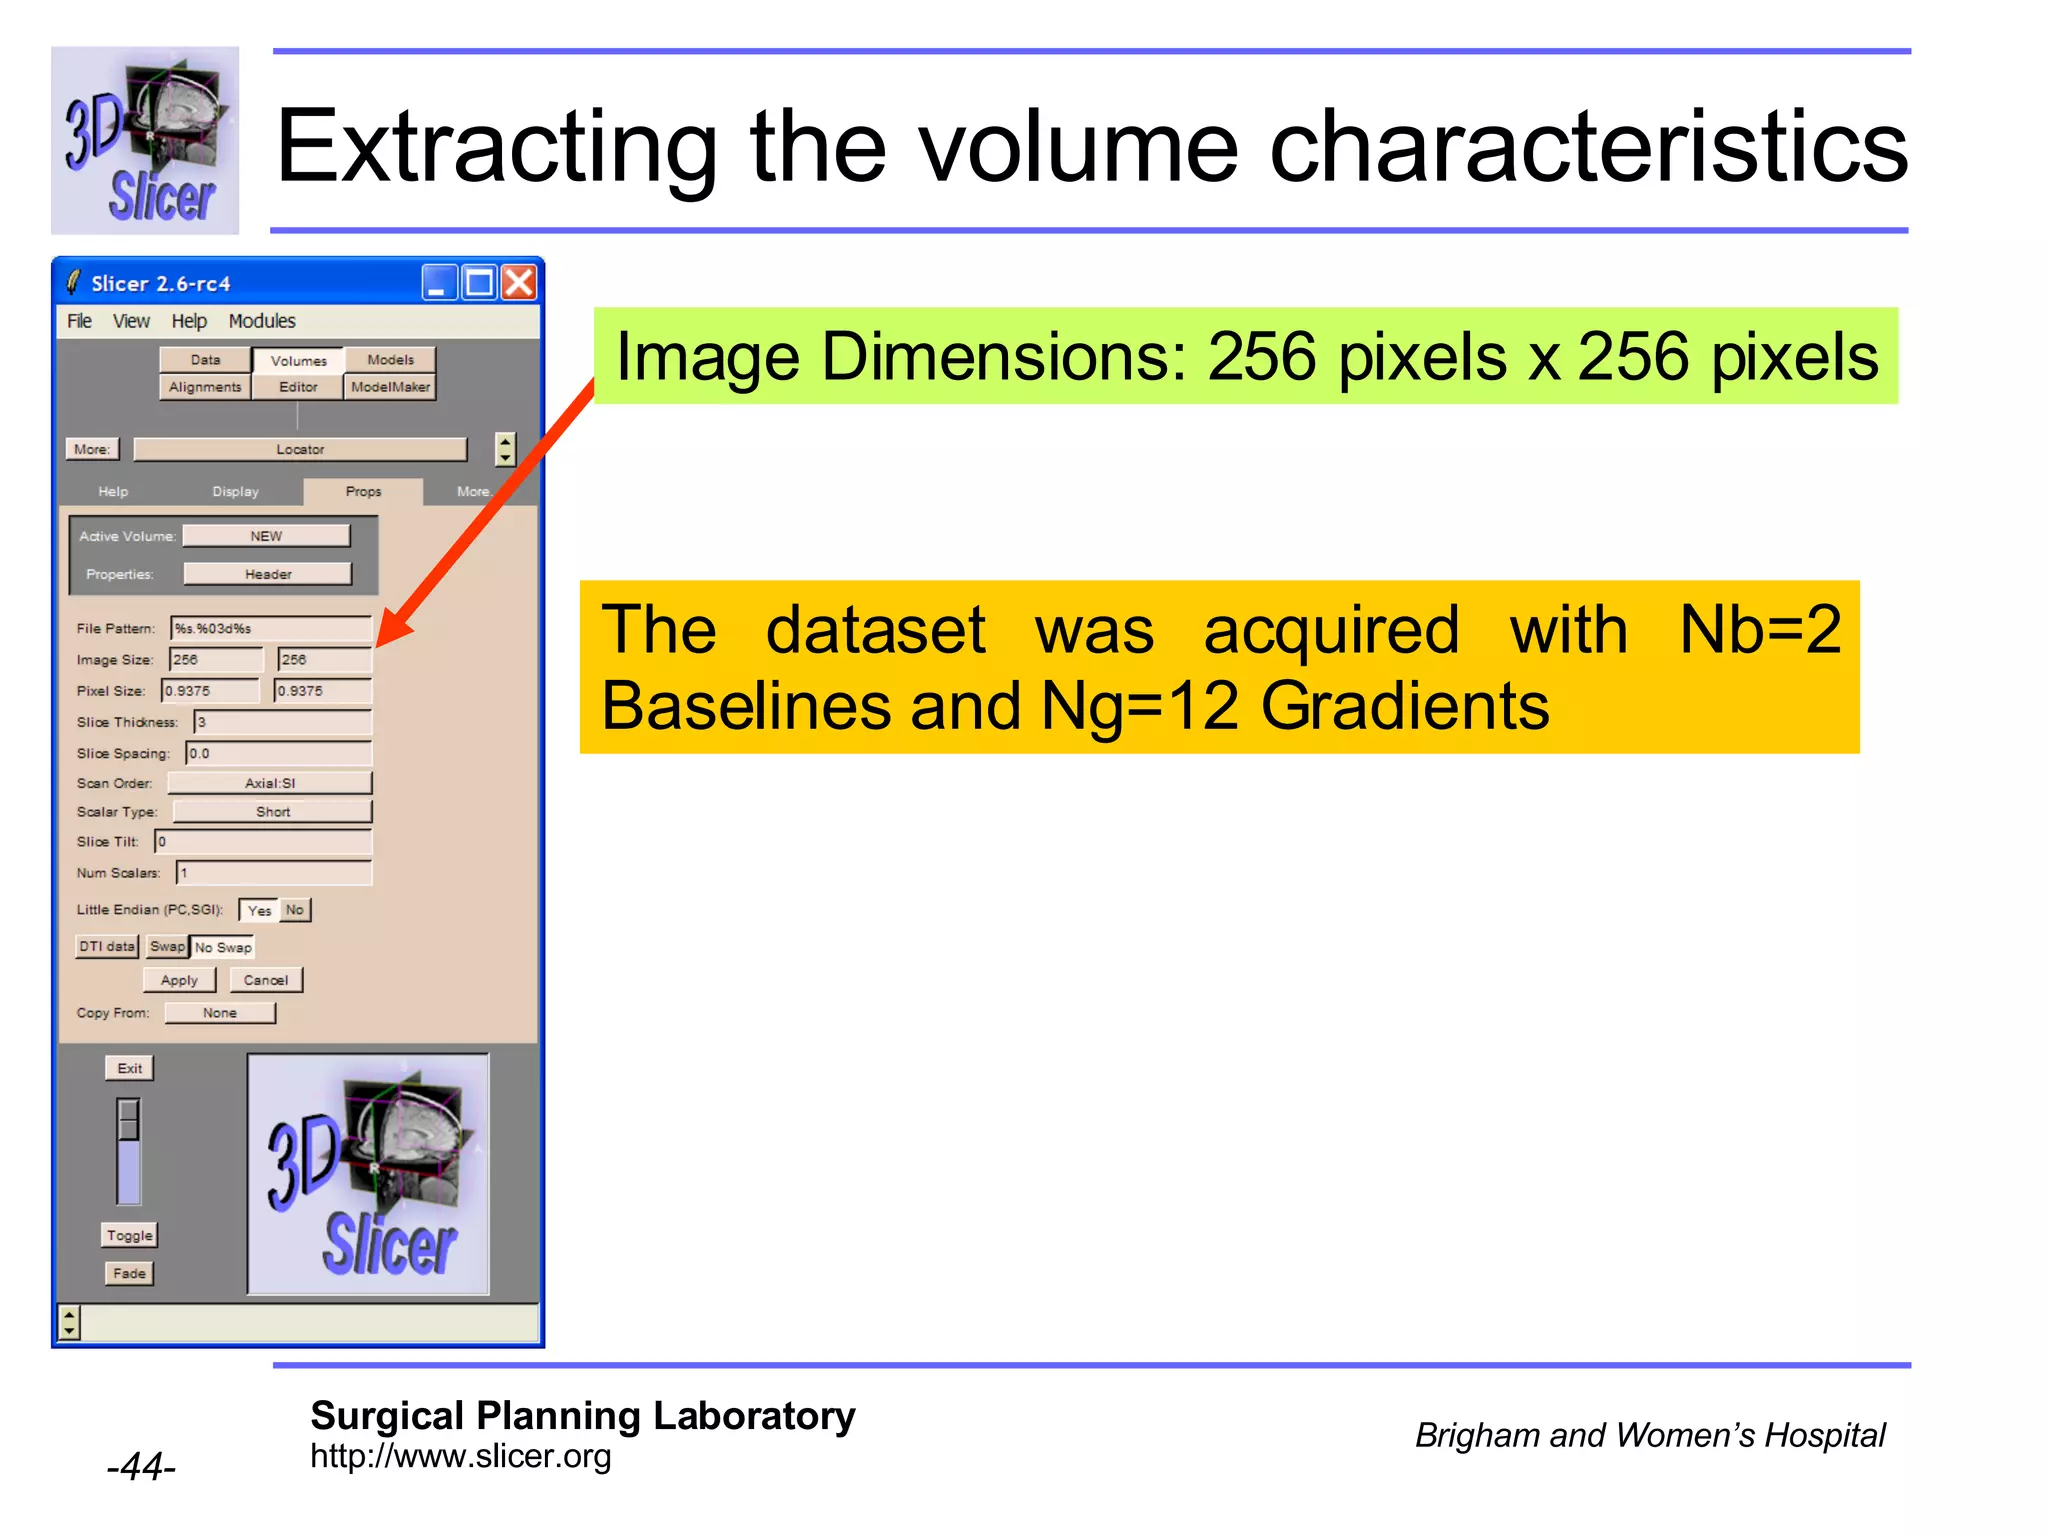
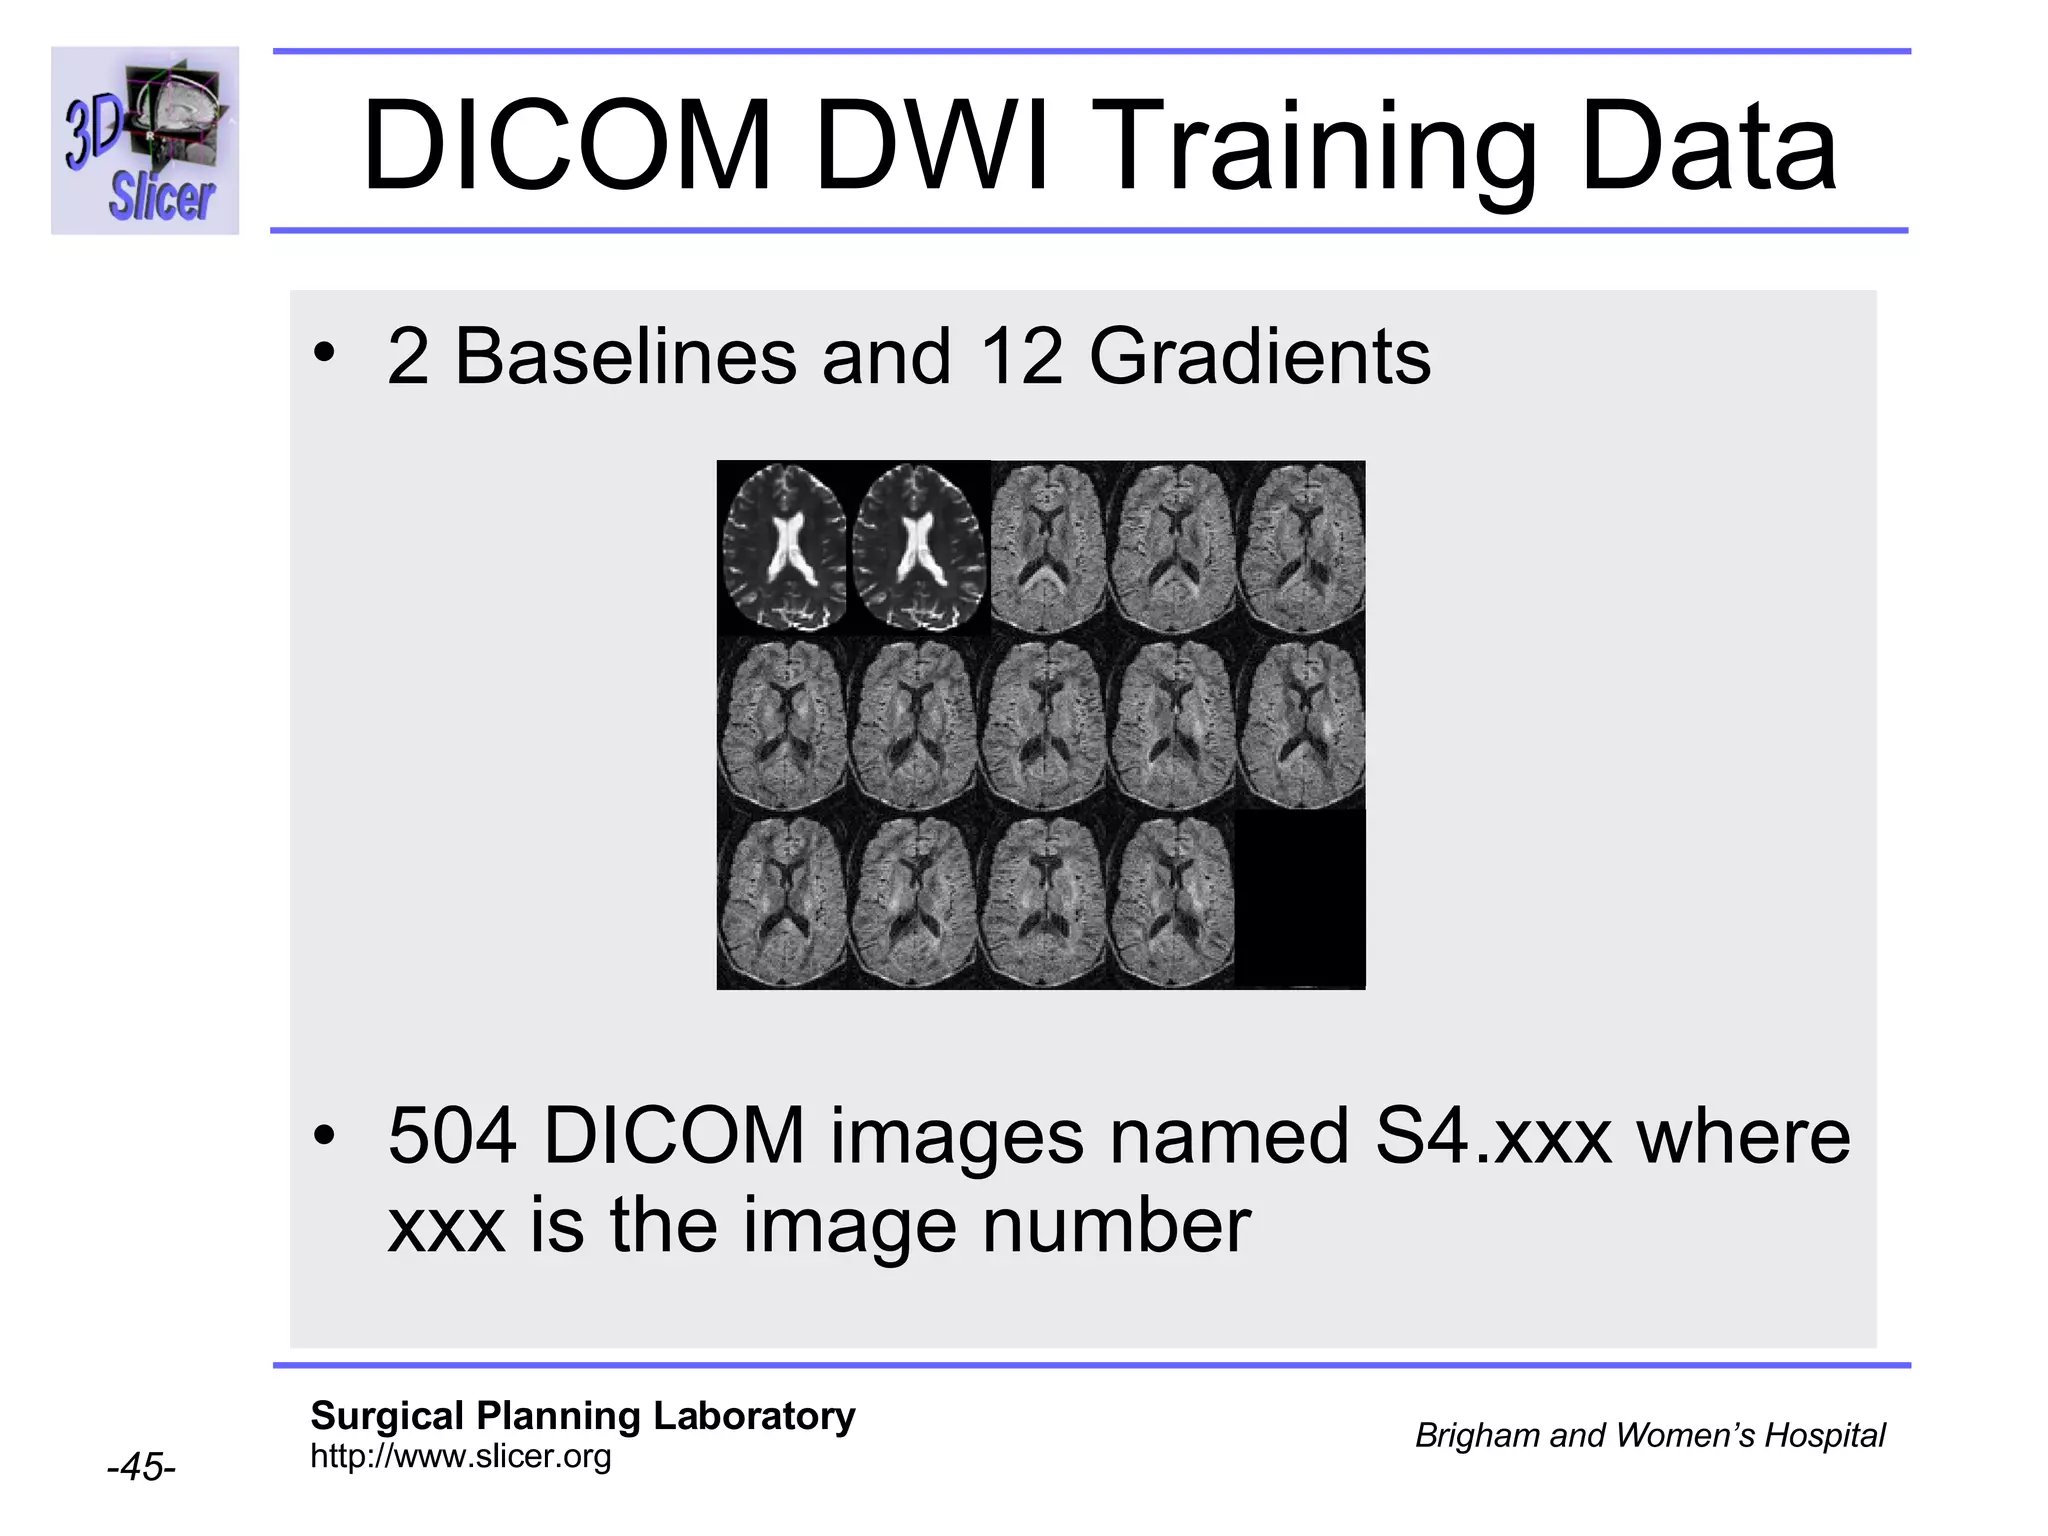
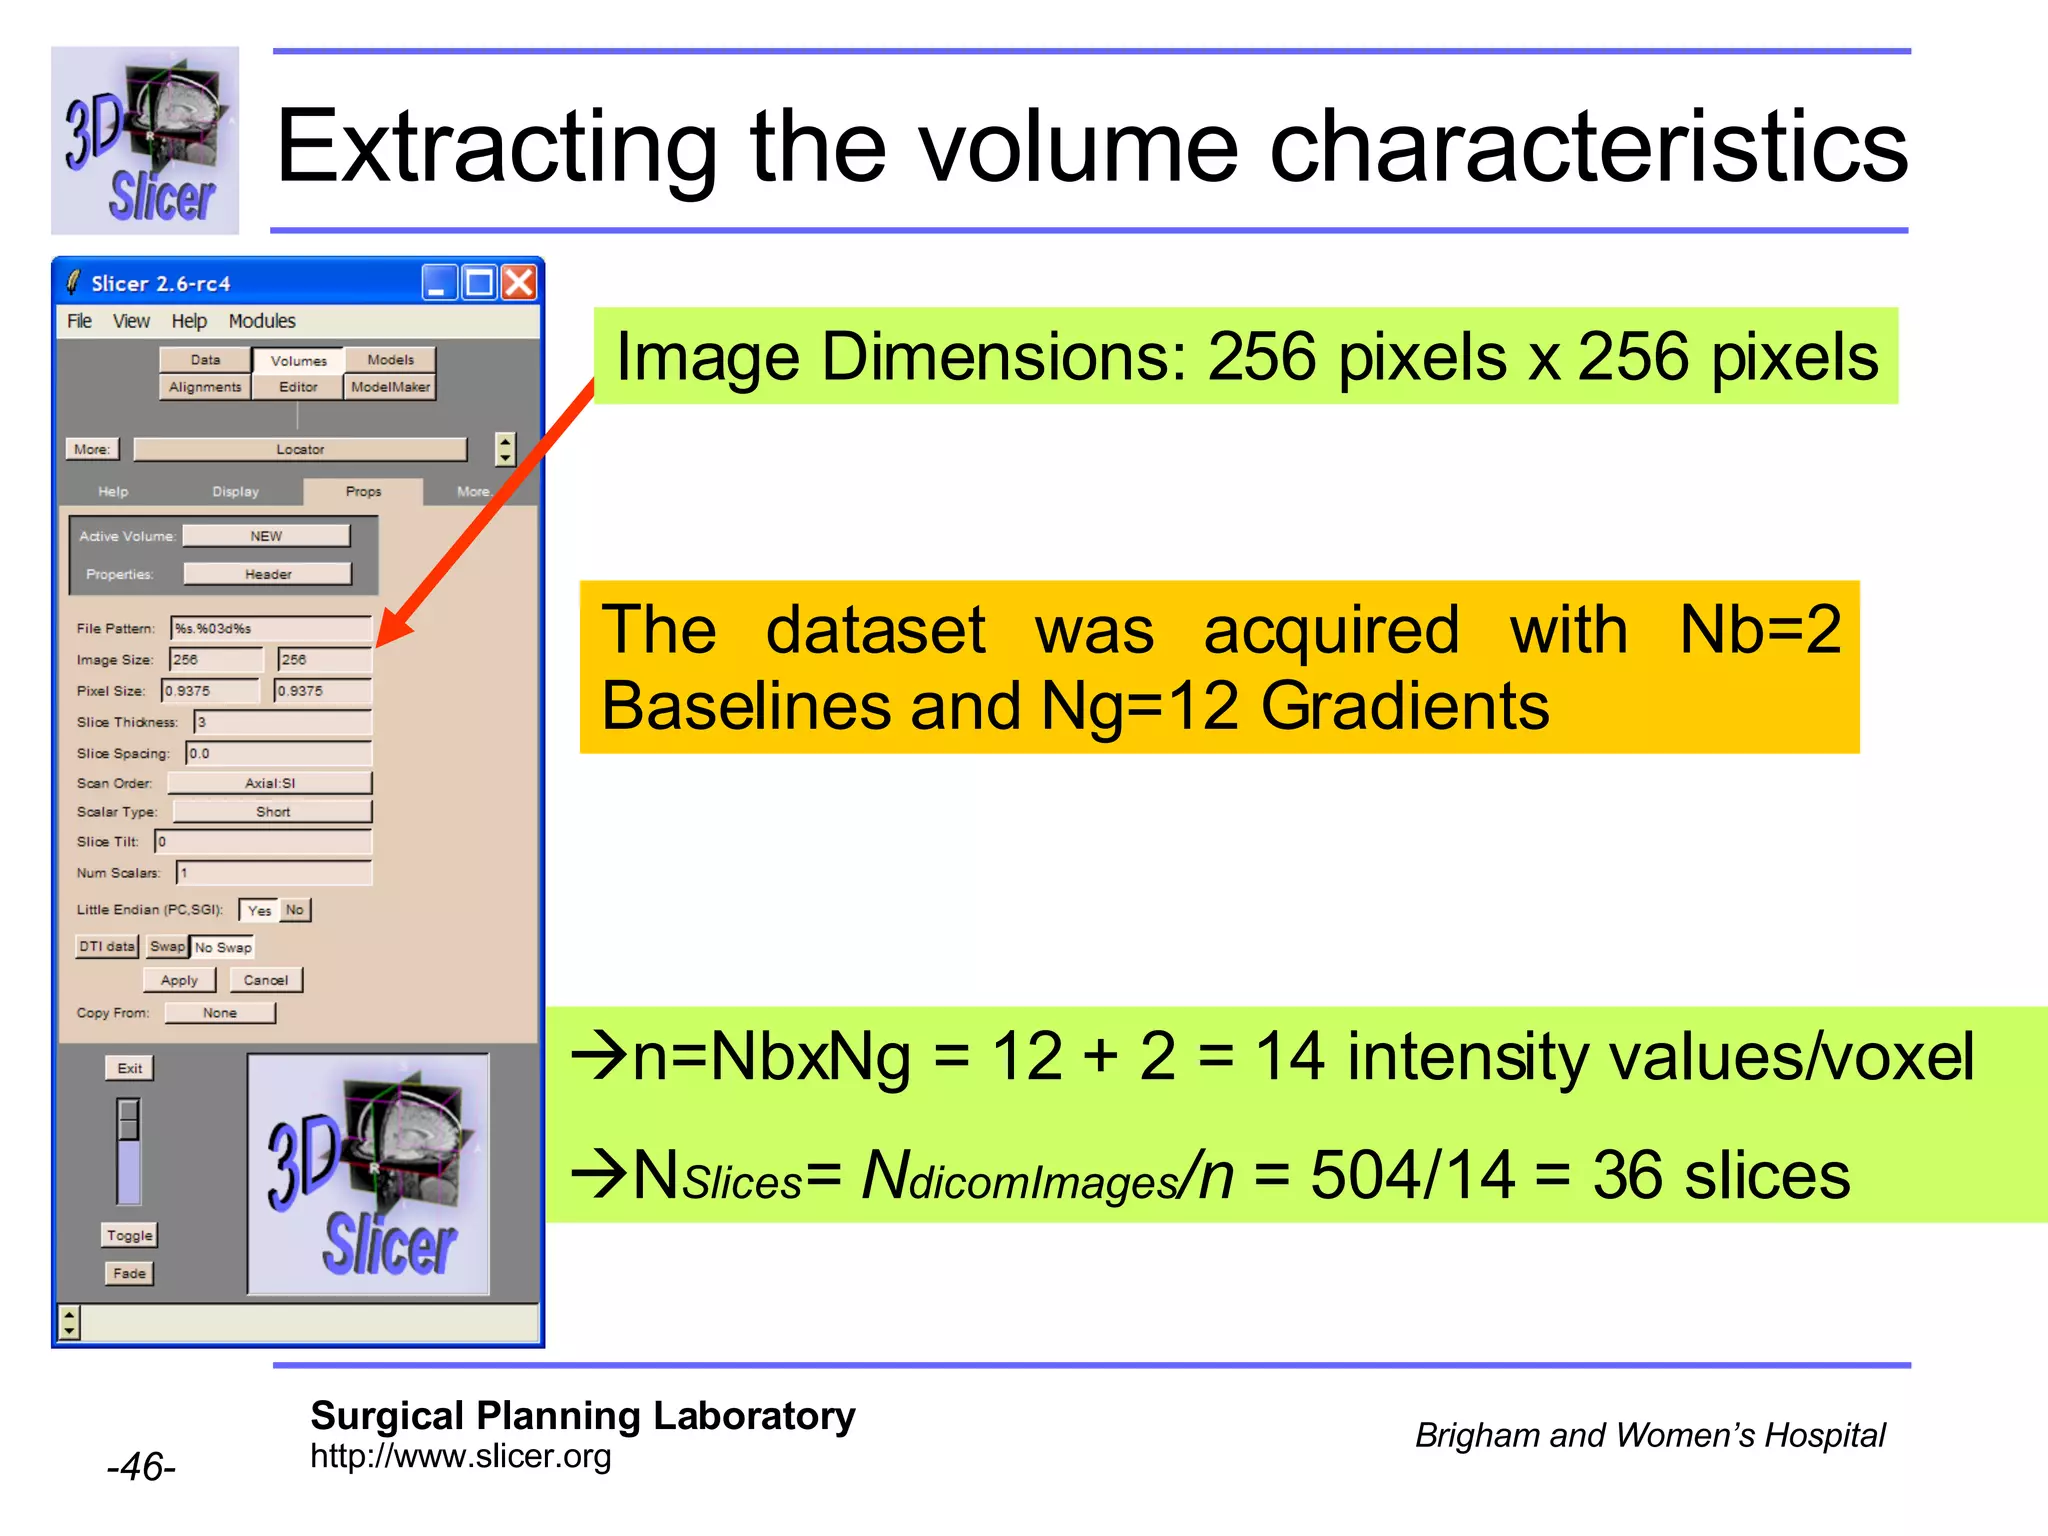
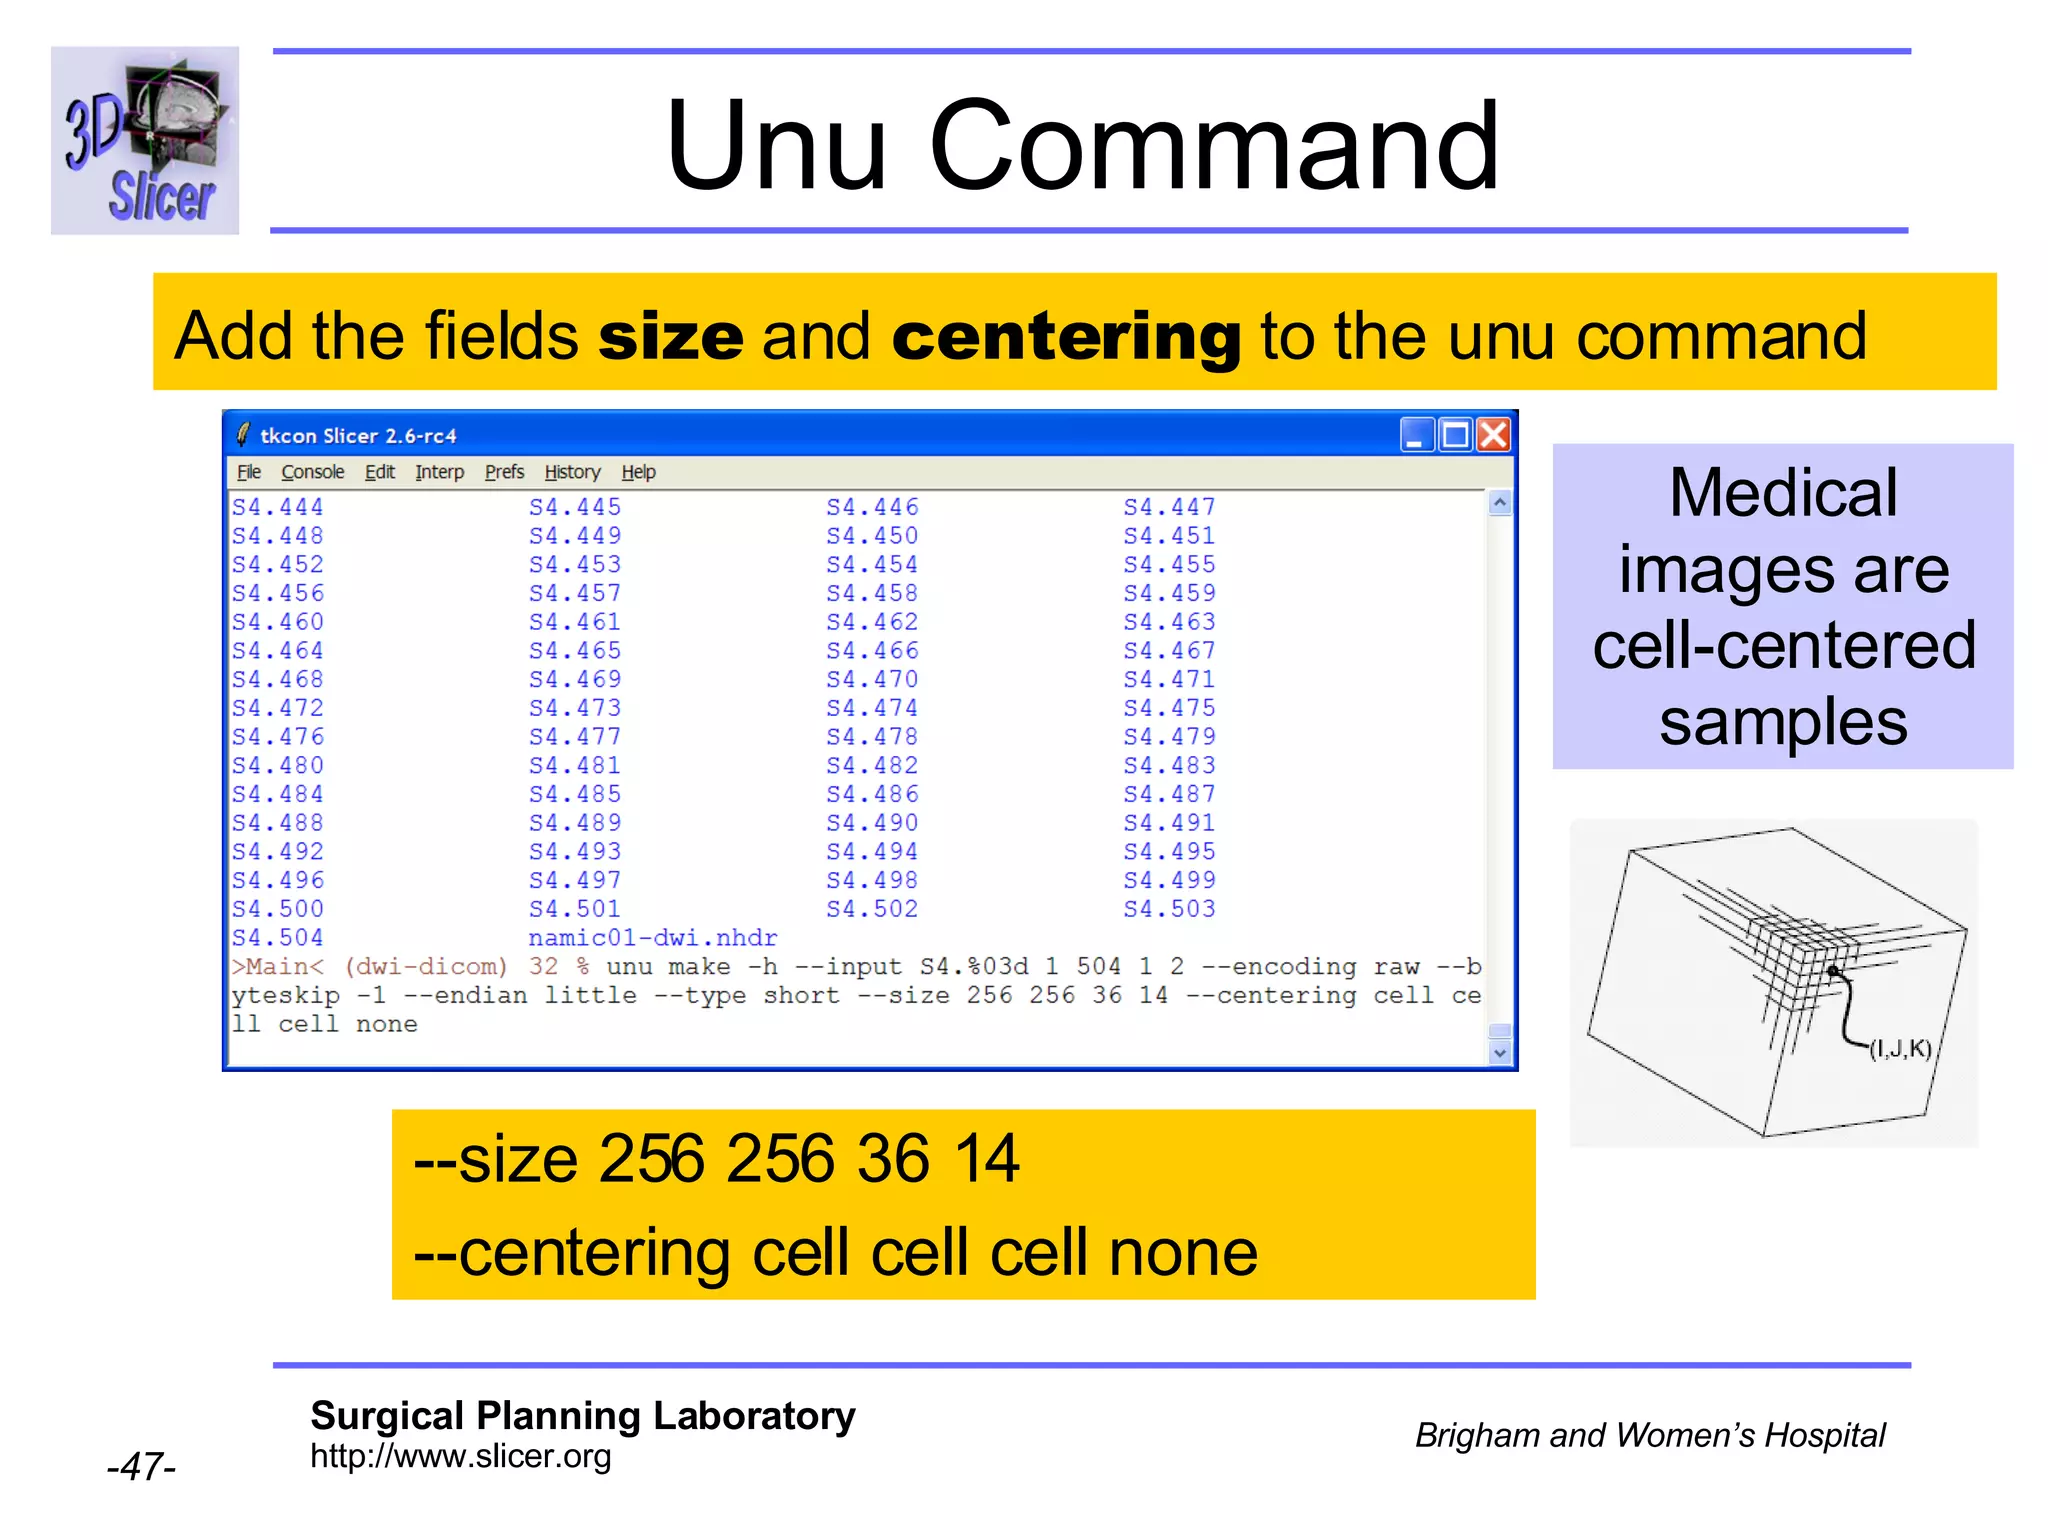
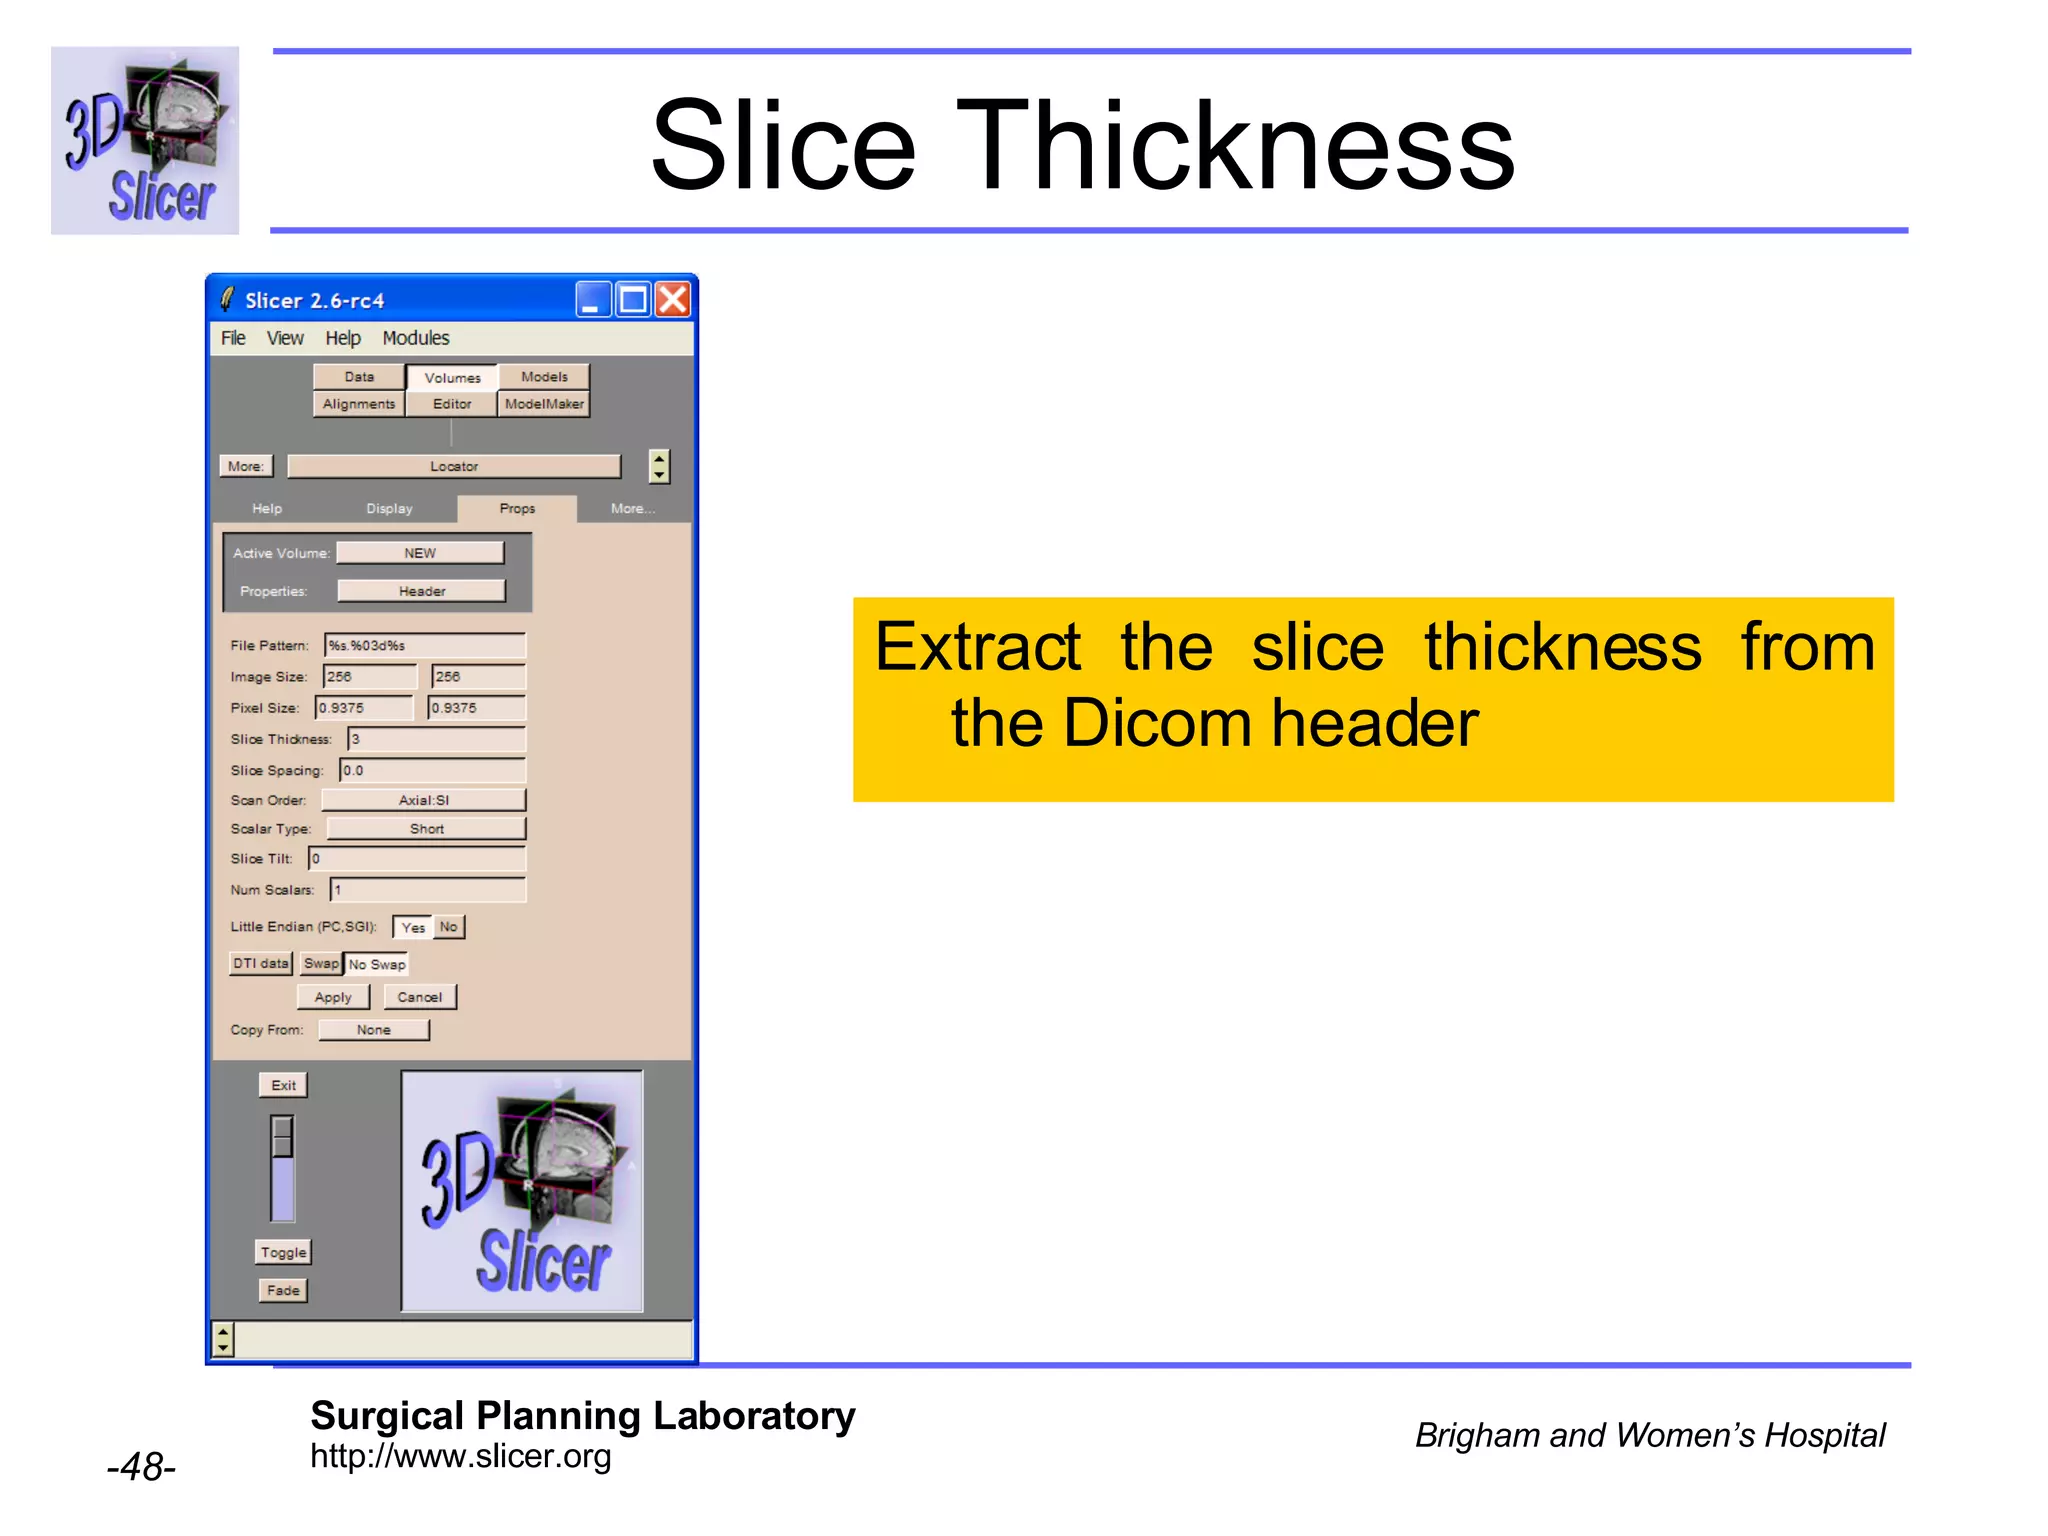
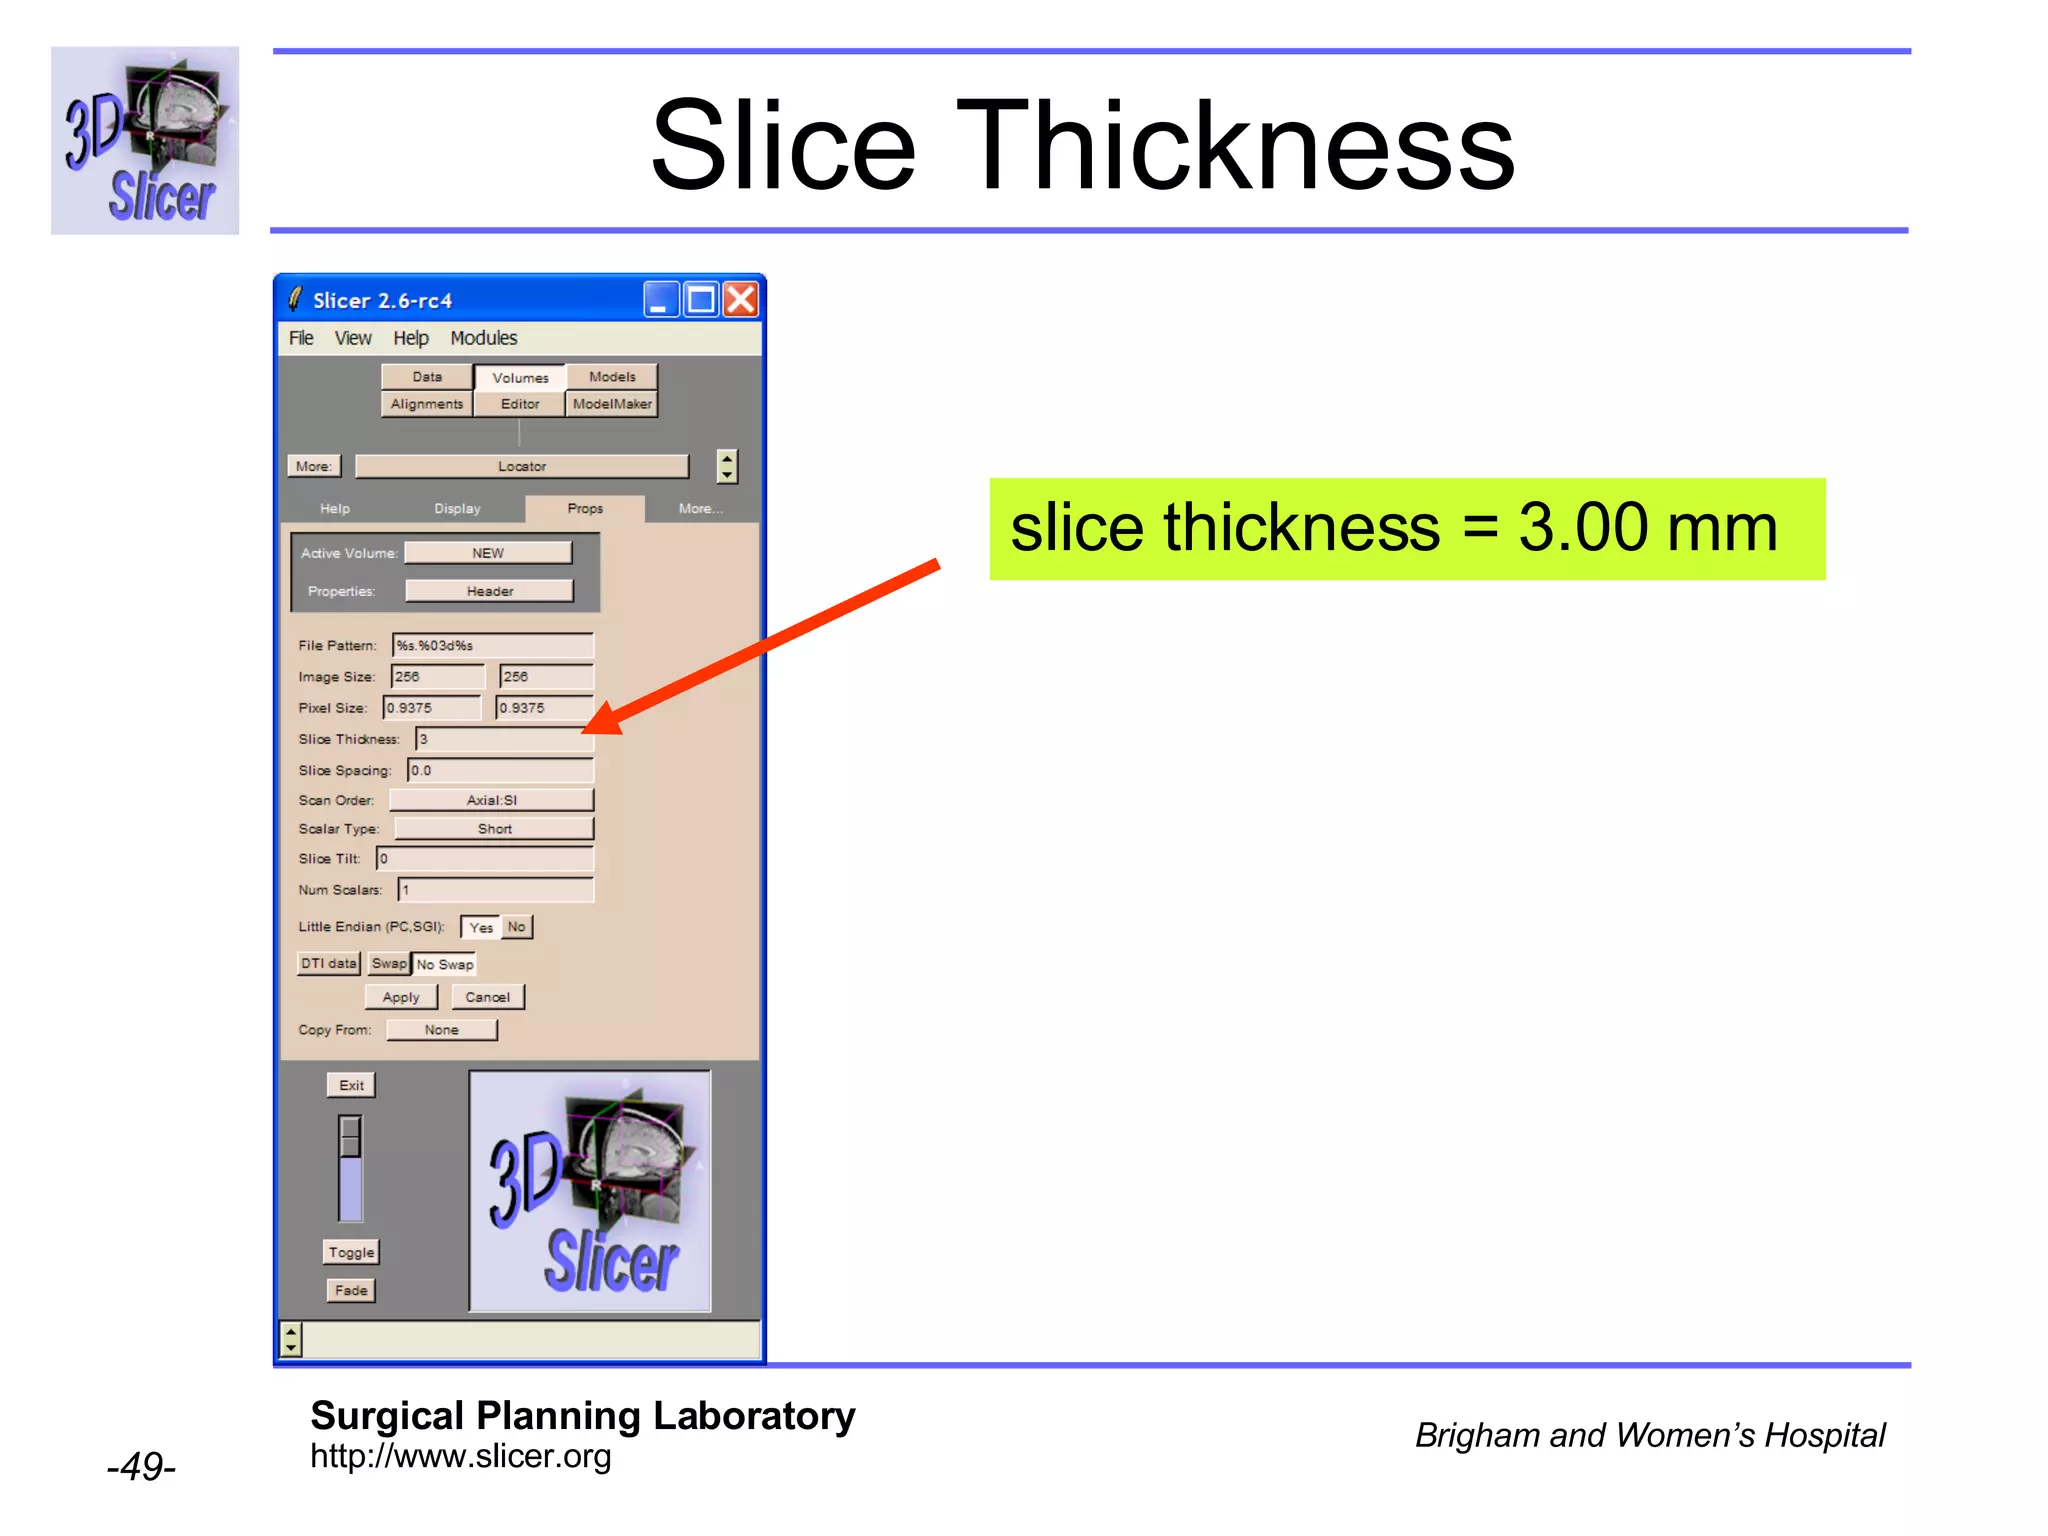
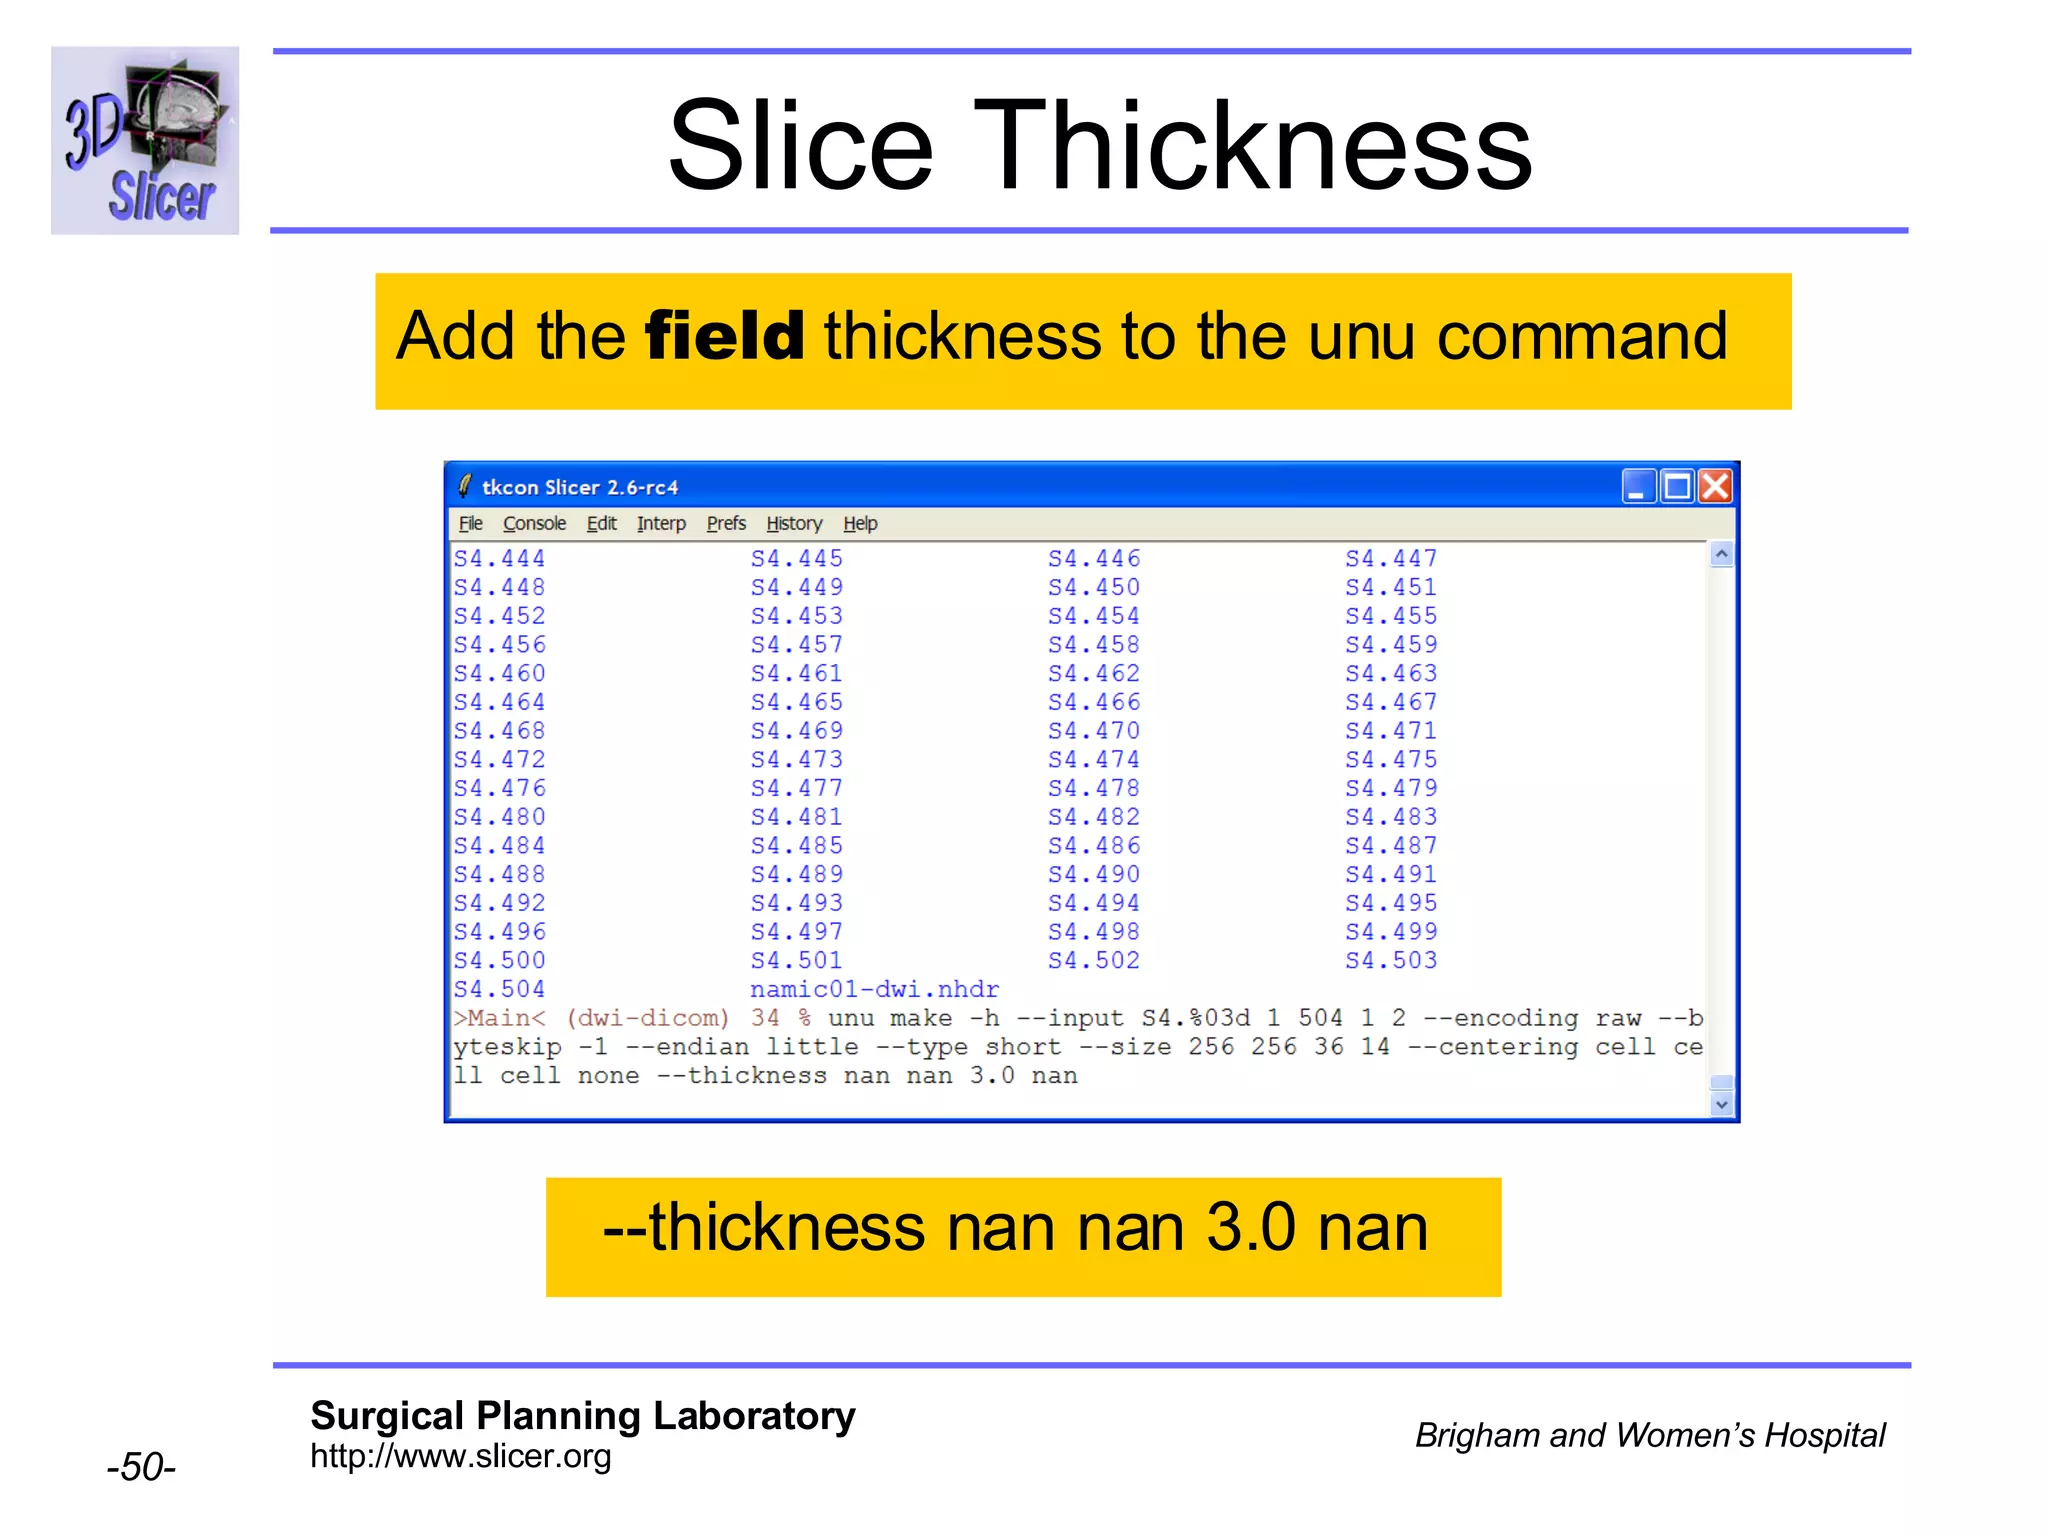
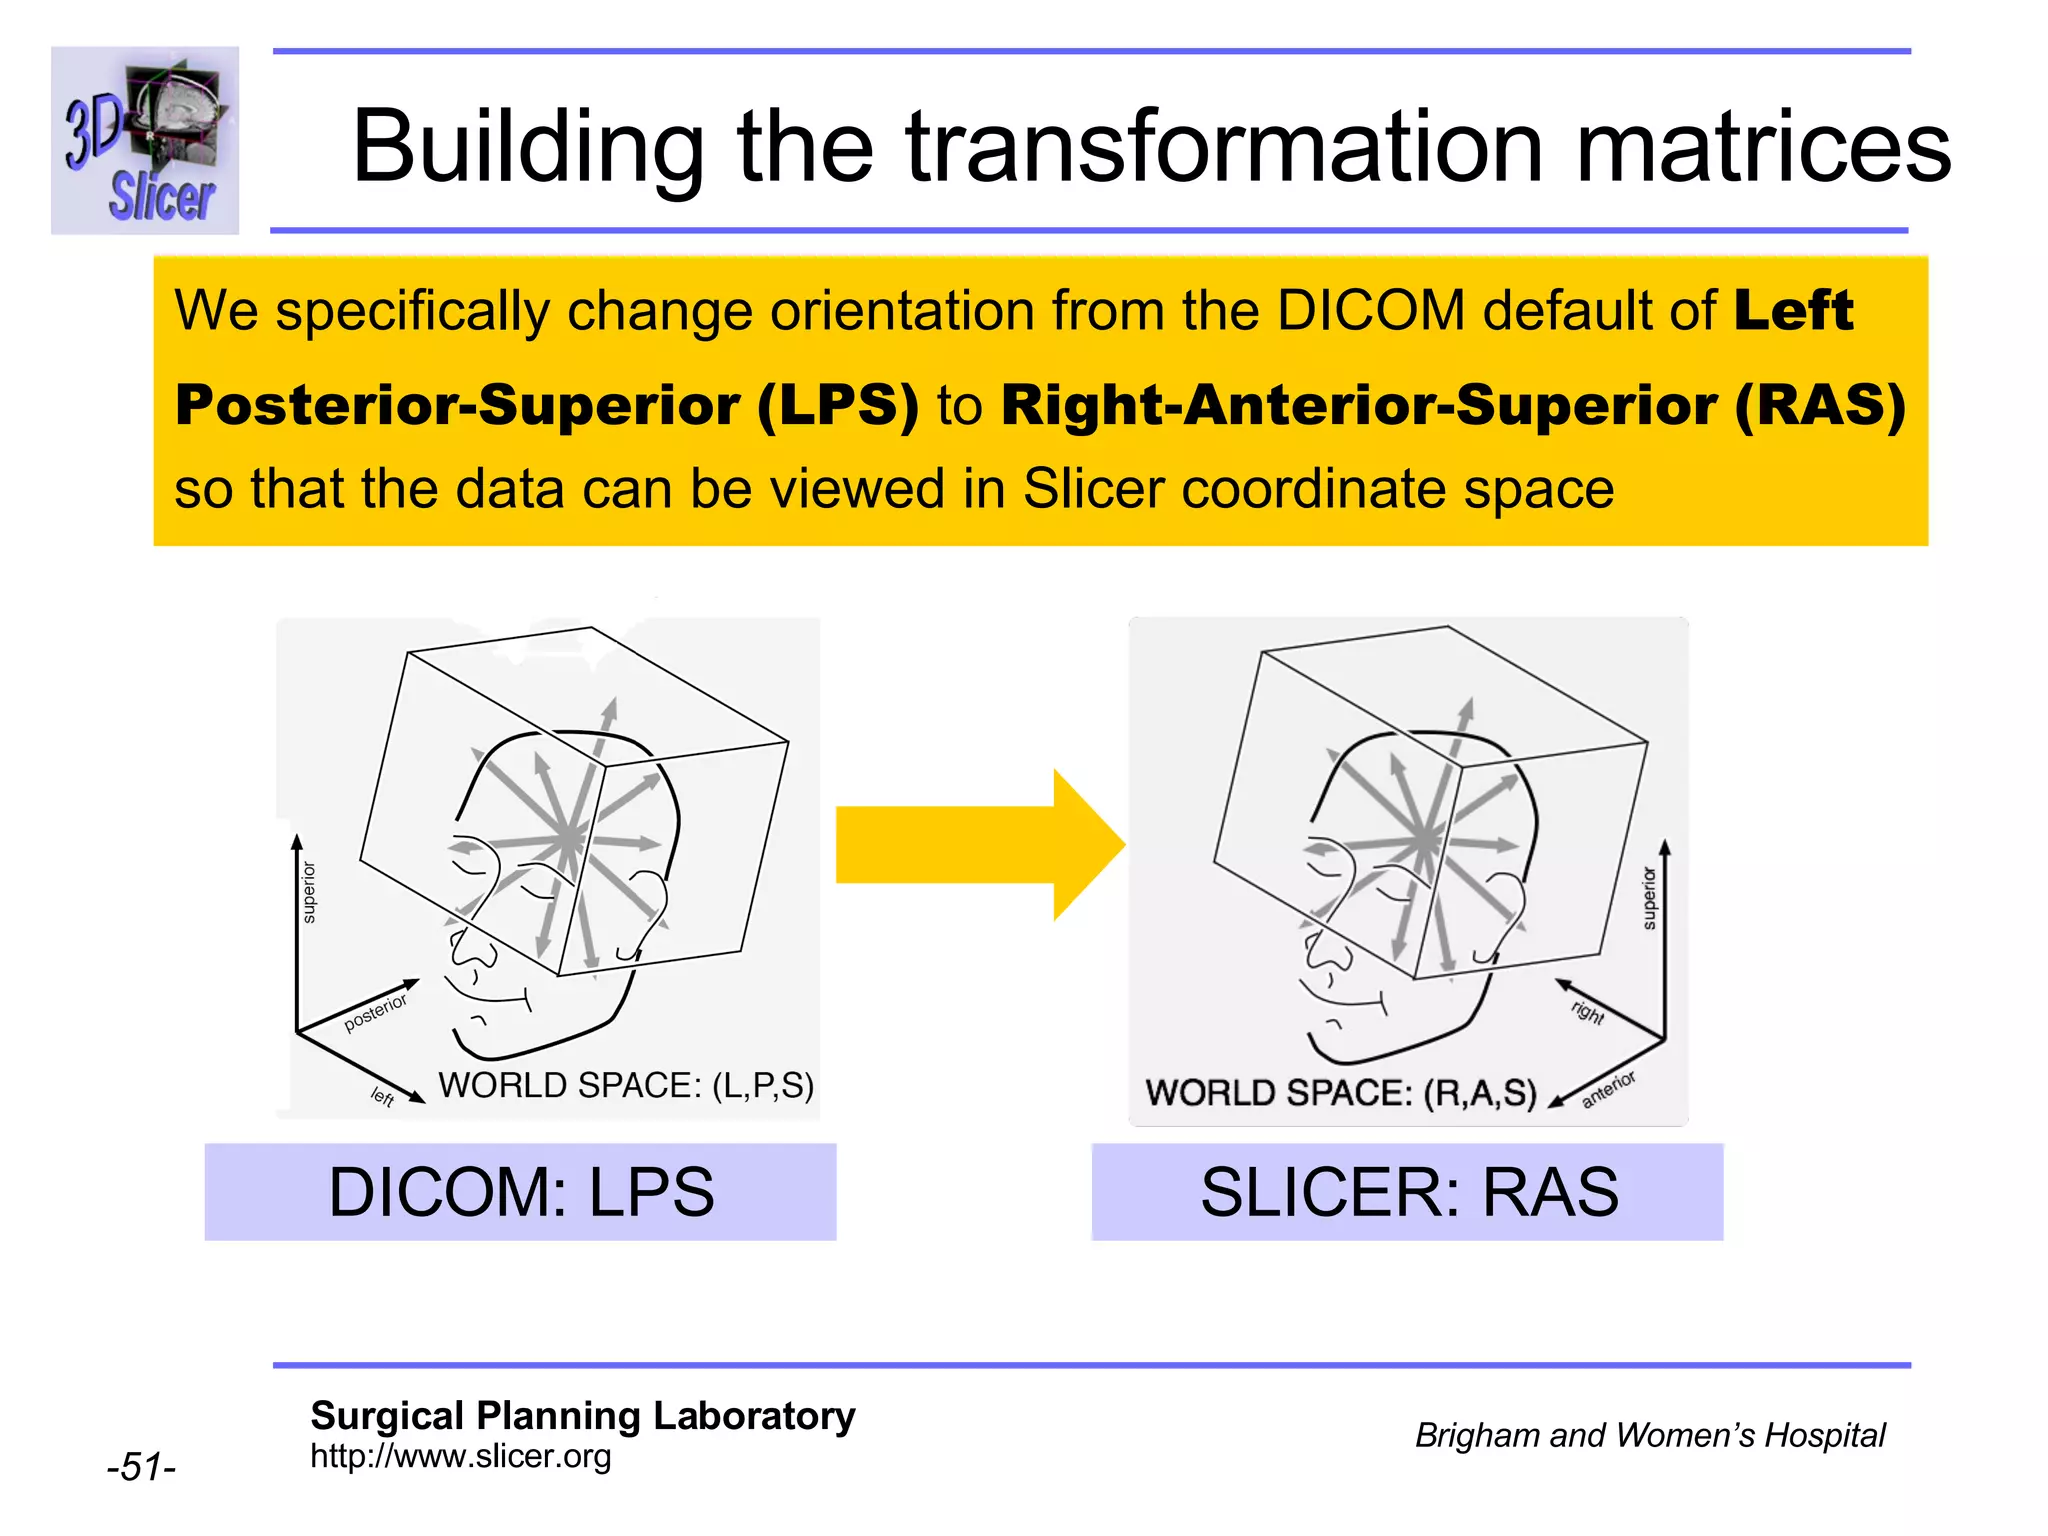
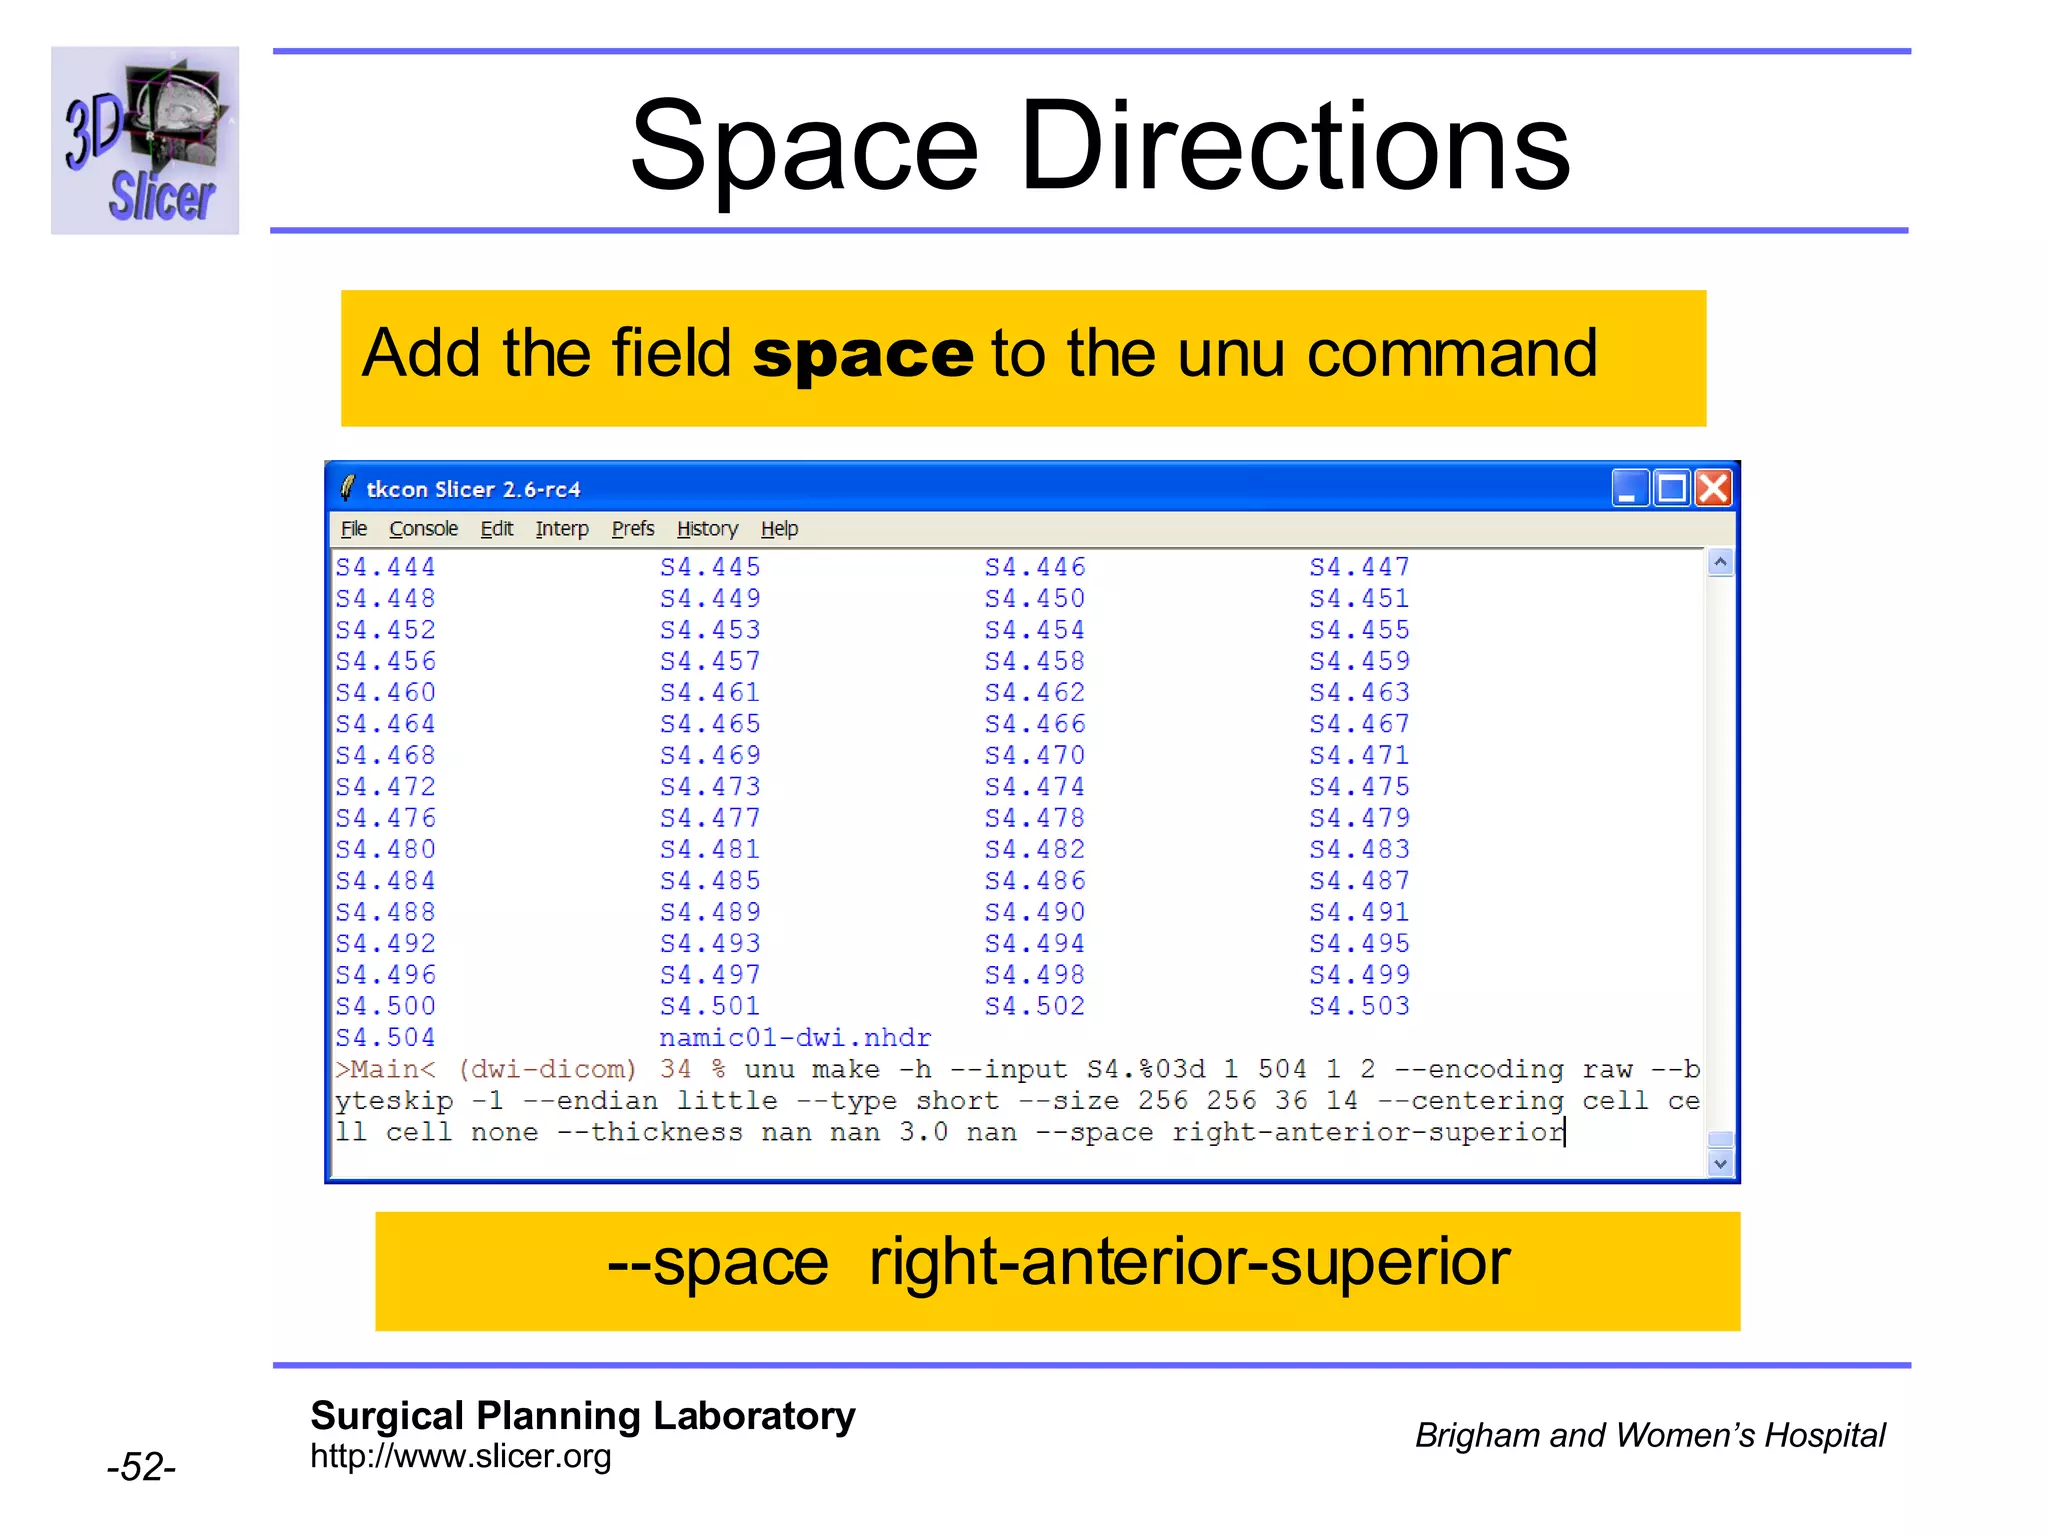
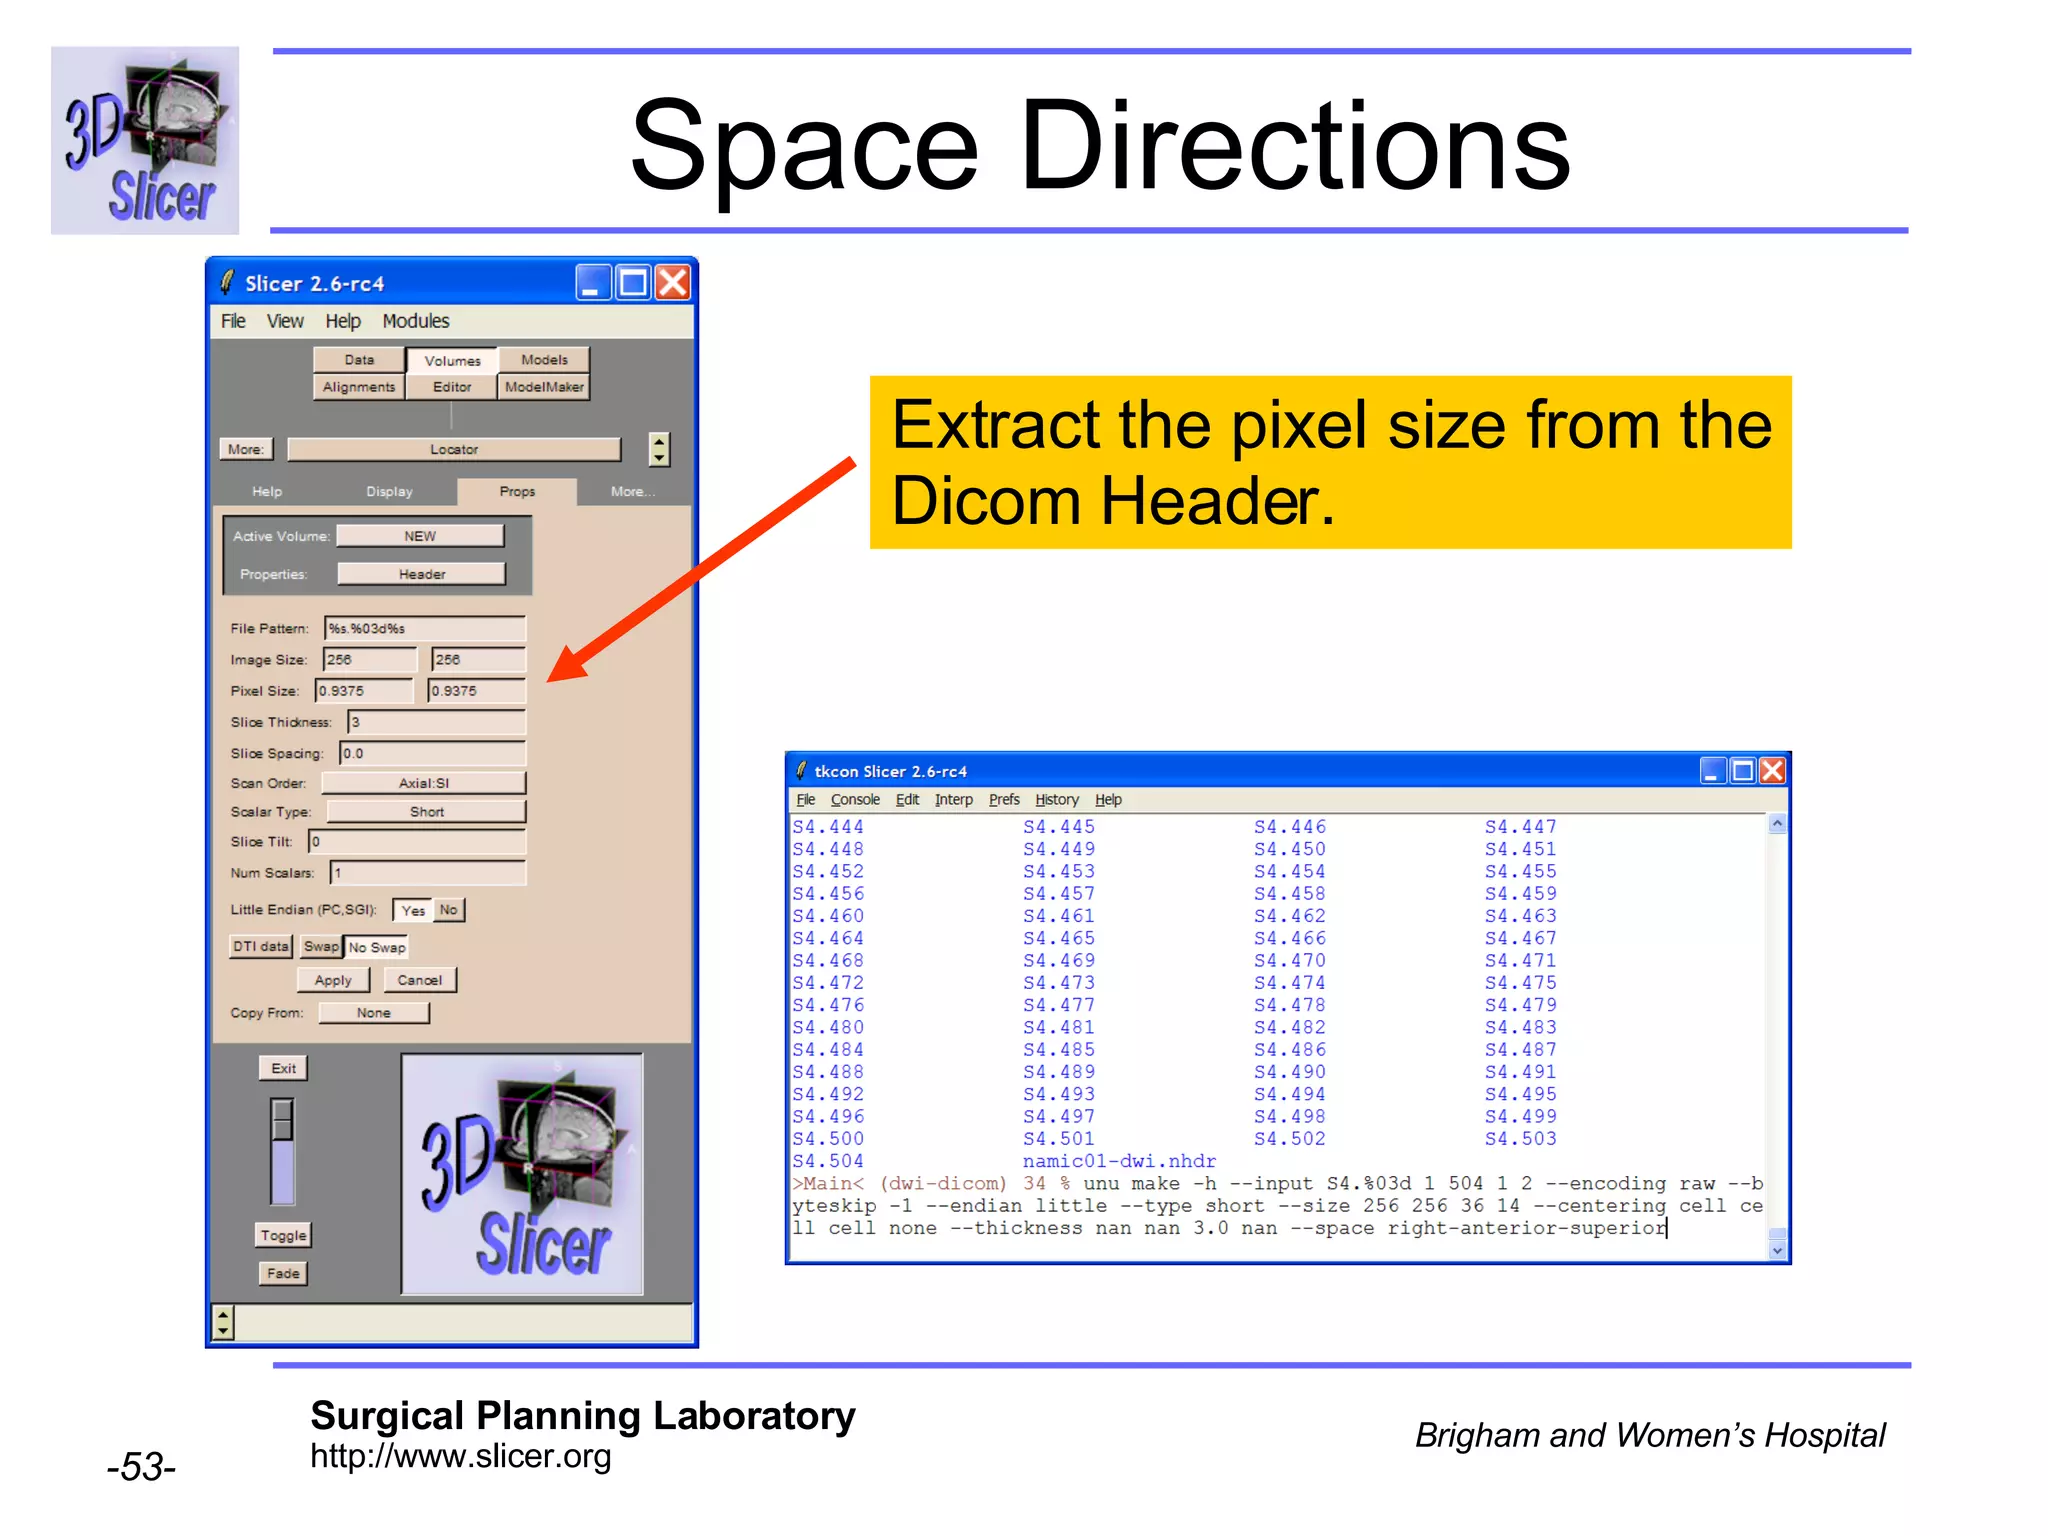
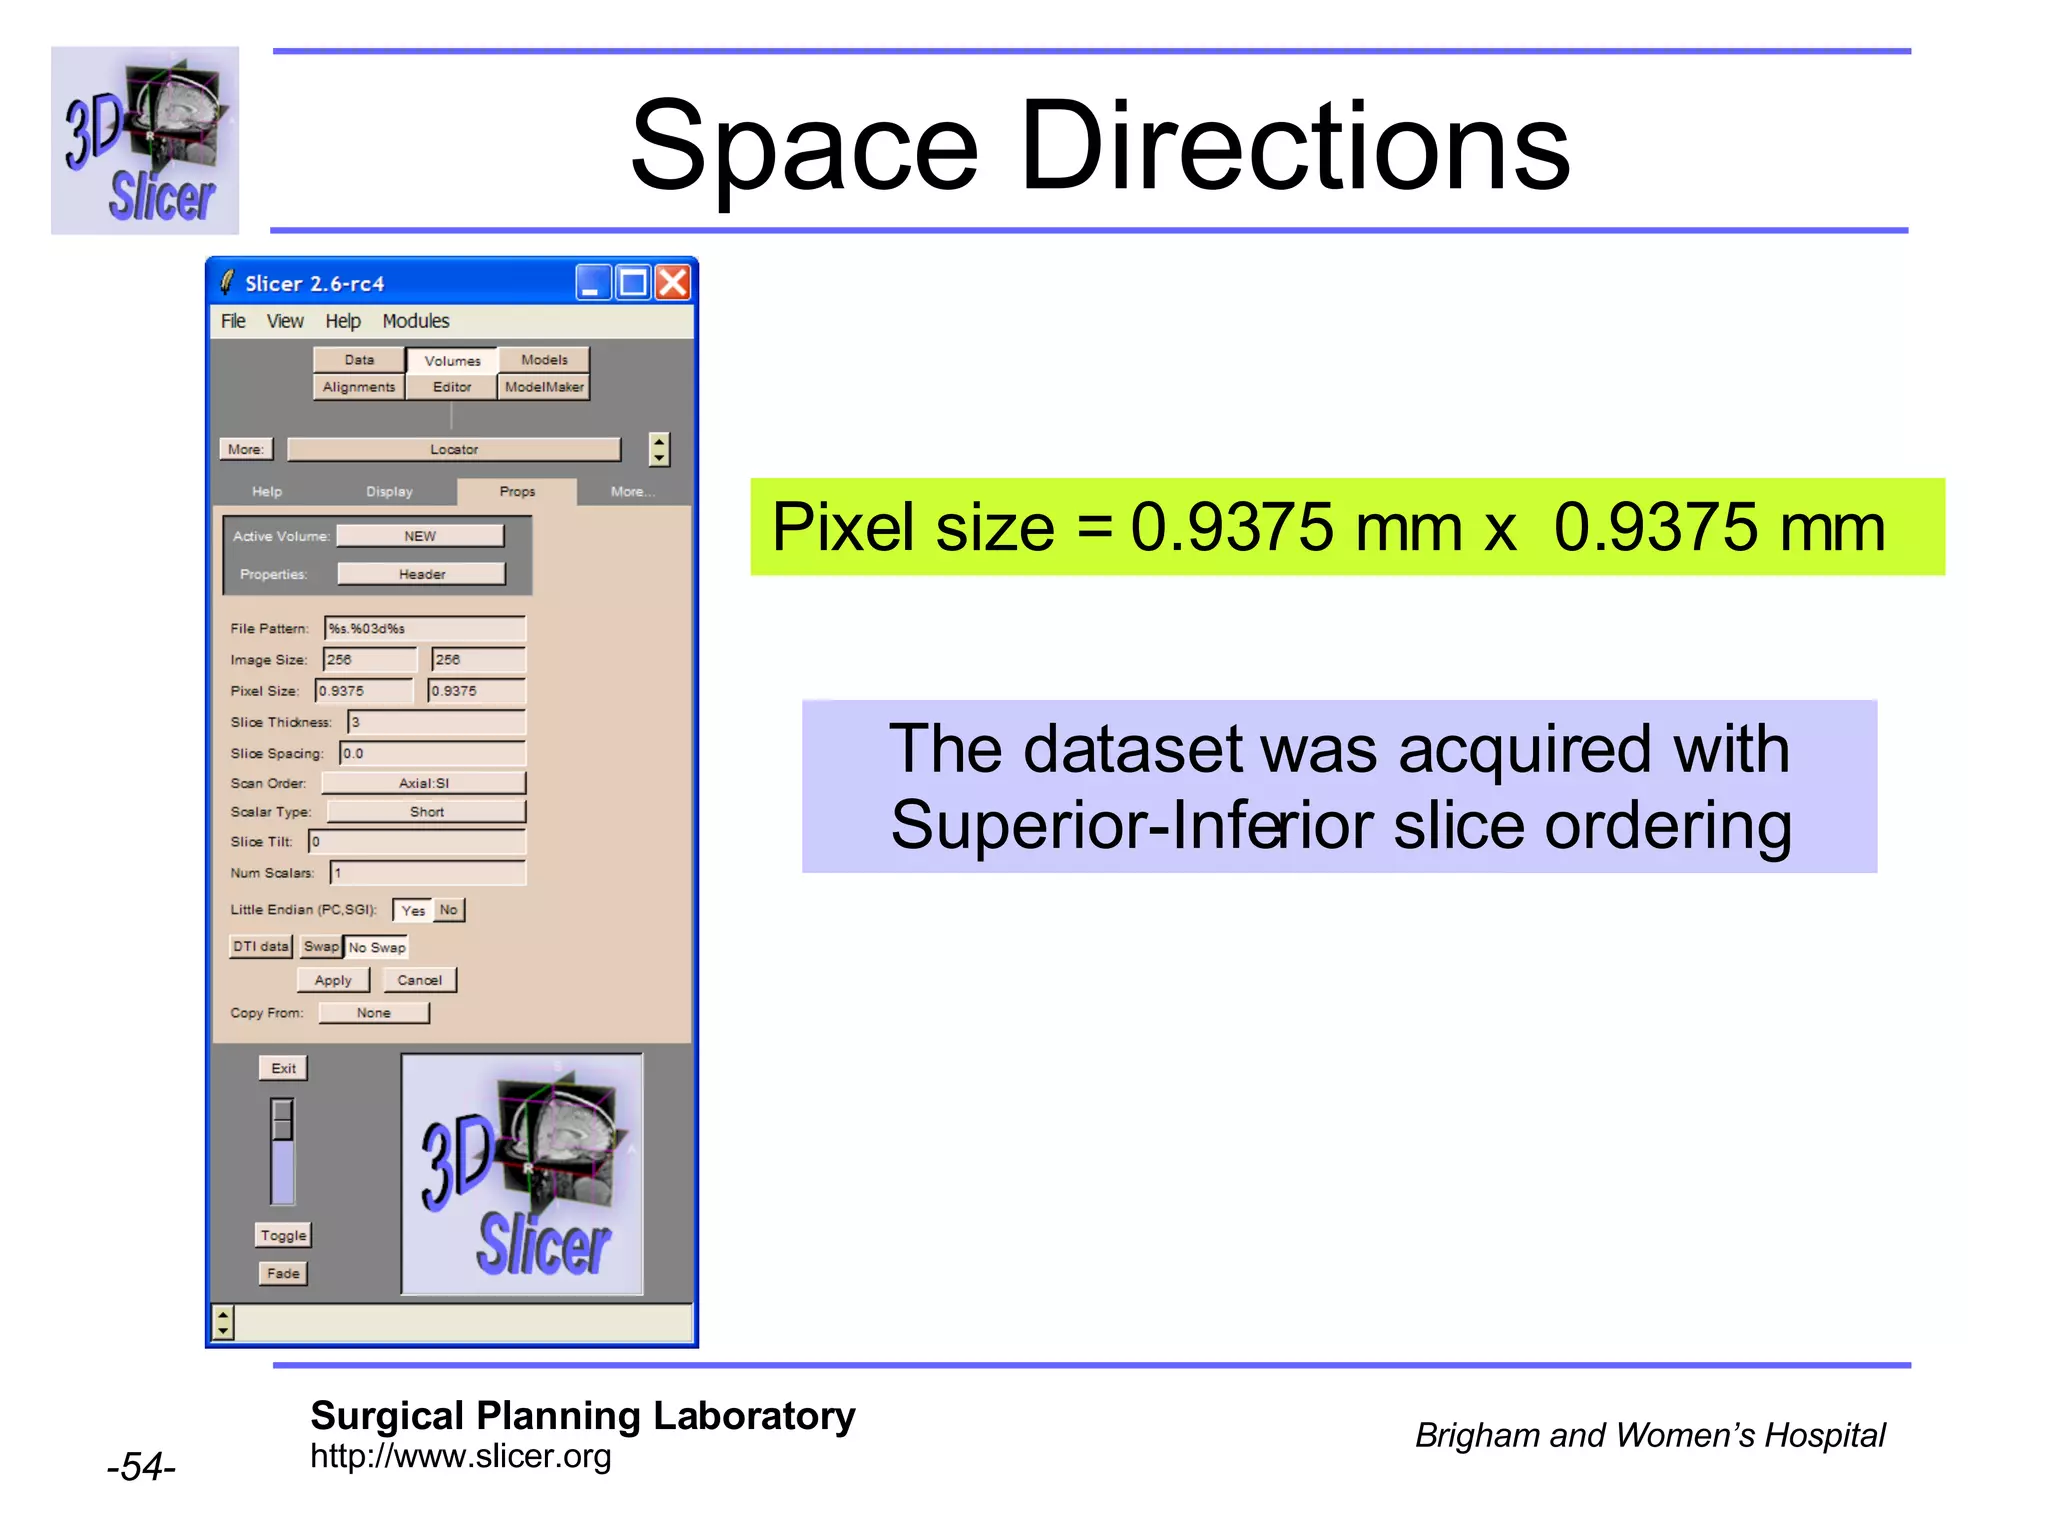
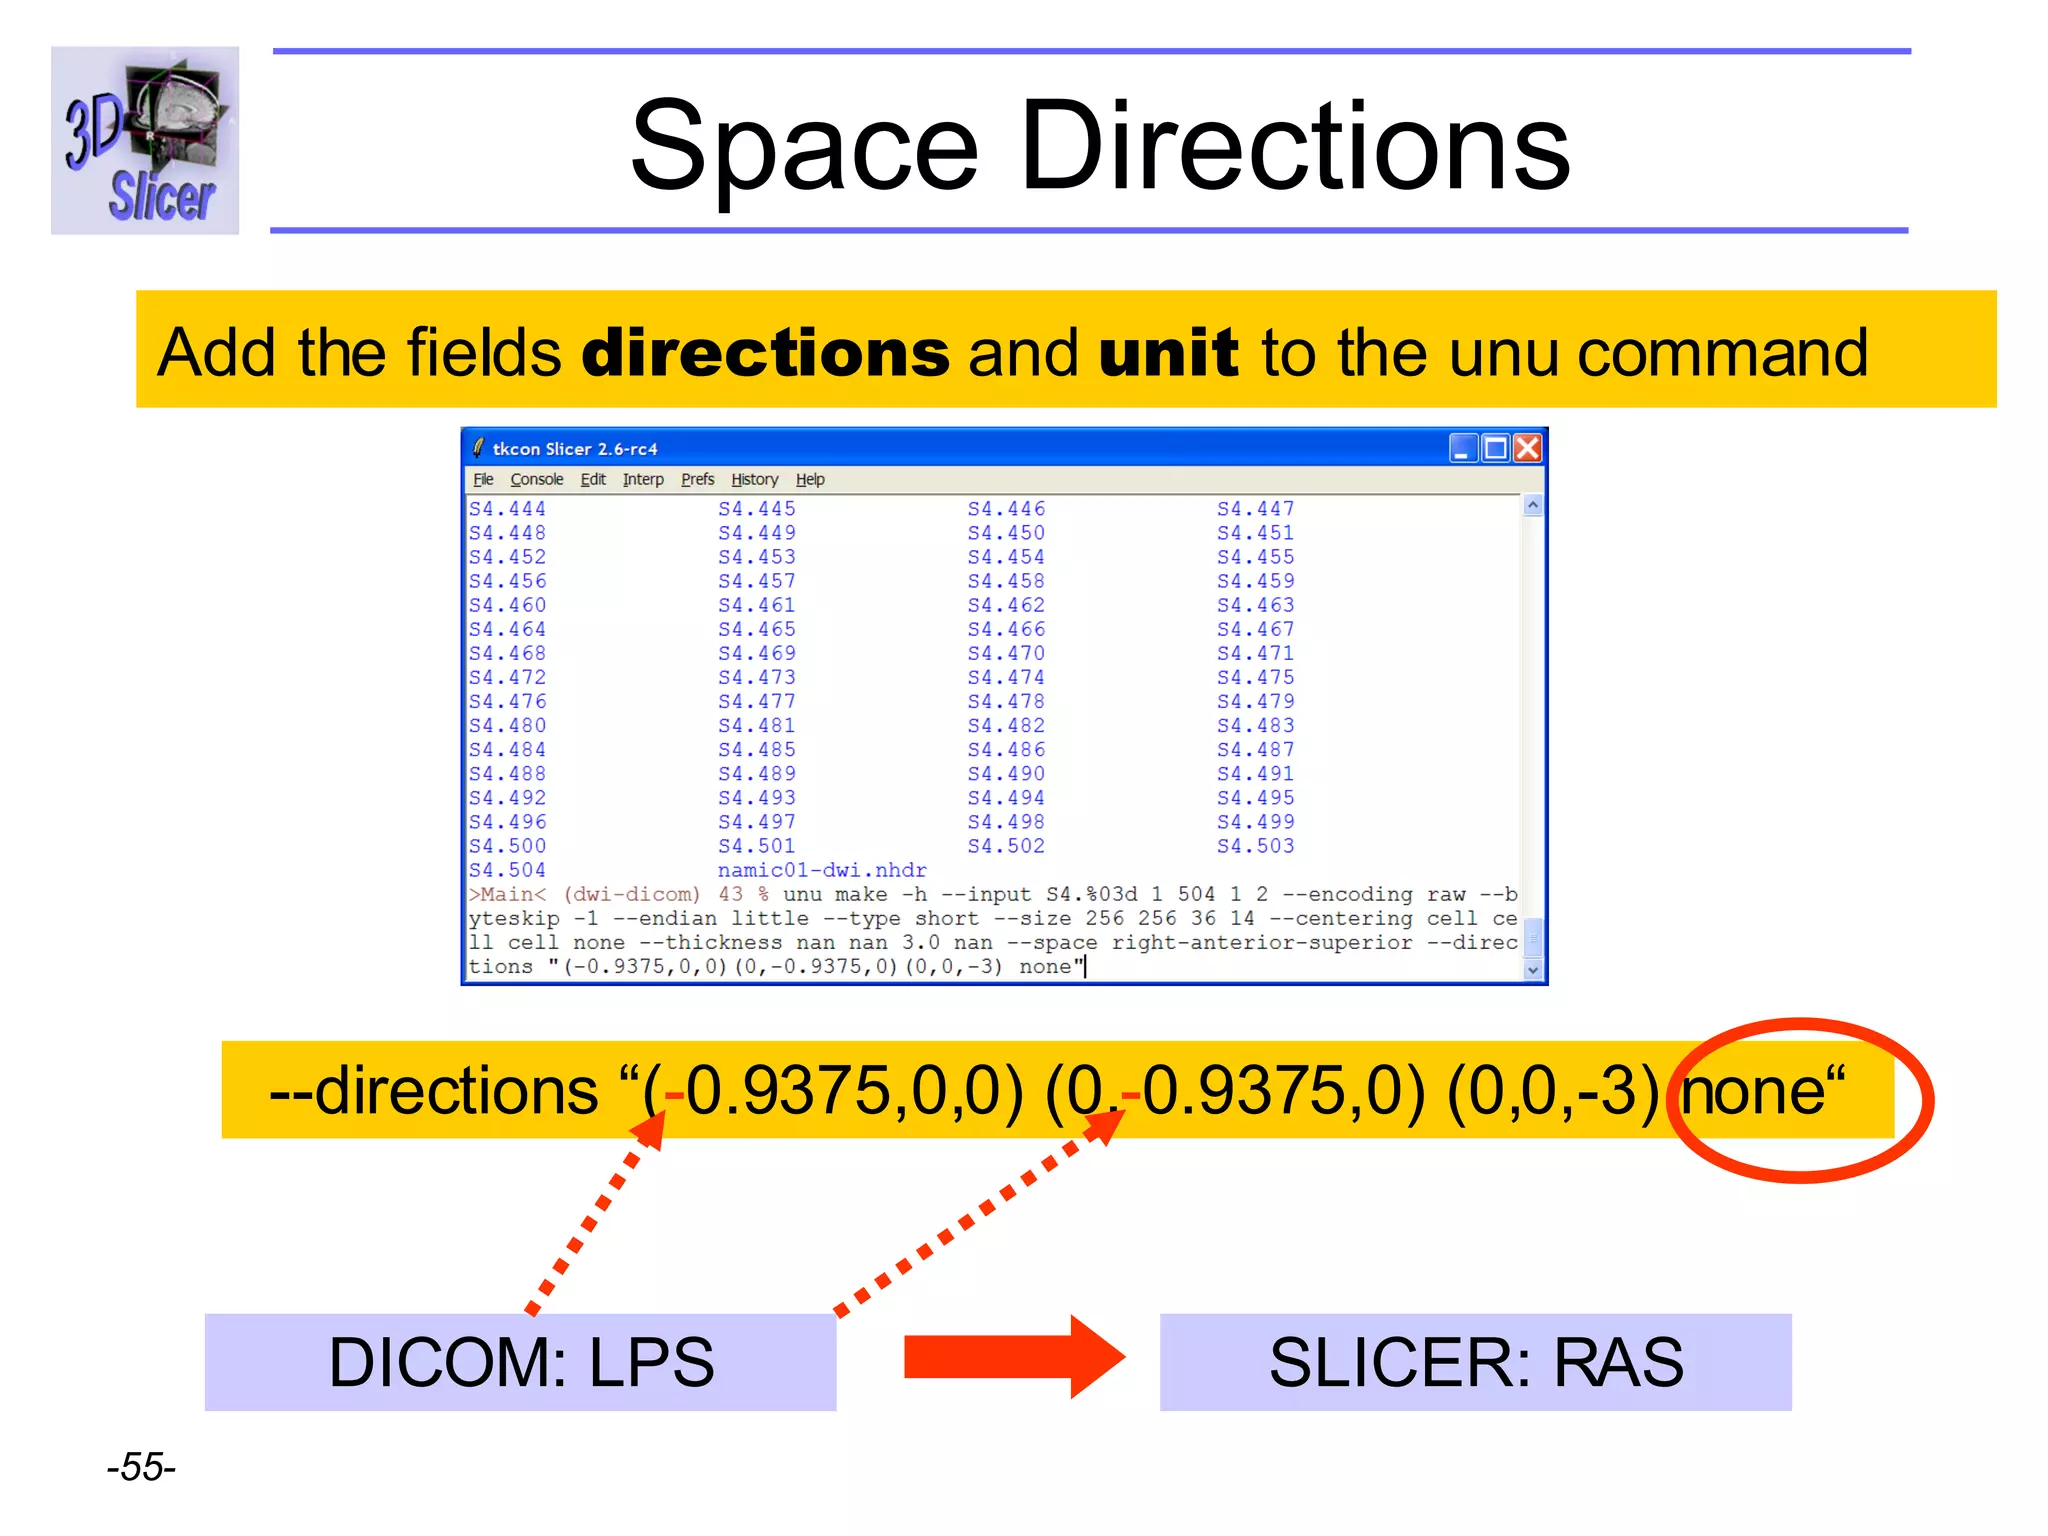
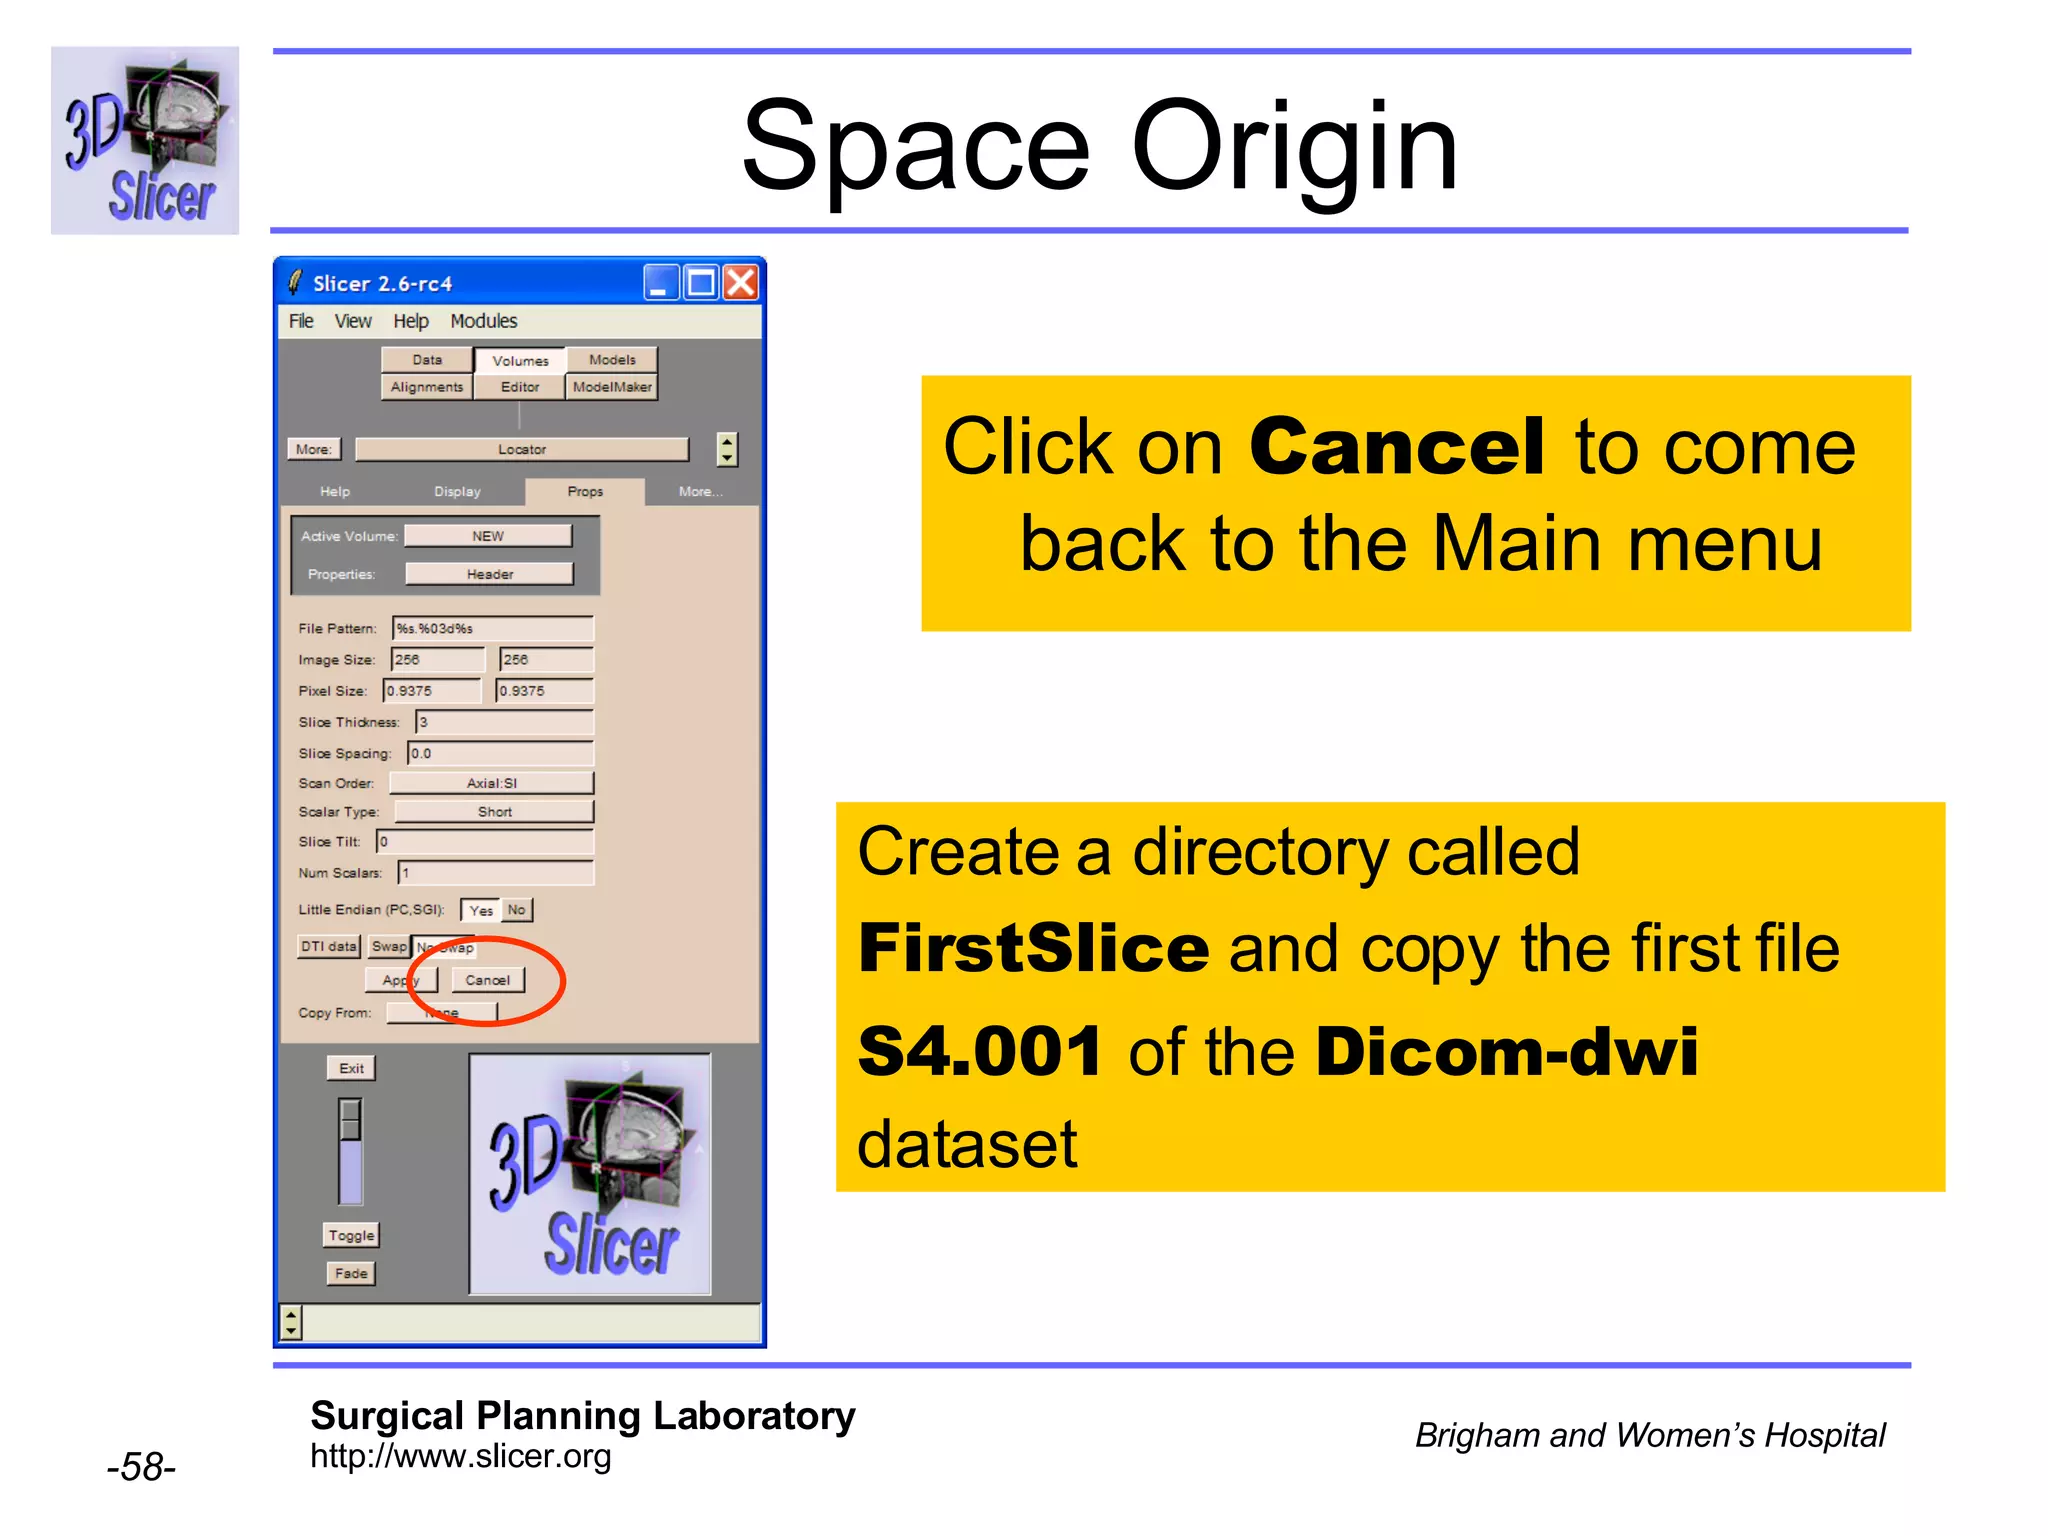
The document discusses converting DICOM diffusion weighted imaging (DWI) data to the Nrrd file format for use in 3D Slicer. It provides an overview of DWI and the Nrrd format, and describes the steps to generate a Nrrd header from the DICOM data including extracting parameters from the DICOM header like image dimensions, data type, and diffusion gradient information and coordinate frames.


![[IJET-V2I2P10] Authors:M. Dhivya, P. Jenifer, D. C. Joy Winnie Wise, N. Rajap...](https://cdn.slidesharecdn.com/ss_thumbnails/ijet-v2i2p10-160427185020-thumbnail.jpg?width=640&height=640&fit=bounds)


