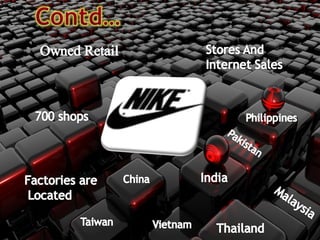
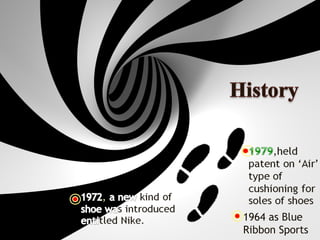
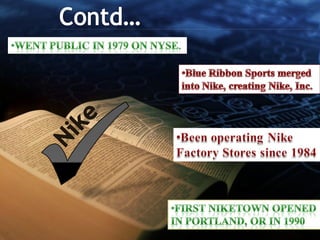
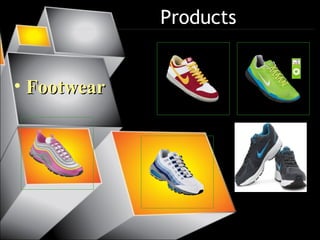
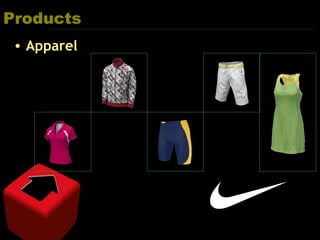
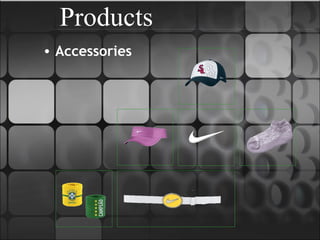
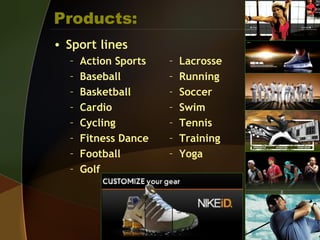
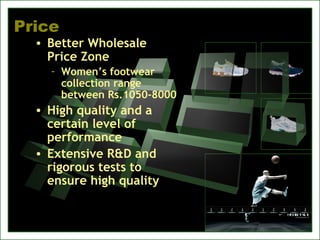
SlideShare a Scribd company logo
1 of 34
Overview of Company:
• American multinational
corporation
• Was founded by
Bill Bowerman and Phil
Knight.
• headquartered in Oregon
Contd…
1964 as Blue
Ribbon Sports
“To bring inspiration and
innovation to every athlete* in
the world.”
* “If you have a body, you are an athlete.”
– Bill Bowerman
(co-founder of Nike)
• Nike has received numerous awards recently.
• Recognized by Fortune magazine
• Nike ranked # 1 in the ‘Companies in a Class
of their Own’ list for use of organic cotton
and re-use a shoe campaign.
• Any athletes who…
– Love sports
– Seek…
• Quality
• Performance
• style
Target Market:
• FootwearFootwear
Products
Products
• Apparel
Products
Equipment
• Accessories
Products
Products:
• Sport lines
– Action Sports
– Baseball
– Basketball
– Cardio
– Cycling
– Fitness Dance
– Football
– Golf
– Lacrosse
– Running
– Soccer
– Swim
– Tennis
– Training
– Yoga
Products:
• College licensed gears
Nike has become so
well known for quality
products that most
people will pay for
these products. This is
why Nike uses cost-
based pricing.
Price
• Better Wholesale
Price Zone
– Women’s footwear
collection range
between Rs.1050-8000
• High quality and a
certain level of
performance
• Extensive R&D and
rigorous tests to
ensure high quality
Footwear- Apparel -
Start- Rs.1000/-
End- Rs.2500/-
Start- Rs.4000/-
End- Rs.15000/-
Bags- Bottle-
Shocks-
Offers:
Start- Rs.1700/-
End- Rs.5000/-
Start- Rs.175/-
End- Rs.895 /-
Start- Rs.1090/-
End- Rs.1600/-
50% or 40% flat
on selected
merchandise,
20% discount for
staff
Place
•Nike’s big outlet in linking road, Bandra (west)
•Next outlet i.e. small store is Near Ramakishan
Mission Hospital, Khare (West)
• Nike Swoosh
• “big athlete, big ad, big product”
formula,
• Employ Celebrities
and well known Athletes
Promotion:
Promotion
“Secret Tournament”
Finest Champion Athletes
Internet, Public Relations, Retail and Consumer
Events
Nike Free, Nike+ and Nike Sphere y
PromotionPromotion
Store Layout and Design
• Variation of free-flow and loop
layout
Store Layout and Design:
• Modern/sporty interior design
Our suggestion through
SWOT analysis
•Strong and meaningful response to labor criticisms
•High quality products and good overall reputation
•Poor communication of labor practices
•Insufficient line of affordable shoes
•Uninformed store salesman.
•The direct distribution to store from warehouse.
•The retail store can be expand its layout, so that the store get
opportunity to deal with maximum customer.
The highly competition with
adidas, Reebok, puma,
lifestyle outlet located
nearby the store.
JUST DO IT
Thank you

More Related Content

What's hot

Team x product research
Team x product researchTeam x product research
Team x product researchTeamX
 
Nike brand audit final ppt
Nike brand audit final pptNike brand audit final ppt
Nike brand audit final pptAjit Jose Mathew
 
Nike marketing strategies
Nike  marketing strategiesNike  marketing strategies
Nike marketing strategiesshivani sharma
 
Turkey_Sports Retail Market
Turkey_Sports Retail MarketTurkey_Sports Retail Market
Turkey_Sports Retail MarketOmer Erdem
 
Nike Consumer Behavior Analysis
Nike Consumer Behavior AnalysisNike Consumer Behavior Analysis
Nike Consumer Behavior Analysiscrmowbray
 
case stude ppt on nike
case stude ppt on nikecase stude ppt on nike
case stude ppt on nikeMOHAMMED SAQIB
 
Nike Brand Management
Nike Brand ManagementNike Brand Management
Nike Brand Managementlouk_ball
 
Brand Managment: Nike; Building A Global Brand Case Analysis
Brand Managment: Nike; Building A Global Brand Case AnalysisBrand Managment: Nike; Building A Global Brand Case Analysis
Brand Managment: Nike; Building A Global Brand Case AnalysisAhmed Coucha, MBA, MSc
 
BUS 467 - Nike Brand Audit Presentation
BUS 467 - Nike Brand Audit PresentationBUS 467 - Nike Brand Audit Presentation
BUS 467 - Nike Brand Audit PresentationTyler Jones
 
Nike Free-Presentation to the Board
Nike Free-Presentation to the BoardNike Free-Presentation to the Board
Nike Free-Presentation to the BoardLilly Shapiro
 
Nike brand extension_vasu_pal_pgp30117
Nike brand extension_vasu_pal_pgp30117Nike brand extension_vasu_pal_pgp30117
Nike brand extension_vasu_pal_pgp30117Sameer Mathur
 
Branding(Nike)
Branding(Nike)Branding(Nike)
Branding(Nike)prashtz
 

What's hot (20)

Team x product research
Team x product researchTeam x product research
Team x product research
 
Nike
NikeNike
Nike
 
Brand management nike
Brand management nikeBrand management nike
Brand management nike
 
Nike brand audit final ppt
Nike brand audit final pptNike brand audit final ppt
Nike brand audit final ppt
 
Nike marketing strategies
Nike  marketing strategiesNike  marketing strategies
Nike marketing strategies
 
Turkey_Sports Retail Market
Turkey_Sports Retail MarketTurkey_Sports Retail Market
Turkey_Sports Retail Market
 
Nike class presentation
Nike class presentationNike class presentation
Nike class presentation
 
Brand Management-Nike
Brand Management-NikeBrand Management-Nike
Brand Management-Nike
 
Nike Consumer Behavior Analysis
Nike Consumer Behavior AnalysisNike Consumer Behavior Analysis
Nike Consumer Behavior Analysis
 
nike
nikenike
nike
 
case stude ppt on nike
case stude ppt on nikecase stude ppt on nike
case stude ppt on nike
 
NIKE Marketing analysis
 NIKE  Marketing analysis NIKE  Marketing analysis
NIKE Marketing analysis
 
Nike Brand Management
Nike Brand ManagementNike Brand Management
Nike Brand Management
 
Brand Managment: Nike; Building A Global Brand Case Analysis
Brand Managment: Nike; Building A Global Brand Case AnalysisBrand Managment: Nike; Building A Global Brand Case Analysis
Brand Managment: Nike; Building A Global Brand Case Analysis
 
BUS 467 - Nike Brand Audit Presentation
BUS 467 - Nike Brand Audit PresentationBUS 467 - Nike Brand Audit Presentation
BUS 467 - Nike Brand Audit Presentation
 
Nike Free-Presentation to the Board
Nike Free-Presentation to the BoardNike Free-Presentation to the Board
Nike Free-Presentation to the Board
 
Athletic Shoes Industry
Athletic Shoes IndustryAthletic Shoes Industry
Athletic Shoes Industry
 
Nike brand extension_vasu_pal_pgp30117
Nike brand extension_vasu_pal_pgp30117Nike brand extension_vasu_pal_pgp30117
Nike brand extension_vasu_pal_pgp30117
 
Nike brand audit
Nike brand auditNike brand audit
Nike brand audit
 
Branding(Nike)
Branding(Nike)Branding(Nike)
Branding(Nike)
 

Viewers also liked

Nike product info and history
Nike product info and historyNike product info and history
Nike product info and historySmit Shah
 
Presentation nike finance marketing india asia
Presentation nike finance marketing india asiaPresentation nike finance marketing india asia
Presentation nike finance marketing india asiaShruti Srivastava
 
Intellectual Property Rights
Intellectual Property RightsIntellectual Property Rights
Intellectual Property RightsShubham Singh
 
Nike presentation
Nike presentationNike presentation
Nike presentationnickypang
 
Nike Ethics
Nike EthicsNike Ethics
Nike Ethicseonemo
 
Nike 2007 Financial Statement Comparision with Statement
Nike 2007 Financial Statement Comparision with StatementNike 2007 Financial Statement Comparision with Statement
Nike 2007 Financial Statement Comparision with Statementdahalpuskar
 
Nike, The Innovation Machine
Nike, The Innovation MachineNike, The Innovation Machine
Nike, The Innovation MachineHelixa
 
Nike - stratégie digitale
Nike - stratégie digitaleNike - stratégie digitale
Nike - stratégie digitaleCamille Guibert
 
Nike_Marketing Policy
Nike_Marketing PolicyNike_Marketing Policy
Nike_Marketing Policyleli4ka
 
Introducing.. The Nike Project
Introducing.. The Nike ProjectIntroducing.. The Nike Project
Introducing.. The Nike ProjectTess Maurici
 
Nike - TNC case study
Nike - TNC case studyNike - TNC case study
Nike - TNC case study6thformmatt
 
Nike Case Study (Building a Global Brand Image)
Nike Case Study (Building a Global Brand Image)Nike Case Study (Building a Global Brand Image)
Nike Case Study (Building a Global Brand Image)Wajid Ali
 

Viewers also liked (20)

Sejarah Nike
Sejarah NikeSejarah Nike
Sejarah Nike
 
Nike product info and history
Nike product info and historyNike product info and history
Nike product info and history
 
Nike
NikeNike
Nike
 
Presentation nike finance marketing india asia
Presentation nike finance marketing india asiaPresentation nike finance marketing india asia
Presentation nike finance marketing india asia
 
Intellectual Property Rights
Intellectual Property RightsIntellectual Property Rights
Intellectual Property Rights
 
Nike presentation
Nike presentationNike presentation
Nike presentation
 
Nike - Just do it
Nike - Just do it Nike - Just do it
Nike - Just do it
 
Business ethics - Nike
Business ethics - Nike Business ethics - Nike
Business ethics - Nike
 
Nike presentation
Nike presentationNike presentation
Nike presentation
 
Nike presentation
Nike presentationNike presentation
Nike presentation
 
Nike Case Study
Nike Case StudyNike Case Study
Nike Case Study
 
Nike Is Bad
Nike Is BadNike Is Bad
Nike Is Bad
 
Nike Ethics
Nike EthicsNike Ethics
Nike Ethics
 
Nike 2007 Financial Statement Comparision with Statement
Nike 2007 Financial Statement Comparision with StatementNike 2007 Financial Statement Comparision with Statement
Nike 2007 Financial Statement Comparision with Statement
 
Nike, The Innovation Machine
Nike, The Innovation MachineNike, The Innovation Machine
Nike, The Innovation Machine
 
Nike - stratégie digitale
Nike - stratégie digitaleNike - stratégie digitale
Nike - stratégie digitale
 
Nike_Marketing Policy
Nike_Marketing PolicyNike_Marketing Policy
Nike_Marketing Policy
 
Introducing.. The Nike Project
Introducing.. The Nike ProjectIntroducing.. The Nike Project
Introducing.. The Nike Project
 
Nike - TNC case study
Nike - TNC case studyNike - TNC case study
Nike - TNC case study
 
Nike Case Study (Building a Global Brand Image)
Nike Case Study (Building a Global Brand Image)Nike Case Study (Building a Global Brand Image)
Nike Case Study (Building a Global Brand Image)
 

Similar to Nike: American sportswear giant known for quality products

Nike presentation store layout
Nike presentation store layoutNike presentation store layout
Nike presentation store layoutarvindrocks1136
 
reebok-150203045029-conversion-gate01
reebok-150203045029-conversion-gate01reebok-150203045029-conversion-gate01
reebok-150203045029-conversion-gate01Karishmå AĻyąą
 
Stp of nike 21
Stp of nike 21Stp of nike 21
Stp of nike 21Dheeraj54
 
Few sucessful brand story and their communication transistion
Few sucessful brand story and their communication transistionFew sucessful brand story and their communication transistion
Few sucessful brand story and their communication transistionRajneesh Jha
 
Marketing management final ppt pdf
Marketing management final ppt pdfMarketing management final ppt pdf
Marketing management final ppt pdfTanishkar Sudhakar
 
Branding adventure sports gear of Indian Origin
Branding adventure sports gear of Indian OriginBranding adventure sports gear of Indian Origin
Branding adventure sports gear of Indian OriginShashank Tripathi
 
MARK 671 Consumer Behaviour Case Study
MARK 671 Consumer Behaviour Case StudyMARK 671 Consumer Behaviour Case Study
MARK 671 Consumer Behaviour Case Studymarhenbun
 
Nike presentation
Nike presentationNike presentation
Nike presentationfizzazaidi4
 
Nike brand analysis
Nike brand analysisNike brand analysis
Nike brand analysisPallav Tyagi
 
Presentation on Marketing plan
Presentation on Marketing planPresentation on Marketing plan
Presentation on Marketing planAl Shahriar
 
Rm ppt sl
Rm ppt slRm ppt sl
Rm ppt slsur8910
 
Nike by jeevan copy
Nike by jeevan   copyNike by jeevan   copy
Nike by jeevan copyMVIT
 

Similar to Nike: American sportswear giant known for quality products (20)

Nike presentation store layout
Nike presentation store layoutNike presentation store layout
Nike presentation store layout
 
Reebok
ReebokReebok
Reebok
 
reebok-150203045029-conversion-gate01
reebok-150203045029-conversion-gate01reebok-150203045029-conversion-gate01
reebok-150203045029-conversion-gate01
 
Stp of nike 21
Stp of nike 21Stp of nike 21
Stp of nike 21
 
Few sucessful brand story and their communication transistion
Few sucessful brand story and their communication transistionFew sucessful brand story and their communication transistion
Few sucessful brand story and their communication transistion
 
Www.homeseeker.com
Www.homeseeker.comWww.homeseeker.com
Www.homeseeker.com
 
Marketing management final ppt pdf
Marketing management final ppt pdfMarketing management final ppt pdf
Marketing management final ppt pdf
 
Branding adventure sports gear of Indian Origin
Branding adventure sports gear of Indian OriginBranding adventure sports gear of Indian Origin
Branding adventure sports gear of Indian Origin
 
Nike Final
Nike FinalNike Final
Nike Final
 
Nike Brand Measurement ppt
Nike Brand Measurement pptNike Brand Measurement ppt
Nike Brand Measurement ppt
 
MARK 671 Consumer Behaviour Case Study
MARK 671 Consumer Behaviour Case StudyMARK 671 Consumer Behaviour Case Study
MARK 671 Consumer Behaviour Case Study
 
Nike presentation
Nike presentationNike presentation
Nike presentation
 
Nike brand analysis
Nike brand analysisNike brand analysis
Nike brand analysis
 
Presentation on Marketing plan
Presentation on Marketing planPresentation on Marketing plan
Presentation on Marketing plan
 
(MBASkills.IN) Nike
(MBASkills.IN) Nike(MBASkills.IN) Nike
(MBASkills.IN) Nike
 
Sports goods retailing
Sports goods retailingSports goods retailing
Sports goods retailing
 
Rm ppt sl
Rm ppt slRm ppt sl
Rm ppt sl
 
Nike by jeevan copy
Nike by jeevan   copyNike by jeevan   copy
Nike by jeevan copy
 
NIKE Case Study
NIKE Case StudyNIKE Case Study
NIKE Case Study
 
Nike
Nike Nike
Nike
 

More from Akash Gupta

Black book project on power generation company
Black book project on power generation companyBlack book project on power generation company
Black book project on power generation companyAkash Gupta
 
Thinking fast and slow by daniel kahnman
Thinking fast and slow by daniel kahnmanThinking fast and slow by daniel kahnman
Thinking fast and slow by daniel kahnmanAkash Gupta
 
Kotak Bank vs ING vyasya- amalgamation (merger)
Kotak Bank vs ING vyasya- amalgamation (merger)Kotak Bank vs ING vyasya- amalgamation (merger)
Kotak Bank vs ING vyasya- amalgamation (merger)Akash Gupta
 
Responsibilitycentersfinal 130122112204-phpapp01
Responsibilitycentersfinal 130122112204-phpapp01Responsibilitycentersfinal 130122112204-phpapp01
Responsibilitycentersfinal 130122112204-phpapp01Akash Gupta
 
bharat heavy electrical limited
bharat heavy electrical limitedbharat heavy electrical limited
bharat heavy electrical limitedAkash Gupta
 
Flipkart potential
Flipkart potentialFlipkart potential
Flipkart potentialAkash Gupta
 
Star export housing
Star export housingStar export housing
Star export housingAkash Gupta
 
method engineering,work simplification, job design, job simplification
method engineering,work simplification, job design, job simplificationmethod engineering,work simplification, job design, job simplification
method engineering,work simplification, job design, job simplificationAkash Gupta
 
export import procedure and documentation
export import procedure and documentationexport import procedure and documentation
export import procedure and documentationAkash Gupta
 

More from Akash Gupta (20)

Ipo final (1)
Ipo final (1)Ipo final (1)
Ipo final (1)
 
Black book project on power generation company
Black book project on power generation companyBlack book project on power generation company
Black book project on power generation company
 
Thinking fast and slow by daniel kahnman
Thinking fast and slow by daniel kahnmanThinking fast and slow by daniel kahnman
Thinking fast and slow by daniel kahnman
 
Kotak Bank vs ING vyasya- amalgamation (merger)
Kotak Bank vs ING vyasya- amalgamation (merger)Kotak Bank vs ING vyasya- amalgamation (merger)
Kotak Bank vs ING vyasya- amalgamation (merger)
 
Eva vs roi 14j
Eva vs roi 14jEva vs roi 14j
Eva vs roi 14j
 
Responsibilitycentersfinal 130122112204-phpapp01
Responsibilitycentersfinal 130122112204-phpapp01Responsibilitycentersfinal 130122112204-phpapp01
Responsibilitycentersfinal 130122112204-phpapp01
 
bharat heavy electrical limited
bharat heavy electrical limitedbharat heavy electrical limited
bharat heavy electrical limited
 
Flipkart potential
Flipkart potentialFlipkart potential
Flipkart potential
 
khan academy
khan academy khan academy
khan academy
 
Muda mura muri
Muda mura muriMuda mura muri
Muda mura muri
 
Star export housing
Star export housingStar export housing
Star export housing
 
Samosa
SamosaSamosa
Samosa
 
Rcm
RcmRcm
Rcm
 
Potholes
PotholesPotholes
Potholes
 
Nike just do it
Nike just do itNike just do it
Nike just do it
 
method engineering,work simplification, job design, job simplification
method engineering,work simplification, job design, job simplificationmethod engineering,work simplification, job design, job simplification
method engineering,work simplification, job design, job simplification
 
export import procedure and documentation
export import procedure and documentationexport import procedure and documentation
export import procedure and documentation
 
Navratri
NavratriNavratri
Navratri
 
Jutemex
JutemexJutemex
Jutemex
 
Imc of amway
Imc of amwayImc of amway
Imc of amway
 

Recently uploaded

18-04-UA_REPORT_MEDIALITERAСY_INDEX-DM_23-1-final-eng.pdf
18-04-UA_REPORT_MEDIALITERAСY_INDEX-DM_23-1-final-eng.pdf18-04-UA_REPORT_MEDIALITERAСY_INDEX-DM_23-1-final-eng.pdf
18-04-UA_REPORT_MEDIALITERAСY_INDEX-DM_23-1-final-eng.pdfssuser54595a
 
Crayon Activity Handout For the Crayon A
Crayon Activity Handout For the Crayon ACrayon Activity Handout For the Crayon A
Crayon Activity Handout For the Crayon AUnboundStockton
 
Presiding Officer Training module 2024 lok sabha elections
Presiding Officer Training module 2024 lok sabha electionsPresiding Officer Training module 2024 lok sabha elections
Presiding Officer Training module 2024 lok sabha electionsanshu789521
 
ECONOMIC CONTEXT - LONG FORM TV DRAMA - PPT
ECONOMIC CONTEXT - LONG FORM TV DRAMA - PPTECONOMIC CONTEXT - LONG FORM TV DRAMA - PPT
ECONOMIC CONTEXT - LONG FORM TV DRAMA - PPTiammrhaywood
 
Separation of Lanthanides/ Lanthanides and Actinides
Separation of Lanthanides/ Lanthanides and ActinidesSeparation of Lanthanides/ Lanthanides and Actinides
Separation of Lanthanides/ Lanthanides and ActinidesFatimaKhan178732
 
CARE OF CHILD IN INCUBATOR..........pptx
CARE OF CHILD IN INCUBATOR..........pptxCARE OF CHILD IN INCUBATOR..........pptx
CARE OF CHILD IN INCUBATOR..........pptxGaneshChakor2
 
The Most Excellent Way | 1 Corinthians 13
The Most Excellent Way | 1 Corinthians 13The Most Excellent Way | 1 Corinthians 13
The Most Excellent Way | 1 Corinthians 13Steve Thomason
 
Sanyam Choudhary Chemistry practical.pdf
Sanyam Choudhary Chemistry practical.pdfSanyam Choudhary Chemistry practical.pdf
Sanyam Choudhary Chemistry practical.pdfsanyamsingh5019
 
mini mental status format.docx
mini    mental       status     format.docxmini    mental       status     format.docx
mini mental status format.docxPoojaSen20
 
KSHARA STURA .pptx---KSHARA KARMA THERAPY (CAUSTIC THERAPY)————IMP.OF KSHARA ...
KSHARA STURA .pptx---KSHARA KARMA THERAPY (CAUSTIC THERAPY)————IMP.OF KSHARA ...KSHARA STURA .pptx---KSHARA KARMA THERAPY (CAUSTIC THERAPY)————IMP.OF KSHARA ...
KSHARA STURA .pptx---KSHARA KARMA THERAPY (CAUSTIC THERAPY)————IMP.OF KSHARA ...M56BOOKSTORE PRODUCT/SERVICE
 
“Oh GOSH! Reflecting on Hackteria's Collaborative Practices in a Global Do-It...
“Oh GOSH! Reflecting on Hackteria's Collaborative Practices in a Global Do-It...“Oh GOSH! Reflecting on Hackteria's Collaborative Practices in a Global Do-It...
“Oh GOSH! Reflecting on Hackteria's Collaborative Practices in a Global Do-It...Marc Dusseiller Dusjagr
 
microwave assisted reaction. General introduction
microwave assisted reaction. General introductionmicrowave assisted reaction. General introduction
microwave assisted reaction. General introductionMaksud Ahmed
 
Paris 2024 Olympic Geographies - an activity
Paris 2024 Olympic Geographies - an activityParis 2024 Olympic Geographies - an activity
Paris 2024 Olympic Geographies - an activityGeoBlogs
 
Call Girls in Dwarka Mor Delhi Contact Us 9654467111
Call Girls in Dwarka Mor Delhi Contact Us 9654467111Call Girls in Dwarka Mor Delhi Contact Us 9654467111
Call Girls in Dwarka Mor Delhi Contact Us 9654467111Sapana Sha
 
Organic Name Reactions for the students and aspirants of Chemistry12th.pptx
Organic Name Reactions  for the students and aspirants of Chemistry12th.pptxOrganic Name Reactions  for the students and aspirants of Chemistry12th.pptx
Organic Name Reactions for the students and aspirants of Chemistry12th.pptxVS Mahajan Coaching Centre
 
A Critique of the Proposed National Education Policy Reform
A Critique of the Proposed National Education Policy ReformA Critique of the Proposed National Education Policy Reform
A Critique of the Proposed National Education Policy ReformChameera Dedduwage
 
Introduction to AI in Higher Education_draft.pptx
Introduction to AI in Higher Education_draft.pptxIntroduction to AI in Higher Education_draft.pptx
Introduction to AI in Higher Education_draft.pptxpboyjonauth
 
Introduction to ArtificiaI Intelligence in Higher Education
Introduction to ArtificiaI Intelligence in Higher EducationIntroduction to ArtificiaI Intelligence in Higher Education
Introduction to ArtificiaI Intelligence in Higher Educationpboyjonauth
 

Recently uploaded (20)

18-04-UA_REPORT_MEDIALITERAСY_INDEX-DM_23-1-final-eng.pdf
18-04-UA_REPORT_MEDIALITERAСY_INDEX-DM_23-1-final-eng.pdf18-04-UA_REPORT_MEDIALITERAСY_INDEX-DM_23-1-final-eng.pdf
18-04-UA_REPORT_MEDIALITERAСY_INDEX-DM_23-1-final-eng.pdf
 
Crayon Activity Handout For the Crayon A
Crayon Activity Handout For the Crayon ACrayon Activity Handout For the Crayon A
Crayon Activity Handout For the Crayon A
 
Código Creativo y Arte de Software | Unidad 1
Código Creativo y Arte de Software | Unidad 1Código Creativo y Arte de Software | Unidad 1
Código Creativo y Arte de Software | Unidad 1
 
Presiding Officer Training module 2024 lok sabha elections
Presiding Officer Training module 2024 lok sabha electionsPresiding Officer Training module 2024 lok sabha elections
Presiding Officer Training module 2024 lok sabha elections
 
ECONOMIC CONTEXT - LONG FORM TV DRAMA - PPT
ECONOMIC CONTEXT - LONG FORM TV DRAMA - PPTECONOMIC CONTEXT - LONG FORM TV DRAMA - PPT
ECONOMIC CONTEXT - LONG FORM TV DRAMA - PPT
 
Separation of Lanthanides/ Lanthanides and Actinides
Separation of Lanthanides/ Lanthanides and ActinidesSeparation of Lanthanides/ Lanthanides and Actinides
Separation of Lanthanides/ Lanthanides and Actinides
 
CARE OF CHILD IN INCUBATOR..........pptx
CARE OF CHILD IN INCUBATOR..........pptxCARE OF CHILD IN INCUBATOR..........pptx
CARE OF CHILD IN INCUBATOR..........pptx
 
The Most Excellent Way | 1 Corinthians 13
The Most Excellent Way | 1 Corinthians 13The Most Excellent Way | 1 Corinthians 13
The Most Excellent Way | 1 Corinthians 13
 
9953330565 Low Rate Call Girls In Rohini Delhi NCR
9953330565 Low Rate Call Girls In Rohini  Delhi NCR9953330565 Low Rate Call Girls In Rohini  Delhi NCR
9953330565 Low Rate Call Girls In Rohini Delhi NCR
 
Sanyam Choudhary Chemistry practical.pdf
Sanyam Choudhary Chemistry practical.pdfSanyam Choudhary Chemistry practical.pdf
Sanyam Choudhary Chemistry practical.pdf
 
mini mental status format.docx
mini    mental       status     format.docxmini    mental       status     format.docx
mini mental status format.docx
 
KSHARA STURA .pptx---KSHARA KARMA THERAPY (CAUSTIC THERAPY)————IMP.OF KSHARA ...
KSHARA STURA .pptx---KSHARA KARMA THERAPY (CAUSTIC THERAPY)————IMP.OF KSHARA ...KSHARA STURA .pptx---KSHARA KARMA THERAPY (CAUSTIC THERAPY)————IMP.OF KSHARA ...
KSHARA STURA .pptx---KSHARA KARMA THERAPY (CAUSTIC THERAPY)————IMP.OF KSHARA ...
 
“Oh GOSH! Reflecting on Hackteria's Collaborative Practices in a Global Do-It...
“Oh GOSH! Reflecting on Hackteria's Collaborative Practices in a Global Do-It...“Oh GOSH! Reflecting on Hackteria's Collaborative Practices in a Global Do-It...
“Oh GOSH! Reflecting on Hackteria's Collaborative Practices in a Global Do-It...
 
microwave assisted reaction. General introduction
microwave assisted reaction. General introductionmicrowave assisted reaction. General introduction
microwave assisted reaction. General introduction
 
Paris 2024 Olympic Geographies - an activity
Paris 2024 Olympic Geographies - an activityParis 2024 Olympic Geographies - an activity
Paris 2024 Olympic Geographies - an activity
 
Call Girls in Dwarka Mor Delhi Contact Us 9654467111
Call Girls in Dwarka Mor Delhi Contact Us 9654467111Call Girls in Dwarka Mor Delhi Contact Us 9654467111
Call Girls in Dwarka Mor Delhi Contact Us 9654467111
 
Organic Name Reactions for the students and aspirants of Chemistry12th.pptx
Organic Name Reactions  for the students and aspirants of Chemistry12th.pptxOrganic Name Reactions  for the students and aspirants of Chemistry12th.pptx
Organic Name Reactions for the students and aspirants of Chemistry12th.pptx
 
A Critique of the Proposed National Education Policy Reform
A Critique of the Proposed National Education Policy ReformA Critique of the Proposed National Education Policy Reform
A Critique of the Proposed National Education Policy Reform
 
Introduction to AI in Higher Education_draft.pptx
Introduction to AI in Higher Education_draft.pptxIntroduction to AI in Higher Education_draft.pptx
Introduction to AI in Higher Education_draft.pptx
 
Introduction to ArtificiaI Intelligence in Higher Education
Introduction to ArtificiaI Intelligence in Higher EducationIntroduction to ArtificiaI Intelligence in Higher Education
Introduction to ArtificiaI Intelligence in Higher Education
 

Nike: American sportswear giant known for quality products

Editor's Notes

  1. Custom animation effects: floating bubbles (Intermediate) To reproduce the bubble shape effects on this slide, do the following: On the Home tab, in the Slides group, click Layout, and then click Blank. On the Home tab, in the Drawing group, click Shapes, and then under Basic Shapes select Oval (second option from the left). Press and hold SHIFT, and then click and drag to draw the oval shape. Select the circle (oval shape). On the Home tab, in the Drawing group, in the lower right corner, click the Format Shape dialog box launcher. In the Format Shape dialog box in the left pane, click Fill. In the Fill pane, click Gradient fill, and then do the following: Click the button next to Preset Colors, and then select Calm Water (second row, third option from the left). In the Type box, select Radial. Click the button next to Direction, and then select From Corner (first option from the left). Also in the Format Shape pane, in the left pane, click Line Color. In the Line Color pane, click Gradient Line, and then do the following: Click the button next to Preset Colors, and select Calm Water (second row, third option from the left). In the Type box, select Linear. Click the button next to Direction, and then select Linear Down (second option from the left). Also in the Format Shape pane, in the left pane, click 3-D Format and then in the 3-D Format pane, do the following: Under Bevel, click the button next to Top, and then select Circle (first option from the left). Next to Top, in the Width box, enter 50 pt, and in the Height box, enter 50 pt. Under Surface, click the button next to Material, and then under Translucent, select Clear. Click the button next to Lighting, and then under Special, select Glow (third option from the left). In the Angle box, enter 110°. To reproduce the animation effects on this slide, do the following: Drag the bubble off the bottom right corner of the slide. On the Animations tab, in the Animations group, click Custom Animation. In the Custom Animation task pane, click Add Effect, point to Entrance, and then click More Effects. In the Add Entrance Effect dialog box, under Basic, select Appear, and then click OK. In the Custom Animation task pane, select the entrance animation effect, and under Modify: Appear, in the Start list, select With Previous. In the Custom Animation task pane, click Add Effect, point to Motion Path, point to Draw Custom Path, and then click Curve. Click a point below the bottom right corner of the slide, and then click several more points to draw a curve. Press ESC to end the curve. In the Custom Animation task pane, click the arrow next to the motion path animation effect, and then click Timing. In the Custom Path dialog box, on the Timing tab, in the Start list, select With Previous. In the Speed box, enter 8.0 seconds, and then click OK. Select the bubble. In the Custom Animation task pane, click Add Effect, point to Emphasis, and then click More Effects. In the Add Emphasis Effect dialog box, under Basic, click Grow/Shrink, and then click OK. In the Custom Animation task pane, select the Grow/Shrink animation. Under Modify: Grow/Shrink, in the Size list, select Larger. Also in the Size list, in the Custom box, enter 150%, and then press ENTER. Click arrow next to the Grow/Shrink animation effect, and then click Timing. In the Grow/Shrink dialog box, on the Timing tab, in the Delay box, enter 6 seconds. In the Speed box, enter 0.1 seconds, and then click OK. Select the bubble. In the Custom Animation task pane, click Add Effect, point to Exit, click More Effects. In the Add Exit Effect dialog box, under Subtle, select Fade, and then click OK. In the Custom Animation task pane, with the Fade animation effect selected, under Modify: Fade, in the Start list, select With Previous. In the Custom Animation task pane, click the arrow next to the Fade animation, and then click Timing. In the Fade dialog box, on the Timing tab, in the Delay box, enter 6 seconds. In the Speed list, enter 0.1 seconds, and then click OK. To duplicate the bubble on this slide, do the following: Select the bubble. On the Home tab, in the Clipboard group, click the arrow under Paste, and then click Duplicate. Select the new bubble. Press and hold SHIFT, and then drag the adjustment handle to resize the shape. On the slide, right-click the motion math for the new bubble, and then click Edit Points. Select the points on the motion path and drag them to create a different motion path. Do the following to reproduce the background effects on this slide, using the water background picture from the example above: Right-click the water background on the original template, and then click Save Background. Save the file as a JPEG (.jpg) file format. Right-click the slide that you are creating, and then click Format Background. In the Format Background dialog box, click Fill in the left pane, select Picture fill in the Fill pane, and then under Insert from click File. In the Insert Picture dialog box, select the saved water picture (.jpg), and then click Insert.   Do the following to reproduce the background effects on this slide, using a different picture: Right-click the slide background area, and then click Format Background. In the Format Background dialog box, click Fill in the left pane, select Picture fill in the Fill pane, and then under Insert from click File. In the Insert Picture dialog box, select another picture, and then click Insert.
  2. Floating, transparent 3-D rectangles (Basic) To reproduce the shape effects on this slide, do the following: On the Home tab, in the Slides group, click Layout, and then click Blank. On the Home tab, in the Drawing group, click Shapes, and then under Rectangles, click Rectangle (first option from the left). On the slide, drag to draw a rectangle. Repeat the process to create multiple rectangles. On the Home tab, in the Editing group, click Select, and then click Select All. On the Home tab, in the bottom right corner of the Drawing group, click the Format Shape dialog box launcher. In the Format Shape dialog box, click Fill in the left pane, and then select No fill in the Fill pane. Also in the Format Shape dialog box, click Line Color in the left pane, and then in the Line Color pane, select No line. Also in the Format Shape dialog box, click 3-D Format in the left pane, and then do the following in the 3-D Format pane: Under Depth, click the button next to Color, and then under Theme Colors, click Blue, Accent 1, Lighter 40% (fourth row, fifth option from the left). In the Depth box, enter 50 pt. Under Surface, click the button next to Material, and then under Translucent, click Clear (third option from the left). Click the button next to Lighting, and then under Special, click Two Point (second option from the left). In the Angle box, enter 290°. Also in the Format Shape dialog box, click 3-D Rotation in the left pane. In the 3-D Rotation pane, click the button next to Presets, under Perspective, click Perspective Heroic Extreme Left (third row, second option from the left), and then do the following: In the X box, enter 333°. In the Y box, enter 25.8°. In the Z box, enter 160°. In the Perspective box, enter 90°. To reproduce the background effects on this slide, do the following: Right-click the slide background area, and then click Format Background. In the Format Background dialog box, click Fill in the left pane, select Gradient fill in the Fill pane, and then do the following: In the Type list, select Linear. Click the button next to Direction, and then click Linear Down (first row, second option from the left). Under Gradient stops, click Add or Remove until three stops appear in the drop-down list. Also under Gradient stops, customize the gradient stops that you added as follows: Select Stop 1 from the list, and then do the following: In the Stop position box, enter 58%. Click the button next to Color, and then under Theme Colors click Dark Blue, Text 2, Lighter 60% (third row, fourth option from the left). Select Stop 2 from the list, and then do the following: In the Stop position box, enter 87%. Click the button next to Color, and then under Theme Colors click Dark Blue, Text 2, Lighter 80% (second row, fourth option from the left). Select Stop 3 from the list, and then do the following: In the Stop position box, enter 100%. Click the button next to Color, and then under Theme Colors click White, Background 1 (first row, first option from the left).
  3. Brushed aluminum shape with gradient spheres (Advanced) To reproduce the circles on this slide, do the following: On the Home tab, in the Slides group, click Layout, and then click Blank. On the Home tab, in the Drawing group, click Shapes, and then under Basic Shapes click Oval (first row, second option from the left). Press and hold SHIFT to constrain the shape to a circle, and then on the slide, drag to draw a circle. Select the circle. Under Drawing Tools, on the Format tab, in the Size group, do the following: In the Shape Height box, enter 0.46”. In the Shape Width box, enter 0.46”. On the Home tab, in the Drawing group, click the arrow next to Shape Fill, point to Gradient, and then click More Gradients. In the Format Shape dialog box, click Fill in the left pane, select Gradient fill in the Fill pane, and then do the following: In the Type list, select Radial. Click the button next to Direction, and then click From Center (third option from the left). Under Gradient stops, click Add or Remove until three stops appear in the drop-down list. Also under Gradient stops, customize the gradient stops that you added as follows: Select Stop 1 from the list, and then do the following: In the Stop position box, enter 0%. Click the button next to Color, and then under Theme Colors click Olive Green, Accent 3, Lighter 80% (second row, seventh option from the left). Select Stop 2 from the list, and then do the following: In the Stop position box, enter 41%. Click the button next to Color, click More Colors, and then in the Colors dialog box, on the Custom tab, enter values for Red: 124, Green: 220, Blue: 52. Select Stop 3 from the list, and then do the following: In the Stop position box, enter 100%. Click the button next to Color, and then under Theme Colors click Black, Text 1, Lighter 5% (sixth row, second option from the left). Also in the Format Shape dialog box, click Line Color in the left pane, and then in the Line Color pane, select No line. Also in the Format Shape dialog box, click Shadow in the left pane. In the Shadow pane, click the button next to Presets, under Outer click Offset Center (second row, second option from the left, and then do the following: In the Transparency box, enter 60%. In the Size box, enter 102%. In the Blur box, enter 5 pt. In the Angle box, enter 0⁰. In the Distance box, enter 0 pt. Also in the Format Shape dialog box, click 3-D Format in the left pane, and then do the following in the 3-D Format pane: Under Bevel, click the button next to Top, and then under Bevel click Soft Round (second row, second option from the left). Next to Top, in the Width box, enter 18.5 pt, and in the Height box, enter 6.5 pt. Under Surface, click the button next to Material, and then under Translucent click Powder (first option from the left). Click the button next to Lighting, and then under Special click Flat (first option from the left). In the Angle box, enter 310°. On the Home tab, in the Drawing group, click Shape Effects, point to Glow, and then do the following: Click Accent color 1, 8 pt glow (second row, first option from the left). Point to More Glow Colors, and then click White, Background 1, Darker 35% (fifth row, first option from the left). Select the circle. On the Home tab, in the Clipboard group, click the button under Paste, and then click Duplicate. On the slide, drag the second, duplicate circle away from the first circle. Select the second circle. Under Drawing Tools, on the Format tab, in the bottom right corner of the Shape Styles group, click the Format Shape dialog box launcher. In the Format Shape dialog box, click Fill in the left pane, select Gradient fill in the Fill pane, and then do the following: In the Type list, select Radial. Click the button next to Direction, and then click From Center (third option from the left). Under Gradient stops, click Add or Remove until three stops appear in the drop-down list. Also under Gradient stops, customize the gradient stops that you added as follows: Select Stop 1 from the list, and then do the following: In the Stop position box, enter 0%. Click the button next to Color, and then under Theme Colors click Olive Green, Accent 3, Lighter 80% (second row, seventh option from the left). Select Stop 2 from the list, and then do the following: In the Stop position box, enter 41%. Click the button next to Color, click More Colors, and then in the Colors dialog box, on the Custom tab, enter values for Red: 11, Green: 189, Blue: 245. Select Stop 3 from the list, and then do the following: In the Stop position box, enter 100%. Click the button next to Color, and then under Theme Colors click Black, Text 1, Lighter 5% (sixth row, second option from the left). Select the second circle. On the Home tab, in the Clipboard group, click the button under Paste, and then click Duplicate. On the slide, drag the third circle away from the second circle. Select the third circle. Under Drawing Tools, on the Format tab, in the bottom right corner of the Shape Styles group, click the Format Shape dialog box launcher. In the Format Shape dialog box, click Fill in the left pane, select Gradient fill in the right pane, and then do the following: In the Type list, select Radial. Click the button next to Direction, and then click From Center (third option from the left). Under Gradient stops, click Add or Remove until three stops appear in the drop-down list. Also under Gradient stops, customize the gradient stops that you added as follows: Select Stop 1 from the list, and then do the following: In the Stop position box, enter 0%. Click the button next to Color, click More Colors, and then in the Colors dialog box, on the Custom tab, enter values for Red: 255, Green: 209, Blue: 159. Select Stop 2 from the list, and then do the following: In the Stop position box, enter 41%. Click the button next to Color, click More Colors, and then in the Colors dialog box, on the Custom tab, enter values for Red: 255, Green: 134, Blue: 1. Select Stop 3 from the list, and then do the following: In the Stop position box, enter 100%. Click the button next to Color, and then under Theme Colors click Black, Text 1, Lighter 5% (sixth row, second option from the left). On the slide, drag the three circles to form a row. Press and hold SHIFT and select all three circles. On the Home tab, in the Drawing group, click Arrange, and then do the following: Point to Align, and then click Align Selected Objects. Point to Align, and then click Align Middle. Point to Align, and then click Align Horizontally. Click Group. On the Home tab, in the Editing group, click Select, and then click Selection Pane. In the Selection and Visibility pane, to edit the name of the group, double-click the group and enter Circle Group. To reproduce the large rounded rectangle on this slide, do the following: On the Home tab, in the Drawing group, click Shapes, and then under Rectangles, click Rounded Rectangle (second option from the left). On the slide, drag to draw a rounded rectangle. Drag the yellow diamond adjustment handle to the left to reduce the rounding on the corners of the rectangle. Select the rectangle. Under Drawing Tools, on the Format tab, in the Size group, do the following: In the Shape Height box, enter 4.26”. In the Shape Width box, enter 5”. On the Home tab, in the Drawing group, click the arrow next to Shape Fill, point to Gradient, and then click More Gradients. In the Format Shape dialog box, click Fill in the left pane, select Gradient fill in the Fill pane, and then do the following: In the Type list, select Linear. Click the button next to Direction, and then click Linear Down (first row, second option from the left). Under Gradient stops, click Add or Remove until two stops appear in the drop-down list. Also under Gradient stops, customize the gradient stops that you added as follows: Select Stop 1 from the list, and then do the following: In the Stop position box, enter 0%. Click the button next to Color, and then under Theme Colors click White, Background 1, Darker 5% (second row, first option from the left). Select Stop 2 from the list, and then do the following: In the Stop position box, enter 100%. Click the button next to Color, and then under Theme Colors click White, Background 1, Darker 35% (fifth row, first option from the left). Also in the Format Shape dialog box, click Line Color in the left pane, and then select No line in the Line Color pane. Also in the Format Shape dialog box, click 3-D Format in the left pane, and then do the following in the 3-D Format pane: Under Bevel, click the button next to Top, and then under Bevel, click Cool Slant (first row, fourth option from the left). Under Surface, click the button next to Material, and then under Standard, click Metal (fourth option from the left). Click the button next to Lighting, and then under Neutral, click Three Point (first row, first option from the left). On the Home tab, in the Drawing group, click Shape Effects, point to Reflection, and then under Reflection Variations, click Tight Reflection, touching (first row, first option from the left). On the Home tab, in the Drawing group, click Arrange, and then do the following: Point to Align, and then click Align to Slide. Point to Align, and then click Align Middle. Point to Align, and then click Align Center. Click Send to Back. In the Selection and Visibility pane, select Circle Group. Drag the group on the slide to position it in the top right corner of the rounded rectangle. To reproduce the raised rectangle on this slide, do the following: Select the large rectangle on the slide, and then on the Home tab, in the Clipboard group, click the arrow under Paste, and then click Duplicate. Select the duplicate rectangle. Under Drawing Tools, on the Format tab, in the Size group, do the following: In the Shape Height box, enter 2.31”. In the Shape Width box, enter 4.58”. On the Home tab, in the Drawing group, click the arrow next to Shape Fill, point to Gradient, and then click More Gradient Options. In the Format Shape dialog box, click Fill in the left pane, click Gradient fill in the Fill pane, and then under Gradient stops, click Add or Remove until two stops appear in the drop-down list. Also under Gradient stops, customize the gradient stops that you added as follows: Select Stop 1 from the drop-down menu, and then do the following: Click the button next to Color, and then under Theme Colors click Black, Text 1, Lighter 5% (sixth row, second option from the left). In the Transparency box, enter 100%. Select Stop 2 from the drop-down menu, and then do the following: Click the button next to Color, and then under Theme Colors click Black, Text 1, Lighter 15% (fifth row, second option from the left). In the Transparency box, enter 70%. Drag the duplicate rectangle onto the bottom of the larger rectangle. To create the two embossed lines on this slide, do the following: On the Home tab, in the Drawing group, click Shapes, and then under Rectangles click Rounded Rectangle (first row, second option from the left). Drag to draw a rectangle on the slide. Select the new duplicate rectangle. Under Drawing Tools, on the Format tab, in the Size group, do the following: In the Shape Height box, enter 0.1”. In the Shape Width box, enter 4.51”. Drag the yellow diamond adjustment handle to the right to increase the rounding on the corners of the rectangle. (Note: If the yellow diamond is not visible, click the View tab and then in the Zoom group click Zoom. In the Zoom dialog box, click 400%.) On the Home tab, in the Drawing group, click the arrow next to Shape Fill, and then under Theme Colors click White, Background 1, Darker 5% (second row, first option from the left). On the Home tab, in the Drawing group, click the arrow next to Shape Outline, and then click No Outline. On the Home tab, in the Drawing group, click Shape Effects, point to Shadow, and then click Shadow Options. In the Format Shape dialog box, click Shadow in the left pane, and then do the following in the Shadow pane: Click the button next to Presets, and then under Inner, click Inside Diagonal Top Left (first row, first option from the left). In the Transparency box, enter 80%. On the Home tab, in the Drawing group, click Shape Effects, point to Reflection, and then under Reflection Variations, click Tight Reflection, touching (first row, first option from the left). On the Home tab, in the Clipboard group, click the arrow under Paste, and then click Duplicate. Drag the duplicate rectangle underneath the other long, thin, rounded rectangle. Press and hold SHIFT and select both of the long, thin, rounded rectangles. On the Home tab, in the Drawing group, click Arrange, and then do the following: Point to Align, and then click Align Selected Objects. Point to Align, and then click Align Center. Click Group. In the Selection and Visibility pane, double-click the group to edit the name, and then enter Embossed Line Group. To align the shapes on the slide, do the following: In the Selection and Visibility pane, select Embossed Line Group. On the slide, drag the group onto the large rectangle, between the circles and the raised area. In the Selection and Visibility pane, press and hold CTRL, and then select Circle Group, Embossed Line Group, and the raised rectangle. On the Home tab, in the Drawing group, click Arrange, point to Align, and then do the following: Click Align Selected Objects. Click Distribute Vertically. Also in the Selection and Visibility pane, press and hold CTRL, select the large rectangle, and cancel the selection of Circle Group, keeping Embossed Line Group and the raised rectangle selected. On the Home tab, in the Drawing group, click Arrange, point to Align, and then do the following: Click Align Selected Objects. Click Align Center. To reproduce the background effects on this slide, do the following: Right-click the slide background area, and then click Format Background. In the Format Background dialog box, click Fill in the left pane, select Gradient fill in the Fill pane, and then do the following: In the Type list, select Linear. Click the button next to Direction, and then click Linear Down (first row, second option from the left). Under Gradient stops, click Add or Remove until two stops appear in the drop-down list. Also under Gradient stops, customize the gradient stops that you added as follows: Select Stop 1 from the list, and then do the following: In the Stop position box, enter 46%. Click the button next to Color, and then under Theme Colors click White, Background 1 (first row, first option from the left). Select Stop 2 from the list, and then do the following: In the Stop position box, enter 100%. Click the button next to Color, and then under Theme Colors click Blue, Accent 1, Lighter 60% (third row, fifth option from the left).
  4. Custom animation effects: motion path and grow/shrink (Advanced) To reproduce the balloon on this slide, do the following: On the Home tab, in the Slides group, click Layout, and then click Blank. On the Home tab, in the Drawing group, click Shapes, under Basic Shapes, click Teardrop (second row, fourth from the left). On the slide, drag to draw the teardrop. Under Drawing Tools, on the Format tab, in the Size group, click the Size and Position dialog box launcher, and then in the Size and Position dialog box on the Size tab under Size and rotate, do the following: In the Height box, enter 1.66”. In the Width box, enter 1.7”. In the Rotation box, enter 133⁰. Under Drawing Tools, on the Format tab, in the Shape Styles group, click the Format Shape dialog box launcher. In the Format Shape dialog box in the left pane, click Fill, and in the Fill pane, click Gradient fill. In the Type list, select Linear. Click the button next to Direction, and then click Linear Down (second option from the left). Under Gradient stops, click Add or Remove until three stops appear in the drop-down list and then under Gradient stops, customize the gradient stops as follows: Select Stop 1 from the list, and then do the following: In the Stop position box, enter 13%. Click the button next to Color, and then under Theme Colors click Red, Accent 2, Darker 25% (fifth row, sixth option from the left). Select Stop 2 from the list, and then do the following: In the Stop position box, enter 66%. Click the button next to Color, and then under Theme Colors click Red, Accent 2, Lighter 40% (fourth row, sixth option from the left). Select Stop 3 from the list, and then do the following: In the Stop position box, enter 100%. Click the button next to Color, and then under Theme Colors click White, Background 1 (first row, first option from the left). Also in the Format Shape dialog box in the left pane, click Line Color, and in the Line Color pane, select No line. On the Home tab, in the Drawing group, click Shapes, and then under Basic Shapes, click Isosceles Triangle (third option from the left). On the slide, drag to draw the isosceles triangle. Select the isosceles triangle. Under Drawing Tools, on the Format tab, in the Size group, click the Size and Position dialog box launcher. In the Size and Position dialog box in the Size tab, under Size and rotate, do the following: In the Height box, enter 0.16”. In the Width box, enter 0.11”. In the Rotation box, enter 8⁰. Under Drawing Tools, on the Format tab, click the Format Shape dialog box launcher. In the Format Shape dialog box in the left pane, click Fill. In the Fill pane, click Solid Fill. Click the button next to Color, and then under Theme Colors click Red, Accent 2, Darker 25% (fifth row, sixth option from the left). Also in the Format Shape dialog box in the left pane, click Line Color, and then in the Line Color pane select No line. Position the isosceles triangle on the slide so that the sharp angle touches the point of the teardrop. On the Home tab, in the Drawing group, click Shapes, and under Lines click Curve (tenth option from the right). On the slide, draw a curve (for, example, one that has four points). Press ESC to end the curve. Select the curved line. On the Home tab, in the Drawing group, click the arrow next to Shape Outline, and then under Theme Colors, click White, Background 1, Darker 15% (third row, first option from the left). On the Home, in the Drawing group, click Shape Outline, point to Weight, and then click 1 pt. Position the curve on your slide so that one end is touching the bottom edge of the isosceles triangle. On the Home tab, in the Drawing group, click Shapes, and under Basic Shapes, select Oval (second option from the left). On the slide, drag to draw an oval. Select the oval. Under Drawing Tools, on the Format tab, in the Size group do the following: In the Shape Height box, enter 1.2”. In the Shape Width box, enter 1.2”. Under Drawing Tools, on the Format tab, in the Shape Styles group, click the arrow next to Shape Fill, point to Gradient, and then click More Gradients. In the Format Shape dialog box, in the left pane click Fill. In the Fill pane, select Gradient fill, and then do the following: In the Type list, select Radial. Click the button next to Direction, and then click From Center (third option from the left). Under Gradient stops, click Add or Remove until three stops appear in the drop-down list. Also under Gradient stops, customize the gradient stops as follows: Select Stop 1 from the list, and then do the following: In the Stop position box, enter 0%. Click the button next to Color, and then under Theme Colors click White, Background 1 (first row, first option from the left). Select Stop 2 from the list, and then do the following: In the Stop position box, enter 50% Click the button next to Color, and then under Theme Colors click White, Background 1 (first row, first option from the left). In the Transparency box, enter 81%. Select Stop 3 from the list, and then do the following: In the Stop position box, enter 71%. Click the button next to Color, and then under Theme Colors click White, Background 1(first row, first option from the left). In the Transparency box, enter 100%. Also in the Format Shape dialog box, in the left pane, click Line Color, and then in the Line Color pane, click No line. Position the oval at the top left edge of the teardrop to create a lighting effect. Press and hold CTRL, and then select all four objects. On the Home tab, in the Drawing group, click Arrange, and then click Group. To reproduce the animation effects on this slide, do the following: On the slide, select the balloon and drag it off the bottom left corner of the slide. With the balloon still selected, on the Animations tab, in the Animations group, click Custom Animation. In the Custom Animation task pane, click Add Effect, point to Motion Paths, and then select Diagonal Up Right. On the slide, select the motion path and then drag the endpoint (red arrow) across the slide and off the top right corner. In the Custom Animation task pane, under Modify: Diagonal Up Right, in the Start list, select With Previous. Select the balloon. In the Custom Animation task pane, click Add Effect, point to Emphasis, click More Effects. In the Add Emphasis Effect dialog box, under Basic, select Grow/Shrink, and then click OK. In the Custom Animation task pane, under Modify: Grow/Shrink, in the Start list, select With Previous. In the Size list, in the Custom box, enter 2%, and then press ENTER. In the Custom Animation task pane, press and hold SHIFT and select both animation effects (motion path and grow/shrink). Click the arrow next to one of the animation effects, and then click Timing. In the Effect Options dialog box, do the following: On the Timing tab, in the Speed box, enter 32 seconds. On the Effect tab, under Settings, clear the Smooth start check box. Click OK.   Do the following to reproduce the background effects on this slide, using the sky background picture from the example above: Right-click the sky background on the original template, and then click Save Background. Save the file as a JPEG (.jpg) file format. Right-click the slide that you are creating, and then click Format Background. In the Format Background dialog box, click Fill in the left pane, select Picture fill in the Fill pane, and then under Insert from click File. In the Insert Picture dialog box, select the saved sky picture (.jpg), and then click Insert.   Do the following to reproduce the background effects on this slide, using a different picture: Right-click the slide background area, and then click Format Background. In the Format Background dialog box, click Fill in the left pane, select Picture fill in the Fill pane, and then under Insert from click File. In the Insert Picture dialog box, select another picture, and then click Insert.    
  5. 3-D rings (Intermediate) To reproduce the effects on this slide, do the following: On the Home tab, in the Slides group, click Layout, and then click Blank. On the Home tab, in the Drawing group, click Shapes, and then under Basic Shapes click Donut (third row, second option from the left). On the slide, drag to draw a donut shape. Select the donut shape. Drag the yellow diamond adjustment handle to the left to decrease the width of the donut shape. Under Drawing Tools, on the Format tab, in the Size group, do the following: In the Shape Height box, click 4.17”. In the Shape Width box, click 4.17”. Under Drawing Tools, on the Format tab, in the Shape Styles group, click the arrow next to Shape Fill, and then under Theme Colors click Aqua, Accent 5, Darker 25% (fifth row, ninth option from the left). Under Drawing Tools, on the Format tab, in the Shape Styles group, click the arrow next to Shape Outline, and then click No Outline. Under Drawing Tools, on the Format tab, in the bottom right corner of the Shape Styles group, click the Format Shape dialog box launcher. In the Format Shape dialog box, click 3-D Format in the left pane, and then do the following in the 3-D Format pane: Under Bevel, click the button next to Top, and then under Bevel click Convex (second row, third option from the left). Next to Top, in the Width box, enter 5 pt, and then in the Height box, enter 5 pt. Click the button next to Bottom, and then under Bevel click Convex (second row, third option from the left). Next to Bottom, in the Width box, enter 5 pt, and then in the Height box, enter 5 pt. Under Depth, click the button next to Color, and then under Theme Colors click Aqua, Accent 5, Darker 25% (fifth row, ninth option from the left). In the Depth box, enter 30 pt. Under Surface, click the button next to Material, and then under Special Effect click Soft Edge (second option from the left). Click the button next to Lighting, and then under Neutral click Three Point (first row, first option from the left). In the Angle box, enter 30°. Also in the Format Shape dialog box, click Shadow in the left pane, and then do the following in the Shadow pane: Click the button next to Presets, and then under Outer click Offset Diagonal Bottom Left (first row, third option from the left). In the Blur box, enter 11 pt. In the Angle box, enter 90°. Also in the Format Shape dialog box, click 3-D Rotation in the left pane. In the 3-D Rotation pane, click the button next to Presets, and then under Parallel click Off Axis 1 Top (second row, third option from the left). On the Insert tab, in the Text group, click Text Box. On the slide, drag to draw a text box. Enter text in the text box (Note: Enter three spaces before and after the text), select the text, and then on the Home tab, in the Font group, select Franklin Gothic Medium from the Font list and then select 24 from the Font Size list. On the Home tab, in the Paragraph group, click Center to center the text in the text box. Select the text box. Under Drawing Tools, on the Format tab, in the WordArt Styles group, click Text Effects, point to Transform, and then under Warp click Can Down (fourth row, fourth option from the left). Drag the text box onto the donut shape. On the text box, drag the pink diamond and blue adjustment handles to adjust the amount of text warp so that it matches the curve of the donut shape. Under Drawing Tools, on the Format tab, in the WordArt Styles group, click the arrow next to Text Fill, point to Gradient, and then click More Gradients. In the Format Text Effects dialog box, click Text Fill in the left pane, select Gradient fill in the Text Fill pane, and then do the following: In the Type list, select Linear. Click the button next to Direction, and then click Linear Right (first row, fourth option from the left). In the Angle box, enter 0°. Under Gradient stops, click Add or Remove until three stops appear in the drop-down list. Also under Gradient stops, customize the gradient stops that you added as follows: Select Stop 1 from the list, and then do the following: In the Stop position box, enter 0%. Click the button next to Color, and then under Theme Colors click White, Background 1 (first row, first option from the left). In the Transparency box, enter 30%. Select Stop 2 from the list, and then do the following: In the Stop position box, enter 77%. Click the button next to Color, and then under Theme Colors click White, Background 1 Darker 15% (third row, first option from the left). In the Transparency box, enter 0%. Select Stop 3 from the list, and then do the following: In the Stop position box, enter 100%. Click the button next to Color, and then under Theme Colors click White, Background 1, Darker 35% (fifth row, first option from the left). In the Transparency box, enter 0%. Press and hold CTRL, and then select the donut shape and the text box. On the Home tab, in the Clipboard group, click the arrow under Paste, and then click Duplicate. Press and hold CTRL, select the second donut shape and text box, and then drag on the slide slightly above and to the right of the first donut shape. Click in the second text box and edit the text. Select the second donut shape. Under Drawing Tools, on the Format tab, in the Size group, do the following: In the Shape Height box, enter 3.75”. In the Shape Width box, enter 3.75”. Drag the second text box onto the second donut shape. On the second text box, drag the pink diamond and blue adjustment handles to adjust the amount of text warp so that it matches the curve of the second donut shape. Select the second donut shape. Under Drawing Tools, on the Format tab, in the Shape Styles group, click the arrow next to Shape Fill, and then under Theme Colors click Purple, Accent 4, Darker 25% (fifth row, eighth option from the left). On the Home tab, in the bottom right corner of the Drawing group, click the Format Shape dialog box launcher. In the Format Shape dialog box, click 3-D Format in the left pane. In the 3-D Format pane, under Depth, click the button next to Color, and then under Theme Colors click Purple, Accent 4, Darker 25% (fifth row, eighth option from the left). Press and hold CTRL, and then select the second donut shape and text box. On the Home tab, in the Clipboard group, click the arrow under Paste, and then click Duplicate. Drag the third donut shape and text box slightly above and to the left of the second donut shape. Click the third text box and edit the text. Press and hold CTRL, and then select the third donut shape and text box. Under Drawing Tools, on the Format tab, in the Size group, do the following: In the Shape Height box, enter 3.33”. In the Shape Width box, enter 3.33”. Drag the third text box onto the third donut shape. On the third text box, drag the pink diamond and blue adjustment handles to adjust the amount of text warp so that it matches the curve of the third donut shape. Select the third donut shape. Under Drawing Tools, on the Format tab, in the Shape Styles group, click the arrow next to Shape Fill, and then under Theme Colors click Olive Green, Accent 3, Darker 25% (fifth row, seventh option from the left). On the Home tab, in the bottom right corner of the Drawing group, click the Format Shape dialog box launcher. In the Format Shape dialog box, click 3-D Format in the left pane. In the 3-D Format pane, under Depth, click the button next to Color, and then under Theme Colors click Olive Green, Accent 3, Darker 25% (fifth row, seventh option from the left). Select the first donut shape. On the Home tab, in the Drawing group, click Arrange, and then click Send to Back. To reproduce the background effects on this slide, do the following: Right-click the slide background area, and then click Format Background. In the Format Background dialog box, click Fill in the left pane, select Gradient fill in the Fill pane, and then do the following: In the Type list, select Linear. Click the button next to Direction, and then click Linear Up (second row, second option from the left). Under Gradient stops, click Add or Remove until two stops appear in the drop-down list. Also under Gradient stops, customize the gradient stops that you added as follows: Select Stop 1 from the list, and then do the following: In the Stop position box, enter 31%. Click the button next to Color, and then under Theme Colors click White, Background 1 (first row, first option from the left). Select Stop 2 from the list, and then do the following: In the Stop position box, enter 100%. Click the button next to Color, click More Colors, and then in the Colors dialog box, on the Custom tab, enter values for Red: 200, Green: 201, Blue: 193.