Downloaded 208 times


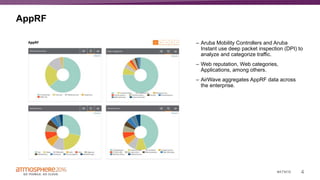
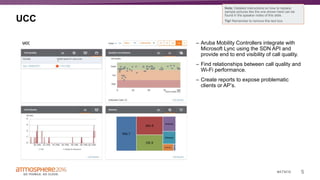


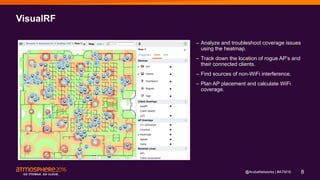
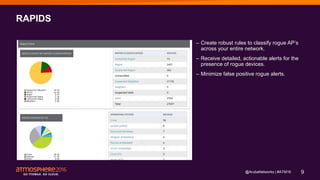
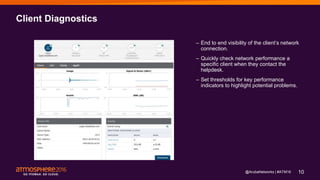
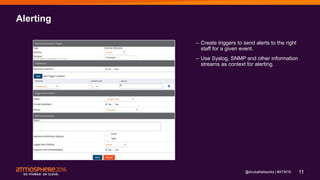
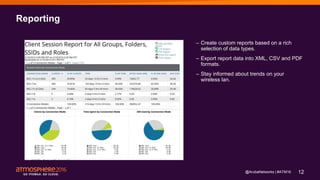


The document outlines features of Aruba AirWave for managing multi-vendor networks, emphasizing tools like Clarity for performance statistics, APPRF for traffic analysis, and UCC for call quality visibility. It discusses capabilities such as zero-touch provisioning, VisualRF for troubleshooting coverage issues, and client diagnostics for network performance monitoring. Additionally, it highlights alerting and reporting functions to enhance network management and operational efficiency.