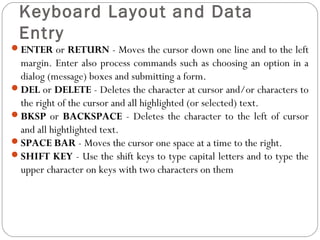
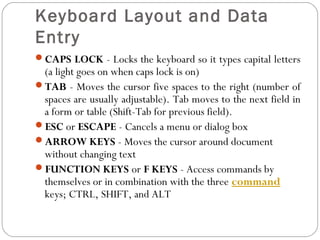
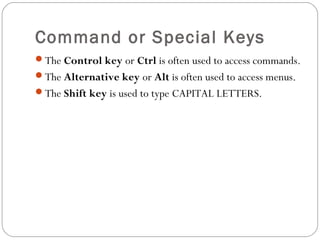
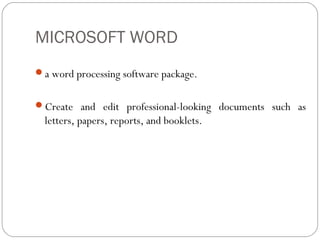
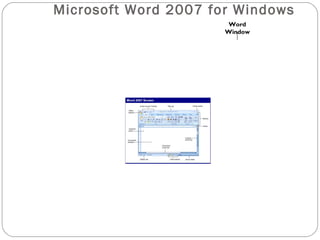
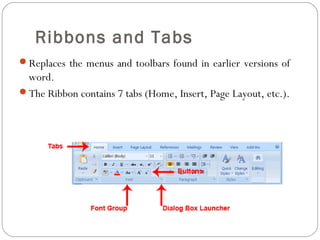
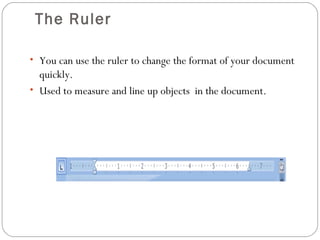
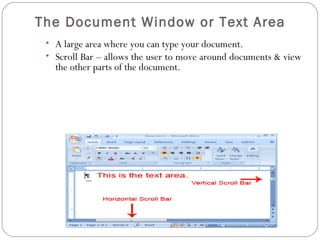
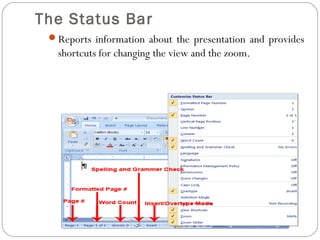
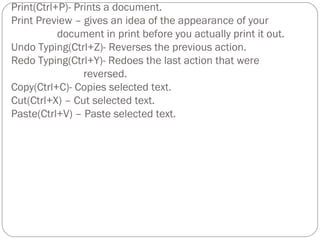
Microsoft Word
Keyboard Layout and Data 
Entry 
ENTER or RETURN - Moves the cursor down one line and to the left 
margin. Enter also process commands such as choosing an option in a 
dialog (message) boxes and submitting a form. 
DEL or DELETE - Deletes the character at cursor and/or characters to 
the right of the cursor and all highlighted (or selected) text. 
BKSP or BACKSPACE - Deletes the character to the left of cursor 
and all hightlighted text. 
SPACE BAR - Moves the cursor one space at a time to the right. 
SHIFT KEY - Use the shift keys to type capital letters and to type the 
upper character on keys with two characters on them
Keyboard Layout and Data 
Entry 
CAPS LOCK - Locks the keyboard so it types capital letters 
(a light goes on when caps lock is on) 
TAB - Moves the cursor five spaces to the right (number of 
spaces are usually adjustable). Tab moves to the next field in 
a form or table (Shift-Tab for previous field). 
ESC or ESCAPE - Cancels a menu or dialog box 
ARROW KEYS - Moves the cursor around document 
without changing text 
FUNCTION KEYS or F KEYS - Access commands by 
themselves or in combination with the three command 
keys; CTRL, SHIFT, and ALT
Command or Special Keys 
Command keys normally do nothing on their own but work 
in combination with other keys. 
As well the command keys are all used to move through 
documents and edit text faster and easier. As well many 
computers have Special keys design specifically for the 
particular computer.
Command or Special Keys 
The Control key or Ctrl is often used to access commands. 
The Alternative key or Alt is often used to access menus. 
The Shift key is used to type CAPITAL LETTERS.
MICROSOFT WORD 
a word processing software package. 
Create and edit professional-looking documents such as 
letters, papers, reports, and booklets.
Microsoft Word 2007 for Windows 
Word 
Window
Office Button 
• Used for opening , saving, or printing and 
to see everything else you can do with your 
document.
The Quick Access Toolbar 
located above the ribbon to which you can easily add 
commonly used commands for quicker access.
The Title Bar 
Displays the name of the currently working document as 
well as the name of the application.
Ribbons and Tabs 
Replaces the menus and toolbars found in earlier versions of 
word. 
The Ribbon contains 7 tabs (Home, Insert, Page Layout, etc.).
The Ruler 
• You can use the ruler to change the format of your document 
quickly. 
• Used to measure and line up objects in the document.
The Document Window or Text Area 
• A large area where you can type your document. 
• Scroll Bar – allows the user to move around documents & view 
the other parts of the document.
Insertion Point 
A blinking vertical bar that indicates where text, graphics, & 
other items will be inserted.
The Status Bar 
Reports information about the presentation and provides 
shortcuts for changing the view and the zoom.
Select wiTthe txhte SSheiflte acntdi oAnrrow Keys 
Place your cursor before the word. 
Press and hold down the Shift key, which serves as an "anchor" showing 
where text you wish to select begins or ends. 
Press the right arrow key until the first line of text is highlighted. 
Press the down arrow key until the first paragraph is highlighted. 
Click anywhere outside the highlighted area to remove the highlighting. 
Select with the Mouse 
Place your cursor before the word. 
Press and hold down the left mouse button. 
Drag the mouse until you have highlighted the second paragraph. 
Click anywhere outside the highlighted area to remove the highlighting.
document & give the file a new name. 
Print(Ctrl+P)- Prints a document. 
Print Preview – gives an idea of the appearance of your 
document in print before you actually print it out. 
Undo Typing(Ctrl+Z)- Reverses the previous action. 
Redo Typing(Ctrl+Y)- Redoes the last action that were 
reversed. 
Copy(Ctrl+C)- Copies selected text. 
Cut(Ctrl+X) – Cut selected text. 
Paste(Ctrl+V) – Paste selected text.
Spell & Grammar(F7) – check the spelling and grammar of text 
in the document. 
Green wavy line – grammar errors 
Red Wavy line – spelling errors 
Thesaurus(Shift+F7)- Helps you to have other options to use 
other words or just to enhance writing by making new word 
choices. 
Find(Ctlr+F) – Command used to look for a particular word or 
text in your document. 
Replace(Ctrl+H) – Replace text in the document. 
Font(Ctlr+Shift+F or Ctrl+D) – simple but important factor in 
Word document. Change the Font. 
Font Size(Ctlr+Shift+P or Ctrl+D) –changes the font size. 
Ctrl+Shift+> = Increase Font Size 
Ctrl+Shift+< = Decrease Font Size
Font Color- Change the text color. 
Text Highlight Color- Make text look like it was marked with a 
highlighter pen. 
Shading – Color the background behind the selected text or 
paragraph. 
Line Spacing – Change the spacing between 
lines of text. 
Indent And Spacin
Bold(Crtl+B) – Make the selected text bold. 
Italic(Crtl+I) – Italicize selected text. 
Underline(Crtl+U) – Underline the selected text. 
Strikethrough-draw a line through the middle of the 
selected text. 
Font Color-Change the Font Color. 
Superscript (Ctrl+Shift+(+ Plus sign)- create small letters 
above the line of selected text. 
Subscript (Ctrl+=)-create small letters below the text 
baseline. 
Sort- Alphabetize selected or sort numerical data.

MS Word for Beginners

  • 1.
  • 2.
    Keyboard Layout andData Entry ENTER or RETURN - Moves the cursor down one line and to the left margin. Enter also process commands such as choosing an option in a dialog (message) boxes and submitting a form. DEL or DELETE - Deletes the character at cursor and/or characters to the right of the cursor and all highlighted (or selected) text. BKSP or BACKSPACE - Deletes the character to the left of cursor and all hightlighted text. SPACE BAR - Moves the cursor one space at a time to the right. SHIFT KEY - Use the shift keys to type capital letters and to type the upper character on keys with two characters on them
  • 3.
    Keyboard Layout andData Entry CAPS LOCK - Locks the keyboard so it types capital letters (a light goes on when caps lock is on) TAB - Moves the cursor five spaces to the right (number of spaces are usually adjustable). Tab moves to the next field in a form or table (Shift-Tab for previous field). ESC or ESCAPE - Cancels a menu or dialog box ARROW KEYS - Moves the cursor around document without changing text FUNCTION KEYS or F KEYS - Access commands by themselves or in combination with the three command keys; CTRL, SHIFT, and ALT
  • 4.
    Command or SpecialKeys Command keys normally do nothing on their own but work in combination with other keys. As well the command keys are all used to move through documents and edit text faster and easier. As well many computers have Special keys design specifically for the particular computer.
  • 5.
    Command or SpecialKeys The Control key or Ctrl is often used to access commands. The Alternative key or Alt is often used to access menus. The Shift key is used to type CAPITAL LETTERS.
  • 6.
    MICROSOFT WORD aword processing software package. Create and edit professional-looking documents such as letters, papers, reports, and booklets.
  • 7.
    Microsoft Word 2007for Windows Word Window
  • 8.
    Office Button •Used for opening , saving, or printing and to see everything else you can do with your document.
  • 9.
    The Quick AccessToolbar located above the ribbon to which you can easily add commonly used commands for quicker access.
  • 10.
    The Title Bar Displays the name of the currently working document as well as the name of the application.
  • 11.
    Ribbons and Tabs Replaces the menus and toolbars found in earlier versions of word. The Ribbon contains 7 tabs (Home, Insert, Page Layout, etc.).
  • 12.
    The Ruler •You can use the ruler to change the format of your document quickly. • Used to measure and line up objects in the document.
  • 13.
    The Document Windowor Text Area • A large area where you can type your document. • Scroll Bar – allows the user to move around documents & view the other parts of the document.
  • 14.
    Insertion Point Ablinking vertical bar that indicates where text, graphics, & other items will be inserted.
  • 15.
    The Status Bar Reports information about the presentation and provides shortcuts for changing the view and the zoom.
  • 17.
    Select wiTthe txhteSSheiflte acntdi oAnrrow Keys Place your cursor before the word. Press and hold down the Shift key, which serves as an "anchor" showing where text you wish to select begins or ends. Press the right arrow key until the first line of text is highlighted. Press the down arrow key until the first paragraph is highlighted. Click anywhere outside the highlighted area to remove the highlighting. Select with the Mouse Place your cursor before the word. Press and hold down the left mouse button. Drag the mouse until you have highlighted the second paragraph. Click anywhere outside the highlighted area to remove the highlighting.
  • 19.
    document & givethe file a new name. Print(Ctrl+P)- Prints a document. Print Preview – gives an idea of the appearance of your document in print before you actually print it out. Undo Typing(Ctrl+Z)- Reverses the previous action. Redo Typing(Ctrl+Y)- Redoes the last action that were reversed. Copy(Ctrl+C)- Copies selected text. Cut(Ctrl+X) – Cut selected text. Paste(Ctrl+V) – Paste selected text.
  • 20.
    Spell & Grammar(F7)– check the spelling and grammar of text in the document. Green wavy line – grammar errors Red Wavy line – spelling errors Thesaurus(Shift+F7)- Helps you to have other options to use other words or just to enhance writing by making new word choices. Find(Ctlr+F) – Command used to look for a particular word or text in your document. Replace(Ctrl+H) – Replace text in the document. Font(Ctlr+Shift+F or Ctrl+D) – simple but important factor in Word document. Change the Font. Font Size(Ctlr+Shift+P or Ctrl+D) –changes the font size. Ctrl+Shift+> = Increase Font Size Ctrl+Shift+< = Decrease Font Size
  • 21.
    Font Color- Changethe text color. Text Highlight Color- Make text look like it was marked with a highlighter pen. Shading – Color the background behind the selected text or paragraph. Line Spacing – Change the spacing between lines of text. Indent And Spacin
  • 22.
    Bold(Crtl+B) – Makethe selected text bold. Italic(Crtl+I) – Italicize selected text. Underline(Crtl+U) – Underline the selected text. Strikethrough-draw a line through the middle of the selected text. Font Color-Change the Font Color. Superscript (Ctrl+Shift+(+ Plus sign)- create small letters above the line of selected text. Subscript (Ctrl+=)-create small letters below the text baseline. Sort- Alphabetize selected or sort numerical data.