This document provides instructions for navigating and performing common tasks in Microsoft Word. It covers using keyboard shortcuts and the mouse to move the cursor and select text. Common formatting tools like changing font, size, style, alignment and indentation are described. Methods for saving, closing and undoing actions are also outlined. The document is intended as a basic tutorial or workshop for beginning Word users.

![Page 3
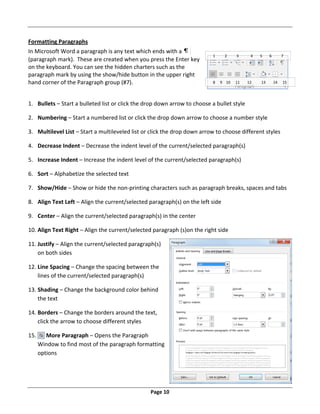
Common Shortcut Keys
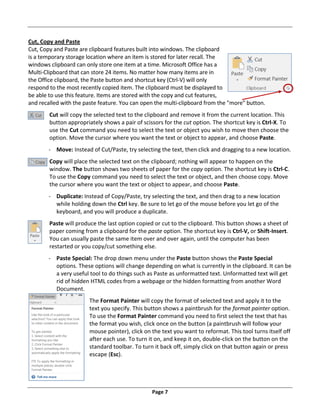
Clipboard: Cut, Copy and Paste
Ctrl X Ctrl C Ctrl V
Cut Copy Paste
X=> Scissors C=> Copy V=> Editing Insert character
These characters are also right next to each other on your keyboard.
File Management
Open Document.....................Ctrl ‐ O
Close Document.....................Ctrl ‐ W or Ctrl ‐ F4
Save Document .....................Ctrl ‐ S Save As… ................................F12
Print Preview/Print ................Ctrl ‐ P
Resizing Font
Increase Font Size .................Shift ‐ Ctrl ‐ > Decrease Font Size.................Shift ‐ Ctrl ‐ <
Increase Font Point ................Ctrl ‐ [ Decrease Font Point...............Ctrl ‐ ]
Formatting Text
Bold ........................................Ctrl ‐ B Italicize ...................................Ctrl ‐ I
Underline ...............................Ctrl ‐ U Double Underline...................Shift ‐ Ctrl ‐ D
Subscript ................................Ctrl ‐ = Superscript.............................Shift ‐ Ctrl ‐ =
Small Caps..............................Shift ‐ Ctrl ‐ K All Caps...................................Shift ‐ Ctrl ‐ A
Alignments
Left Align ................................Ctrl ‐ L Justify Align ............................Ctrl ‐ J
Center Align............................Ctrl ‐ E Right Align..............................Ctrl ‐ R
Indents
Increase Indent ......................Ctrl‐M Decrease Indent.....................Shift‐Ctrl‐M
Increase Hanging Indent ........Ctrl‐T Decrease Hanging Indent.......Shift‐Ctrl‐T
Line Spacing
Single Space ...........................Ctrl ‐ 1 1.5 Spacing .............................Ctrl ‐ 5
Double Space .........................Ctrl ‐ 2
Paragraph
Reset Paragraph.....................Ctrl – Q
r
F ont](https://image.slidesharecdn.com/beginner-word-230924042309-9970a4aa/85/Beginner-Word-pdf-5-320.jpg)

![Page 8
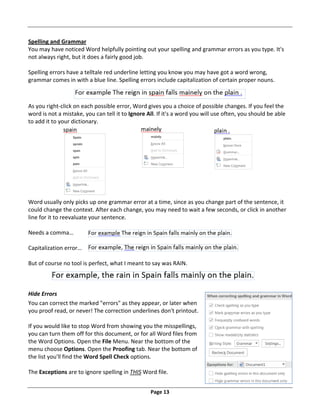
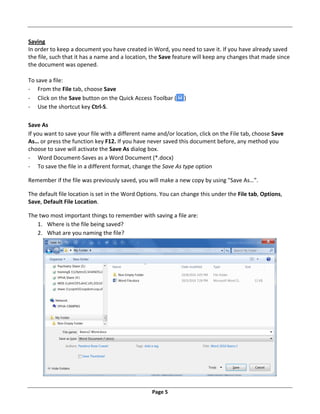
Format Font
Most options to change the format of the text can be found on the Home tab, in the Font group.
1. List of Fonts ‐ Changes the shape of the selected text.
2. List of Font Sizes ‐ Changes the size of the selected text. You can type in your own custom size,
the range is 1pt to 1638pt, including half sizes (e.g. 14.5pt) Use Ctrl‐[ or Ctrl‐] to increase and
decrease by one font point.
3. Grow Font ‐ Increases the size of the selected text, based on the list of font sizes. Use Ctrl‐> to
increase the font based on the list of sizes.
4. Shrink Font ‐ Decreases the size of the selected text, based on the list of font sizes. Use Ctrl‐< to
decrease the font based on the list of sizes.
5. Change Case ‐ Changes the capitalization of your selected text. Choices include: Sentence case.;
lowercase; UPPERCASE; Capitalize Each Word; and tOGGLE cASE.
6. Clear Formatting ‐ Change the selected text to the default settings.
7. Bold ‐ Changes selected text appear darker, like writing with a marker instead of a pen. Use Ctrl‐B
to bold.
8. Italic ‐ Changes selected text to appear slanted, leaning the letters to the right. Use Ctrl‐I to
Italicize.
9. Underline ‐ Changes selected text to have a single line under the text. The dropdown allows you
to pick different underlines and underline colors. Use Ctrl‐U for a basic underline.
10. Strikethrough ‐ Changes the selected to have a single line through the middle of the letters.
11. Subscript ‐ Changes the selected text to be small and lowered. Example: H2O (“Subway goes down”).
Use Ctrl‐= to subscript.
12. Superscript ‐ Changes the selected text to be small and raised
. Example: x2
(“Superman goes up”). Use
Ctrl‐+ to superscript.
13. Text Effects ‐ Changes the text to have more dramatic appearance. This option is only available in
Office 2010.
14. Text Highlight Color ‐ Changes the mouse to a highlighter. Turn on this tool and drag over text to
highlight/un‐highlight.
15. Font Color ‐ Changes the selected text to the chosen color. When you choose a color it becomes
the default. To see other color options, click More Colors… to see all the colors available.
16. More Font – Opens the Font dialog box with more Font settings
7 8 9 10 11 12 13 14 15 16
1 2 3 4 5 6](https://image.slidesharecdn.com/beginner-word-230924042309-9970a4aa/85/Beginner-Word-pdf-10-320.jpg)