Download to read offline


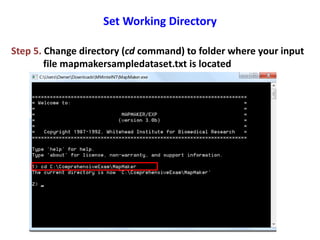
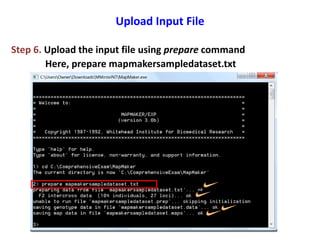
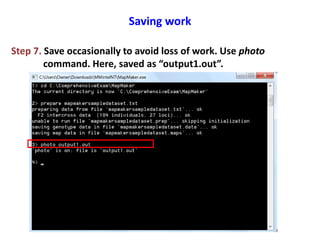
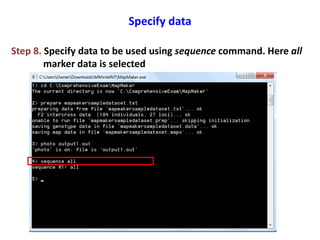

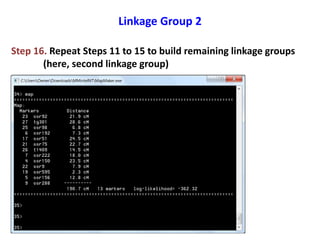
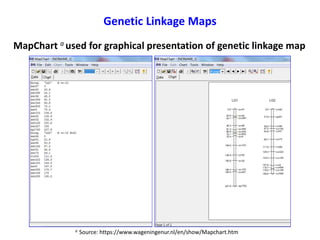

This document is a comprehensive lab manual for performing linkage mapping using MapMaker software, detailing steps for data preparation, execution, and analysis. It includes instructions for downloading necessary files, setting up the software, and processing sample datasets to build genetic linkage maps. Additionally, it provides guidance on grouping and ordering markers, as well as resources for graphical presentations of the results.


![谷歌留痕技术 [ 𝙩𝙤𝙥 𝟮𝟯𝟯. 𝙘 𝙤𝙢 ]](https://cdn.slidesharecdn.com/ss_thumbnails/top233-260130174328-3833018c-thumbnail.jpg?width=640&height=640&fit=bounds)


