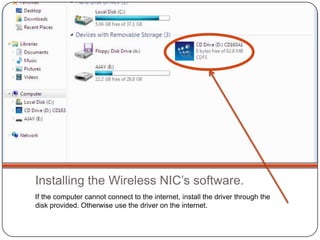
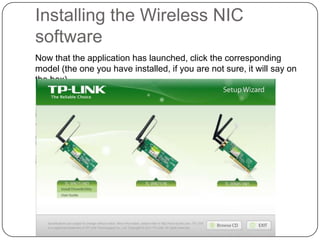
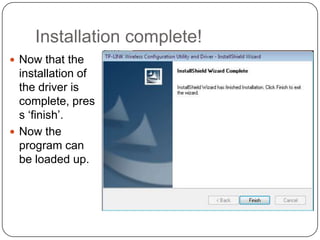
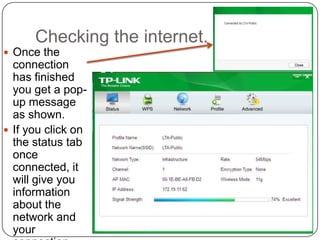
By George Smith-Moore
Installation of a wireless NIC
Installation of the wireless NIC
Once the wireless NIC has been physically installed, you must install the
software, If you do not, the device may not work!
Installing the Wireless NIC’s software.
If the computer cannot connect to the internet, install the driver through the
disk provided. Otherwise use the driver on the internet.
Click the setup application!
Installing the Wireless NIC
software
Now that the application has launched, click the corresponding
model (the one you have installed, if you are not sure, it will say on
the box)
Install Shield Wizard
Once you have selected your model, the ‘install
shield’ wizard will launch.
You can install the driver only but the configuration
utility is an add-on which is recommended by TP-
LIN K
File location
You can change the file location but
for simplicity I would recommend
that you let the program create and
install to the default folder. Once you have
chosen the file
location press, ‘next’
and then ‘install’.
Installation
 Now that the program is installing, please wait
until it has finished.
Installation complete!
 Now that the
installation of
the driver is
complete, pres
s ‘finish’.
 Now the
program can
be loaded up.
TP-LINK GUI
 Once the application has booted up, you can use it to
connect to the internet.
 Connecting to the internet is shown above, first
choose your network, secondly type in the password if
required, thirdly off you go!
Checking the internet.
 Once the
connection
has finished
you get a pop-
up message
as shown.
 If you click on
the status tab
once
connected, it
will give you
information
about the
network and
your
Check the driver.
 To check if the driver has installed correctly, you
can check in the device manager.
 Under the tab network adapters, if the TP-LINK
adapter is shown (without an exclamation mark
next to the image), then it has installed correctly.

Installation of wireless NIC software

  • 1.
  • 2.
    Installation of thewireless NIC Once the wireless NIC has been physically installed, you must install the software, If you do not, the device may not work!
  • 3.
    Installing the WirelessNIC’s software. If the computer cannot connect to the internet, install the driver through the disk provided. Otherwise use the driver on the internet.
  • 4.
    Click the setupapplication!
  • 5.
    Installing the WirelessNIC software Now that the application has launched, click the corresponding model (the one you have installed, if you are not sure, it will say on the box)
  • 6.
    Install Shield Wizard Onceyou have selected your model, the ‘install shield’ wizard will launch. You can install the driver only but the configuration utility is an add-on which is recommended by TP- LIN K
  • 7.
    File location You canchange the file location but for simplicity I would recommend that you let the program create and install to the default folder. Once you have chosen the file location press, ‘next’ and then ‘install’.
  • 8.
    Installation  Now thatthe program is installing, please wait until it has finished.
  • 9.
    Installation complete!  Nowthat the installation of the driver is complete, pres s ‘finish’.  Now the program can be loaded up.
  • 10.
    TP-LINK GUI  Oncethe application has booted up, you can use it to connect to the internet.  Connecting to the internet is shown above, first choose your network, secondly type in the password if required, thirdly off you go!
  • 11.
    Checking the internet. Once the connection has finished you get a pop- up message as shown.  If you click on the status tab once connected, it will give you information about the network and your
  • 12.
    Check the driver. To check if the driver has installed correctly, you can check in the device manager.  Under the tab network adapters, if the TP-LINK adapter is shown (without an exclamation mark next to the image), then it has installed correctly.