SlideShare a Scribd company logo
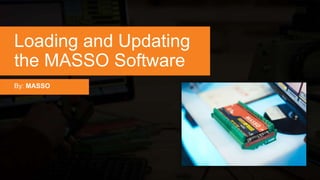
Loading and Updating
the MASSO Software
By: MASSO
MASSO is the most cost-effective CNC controller that
has a fully integrated hardware and software to run
Mill, Lathe, Router, and Plasma machines!
MASSO comes with all these green connectors that can be
used for connecting your cables.
On the left side you have
the VGA connectors and
your USB connectors.
On the right side you have
the PlayStation controller
connector and your MPG
hand wheel connector.
STEP 1: Remove the 4 screws
(top left, top right, bottom left,
bottom right)
STEP 2: Lift and slide out the
panel to the left hand side
If you need to unplug any of the green connectors,
please make sure to do these steps:
Do this before you unplug the connectors because they are actually
locked with the panel.
If you try to force open the connectors without removing the panel,
you can actually damage the connectors.
REMEMBER:
If you ordered a 3-axis mill controller and
later want to upgrade to a 5-axis unit, then
you simply do an upgrade through our
website and we'll send you an email with
the updated software.
All MASSO controllers share the same hardware
and supports up to 5-AXIS!
You don't have to worry about having
different hardware models for 3-axis
or 5-axis versions.
You can get it all from MASSO!
All MASSO controllers share the same hardware
and supports up to 5-AXIS!
You will need these two:
USB flash disk to load the
software
12-24 volt adapter
 To initially get started with the MASSO,
STEP 1: Connect the power
here on the power connector
(this is the negative side of our
power supply).
STEP 2: Connect the positive
side.
 To initially get started with the MASSO,
STEP 3: Connect the VGA
screen by plugging in the VGA
cable.
STEP 4: Simply power up the
MASSO unit.
 To initially get started with the MASSO,
Once it's powered up, you will see this message on the screen:
"Thanks for purchasing Masso CNC controller!
To receive the software, please register & activate your unit by emailing Masso's serial
number
5A-2070 to support@hindtechnology.com and specify your machine type such as Lathe,
Mill, or Plasma."
 To initially get started with the MASSO,
STEP 1: Prepare a USB pen drive using a Mac
and load the MASSO software.
STEP 2: After plugging the USB, go to the disk
utility. From there select your USB drive, go to
erase, and make sure format is set to Fat 32.
 To update the MASSO,
STEP 3: Once completed, copy the MASSO
software file to the USB, then remove it.
 To update the MASSO,
STEP 1: Plug in the USB flash drive.
Make sure that the USB flash drive is
actually formatted to Fat 32.
 To load the software to the MASSO,
HOW TO CHECK?
Just right click, go to Format, then select Fat 32.
If it's not set as Fat 32, then do a quick format.
Please make sure to COPY the data of the USB
flash drive because when you format the drive
you will lose everything that's on the drive.
 To load the software to the MASSO,
STEP 2: Simply copy this file and put it inside the
flash drive. Make sure the file name is exactly
how you received from us. Do not copy this file in
any folder on the USB because the update will fail.
STEP 3: Safely eject the drive. Once we have
copied the files to the USB drive we will connect
the drive to the MASSO. Make sure it is powered
down before doing that.
 To load the software to the MASSO,
STEP 4: Plug the USB drive in, and now plug on the
power supply. Now MASSO is updating itself. Please
wait for the progress bar to go all the way to 100%.
 To load the software to the MASSO,
Once progress bar reaches
100% and stays in yellow
color, that means that the
update has finished.
 To load the software to the MASSO,
If during the update the
progress bar turns red at
any point, that means the
update has failed. You
should retry to update the
unit.
 To load the software to the MASSO,
If no issue occurs, power off
the unit then power back
on. No need to remove the
USB drive from the controller.
You will see on the screen
that the MASSO software has
loaded and the system has
started up.
m a s s o c n c . c o m

More Related Content

Similar to Loading and Updating MASSO CNC Software

Digitisation
Digitisation Digitisation
Digitisation
L-Monk
 
Macbook pro 17inch_early2011
Macbook pro 17inch_early2011Macbook pro 17inch_early2011
Macbook pro 17inch_early2011
bertaa
 
How to Wipe Mac Laptop
How to Wipe Mac LaptopHow to Wipe Mac Laptop
How to Wipe Mac Laptop
glen sagman
 
Mac book pro 13 inch users guide
Mac book pro 13 inch users guideMac book pro 13 inch users guide
Mac book pro 13 inch users guide
cbor123
 
instergram
instergraminstergram
instergram
eden101
 
Manual (en) max m7 pro
Manual (en) max m7 proManual (en) max m7 pro
Manual (en) max m7 pro
fotbalist1968
 

Similar to Loading and Updating MASSO CNC Software (20)

Digitisation
Digitisation Digitisation
Digitisation
 
Macbook pro 17inch_early2011
Macbook pro 17inch_early2011Macbook pro 17inch_early2011
Macbook pro 17inch_early2011
 
Dukane Airslate AS3A usermanual
Dukane Airslate AS3A  usermanualDukane Airslate AS3A  usermanual
Dukane Airslate AS3A usermanual
 
UNIT 2 P6
UNIT 2 P6UNIT 2 P6
UNIT 2 P6
 
Manual ads1
Manual ads1Manual ads1
Manual ads1
 
Final how to create a bootable os x 11.1
Final how to create a bootable os x 11.1Final how to create a bootable os x 11.1
Final how to create a bootable os x 11.1
 
Troubleshoot : Yes Dongle
Troubleshoot : Yes DongleTroubleshoot : Yes Dongle
Troubleshoot : Yes Dongle
 
MacBook Air Reference Guide
MacBook Air Reference GuideMacBook Air Reference Guide
MacBook Air Reference Guide
 
Connect canon pixma ts6120 printer to wi fi
Connect canon pixma ts6120 printer to wi fiConnect canon pixma ts6120 printer to wi fi
Connect canon pixma ts6120 printer to wi fi
 
Family Tree Explorer 9 Premium Manual
Family Tree Explorer 9 Premium ManualFamily Tree Explorer 9 Premium Manual
Family Tree Explorer 9 Premium Manual
 
BSL 860-English Manual
BSL 860-English ManualBSL 860-English Manual
BSL 860-English Manual
 
New microsoft office word document (2)
New microsoft office word document (2)New microsoft office word document (2)
New microsoft office word document (2)
 
How to Wipe Mac Laptop
How to Wipe Mac LaptopHow to Wipe Mac Laptop
How to Wipe Mac Laptop
 
Mac book pro 13 inch users guide
Mac book pro 13 inch users guideMac book pro 13 inch users guide
Mac book pro 13 inch users guide
 
Windows 7 notice
Windows 7 noticeWindows 7 notice
Windows 7 notice
 
Windows 7 notice
Windows 7 noticeWindows 7 notice
Windows 7 notice
 
How to Hard Reset Sony Xperia M2_2016
How to Hard Reset Sony Xperia M2_2016How to Hard Reset Sony Xperia M2_2016
How to Hard Reset Sony Xperia M2_2016
 
instergram
instergraminstergram
instergram
 
Foit lab manual
Foit lab manualFoit lab manual
Foit lab manual
 
Manual (en) max m7 pro
Manual (en) max m7 proManual (en) max m7 pro
Manual (en) max m7 pro
 

Recently uploaded

一比一原版SDSU毕业证圣地亚哥州立大学毕业证成绩单如何办理
一比一原版SDSU毕业证圣地亚哥州立大学毕业证成绩单如何办理一比一原版SDSU毕业证圣地亚哥州立大学毕业证成绩单如何办理
一比一原版SDSU毕业证圣地亚哥州立大学毕业证成绩单如何办理
eemet
 
一比一原版SDSU毕业证圣地亚哥州立大学毕业证成绩单如何办理
一比一原版SDSU毕业证圣地亚哥州立大学毕业证成绩单如何办理一比一原版SDSU毕业证圣地亚哥州立大学毕业证成绩单如何办理
一比一原版SDSU毕业证圣地亚哥州立大学毕业证成绩单如何办理
kywwoyk
 
一比一原版UVM毕业证佛蒙特大学毕业证成绩单如何办理
一比一原版UVM毕业证佛蒙特大学毕业证成绩单如何办理一比一原版UVM毕业证佛蒙特大学毕业证成绩单如何办理
一比一原版UVM毕业证佛蒙特大学毕业证成绩单如何办理
kywwoyk
 
NO1 Uk Amil Baba In Lahore Kala Jadu In Lahore Best Amil In Lahore Amil In La...
NO1 Uk Amil Baba In Lahore Kala Jadu In Lahore Best Amil In Lahore Amil In La...NO1 Uk Amil Baba In Lahore Kala Jadu In Lahore Best Amil In Lahore Amil In La...
NO1 Uk Amil Baba In Lahore Kala Jadu In Lahore Best Amil In Lahore Amil In La...
Amil baba
 

Recently uploaded (6)

一比一原版SDSU毕业证圣地亚哥州立大学毕业证成绩单如何办理
一比一原版SDSU毕业证圣地亚哥州立大学毕业证成绩单如何办理一比一原版SDSU毕业证圣地亚哥州立大学毕业证成绩单如何办理
一比一原版SDSU毕业证圣地亚哥州立大学毕业证成绩单如何办理
 
一比一原版SDSU毕业证圣地亚哥州立大学毕业证成绩单如何办理
一比一原版SDSU毕业证圣地亚哥州立大学毕业证成绩单如何办理一比一原版SDSU毕业证圣地亚哥州立大学毕业证成绩单如何办理
一比一原版SDSU毕业证圣地亚哥州立大学毕业证成绩单如何办理
 
Memory compiler tutorial – TSMC 40nm technology
Memory compiler tutorial – TSMC 40nm technologyMemory compiler tutorial – TSMC 40nm technology
Memory compiler tutorial – TSMC 40nm technology
 
F5 LTM TROUBLESHOOTING Guide latest.pptx
F5 LTM TROUBLESHOOTING Guide latest.pptxF5 LTM TROUBLESHOOTING Guide latest.pptx
F5 LTM TROUBLESHOOTING Guide latest.pptx
 
一比一原版UVM毕业证佛蒙特大学毕业证成绩单如何办理
一比一原版UVM毕业证佛蒙特大学毕业证成绩单如何办理一比一原版UVM毕业证佛蒙特大学毕业证成绩单如何办理
一比一原版UVM毕业证佛蒙特大学毕业证成绩单如何办理
 
NO1 Uk Amil Baba In Lahore Kala Jadu In Lahore Best Amil In Lahore Amil In La...
NO1 Uk Amil Baba In Lahore Kala Jadu In Lahore Best Amil In Lahore Amil In La...NO1 Uk Amil Baba In Lahore Kala Jadu In Lahore Best Amil In Lahore Amil In La...
NO1 Uk Amil Baba In Lahore Kala Jadu In Lahore Best Amil In Lahore Amil In La...
 

Loading and Updating MASSO CNC Software

  • 1. Loading and Updating the MASSO Software By: MASSO
  • 2. MASSO is the most cost-effective CNC controller that has a fully integrated hardware and software to run Mill, Lathe, Router, and Plasma machines!
  • 3. MASSO comes with all these green connectors that can be used for connecting your cables.
  • 4. On the left side you have the VGA connectors and your USB connectors.
  • 5. On the right side you have the PlayStation controller connector and your MPG hand wheel connector.
  • 6. STEP 1: Remove the 4 screws (top left, top right, bottom left, bottom right) STEP 2: Lift and slide out the panel to the left hand side If you need to unplug any of the green connectors, please make sure to do these steps:
  • 7. Do this before you unplug the connectors because they are actually locked with the panel. If you try to force open the connectors without removing the panel, you can actually damage the connectors. REMEMBER:
  • 8. If you ordered a 3-axis mill controller and later want to upgrade to a 5-axis unit, then you simply do an upgrade through our website and we'll send you an email with the updated software. All MASSO controllers share the same hardware and supports up to 5-AXIS!
  • 9. You don't have to worry about having different hardware models for 3-axis or 5-axis versions. You can get it all from MASSO! All MASSO controllers share the same hardware and supports up to 5-AXIS!
  • 10. You will need these two: USB flash disk to load the software 12-24 volt adapter  To initially get started with the MASSO,
  • 11. STEP 1: Connect the power here on the power connector (this is the negative side of our power supply). STEP 2: Connect the positive side.  To initially get started with the MASSO,
  • 12. STEP 3: Connect the VGA screen by plugging in the VGA cable. STEP 4: Simply power up the MASSO unit.  To initially get started with the MASSO,
  • 13. Once it's powered up, you will see this message on the screen: "Thanks for purchasing Masso CNC controller! To receive the software, please register & activate your unit by emailing Masso's serial number 5A-2070 to support@hindtechnology.com and specify your machine type such as Lathe, Mill, or Plasma."  To initially get started with the MASSO,
  • 14. STEP 1: Prepare a USB pen drive using a Mac and load the MASSO software. STEP 2: After plugging the USB, go to the disk utility. From there select your USB drive, go to erase, and make sure format is set to Fat 32.  To update the MASSO,
  • 15. STEP 3: Once completed, copy the MASSO software file to the USB, then remove it.  To update the MASSO,
  • 16. STEP 1: Plug in the USB flash drive. Make sure that the USB flash drive is actually formatted to Fat 32.  To load the software to the MASSO,
  • 17. HOW TO CHECK? Just right click, go to Format, then select Fat 32. If it's not set as Fat 32, then do a quick format. Please make sure to COPY the data of the USB flash drive because when you format the drive you will lose everything that's on the drive.  To load the software to the MASSO,
  • 18. STEP 2: Simply copy this file and put it inside the flash drive. Make sure the file name is exactly how you received from us. Do not copy this file in any folder on the USB because the update will fail. STEP 3: Safely eject the drive. Once we have copied the files to the USB drive we will connect the drive to the MASSO. Make sure it is powered down before doing that.  To load the software to the MASSO,
  • 19. STEP 4: Plug the USB drive in, and now plug on the power supply. Now MASSO is updating itself. Please wait for the progress bar to go all the way to 100%.  To load the software to the MASSO,
  • 20. Once progress bar reaches 100% and stays in yellow color, that means that the update has finished.  To load the software to the MASSO,
  • 21. If during the update the progress bar turns red at any point, that means the update has failed. You should retry to update the unit.  To load the software to the MASSO,
  • 22. If no issue occurs, power off the unit then power back on. No need to remove the USB drive from the controller. You will see on the screen that the MASSO software has loaded and the system has started up.
  • 23. m a s s o c n c . c o m