Downloaded 295 times
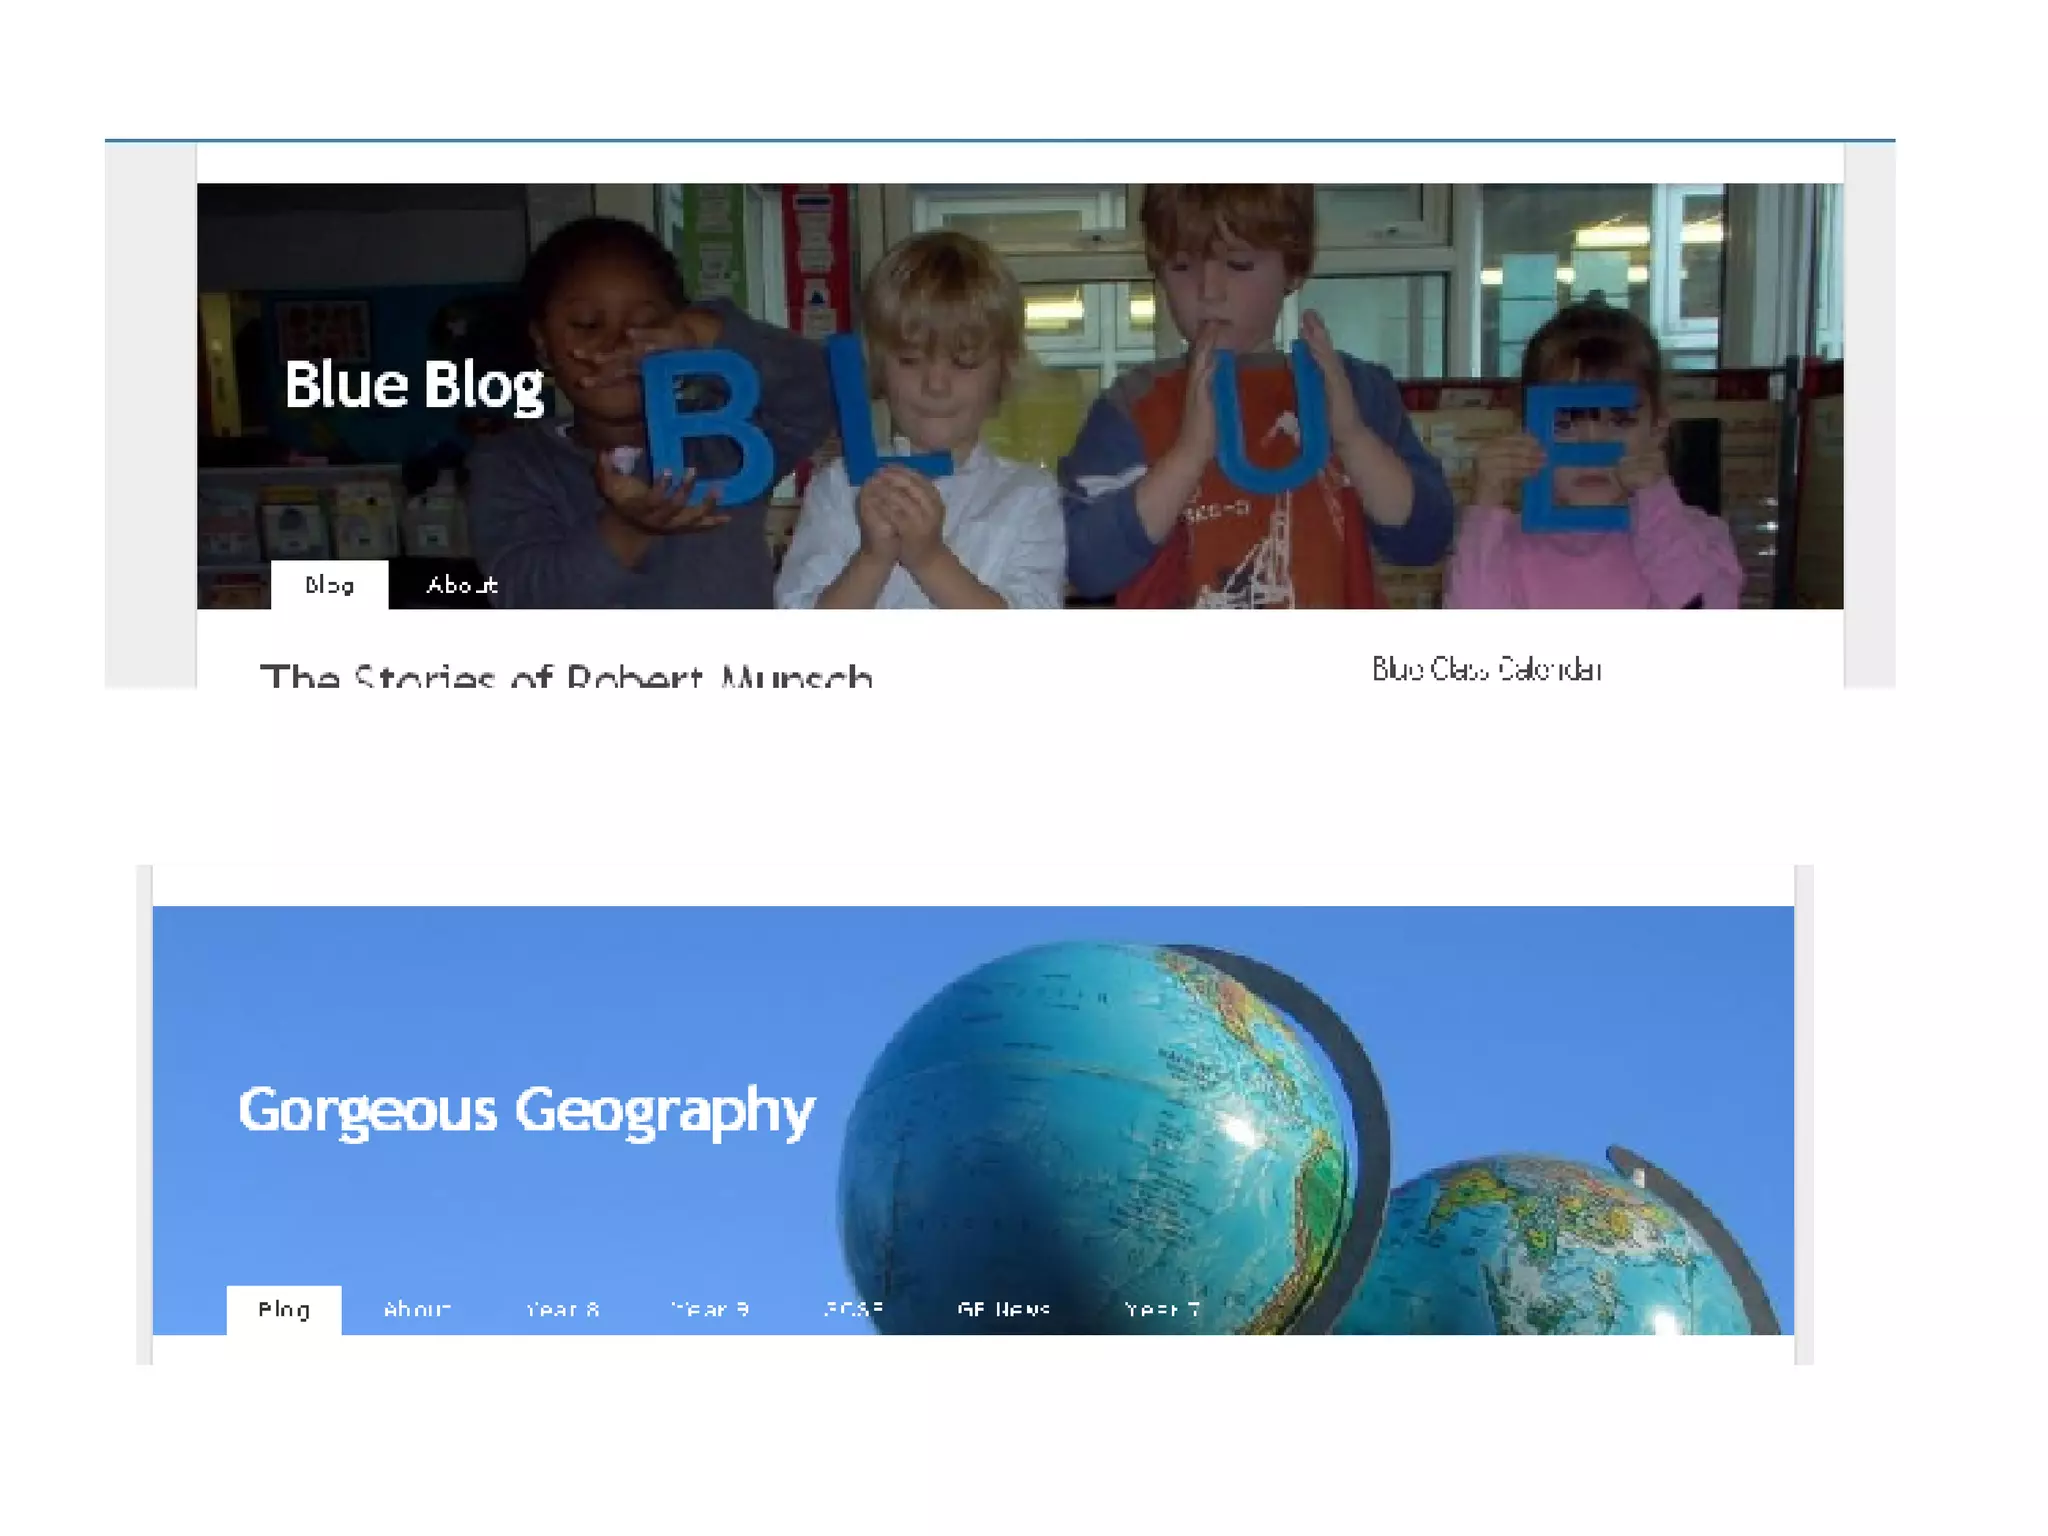


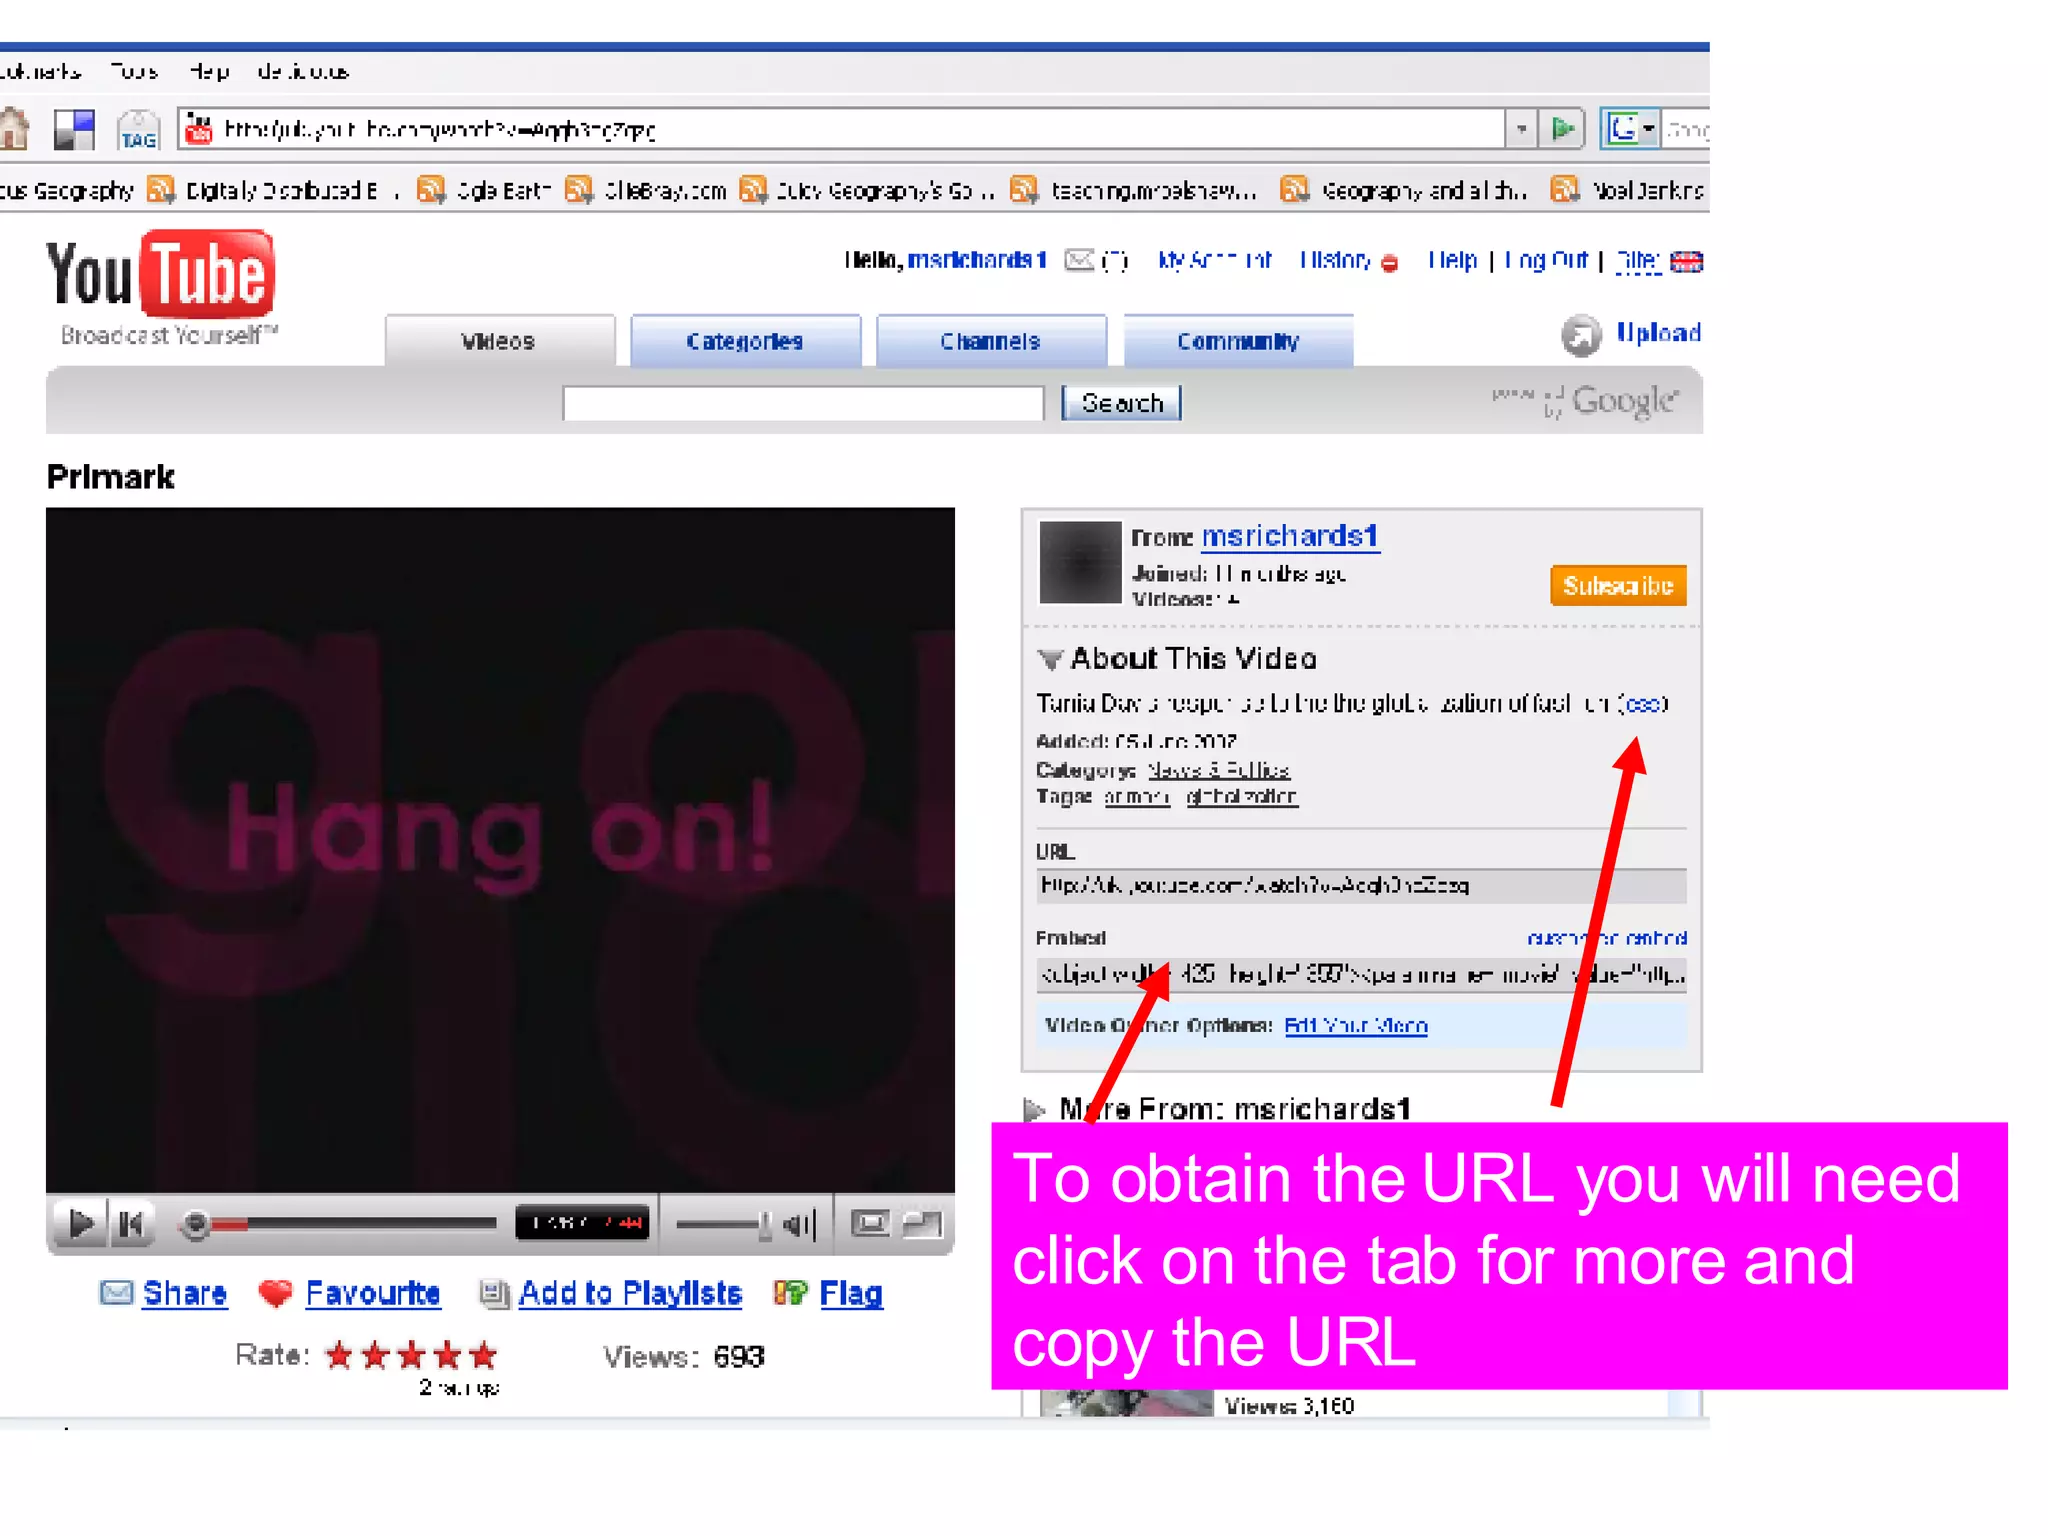
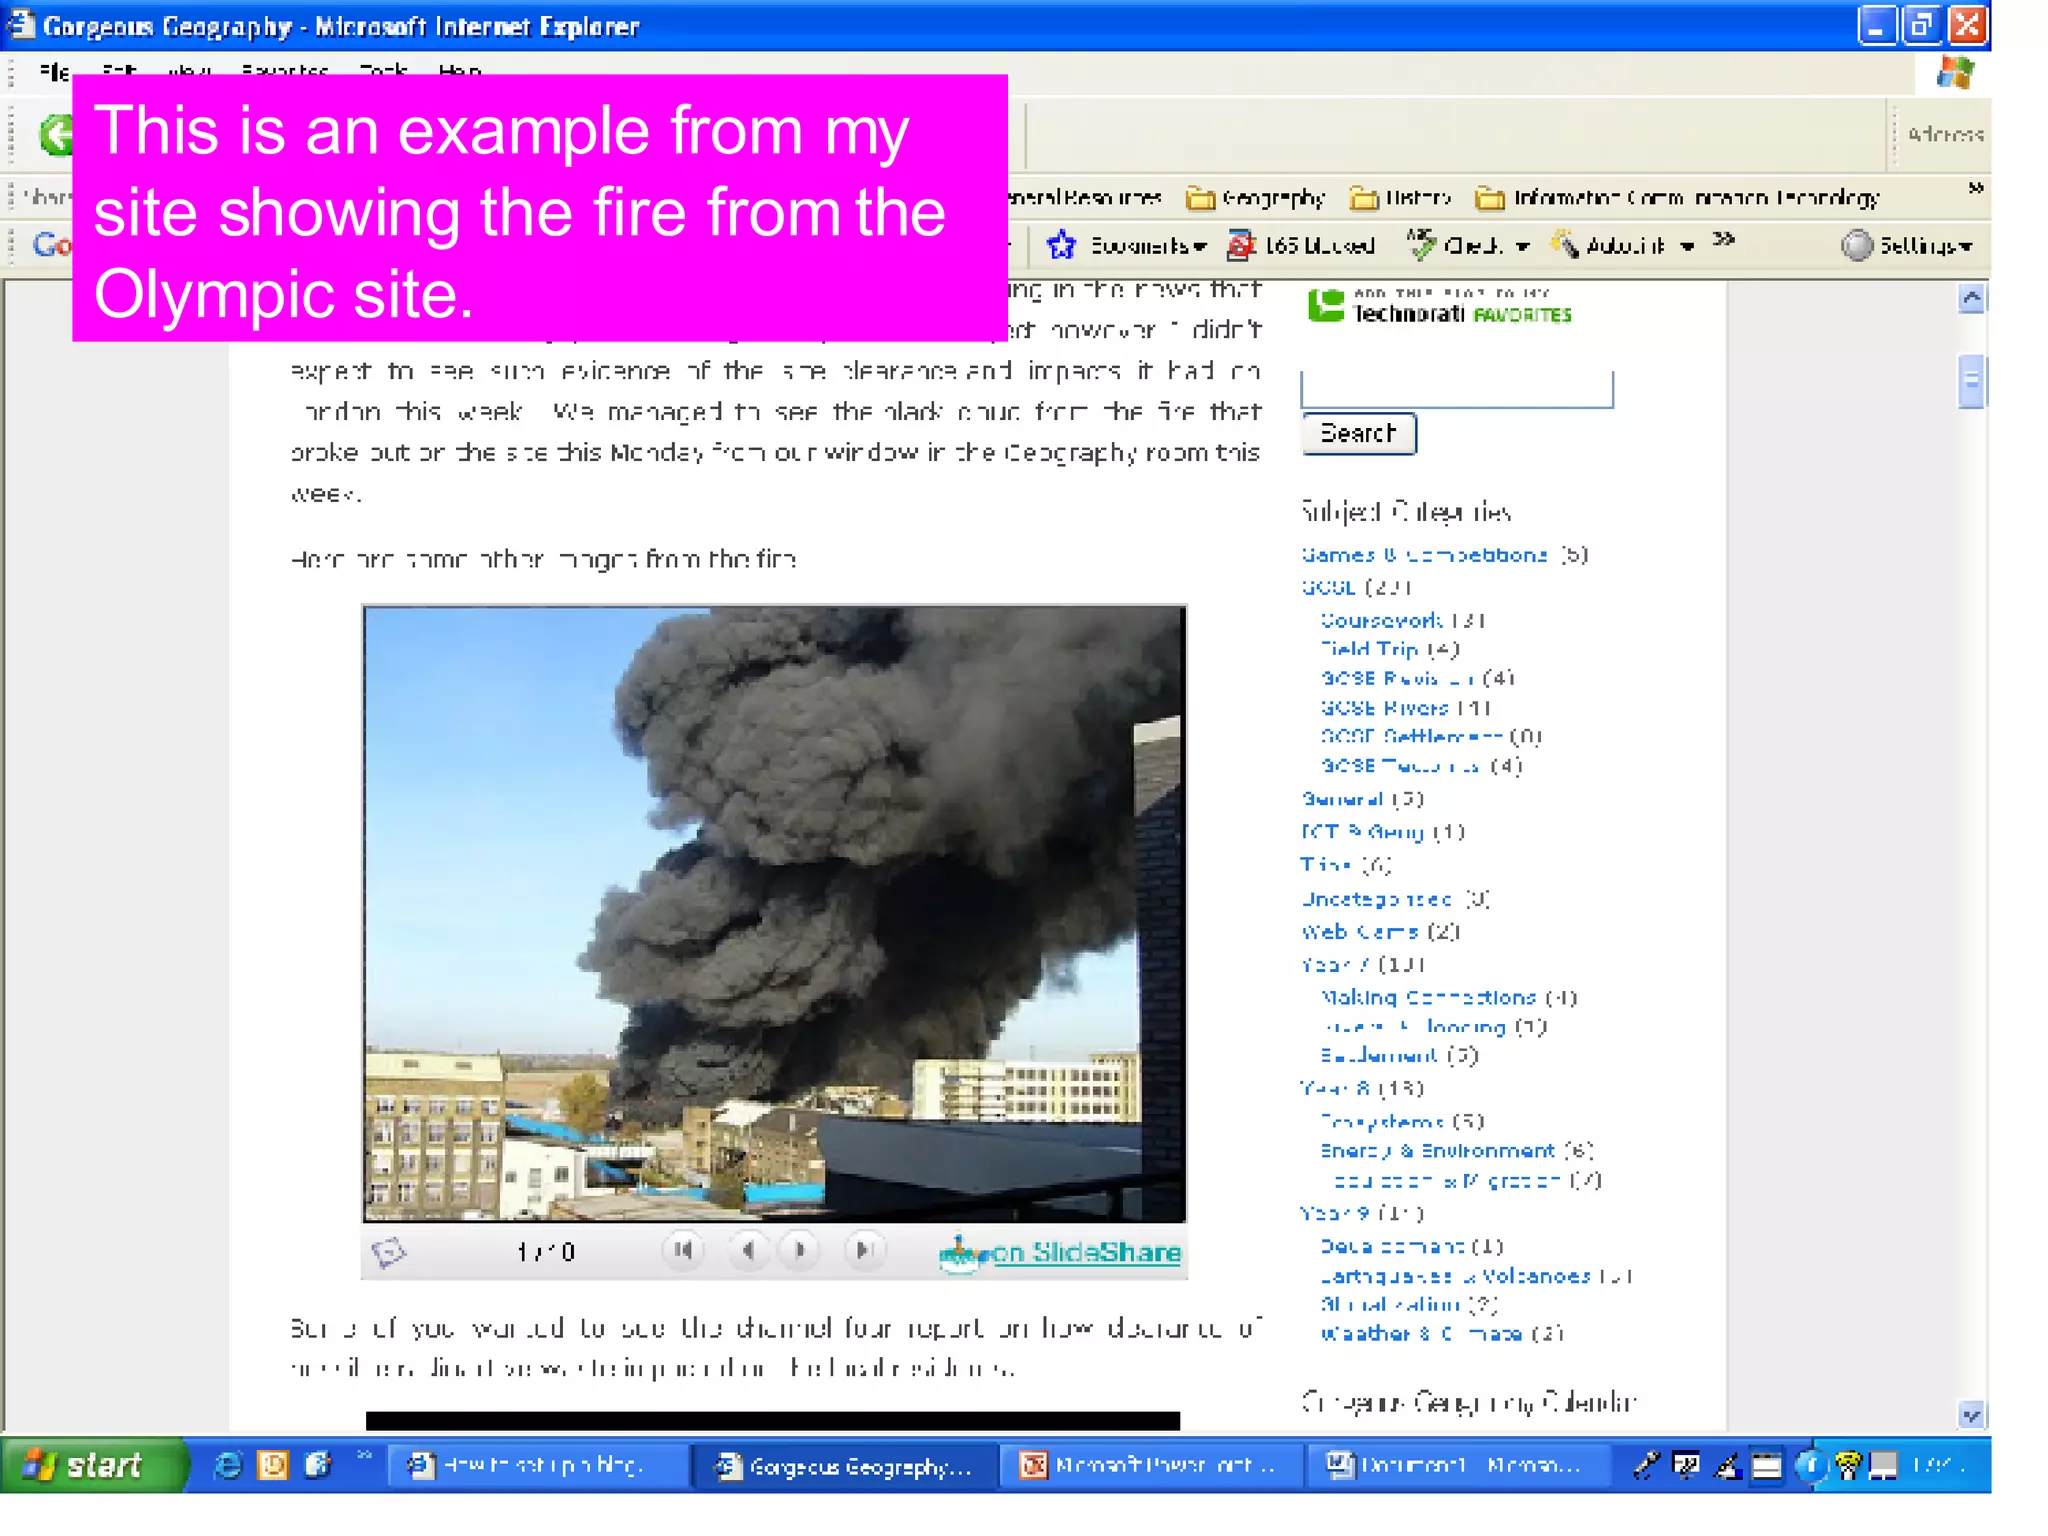
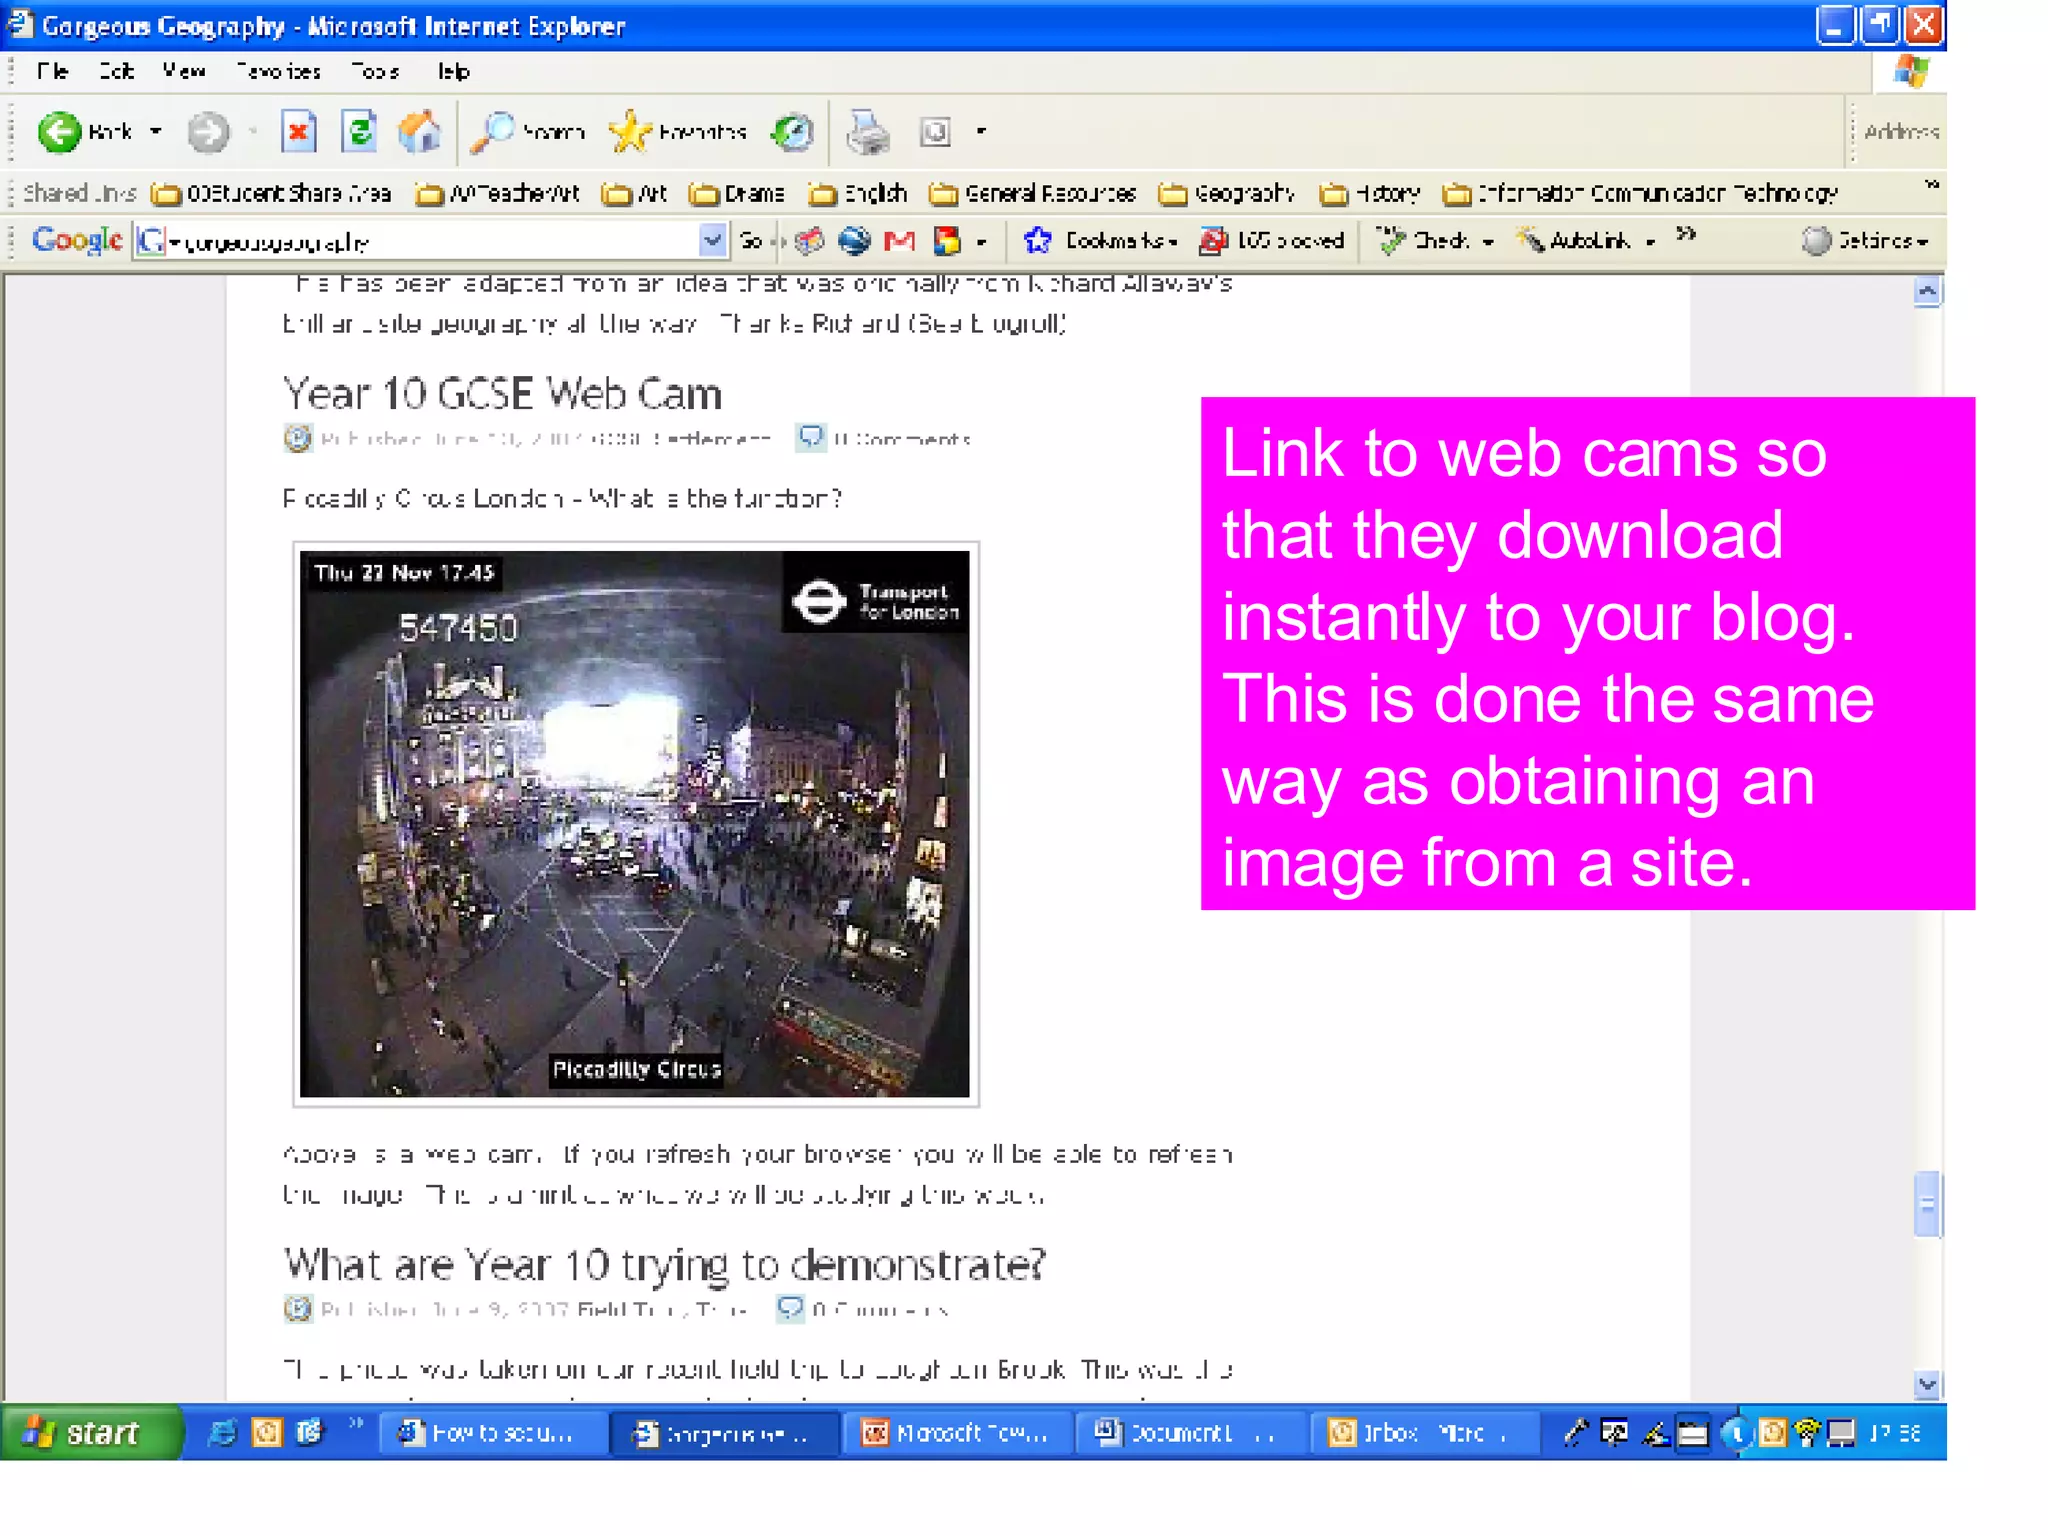
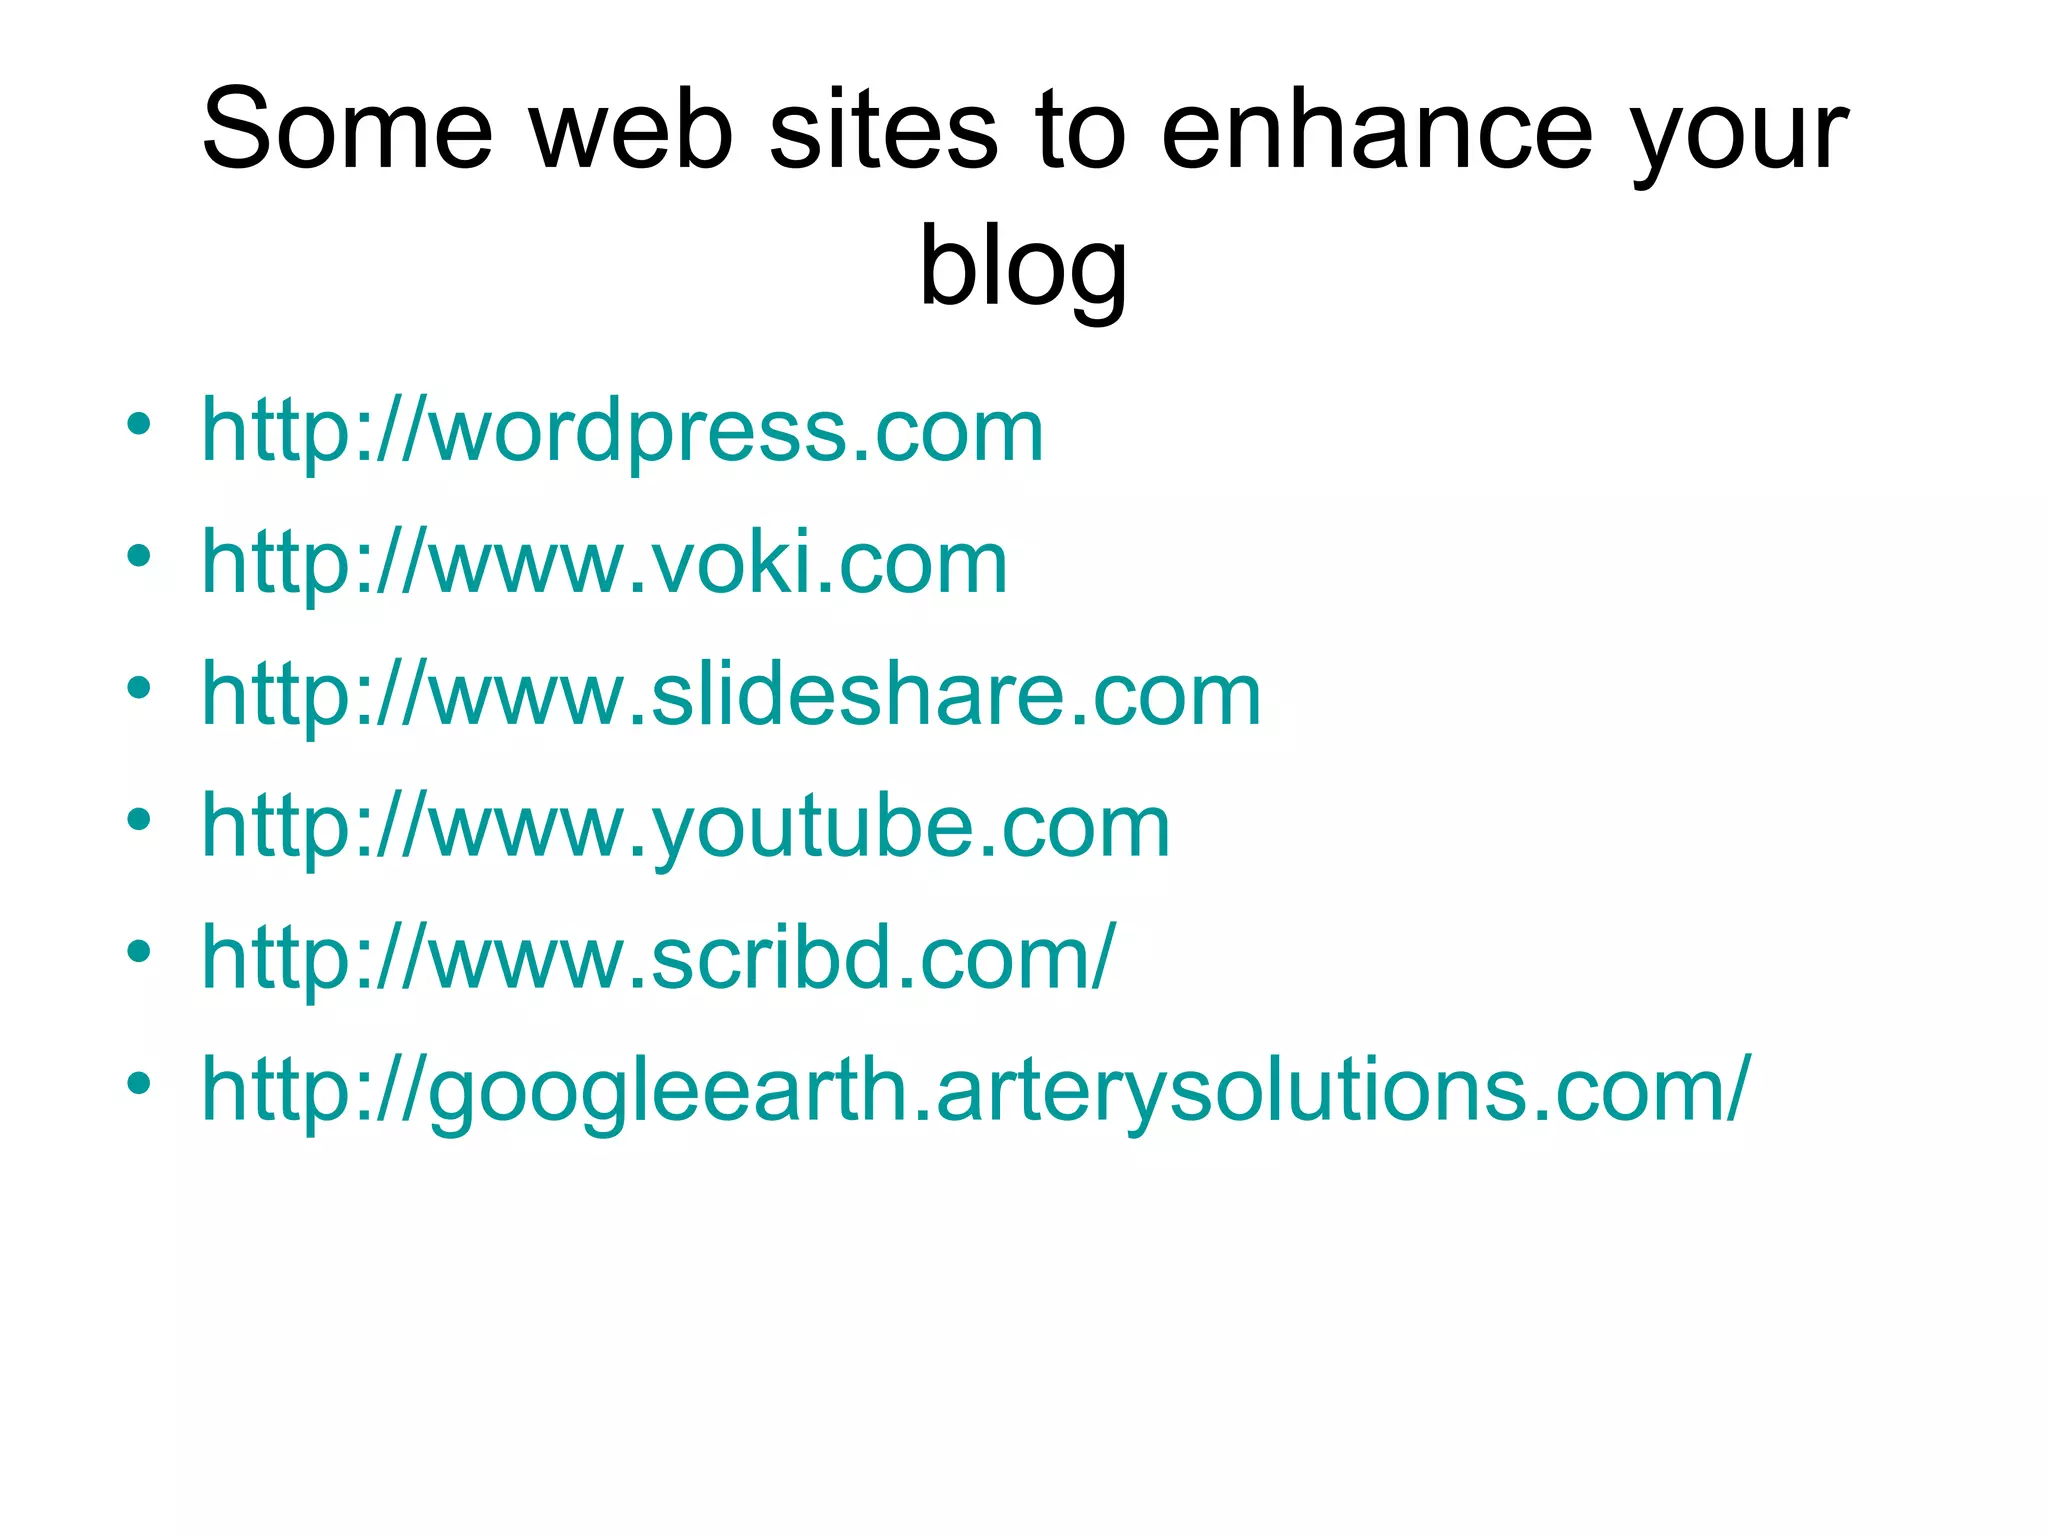
![To make your site more interesting you can add videos and slideshows and other content. You can have a look at www.gorgeousgeography.co.uk or any other blogs for that matter to see what you can include. You just have to get the URL again and type [youtube=insert the URL]](https://image.slidesharecdn.com/how-to-set-up-your-own-blog-using-wordpress-1195769291649518-5/75/How-To-Set-Up-Your-Own-Blog-Using-Wordpress-52-2048.jpg)


![www.gorgeousgeography.co.uk For more Geography related sites look under my blogroll and links I can be contacted by leaving a comment on my blog or by email [email_address]](https://image.slidesharecdn.com/how-to-set-up-your-own-blog-using-wordpress-1195769291649518-5/75/How-To-Set-Up-Your-Own-Blog-Using-Wordpress-78-2048.jpg)

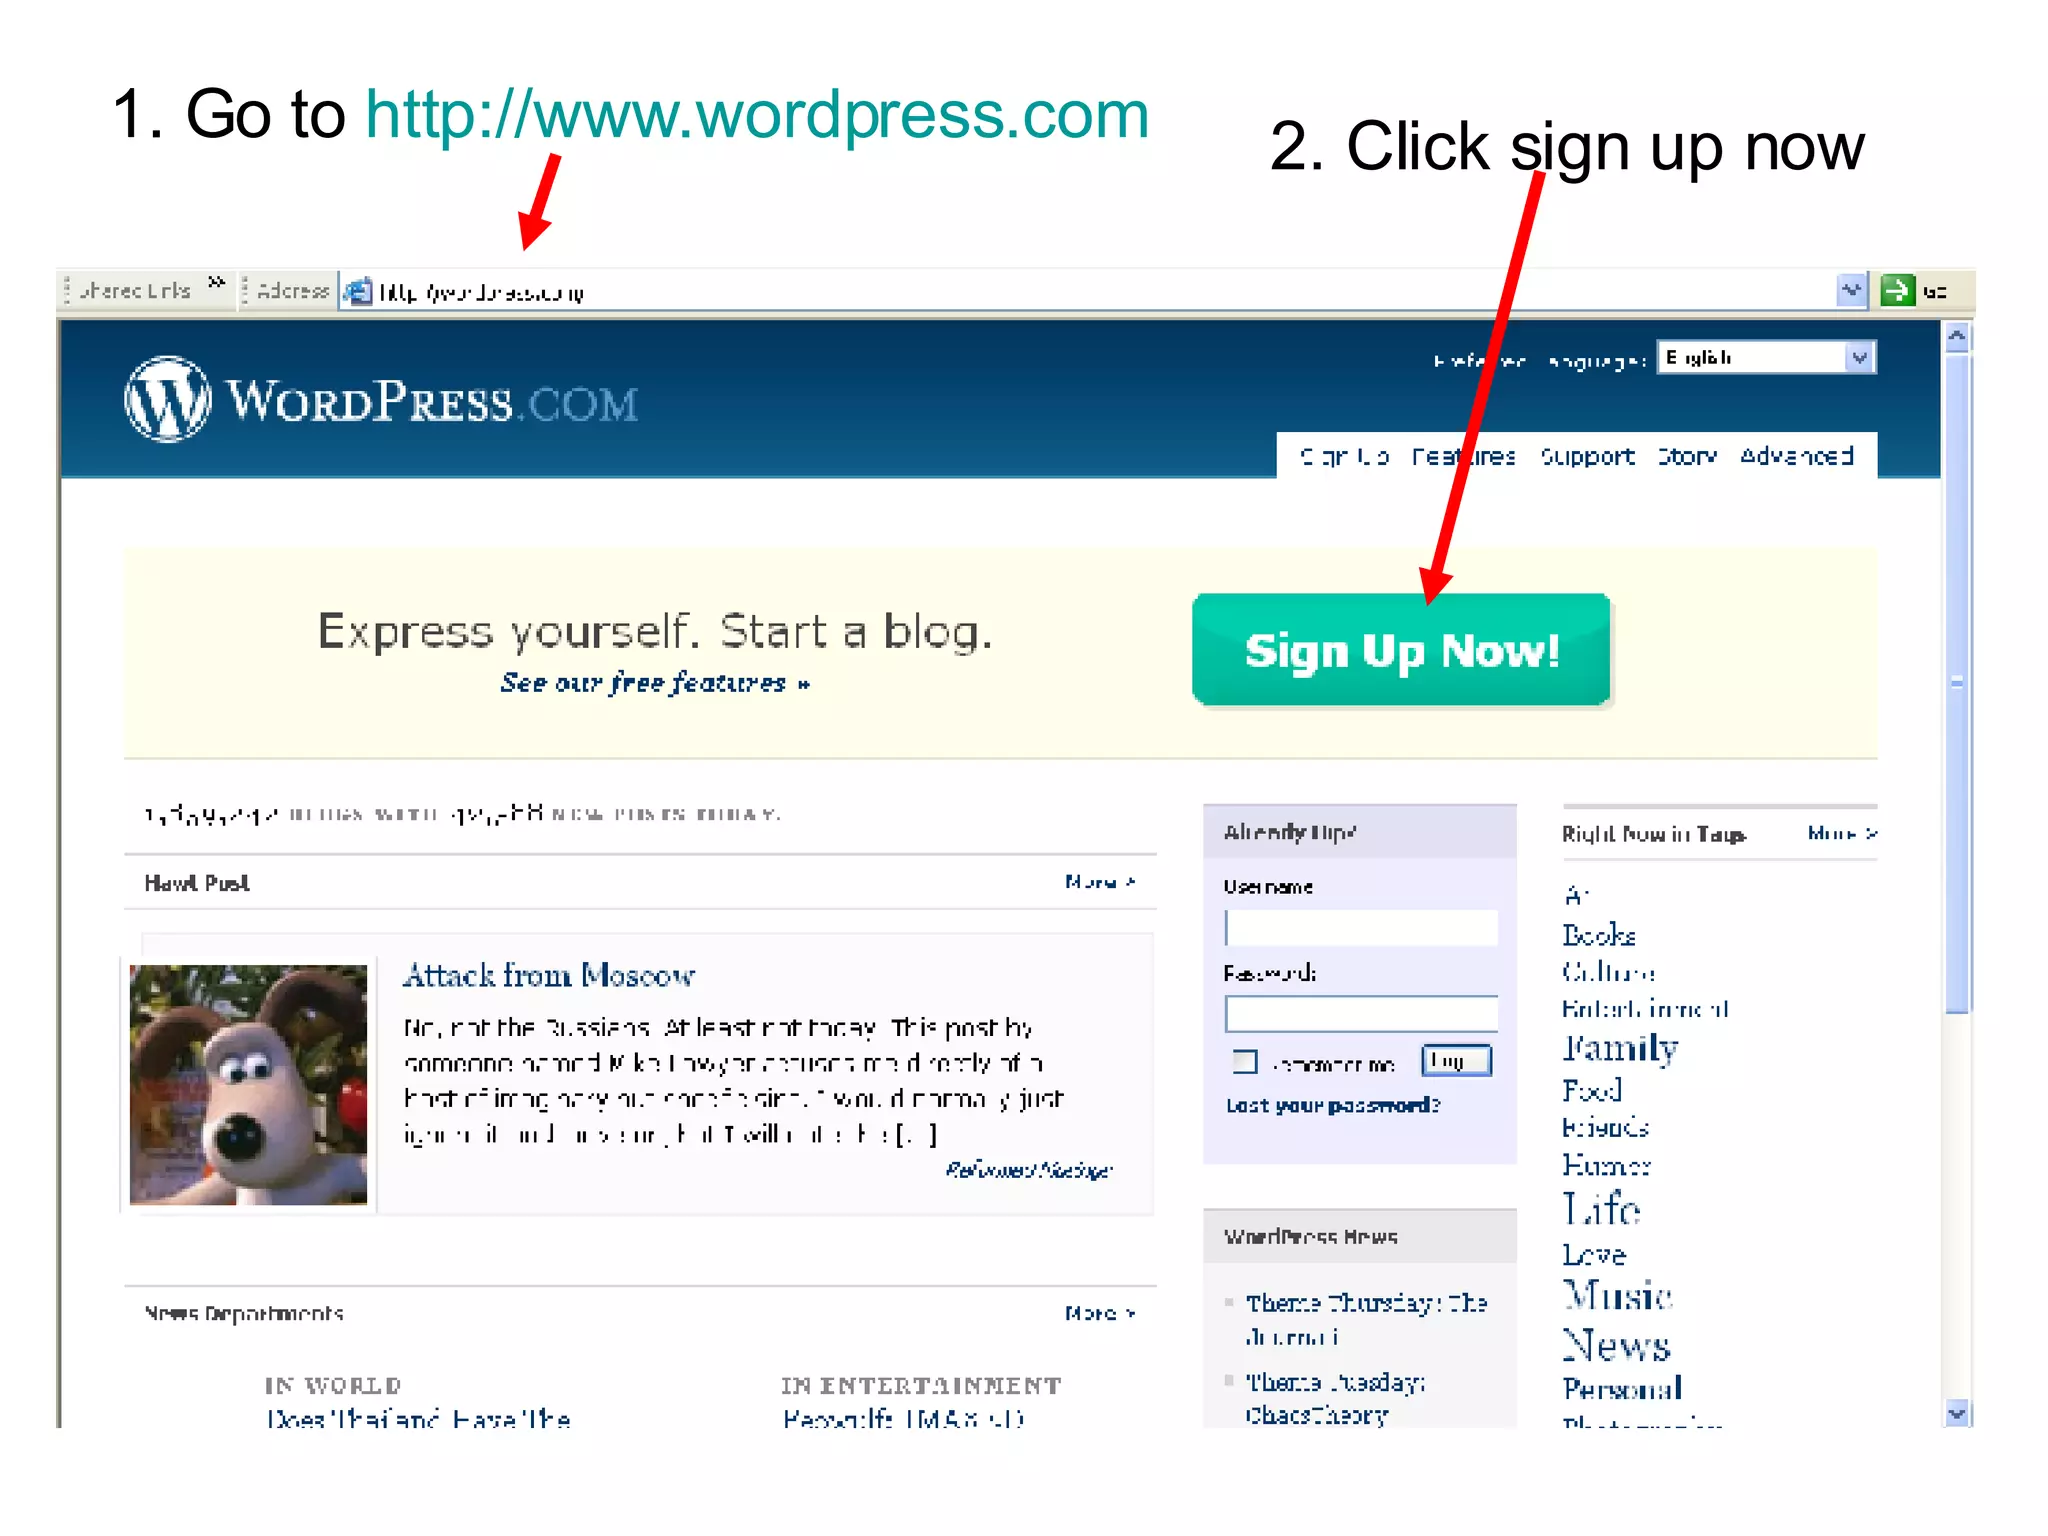
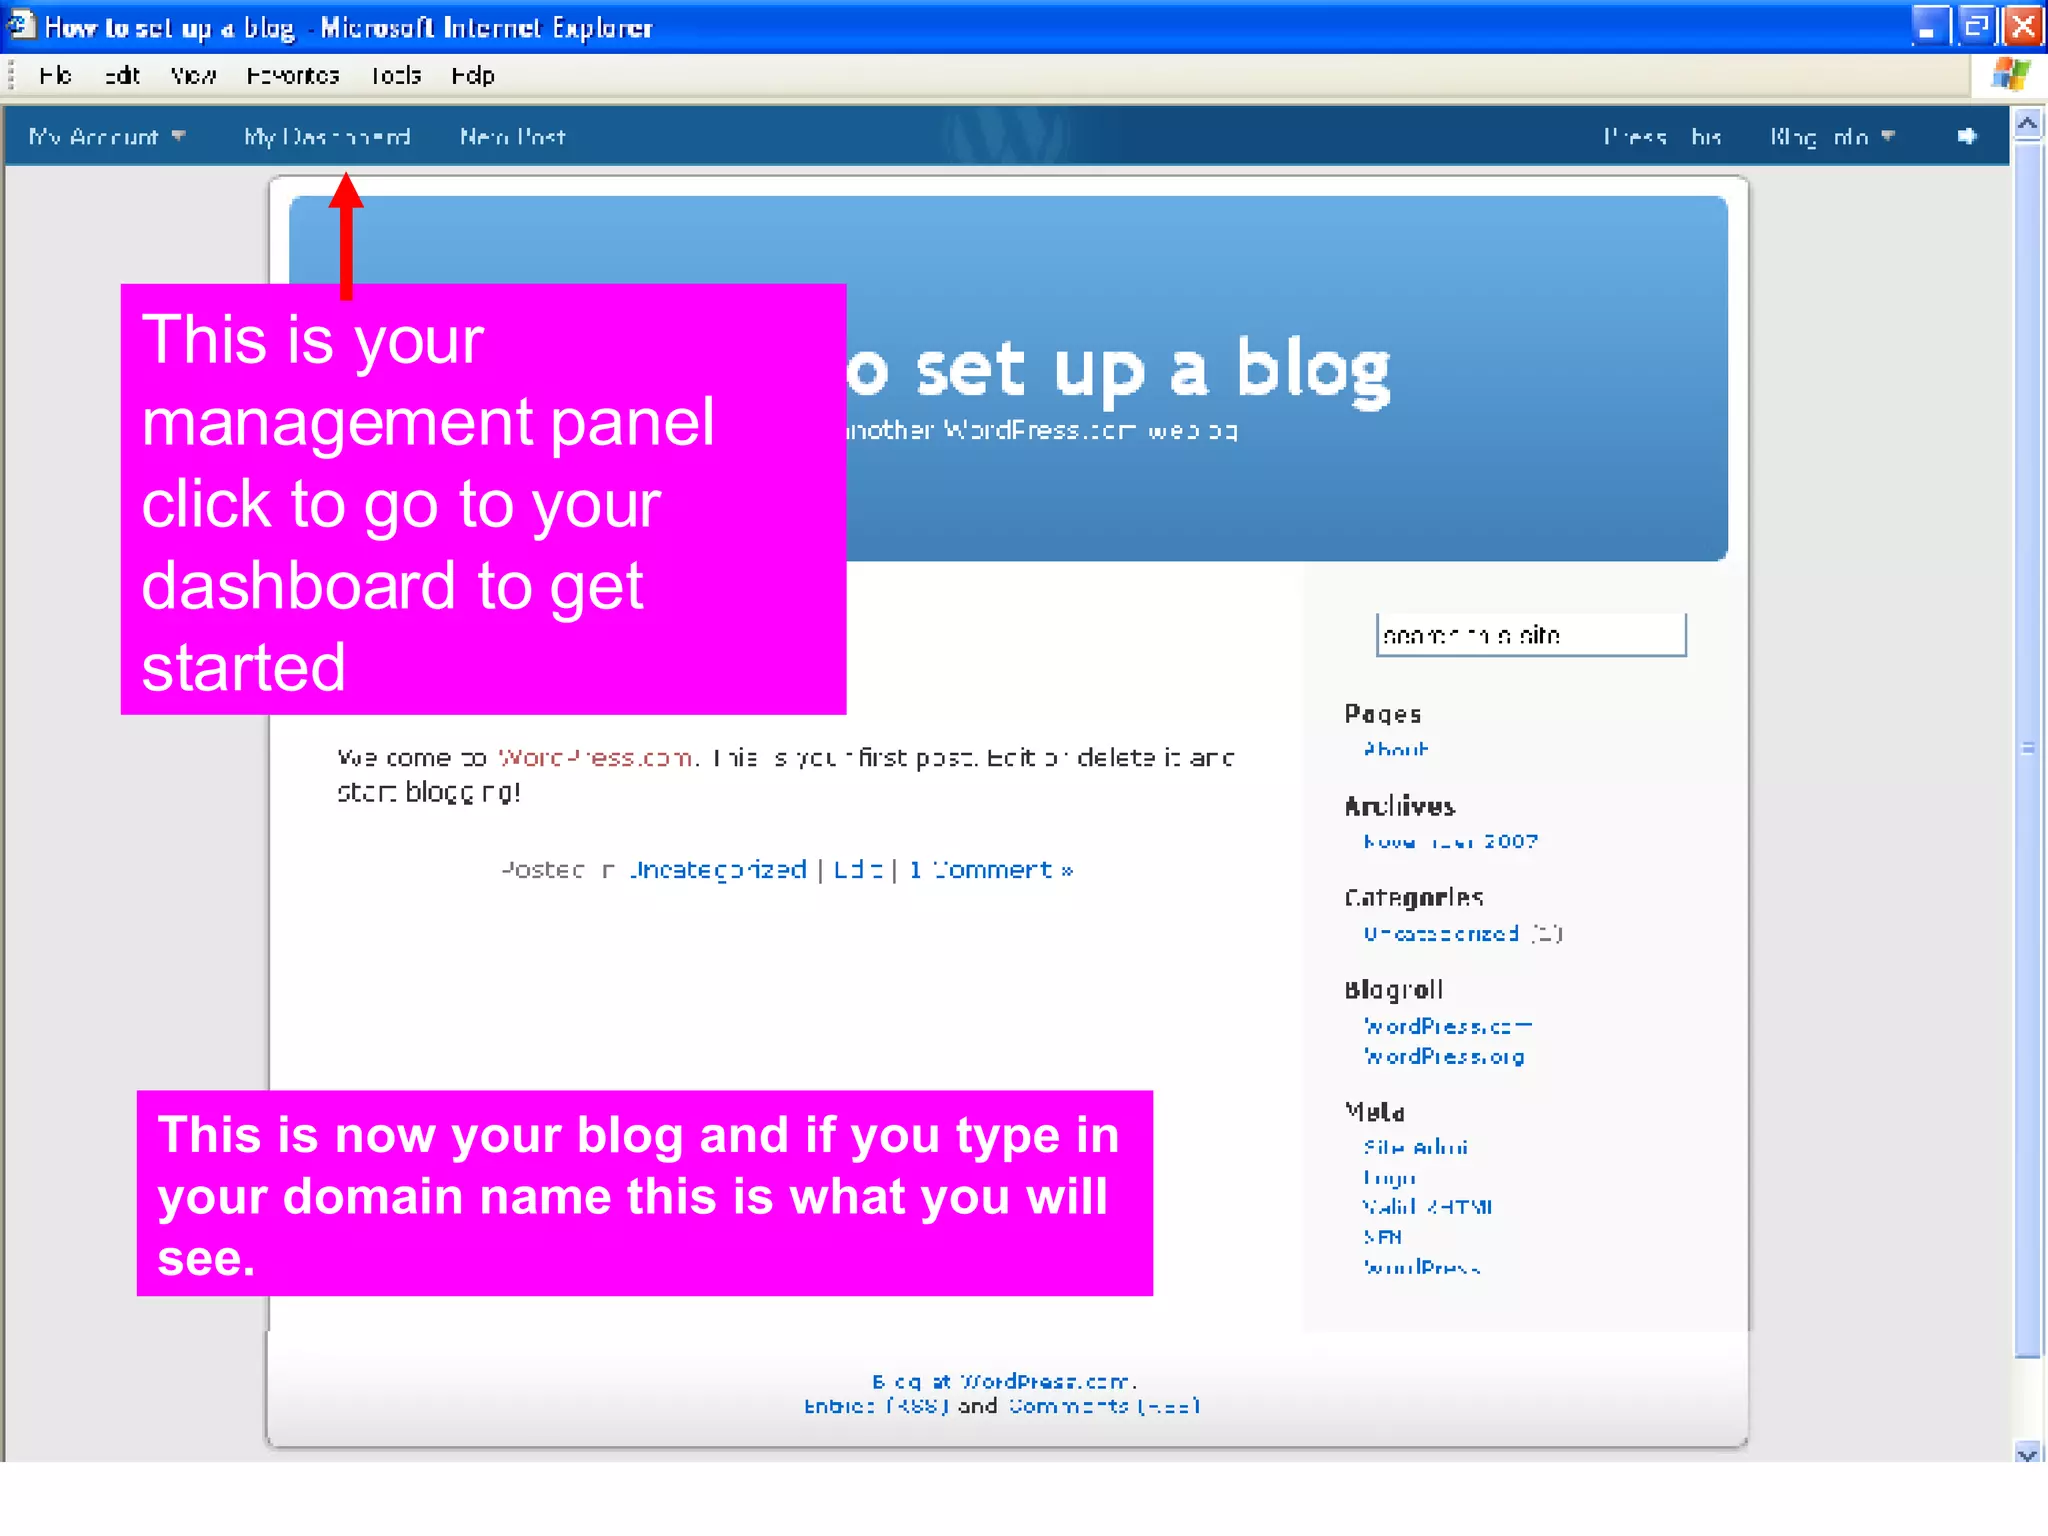
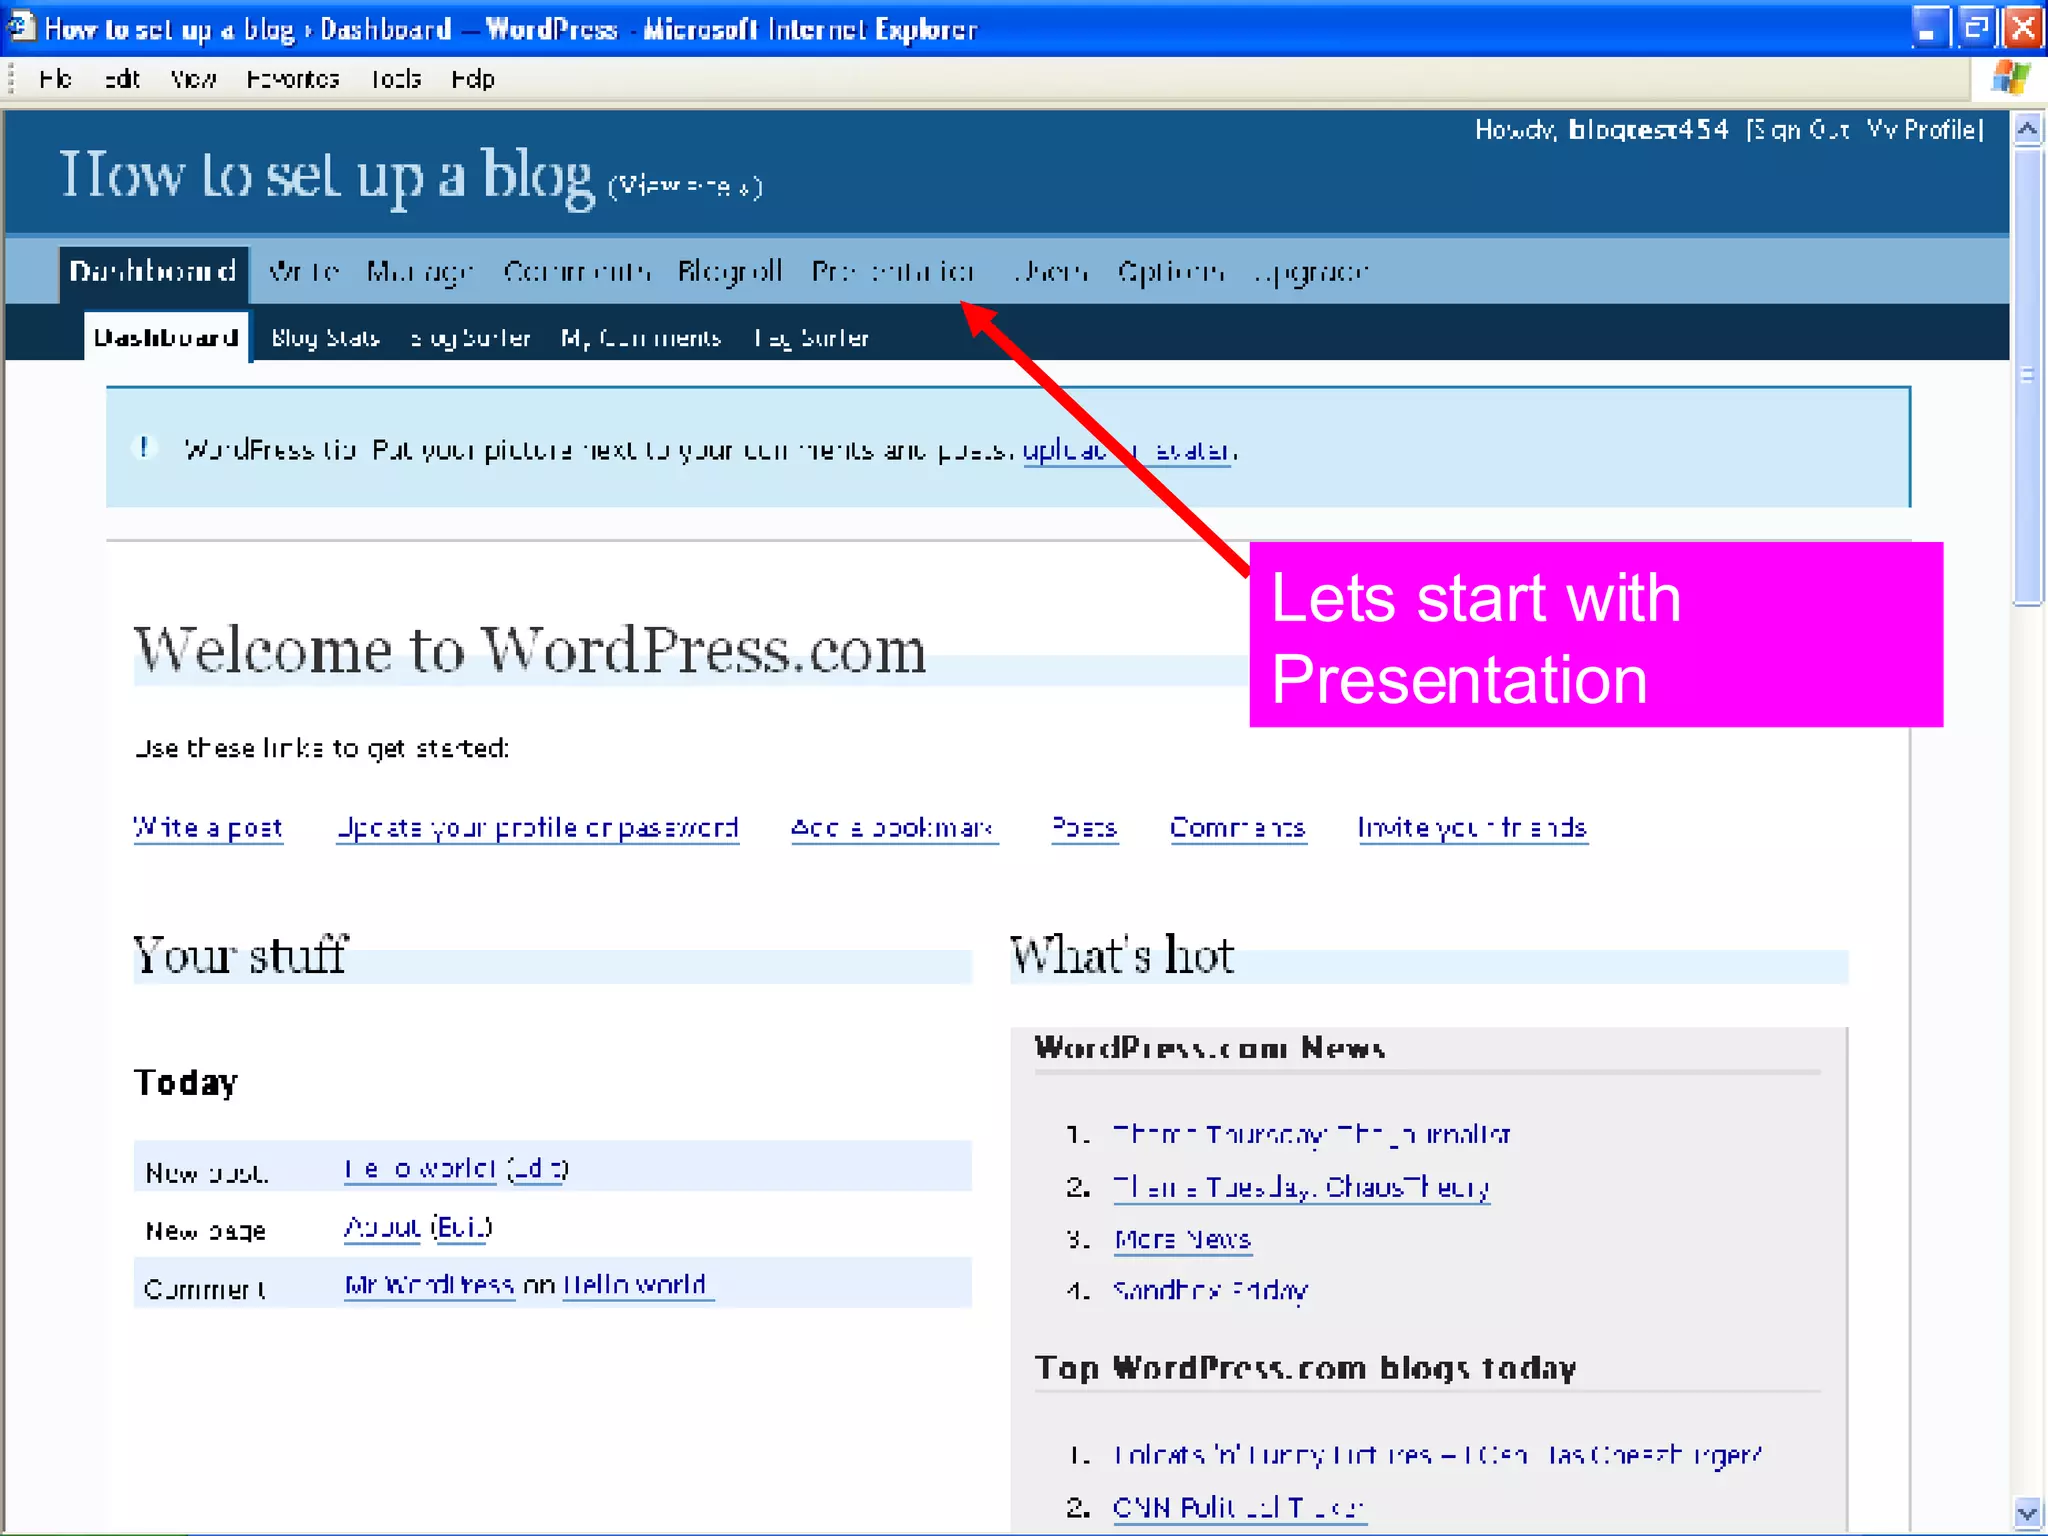
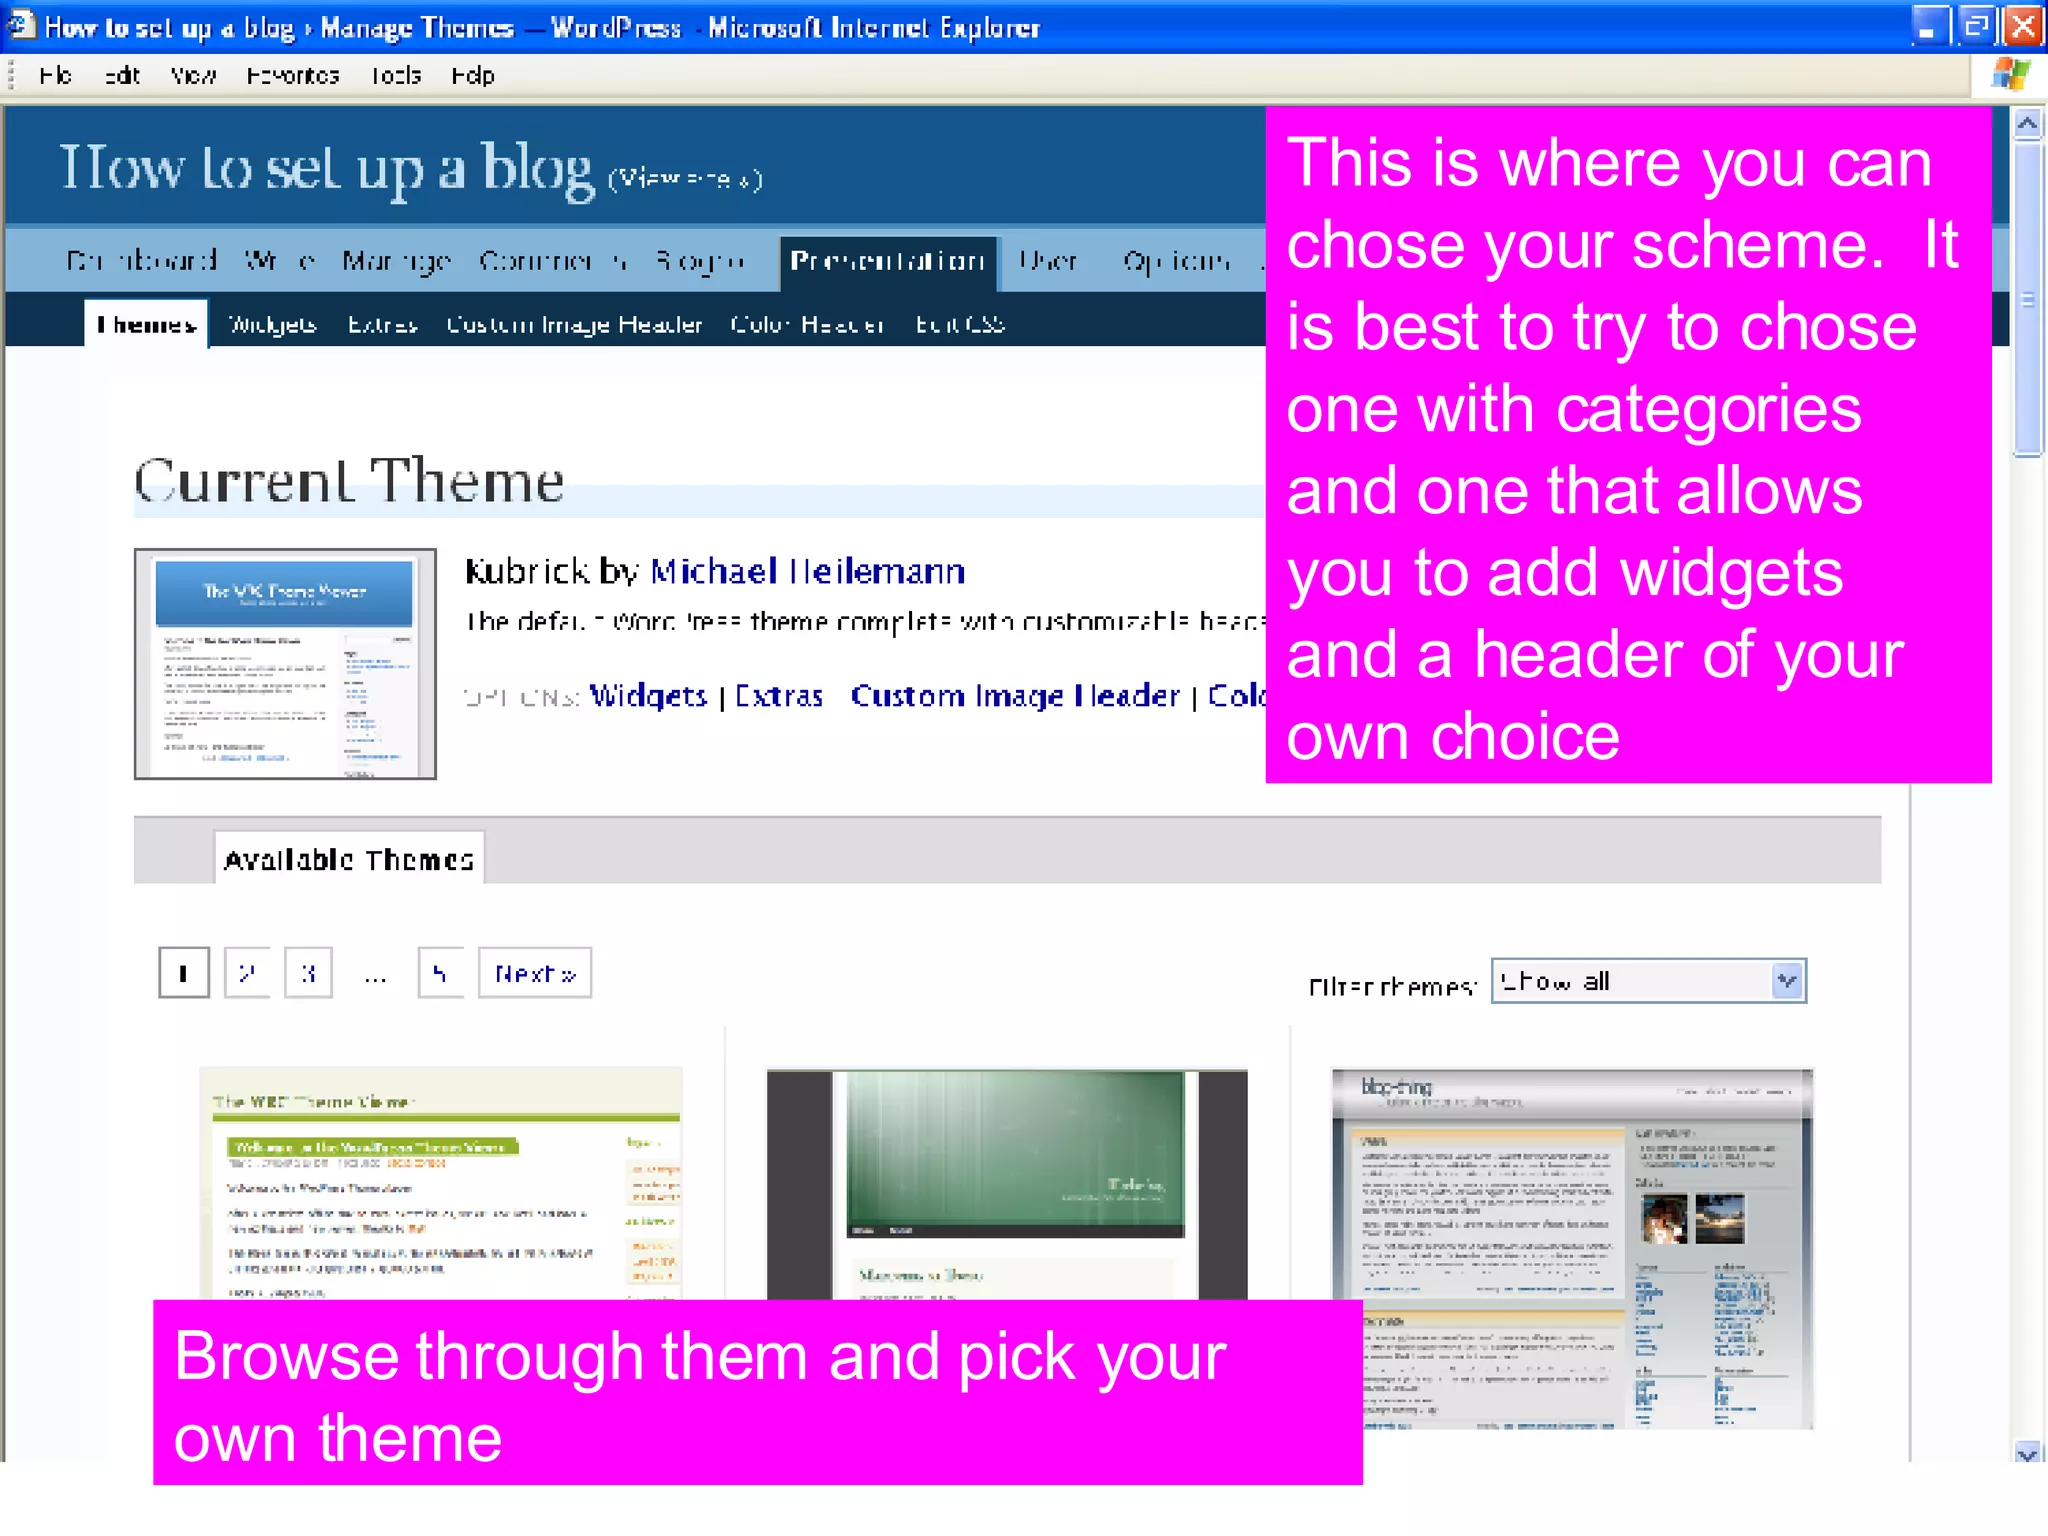
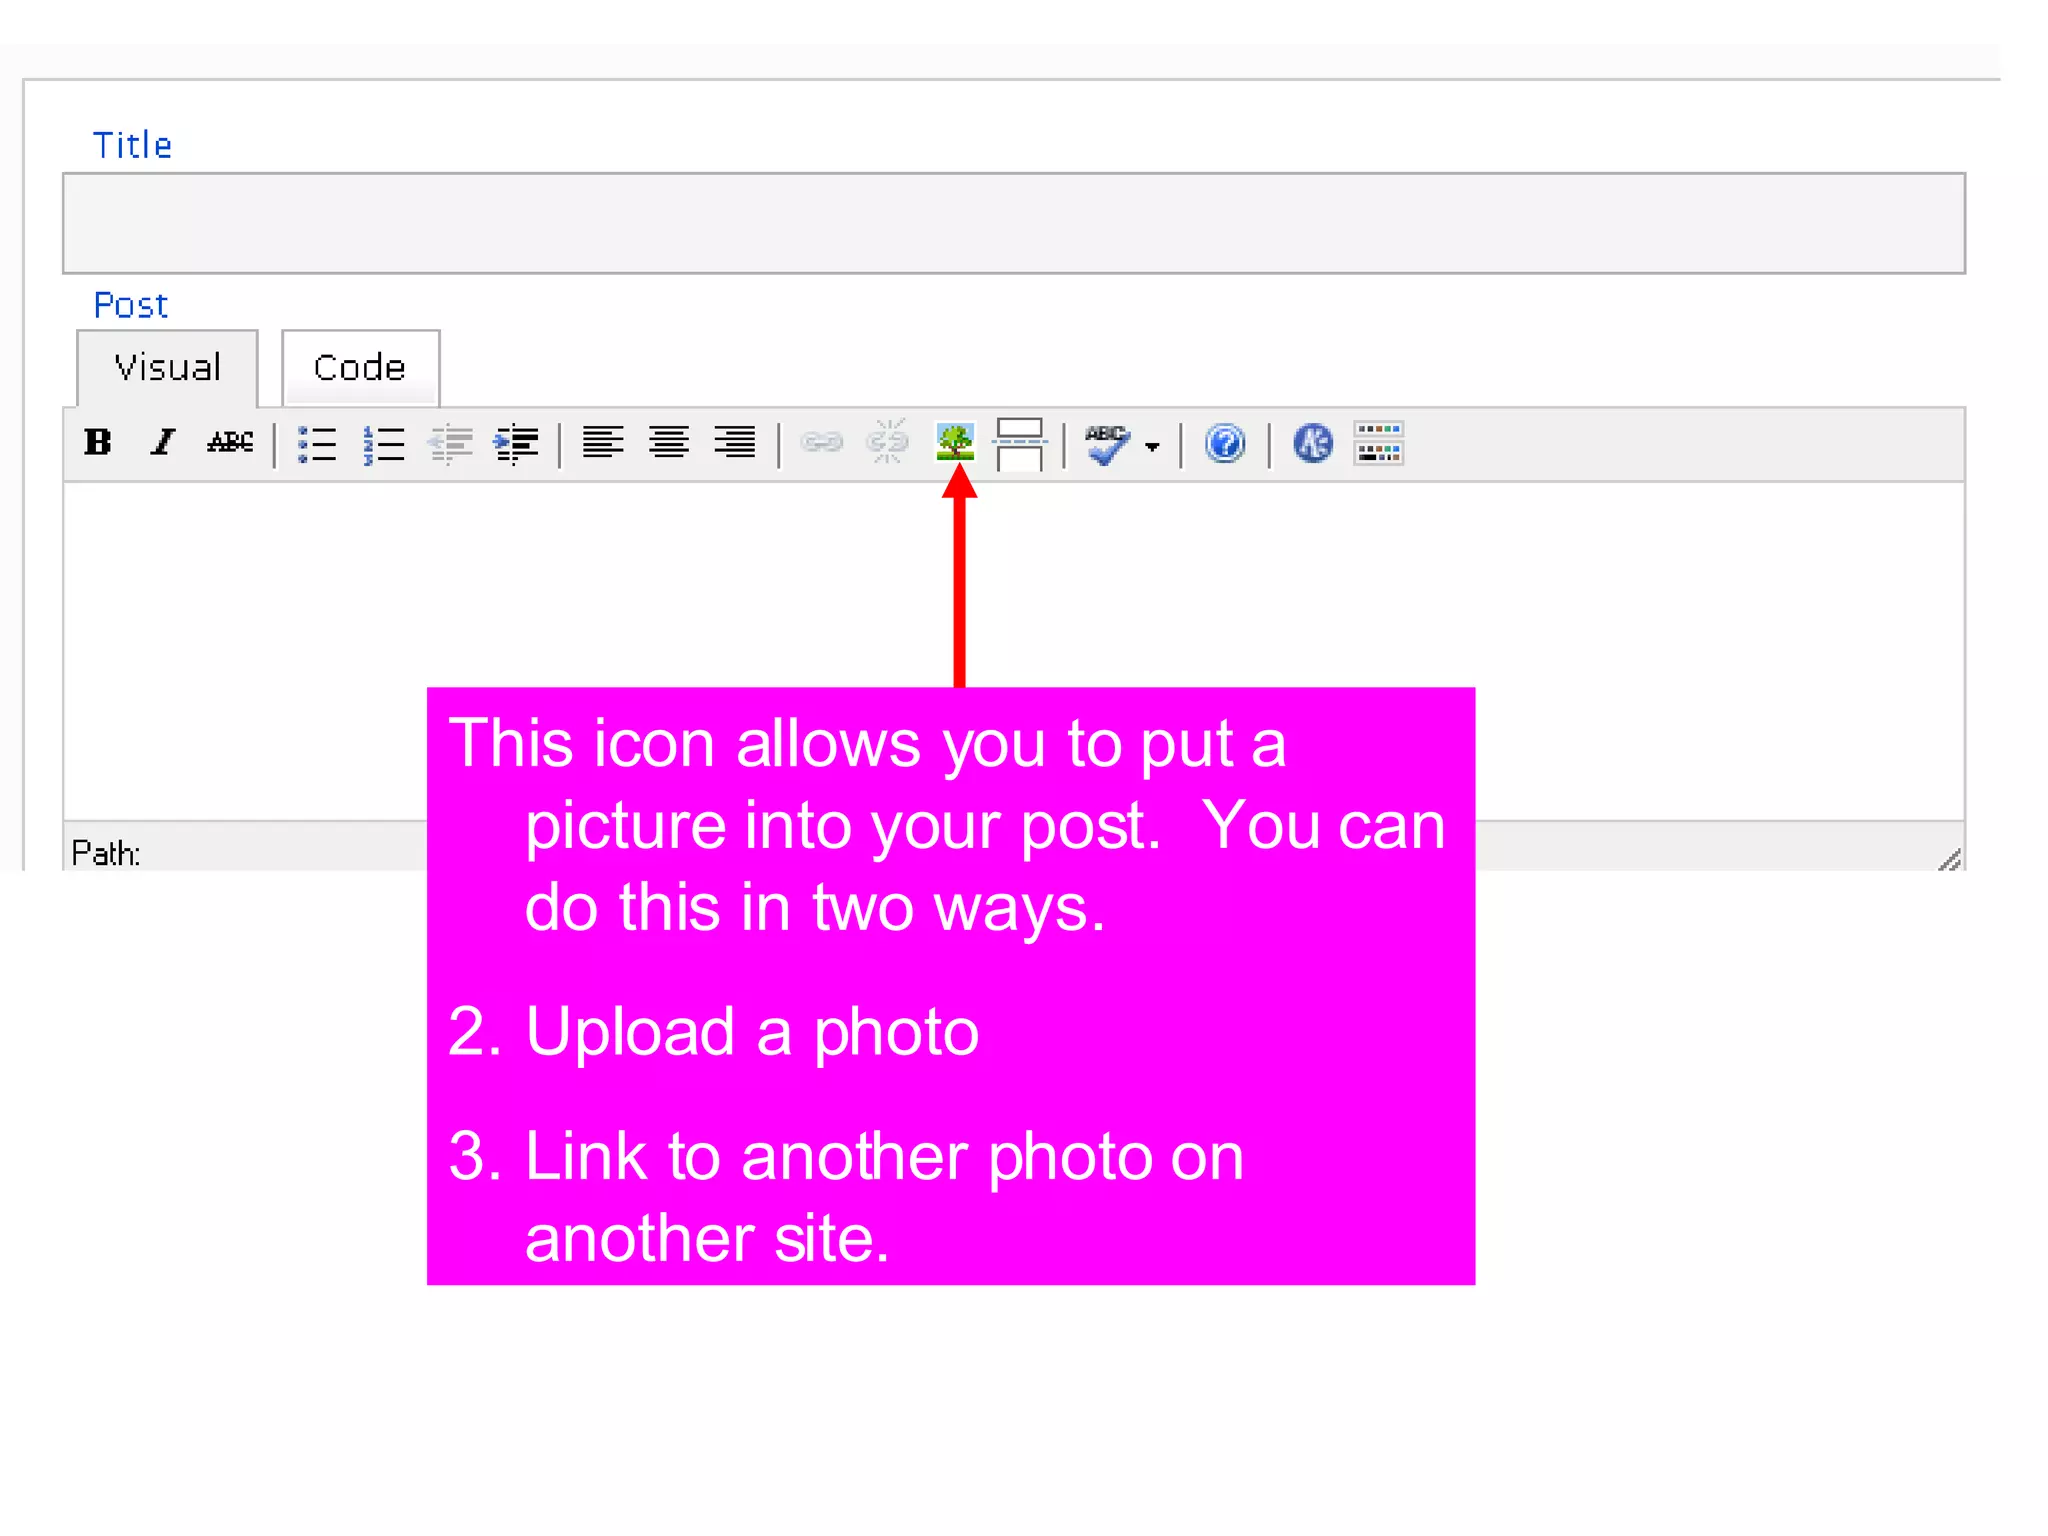
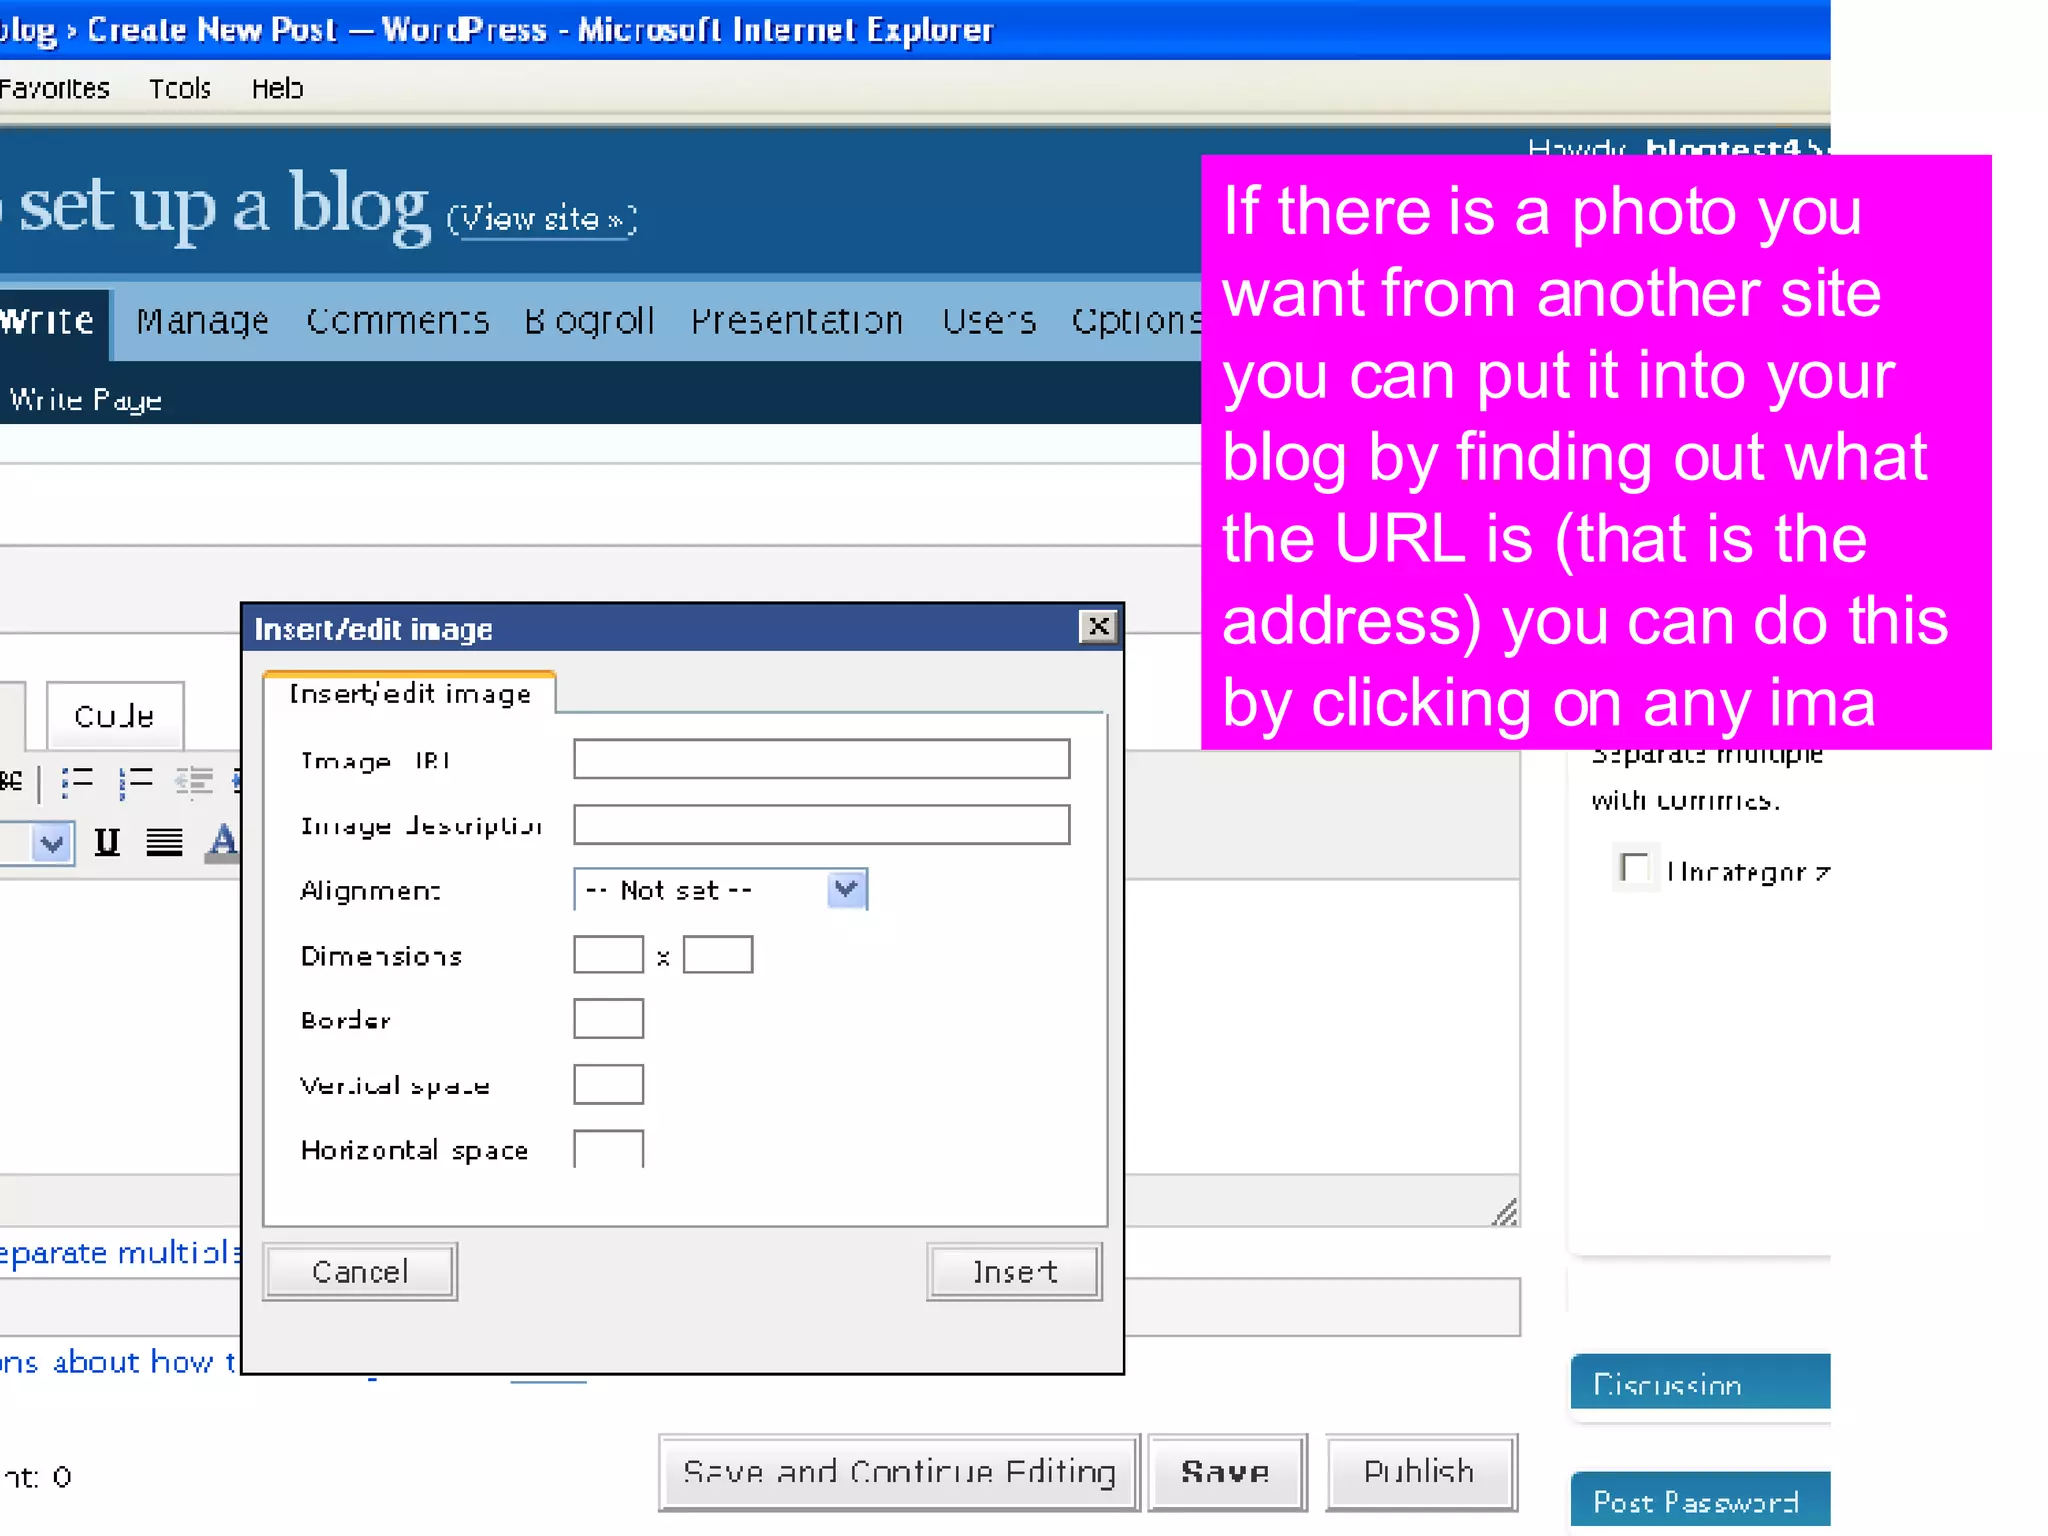
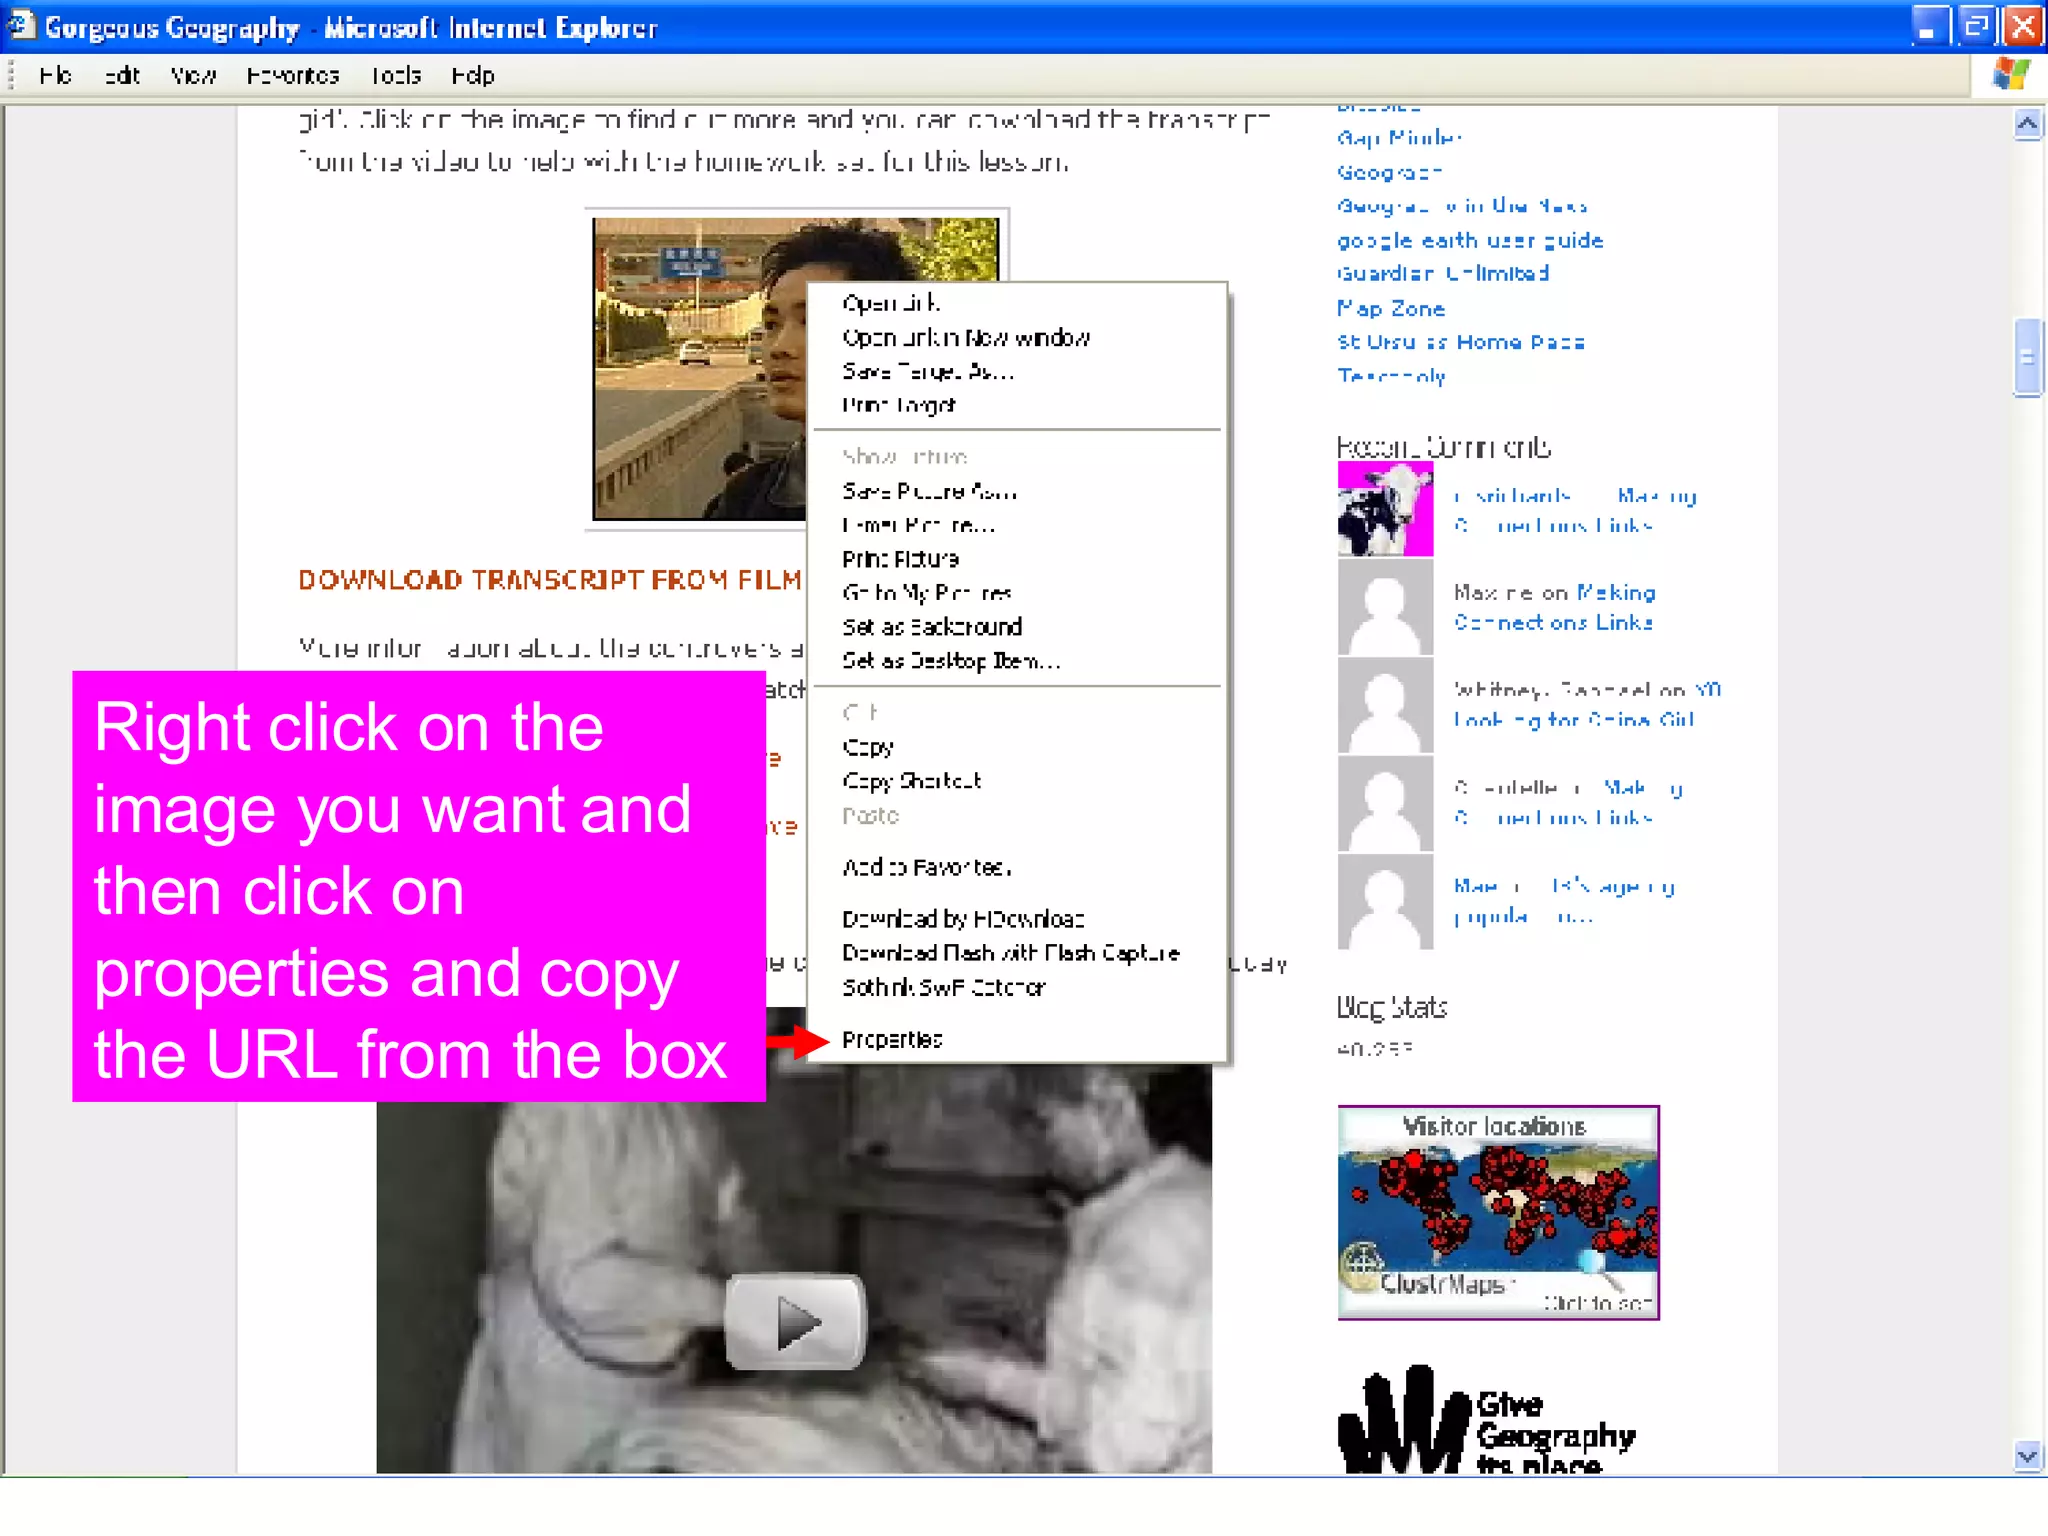
This document provides step-by-step instructions for setting up a blog using WordPress.com. It details how to choose a username and domain name, select a theme, add images and widgets, write posts, enable comments, and more. Additional tips are provided such as using tools like YouTube, SlideShare, and Google Earth to embed videos, presentations, and maps into posts. The goal is to help educators create engaging blogs for their students.