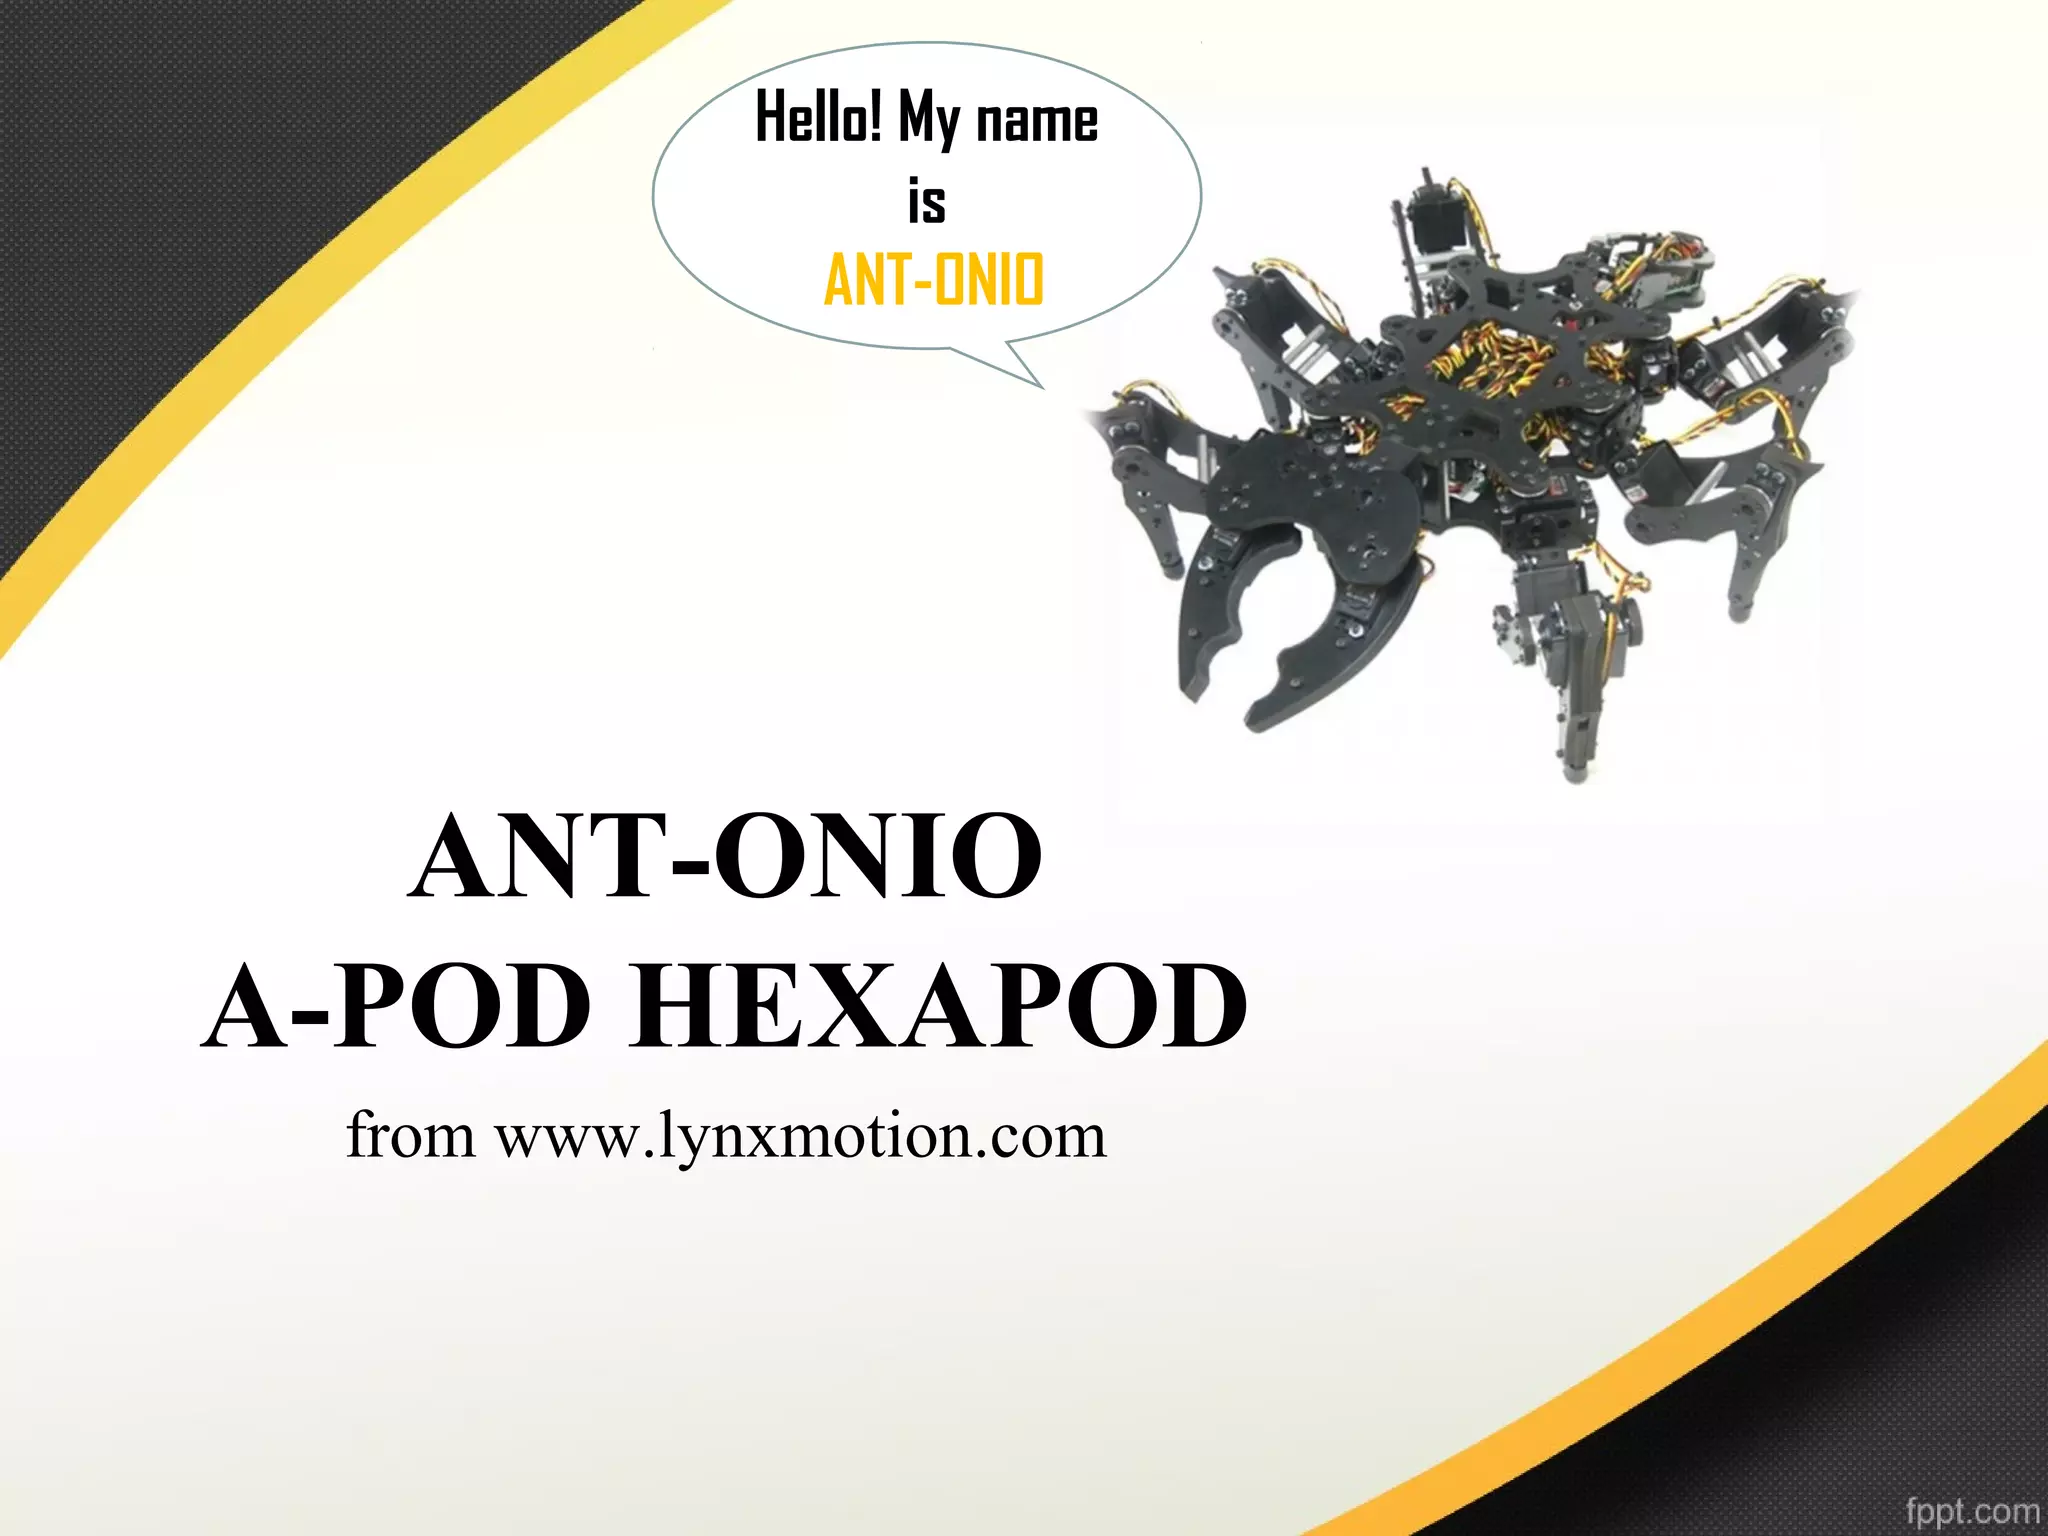
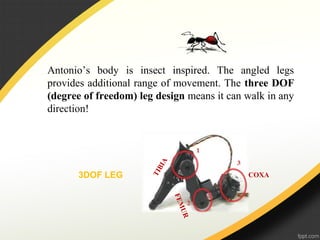
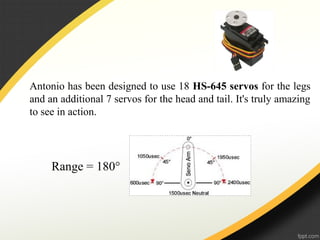
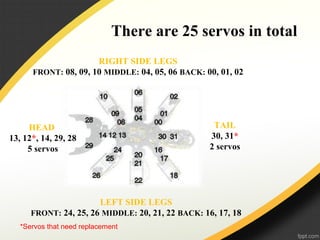
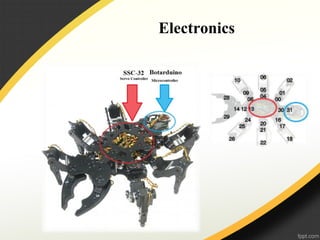
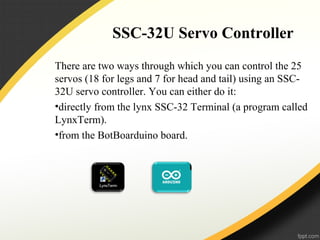
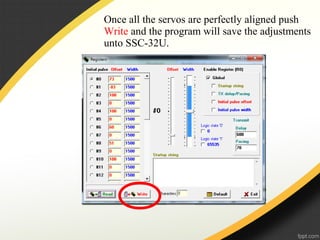
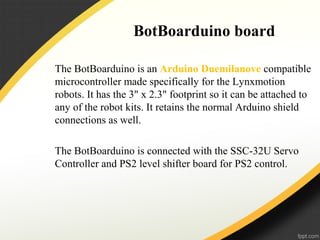
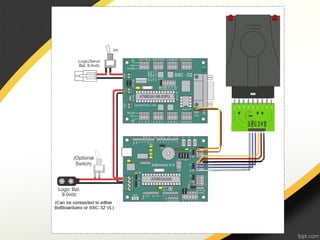
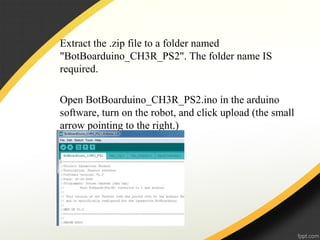
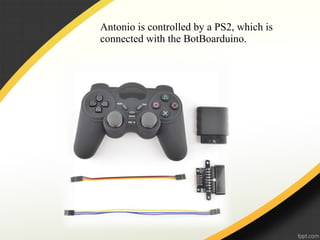
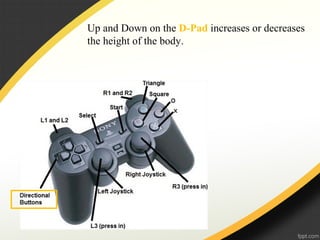
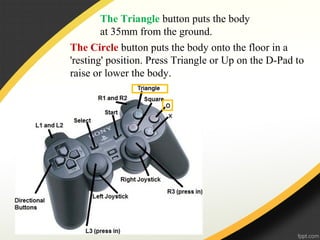
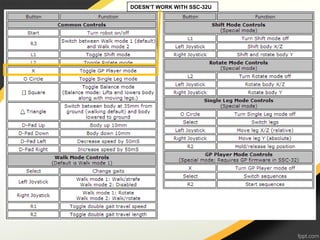
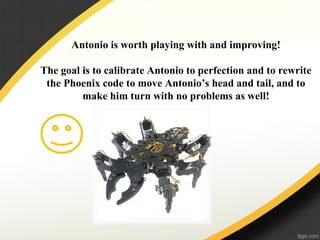
ANT-ONIO
A-POD HEXAPOD
from www.lynxmotion.com
Hello! My name
is
ANT-ONIO
Antonio’s body is insect inspired. The angled legs
provides additional range of movement. The three DOF
(degree of freedom) leg design means it can walk in any
direction!
3DOF LEG
TIBIA
FEMUR
COXA
Antonio has been designed to use 18 HS-645 servos for the legs
and an additional 7 servos for the head and tail. It's truly amazing
to see in action.
Range = 180°
There are 25 servos in total
RIGHT SIDE LEGS
FRONT: 08, 09, 10 MIDDLE: 04, 05, 06 BACK: 00, 01, 02
LEFT SIDE LEGS
FRONT: 24, 25, 26 MIDDLE: 20, 21, 22 BACK: 16, 17, 18
TAIL
30, 31*
2 servos
HEAD
13, 12*, 14, 29, 28
5 servos
*Servos that need replacement
Electronics
SSC-32U Servo Controller
There are two ways through which you can control the 25
servos (18 for legs and 7 for head and tail) using an SSC-
32U servo controller. You can either do it:
•directly from the lynx SSC-32 Terminal (a program called
LynxTerm).
•from the BotBoarduino board.
LynxTerm
LynxTerm is used to test the servos and to calibrate Antonio.
How to use LynxTerm:
Connect the SSC-32U to the computer
skip
LynxTerm
tutorial
 Turn on robot and open LynxTerm
 Select the port and click connect
 All = 1500 means all to neutral positions
NOTICE: the neutral positions might be wrong
due to the assembly or the servos
How Antonio’s LEGS should be
calibrated
How Antonio’s HEAD and TAIL
should be calibrated
 Turn on Registers and read the positions of the servos
 pick a servo and change its angle by scrolling up and
down the Offset nob
This will help you to:
•test if a particular servo
works
•adjust a certain servo to
the position it should have
according to the previous
guidelines
NOTICE that servos have limited range they can
be adjusted. If a servo is too off you might need
to fix the problem by re-assembling and
assembling a part again.
90°90°
Re-assembling and assembling a part again
• Detach the servo control horn from Antonio, but do not detach
its cable from the SSC-32U.
• Pull off the metal control horn from the shaft.
• Turn on the robot and open LynxTerm.
• Set all = 1500.
• Push the metal control horn back on this way:
• Attach the servo back
into position.
Once all the servos are perfectly aligned push
Write and the program will save the adjustments
unto SSC-32U.
To study and learn more about how the servos, the SSC-32U and
LynxTerm work go to:
http://www.lynxmotion.com/images/data/lynxmotion_ssc-32u_usb_u
BotBoarduino board
The BotBoarduino is an Arduino Duemilanove compatible
microcontroller made specifically for the Lynxmotion
robots. It has the 3" x 2.3" footprint so it can be attached to
any of the robot kits. It retains the normal Arduino shield
connections as well.
The BotBoarduino is connected with the SSC-32U Servo
Controller and PS2 level shifter board for PS2 control.
To study and learn more about how the BotBoarduino works go
to:
http://www.lynxmotion.com/images/html/build185.htm
The BotBoarduino has been programmed through
Arduino software with the Phoenix code.
The Phoenix Code can be found at (step 5):
http://www.lynxmotion.com/images/html/build99f.htm
by KurtE
Extract the .zip file to a folder named
"BotBoarduino_CH3R_PS2". The folder name IS
required.
Open BotBoarduino_CH3R_PS2.ino in the arduino
software, turn on the robot, and click upload (the small
arrow pointing to the right.)
Remember to choose the appropriate board,
processor and port beforehand.
The problem with the Phoenix code:
The code is only for the legs (for 18 servos),
therefore Antonio cannot move its head or its tail.
Moreover the middle legs hook over the front legs
while turning, which means that the degrees in the
code must me reduced.
Antonio is controlled by a PS2, which is
connected with the BotBoarduino.
PS2 controls
The default is Walking mode 1.
Use the Left joystick to move Antonio around
without turning (this is called "translation"), and
the Right joystick rotates Antonio as it moves.
Up and Down on the D-Pad increases or decreases
the height of the body.
The Circle button puts the body onto the floor in a
'resting' position. Press Triangle or Up on the D-Pad to
raise or lower the body.
The Triangle button puts the body
at 35mm from the ground.
That is only the few things Antonio can do!
There are four special "body moves" functions that are
triggered by pressing L1, L2, Circle, or X.
While in one of these modes, it does not walk.
The joysticks and some buttons change function depending
on which mode is toggled on.
See next slide for more functions and details.
DOESN’T WORK WITH SSC-32U
Antonio is worth playing with and improving!
The goal is to calibrate Antonio to perfection and to rewrite
the Phoenix code to move Antonio’s head and tail, and to
make him turn with no problems as well!
A-Pod Hexapod Robot Specs

Hexapod Presentation

  • 1.
  • 2.
    Antonio’s body isinsect inspired. The angled legs provides additional range of movement. The three DOF (degree of freedom) leg design means it can walk in any direction! 3DOF LEG TIBIA FEMUR COXA
  • 3.
    Antonio has beendesigned to use 18 HS-645 servos for the legs and an additional 7 servos for the head and tail. It's truly amazing to see in action. Range = 180°
  • 4.
    There are 25servos in total RIGHT SIDE LEGS FRONT: 08, 09, 10 MIDDLE: 04, 05, 06 BACK: 00, 01, 02 LEFT SIDE LEGS FRONT: 24, 25, 26 MIDDLE: 20, 21, 22 BACK: 16, 17, 18 TAIL 30, 31* 2 servos HEAD 13, 12*, 14, 29, 28 5 servos *Servos that need replacement
  • 5.
  • 6.
    SSC-32U Servo Controller Thereare two ways through which you can control the 25 servos (18 for legs and 7 for head and tail) using an SSC- 32U servo controller. You can either do it: •directly from the lynx SSC-32 Terminal (a program called LynxTerm). •from the BotBoarduino board.
  • 7.
    LynxTerm LynxTerm is usedto test the servos and to calibrate Antonio. How to use LynxTerm: Connect the SSC-32U to the computer skip LynxTerm tutorial
  • 8.
     Turn onrobot and open LynxTerm
  • 9.
     Select theport and click connect
  • 10.
     All =1500 means all to neutral positions NOTICE: the neutral positions might be wrong due to the assembly or the servos
  • 11.
    How Antonio’s LEGSshould be calibrated
  • 12.
    How Antonio’s HEADand TAIL should be calibrated
  • 13.
     Turn onRegisters and read the positions of the servos
  • 14.
     pick aservo and change its angle by scrolling up and down the Offset nob This will help you to: •test if a particular servo works •adjust a certain servo to the position it should have according to the previous guidelines
  • 15.
    NOTICE that servoshave limited range they can be adjusted. If a servo is too off you might need to fix the problem by re-assembling and assembling a part again. 90°90°
  • 16.
    Re-assembling and assemblinga part again • Detach the servo control horn from Antonio, but do not detach its cable from the SSC-32U. • Pull off the metal control horn from the shaft. • Turn on the robot and open LynxTerm. • Set all = 1500. • Push the metal control horn back on this way: • Attach the servo back into position.
  • 17.
    Once all theservos are perfectly aligned push Write and the program will save the adjustments unto SSC-32U.
  • 18.
    To study andlearn more about how the servos, the SSC-32U and LynxTerm work go to: http://www.lynxmotion.com/images/data/lynxmotion_ssc-32u_usb_u
  • 19.
    BotBoarduino board The BotBoarduinois an Arduino Duemilanove compatible microcontroller made specifically for the Lynxmotion robots. It has the 3" x 2.3" footprint so it can be attached to any of the robot kits. It retains the normal Arduino shield connections as well. The BotBoarduino is connected with the SSC-32U Servo Controller and PS2 level shifter board for PS2 control.
  • 21.
    To study andlearn more about how the BotBoarduino works go to: http://www.lynxmotion.com/images/html/build185.htm
  • 22.
    The BotBoarduino hasbeen programmed through Arduino software with the Phoenix code. The Phoenix Code can be found at (step 5): http://www.lynxmotion.com/images/html/build99f.htm by KurtE
  • 23.
    Extract the .zipfile to a folder named "BotBoarduino_CH3R_PS2". The folder name IS required. Open BotBoarduino_CH3R_PS2.ino in the arduino software, turn on the robot, and click upload (the small arrow pointing to the right.)
  • 24.
    Remember to choosethe appropriate board, processor and port beforehand.
  • 25.
    The problem withthe Phoenix code: The code is only for the legs (for 18 servos), therefore Antonio cannot move its head or its tail. Moreover the middle legs hook over the front legs while turning, which means that the degrees in the code must me reduced.
  • 26.
    Antonio is controlledby a PS2, which is connected with the BotBoarduino.
  • 27.
  • 28.
    The default isWalking mode 1. Use the Left joystick to move Antonio around without turning (this is called "translation"), and the Right joystick rotates Antonio as it moves.
  • 29.
    Up and Downon the D-Pad increases or decreases the height of the body.
  • 30.
    The Circle buttonputs the body onto the floor in a 'resting' position. Press Triangle or Up on the D-Pad to raise or lower the body. The Triangle button puts the body at 35mm from the ground.
  • 31.
    That is onlythe few things Antonio can do! There are four special "body moves" functions that are triggered by pressing L1, L2, Circle, or X. While in one of these modes, it does not walk. The joysticks and some buttons change function depending on which mode is toggled on. See next slide for more functions and details.
  • 32.
  • 33.
    Antonio is worthplaying with and improving! The goal is to calibrate Antonio to perfection and to rewrite the Phoenix code to move Antonio’s head and tail, and to make him turn with no problems as well!
  • 34.