Downloaded 214 times
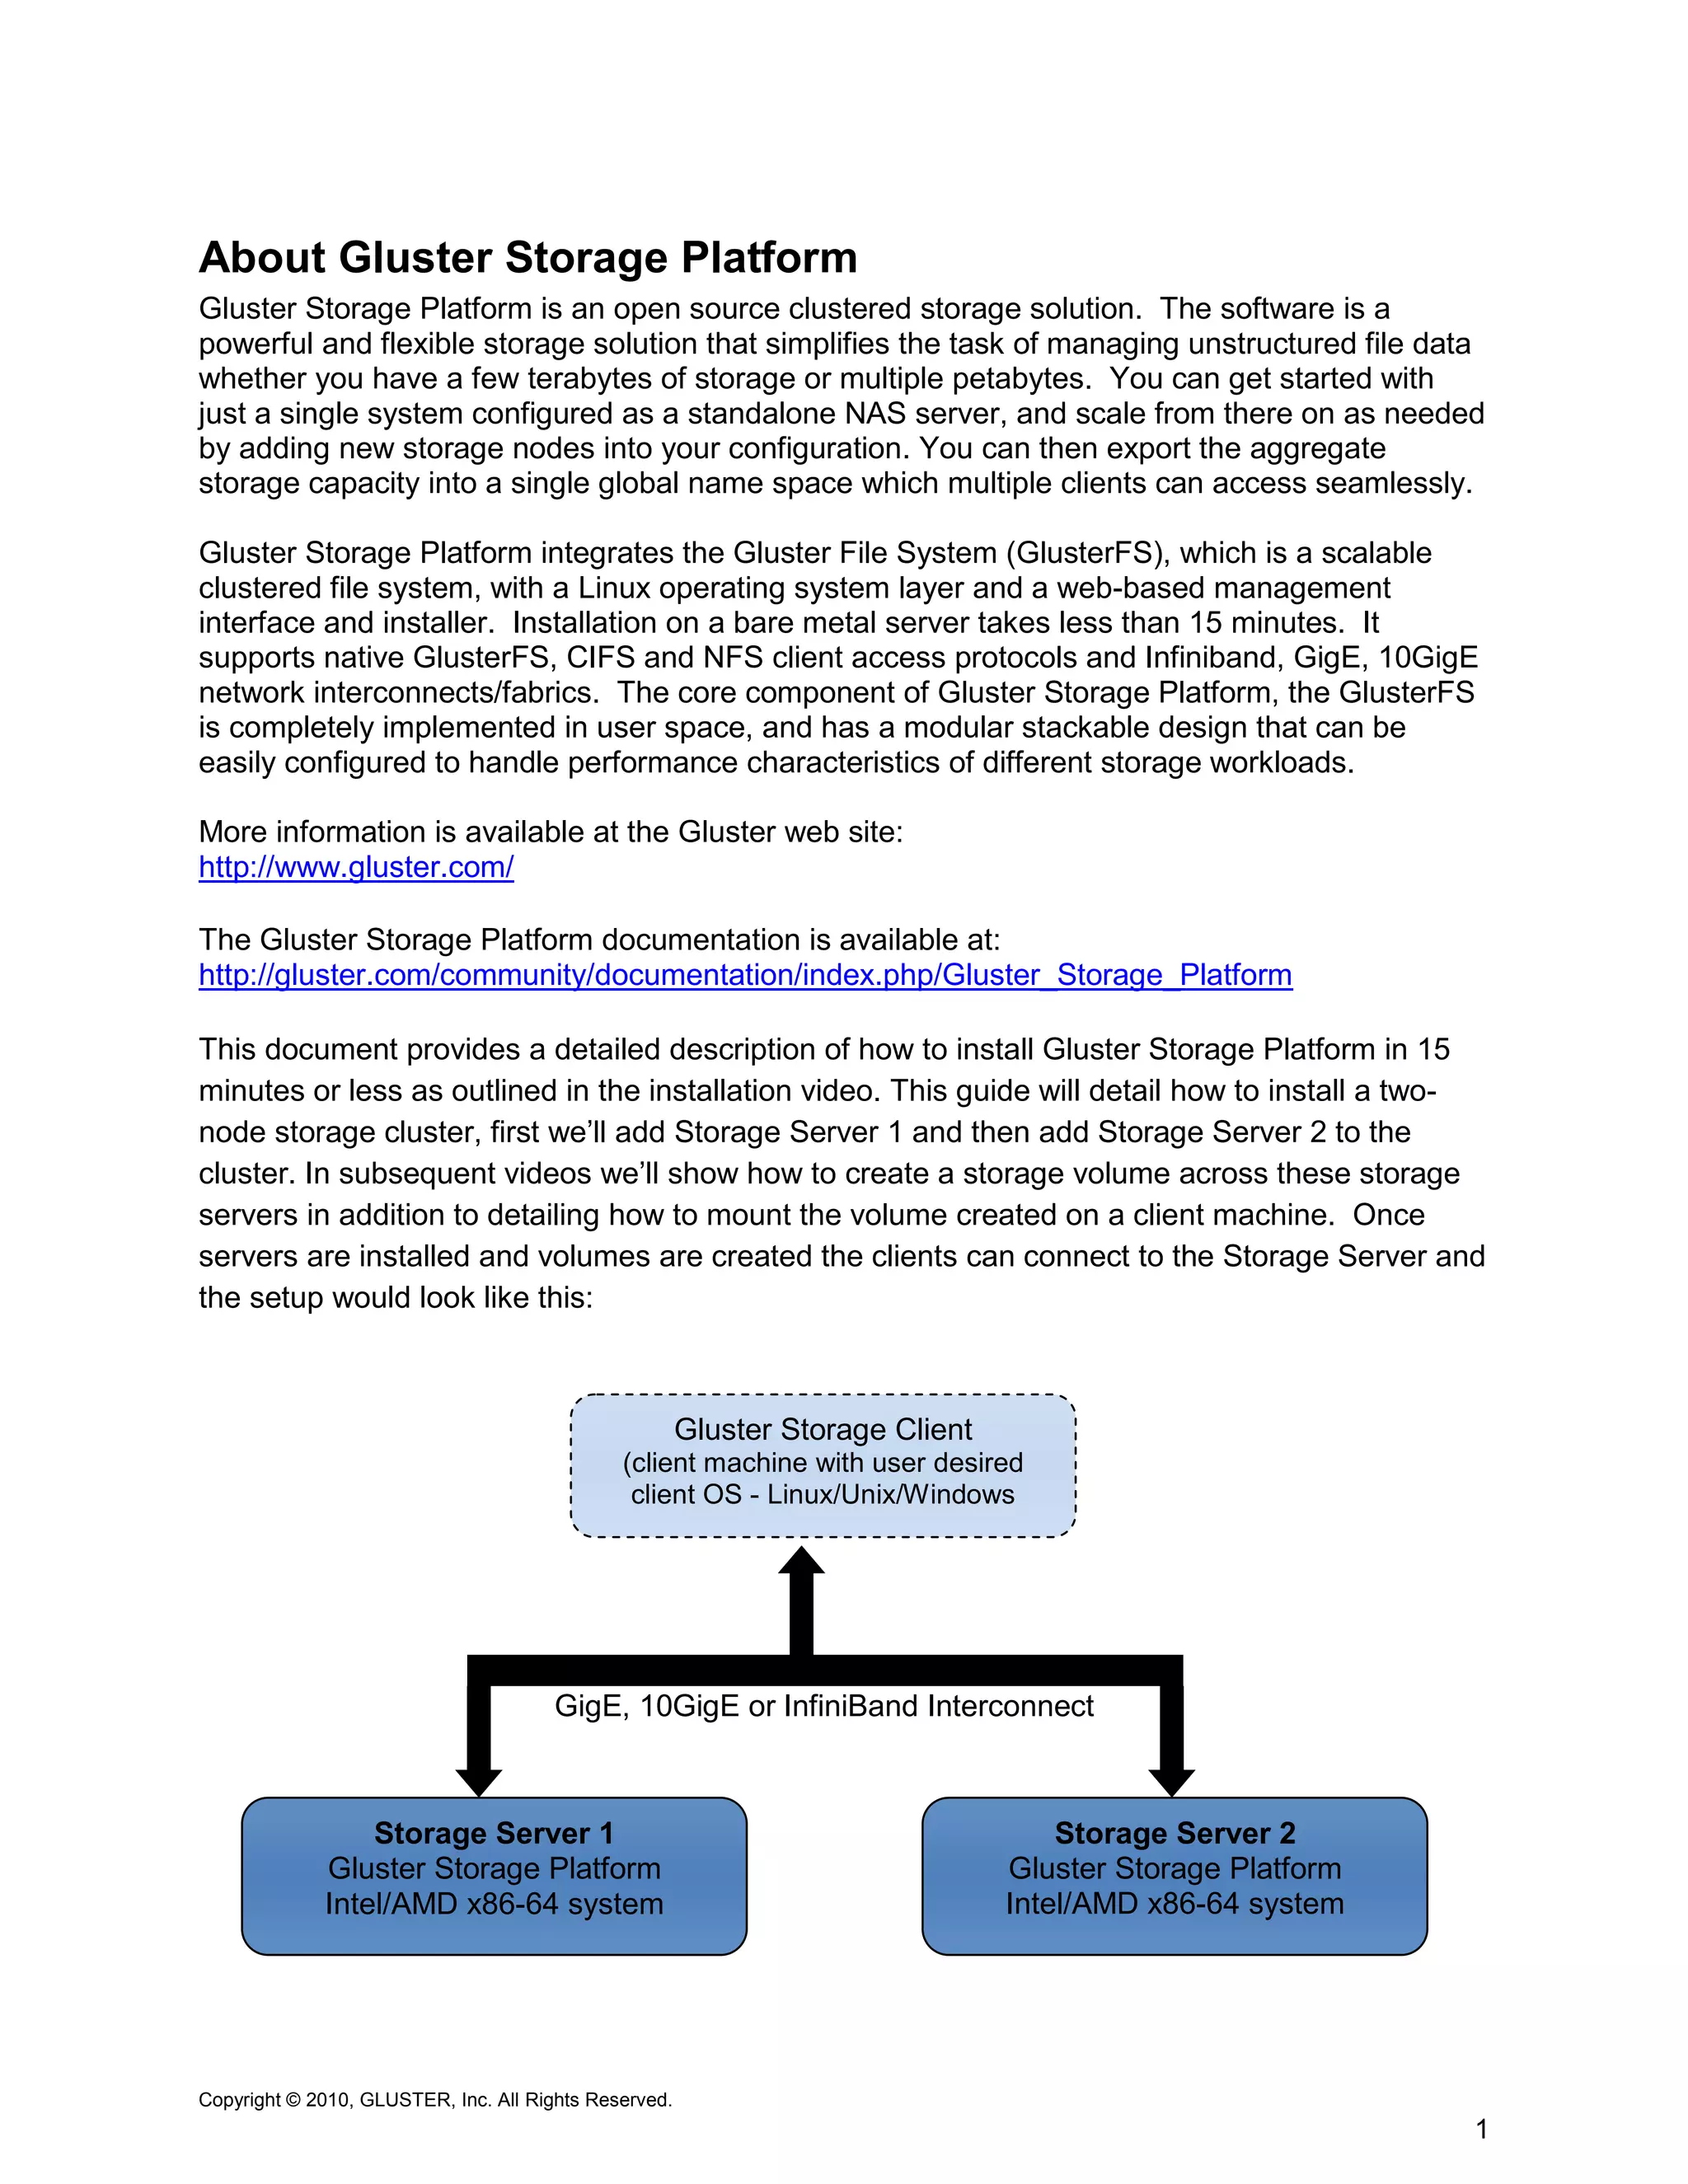
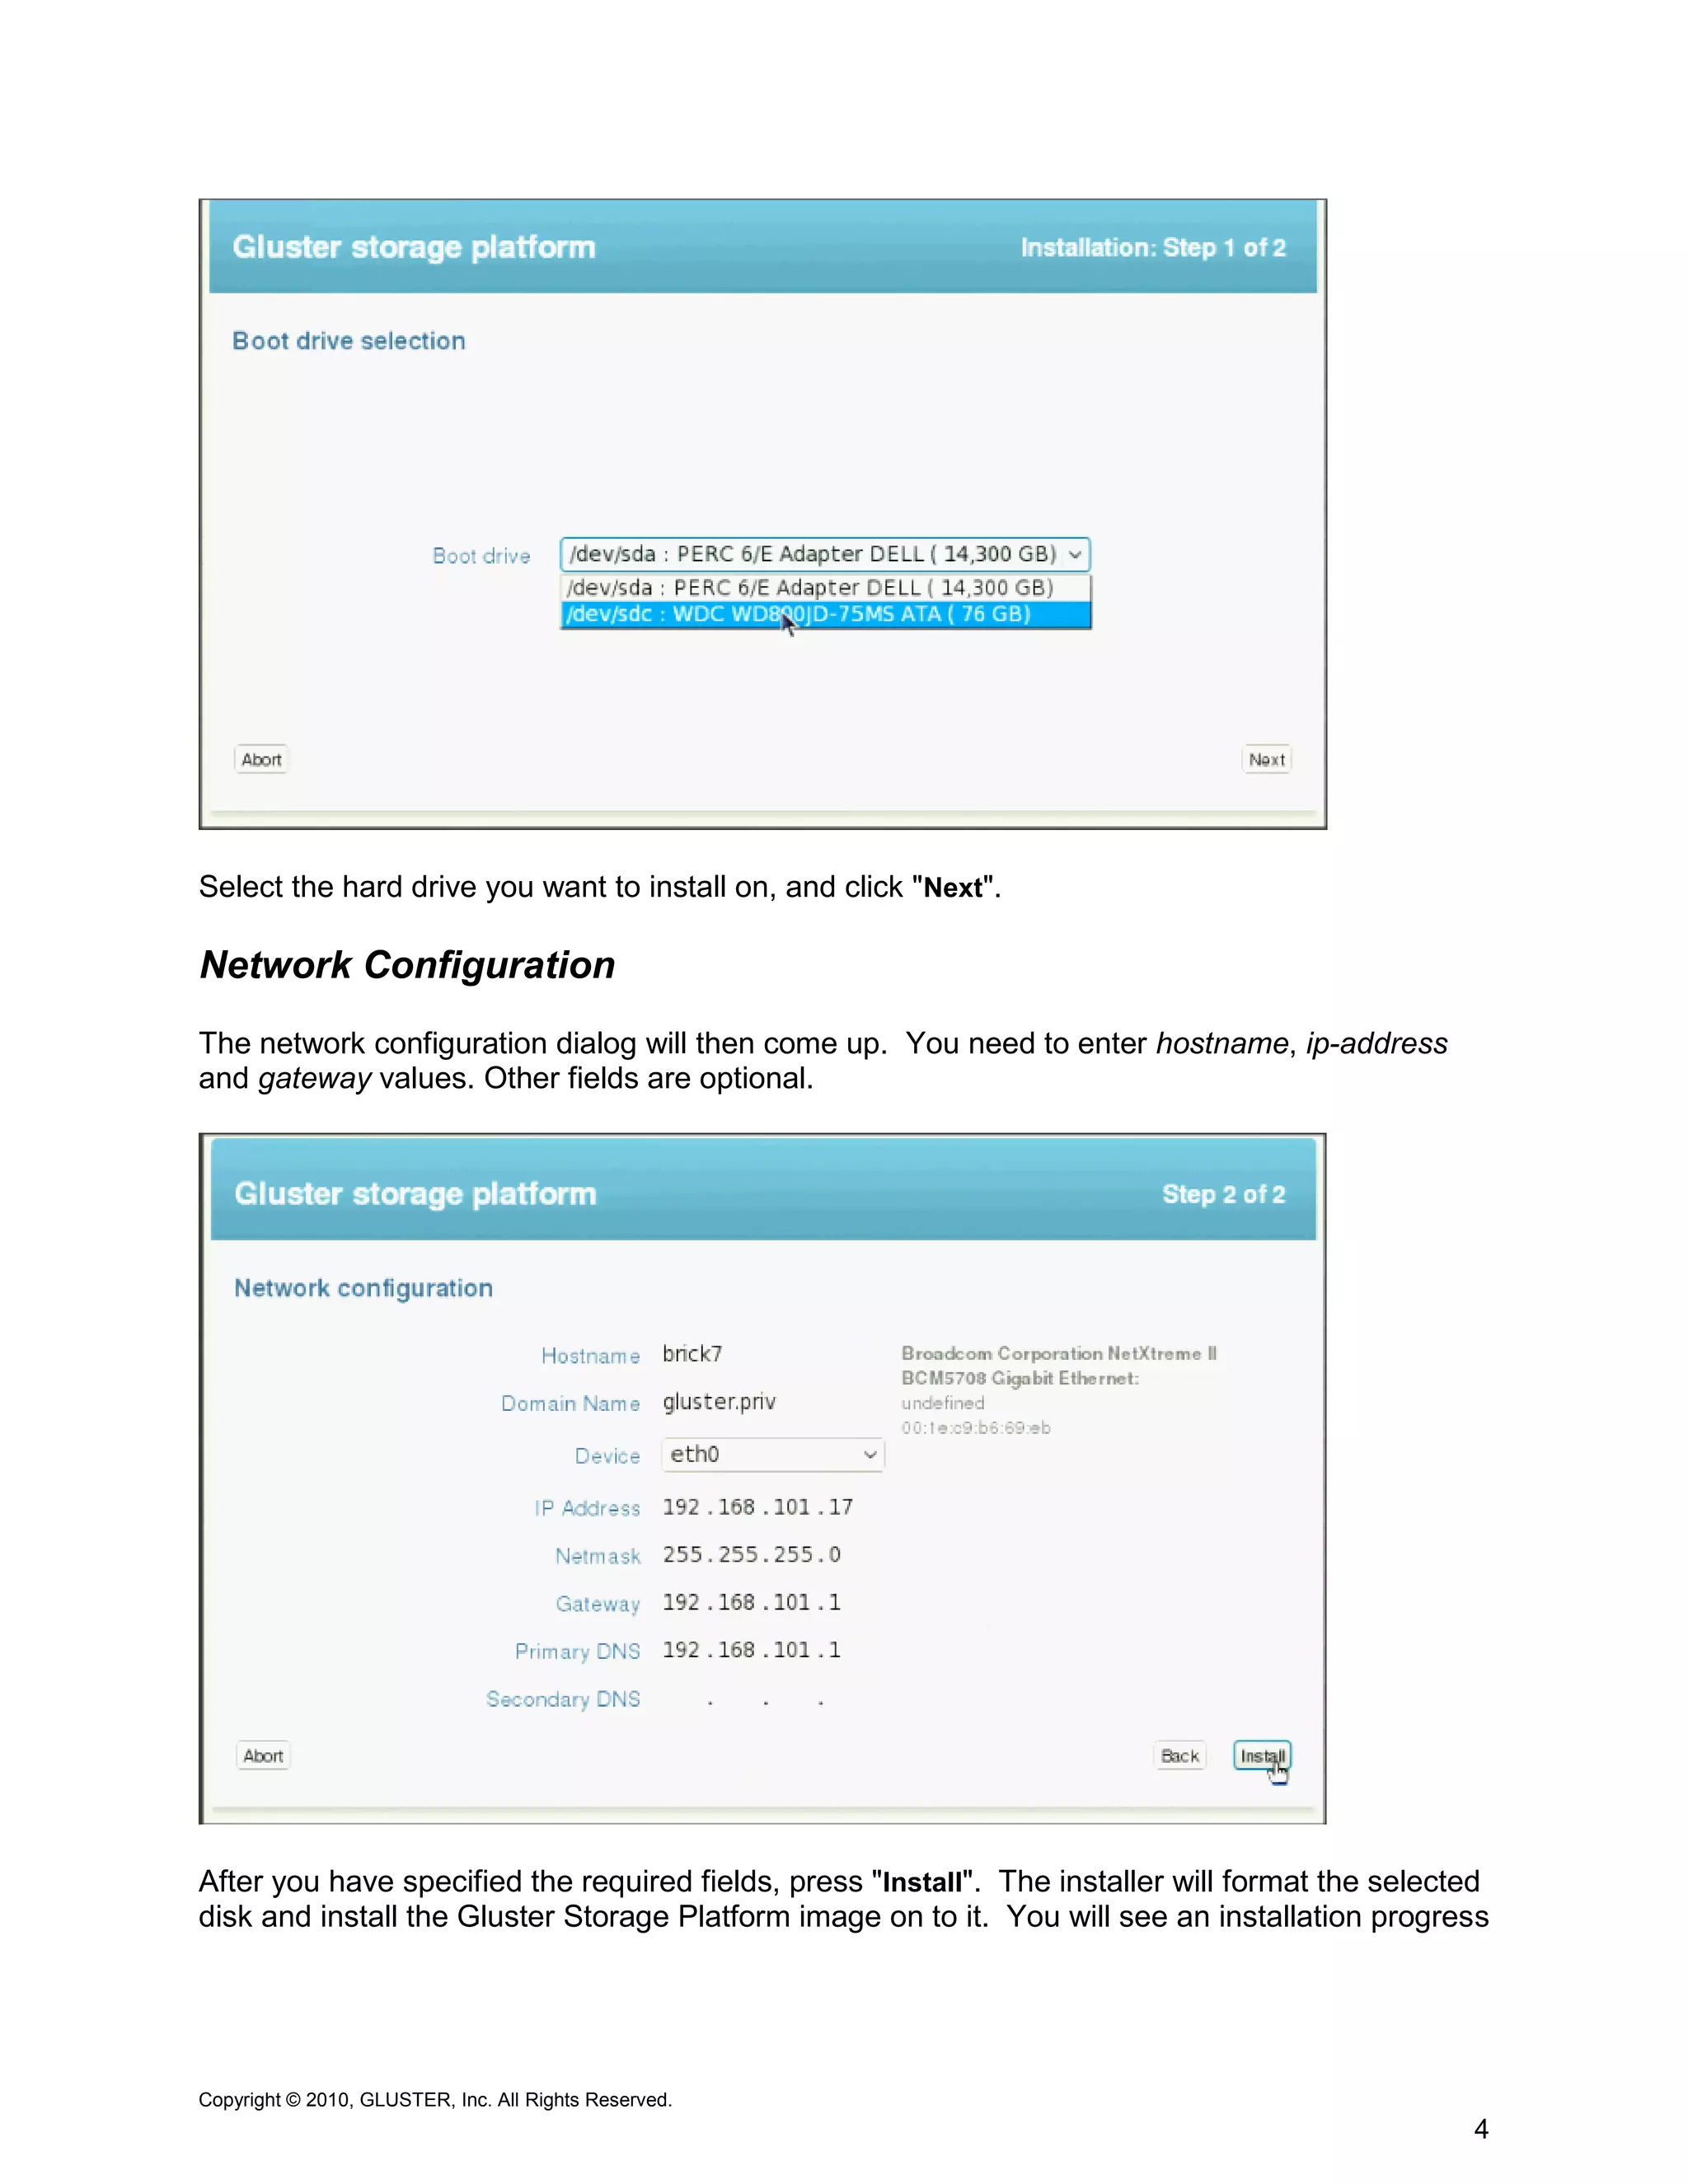
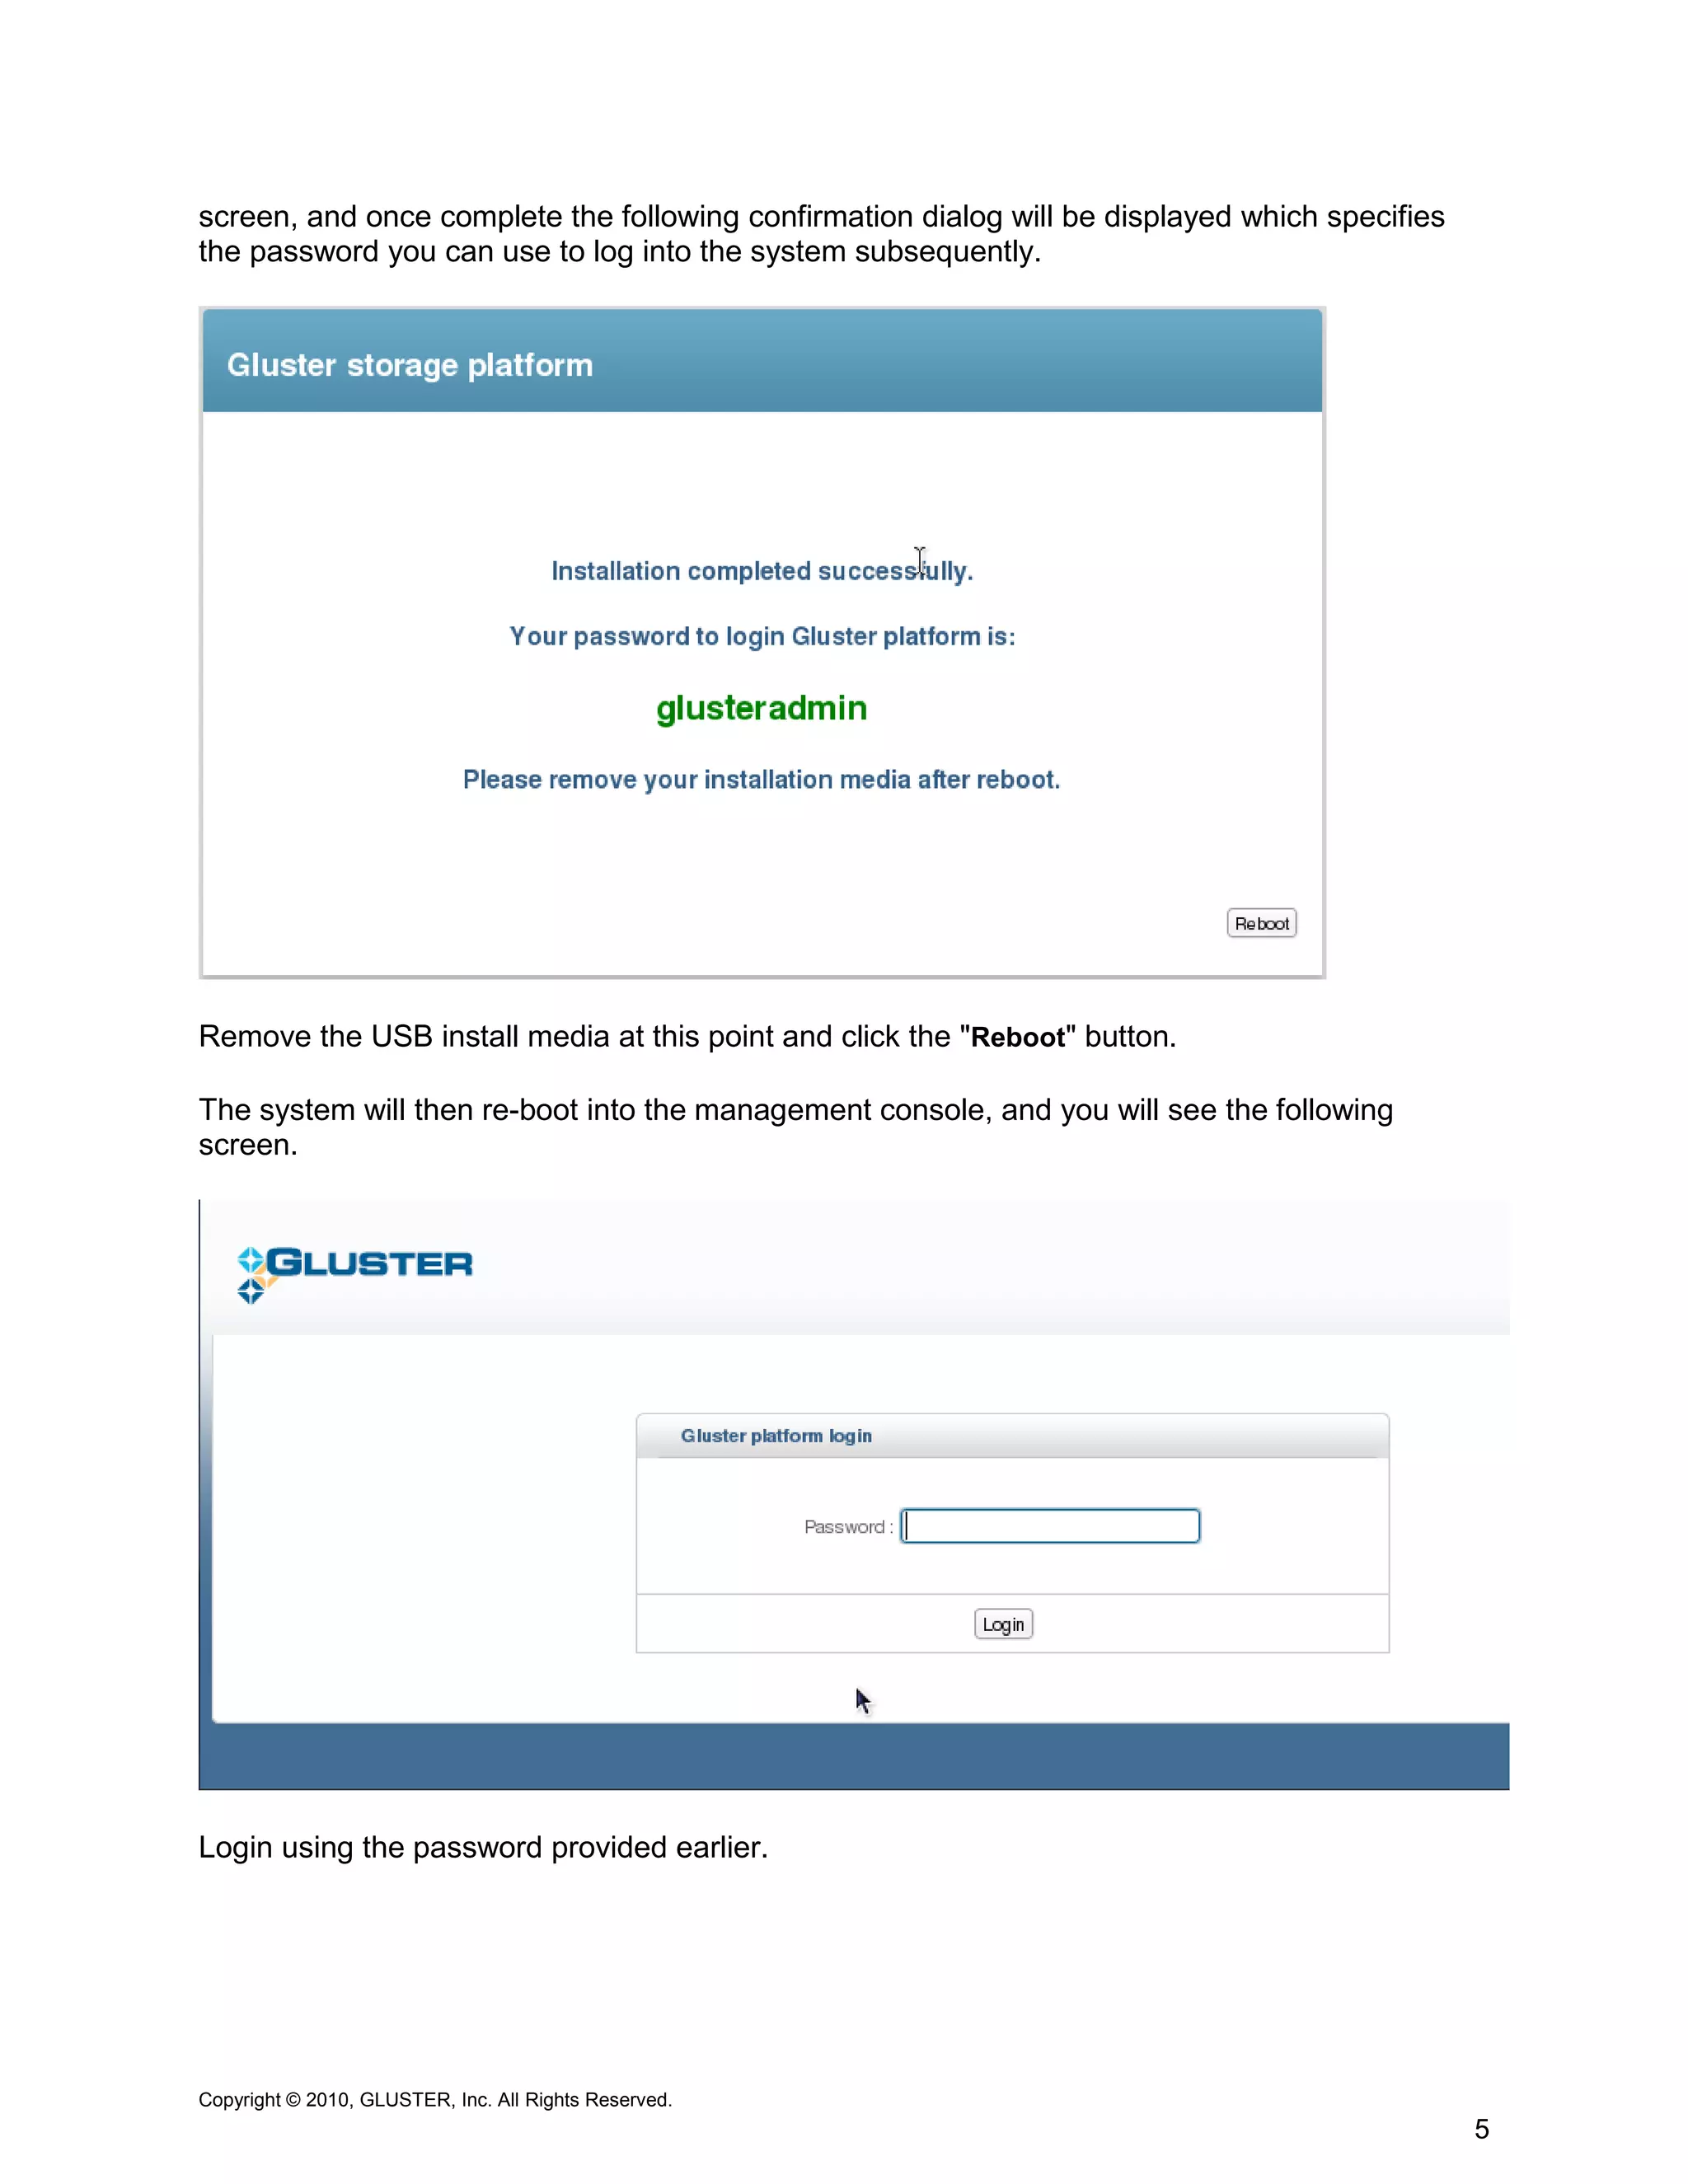
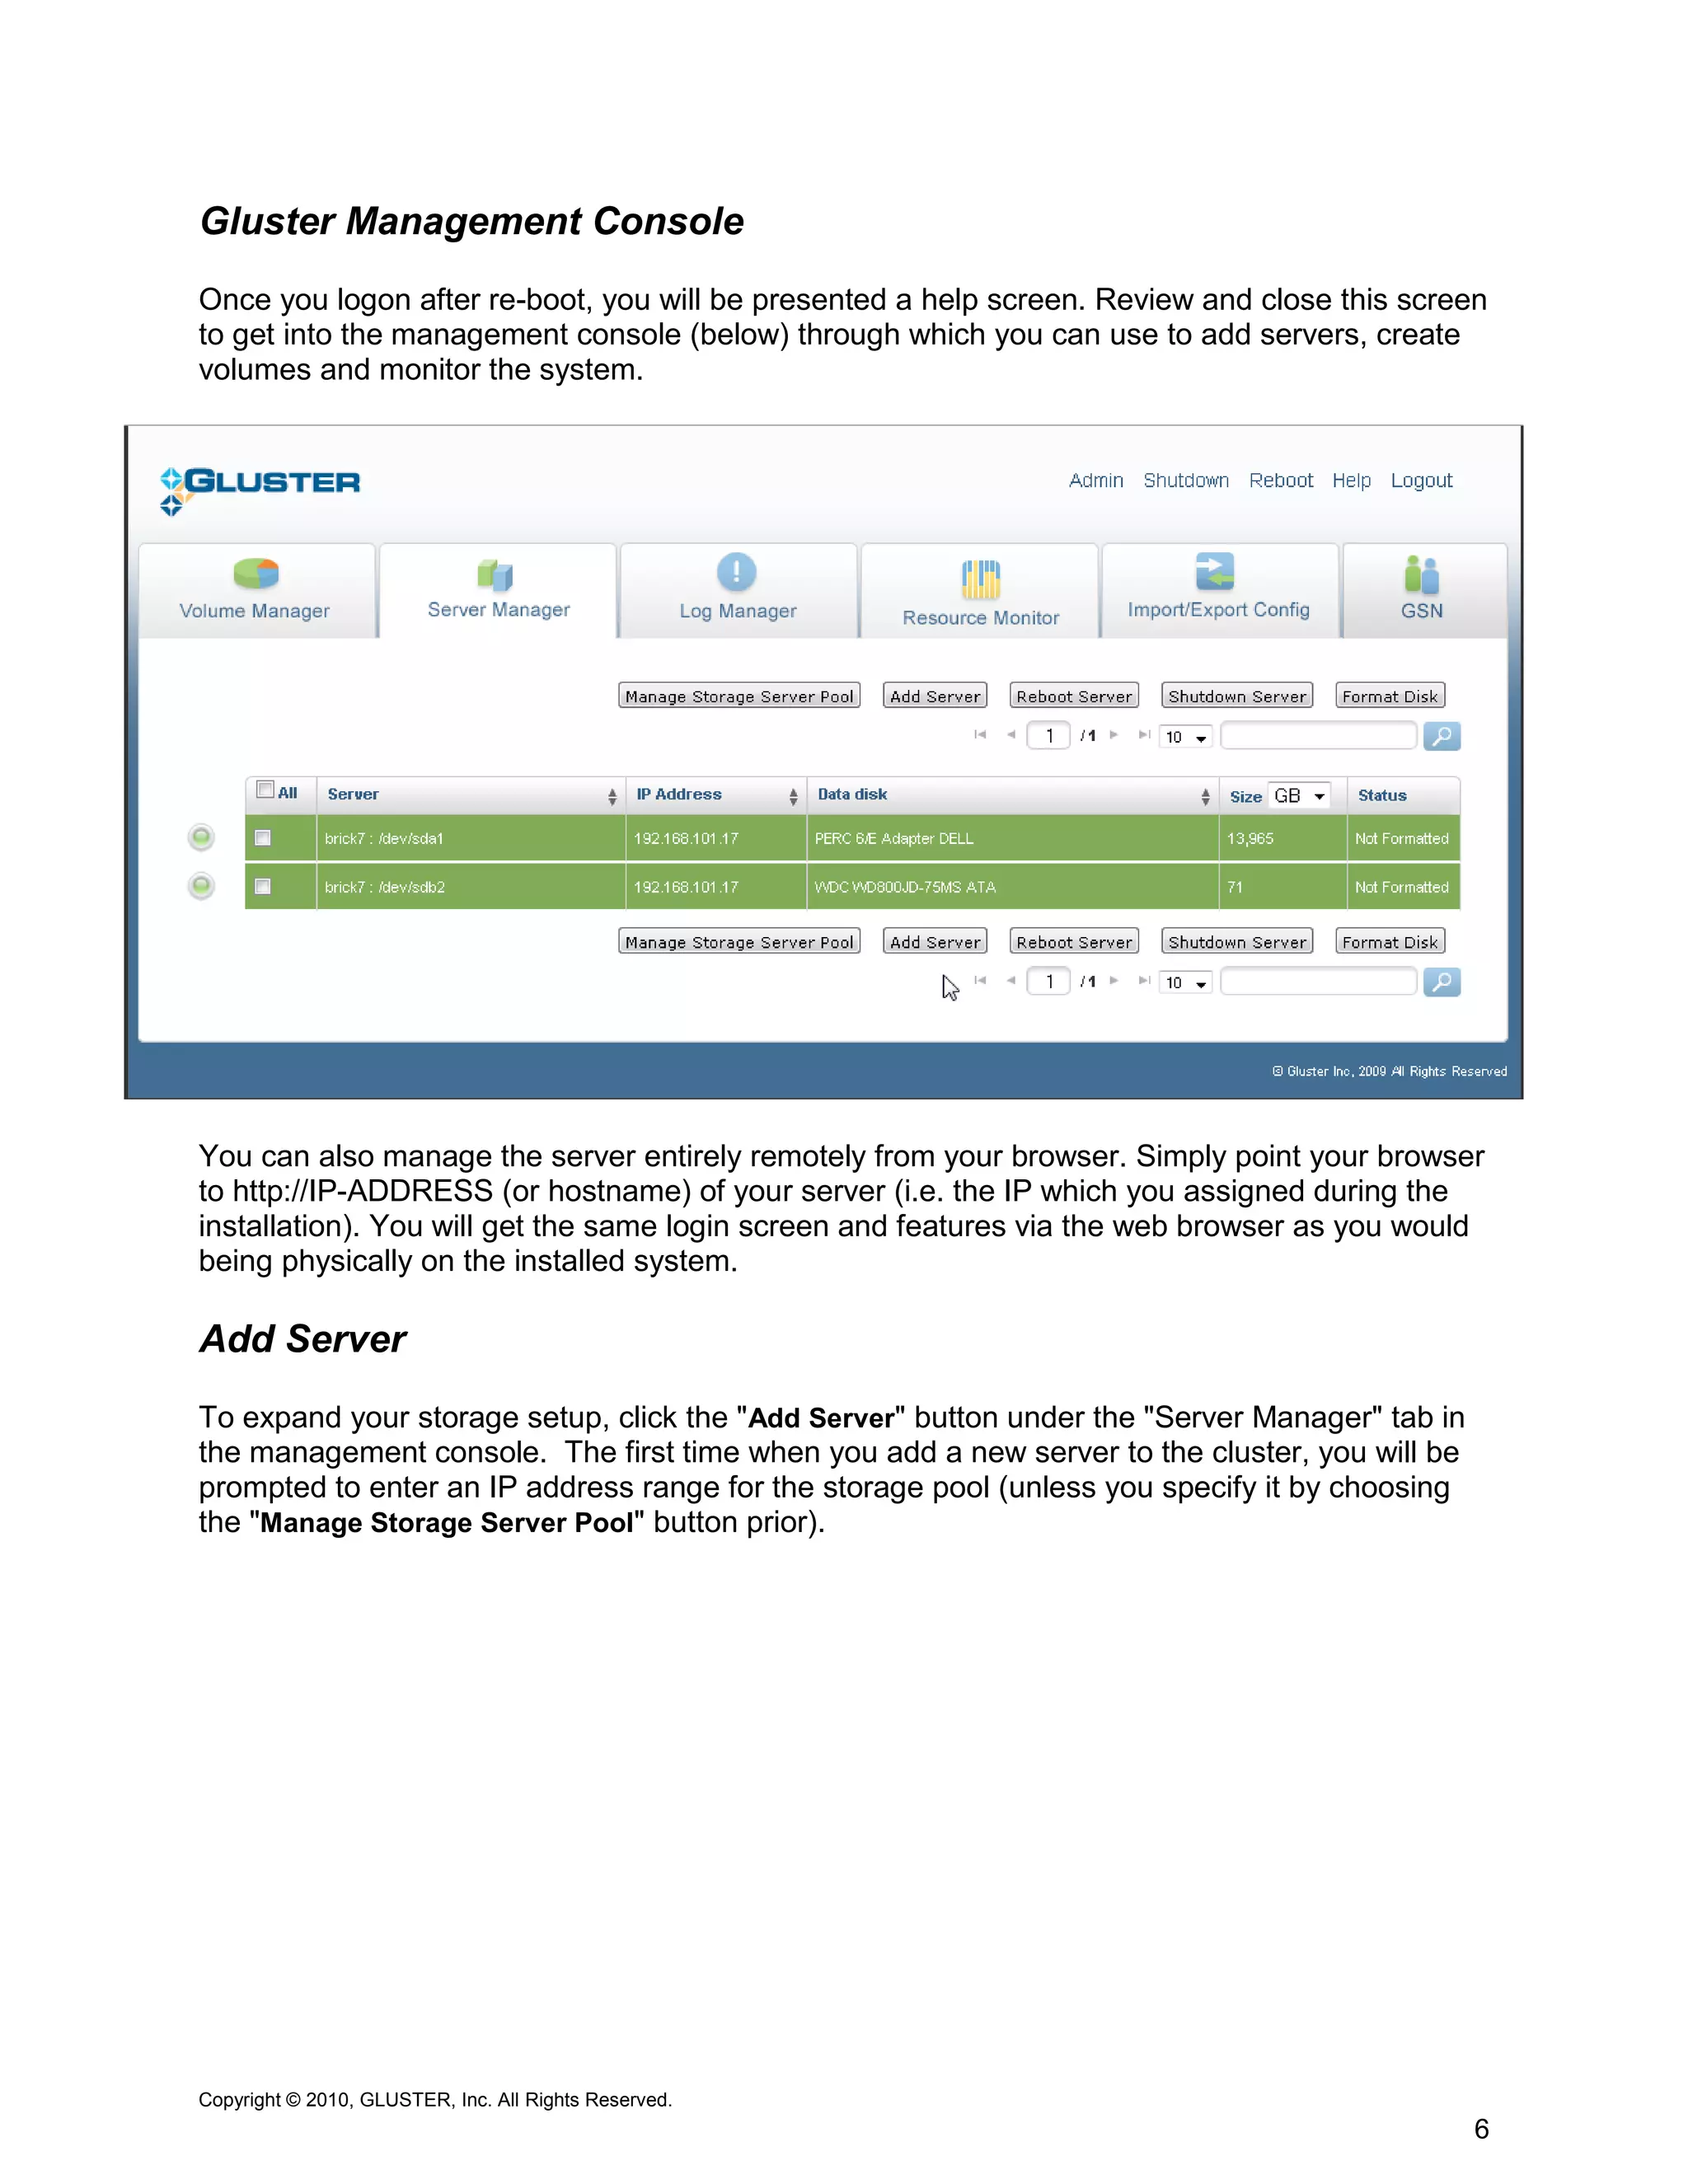
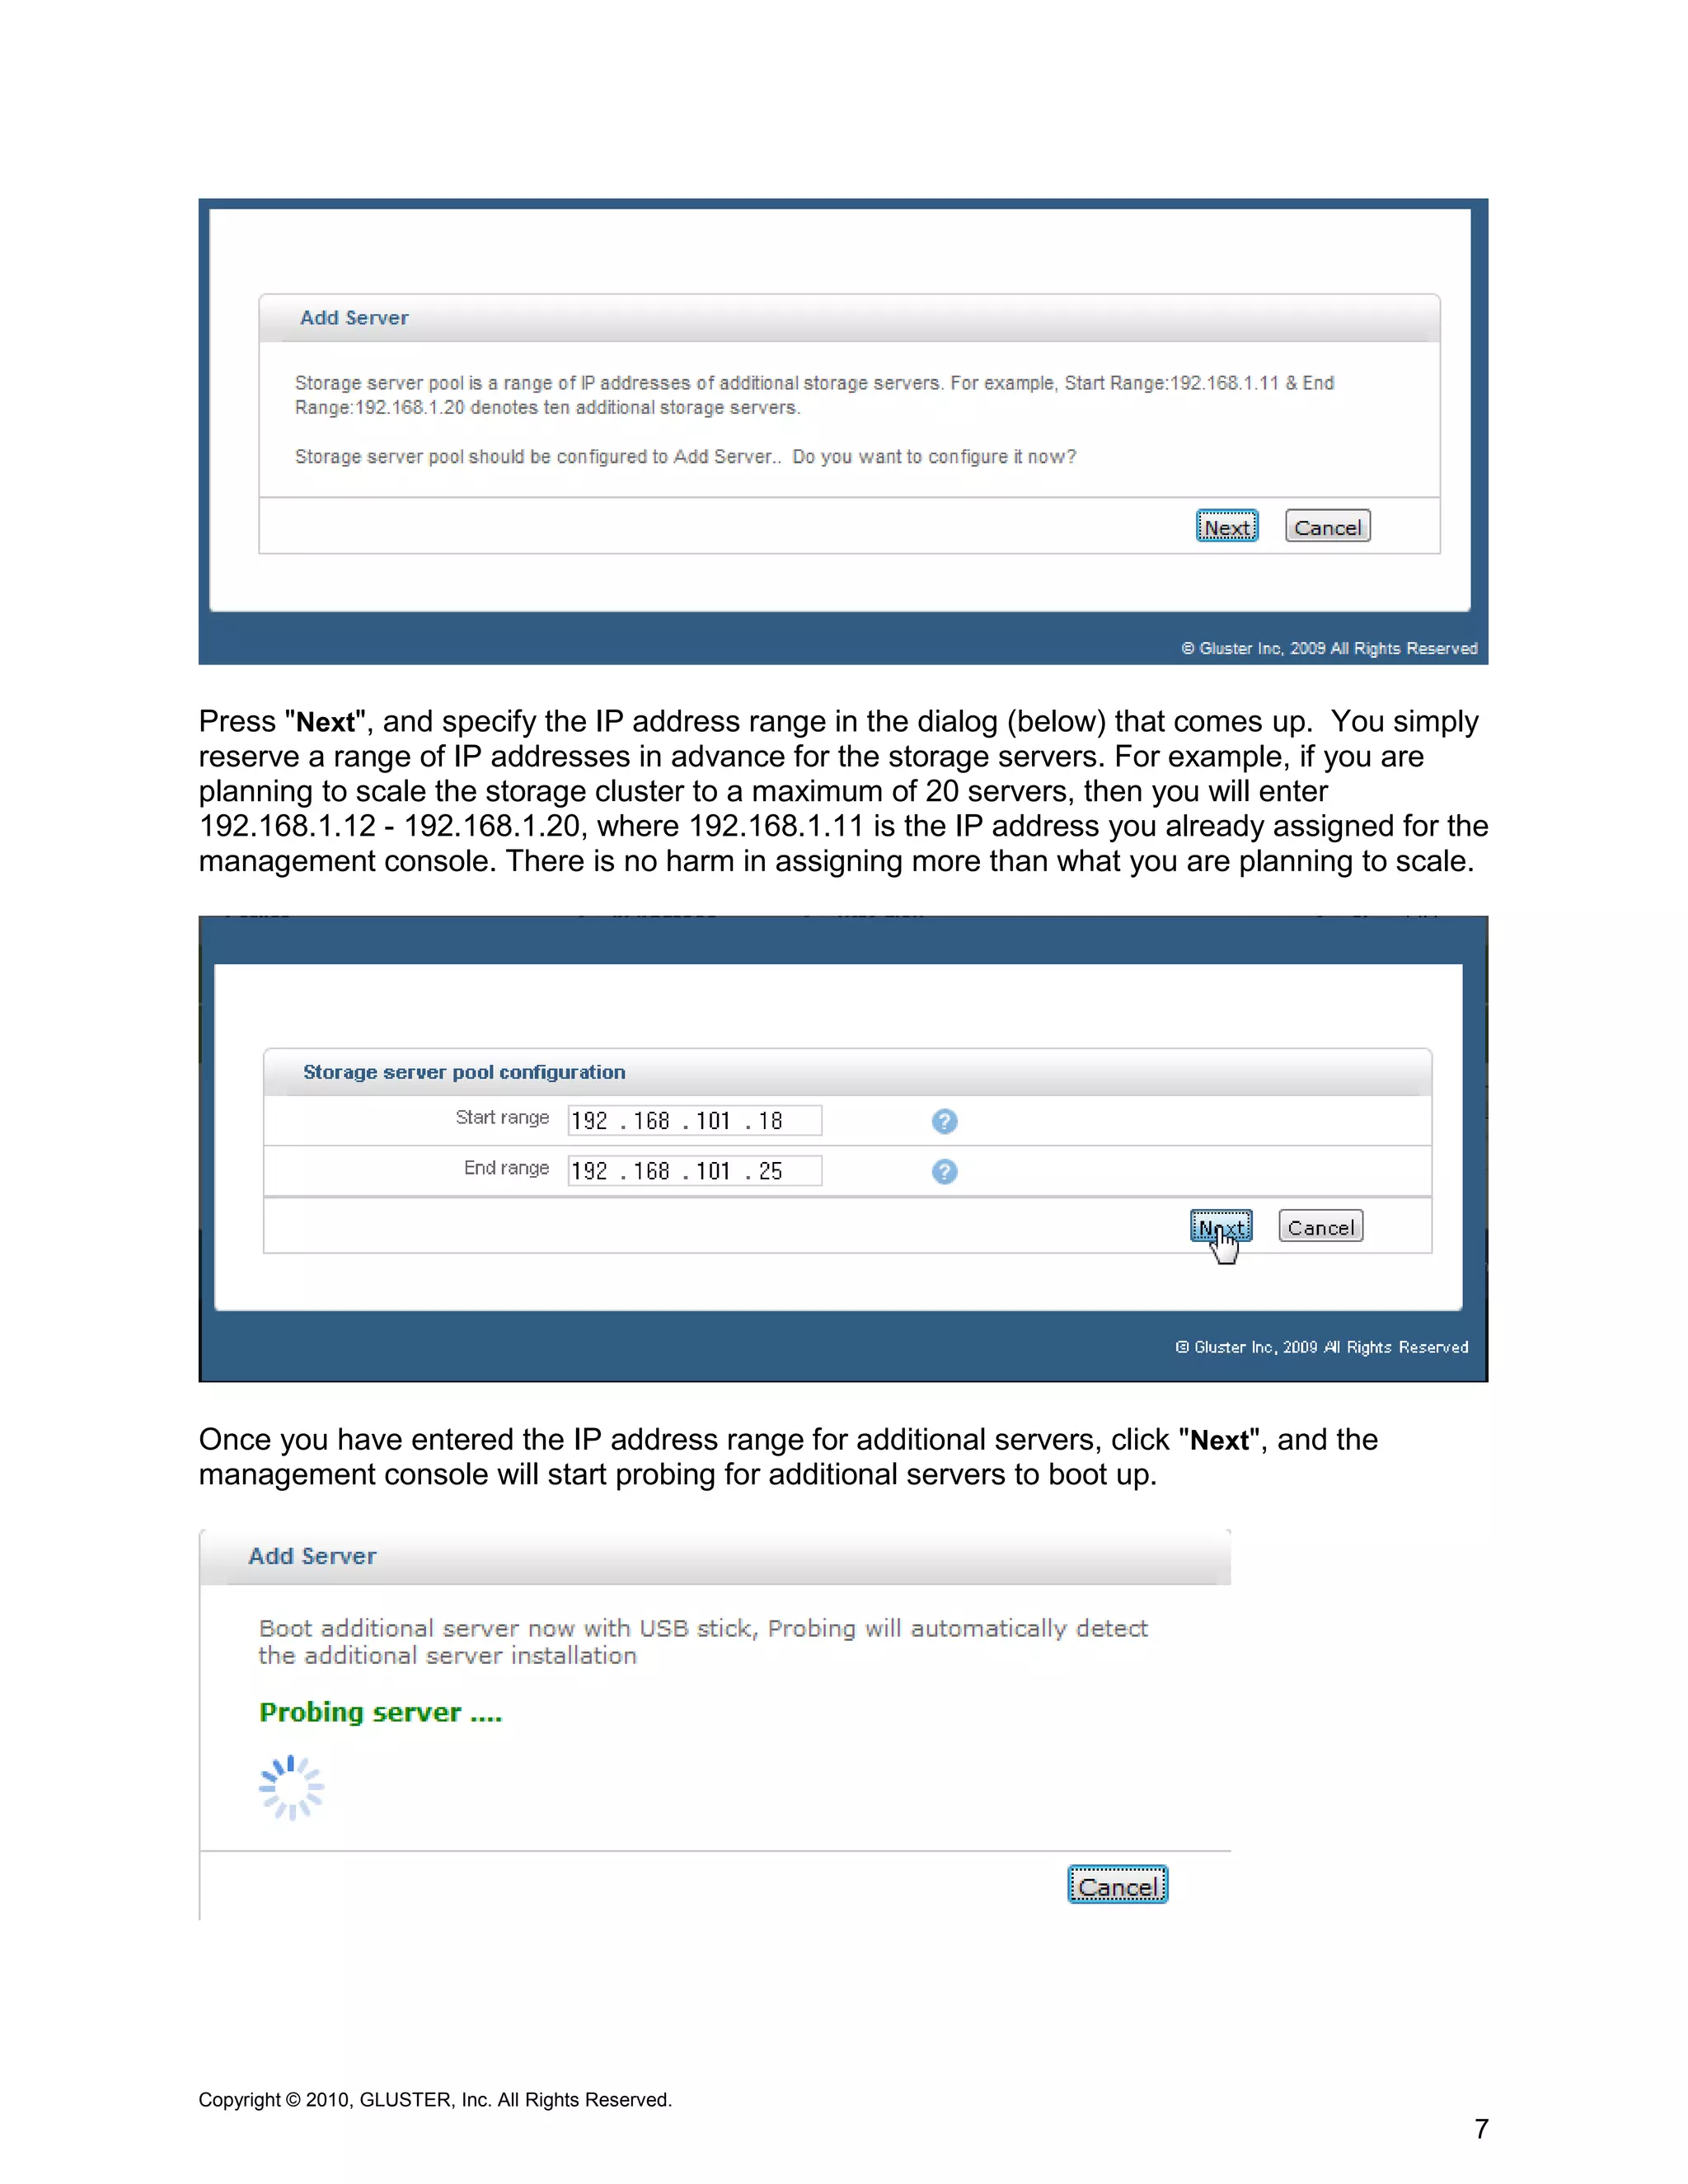
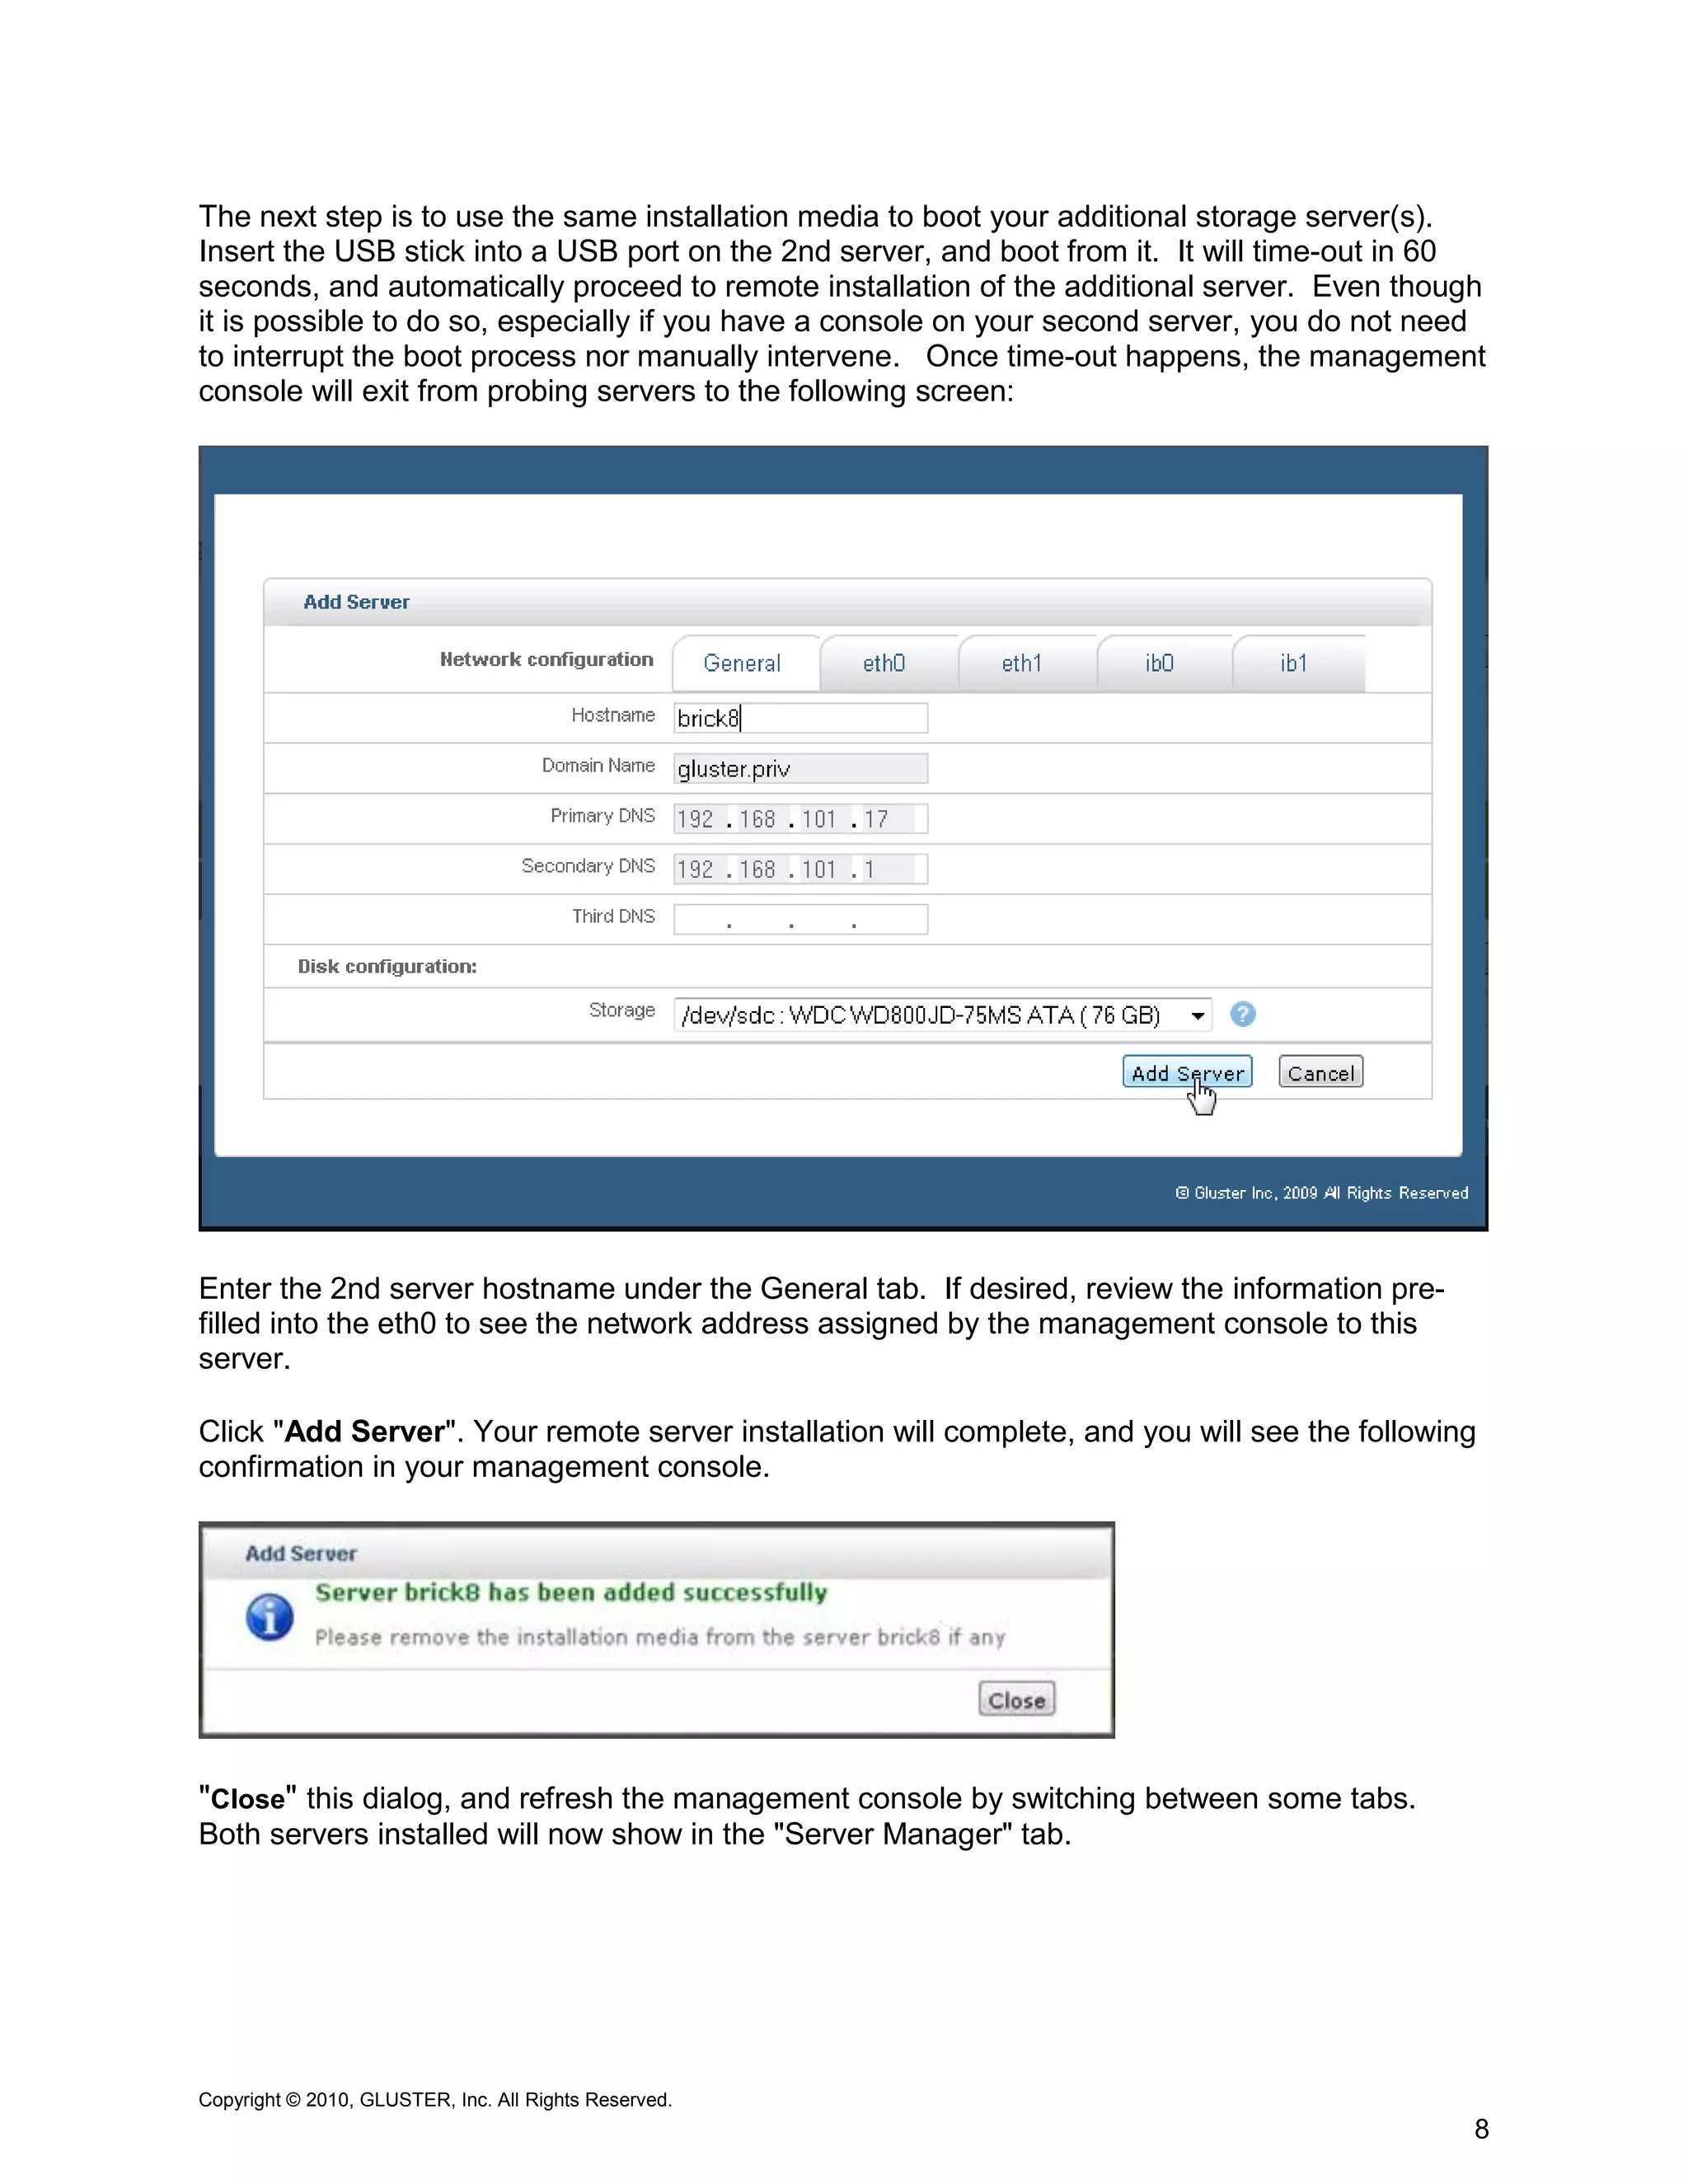
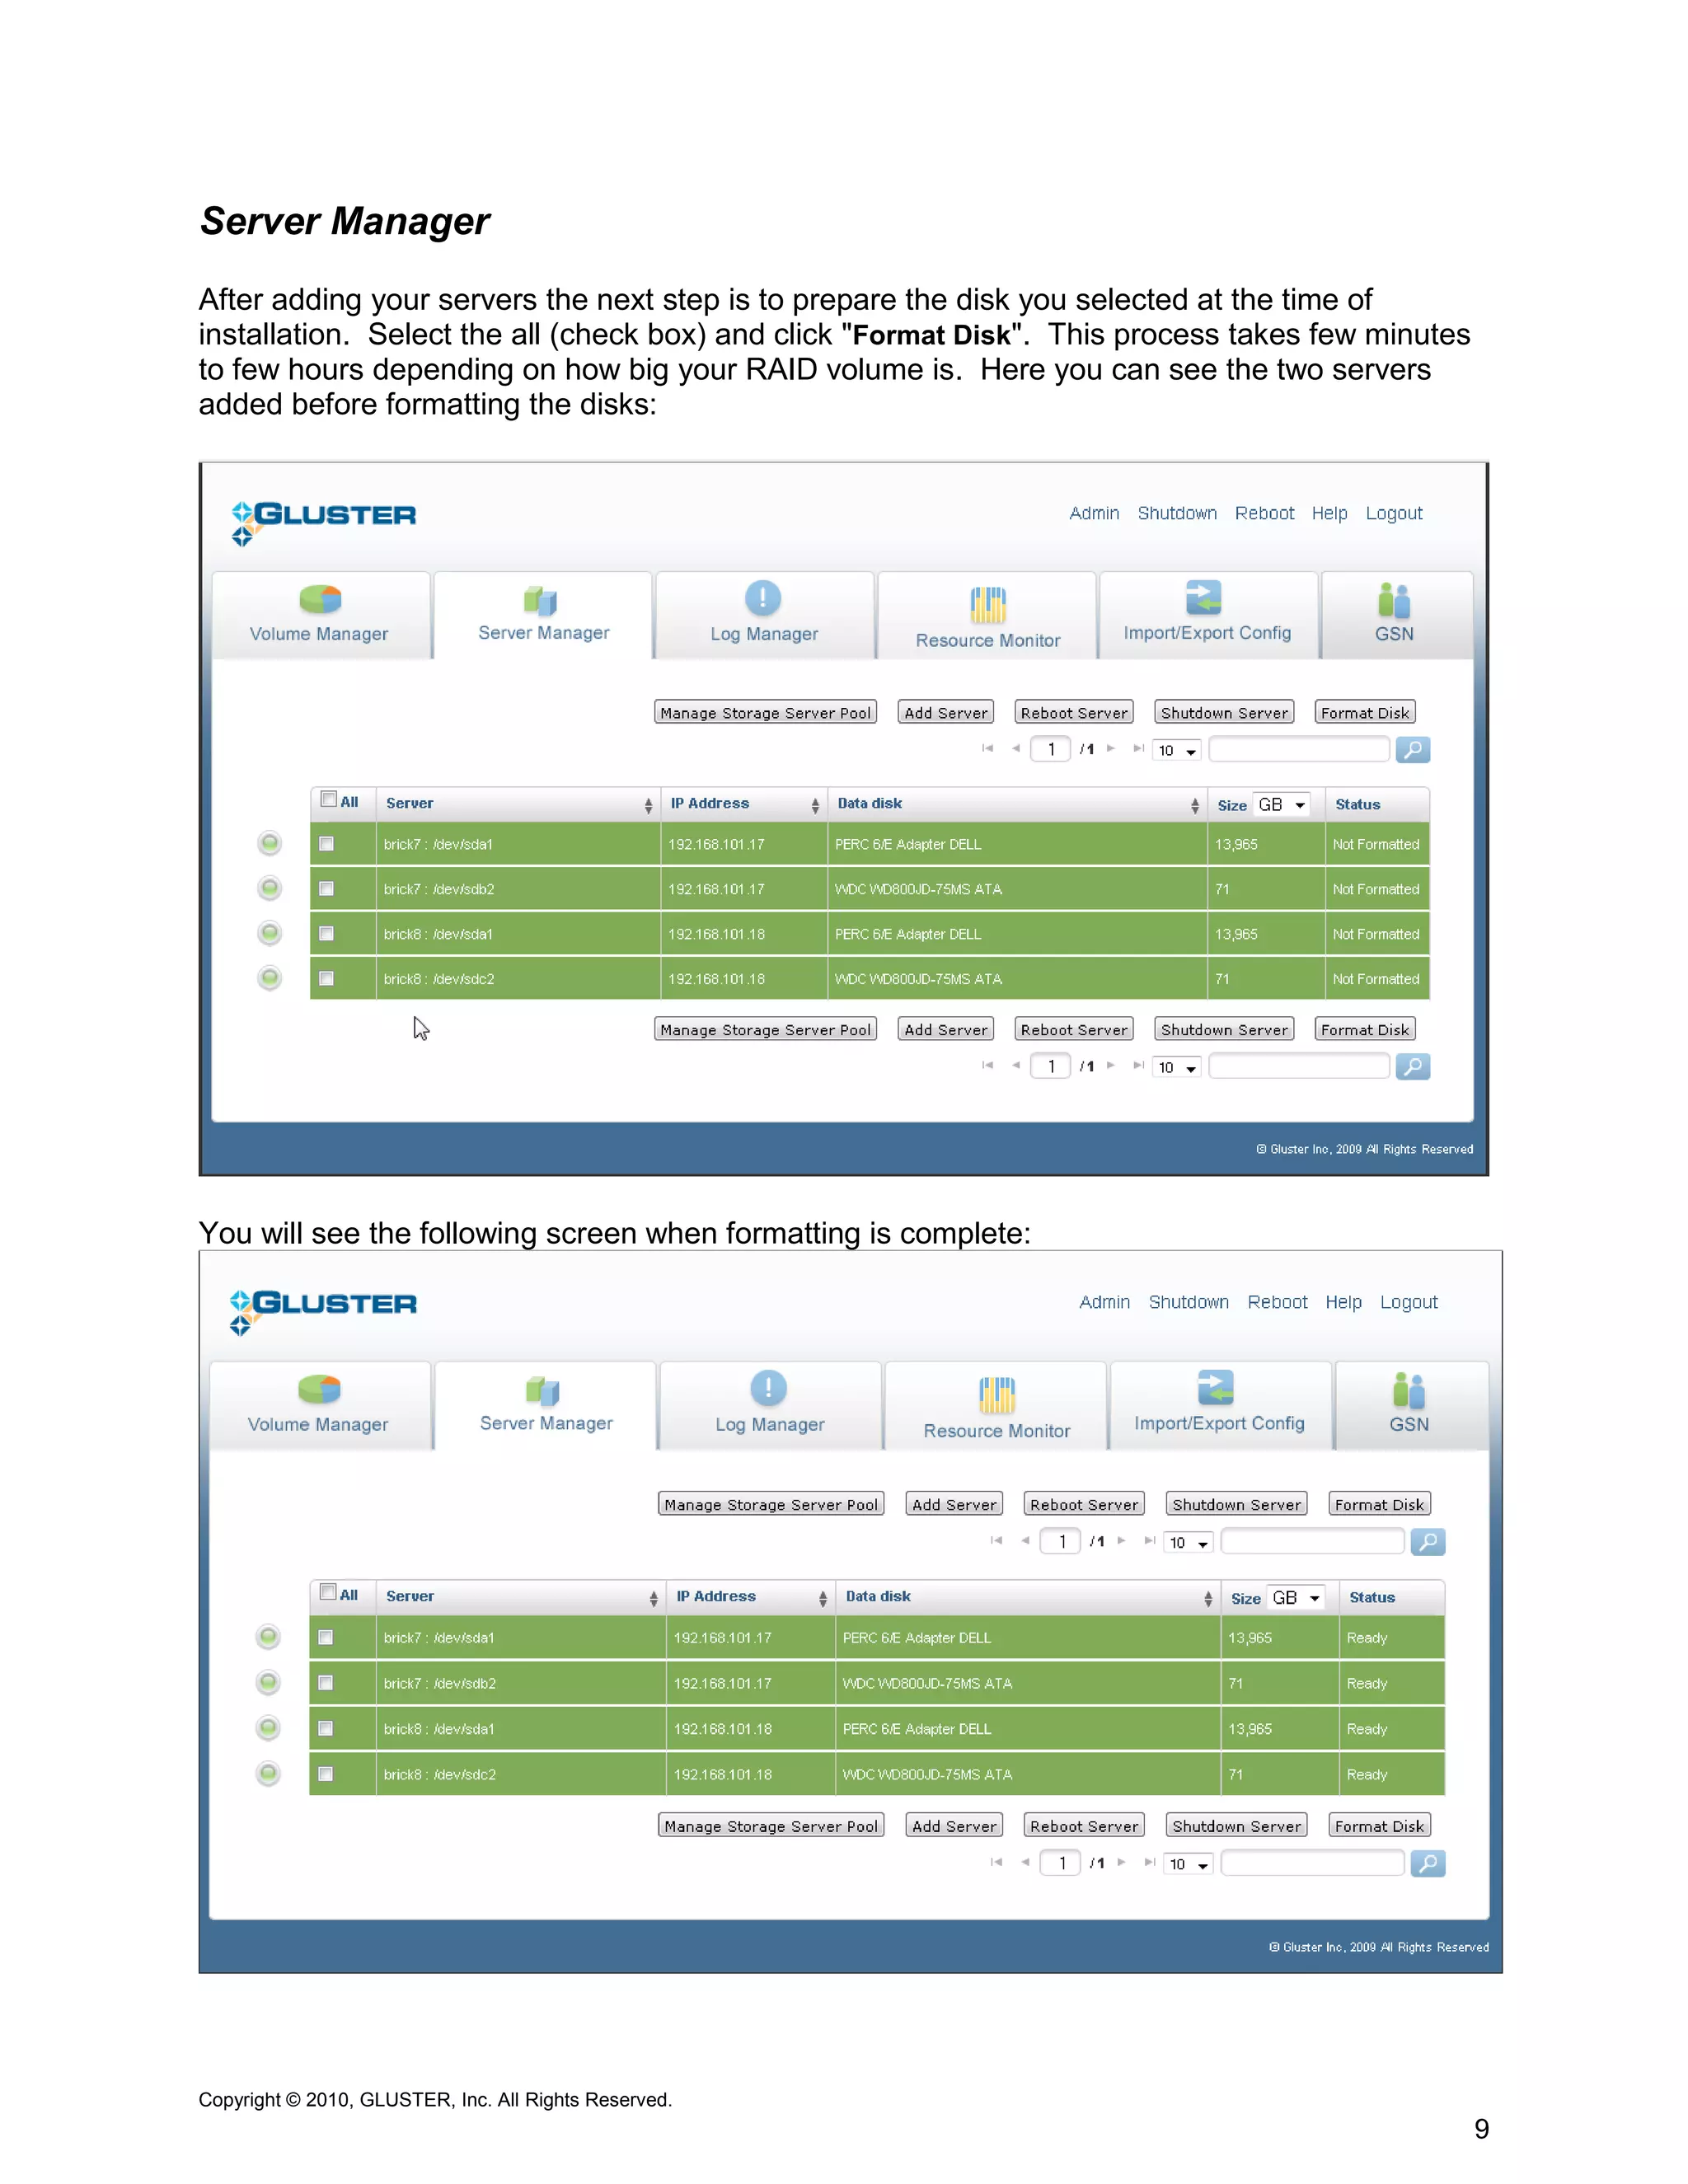
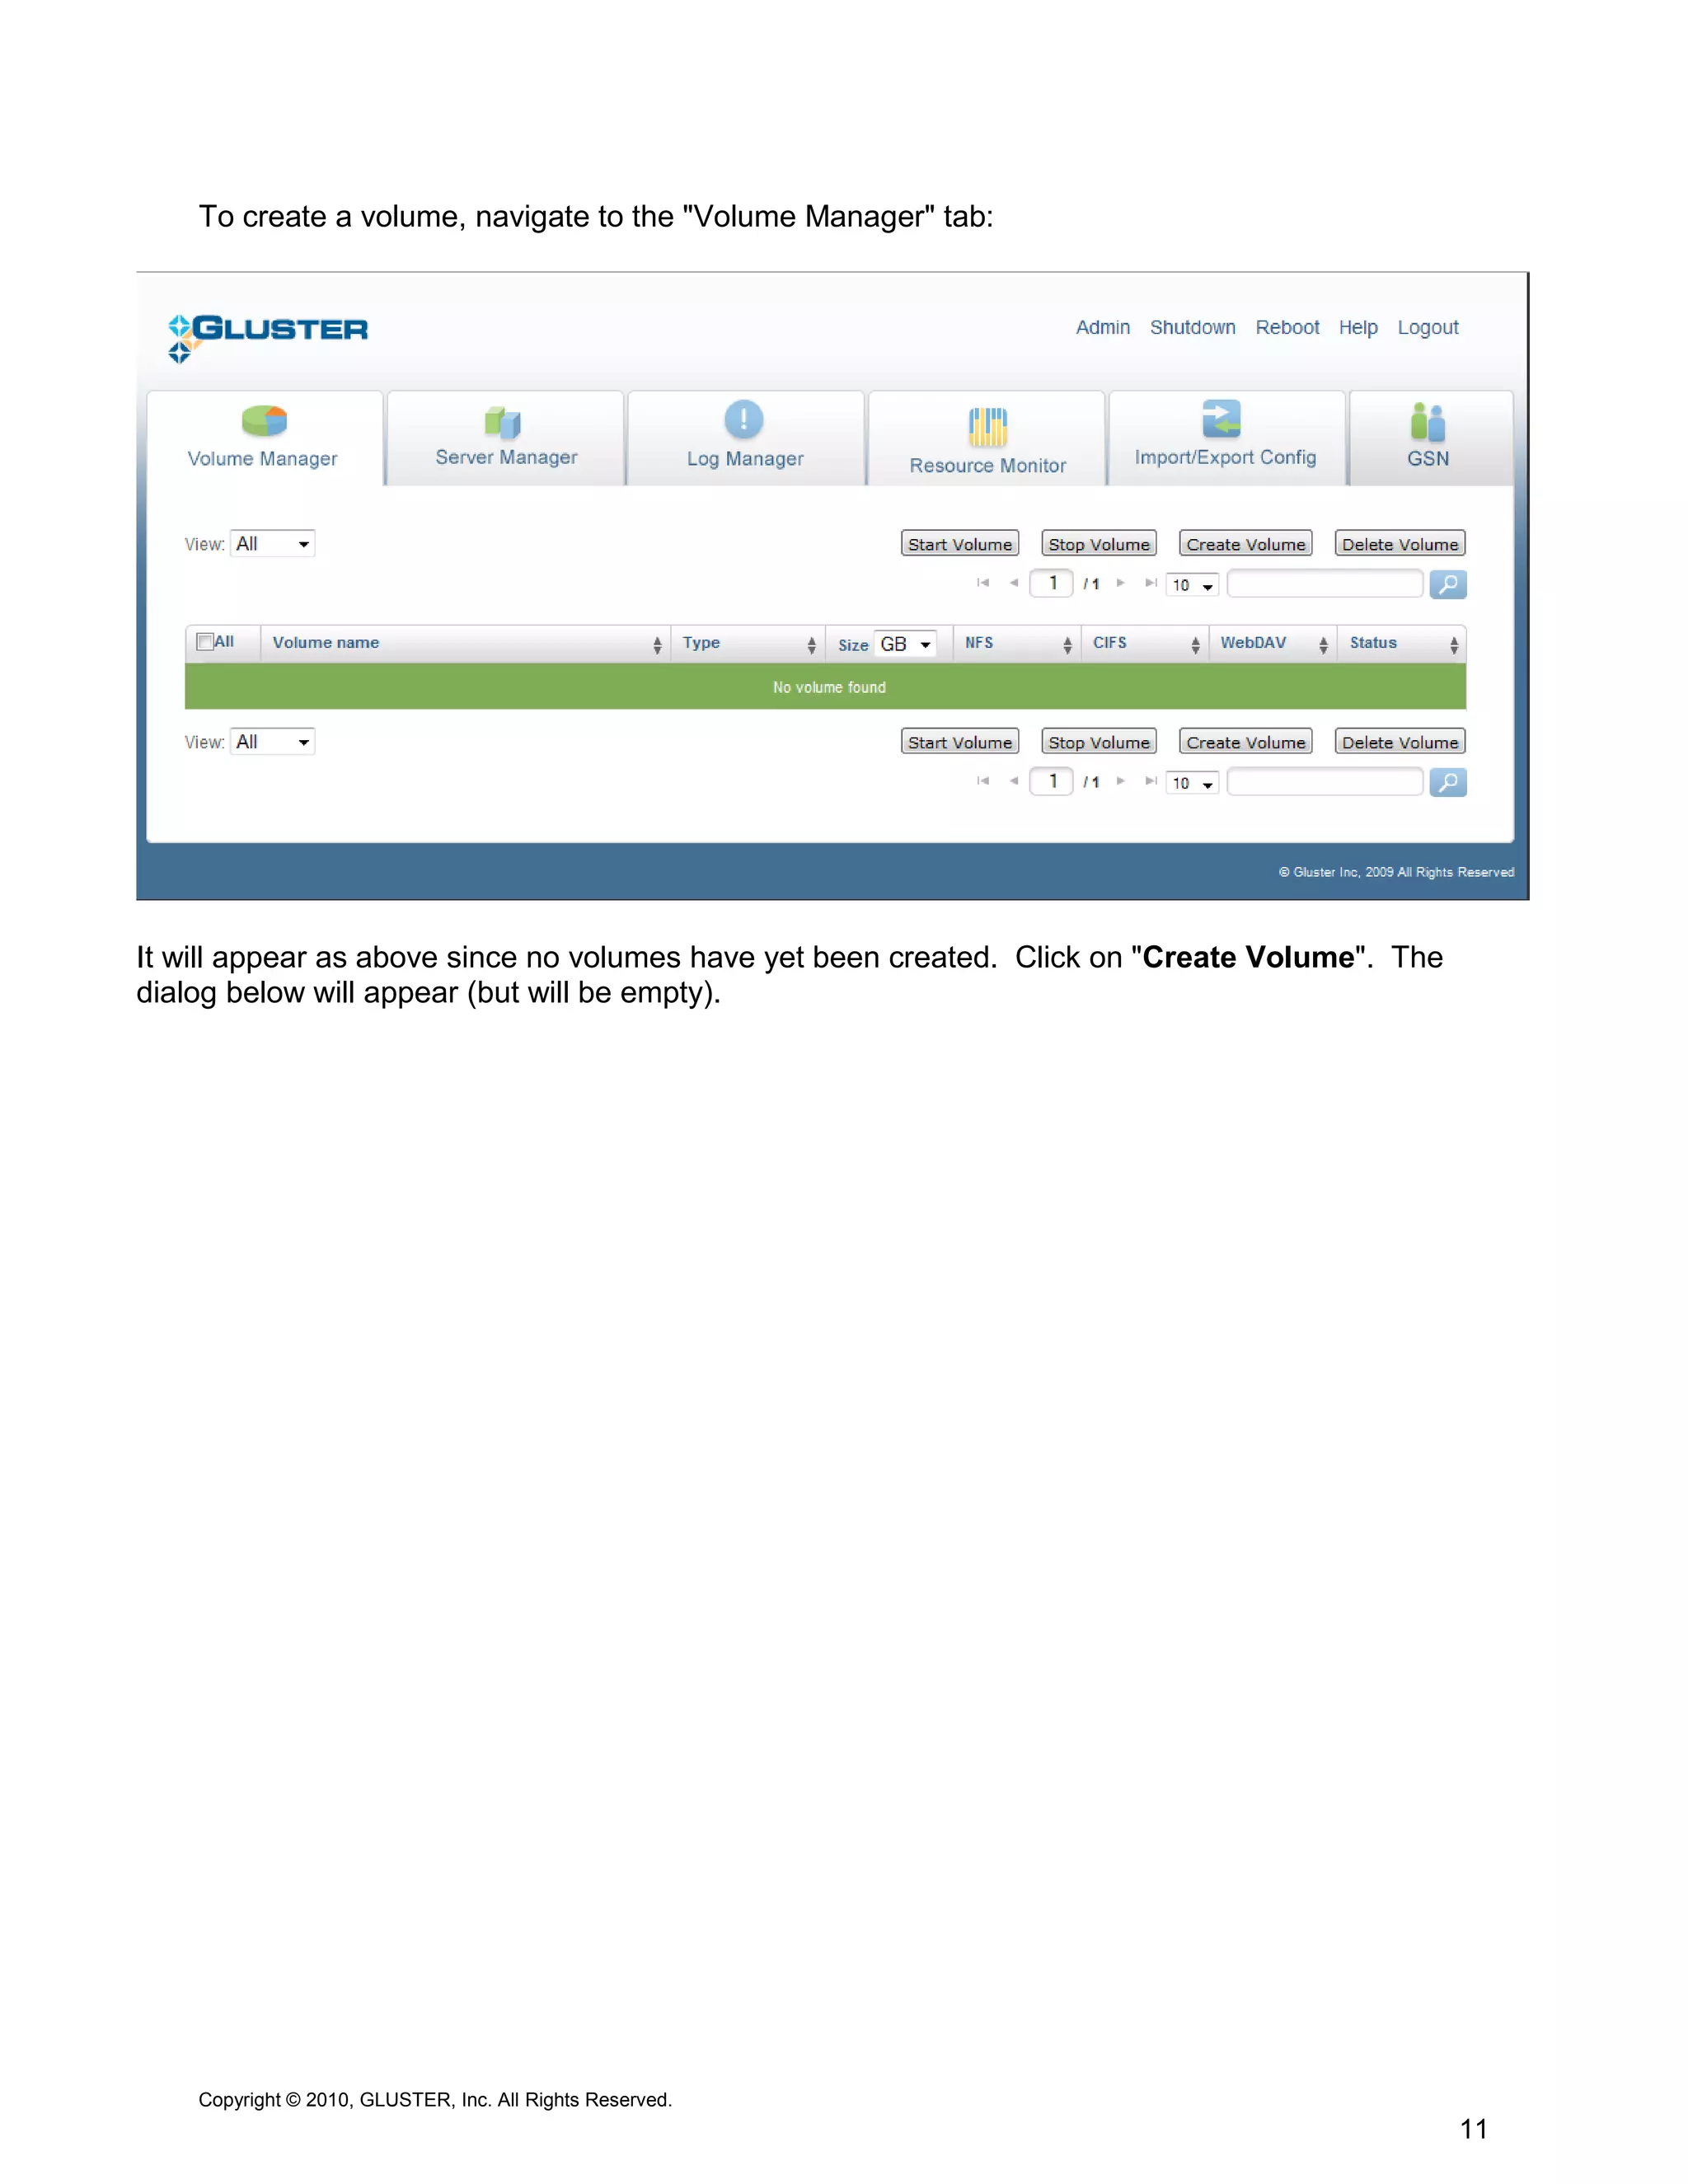

The Gluster Storage Platform is an open-source clustered storage solution designed for managing unstructured file data, which can be scaled from a single NAS server to multiple nodes. Installation takes under 15 minutes and can be performed using a USB image, with support for various access protocols. The document also details the installation process for a two-node storage cluster and managing the system through a web-based interface.


![Aix5[1].3+hacmp+oracle9 i+weblogic8.1安装实施报告](https://cdn.slidesharecdn.com/ss_thumbnails/aix51-3hacmporacle9iweblogic8-1-110524233723-phpapp01-thumbnail.jpg?width=640&height=640&fit=bounds)


