First Aid and
Emergencies
By- Sunil Sharma
Asst. Professor
Nims Nursing College
B
INTRODUCTION
First aid is the first and quick
help given to any individual
experiencing either a minor
or actual disease or injury,
given to protect life, prevent
the condition from
deteriorating.
DEFINITIONS
OF FIRST AID
MANAGEMENT
• First aid is the initial, quick and temporary care given to the victim of
accident/injured/sick person until the medical professional arrives.
• First aid is the first assistance or support given to a casualty or a sick person for
injury or any sudden illness before the arrival of an ambulance, a qualified
paramedical or medical person or before arriving at a facility that can provide
professional medical care. —
(NDMA & IRCS Manual, St Johns Ambulance Manual)
• According to American College of Emergency Physicians (ACEP) First Aid
Manual, first aid is the initial assistance or treatment given to a person who is
injured or suddenly becomes ill.
BASIC PRINCIPLES OF FIRST AID
•Safe response in crisis/situation for well-being of the
victim, bystander and helper/assistance.
•Minimize further injury to the victim by fixing/ stabilizing
the situation.
•Use suitable technique and first aid procedure.
•Move the victim carefully, to reduce pain, to stabilize the
condition.
•Reassure and instruct the victim.
•Communicate with a bystander and emergency first aider.
AIMS OF FIRSTAID MANAGEMENT
The aims of first aid management include 5Ps.
• Life Preservation
• Protection of victim
• Pain relief
• Prevent or control on worsening of the condition of
the patient
• Provide psychological support and reassure
SCOPE OF FIRST AID
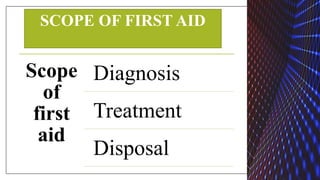
Scope
of
first
aid
Diagnosis
Treatment
Disposal
SCOPE OF FIRST AID
DIAGNOSIS
 First aider should know how the accident or sudden injury/damage
has happened.
 First aider can gather this information from the victim if the victim is
able to speak or from the witnesses or bystanders. This is known as
the history of the incident.
 Watch the victim for symptoms like fainting, thirst, pain or shivering,
bleeding and cyanosis.
 Look for the signs, which are different from normal conditions. Signs
are the most accurate information or indicators, therefore diagnosis
should be based on signs.
SCOPE OF FIRST AID
TREATMENT
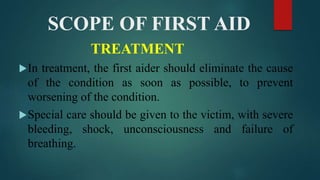
In treatment, the first aider should eliminate the cause
of the condition as soon as possible, to prevent
worsening of the condition.
Special care should be given to the victim, with severe
bleeding, shock, unconsciousness and failure of
breathing.
SCOPE OF FIRST AID
DISPOSAL
In disposal, the victim must be examined by the
doctor on the spot. If this is not possible, the victim
should be transported to the hospital/home
depending on the condition of the patient.
The family members of the victims should be
informed immediately, and make arrangements for
transportation of the victim.
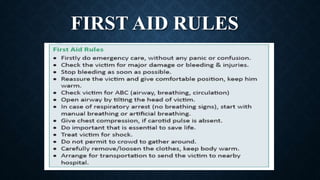
GOLDEN RULES FOR FIRST AID
FIRST AID RULES
ADDRESSING THE EMERGENCY
SITUATIONS
• Assess the consciousness level, respiratory patterns. Check airway,
breathing and circulation. Provide comfortable position to patient
Initial assessment shall focus on life-threatening illness.
Quick
assessment
• Once evaluation is done, call for help. Inform help needed
like what happened, number of injured persons, kind of
injuries are there and provide details of location.
Call for help
• Do not give anything to eat or drink if the victim is drowsy,
unconscious, nauseated, severely injured. Provide
psychological support and reassure the victim.
Provide first aid
• If serious accident/damage has occurred.
Inform the
police
FIRST AID KIT
FIRST AIDER
• A first aider is a person who can
provide emergency care to the victim
at the time of accidents or any kind of
mishap.
• A first aider should know what is best
and what is needed.
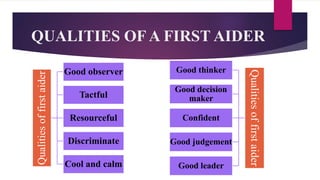
QUALITIES OF A FIRST AIDER
Qualities
of
first
aider
Good observer
Tactful
Resourceful
Discriminate
Cool and calm
Qualities
of
first
aider
Good thinker
Good decision
maker
Confident
Good judgement
Good leader
FIRST AID MANAGEMENT OF VARIOUS
EMERGENCY CONDITIONS
Any disruption/breakage in the skin or the body
surface due to physical means is known as a wound.
WOUNDS
TYPES OF WOUNDS
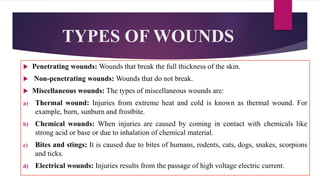
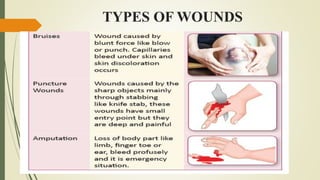
 Penetrating wounds: Wounds that break the full thickness of the skin.
 Non-penetrating wounds: Wounds that do not break.
 Miscellaneous wounds: The types of miscellaneous wounds are:
a) Thermal wound: Injuries from extreme heat and cold is known as thermal wound. For
example, burn, sunburn and frostbite.
b) Chemical wounds: When injuries are caused by coming in contact with chemicals like
strong acid or base or due to inhalation of chemical material.
c) Bites and stings: It is caused due to bites of humans, rodents, cats, dogs, snakes, scorpions
and ticks.
d) Electrical wounds: Injuries results from the passage of high voltage electric current.
TYPES OF WOUNDS
TYPES OF WOUNDS
TYPES OF WOUNDS
MANAGEMENT OF MINOR WOUNDS
• Clean the wound under running water with soap.
• Apply constant, firm and direct pressure on the
wound till the bleeding stops.
• If bleeding stops, immediately apply antibiotic
ointment after cleaning.
• Cover wound with a bandage.
MANAGEMENT OF MAJOR
WOUNDS
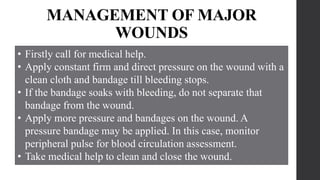
• Firstly call for medical help.
• Apply constant firm and direct pressure on the wound with a
clean cloth and bandage till bleeding stops.
• If the bandage soaks with bleeding, do not separate that
bandage from the wound.
• Apply more pressure and bandages on the wound. A
pressure bandage may be applied. In this case, monitor
peripheral pulse for blood circulation assessment.
• Take medical help to clean and close the wound.
BLEEDING AND HEMORRHAGE
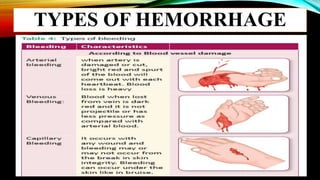
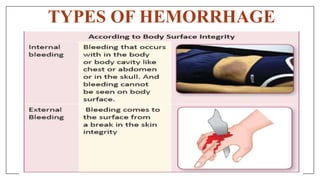
Hemorrhage or bleeding is defined as an
abnormal flow of blood from an artery,
vein and capillary due to injury or rupture.
It can be internal or external.
TYPES OF HEMORRHAGE
TYPES OF HEMORRHAGE
FIRST AID NURSING MANAGEMENT
FOR INTERNAL HEMORRHAGE
• Lay the victim in a comfortable position and immobilize the victim.
• Reassure the casualty/victim.
• Provide a blanket to keep the body warm, according to weather.
• Do not allow the victim to take anything by mouth.
• Check ABC, if the victim is unconscious.
• Keep the victim in a side-lying position to prevent aspiration if he/she is
unconscious.
• Raise his/her leg 8–12 inches by a pillow to treat shock.
• Immediately take him/her to the hospital for the medical facility.
FIRST AID NURSING MANAGEMENT FOR
EXTERNAL HEMORRHAGE
• Check the body surface to find the location of bleeding.
• If any foreign body is visible, remove that to prevent further injuries.
• Clean the wound with a clean cloth and provide a comfortable position to the victim.
• Put a clean/sterile gauge on the wound and press firmly for 10 minutes to stop bleeding.
• If bleeding continues after 10 minutes, then raise that body part above the level of the heart
to decrease blood flow to the injured part.
• Keep victim warm and recheck circulation every 20–30 minutes.
• Raise legs of the victim 8-12 inches, to treat shock.
• Immediately transport him/her to a nearby hospital for a medical facility.
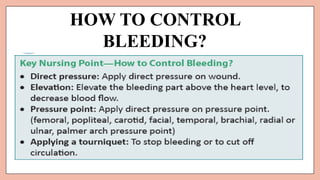
HOW TO CONTROL
BLEEDING?
SHOCK
• Condition in which the blood circulation
towards vitals organs is depleted and vitals
fall below normal is called shock.
• It is a life-threatening condition because it
decreases the function of vital organs, if it is
not treated immediately it will lead to death.
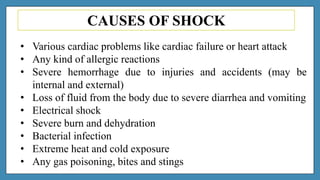
CAUSES OF SHOCK
• Various cardiac problems like cardiac failure or heart attack
• Any kind of allergic reactions
• Severe hemorrhage due to injuries and accidents (may be
internal and external)
• Loss of fluid from the body due to severe diarrhea and vomiting
• Electrical shock
• Severe burn and dehydration
• Bacterial infection
• Extreme heat and cold exposure
• Any gas poisoning, bites and stings
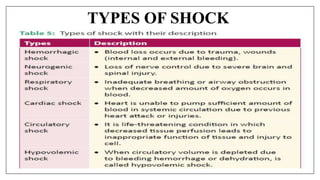
TYPES OF SHOCK
TYPES OF SHOCK
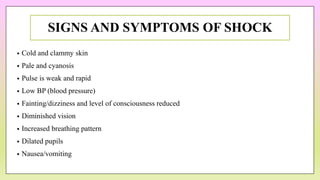
SIGNS AND SYMPTOMS OF SHOCK
• Cold and clammy skin
• Pale and cyanosis
• Pulse is weak and rapid
• Low BP (blood pressure)
• Fainting/dizziness and level of consciousness reduced
• Diminished vision
• Increased breathing pattern
• Dilated pupils
• Nausea/vomiting
FIRST AID MANAGEMENT FOR SHOCK
• Firstly reassure the victim.
• Provide a comfortable position to the victim.
• Elevate foot-end side to improve blood supply to the heart and reduce blood flow to extremities.
• In case of head injury, reduce the pressure by raising the head slightly.
• If a breathing problem is observed, then raise head and shoulder by providing a comfortable
position to the victim.
• Loosen the tight clothing around the neck, chest and waist. It helps in circulation and assists in
breathing.
FIRST AID MANAGEMENT FOR SHOCK
•Provide a blanket to the victim, to keep the body warm.
•Stop bleeding by pressure and immobilize fracture part to
treat the cause of shock.
•Check pulse, respiration and level of consciousness.
•If pulse and breathing stop, immediately establish an airway.
•Start resuscitation as possible.
•Keep the victim in the recovery position.
•Transport to the nearest hospital without any delay.
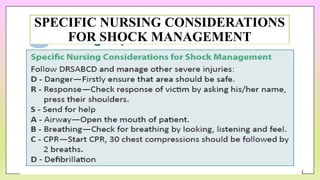
SPECIFIC NURSING CONSIDERATIONS
FOR SHOCK MANAGEMENT
MUSCULOSKELETAL INJURIES –
FRACTURES, DISLOCATION, MUSCLE
INJURIES
Musculoskeletal injuries are the injuries to
bone, muscle, ligament and tendon due to
accident, fall, any force, imbalanced posture,
strenuous exercises which affect the
movement of the body.
FRACTURE
Fracture is defined as breakage in the continuity of bone due to
any external force.
CAUSES
• Direct force: Bone is broken by direct blow of force, e.g., fall, bullet pass through bone
or a wheel passed over the body.
• Indirect force: Bone breaks away from that point on which force is blown/applied, e.g.,
fracture of the collar bone.
• Muscular force: It occurs due to severe contraction of muscles, e.g., fracture of ribs due
to severe/violent cough. This type of fracture is very rare and uncommon, mostly
occurring with diseases, e.g., weak bone structure.
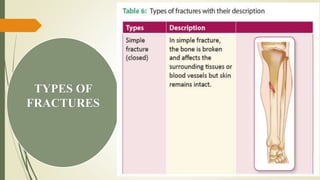
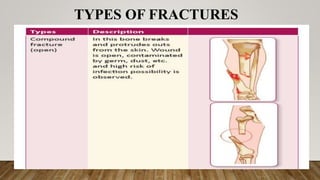
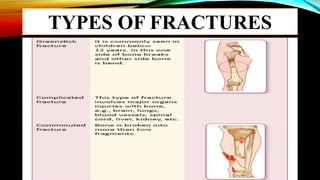
TYPES OF
FRACTURES
TYPES OF FRACTURES
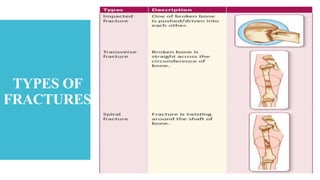
TYPES OF FRACTURES
TYPES OF
FRACTURES
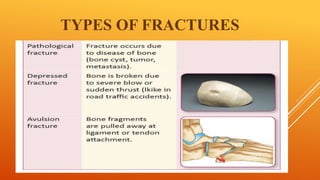
TYPES OF FRACTURES
SIGNS AND
SYMPTOMS
OF
FRACTURE
•Pain at the site of injury
•Swelling
•Difficulty in moving
•Crepitus sound at the site of fracture
•Tenderness
•Limb may be shortened, twisted and
bent
•Loss of function
•Bleeding from the wound
•Shock in severe cases
AIMS OF
FIRST AID
FOR
FRACTURE
•To prevent the victim from
further harm/injury
•To decrease pain
•To treat shock
•To get medical facility as soon
as possible
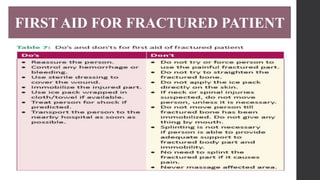
FIRST AID FOR FRACTURED PATIENT
DISLOCATION
• Dislocation is defined as the destruction of tissues around the joints and
displacement of bones.
• Most common joints that can dislocate are shoulder, knees, jaw,
thumbs, and finger joints.
CAUSES
• Sudden twist
• Fall
• Car accident
• Contact sports injuries
• Muscle weakness
SIGNS AND
SYMPTOMS OF
DISLOCATION
•Severe pain
•Unable to move joint
•Swelling
•Bruising
•Bending and shortening of joint (deformity)
FIRST AID FOR DISLOCATION
• Ensure the victim stays calm.
• Help the victim to hold up the dislocated joint in a comfortable
position.
• By using bandages, immobilize dislocated joint.
• In case of arm displacement, use sling to support arm.
• In case of leg injuries, broad fold bandages or padding must be
used.
• Use an ice pack to reduce pain and swelling around joints.
• Transport injured person to a nearby hospital at the earliest.
MUSCLE INJURIES
Muscle injuries occur due to over-stretching of muscles because of
sudden exertion and twisting of any body part. A commonly known
muscle injury is strain.
CAUSES
• Too much physical exertion
• Improper warming up
before physical activity
• Less flexibility in the body
SIGNS AND SYMPTOMS
• Severe pain
• Swelling
• Difficulty to move injured
part
• Discoloration
• Bruising of skin
FIRST AID FOR MUSCLE INJURIES
• Provide a comfortable position and reassure the
victim.
• If possible, put a firm bandage before swelling occurs.
• After the application of the bandage, wet it with cold
water and keep it wet.
• If an ice pack is available, then apply it over the
injured part to reduce swelling.
• Take the patient to the doctor.
TRANSPORTATION OF AN INJURED
PATIENT
• Vital step of action.
• Healthcare provider who is first aider should check the casualty before
transportation for:
 Victim’s respiration to be normal.
 Normal pulse rate.
 Bleeding should be arrested.
 Injured part should be well-supported or immobilized.
 Transportation must be done in that way so that no further injury occurs.
 Always keep the victim warm.
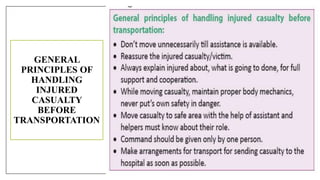
GENERAL
PRINCIPLES OF
HANDLING
INJURED
CASUALTY
BEFORE
TRANSPORTATION
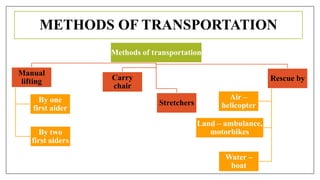
METHODS OF TRANSPORTATION
Methods of transportation
Manual
lifting
By one
first aider
By two
first aiders
Carry
chair
Stretchers
Rescue by
Air –
helicopter
Land – ambulance,
motorbikes
Water –
boat
z MANUAL LIFTING
 Safe method for first aider as well as the victim.
 General rules to be kept in mind while using manual lift are following:
 Always use the strongest muscles of body parts, i.e., shoulder, thigh and hip muscles.
 Keep feet wide apart to keep the body well-balanced and stable. A wide base helps to have
better stability.
 Keep back straight, to prevent strain on the back.
 Hold with your entire hand.
 Hold the victim as close as feasible.
 Bring down the victim if imbalance is felt.
 Change position of the first aider if there are two first aiders and begin lifting again.
MANUALLIFT BY ONE FIRSTAIDER
Human crutch
Drag method
Cradle method
Pick a back
Fireman’s lift and carry method
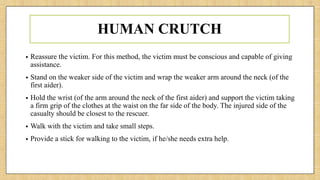
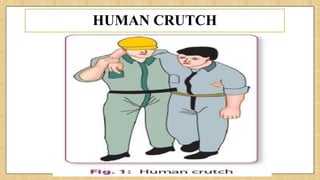
HUMAN CRUTCH
• Reassure the victim. For this method, the victim must be conscious and capable of giving
assistance.
• Stand on the weaker side of the victim and wrap the weaker arm around the neck (of the
first aider).
• Hold the wrist (of the arm around the neck of the first aider) and support the victim taking
a firm grip of the clothes at the waist on the far side of the body. The injured side of the
casualty should be closest to the rescuer.
• Walk with the victim and take small steps.
• Provide a stick for walking to the victim, if he/she needs extra help.
HUMAN CRUTCH
DRAG METHOD
• This type of method is used when the injured victim requires to move immediately from
the source of danger, and when the victim is not able to move.
• Steps of using drag method:
Reassure the victim.
Keep the victim’s arms across his/her chest.
Crouch at the head end of the victim.
Hold the armpit and support the victim’s head on the first aider's
forearms.
Drag the victim along with ground without lifting.
CRADLE METHOD
•This method is used for an injured child because
children are lighter and can be easily lifted.
•Steps for using cradle method:
Place one arm under the victim’s knees or thighs.
Place another hand around the trunk or above the
waist.
Lift the victim and transfer him.
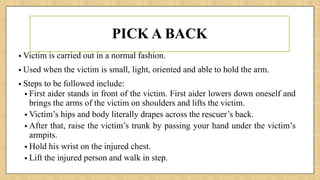
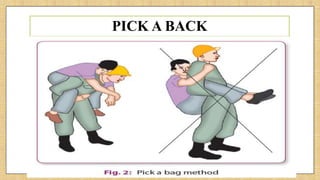
PICK A BACK
• Victim is carried out in a normal fashion.
• Used when the victim is small, light, oriented and able to hold the arm.
• Steps to be followed include:
• First aider stands in front of the victim. First aider lowers down oneself and
brings the arms of the victim on shoulders and lifts the victim.
• Victim’s hips and body literally drapes across the rescuer’s back.
• After that, raise the victim’s trunk by passing your hand under the victim’s
armpits.
• Hold his wrist on the injured chest.
• Lift the injured person and walk in step.
PICK A BACK
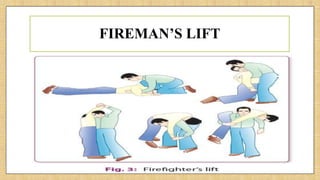
FIREMAN’S LIFT
• Used when the injured person is light weight.
• Steps to be followed are:
• Reassure victim.
• Assist victim to raise in an upright position. The victim and first aider should be face to face.
• Hold the victim’s right wrist with left hand.
• Bend downward with the First aider’s head below the victim’s extended right arm.
• With the dominant hand, support the body of the victim.
• Allow the victim’s body to lean on the right shoulder of the first aider. Adjust the victim’s body
appropriately.
• While lifting up the victim, the first aider should stand straight. Wrap around the arm of the victim
across the first aider’s chest.
• Keep your left side hand free.
FIREMAN’S LIFT
• Methods:
Two handed seat
Four handed seat
Fore and aft method
TWO HANDED SEAT
• Used for those injured persons who are not able to help first aider.
• Steps to be followed are:
Both first aiders squat facing each other on either side of the
victim.
Reach under the victim’s shoulders and under their knees.
First aiders grasp each other’s wrists.
From the squat, with good lifting technique, first aiders stand.
Hold each other’s wrists if possible, otherwise you can hold the
victim from clothes.
Lift together by keeping back straight, walk together, in the
direction that the victim is facing.
TWO HANDED SEAT
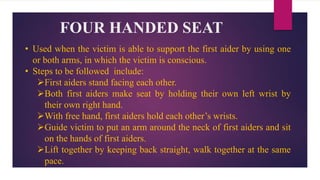
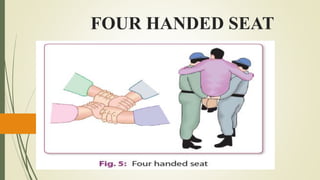
FOUR HANDED SEAT
• Used when the victim is able to support the first aider by using one
or both arms, in which the victim is conscious.
• Steps to be followed include:
First aiders stand facing each other.
Both first aiders make seat by holding their own left wrist by
their own right hand.
With free hand, first aiders hold each other’s wrists.
Guide victim to put an arm around the neck of first aiders and sit
on the hands of first aiders.
Lift together by keeping back straight, walk together at the same
pace.
FOUR HANDED SEAT
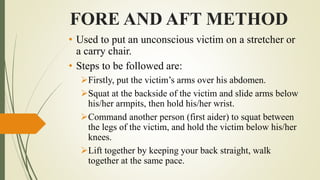
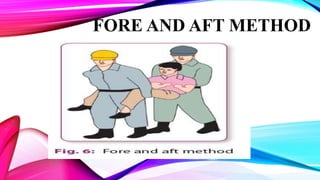
FORE AND AFT METHOD
• Used to put an unconscious victim on a stretcher or
a carry chair.
• Steps to be followed are:
Firstly, put the victim’s arms over his abdomen.
Squat at the backside of the victim and slide arms below
his/her armpits, then hold his/her wrist.
Command another person (first aider) to squat between
the legs of the victim, and hold the victim below his/her
knees.
Lift together by keeping your back straight, walk
together at the same pace.
FORE AND AFT METHOD
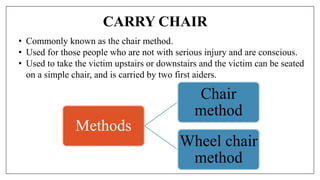
CARRY CHAIR
• Commonly known as the chair method.
• Used for those people who are not with serious injury and are conscious.
• Used to take the victim upstairs or downstairs and the victim can be seated
on a simple chair, and is carried by two first aiders.
Methods
Chair
method
Wheel chair
method
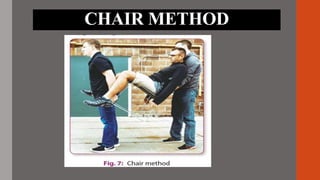
CHAIR METHOD
• First aider can use an ordinary chair.
• Steps to be followed:
Check that the chair is strong enough to carry the victim.
Help the victim to sit on the chair and secure the victim with
the help of bandages.
Stand, one in front and another one behind the victim.
Support backside of chair and victim.
Second person holds chair from front legs.
To secure the victim, tilt the chair backward slowly.
Raise victim in the chair and move together at the same pace.
CHAIR METHOD
All the steps are the same as the chair method but points
to remember in wheel chair method are (those which are
different from the chair method):
• Firstly, find out breaks of wheel chair.
• Secondly, lock the brakes.
• Hold chair from their handles or fixed parts (these are
secured parts of the chair) and never by wheels.
WHEEL CHAIR METHOD
STRETCHERS
Used to take away seriously injured person so, that further risk of injury can
be minimized and used to carry an injured person to ambulance or the shelter.
The principles of using stretcher:
• Check the stretcher to make sure that it is in working condition.
• Assess that the stretcher is solid/strong enough to bear the
weight of an injured person.
• Always explain and reassure the injured person before putting
the victim over the stretcher.
• Secure the victim with straps.
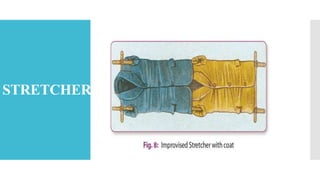
STRETCHER
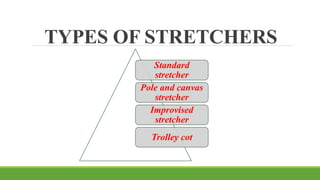
TYPES OF STRETCHERS
Standard
stretcher
Pole and canvas
stretcher
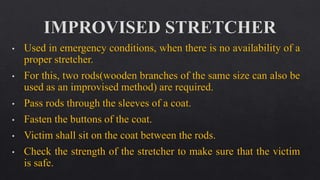
Improvised
stretcher
Trolley cot
• Also known as Furley stretcher.
• This type of stretcher contains one plastic sheet or a
canvas, which is connected with two carrying poles
with one stand on the lower side.
• The transverses are attached to open and close the
stretcher easily.
• When we close the stretcher, plastic sheet/canvas folds
on top and poles lie closely together.
STEPS OF USING STANDARD STRETCHER
• Unwrap canvas and pull the poles to be separated.
• Push outward and face toward transverse open.
• The stretcher should be held upward on its end
and open another transverse by pressing over it.
STEPS OF FOLDING A STANDARD
STRETCHER
• Put the stretcher on the side.
• Now, release the hinged transverse.
• Together join both poles, then wrap canvas
cleanly upon poles.
• At last first aider should secure/protect the
stretcher with the help of a strap.
POLE AND CANVAS STRETCHER
• Most commonly used stretcher, which is used to carry the victim
from one to another stretcher/from stretcher to trolley.
• It contains one plastic/canvas sheet with handle, side sleeves and
pair of poles.
• To make the stretcher stable and hard/rigid, open the rods by
fixing them over the ends of poles to keep them apart.
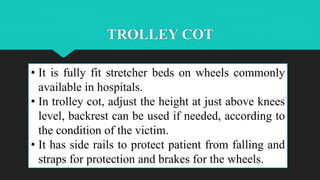
TROLLEY COT
• It is fully fit stretcher beds on wheels commonly
available in hospitals.
• In trolley cot, adjust the height at just above knees
level, backrest can be used if needed, according to
the condition of the victim.
• It has side rails to protect patient from falling and
straps for protection and brakes for the wheels.
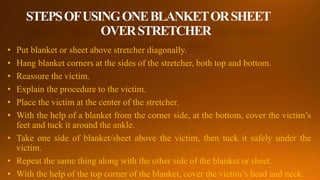
• Put blanket or sheet above stretcher diagonally.
• Hang blanket corners at the sides of the stretcher, both top and bottom.
• Reassure the victim.
• Explain the procedure to the victim.
• Place the victim at the center of the stretcher.
• With the help of a blanket from the corner side, at the bottom, cover the victim’s
feet and tuck it around the ankle.
• Take one side of blanket/sheet above the victim, then tuck it safely under the
victim.
• Repeat the same thing along with the other side of the blanket or sheet.
• With the help of the top corner of the blanket, cover the victim’s head and neck.
STEPS OF USING TWO BLANKETS OR
SHEETS
• Put the first blanket lengthwise along with stretcher, with one edge covering half handles at
the head, after that open the sides of the stretcher.
• Double/fold second blanket (same as first) lengthwise into three parts.
• Put on the blanket on a stretcher along with the upper edge, about one-third of the way
down the stretcher, leaving enough at the bottom end so that to fold it above feet.
• Reassure the victim.
• Explain the procedure to the victim.
• Place the victim over the stretcher.
• Cover the feet with the blanket (top fold), then tuck it around the legs and feet.
• Take one side of the blanket over the victim and gently tuck it around.
• Repeat it with another side also.
• Finally take it over the head and tuck it around.
LOADING A STRETCHER
Loading a stretcher means to carry the victim
from the mishap area to the stretcher.
Methods
Blanket
lift
Manual
lift
BLANKET LIFT
In a blanket lift, we require
four persons, two for the foot-
end side and the other two for
the head-end side.
STEPS OF BLANKET
LIFT
• Put the folded blanket lengthwise against the back of the victim.
• Now turn the victim over the blanket by supporting on the other side.
• Blanket should be unfolded according to victim’s body.
• Put the victim in a supine position, then fold the blanket from both sides.
• Command two bearers to hold on the head end side.
• Command other two bearers on the foot-end side of the victim.
• Bearers should keep their back straight to raise/lift the victim together.
• Hold up the victim at the head and waist, another bearer from hip and ankle
by grasping the fold of the blanket.
• Instruct all to hold and lift the victim together.
RESPIRATORY EMERGENCIES
ASPHYXIA
•Condition in which the body is deprived of oxygen and leads to
unconsciousness or death.
•In asphyxia, lungs do not meet the need for enough supply of air for
breathing.
•If this condition continues, the heart and lungs stop their functions
and lead to death.
•Requires emergency care quickly.
CAUSES OF
ASPHYXIA
• Drowning (fluid in the air
passage)
• Choking (any foreign body
in air passage)
• Inhalation of harmful gases,
e.g., coal tar gas, motor
vehicle gas/fumes, ammonia,
etc
• Narrowing of air passage due
to hanging
• Strangulation
• Any kind of obstruction (most
commonly in an unconscious
patient by falling of tongue)
• Damage to chest or lungs
• Swelling in the windpipe tissue
due to burn or stings
• Electric shock
• Due to poisoning (morphine or
prussic acid)
• Due to diseases, e.g., epilepsy,
rabies, tetanus, etc
ASPHYXIA
SIGNS AND SYMPTOMS
• Shortness of breathing, sometimes breathing may stop
• Cyanosis (lips, nose, ear, fingers and toes)
• Noisy breathing
• Increased pulse rate
• Appearance of froth in mouth and nose
• Loss of consciousness
• Sometimes fits may also occur (seizures)
ASPHYXIA
FIRST AID TREATMENT
• Eliminate the cause if possible.
• Make sure that the airway is patent.
• Vitals of the victim should be checked and maintained.
• Provide artificial breathing (mouth to mouth respiration)
immediately, must be continued till the
• Normal breathing is maintained.
• Place the victim in the recovery position.
• Arrange for transportation to send the victim to the hospital.
AIRWAY OBSTRUCTION
Airway obstruction is a condition, when difficulty in breathing is due to
any obstruction in the air passage.
CAUSES
• Windpipe tissue swelling
• Tongue falling back in case of
epilepsy
• Obstruction of air passage
due to food particles or any
foreign body
• Unconsciousness
SIGNS AND SYMPTOMS
• Breathing is labored and
noisy
• Cyanosis
• Nasal flaring
• Chest wall drawing between
ribs
AIRWAY OBSTRUCTION
FIRST AID TREATMENT
• Do not allow crowd to gather around the victim, so that person can get fresh air.
• Then, check vital signs of victim.
• Reassure the victim, if he/she conscious.
• Keep the person under observation.
• Arrange for transportation, to send to the hospital.
• If the victim/patient is unconscious, then airway is opened and assessed for the
patency using following methods:
 Head tilt chin lift
 Jaw thrust
HEAD TILT CHIN LIFT
• Tilt the patient’s head back by pushing down on the
forehead.
• Place the tips of index and middle fingers under the chin.
• Pull up on the mandible (not on the soft tissues). This lifts
the tongue away from the posterior pharynx and improves
airway patency.
• Be sure to pull up only on the bony parts of the mandible.
Pressure to the soft tissues of the neck may obstruct the
airway.
JAW THRUST
• Stand at the head end side.
• Place palms on the patient’s temples and fingers under the mandibular rami
(Jaw line).
• In patients with possible cervical spine injury, avoid extending the neck.
• Lift the mandible upward with your fingers, at least until the lower
incisors(lower jaw) are higher than the upper incisors (upper jaw). This
maneuver lifts the tongue along with the mandible, thus relieving upper
airway obstruction. Be sure to pull or push only on the bony parts of the
mandible.
• Pressure to the soft tissues of the neck may obstruct the airway.
• If any foreign object is visible, remove it, but if embedded in throat do not
try to remove it.
SUFFOCATION
Suffocation is a condition when air is prevented from entering to the
lungs.
CAUSES
• Any kind of physical obstruction, which stop the air to enter
into nose or mouth
• Due to irritant gases
• Motor exhaust fumes, smokes
SUFFOCATION
SIGNS AND SYMPTOMS
• Breathing difficulty
• Noisy Respiration
• Prominent neck veins
• Confusion
• Cyanosis
• Loss of conscious
FIRST AID MANAGEMENT
• Remove the cause.
• Provide fresh air supply to the
person.
• Stabilize the victim and arrange
for transportation and send to
hospital as soon as possible.
CHOKING
Choking is a condition in which foreign particles obstruct the
back side of the throat and that produces muscular spasm.
CAUSES
• Eating food in
hurry
• Inappropriate
chewing of food
• Speaking while
eating
SIGNS AND SYMPTOMS
• Cyanosis
• Inability to take breath
• Congestion in face and neck
• Inability to speak
• Nasal flaring
• Loss of conscious